**
JDK1.8 installation tutorial under Windows
**
1. First download the JDK installation package, download link: https://pan.baidu.com/s/1SsQpXKNEyYJ5JUAYDhEfwQ
extraction code: zzkt
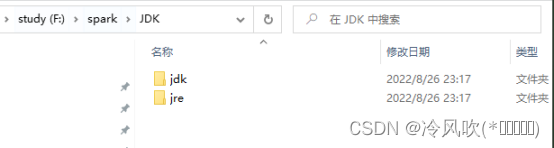
2. Before installation, create two new folders to facilitate the installation of jdk later. You can name them yourself, but do not include Chinese characters.
-
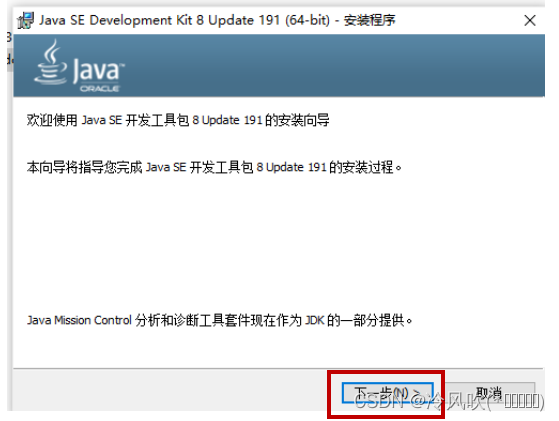
After loading the installation package, double-click to open it and click Next to continue.
-
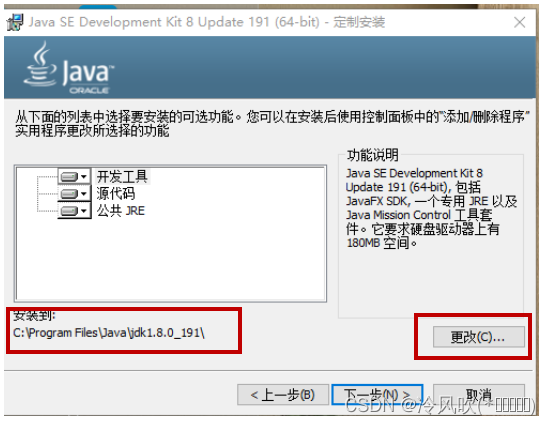
Change the installation path, select one of the jdk files you just created, and copy the installation path you just selected to facilitate the configuration of environment variables later. You don’t need to copy it. When configuring environment variables, you can also reopen the installation path you just selected and copy it.
5. Wait for installation
6. Change the installation path and select the folder jre created at the beginning. Remember that the installation paths selected here cannot be in the same folder. After selecting, click Next 7. Wait for the installation. After the installation is completed, the following will appear 
. interface, just click to close. 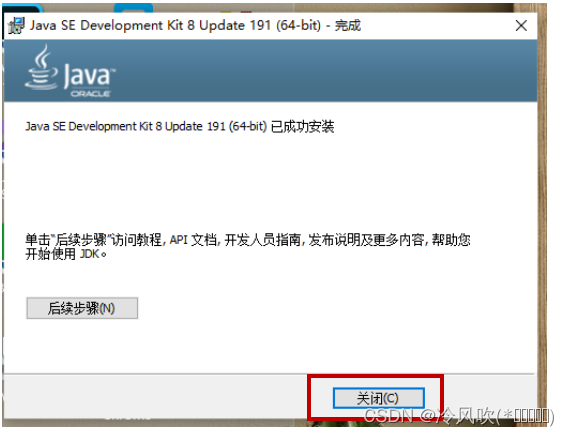
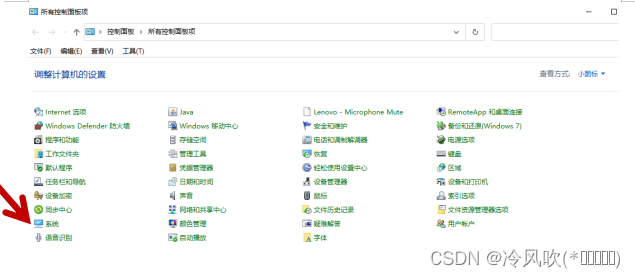
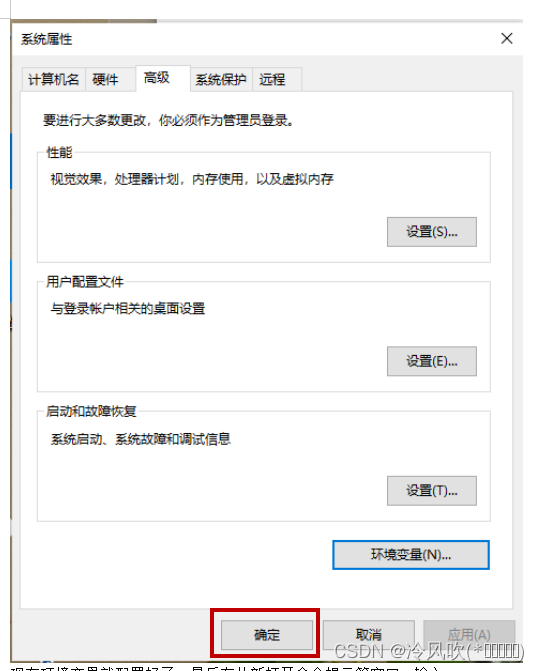
8. Next we configure the environment variables and open the control panel –> open the system
9. Find advanced system settings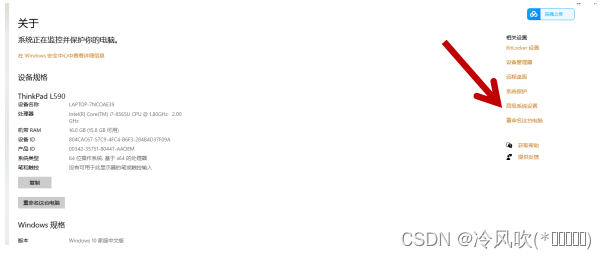
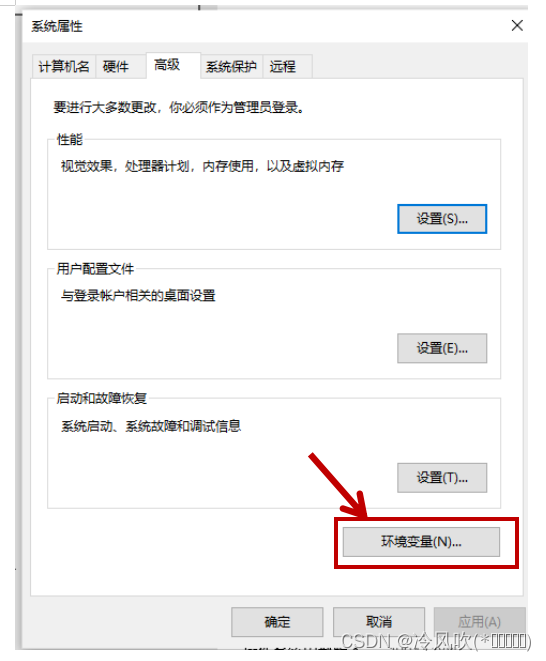
- Click on environment variables
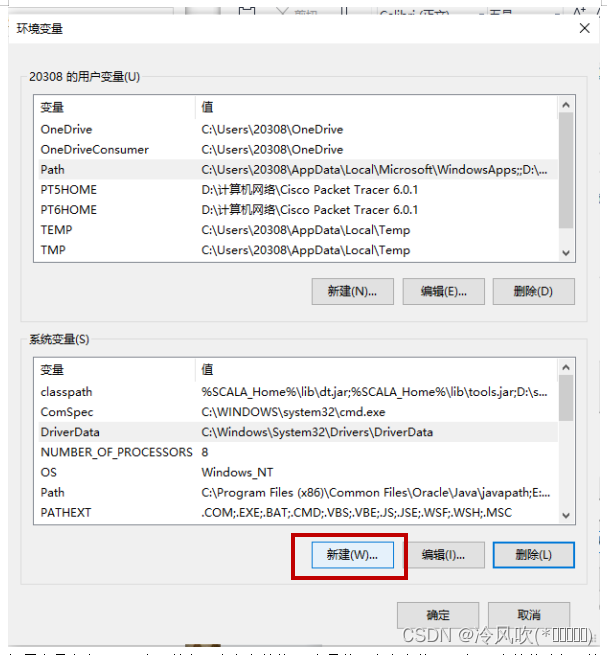
- Click New under System Variables (s) below
12. Set the variable name to java (you can also name it something else). The variable value is the path where jdk is stored when installing jdk. After filling in, click OK. 13. Find
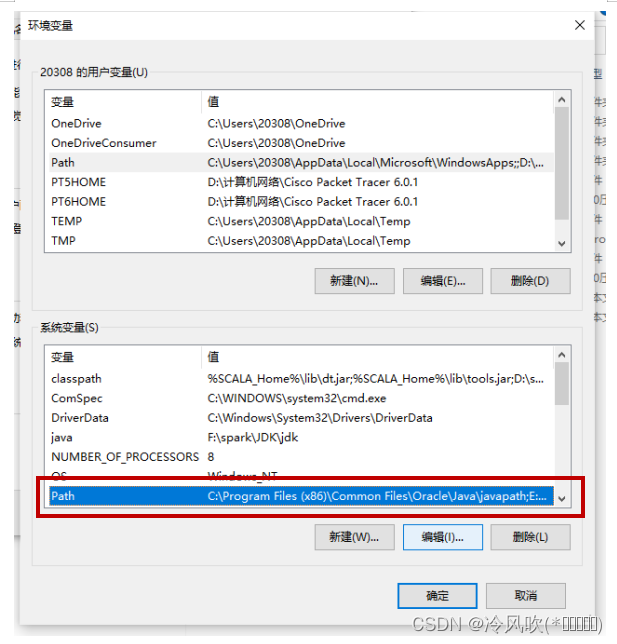
Path 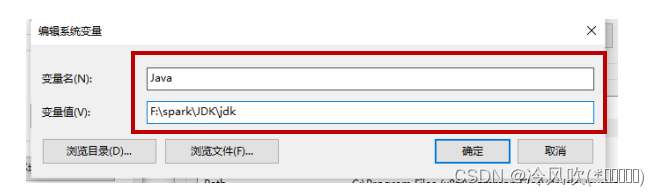
in the system variable (s) and click Edit
14. Click New, enter %java%\bin and click OK.
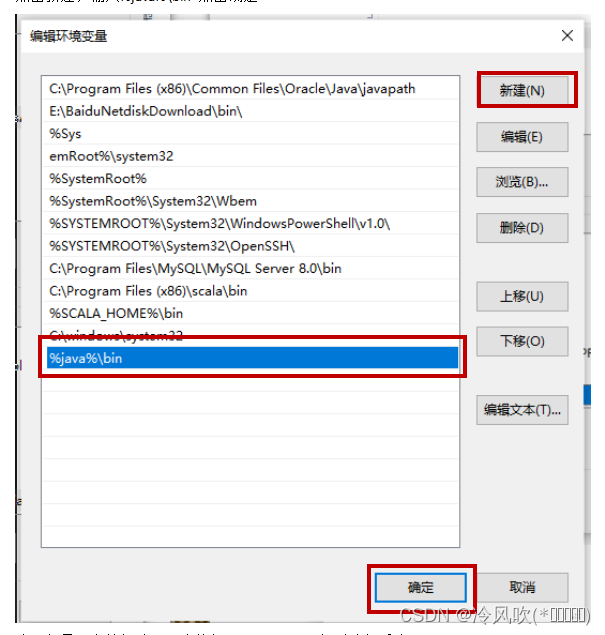
Note: If there is no editing option, just add ;%java%\bin to the end of the path.
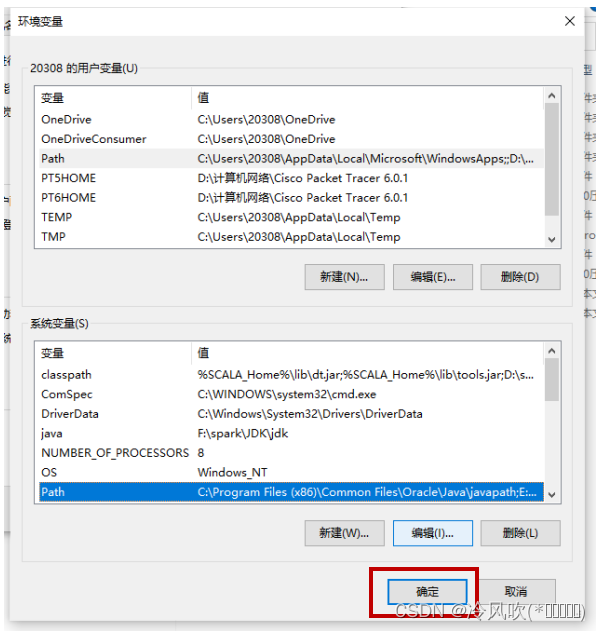
15. Then click OK one by one.

16. The environment variables are now configured. After installation, we can enter the compilation system under Windows to view the version information.
Press Windows+R and enter cmd.
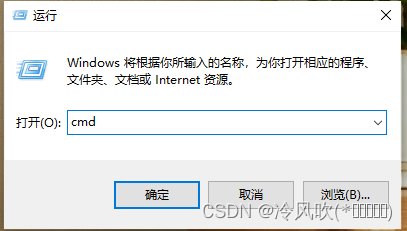
- Finally, open the command prompt window
and enter java -version to view the version information.
Enter javac -version to view the installed version of the compiler.
java -version
- 1
javac -version
- 1
The result is as follows:

The JDK is now installed.
If you enter java -version or javac -version, it will prompt that 'java' is not an internal command, nor is it an executable program or batch file, or 'javac' is not an internal command, nor is it an executable program or batch file. It means that the environment environment variables are not configured properly. Return to the previous steps to configure the environment variables and check whether there is any configuration error.

**
JDK1.8 installation tutorial under Windows
**
1. First download the JDK installation package, download link: https://pan.baidu.com/s/1SsQpXKNEyYJ5JUAYDhEfwQ
extraction code: zzkt
2. Before installation, create two new folders to facilitate the installation of jdk later. You can name them yourself, but do not include Chinese characters.
-
After loading the installation package, double-click to open it and click Next to continue.
-
Change the installation path, select one of the jdk files you just created, and copy the installation path you just selected to facilitate the configuration of environment variables later. You don’t need to copy it. When configuring environment variables, you can also reopen the installation path you just selected and copy it.
5. Wait for installation
6. Change the installation path and select the folder jre created at the beginning. Remember that the installation paths selected here cannot be in the same folder. After selecting, click Next 7. Wait for the installation. After the installation is completed, the following will appear
. interface, just click to close.
8. Next we configure the environment variables and open the control panel –> open the system
9. Find advanced system settings
- Click on environment variables
- Click New under System Variables (s) below
12. Set the variable name to java (you can also name it something else). The variable value is the path where jdk is stored when installing jdk. After filling in, click OK. 13. Find
Path
in the system variable (s) and click Edit
14. Click New, enter %java%\bin and click OK.
Note: If there is no editing option, just add ;%java%\bin to the end of the path.
15. Then click OK one by one.
16. The environment variables are now configured. After installation, we can enter the compilation system under Windows to view the version information.
Press Windows+R and enter cmd.
- Finally, open the command prompt window
and enter java -version to view the version information.
Enter javac -version to view the installed version of the compiler.
java -version
- 1
javac -version
- 1
The result is as follows:
The JDK is now installed.
If you enter java -version or javac -version, it will prompt that 'java' is not an internal command, nor is it an executable program or batch file, or 'javac' is not an internal command, nor is it an executable program or batch file. It means that the environment environment variables are not configured properly. Return to the previous steps to configure the environment variables and check whether there is any configuration error.