Two deployment methods of spring boot
Article directory
Preface
There are many ways to package springboot. Some are made into war, some are made into jar, and some are submitted directly to github and packaged and deployed through Jenkins. Here we mainly introduce how to create a jar for deployment.
The separation of front-end and back-end is now the mainstream architecture. Springboot builds web applications, which can be quickly packaged into jar packages and then start services.
In addition, springboot can also be packaged into a war package to deploy services on external tomcat. At this time, if there is server.port configured by applcation.properties in the project, it will not work. It is not recommended to use war, because springboot is suitable for front-end and back-end separation, and it is more suitable to deploy it as a jar.
1. Jar package deployment
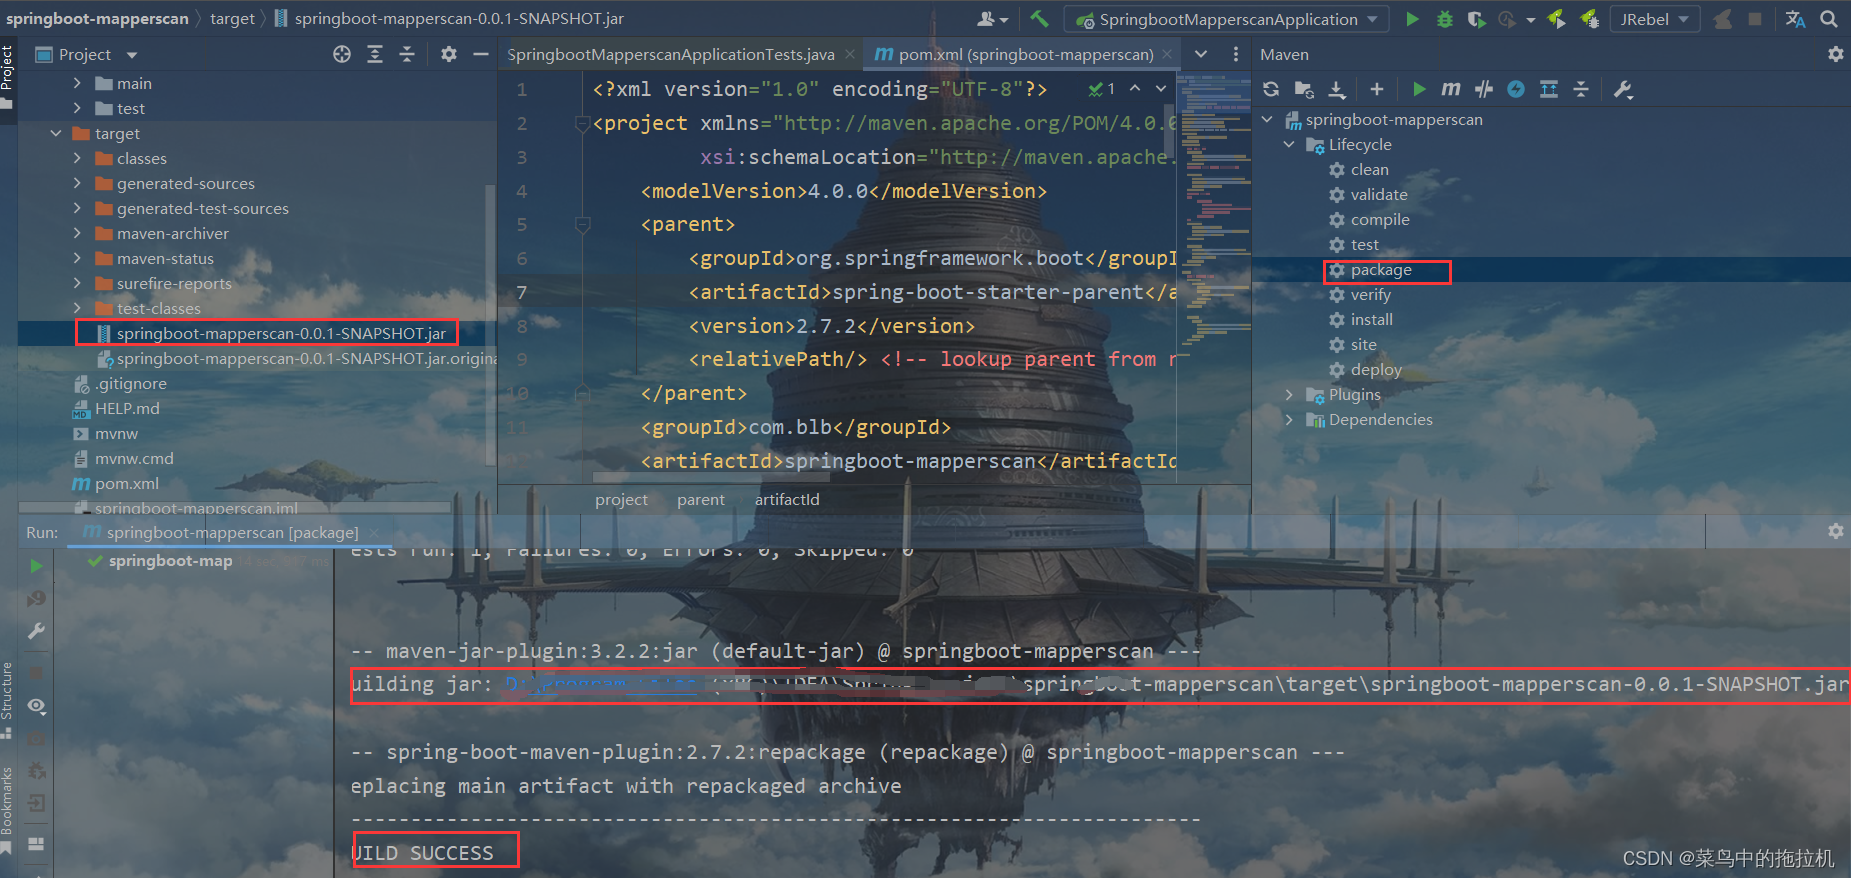
1. Idea opens the created springboot project and uses package packaging in maven (springboot project is marked as jar by default)
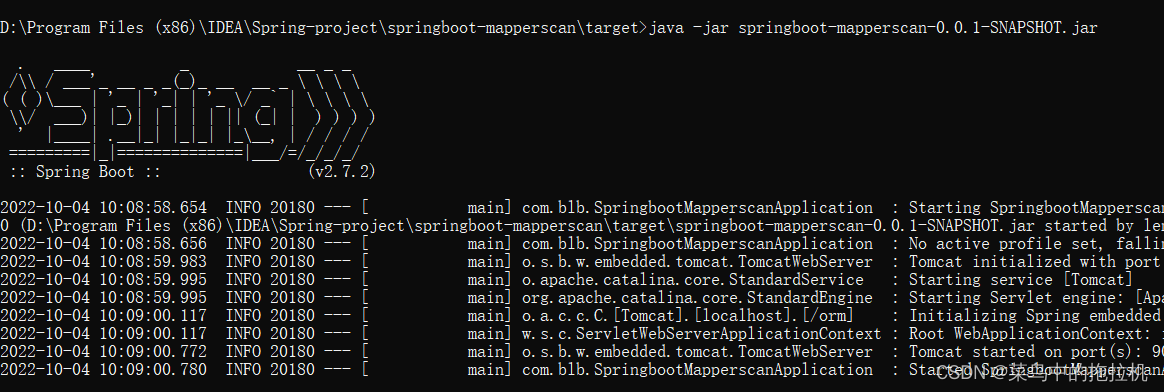
2. Find the packaged jar package directory in the target, open cmd, and use the command line: java -jar to follow the jar package name
3. Note that the jdk version of the project set in the pom needs to be consistent with the jdk version of the local environment.
   <properties>
        <java.version>1.8</java.version>
    </properties>
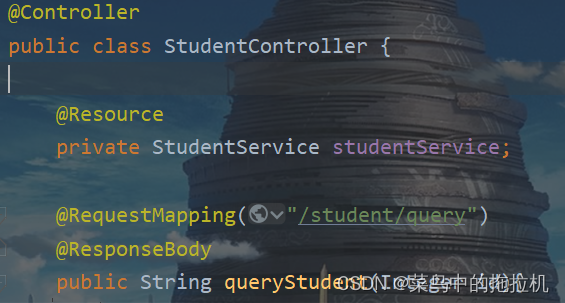
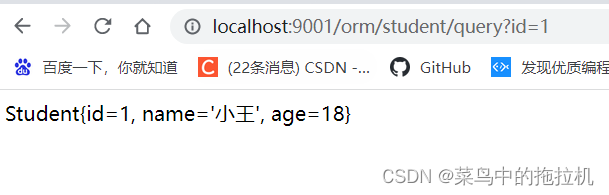
4. After successful startup, you can test (test accessibility, the code here is arbitrary)
2. War package deployment
Generally speaking, packaging the springboot project into war is divided into the following steps:
1. Modify pom.xml, set the packaging mode to war, and modify the jar to war.
<packaging>war</packaging>
2. Remove the springboot default tomcat configuration, remove the default spring-boot-starter-tomcat, and use provided
<dependency>
        <groupId>org.springframework.boot</groupId>
        <artifactId>spring-boot-starter-web</artifactId>
        <exclusions>
            <exclusion>
                <groupId>org.springframework.boot</groupId>
                <artifactId>spring-boot-starter-tomcat</artifactId>
            </exclusion>
        </exclusions>
</dependency>
<dependency>
        <groupId>org.springframework.boot</groupId>
        <artifactId>spring-boot-starter-tomcat</artifactId>
        <scope>provided</scope>
</dependency>
3. Add tomcat-servelt-api dependency
*Be careful to modify the version according to your own situation
<dependency>
  <groupId>javax.servlet</groupId>
  <artifactId>javax.servlet-api</artifactId>
  <version>3.1.0</version>
  <scope>provided</scope>
</dependency>
<dependency>
      <groupId>org.apache.tomcat</groupId>
      <artifactId>tomcat-servlet-api</artifactId>
      <version>8.0.36</version>
      <scope>provided</scope>
</dependency>
4. Transform the startup class. The core startup class inherits SpringBootServletInitializer and rewrites the configure method.
@SpringBootApplication
public class SpringbootMapperscanApplication  extends SpringBootServletInitializer {

	public static void main(String[] args) {
		SpringApplication.run(SpringbootMapperscanApplication.class, args);
	}

	@Override
	protected SpringApplicationBuilder configure(SpringApplicationBuilder builder) {
		return builder.sources(SpringbootMapperscanApplication.class);
	}

}
5. Add a packaging plug-in.
Add a packaging plug-in in build > plugins of pom.xml. You can specify the packaging name and other configurations.
      <plugin>
     	<groupId>org.apache.maven.plugins</groupId>
      	<artifactId>maven-war-plugin</artifactId>
      	<configuration>
          <warSourceExcludes>src/main/resources/**</warSourceExcludes>
          	<warName>cjzdtlj</warName>
          	<failOnMissingWebXml>false</failOnMissingWebXml>
      	</configuration>
     </plugin>
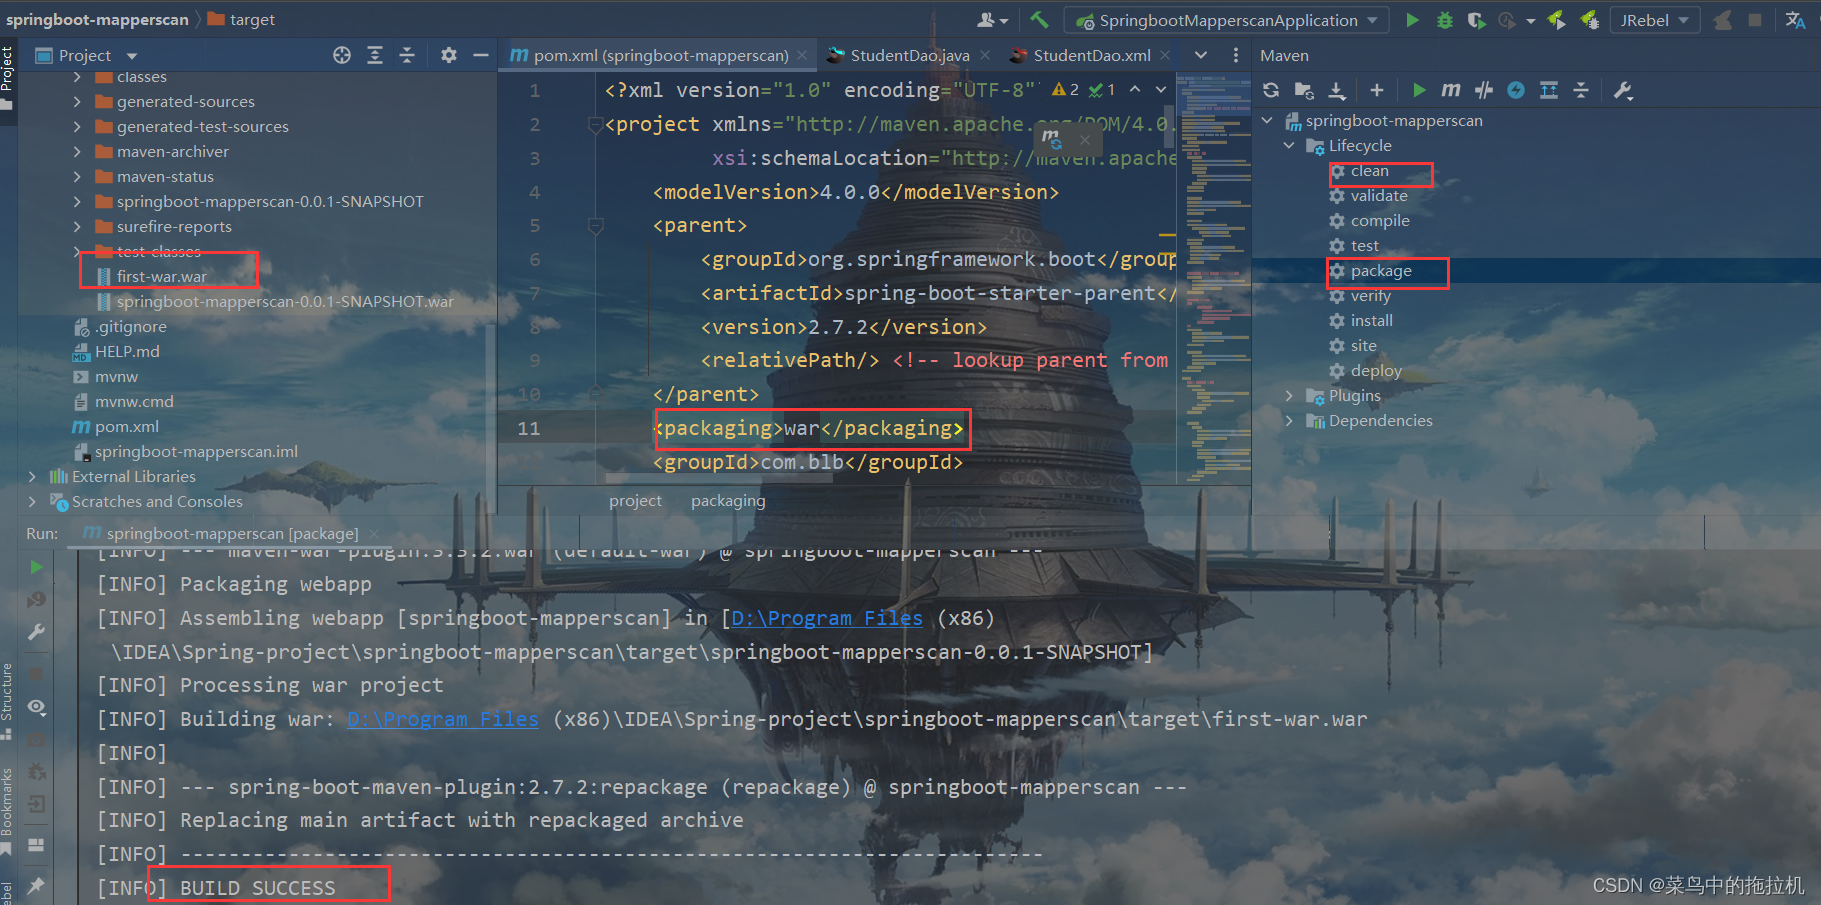
6. Use the mvn clean command on the IDE command line to clear the old packages, and use mvn package to generate a new war package.
Comparison of jar package and war package methods
- When building a jar package, the content under src/main/webapp will not be copied into the jar package, but when building a war package, it will
- Projects that provide REST services need to be packaged into jar packages, and projects that contain a large amount of css, js, html and require frequent changes are more convenient to run in jar packages, because changes to static resources can be directly overwritten, and the effects of the changes can be seen quickly.
- Personally, I think it is much more convenient to package it into a jar package than a war package.