background
Introduction to Gitee:
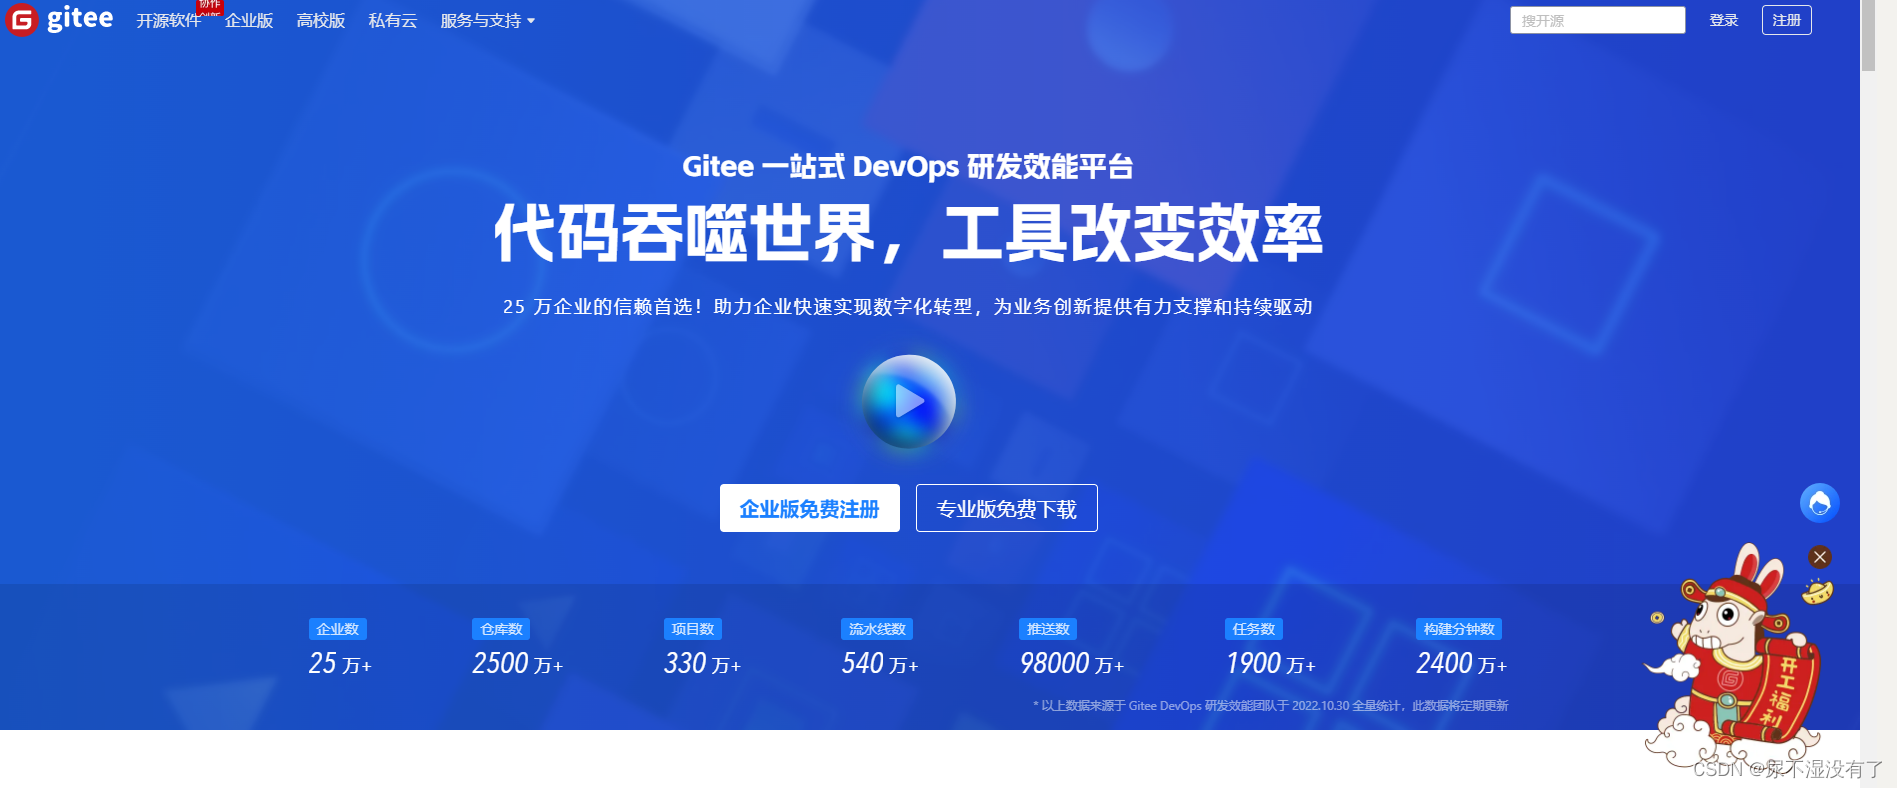
Gitee is a code hosting collaborative development platform launched by the open source Chinese community. It supports Git and provides free private warehouse hosting . Gitee has now become the largest code hosting platform in China. It helps developers store and manage their project source code, and can track, record and control users' modifications to their code, providing a stable, efficient and secure cloud software development collaboration platform. Whether you are an individual, a team or an enterprise, you can use Gitee to achieve code hosting, project management, and collaborative development.
Git is a version control system, a command, and a tool.
Both Gitee and Github are repositories that implement online code hosting based on Git. The access speed of Github in China is too slow, so it is recommended to use Gitee. But if you are going to do an open source project, and it is really open source, and you want more people to participate in the project, the correct approach is to mainly develop it on Github, and then synchronize it to Gitee as a mirror for domestic network access. This is suitable for domestic developers to clone code and access documents hosted on Gitee Pages.
Gitee is simply the Chinese version of Github; both can provide free code repositories. The free version of Gitee supports organizations with less than 5 people and can create private projects, while the free version of GitHub can only create public projects, and private projects require payment. The operation methods of the two are basically the same, and you only need to learn one of them. Today I will mainly introduce Gitee and support the domestic open source ecosystem, hahaha~
Code cloud official website: link
1. Registration and login
Nowadays, you need to register an account to use any website function or software. This process should be familiar to everyone. If you have an account, you can log in directly. If you don't have an account, you must register first and then log in.
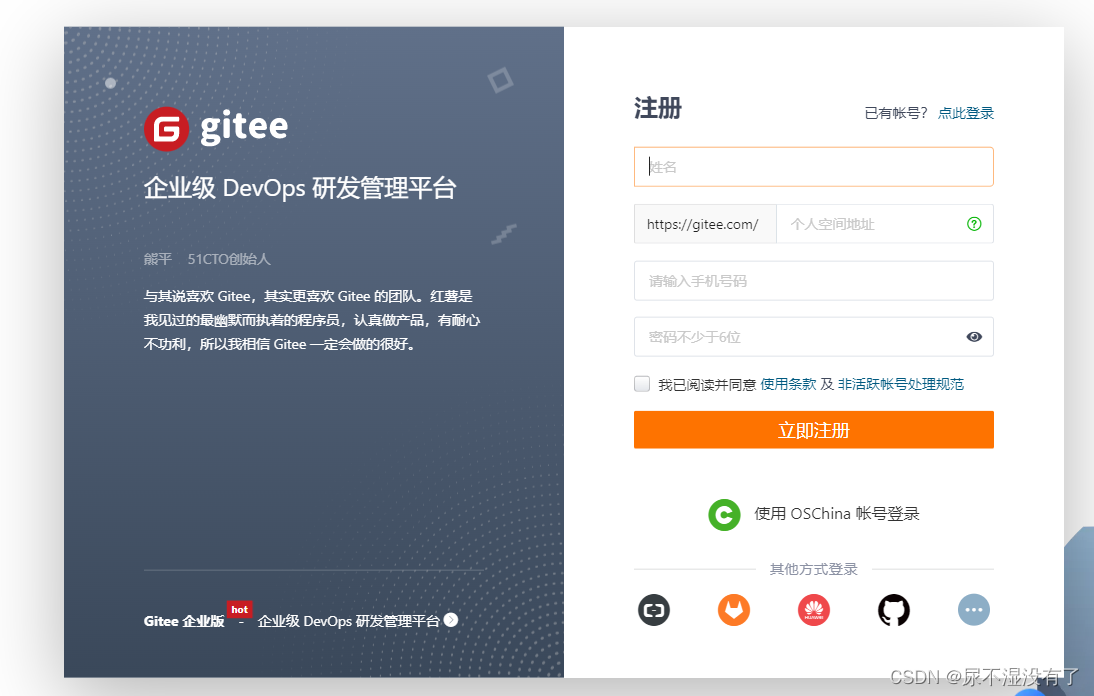
1.1 Registration interface
Click "Register" in the upper right corner of the gitee official website and just register step by step. I won't demonstrate it here.
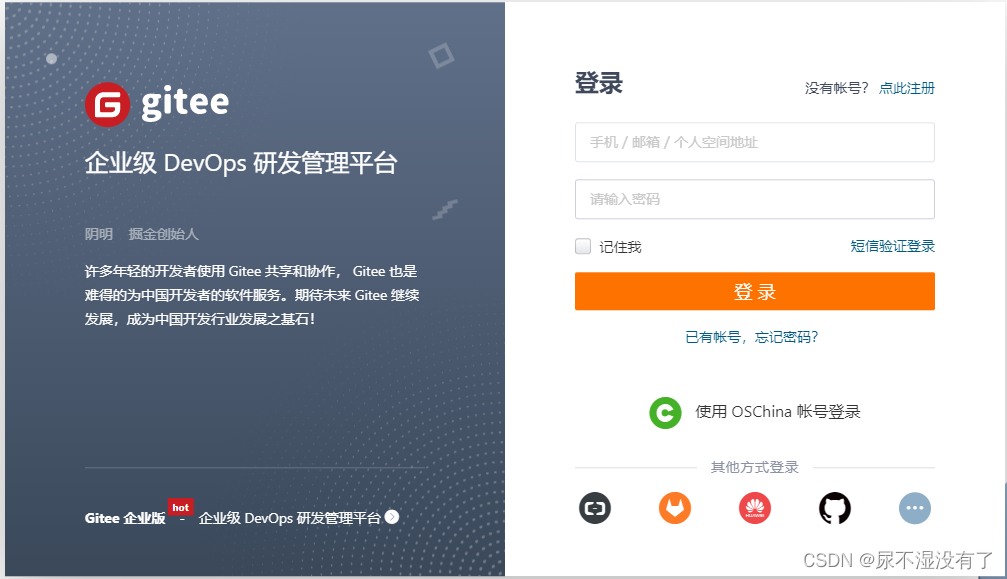
1.2 Login interface
Just fill in your account and password to log in.
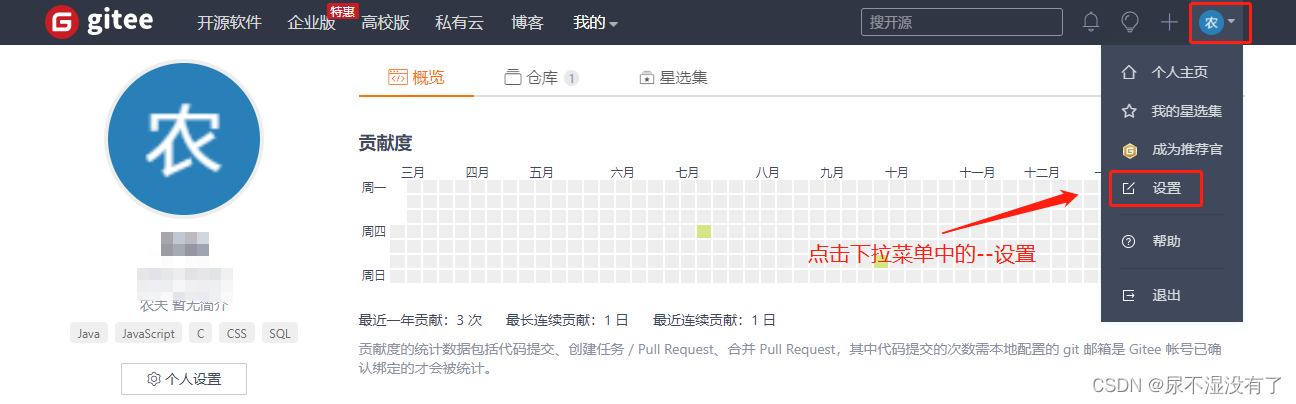
2. Configure code cloud
To have our own warehouse, we first need to configure the SSH public key .
2.1 Configure SSH public key
Click on the avatar in the upper right corner and click Settings in the drop-down menu .
2.1.1 Have ssh public key
After entering the account information setting page, find: "Security Settings" –> "SSH Public Key" in the directory navigation area on the left.
If you have generated a public key before, just copy and paste it. If not, follow the steps below to complete it.
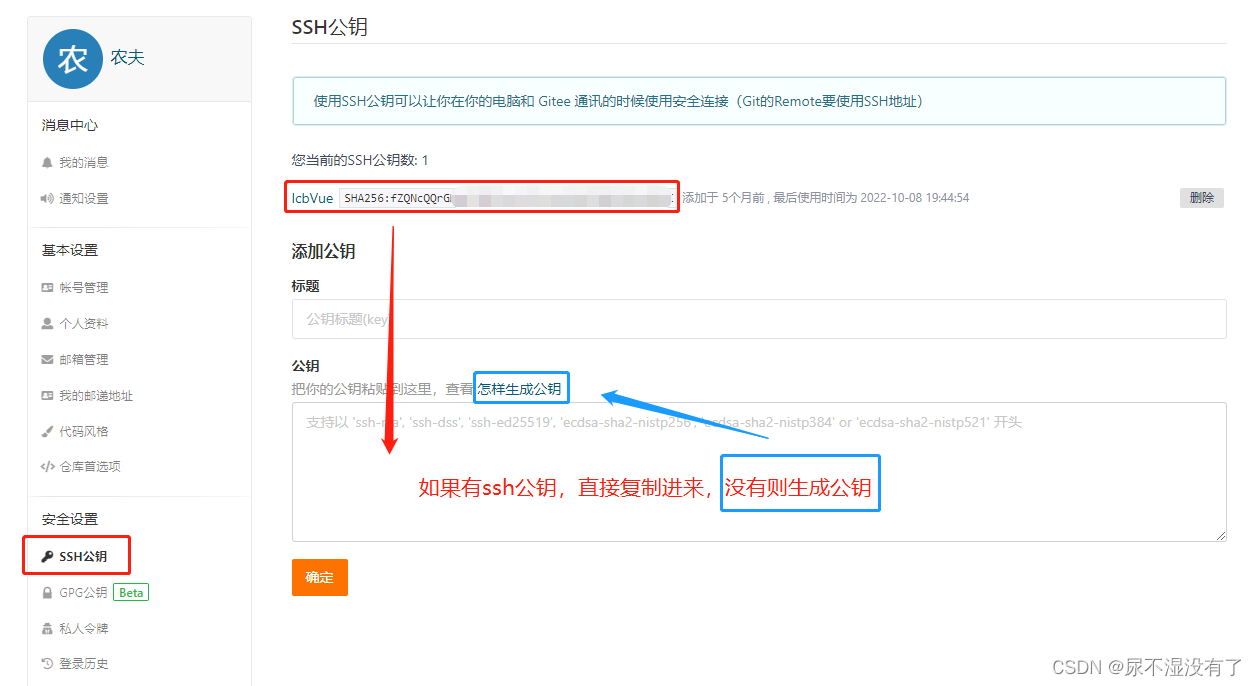
2.1.2 No ssh public key
Gitee official website: ssh public key configuration documentation
A. How to generate a public key
Open the official webpage of "How to generate a public key" in a new tab, and then open "["Warehouse Management"->"Public Key Management"]" in a new tab .
B. Add public key
After entering the new page, click "Generate/Add SSH Public Key" .
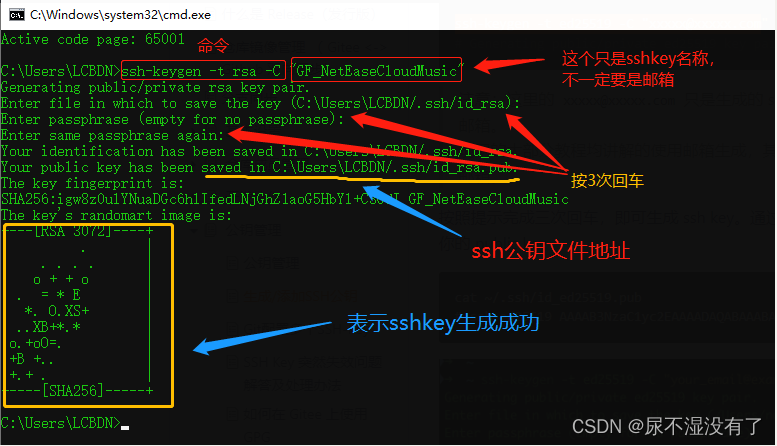
C. cmd operation
First execute the " " command in cmd ssh-keygen -t rsa -C "[email protected]"and press Enter three times.
Note: The " " here
"[email protected]"is just the name of the generated sshkey, and does not restrict or require it to be specifically named a certain mailbox.
Most of the tutorials on the current Internet explain how to use mailbox generation. The original intention was just to use mailboxes for easy identification.
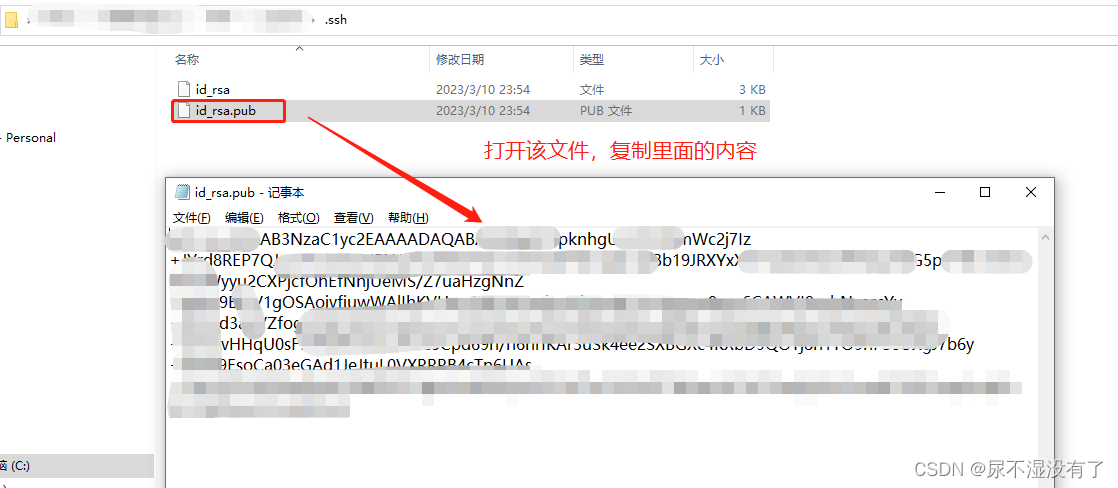
E. Copy the ssh public key
Copy the public key, find the corresponding public key according to the storage path of the public key, open and copy it.
F. Store public key
Return to the page for adding a public key, store the copied public key in the corresponding location, and modify the title name.

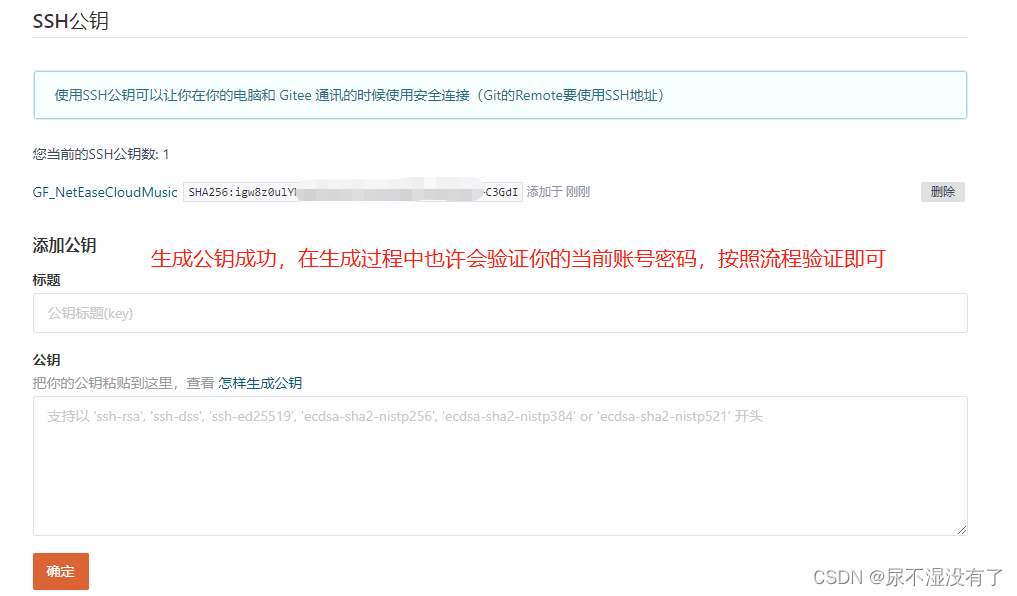
G. Public key added successfully
After successfully adding the public key, click OK and verify the password, you will see the newly added public key.
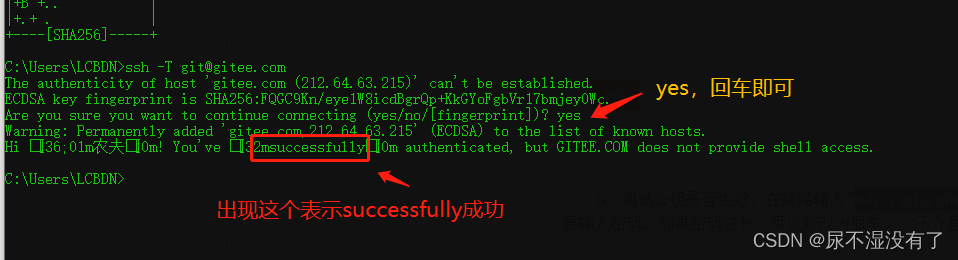
H. Test public key
Test whether the public key is valid. Enter "ssh -T [email protected]" in the terminal. When using it for the first time, you need to confirm and add the host to the local SSH trusted list. You need to enter a password. If the password is too long, you can change it to Enter. (For those who don’t mind if the password is too long and may be entered repeatedly, you don’t need to change it)
3. Create a new warehouse
Create your own warehouse.
3.1 Create a warehouse
In the drop-down menu with the + sign on the left side of the avatar , select New Warehouse to enter the page for creating a new warehouse .

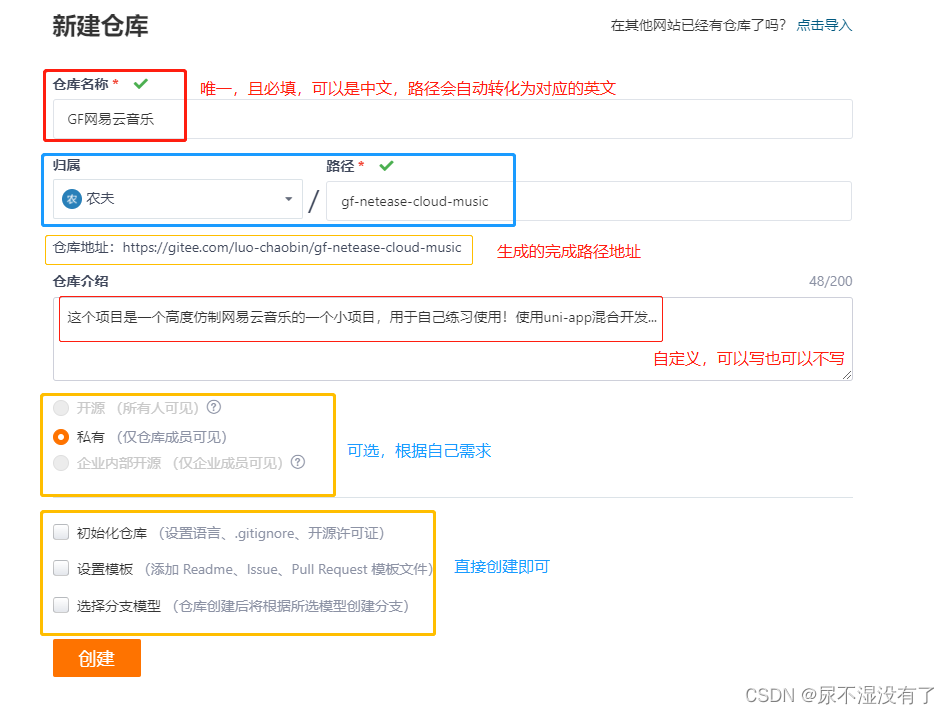
3.2 Configure warehouse
Configure the warehouse and provide the warehouse name and introduction. The warehouse name must be unique and can be in Chinese .
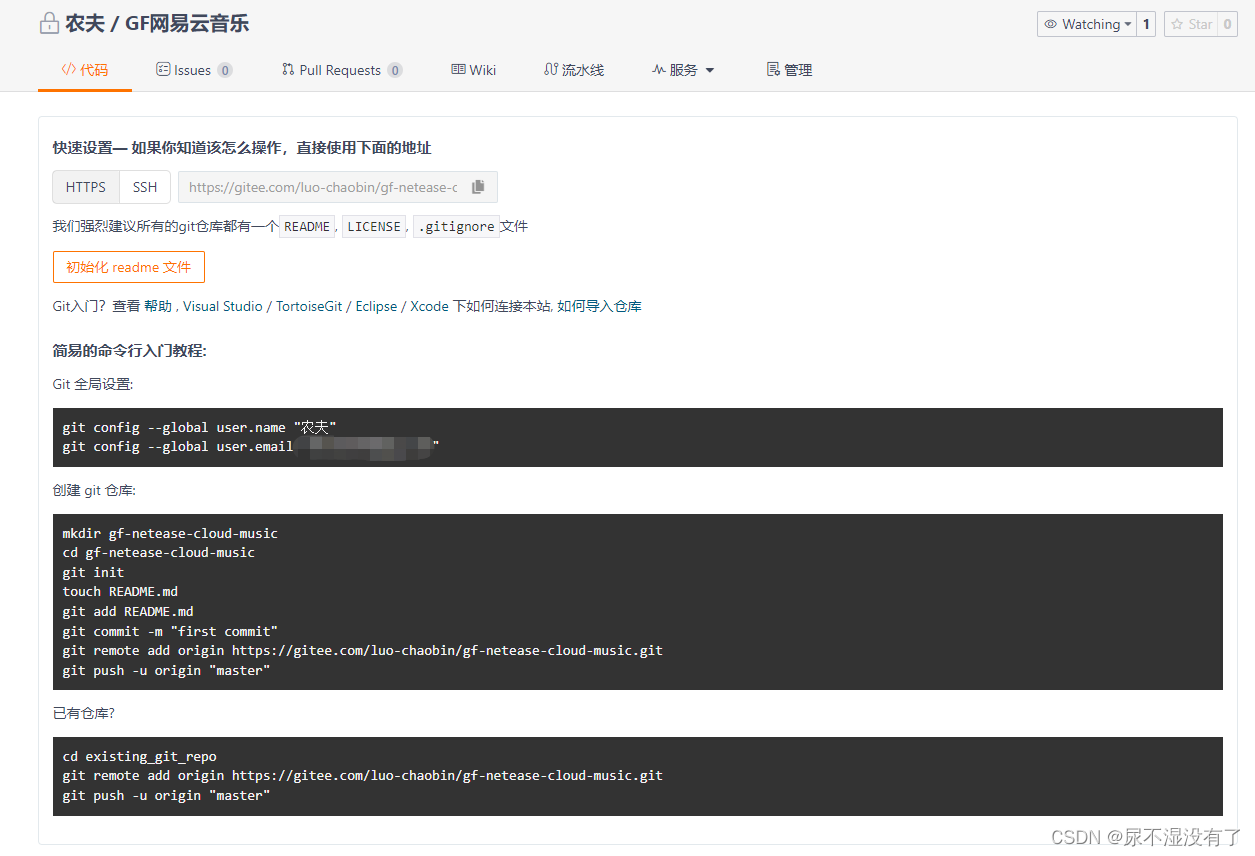
3.3 Created successfully
If the creation is successful and the following page appears, it proves that the warehouse is successfully created. Otherwise, delete the warehouse and create it again.
4. Git configuration
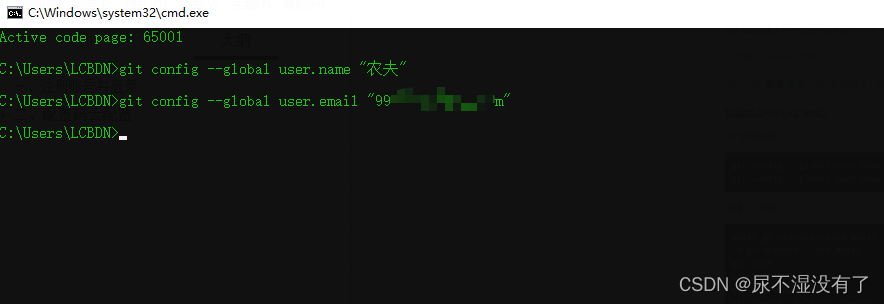
4.1 Git global configuration
Execute the two commands of Git global settings in cmd.
4.2 Configure existing warehouse
We have already created a new one called “GF网易云音乐”的仓库, so choose the existing warehouse for configuration.
4.2.1 Environmental inspection:git status
At this point we have already created a new one
“GF网易云音乐”的仓库, so choose an existing warehouse for configuration.
Open the cmd window under the project path and check the project environment.
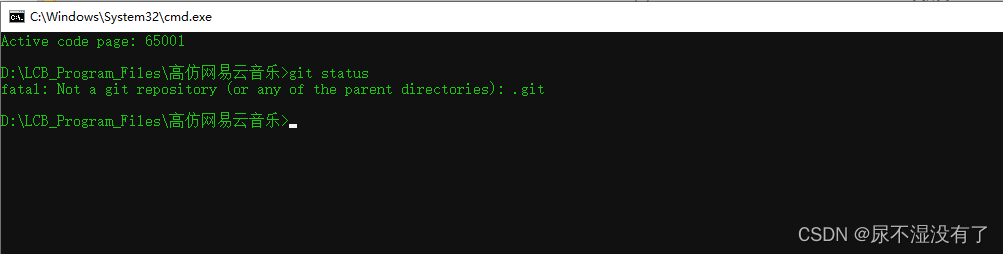
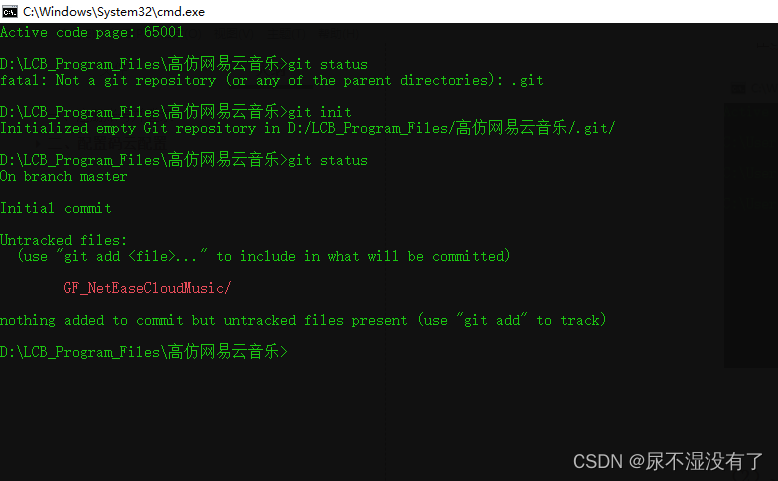
The above situation means: there is no such directory as .git . Enter git init on the command line and press Enter to solve the problem. After solving the problem, check the project environment. If the following situation occurs, it means that some files of the project have not been submitted and need to be submitted.
4.2.2 Create git directory:git init
4.2.3 Submit to local:git add .
Use the following method to submit.
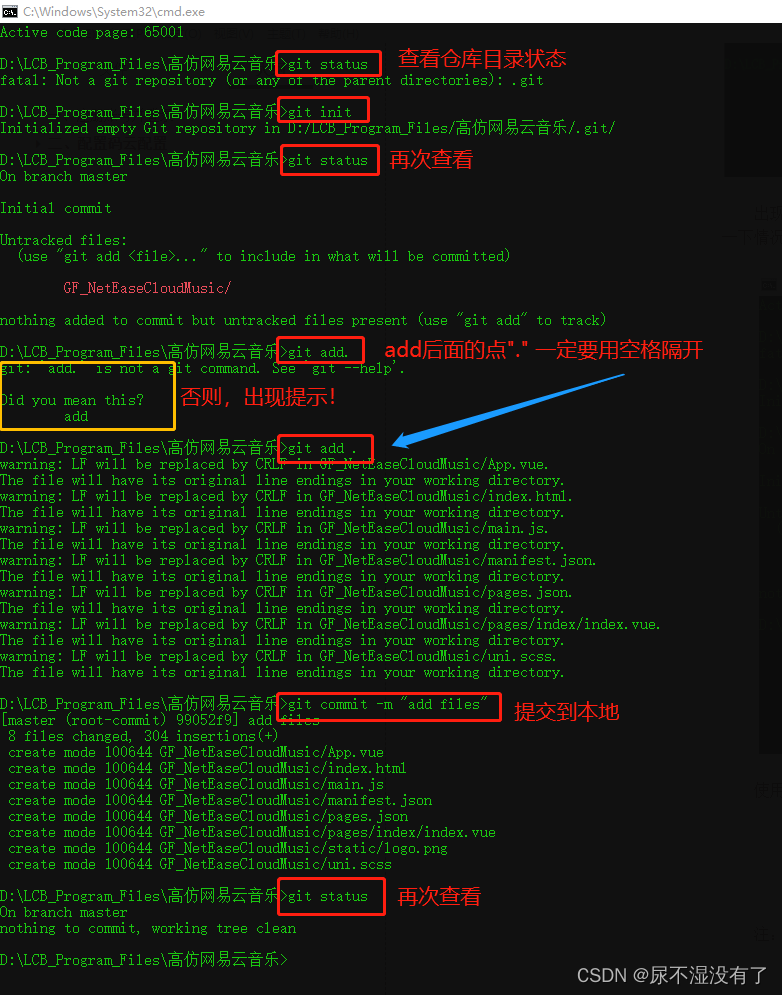
Note: The above operations are all performed in ****local**** and are not submitted to the code cloud (as shown in the picture above, nothing to commit, working tree clean, the directory at this time is clean,)
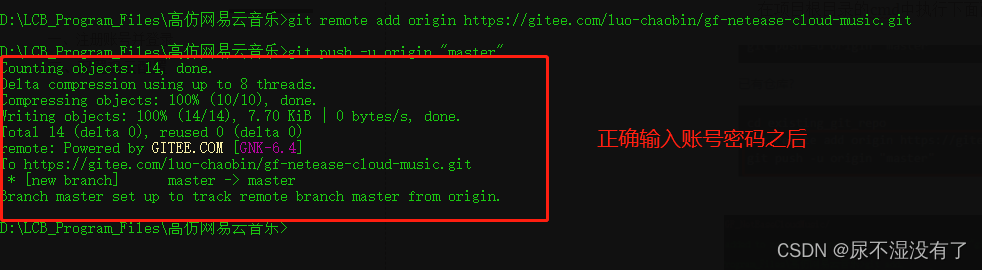
5. Submit the code to the code cloud
5.1 Account password
Execute the following two lines of commands in the cmd of the project root directory. The first time you need to enter the user name and password ( that is, your gitee account and password ).


After entering the account password, as follows:
5.1 View the warehouse
If there are no errors, go to the newly created warehouse and refresh it to see if the files in the root directory of your project have been uploaded.

6. Upload the modified code to the code cloud warehouse
6.1 Check the warehouse status first:git status
To check the status, first use Git status to check the current status.

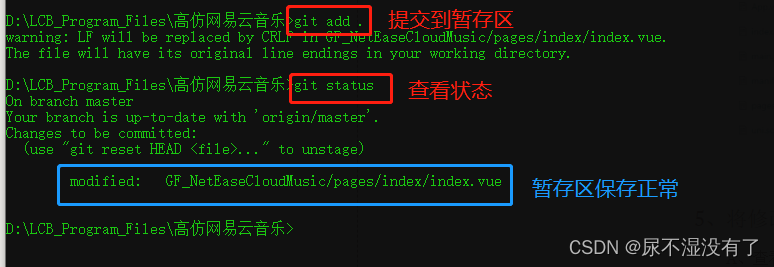
6.2 Submit to the staging area:git add .
Submit it to the staging area and view the status after submission ( git status)
6.3 Submit the code locally
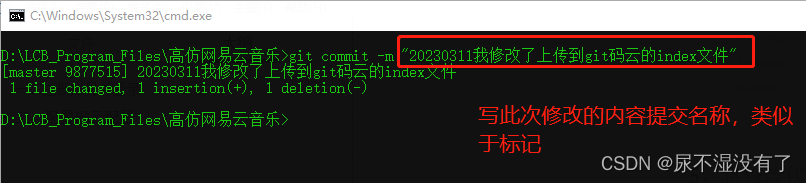
git commit -m "本次提交说明-名称"
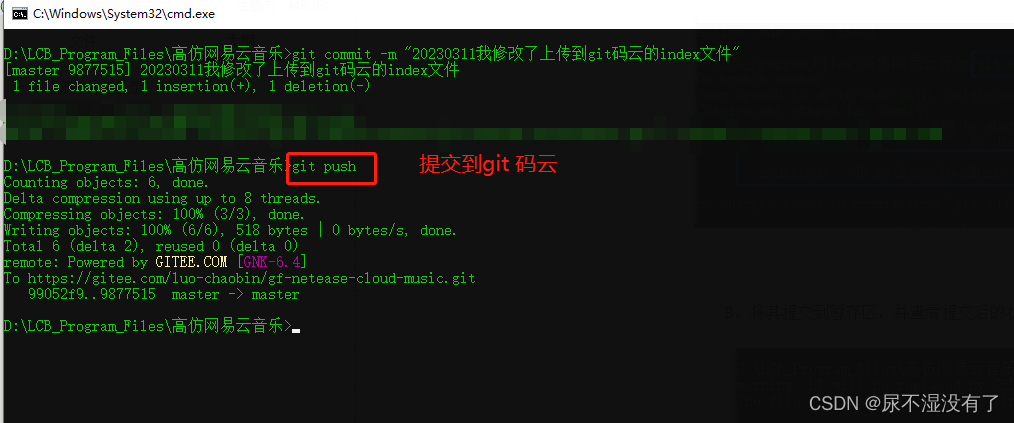
6.4 Submit to code cloud:git push
6.5 Go to the warehouse to check
Only the index file was modified this time, so only the description of this one has changed.
