Table of contents
3. Tomcat registers the service and sets it to start at boot
3.1. Use rc.local to configure startup
3.3.systemd configuration (general way)
Steps to install Tomcat on Debian system, register it as a service and set up startup. Tomcat is an open source Java Servlet container that can be used to run Java web applications. Through the guidance of this article, you can quickly install Tomcat on a Debian system and ensure that it can start automatically when the system starts.
Build environment
Tomcat:apache-tomcat-8.5.91
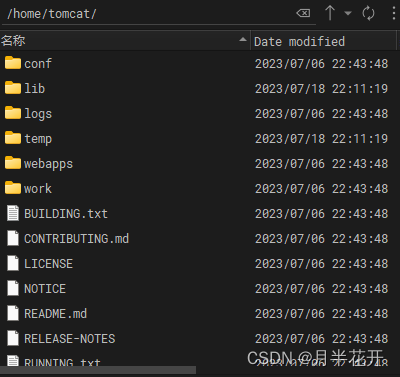
Tomcat installation path :/home/tomcat/
JDK:jdk1.8.0_202
JDK installation path :/home/jdk1.8.0_202/
Operating system: debain12
1. Preparation
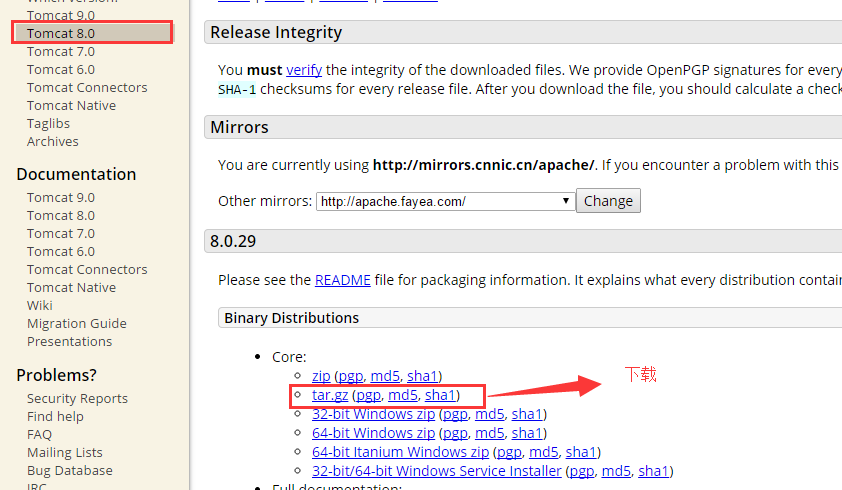
a) Download the tomcat linux package at the address: Apache Tomcat® - Apache Tomcat 8 Software Downloads . The version we downloaded is 8.0. The download method is as shown in the figure:
b) Because the installation of tomcat depends on Java jdk, we need to determine whether jdk is installed under the linux system
1) Use (Xshell) to connect to the Linux system
2) Enter the command: java -version. If the jdk version number is displayed, it proves that it has been installed. If it is not displayed, it proves that it is not installed. If it is not installed, please refer to the following address to install it:
Debain11 installation and configuration jdk
jdk offline installation package download address:
Index of java-local/jdk (huaweicloud.com)
oracle.com/java/technologies/downloads/
After successful installation, verify the jdk as shown in the figure:

2. Install Tomcat under Linux
a) Then use the command in Xshell to jump to the creator's own folder under home: tomcat
b) Then use Xftp to copy tomcat to the tomcat folder, as shown in the figure:
c) Decompress the uploaded Tomcat8.0 and rename it to tomcat after decompression, as shown in the figure:
#可以直接解压并命名到home目录
cd /home/tomcat
tar -zxv -f apache-tomcat-8.5.91.tar.gz
d) Start tomcat
There are three common startup methods:
Method 1: Start the current session
/home/tomcat/bin/startup.sh #启动tomcat命令
If the message shown in the picture appears, it means the startup is successful. Visit http://127.0.0.1:8080 . If the Tomcat homepage can be displayed, the startup is successful.
ps -ef | grep 'tomcat'Check the tomcat service we just started:

The process id is 9814, we can use the following command to shut it down
kill 9814Method 2: Start the current session with logs
./catalina.sh run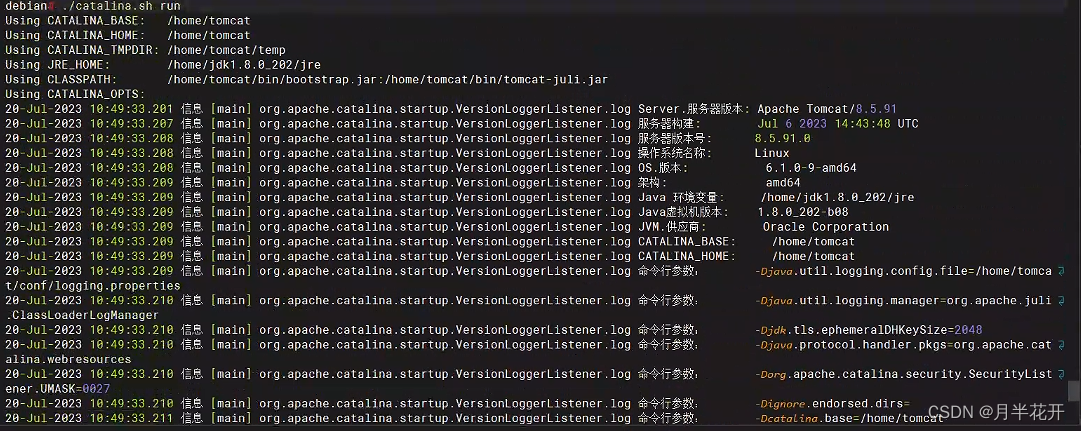 Different from the first method, the second method will display the log after starting, which is equivalent to the current Linux connection session having become the console, and no other Linux commands can be entered. The same as the first method, when the current When the connection is closed, the tomcat service started this time will also be closed. Of course, after successful startup, we can also use ctrl + c to directly close the startup of tomcat in this link session.
Method 3: Permanently start the background.
The simplest way to write:
nohup ./startup.sh &Manually specify the log path when tomcat starts:
nohup ./startup.sh > log.file 2>&1 & To understand the difference between the two, you have to look at the specific usage of nohup:
>log.file redirects the command output to the log.file file, that is, the output content is not printed to the screen, but is output to the log.file file.
2>&1 redirects the standard error to the standard output. The standard output here has been redirected to the log.file file, that is, the standard error is also output to the log.file file. The last & allows the command to be executed in the background.
Just think about what 2>1 represents. The combination of 2 and > represents error redirection, while 1 represents error redirection to a file 1 instead of standard output; replace it with 2>&1, and the combination of & and 1 represents standard output. It becomes an error and redirects to standard output.
e) Command to stop Tomcat
/home/tomcat/bin/shutdown.sh #停止tomcat命令f) Environment variable configuration
sudo vi /home/tomcat/bin/catalina.shg) If the system is not configured with jdk and tomcat environment variables, add CATALINA_HOME and CLASSPATH in tomcat/bin/catalina.sh
#tomcat路径
CATALINA_HOME=/home/tomcat/
CLASSPATH=.:$JAVA_HOME/lib:$CATALINA_HOME/lib

g) Specify the jdk version of Tomcat
Method 1. Add points to JAVA_HOME and JRE_HOME in tomcat/bin/setclasspath.sh
JAVA_HOME=/home/jdk1.8.0_202
JRE_HOME=/home/jdk1.8.0_202/jre
3. Tomcat registers the service and sets it to start at boot
There are three ways to set up startup. There are two commonly used ways to register as a service.
3.1. Use rc.local to configure startup
Directly add the statement /home/tomcat/bin/startup.sh at the end of the /etc/rc.local file, restart the system, and run ps -ef|grep java. If the following information appears, it means that the tomcat service has started automatically!
The contents of /etc/rc.local are scripts executed at boot.
vi /etc/rc.local#!/bin/sh -e
#
# rc.local
#
# This script is executed at the end of each multiuser runlevel.
# Make sure that the script will "exit 0" on success or any other
# value on error.
#
# In order to enable or disable this script just change the execution
# bits.
#
# By default this script does nothing.
#添加startup.sh的路径
/home/tomcat/bin/startup.sh
exit 0Autostart services configured in this way will run under root. Note the line added above exit 0
3.2. Use /etc/init.d
The /etc/init.d directory is the system service script
The process of adding the script as a system service:
1. Copy the script to the /etc/init.d directory
2. Add a 755 permission,
3. Use chkconfig --add service name to add
4. Use chkconfig --list to view
5. Use service service name start|stop|restart to execute the service
1 ) Enter the bin directory under tomcat
cd /home/tomcat/bin2) Copy catalina.sh as a system service script
#重命名的tomcat为以后的服务名
cp /home/tomcat/bin/catalina.sh /etc/init.d/tomcat
3) Modify the script
vi /etc/init.d/tomcat4) Add the following two lines of comments earlier in the script
#chkconfig:2345 10 90
#description:Tomcat service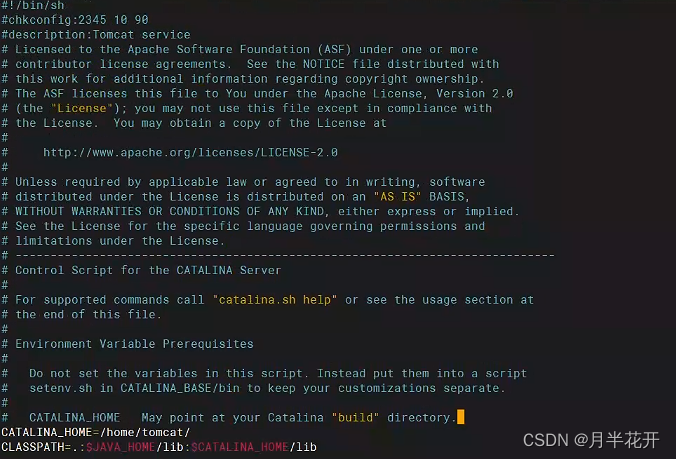
The first line is the configuration of the service: the first number is the runlevel of the service, 2345 indicates that the runlevels of this service are 2, 3, 4 and 5 (the runlevels of Linux are 0 to 6); the second number is Start priority, the value is from 0 to 99; the third number is the stop priority, the value is also from 0 to 99.
The second line is a description of the service
If this comment is incorrect, an error message "tomcat does not support chkconfig" will appear when adding a service.
5) Set environment variables in the script
At the same time in the file /etc/init.d/tomcat
CATALINA_HOME=/home/tomcat/
CLASSPATH=.:$JAVA_HOME/lib:$CATALINA_HOME/lib
JAVA_HOME=/home/jdk1.8.0_202
6 ) Add executable permissions for the script
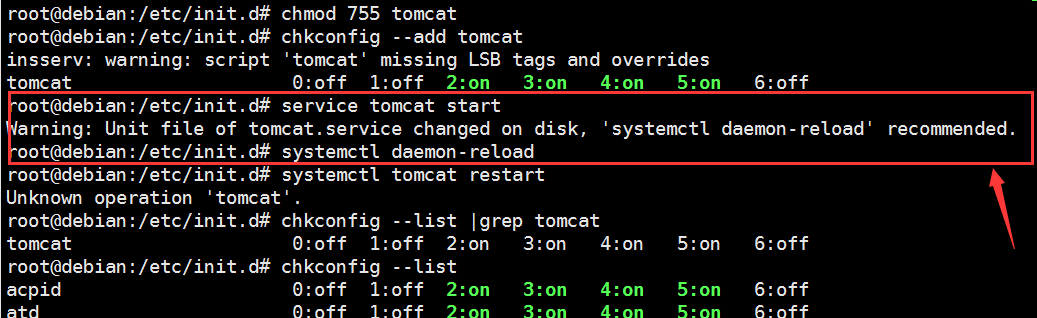
chmod 777 /etc/init.d/tomcat7) Add as system service
chkconfig --add tomcat8) View the system service list
chkconfig --list7. Start and stop tomcat
service tomcat start   #启动tomcat
service tomcat stop    #停止tomcat
service tomcat restart  #重启tomcat
The /etc/init.d directory is the system service script
Note: A message appears when starting the service. I still don’t know what the error is and what the reason is. I checked online and said that I executed this command systemctl daemon-reload and then restarted Tomcat again and it started successfully.
3.3.systemd configuration (general way)
system daemon system daemon process. Systemd can manage all system resources. Different resources are collectively called Units. Unit is divided into 12 types in total. If we want to set up the service to start automatically at boot, we need to use the Service unit.
Assume that the tomcat root directory is in /home/tomcat, create a new file tomcat.service in the directory /lib/systemd/system/, the content is as follows:
1) Register the systemctl service (I am more used to editing with nano)
vi /lib/systemd/system/tomcat.service
或
vi /usr/lib/systemd/system/tomcat.service
2) The contents of the tomcat.service file are as follows:
[Unit]
#Description指定当前服务的简单描述。
Description=tomcat8测试应用服务
#After表示当前服务在network.target之后启动,可以指定多个服务,以空格隔开。
After=network.target

[Service]
#ExecStart将以fork()方式启动,此时父进程将会退出,子进程将成为主进程。
Type=forking
Environment='JAVA_HOME=/home/jdk1.8.0_202'
Environment='JRE_HOME=/home/jdk1.8.0_202/jre'
# ExecStart指定启动进程时执行的命令。
# ExecReload指定当该服务被要求重新载入配置时所执行的命令。另外,还有一个特殊的环境变量 $MAINPID 可用于表示主进程的P>
# ExecStop指定停止服务时执行的命令。
ExecStart=/home/tomcat/bin/startup.sh
ExecReload=/bin/kill -s HUP $MAINPID
ExecStop=/home/tomcat/bin/shutdown.sh

#web服务设置私有/tmp或/var/tmp目录
PrivateTmp=true

[Install]
#“WantedBy=multi-user.target”表示当系统以多用户方式(默认的运行级别)启动时,这个服务需要被自动运行。
WantedBy=multi-user.target
3) Reload the configuration of the systemd manager
systemctl daemon-reload4) Start the tomcat service:
systemctl start tomcat
# tomcat启动的大致流程是startup.sh->catalina.sh->setclasspath.sh
5) Check Tomcat service status:
systemctl status tomcat
Status Active: active, indicating successful startup
6) Set startup. If there are no errors, you can enable the Tomcat service to start automatically at boot:
systemctl enable tomcatSummary of commonly used commands
| Order | Function |
| systemctl stop tomcat.service | Out of service |
| sudo systemctl disable tomcat.service | Cancel auto-start at boot |
| systemctl restart tomcat.service | Restart |
| systemctl enable tomcat.service | Set service to start automatically |
| sudo systemctl status tomcat | Check Tomcat service status |