As we all know, files such as Excel and world documents cannot be previewed directly in web browsers. Some browsers open PDF previews, while others jump to the download page. Inconsistent behavior is also a headache for developers.
Today I will provide you with a solution to achieve online preview of office files. This is very useful in developing OA and push notification applications. Use the plug-in - onlyoffice to realize the online preview function!
Operating environment: centOS + Pagoda panel
The first step is to download docker
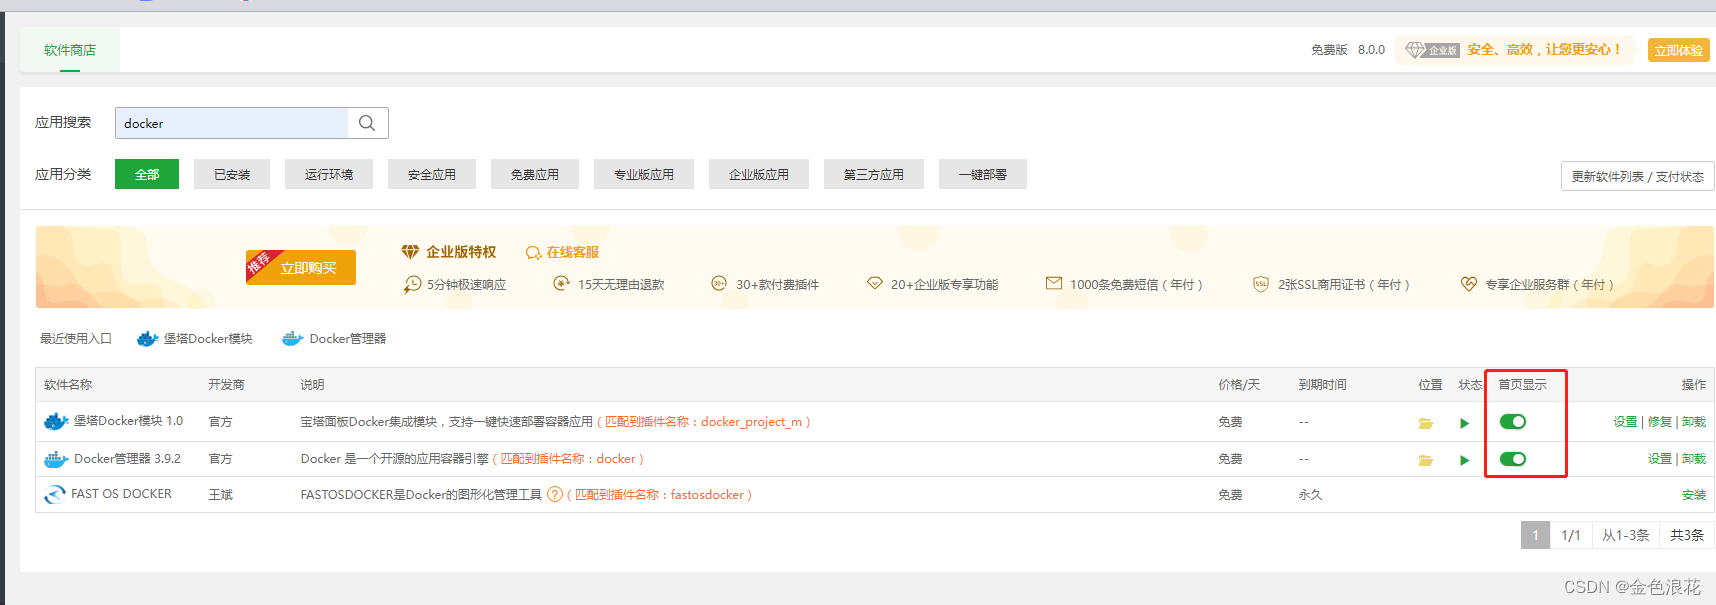
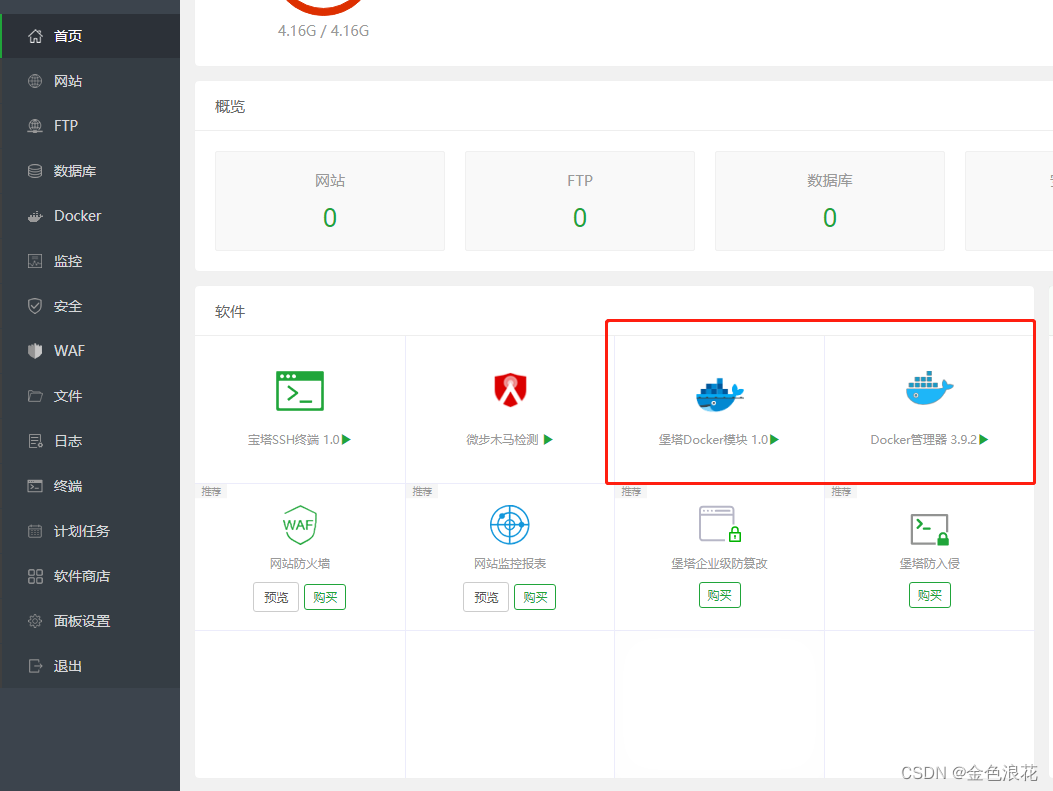
Find the application docker in the [Software Store] of the Pagoda Panel, install docker and docker manager, and place it on the homepage of the panel. In this way we can find the docker manager on the homepage of the panel.
Step 2 : Install the onlyoffice image
Click Docker Manager on the Pagoda homepage, search for and install documentServer in the official image repository.

After pulling it, you can find the onlyoffice image in your docker image.

We ran the command docker inspect [images_id] and saw that the image exposed a port 80. This is the port used for image access. When we start the container, we can successfully access it by mapping the port.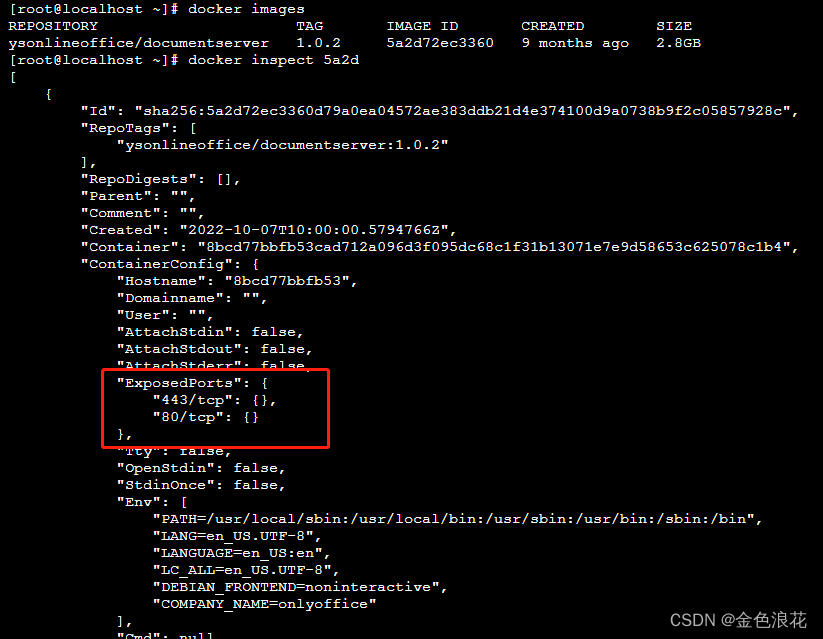
Step 3: Start the container
This can be done on the command line via the command:
docker run -it --name documentServer -d -p 9090:80 onlyoffice/documentserverAmong them, -it means using an interactive terminal, ubuntu is the base image, and bash is the command to be executed. When we run this command, Docker will automatically create a container for us and open a bash terminal in it. At this point, we can run various bash commands in the container, which is very convenient for users who need interactive operations.
The -d option tells Docker to run the container as a daemon. When we use the -d option, Docker will put the container into the background for execution
-p indicates port mapping. We map the local port 9090 (can be specified by you) to the port 80 of the onlyoffice image.
After successful startup, a container ID will be returned.
Step 4. Test onlyoffice
Visit localhost:9090. If the following screen appears, the onlyoffice service has been started successfully!
After successful startup, a js file will be provided, which can be accessed through http://localhost:9090/web-apps/apps/api/documents/api.js . The front-end can reference the file and configure it to preview the office files online.

Step 5: Call the service on the front end
<!DOCTYPE html>
<html lang="en">
<head>
    <meta charset="UTF-8">
    <title>Title</title>
</head>

<body>
<div id="placeholder"></div>
<script type="text/javascript" src="http://localhost:9090/web-apps/apps/api/documents/api.js"></script>
<script>

    var docEditor = new DocsAPI.DocEditor("placeholder", {
        "document": {
            "fileType": "docx",
            "permissions": {
                "edit": false,
            },
            "key": "C8D7FB890BAC496FB0D27B163EDB88BDAA",
            "title": "zf张飞.docx",
            "url": "你需要预览的文件地址",
        },
        "height": "1000px",
        "width": "100%"
    });

</script>
</body>
</html>
At this point, online preview is available.
onlyoffice git address: https://github.com/ONLYOFFICE/DocumentServer