Article directory
1 Introduction
Cloud storage has been in the limelight in the past few years, and cloud storage platforms have sprung up like mushrooms after a rain. However, in the past two years, cloud storage platforms have lost their popularity and have been closed down one after another. Except for a few major Internet companies, other platforms are struggling to support themselves. As a branch of cloud storage, there are very few images left. However, the picture bed can not only be used to store personal pictures, but can also be used as a source of website pictures. If you want to have a stable picture bed, it seems that you can only do it yourself. Today, the author will introduce to you how to use Cpolar+ Imagewheel to build a simple and clear private image bed.
2. Imagewheel website construction
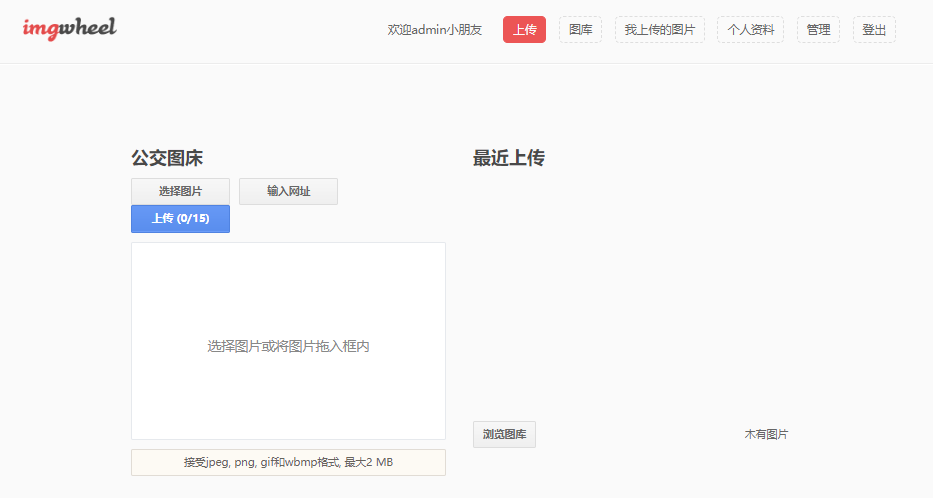
Imagwheel is a lightweight image bed program developed abroad. It can use php5.X-7.X version and also supports MySQL. Although it is a lightweight image bed program, its interface is simple and bright, looks very refreshing, and its functions are not weaker than other image bed programs. At least for users, there is one more choice.
2.1. Imagewheel download and installation
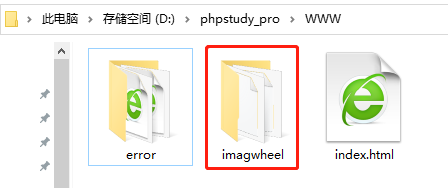
Although Imgwheel is an open source program, the author did not find the download address of github and can only provide a third-party download address ( https://zhujiwiki.com/wp-content/uploads/2017/11/1917334780.zip ). After the Imgwheel source code is downloaded, unzip it to get the Imagewheel source code folder. Paste this folder into the website folder (I am using the phpstudy integrated panel, so I paste the Imgwheel folder into the WWW folder of phpstudy) to start the Imagewheel website installation process.
Then open phpstudy, click 网站the button on the left side of the main interface of the software to enter the website list page, and then click the button on the upper left side of the website list page 创建网站to enter the settings page of the new website.
On the website settings page, there are not many things we need to set. We only need to set a few items:
域名- Open the domain name of the Imagewheel website locally and enter it at will;端口-The output port of the Imagwheel website, as long as it is not occupied;根目录– The file storage location of the Imagewheel website. In this example, the author places these files in the www folder of phpstudy;程序类型– Since Imagewheel is a lightweight web program that can run under php5.X-7.X, for the sake of insurance, the author chose the php5.6.9 version. It should be noted that the normal operation of Imagewheel requires opening several extensions of php such as gd, bcmath, and mysql.
Since Apache already comes with pseudo-static rules, we don’t need to make additional settings when using Apache to run the website. But if you use Nginx, you need to set up corresponding pseudo-static rules (the author found on the Internet that there is a problem with the pseudo-static rules of Imagwheel under Nginx, which will cause Nginx to report an error when running, so it is not recommended to use Nginx to run the Imagwheel website).
After these settings are completed, you can click the "Confirm" button at the bottom to save the settings of the Imagewheel website.

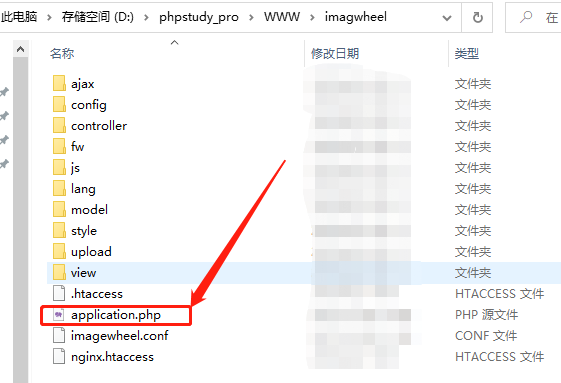
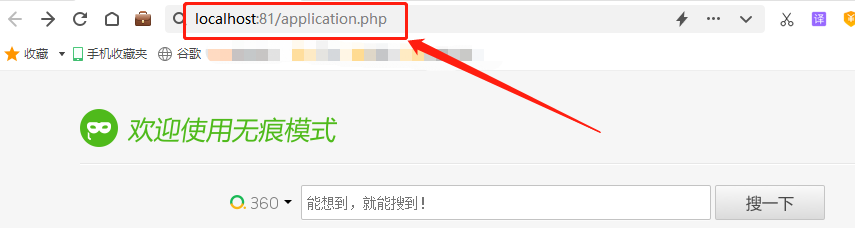
Next, we only need to enter the local address of the Imagewheel website in the browser address bar to start the deployment of the Imagewheel website. Since the webpage running file of the Imagewheel website is application.php, when entering the Imagewheel website address in the browser, you need to specify the running program, and the address that needs to be entered also changes to " " 本地地址:端口号/application.php. Here we enter localhost:81/application.php.
Here we enter localhost:81/application.php to enter the installation page of the Imagewheel website.
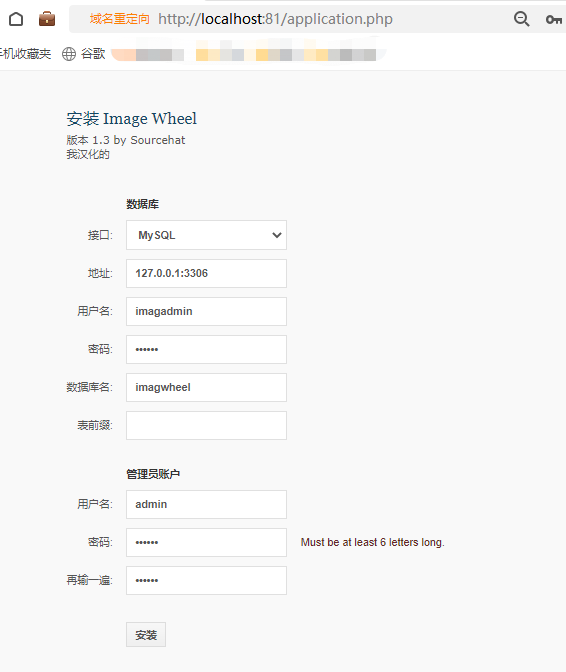
On the installation page, we don't need to fill in much information. We mainly fill in the database information previously set in phpstudy. After the input is completed, we can click the "Install" button at the bottom of the page. After the installation is complete, you will be redirected to the main page of the Imagewheel website.
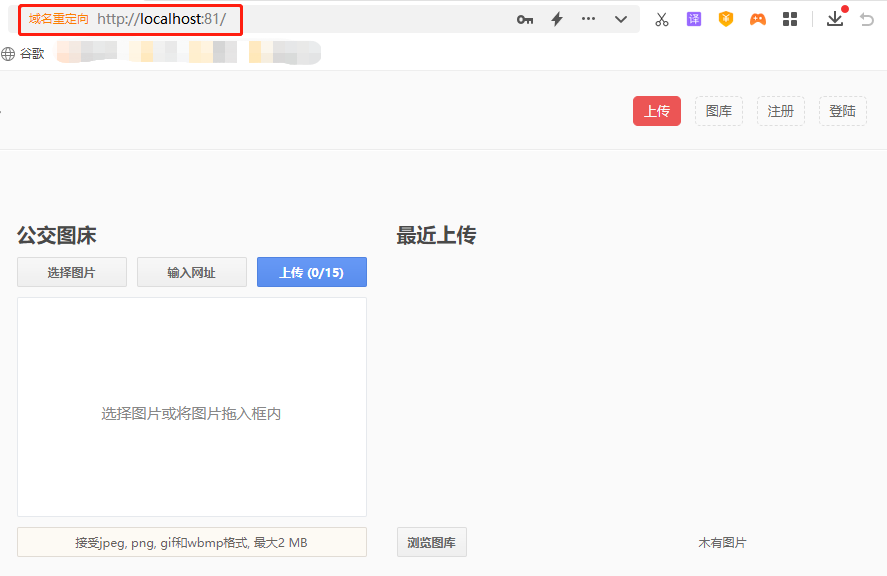
Although we have deployed the Imagewheel website on the local computer, if we want to access the website, we have to enter the address in the format of "local address:port number/application.php" every time, which is obviously not what we want. Therefore, we copy and paste application.php and rename the copied file index.php(you can also directly rename application.php to index.php). You can enter the browser address bar in the format of "local address:port number" to access the Imagewheel website.

2.2. Imagewheel web page testing
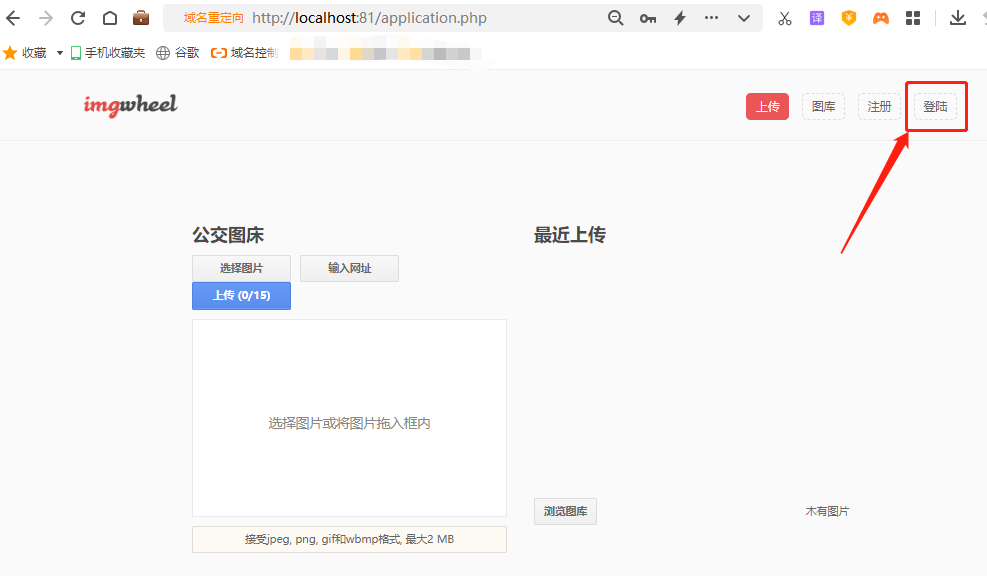
After modifying the index.php file according to the above method, we can enter localhost:81 in the browser address bar and the Imagewheel website can be opened correctly.
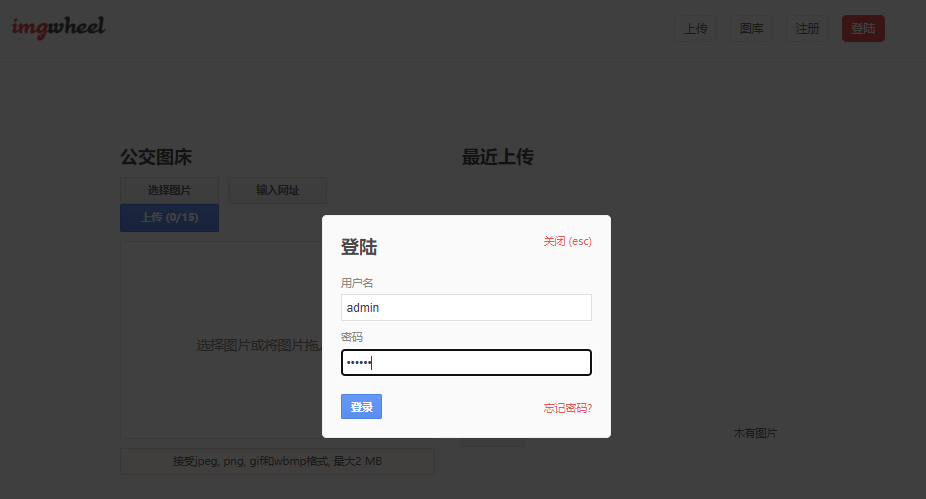
At the same time, we can click on the upper right corner of the Imagewheel website, enter the administrator account and password set when installing Imagewheel, enter the Imagewheel website backend, and make changes to the existing settings.
2.3.cpolar installation and registration
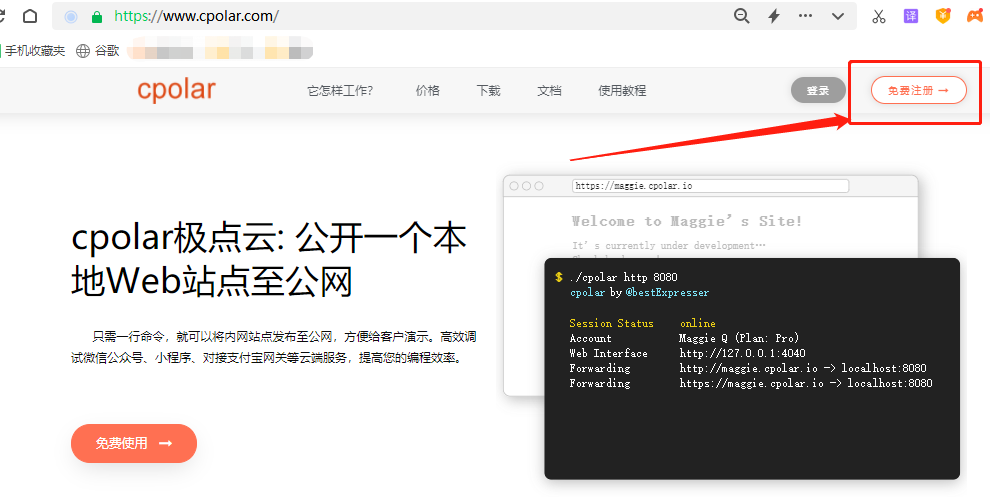
After completing the deployment of the Imagewheel website on the local device, you can move to the installation of cpolar intranet penetration. Compared with Imagewheel website deployment, the installation and registration of cpolar is much simpler. You can find the "Download" button directly on cpolar's official website page ( https://www.cpolar.com/ ).
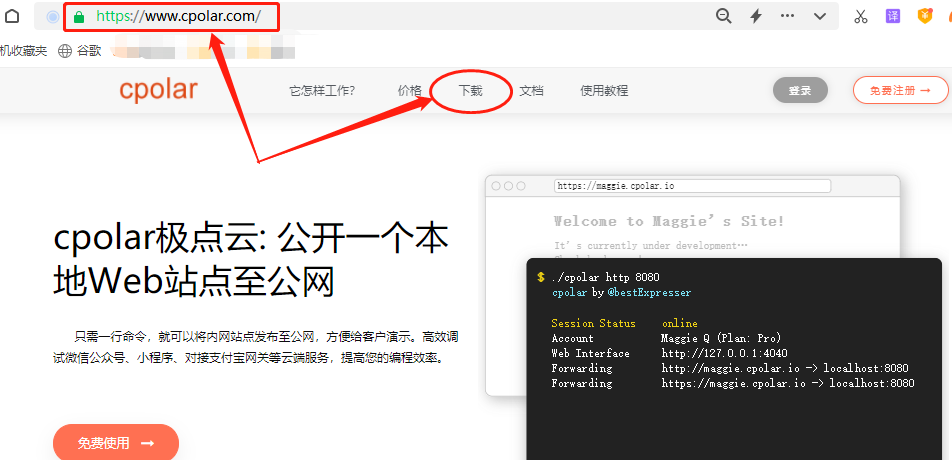
The author is using the Windows operating system, so I chose the Windows version of cpolar to download.
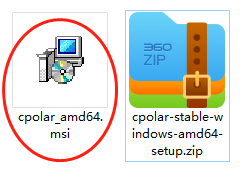
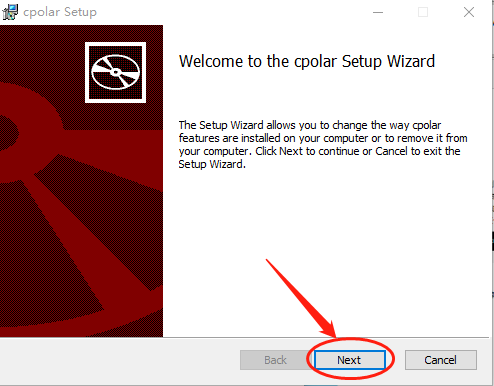
After the Cpolar download is completed, unzip the downloaded file and double-click the unzipped .msifile to automatically execute the installation program. Then it only takes one step Nextto complete the installation.
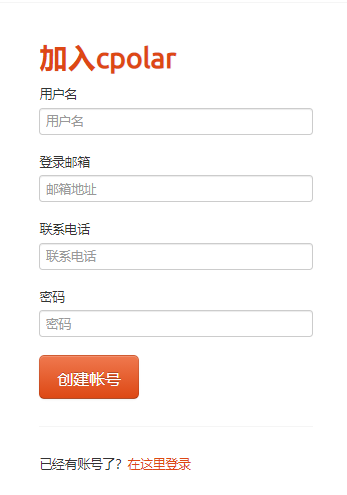
cpolar will create an independent data tunnel for each user to ensure data security with user password and token code. Therefore, user registration is required before using cpolar. The registration process is very simple. Just click on the upper right corner of the cpolar homepage 用户注册and fill in the necessary information on the registration page to complete the registration.
3. Local web page publishing
At this point, we have completed the deployment of the local Imagewheel website and installed the cpolar intranet penetration program. Next, we can use cpolar to create an intranet penetration data tunnel that can connect to the local Imagewheel website, allowing us to access the local Imagewheel website on the public Internet.
3.1.Cpolar temporary data tunnel
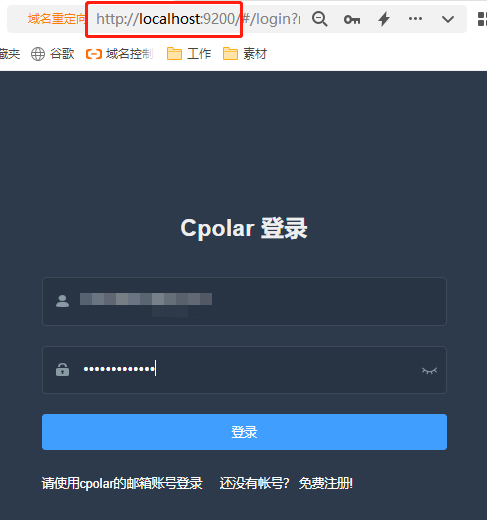
In order to meet the temporary testing function of web pages required by some customers, cpolar can create a temporary data tunnel directly on the cpolar client (the public Internet address is reset every 24 hours). To create a temporary data tunnel, we directly log in to the cpolar client on the local device (enter in the browser address bar ), and click the button under the item localhost:9200on the main interface of the cpolar client to enter the tunnel creation setting page.隧道管理创建隧道
On the "Create Tunnel" page, we need to set several information settings, which include:
隧道名称– It can be regarded as the tunnel information annotation of the cpolar client, as long as it is convenient for us to distinguish;协议– The Imagewheel website is a web program, so the http protocol is selected;本地地址– The local address is the output port number of the local Imagewheel website, so 81 is also filled in here;域名类型–Here we can distinguish whether the data tunnel is used temporarily or exists for a long time. Since we are only conducting a temporary test first, we choose "random domain name" (the second-level subdomain name and custom domain name are both long-term stable tunnels and need to reserve a public Internet address in the cpolar cloud).地区– That is the location of the server, we can fill it in according to the actual location of use;
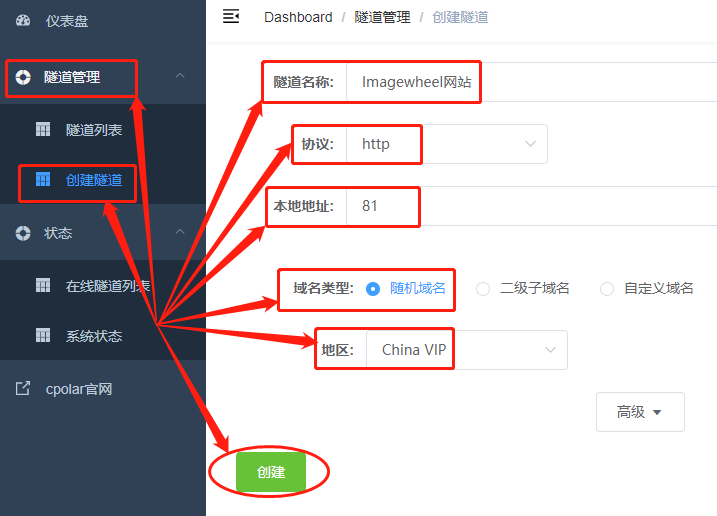
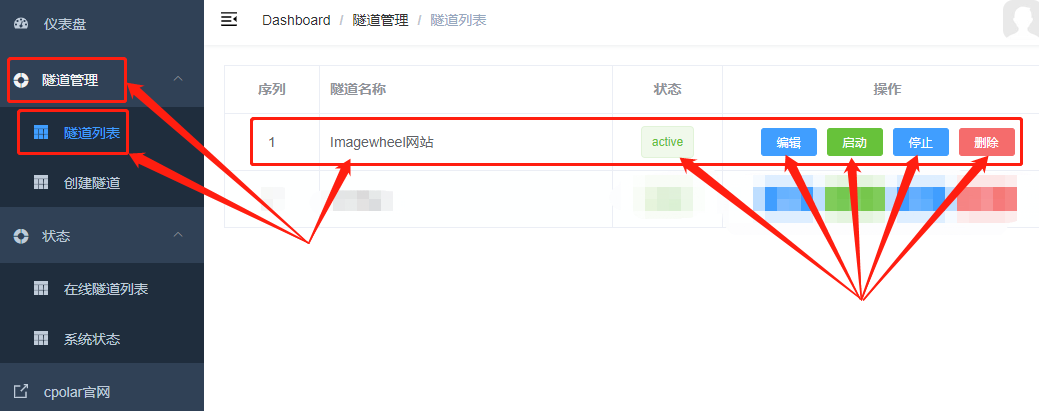
After completing these settings, you can click 创建the button at the bottom of the page to establish a temporary data tunnel. After the temporary data tunnel is created, the cpolar client will automatically jump to the page 隧道管理under the item 隧道列表, where we can see all cpolar local data tunnels (whether temporary or long-term). We can also manage the data tunnel here, including opening, closing or deleting this tunnel. We can also click the "Edit" button to modify the information of this data tunnel.
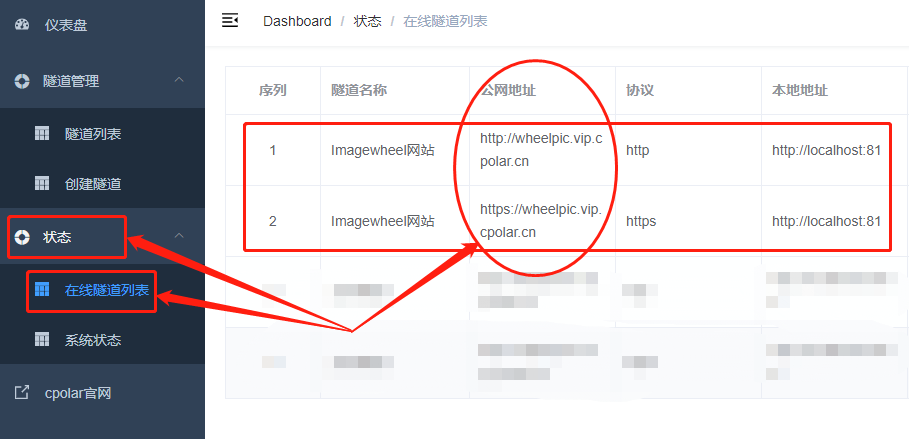
The temporary public Internet address we created that can connect to the local Imagewheel website can be found 状态under the item 在线隧道列表.
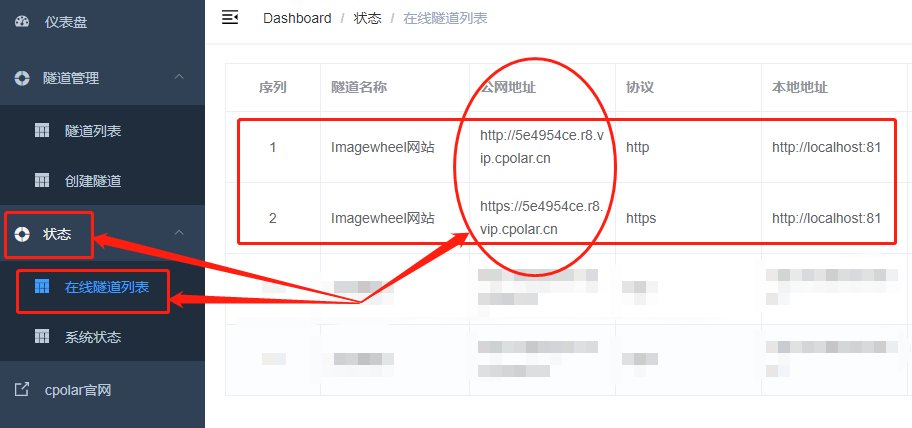
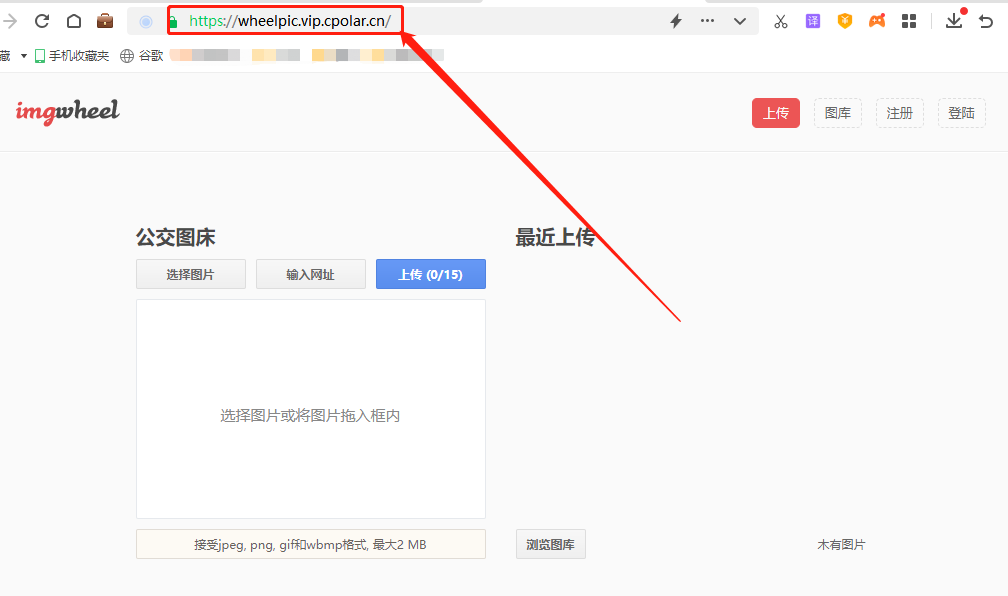
Paste the public Internet address shown here into your browser address bar to access your local Imagewheel page.
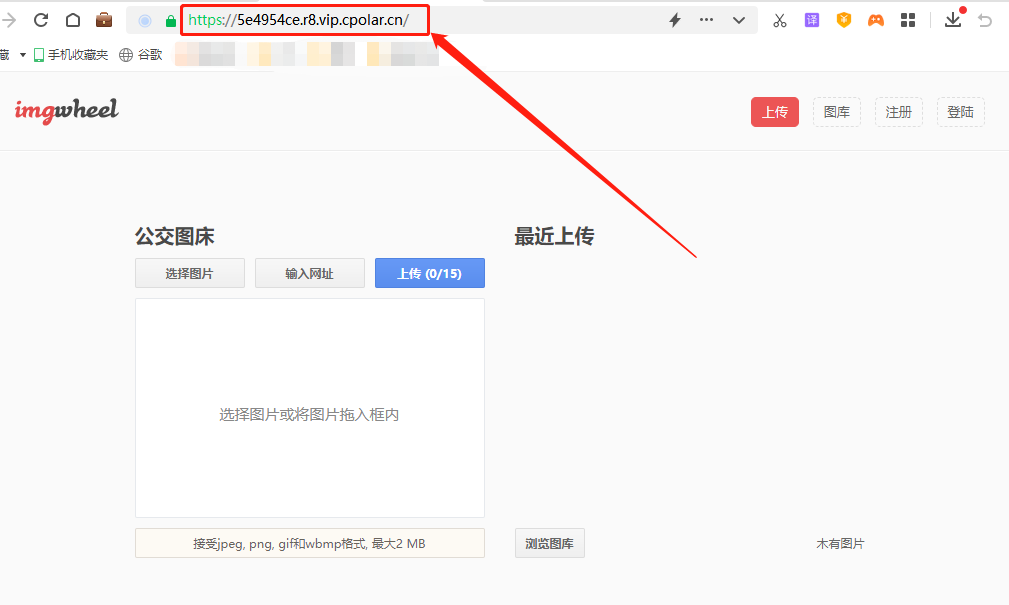
However, the Imagewheel data tunnel at this time is only a temporary data tunnel, and the public Internet address is reset every 24 hours. If you still want to connect to the local Imagewheel web page, you need to use a new address to connect.
3.2.Cpolar stable tunnel (cloud settings)
If we want to set up a long-term stable data tunnel for the local CFImagehost website, we need to upgrade cpolar to the VIP version first.
Next, we can log in to cpolar's official website, find 预留the button on the left side of the user's home page, click to enter cpolar's data tunnel reservation page, and generate a public Internet address here (which can be regarded as the entrance to the data tunnel). Because of this At this time, this address is not connected to the local software output port, so it can also be regarded as a blank data tunnel.

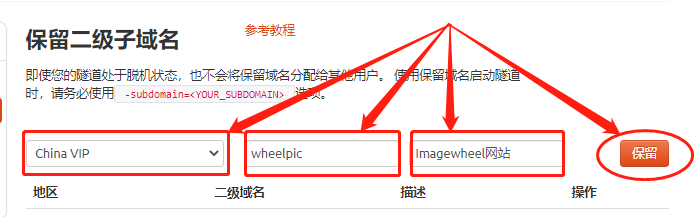
On the reservation page, you can see many types of data tunnels that can be reserved. Here we select 保留二级子域名the field.
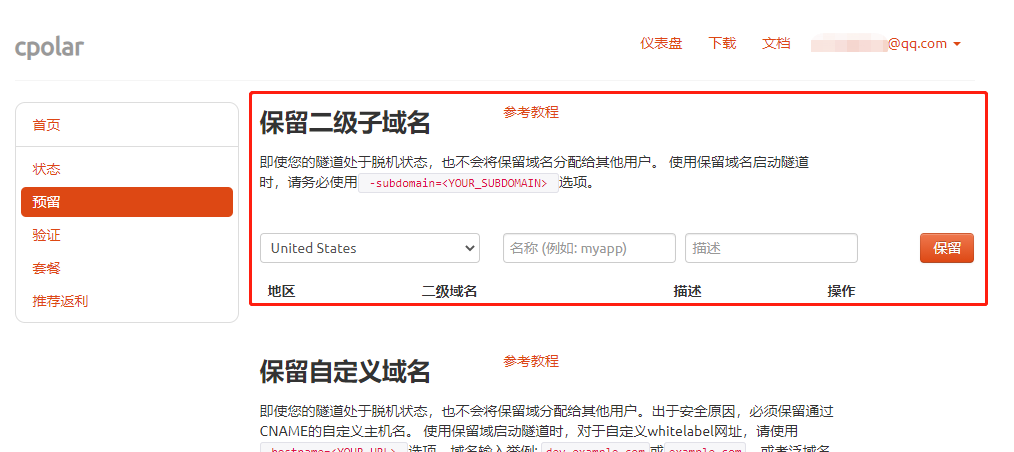
In the "Reserve second-level subdomain name" field, you need to make several simple settings of information, namely
地区(Select the area where the server is located)二级域名(will eventually appear in the generated public Internet address as one of the identifiers of the network address)描述(It can be regarded as a description of this data tunnel, as long as it can be distinguished from other tunnels)
After completing these settings, you can click 保留the button on the right to retain this data tunnel.
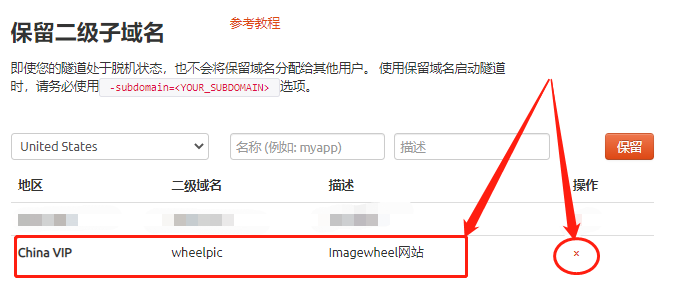
Of course, if you no longer plan to use this data tunnel, you can click the "x" on the right to easily delete it and save valuable tunnel quota.
3.3.Cpolar stable tunnel (local settings)
After completing the settings of the cpolar cloud and retaining the blank data tunnel, we returned to the local cpolar client and connected the blank data tunnel generated by the cloud with the local test page.
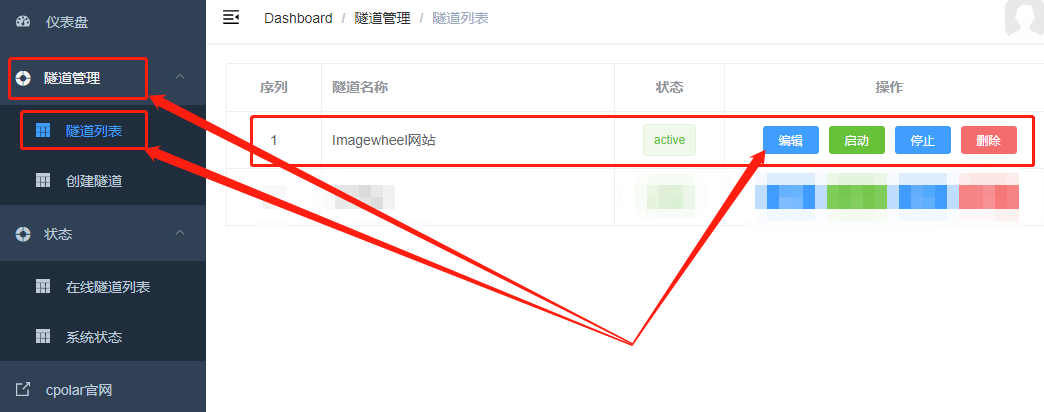
Open and log in to the cpolar client on the local device (you can enter localhost:9200 in the browser to access it directly, or you can click the cpolar client shortcut in the start menu).
隧道管理Click the button under the item on the left side of the client's main interface 隧道列表to enter the local tunnel page, and then click 编辑the button corresponding to the tunnel.
On the "Edit" page of the local tunnel (the same as the page for creating a local temporary tunnel), we only need to make 域名类型modifications to connect the public Internet address reserved by the cpolar cloud to the Imagewheel data tunnel created by the local cpolar.
We have reserved the data tunnel of the second-level subdomain name in the cpolar cloud, so we changed it to 二级子域名(if the reserved domain name is a custom domain name, check the custom domain name), and fill Sub Domainin the reserved second-level subdomain name in the next line. Domain name, here we fill in "wheelpic".
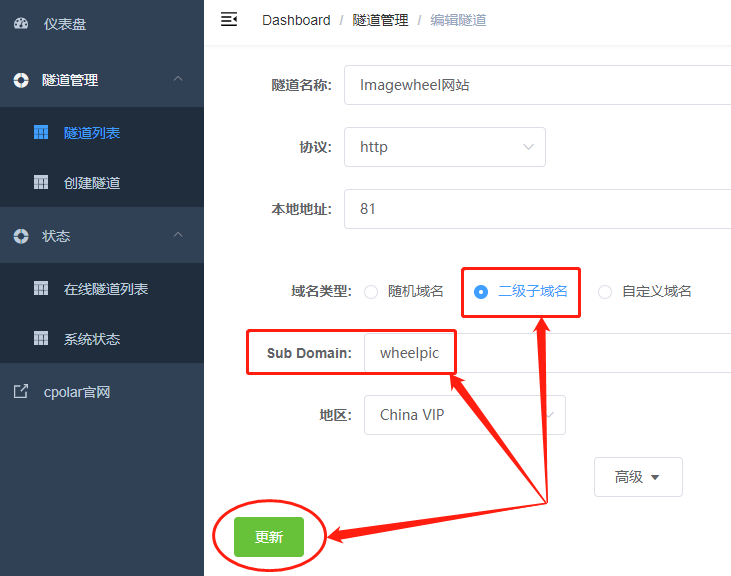
After completing the change of "Domain Name Type", you can click 更新the button at the bottom of the page to connect the blank data tunnel in the cpolar cloud with the local Imagewheel website, thus generating an Imagewheel website data tunnel that can exist stably for a long time.
4. Public network access test
Finally, when we enter 在线隧道列表the page again, we will find that the public Internet address of Imagewheel has changed. We paste the updated public Internet address of the Imagewheel website into the browser, and we can see that the Imagewheel website is accessed using the new address. , successfully allowing long-term and stable access to the local Imagewheel website.
5 Conclusion
Imagewheel is just one of many image hosting software. There are many image hosting websites like Imagewheel. They can also be installed on the local device with the same idea, and then use cpolar to create an intranet penetration data tunnel and publish it to the public. On the Internet, let us build a personal and private picture bed website.
Reprinted from cpolar pole cloud article: [Build a private image bed] Build a simple Imagewheel cloud image bed with local PHP and access it remotely from outside