Table of contents
overview
Nacos (Naming and Configuration Service) is an open source distributed service discovery and configuration management system. It is open sourced by Alibaba and is used to help developers realize service registration, discovery, dynamic configuration and other functions in microservice architecture. Nacos provides core functions such as service registration and discovery, dynamic configuration, and service health checking, and is suitable for various applications based on cloud native architecture.
1. Install Nacos
1. Download Nacos
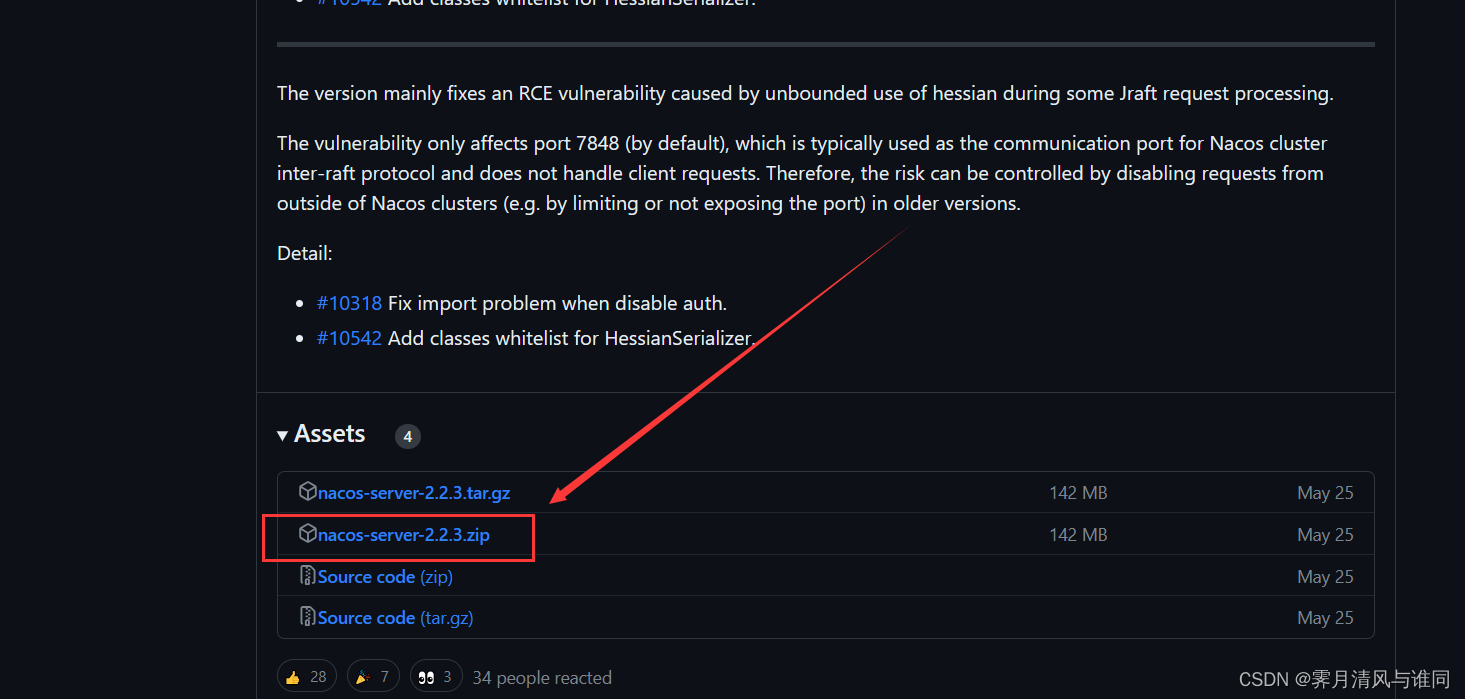
Go to the Nacos GitHub repository to download the latest version of the Nacos distribution.
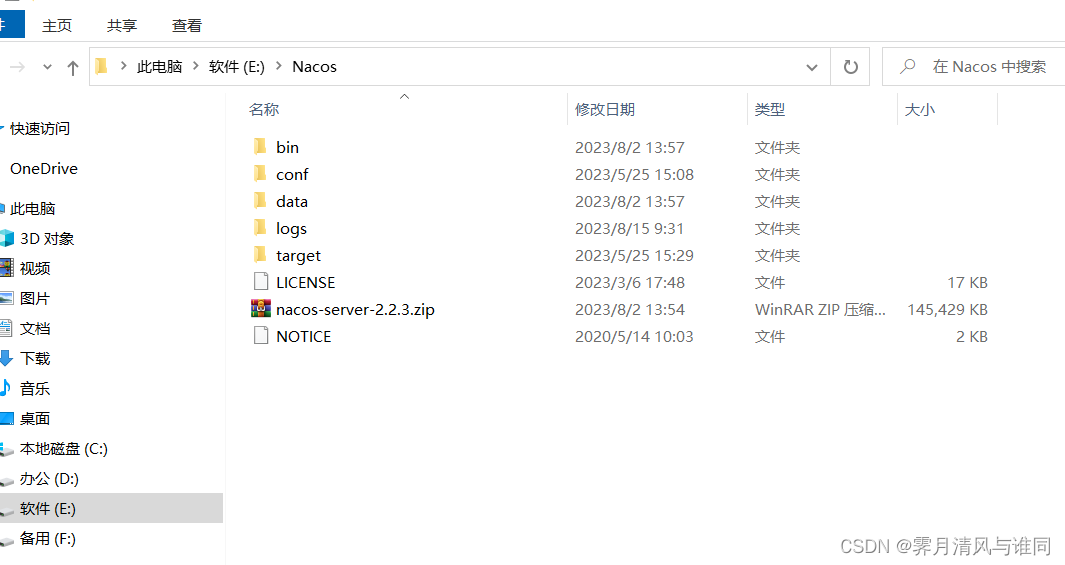
2. Decompress
Unzip the downloaded compressed package to the directory where you want to install Nacos
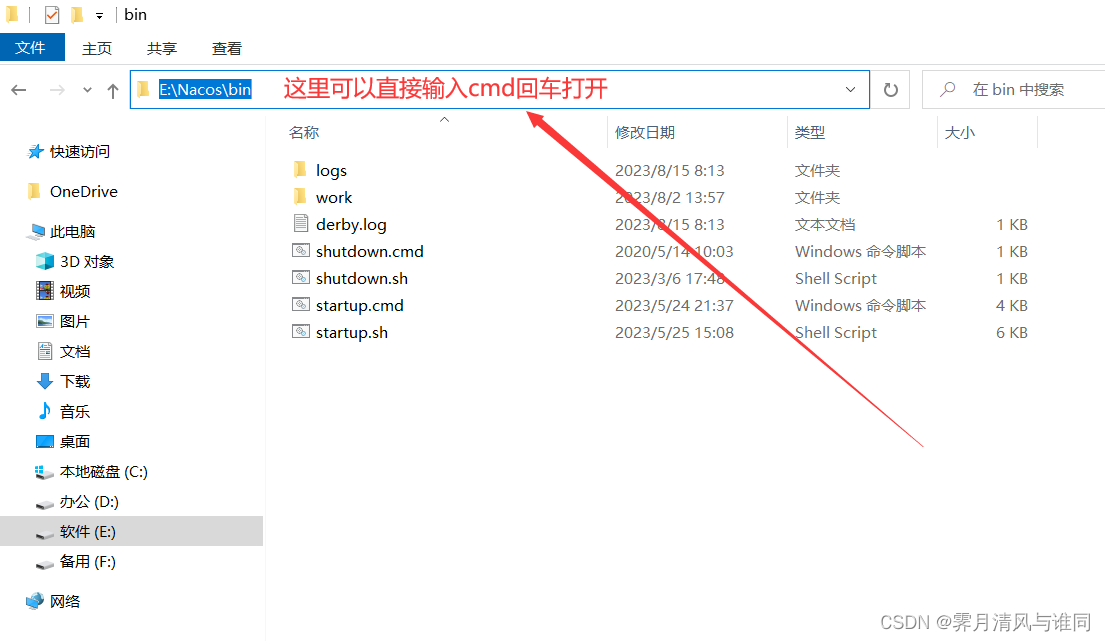
3. Start the Nacos server
Enter the decompressed Nacos\bin directory and execute the following command in cmd to start the Nacos server (stand-alone startup)
startup.cmd -m standalone
The following interface appears, which means the startup is successful.

4. Customize Nacos startup script
Since it is very troublesome to go to the corresponding directory and open it with a command every time you start it, a simple startup script is provided here to facilitate starting Nacos.
- First create a .txt file on the desktop, and then enter the following command in the file. Note : Replace the installation directory path with your Nacos\bin path.
start cmd /k "cd /d 安装目录路径 && startup.cmd -m standalone"
- Then save the .txt file and modify the file suffix to .bat
- Then double-click the .bat file to quickly start Nacos
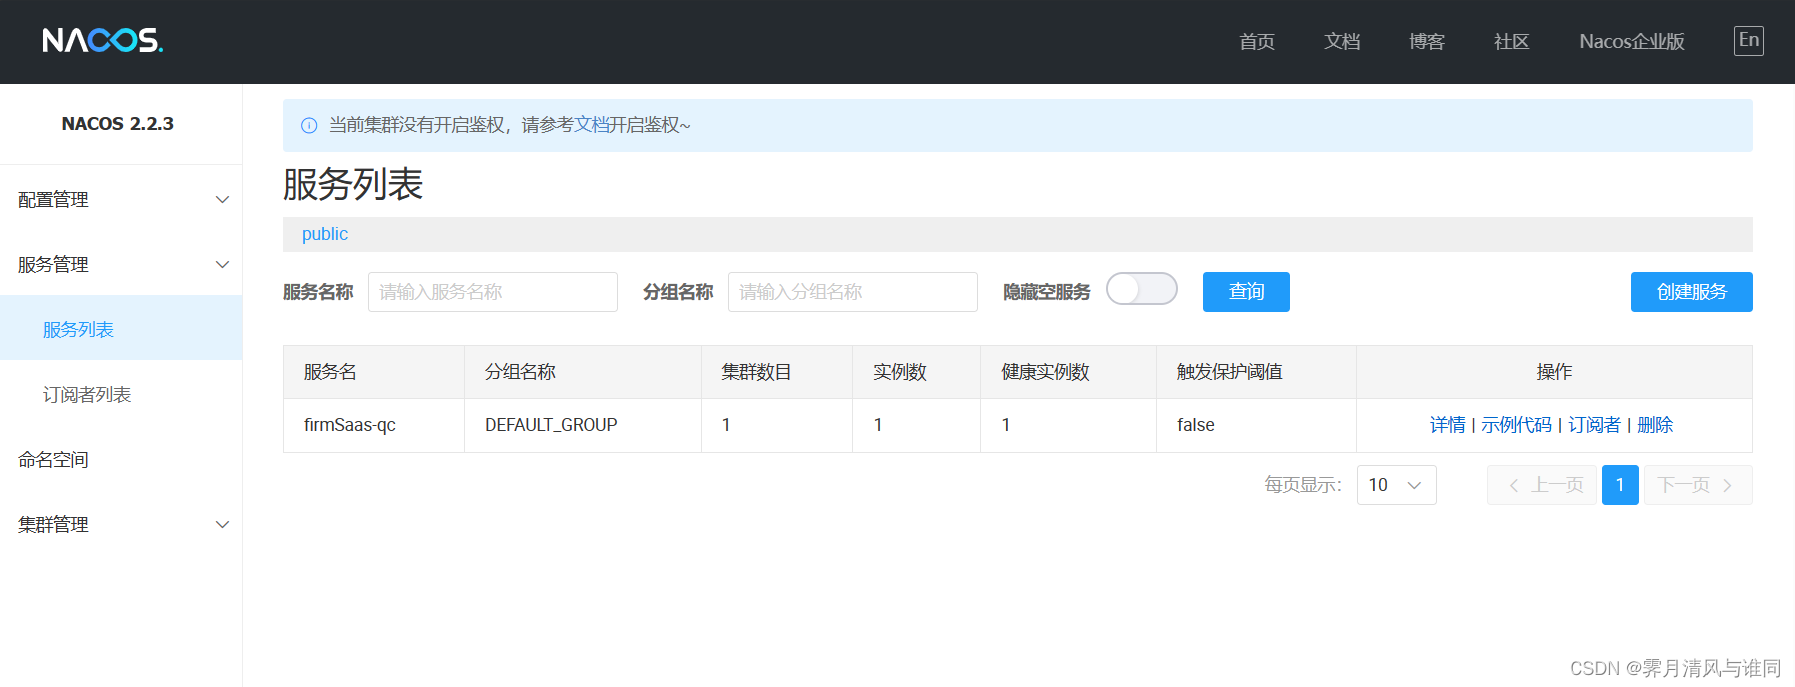
5. Access the Nacos Web Console
Once the Nacos server is started, you can use the Web console or API to perform service registration, discovery, configuration, etc.
- Access the Web console: Enter http://localhost:8848/nacos in the browser to access the Nacos console. The default username and password are nacos. Here you can see various information in Nacos.

2. Nacos----service registration and discovery
Nacos is a component of SpringCloudAlibaba, and SpringCloudAlibaba also follows the service registration and service discovery specifications defined in SpringCloud. Therefore, there is not much difference between using Nacos and using Eureka for microservices.
1. Add Nacos dependency
First, you need to add Nacos-related dependencies to the pom.xml file of the Spring Cloud project
<!-- 服务注册发现 -->
<dependency>
	<groupId>com.alibaba.cloud</groupId>
	<artifactId>spring-cloud-starter-alibaba-nacos-discovery</artifactId>
</dependency>
<!-- 配置中心 -->
<dependency>
	<groupId>com.alibaba.cloud</groupId>
	<artifactId>spring-cloud-starter-alibaba-nacos-config</artifactId>
</dependency>
2. Configure Nacos server address
Configure the address to connect to the Nacos server in the Spring Cloud project's configuration file (such as application.yml or application.properties)
spring:
  cloud:
    nacos:
      config:
        server-addr: localhost:8848 # Nacos 服务器地址
  application: # 服务名称 名称唯一,如果一样就自动成了集群
    name: example
3. Use Nacos registration service
Add the @EnableDiscoveryClient annotation to the main startup class of the Spring Cloud project to enable service discovery.
import org.springframework.boot.SpringApplication;
import org.springframework.boot.autoconfigure.SpringBootApplication;
import org.springframework.cloud.client.discovery.EnableDiscoveryClient;

@SpringBootApplication
@EnableDiscoveryClient
public class MyApplication {


    public static void main(String[] args) {


        SpringApplication.run(MyApplication.class, args);
    }
}
4. Start the service
After starting, you can see the registered service in the Nacos service list
3. Nacos----Configuration Management
1. Create configuration data
Note: Same as above, you need to add Nacos dependencies and configure the Nacos server address first.
Create configuration data on the Nacos console. For example, you can create a configuration file named my-service-dev.yaml with the following content
spring:
  datasource:
    url: jdbc:mysql://localhost:3306/mydb
    username: root
    password: password
Then, configure the configuration of the Nacos configuration center in the bootstrap.yml (or bootstrap.properties) file of the Spring Cloud project
spring:
  application:
    name: my-service
  cloud:
    nacos:
      config:
        server-addr: ${

    NACOS_SERVER_ADDR:localhost:8848}
        group: DEFAULT_GROUP
        file-extension: yaml
2. Get configuration from Nacos
In the Spring Cloud project, use the @Value annotation or the @ConfigurationProperties annotation to obtain the configuration values obtained from Nacos
import org.springframework.beans.factory.annotation.Value;
import org.springframework.web.bind.annotation.GetMapping;
import org.springframework.web.bind.annotation.RestController;

@RestController
public class MyController {


    @Value("${spring.datasource.url}")
    private String datasourceUrl;

    @GetMapping("/config")
    public String getConfig() {


        return "Datasource URL: " + datasourceUrl;
    }
}
In the above example, @Value(“${spring.datasource.url}”) will get the configuration value named spring.datasource.url from the Nacos Configuration Center
Summarize
To sum up, Nacos can be used to implement service registration, discovery and configuration management in Spring Cloud projects. You can easily use Nacos in Spring Cloud projects by adding dependencies, configuring the Nacos server address, using @EnableDiscoveryClient to enable service discovery, and using the @Value annotation to obtain configuration.