1 Description
kubeasz is committed to providing tools for quickly deploying high-availability k8s clusters, and at the same time strives to become a reference book for k8s practice and use; it is based on binary deployment and uses ansible-playbook to realize automation; it not only provides one-click installation scripts, but also can be divided according to the installation guide Step by step to install each component.
Kubeasz assembles from each individual component to a complete cluster, providing the most flexible configuration capability, and can set almost any parameter of any component; at the same time, it creates a preset set of well-run default configurations for the cluster, and even automates the creation of large-scale clusters BGP Route Reflector network mode.
2. Basic system configuration
- Prepare a virtual machine with a memory of 2G/hard disk of 30G or more
- Install the Linux operating system
Ubuntu16以上或者CentOS7以上 - Configure basic network, update source, SSH login, etc.
Note: Make sure to start the installation on a clean system. Do not use an environment where kubeadm or other k8s distributions have been installed.
3. Download the file
- Download the tool script ezdown, using kubeasz version 3.5.2 as an example
export release=3.5.2
wget https://github.com/easzlab/kubeasz/releases/download/${release}/ezdown
chmod +x ./ezdown
- Use the tool script to download (for more parameters about ezdown, run ./ezdown to view)
Download kubeasz code, binaries, and default container images
#
./ezdown -D
[Optional] Download additional container images (cilium, flannel, prometheus, etc.)
./ezdown -X
[Optional] Download the offline system package (applicable to situations where the yum/apt warehouse cannot be used)
./ezdown -P
After the above script runs successfully, all files (kubeasz code, binary, offline image) have been organized and put into the directory/etc/kubeasz
/etc/kubeaszContains release code for kubeasz version ${release}/etc/kubeasz/binContains binary files such as k8s/etcd/docker/cni/etc/kubeasz/downContains offline container images required for cluster installation/etc/kubeasz/down/packagesContains the basic system software required for cluster installation
4. Install the cluster
- Containerized running kubeasz
./ezdown -S

...
- Install aio cluster with default configuration
docker exec -it kubeasz ezctl start-aio
# 如果安装失败,查看日志排除后,使用如下命令重新安装aio集群
# docker exec -it kubeasz ezctl setup default all
5. Verify the installation
$ source ~/.bashrc
$ kubectl version         # 验证集群版本
$ kubectl get node        # 验证节点就绪 (Ready) 状态
$ kubectl get pod -A      # 验证集群pod状态,默认已安装网络插件、coredns、metrics-server等
$ kubectl get svc -A      # 验证集群服务状态
6. Use the dashboard dashboard
This document is based on dashboard version 2.2 and k8s version 1.22. Since dashboard 1.7 and later has its own login verification mechanism enabled by default, there are differences in login between different versions:
- The old version (<= 1.6) recommends accessing through apiserver and controlling dashboard permissions directly through the apiserver authentication and authorization mechanism. For details, see the old version documentation.
- The new version (>= 1.7) can use its own login interface and use different Service Account Tokens to control access to the dashboard.
deploy
Reference https://github.com/kubernetes/dashboard
- Added
api-servermethod to access dashboard - A method has been added
NodePortto expose the service so that it can be used outside the clusterhttps://NodeIP:NodePort(note that https is not http, which is different from version 1.6.3) to directly access the dashboard.
Installation and deployment
# ezctl 集成部署组件,xxxx 代表集群部署名
# dashboard 部署文件位于 /etc/kubeasz/clusters/xxxx/yml/dashboard/ 目录
./ezctl setup xxxx 07
Verify deployment
# 查看pod 运行状态
kubectl get pod -n kube-system | grep dashboard
dashboard-metrics-scraper-856586f554-l6bf4   1/1     Running   0          35m
kubernetes-dashboard-698d4c759b-67gzg        1/1     Running   0          35m

# 查看dashboard service
kubectl get svc -n kube-system|grep dashboard
kubernetes-dashboard   NodePort    10.68.219.38   <none>        443:24108/TCP                   53s

# 查看pod 运行日志
kubectl logs -n kube-system kubernetes-dashboard-698d4c759b-67gzg
Log in
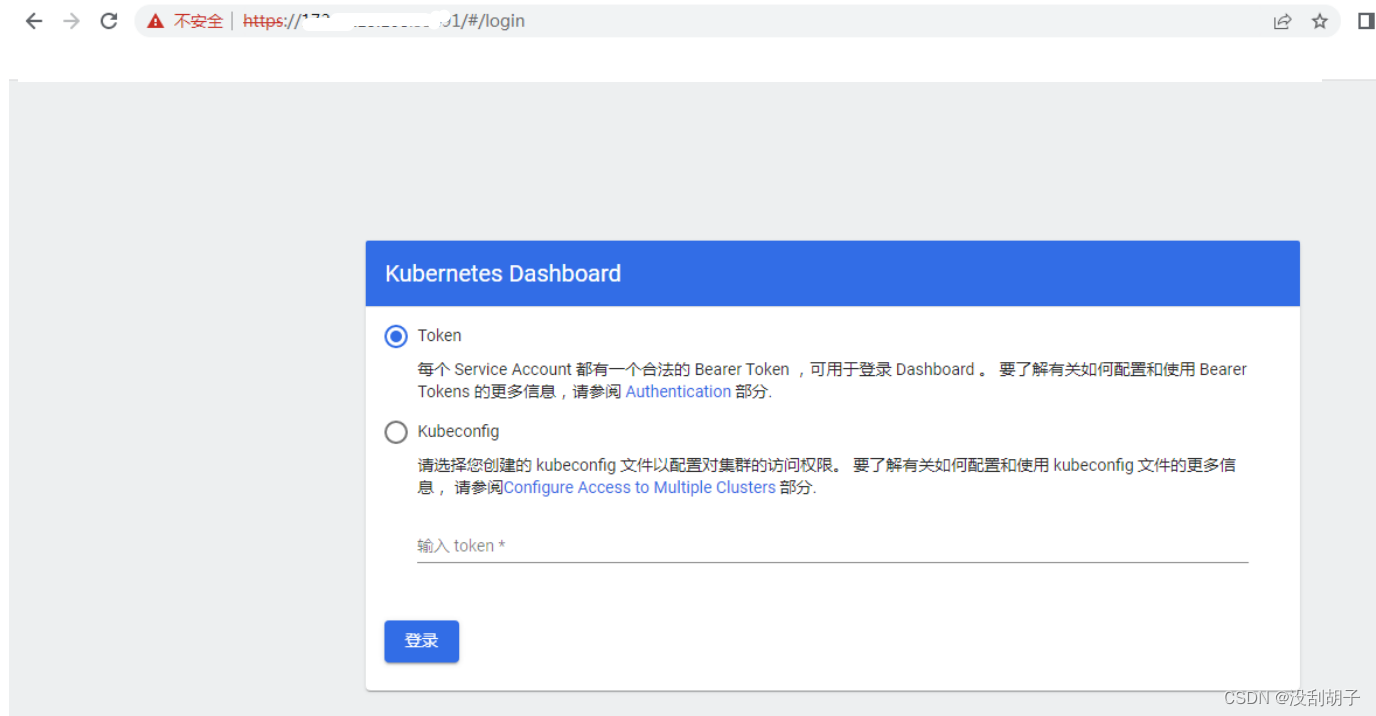
Because the dashboard, as a k8s native UI, can display various resource information and even have modification, addition, and deletion permissions, it is necessary to authenticate and control access. To facilitate the demonstration, access to the dashboard using this method supports two login methods: https://NodeIP:NodePortKubeconfig , token (Token).
Token login (admin)
Select the Token method to log in, and copy the admin token field output below into the input box.
# 获取 Bearer Token,找到输出中 ‘token:’ 开头的后面部分
$ kubectl describe -n kube-system secrets admin-user
Name: dashboard-read-user-token-68g2q
Namespace: kube-system
Labels: <none>
Annotations: kubernetes.io/service-account.name: dashboard-read-user
kubernetes.io/service-account.uid: 2aeac11f-5498-491d-832d-bd4e6b307c08
Type: kubernetes.io/service-account-token
Data
====
ca.crt: 1350 bytes
namespace: 11 bytes
token:
eyJhbGciOiJSUzI1NiIsImtpZCI6ImpBQzEyelVYNjdwaDRBMm5HbHZLSE5sTTgzTTNQWU5Rak1Ja24tU29ybGcifQ.eyJpc3MiOiJrdWJlcm5ldGVzL
3NlcnZpY2VhY2NvdW50Iiwia3ViZXJuZXRlcy5pby9zZXJ2aWNlYWNjb3VudC9uYW1lc3BhY2UiOiJrdWJlLXN5c3RlbSIsImt1YmVybmV0ZXMuaW8vc
2VydmljZWFjY291bnQvc2VjcmV0Lm5hbWUiOiJkYXNoYm9hcmQtcmVhZC11c2VyLXRva2VuLTY4ZzJxIiwia3ViZXJuZXRlcy5pby9zZXJ2aWNlYWNjb
3VudC9zZXJ2aWNlLWFjY291bnQubmFtZSI6ImRhc2hib2FyZC1yZWFkLXVzZXIiLCJrdWJlcm5ldGVzLmlvL3NlcnZpY2VhY2NvdW50L3NlcnZpY2UtY
WNjb3VudC51aWQiOiIyYWVhYzExZi01NDk4LTQ5MWQtODMyZC1iZDRlNmIzMDdjMDgiLCJz
Note: Accessing using the Chrome browser https://NodeIP:NodePortmay prompt security risks and inaccessibility. You can change the Firefox browser to set security exceptions and continue accessing. According to the above tips, my access address here is: https://172.23.13.168:24108
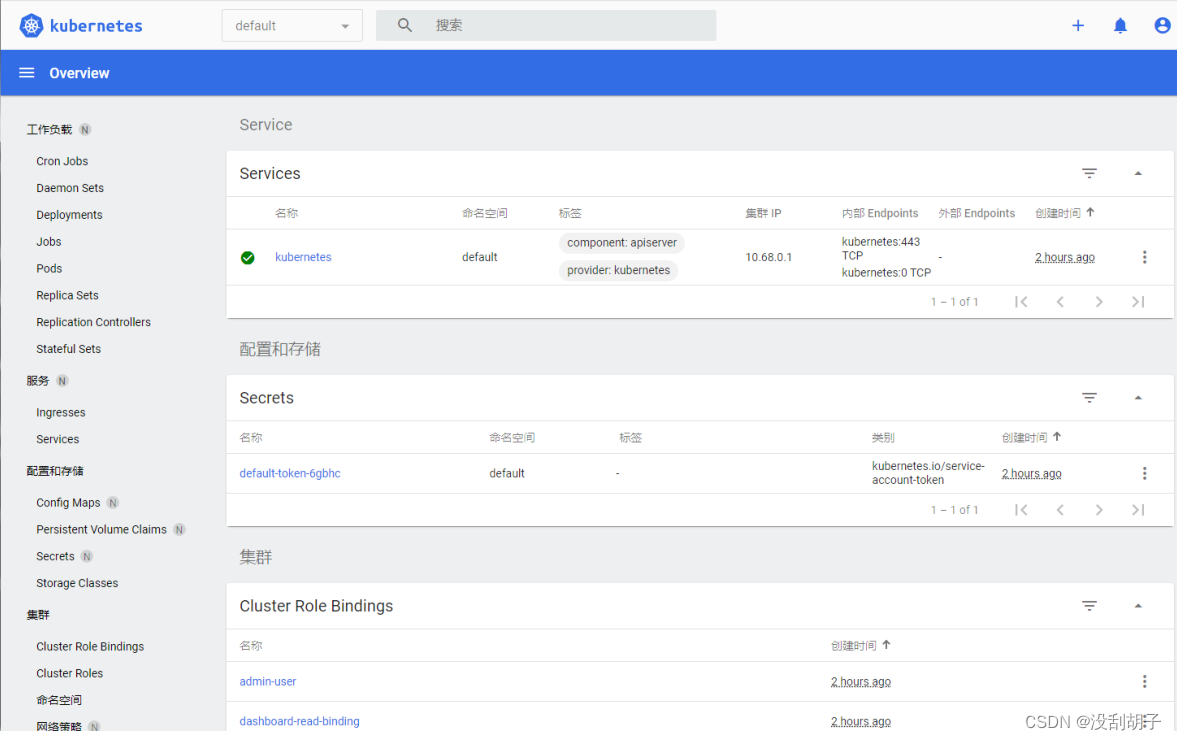
Access in browser
Note: Using the Chrome browser to access https://NodeIP:NodePort may prompt a security risk and inaccessibility. Select Advanced to continue accessing.
Kubeconfig login (optional)
Kubeconfig login (admin) Admin Default location of kubeconfig file: /root/.kube/config, there is no token field in this file by default. If you use Kubeconfig to log in, you need to append the token to the file. The complete file format is as follows:
apiVersion: v1
clusters:
- cluster:
    certificate-authority-data: LS0tLS1CRUdxxxxxxxxxxxxxx
    server: https://192.168.1.2:6443
  name: kubernetes
contexts:
- context:
    cluster: kubernetes
    user: admin
  name: kubernetes
current-context: kubernetes
kind: Config
preferences: {

    }
users:
- name: admin
  user:
    client-certificate-data: LS0tLS1CRUdJTiBDRxxxxxxxxxxx
    client-key-data: LS0tLS1CRUdJTxxxxxxxxxxxxxx
    token: eyJhbGcixxxxxxxxxxxxxxxx
Addendum: Cleaning up kubeasz
Please enjoy the K8S development and testing environment created by the above steps. If you encounter errors, try to issuessolve them by checking logs, searching online, submitting, etc.; of course, you can also clean up the cluster and create it again.
On the host machine, follow the steps below to clean up
- Clean up the cluster
docker exec -it kubeasz ezctl destroy default - Restart the node to ensure that residual virtual network cards, routing and other information are cleared