Title: Set up an FTP server on Windows 11.
1. Enable windows functions.
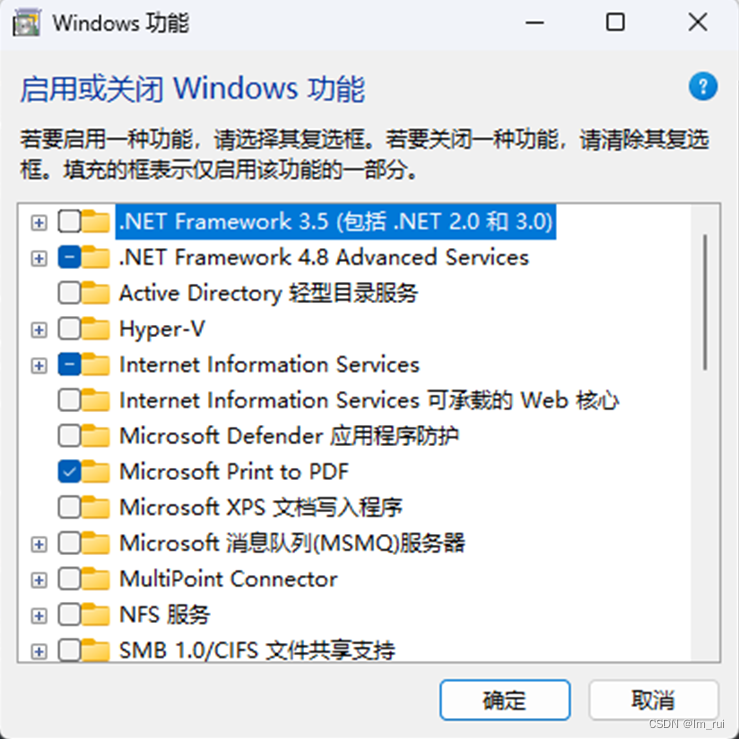
1.1. Search Windows features in the search box and click to turn Windows features on or off.

1.2. Check Internet Information Services as shown below, and click OK to complete the installation.
2. Enable FTP firewall permissions.
2.1. Search for firewall and network protection in the search box, select and open.
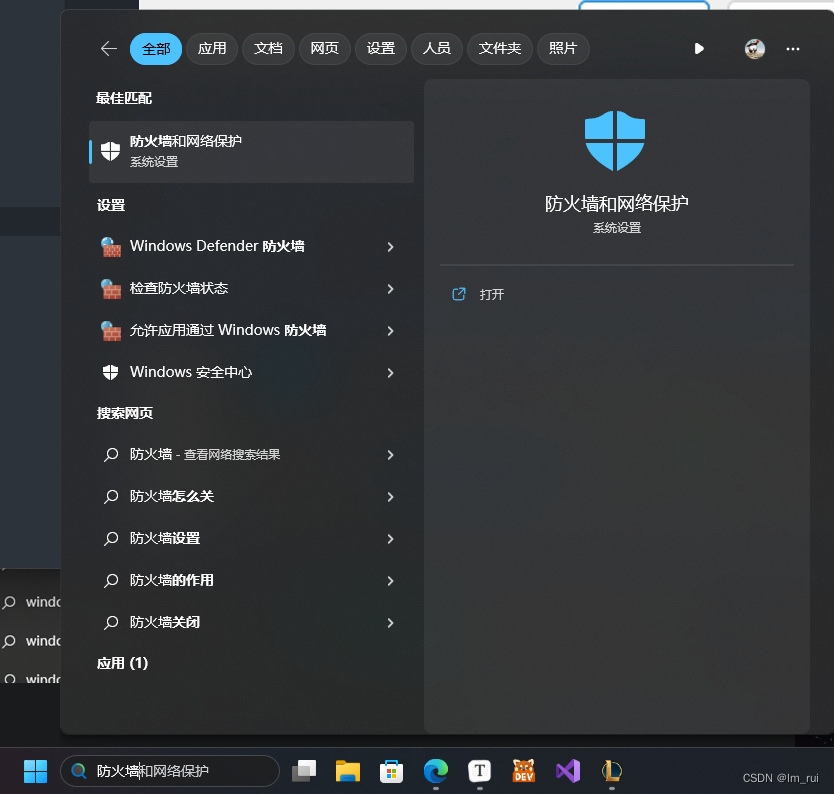
2.2. Turn on Allow applications through the firewall.

2.3. Check the FTP server.

3. Open IIS Manager.
3.1. Search for IIS in the search box, select and open Internet Information Services Manager.

3.2. Right-click the website -> click Add FTP site.

4. Find the user name used to configure server user login authentication.
4.1. Open cmd.
4.2. Note: At this time, the 24101 behind the terminal Users is the user name of the local account corresponding to the Microsoft account. You need to remember this local account user name.

4.3. If the system is logged in with a Microsoft account, the password of 24101 is the Microsoft account password.
4.4. If the system is logged in with a local account, it will be the local account password.
5. Configure the FTP server.
5.1. Set the FTP server name and corresponding physical path.

5.2. Set the server IP address. Select the obtained local IP address in the list. Do not set it arbitrarily. Set without SSL.

5.3. Set up two login authentications: anonymous and basic identity. Anonymous authorization only allows reading.

5.4. Set up basic identity authorization.
5.4.1. Enter authorization management settings.

5.4.2. Add permission rules, fill in step iii to obtain the user name and set permission to write and read.

5.5. Bind FTP authorized users.
5.5.1. Enter basic settings.

5.5.2. Click Connect As, select a specific user, click Settings, enter the username and password obtained in step iii, and confirm.

5.6. The FTP server is configured.
5.7. Log in to the FTP server.
5.7.1. Open the file manager, enter FTP://192.168.1.103 and press Enter.
5.7.2. Because anonymous login is allowed during configuration, the anonymous account will be logged in by default at this time, but only with read permission.


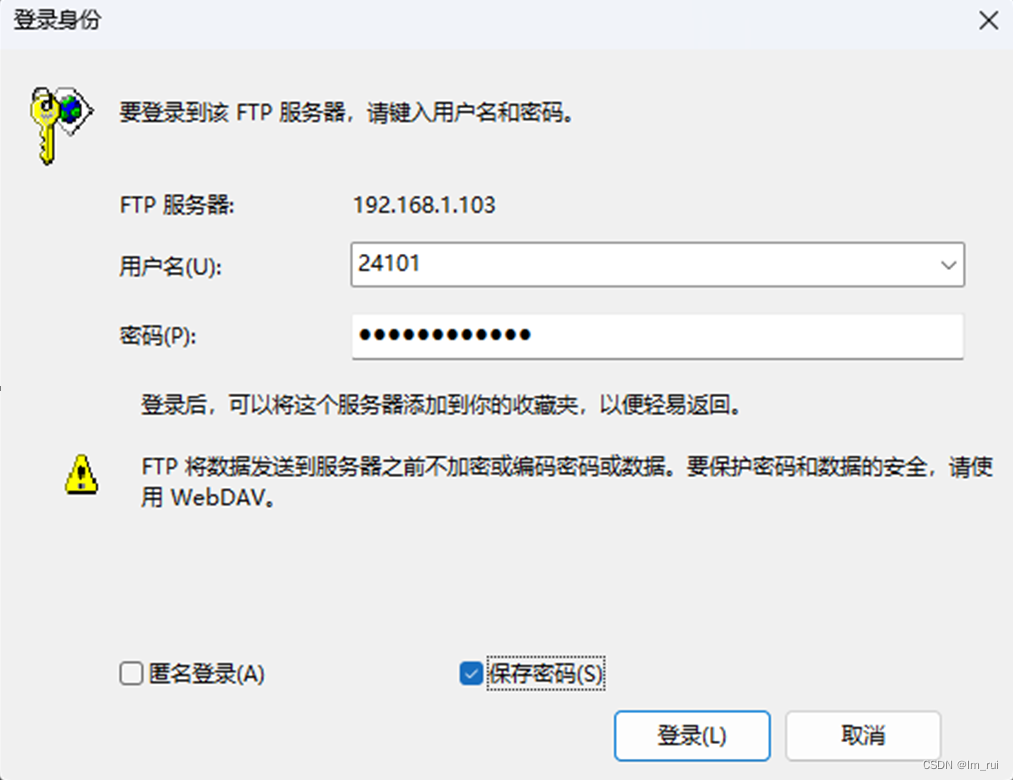
5.7.3. Right-click the folder and select Login.

5.7.4. Enter username and password.
5.7.5. Login successful! At this time, you can have read and write permissions.
