(1) Burning system
Step one: Log in to the official website
https://www.raspberrypi.com/software/
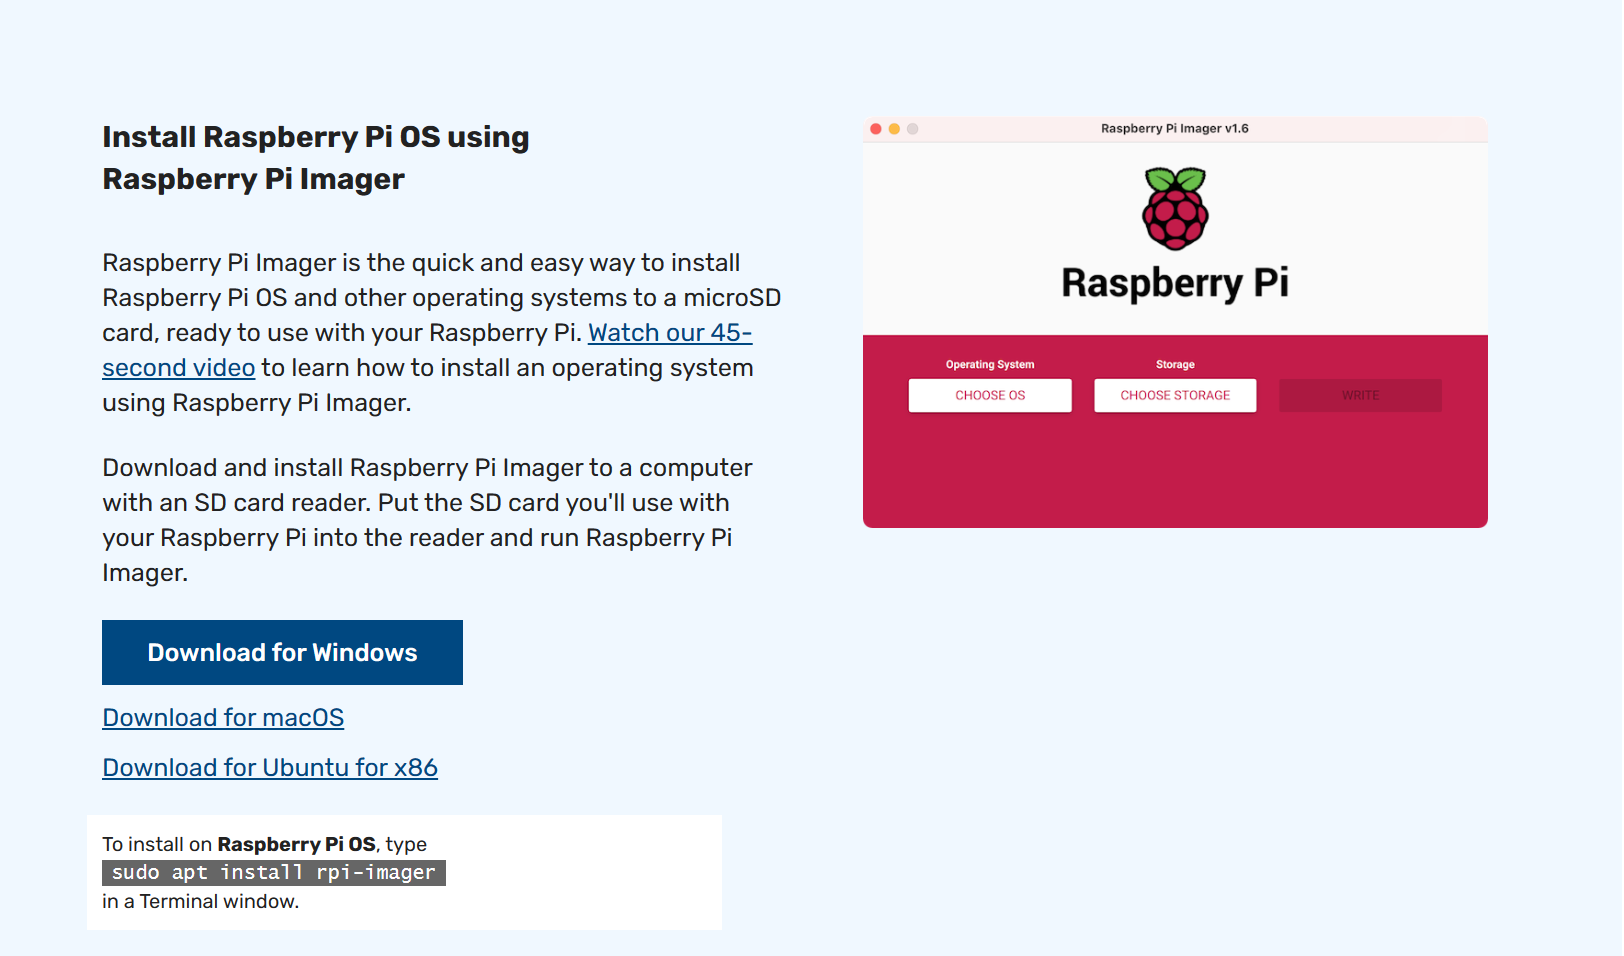
Download the Raspberry Pi Imager tool to burn the Raspberry Pi OS system.
Step 2: Install and open the Raspberry Pi Imager tool for system burning
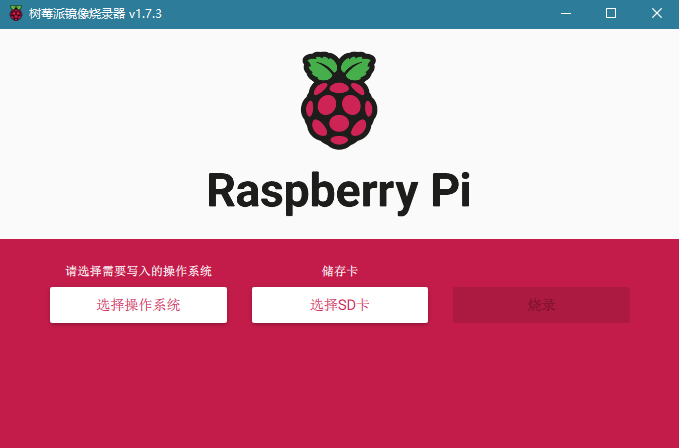
[Note] It is recommended to select the default first official operating system Raspberry Pi OS
Insert the SD card into the card reader and into the USB port of the computer. Then you can select the SD card you inserted in the Imager tool.
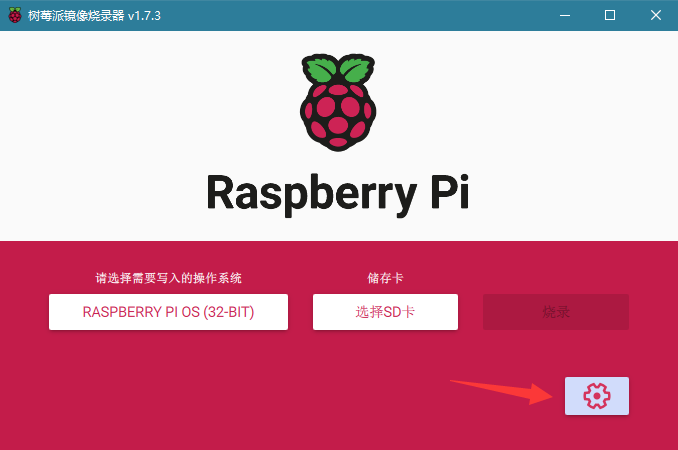
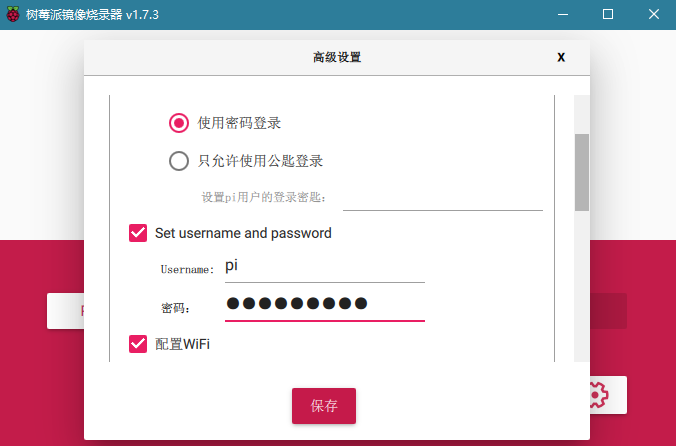
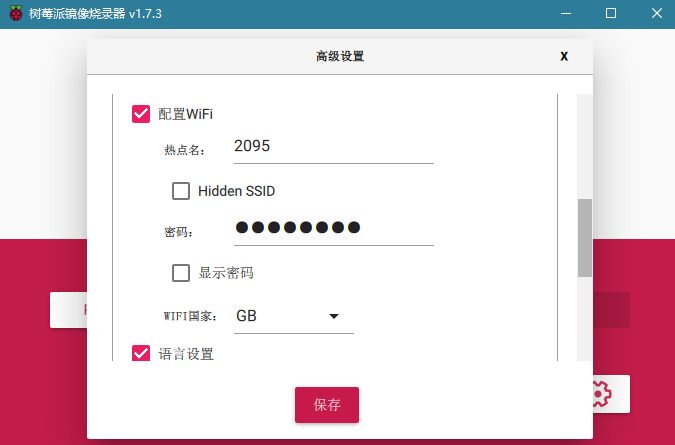
[Pit] The new version of the system can be configured before burning
After selecting the operating system, the setting button in the lower right corner appears. Remember to tick all the checks in the setting.
The advantage of this is that there is no need to manually configure SSH and WIFI connections, and the latest Raspberry Pi system has canceled the default user "pi", so in this setting, the default user can be set for subsequent putty connections to the Raspberry Pi. important! ! !
(2) Connection login
Connection methods: wired connection and wireless connection
Type 1: Wired connection
It is very simple to connect the screen, keyboard and mouse by yourself.
Second type: wireless connection
The premise is that your Raspberry Pi and the computer are connected to the same network (like a WiFi) and the IP address of the Raspberry Pi has been queried.
At this time, it reflects the advantage of configuring WiFi in advance in the previous burning settings! ! !
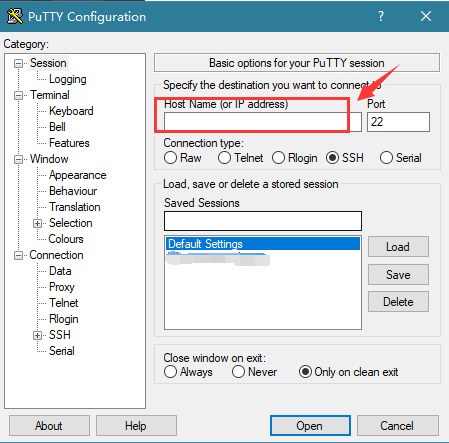
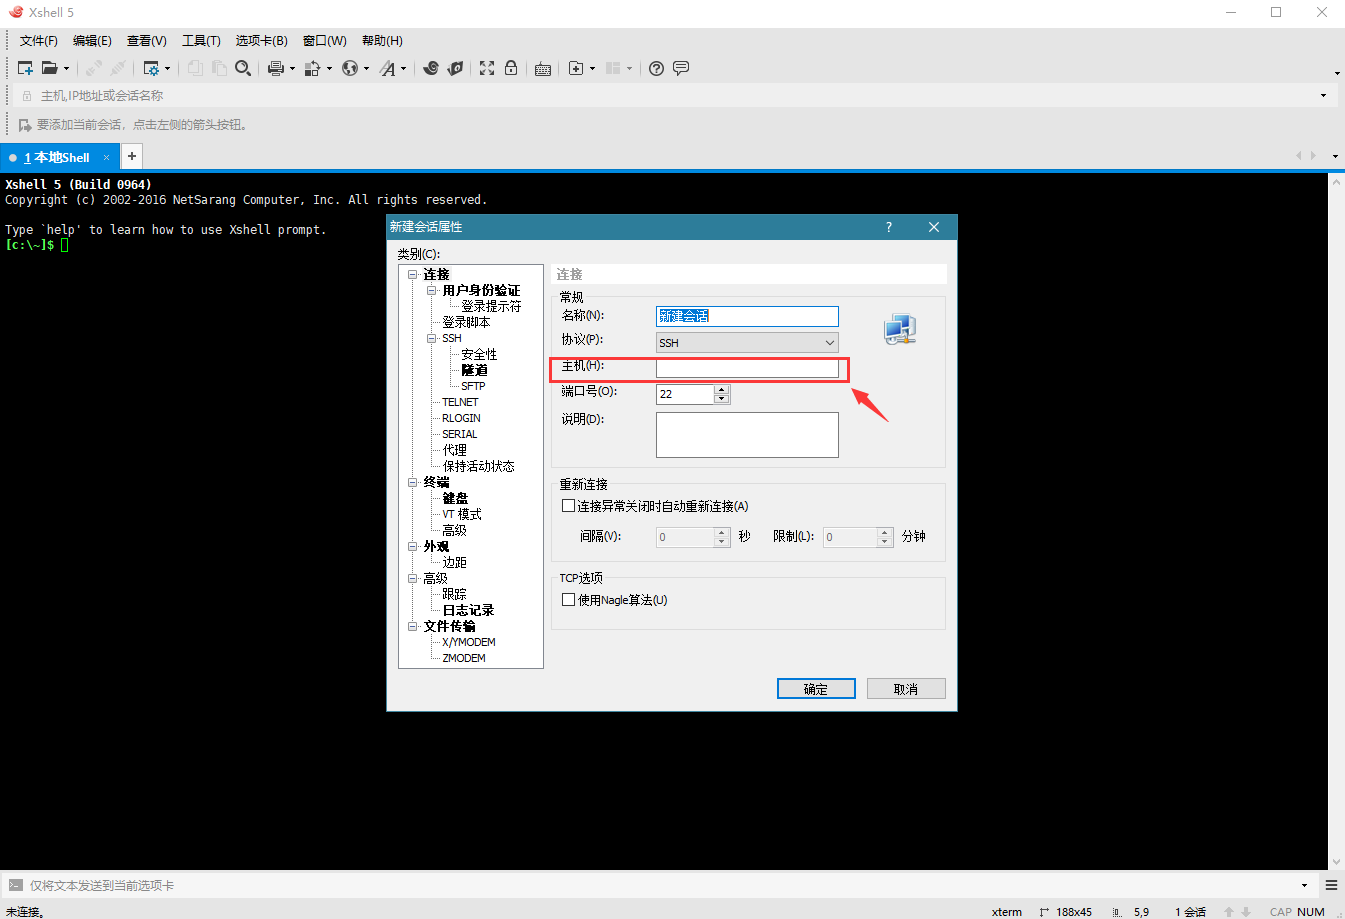
Method 1: Putty or Xshell
Enter the queried Raspberry Pi IP to connect.
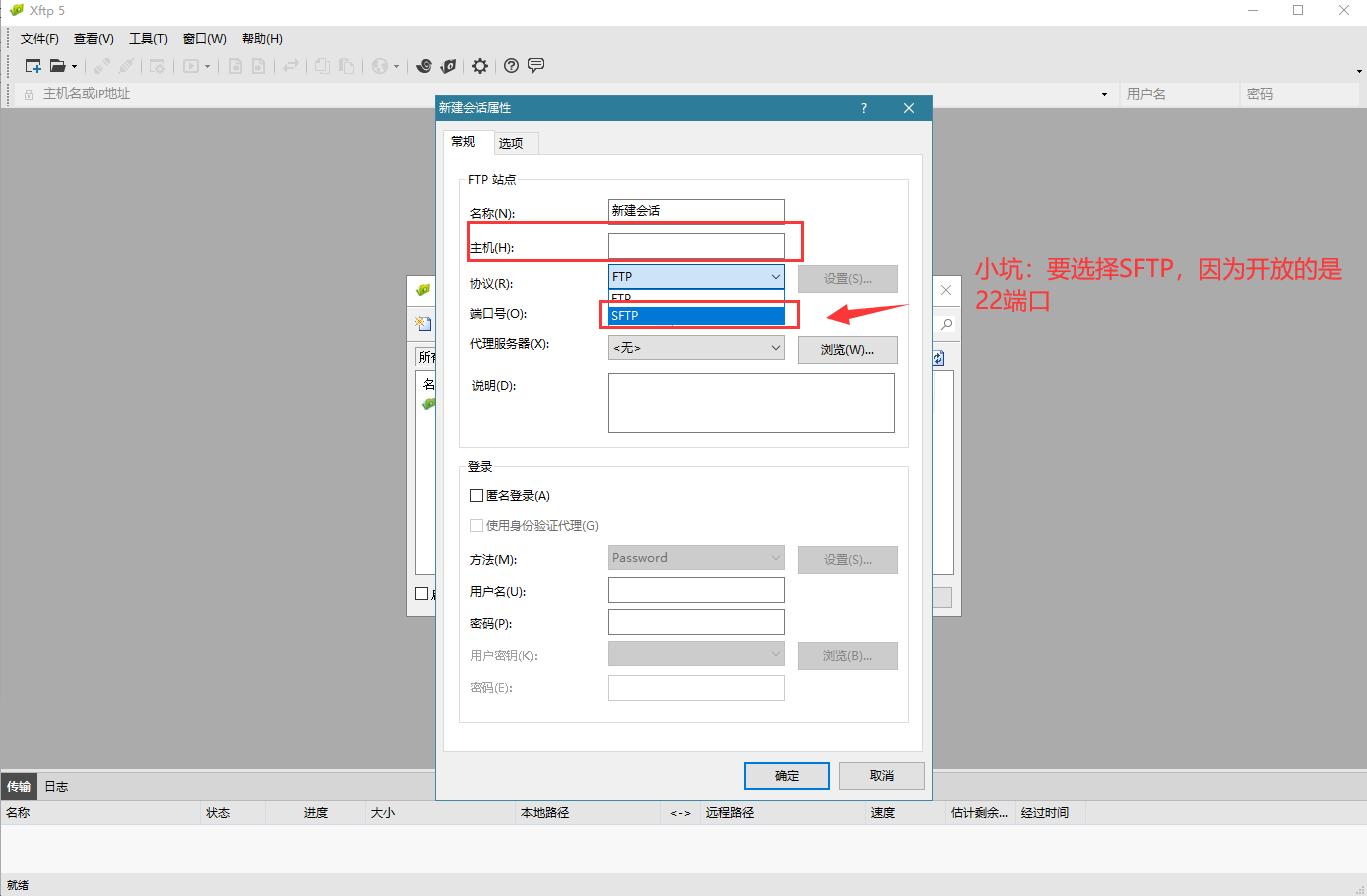
Way 2: Xftp
Enter the queried IP of the Raspberry Pi and select SFTP to connect.
Method 3: VNC
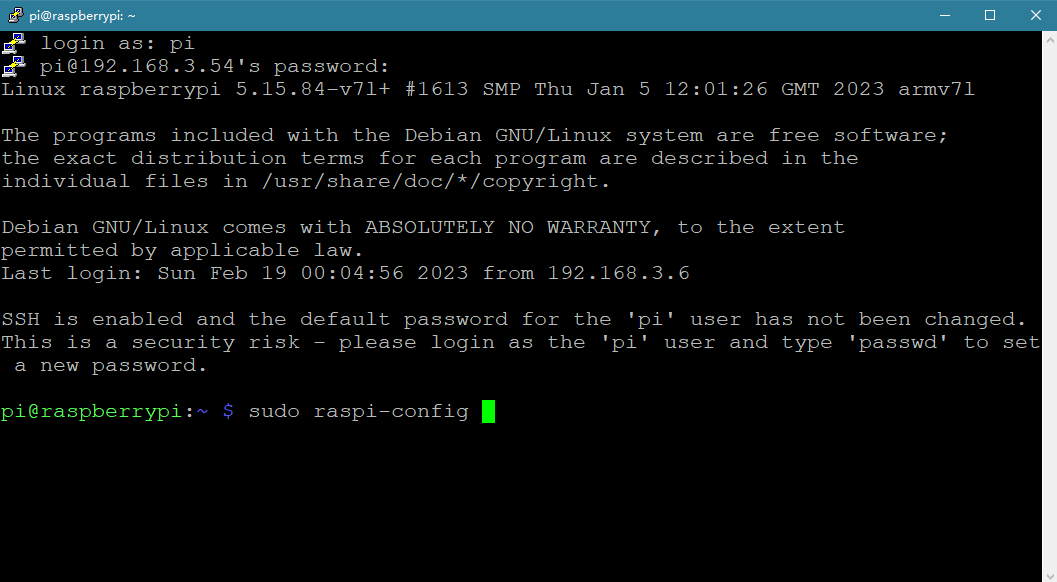
Step 1: Connect the Raspberry Pi with putty or xshell, and enter the command to open the VNC monitor of the Raspberry Pi.
sudo raspi-config # Change Raspberry Pi configuration
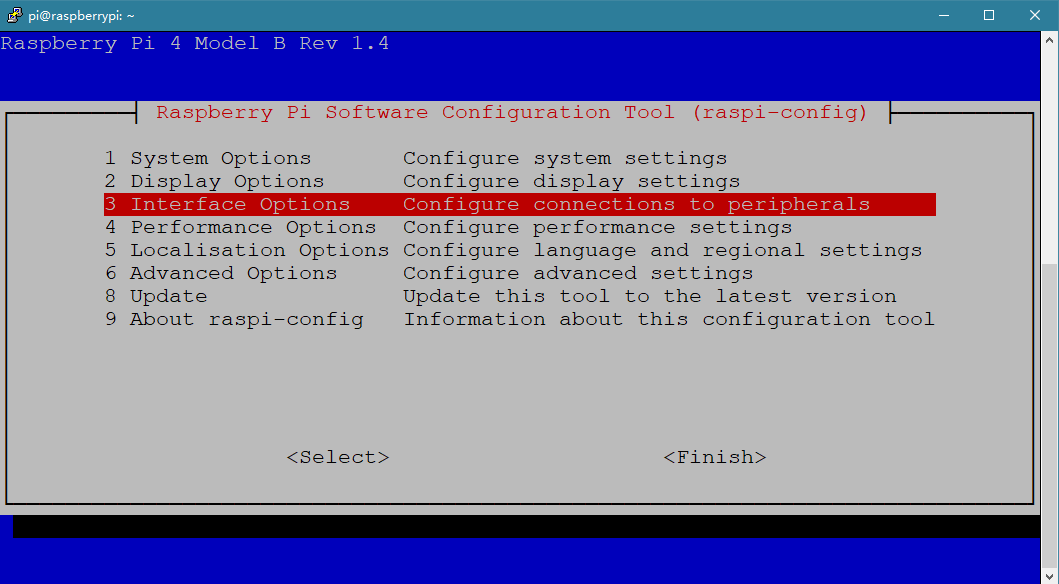
Select Interface Options down and press Enter
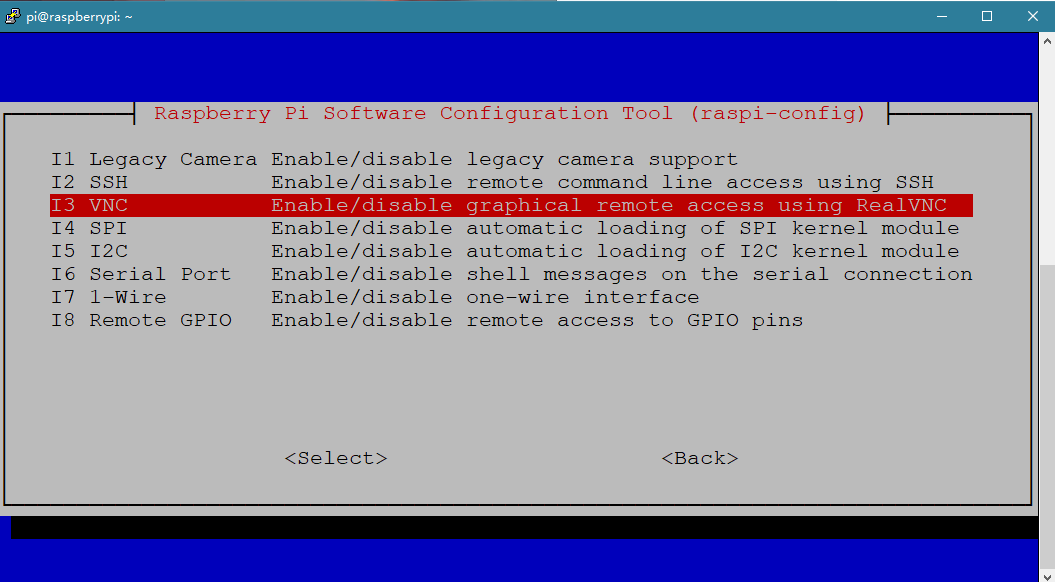
Look down for VNC and press enter to select it
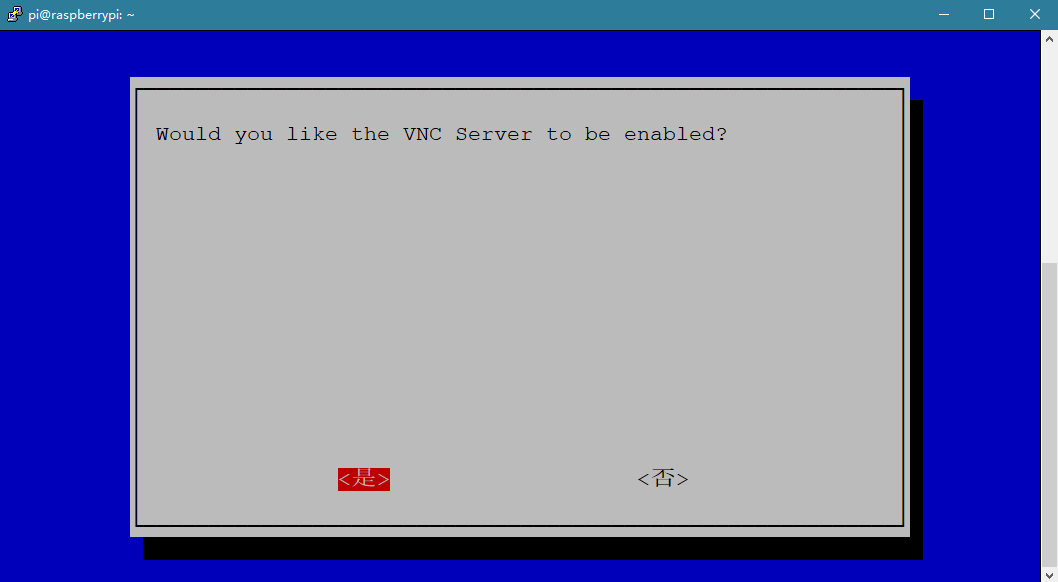
Select <Yes> and press Enter
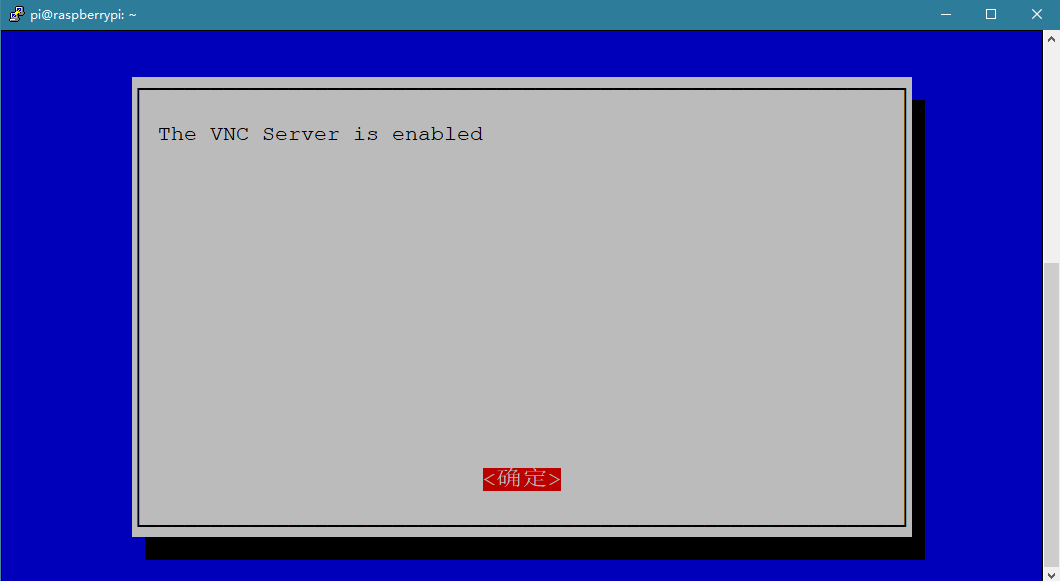
Enter <OK>

Right click and select <Finish>
After this operation, the VNC monitor on the Raspberry Pi is opened.
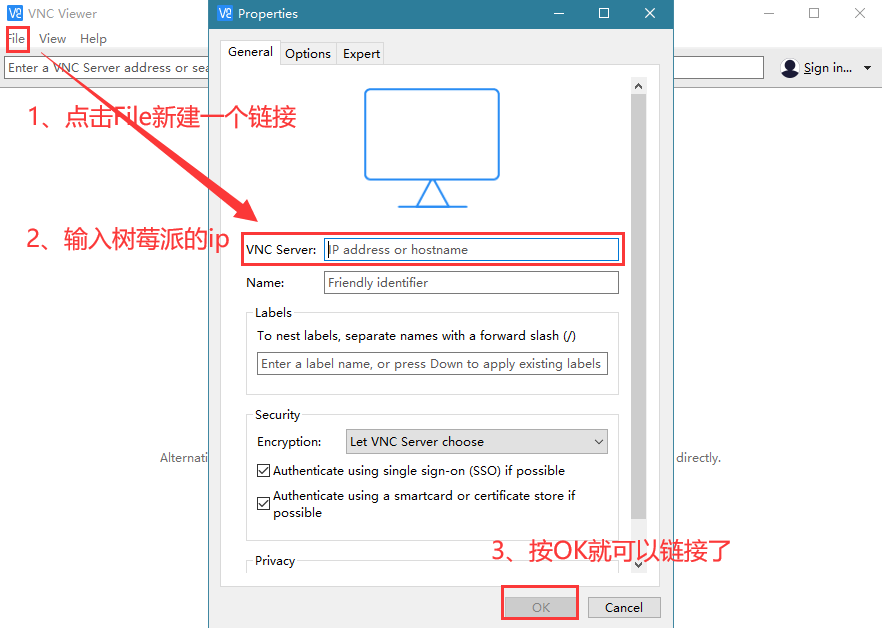
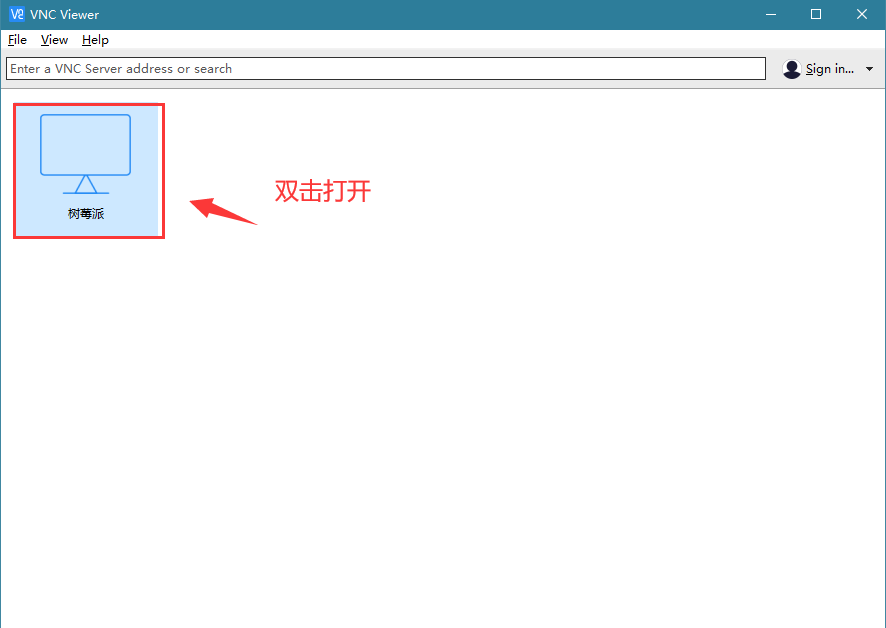
Step 2: Install and open the VNC viewer on your computer.
The steps to install VNC are skipped and very simple.
Open the VNC viewer and follow the series of operations shown in the figure to realize the remote connection to the desktop of the Raspberry Pi.

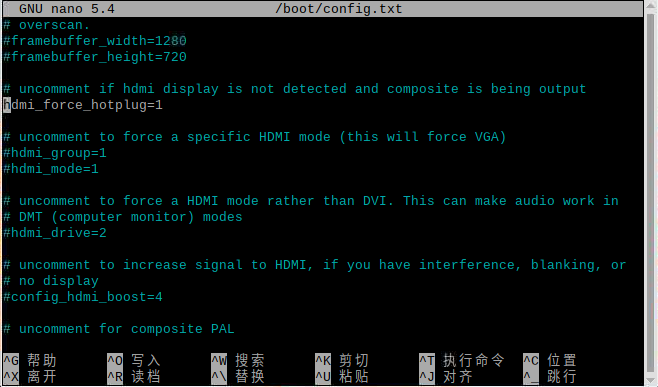
【坑】连接摄像头后VNC连接黑屏问题
问题描述:连接摄像头后用sudo raspi-config打开摄像头功能但VNC却无法连接,关掉摄像头又可以VNC连接。
解决方法:修改/boot/config.txt文件,取消hdmi_force_hotplug=1 的注释。
sudo nano /boot/config.txt
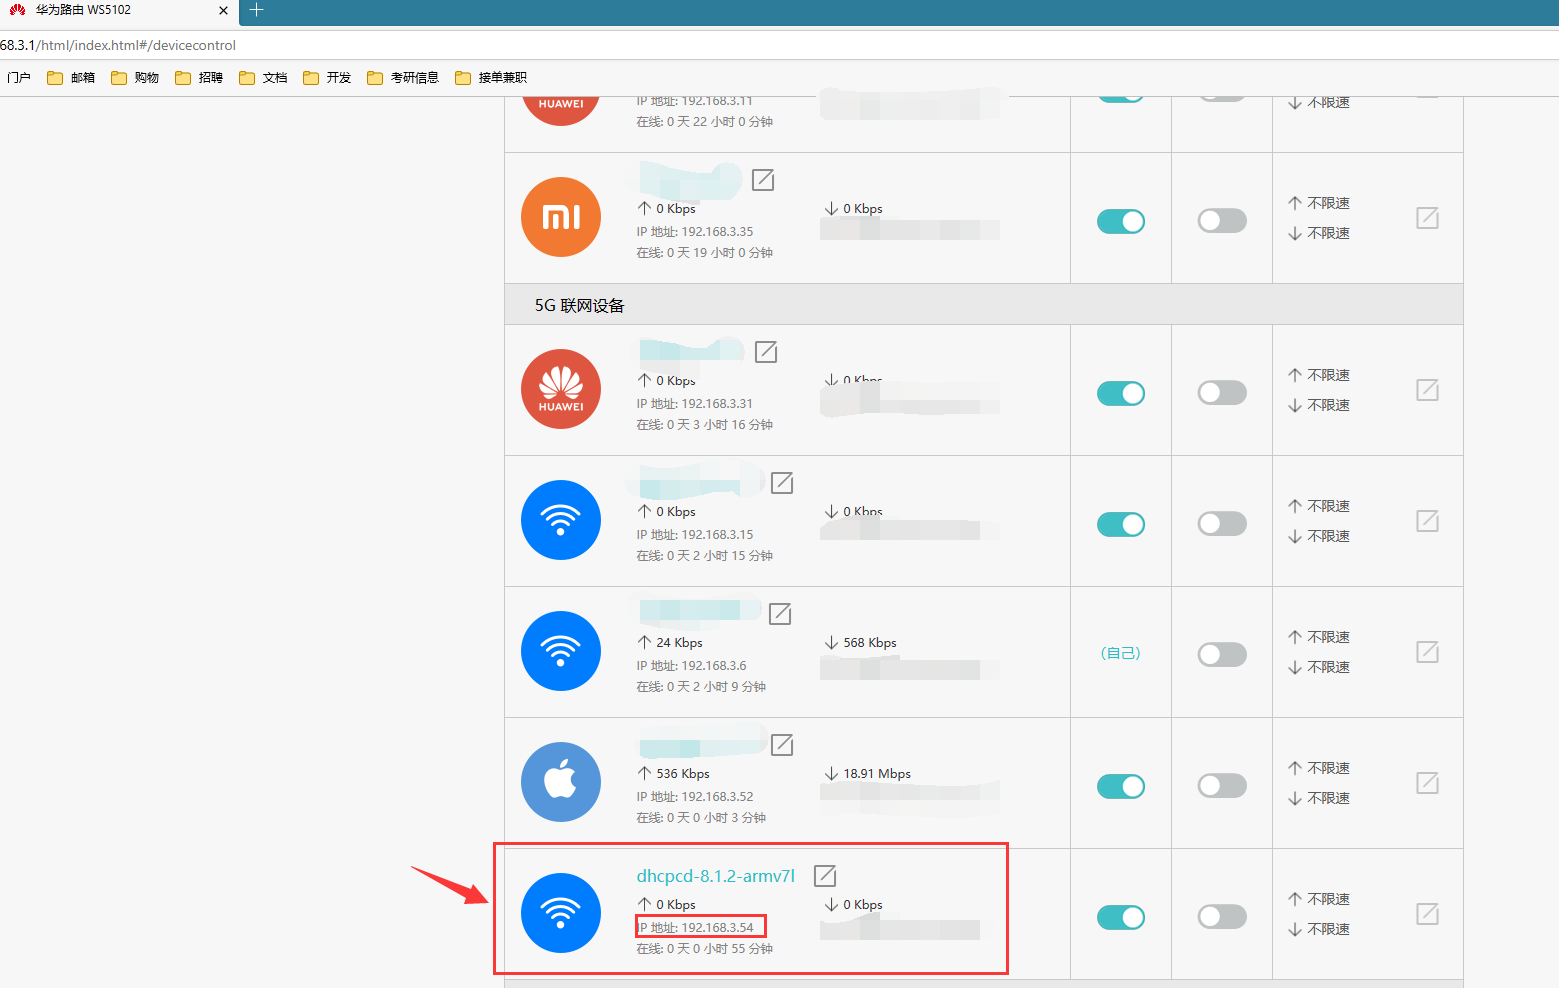
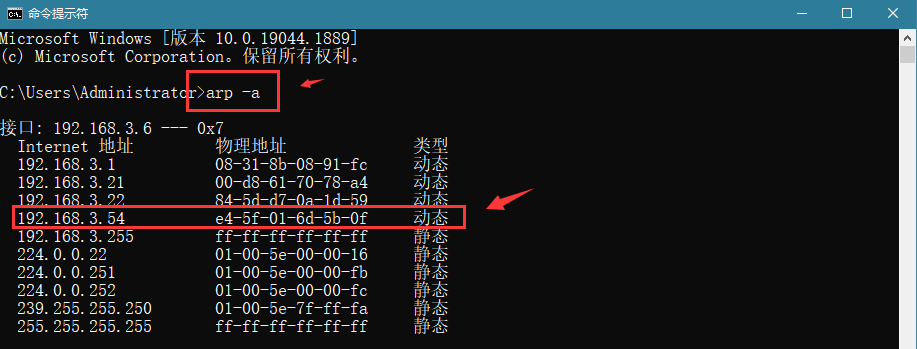
补充:查询IP地址的方式
方法1:cmd中输入命令
arp -a
方法2:路由器设置中找到树莓派的IP