Hello everyone! What I will share with you today is that Android sends requests and returns data through okhttp.
1. Okhttp?
Okhttp is one of the current mainstream network request frameworks for Android. Without further ado, let’s look directly at how to use Okhttp.
First we need to add Okhttp dependencies to the project and find the build.gradle file
dependencies {
    implementation 'com.squareup.okhttp3:okhttp:4.1.1'
}
Complete build.gradle file
dependencies {
    implementation 'androidx.appcompat:appcompat:1.4.1'
    implementation 'com.google.android.material:material:1.5.0'
    implementation 'androidx.constraintlayout:constraintlayout:2.1.3'
    implementation files('libs\\mysql-connector-java-5.1.0-bin.jar')
    implementation 'com.squareup.okhttp3:okhttp:4.1.1'
    implementation 'com.alibaba:fastjson:1.2.62'
    testImplementation 'junit:junit:4.13.2'
    androidTestImplementation 'androidx.test.ext:junit:1.1.3'
    androidTestImplementation 'androidx.test.espresso:espresso-core:3.4.0'
}
Simply adding dependencies is not enough. We also need to add network permissions to the project and find the AndroidManifest.xml file.
<uses-permission android:name="android.permission.INTERNET"/>In this way we have completed the configuration of Okhttp.
2. Send a request
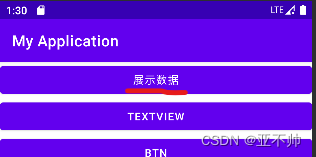
Here I choose to click a button to send the request. We first need to find the button, then write its click event, and write the code for sending the request into the click event. It should be noted that you need to try catch here, otherwise exceptions will easily occur. We can easily catch exceptions.
 houduan = findViewById(R.id.btn_houduan);//找到按钮
        houduan.setOnClickListener(new View.OnClickListener() {
            @Override
            public void onClick(View view) {
                new Thread(new Runnable() {//子线程
                    @Override
                    public void run() {
                        try {
                           OkHttpClient client = new OkHttpClient();//创建Okhttp实例
                           String url = "https://apis.tianapi.com/nba/index?key=2883d8175524da819017415676fdf911";//请求路径
                           Request request = new Request.Builder()
                                   .url(url)
                                   .get()
                                   .build();//get请求
                           Call call = client.newCall(request);
                           Response response = call.execute();//执行
                           String responseData = response.body().string();//接收数据
                           JSONArray array = new JSONArray(responseData);//将数据存到数组
                           for(int i = 0; i<array.length();i++){//循环打印
                               JSONObject obj = array.getJSONObject(i);
                               String title = obj.getString("title");
                               Log.d("title:",title);//打印
                           }
                        }catch (Exception e){
                            //Toast.makeText(MainActivity.this, "jj:"+e, Toast.LENGTH_SHORT).show();
                            Log.d("e",e.toString());
                            runOnUiThread(new Runnable() {
                                @Override
                                public void run() {
                                    Toast.makeText(MainActivity.this, "网络连接失败!", Toast.LENGTH_SHORT).show();
                                }
                            });
                        }
                    }
                }).start();
Here we need to put the code in a sub-thread, because this is a network request. If it is placed in the main thread and the network is not good, the entire application will be stuck, but putting it in a sub-thread will not affect the main thread and other threads. operating speed.
If you need to write a RequestBody to add parameters, put the parameters in it, and then put them in the request and pass them. code show as below:
                           RequestBody requestBody = requestBuild
                                   .add("key",key)
                                   .build();
                           Request request = new Request.Builder()
                                   .url(url)
                                   .post(key)
                                   .build();//post请求
After the code is written, we run it and click the button

The data is printed successfully on the console. I just simply printed the output here. If you want to return the data to the page, you can use Bundle.
Summarize
This is what I want to share today. You just need to configure the project and write the correct code. If you find it useful, remember to leave a like! Thanks for watching!