Article directory
foreword
GeoServer is the J2EE implementation of the OGC Web server specification. GeoServer can be used to easily publish map data, allowing users to update, delete, and insert element data. Through GeoServer, it is relatively easy to quickly share spatial geographic information among users. Also, GeoServer is open source software.
The following introduces the GeoServer web ui management interface combined with the cpolar intranet penetration tool to achieve remote access,
1. Install GeoServer
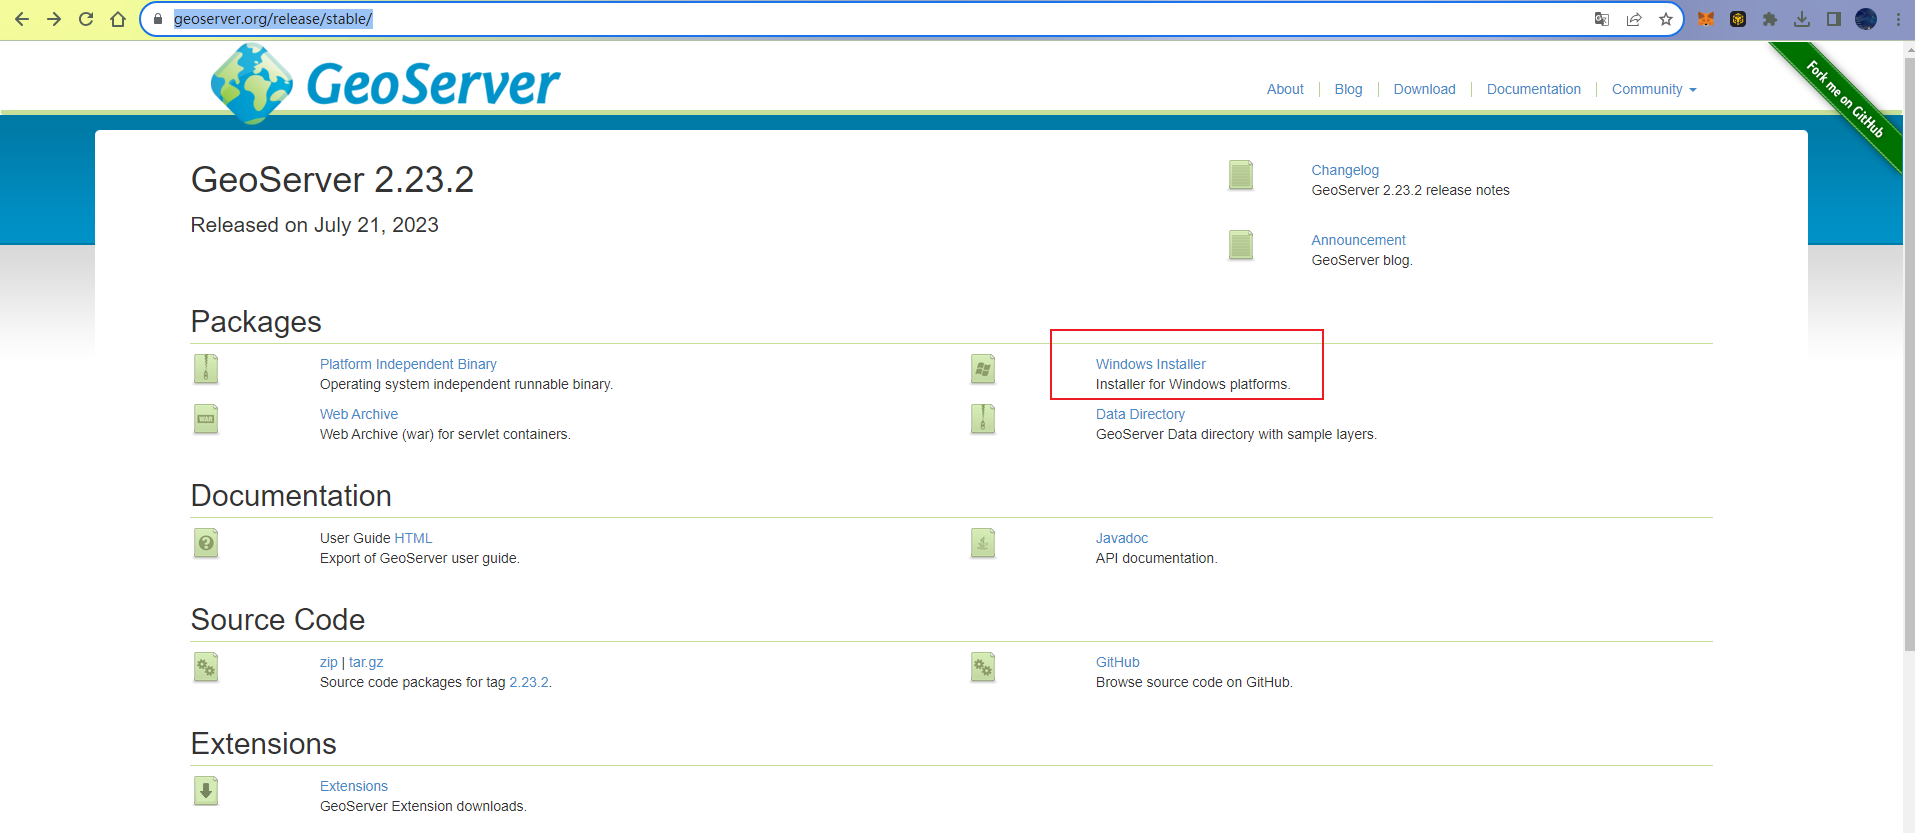
Open the official website https://geoserver.org/release/stable/, download the windows installation file here for installation, because GeoServer is developed based on Java. Therefore, before installation, you must ensure that JDK, JDK version 11 or 17 is installed
After the download is successful, click the download file to install. During the installation process, you will be prompted to select jdk, just select the jdk directory we installed locally.

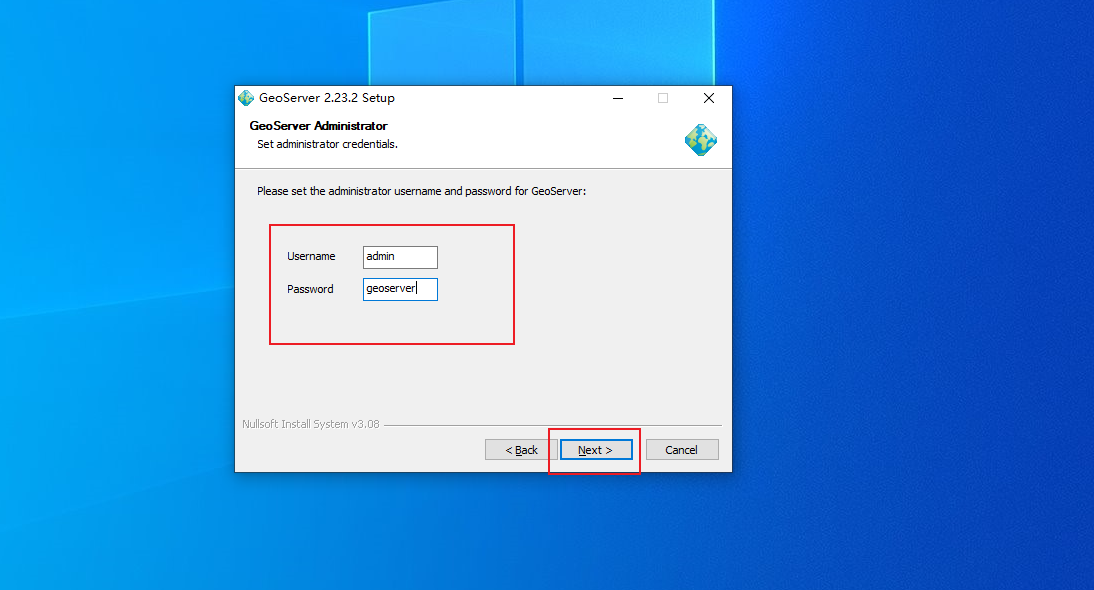
The next step is to set the login username and password, which can be customized or default
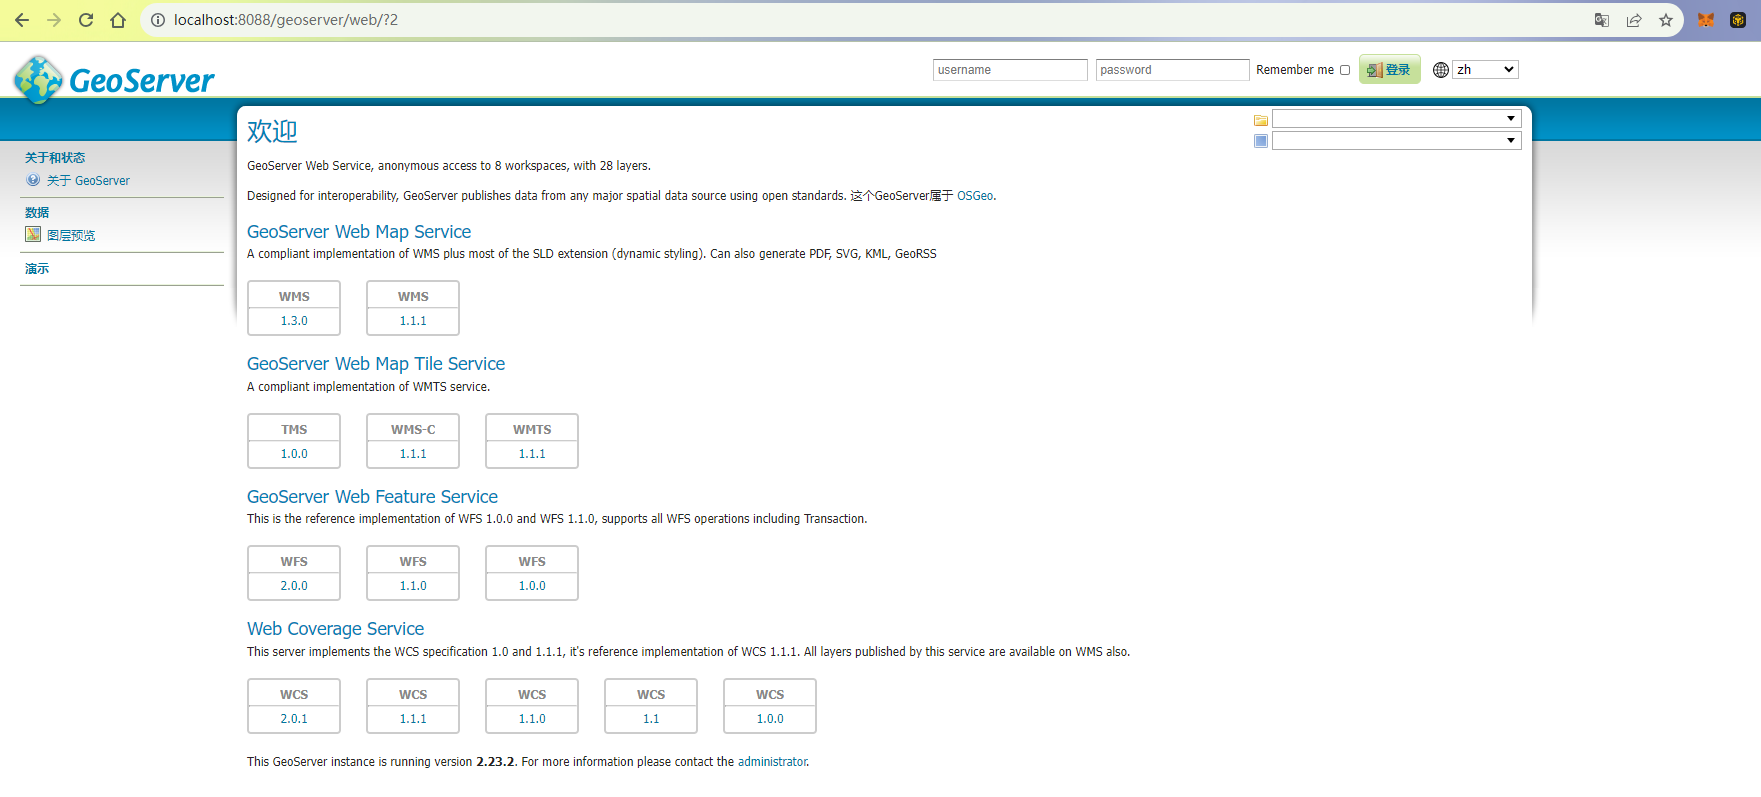
The next step is to set the port number of the web interface. We can change it to a port that does not conflict with our own computer. Here we change it to 8088.

Then go to the next step to install. After the installation is complete, we open the browser and enter http://localhost:8088/geoserver to see the web management interface of GeoServer. The local installation is successful. Next, install cpolar intranet penetration tools for remote access
2. windows install cpolar
cpolar official website: https://www.cpolar.com/
Visit the cpolar official website, register an account, and then download and install the client. For specific installation tutorials, please refer to the official website documentation tutorial.
- Windows system: After downloading the installation package from the official website, double-click the installation package and install it by default.
- Linux system: supports one-click automatic installation scripts, please refer to the official website documentation for details - Getting Started Guide
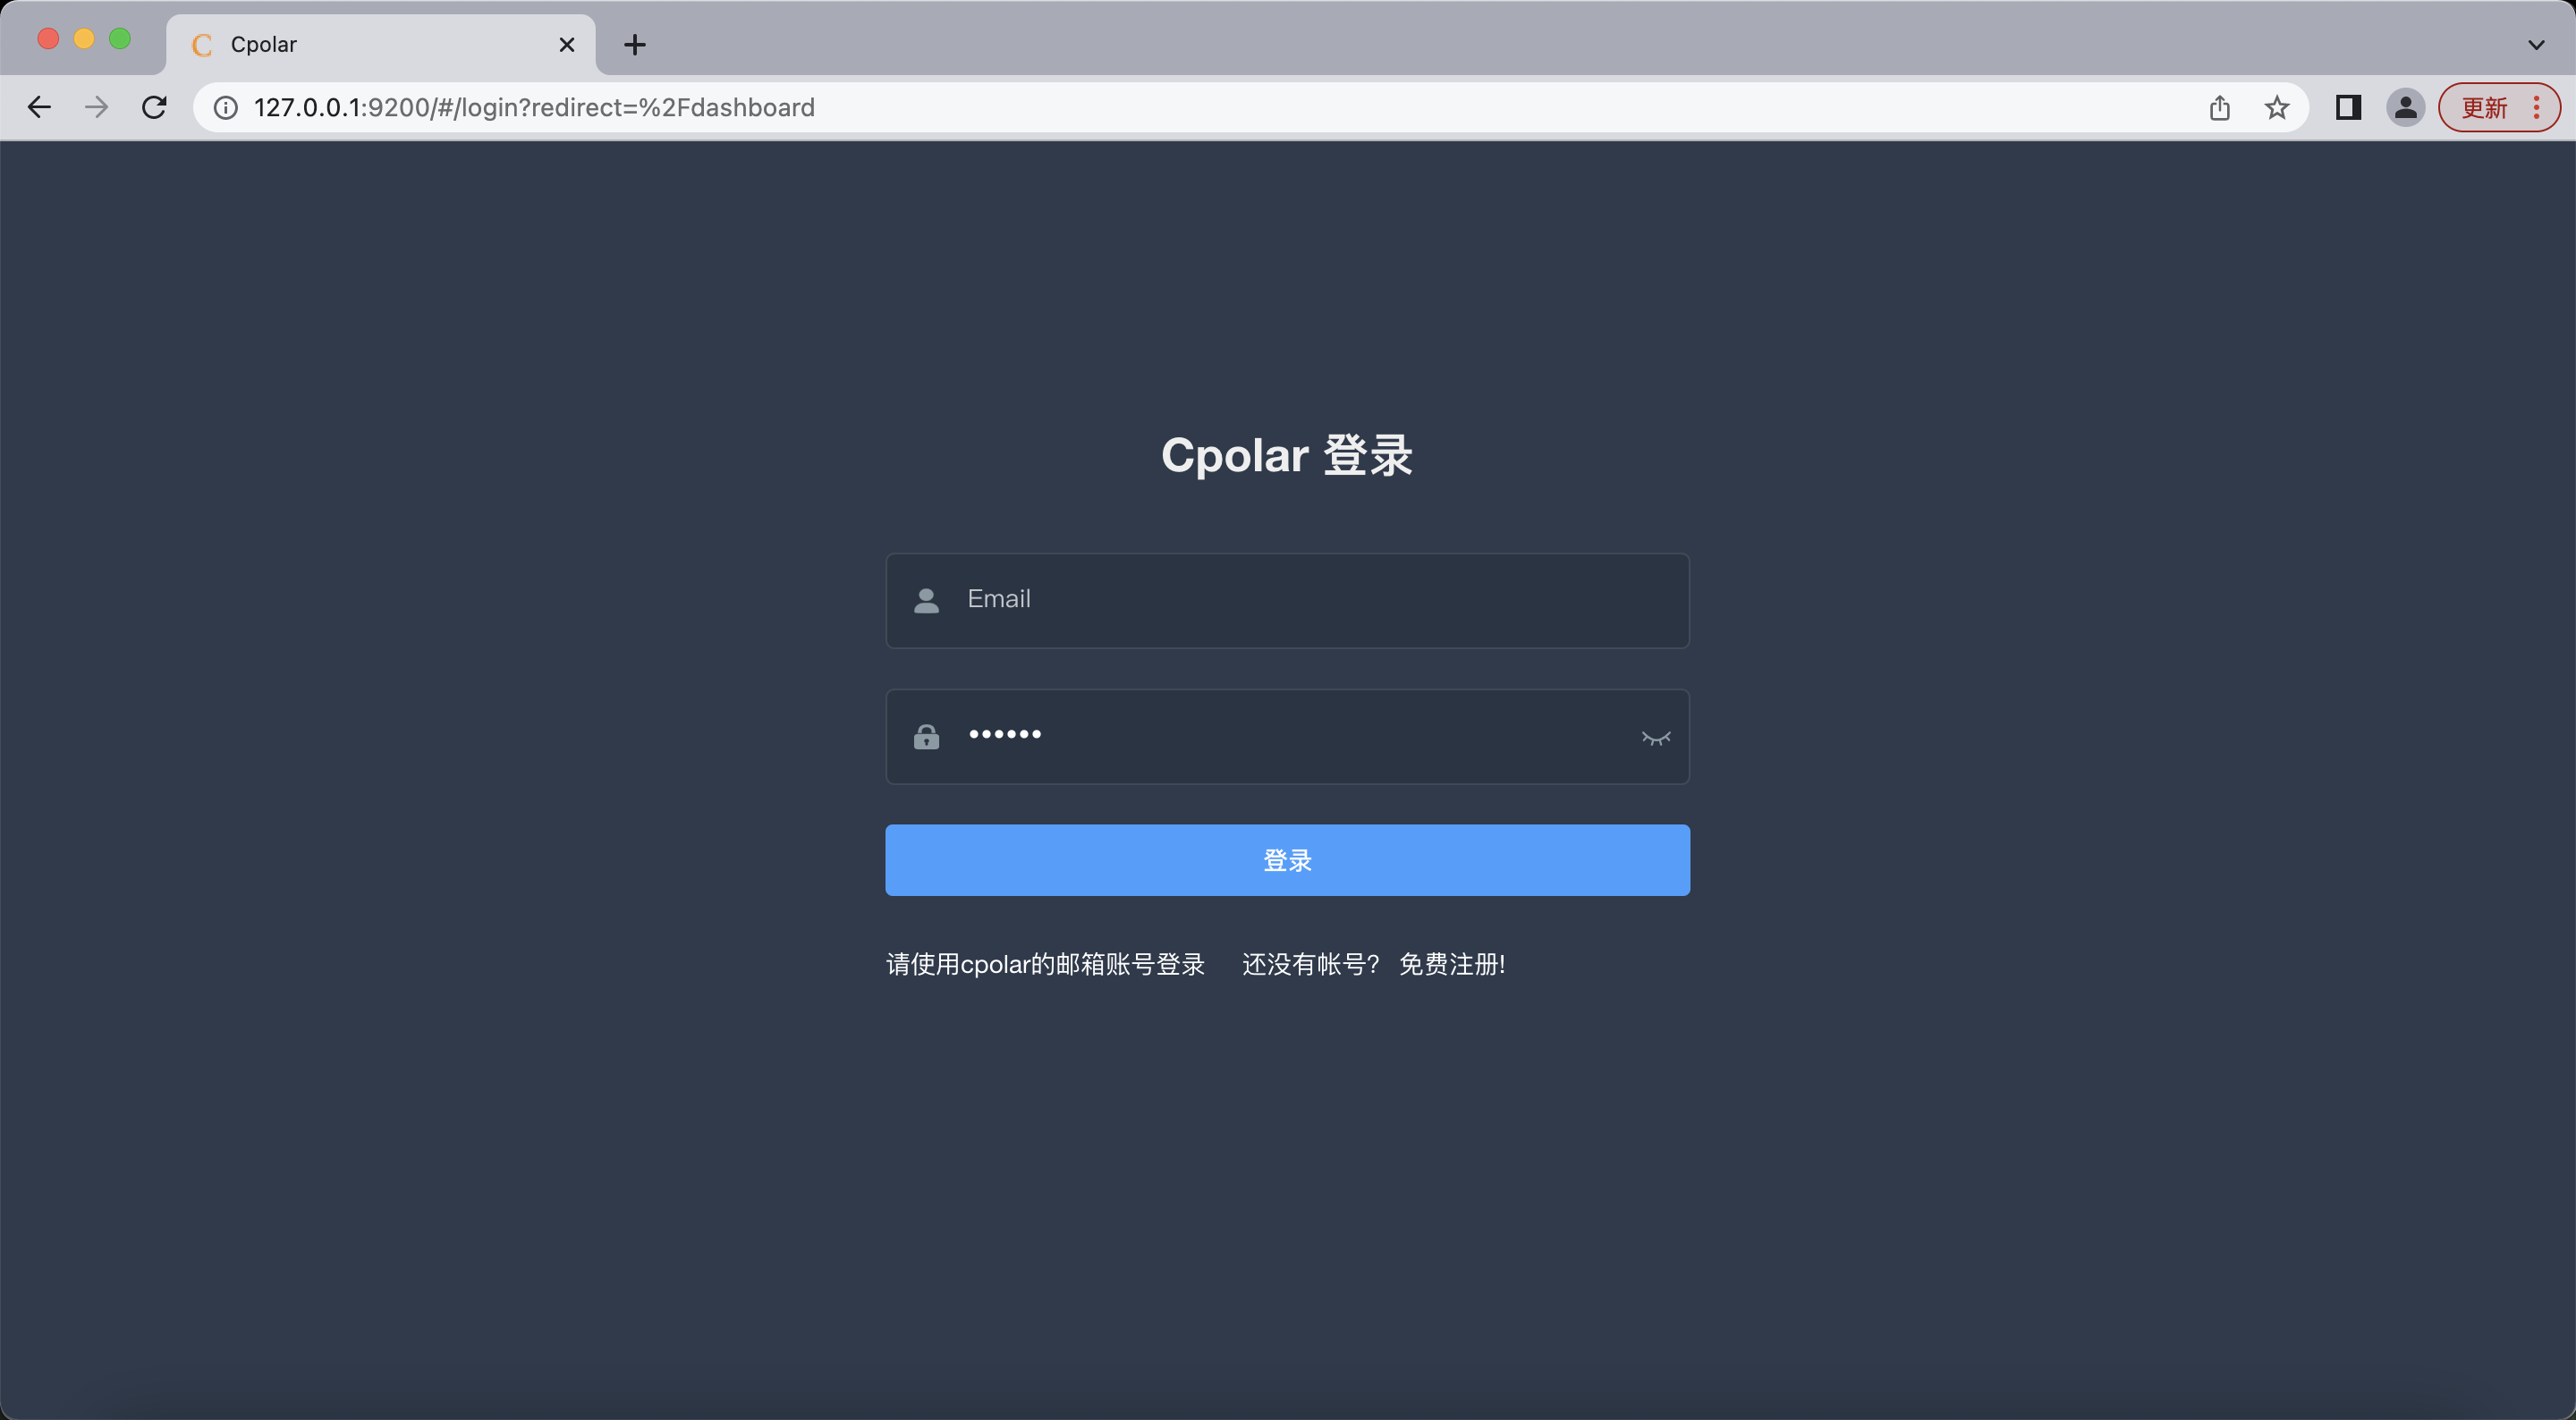
After cpolar is successfully installed, visit the local port 9200 [ http://localhost:9200 ] on the browser , and log in with the cpolar account.
3. Create a public network access address
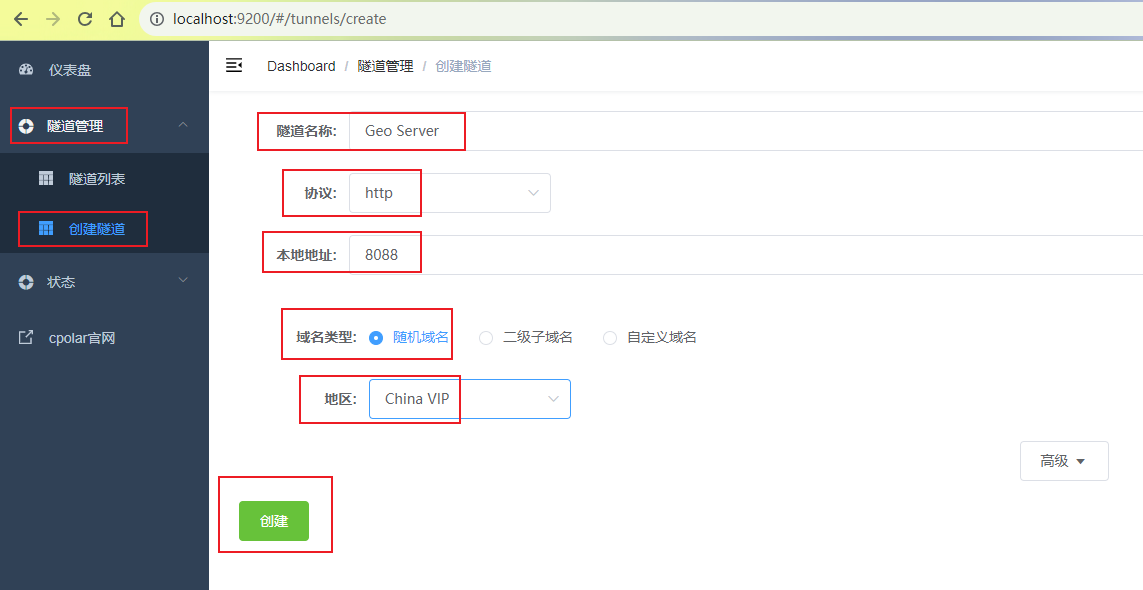
After logging in, click Tunnel Management on the left dashboard - Create Tunnel to create an 8088 http tunnel
- Tunnel name: you can customize the name, be careful not to duplicate the existing tunnel name
- Protocol: select http
- Local address: 8088 (the port we set above during installation)
- Domain name type: choose a random domain name for free
- Region: Select China VIP
click创建
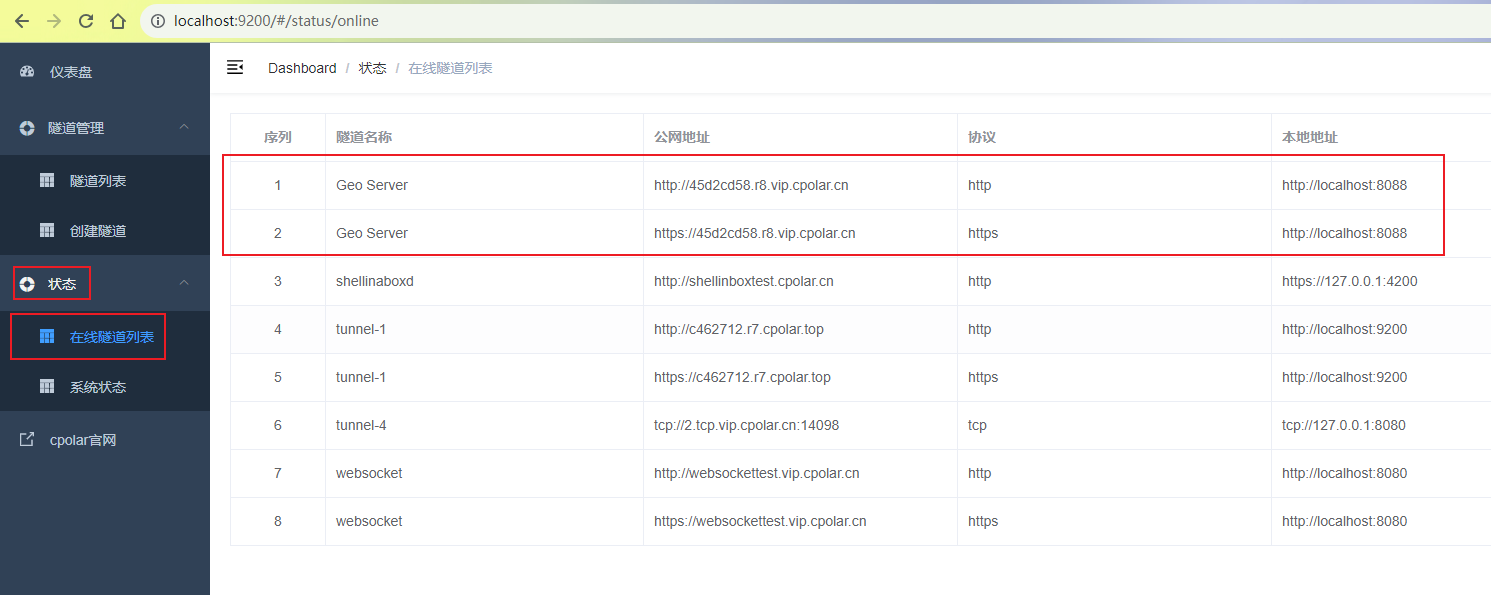
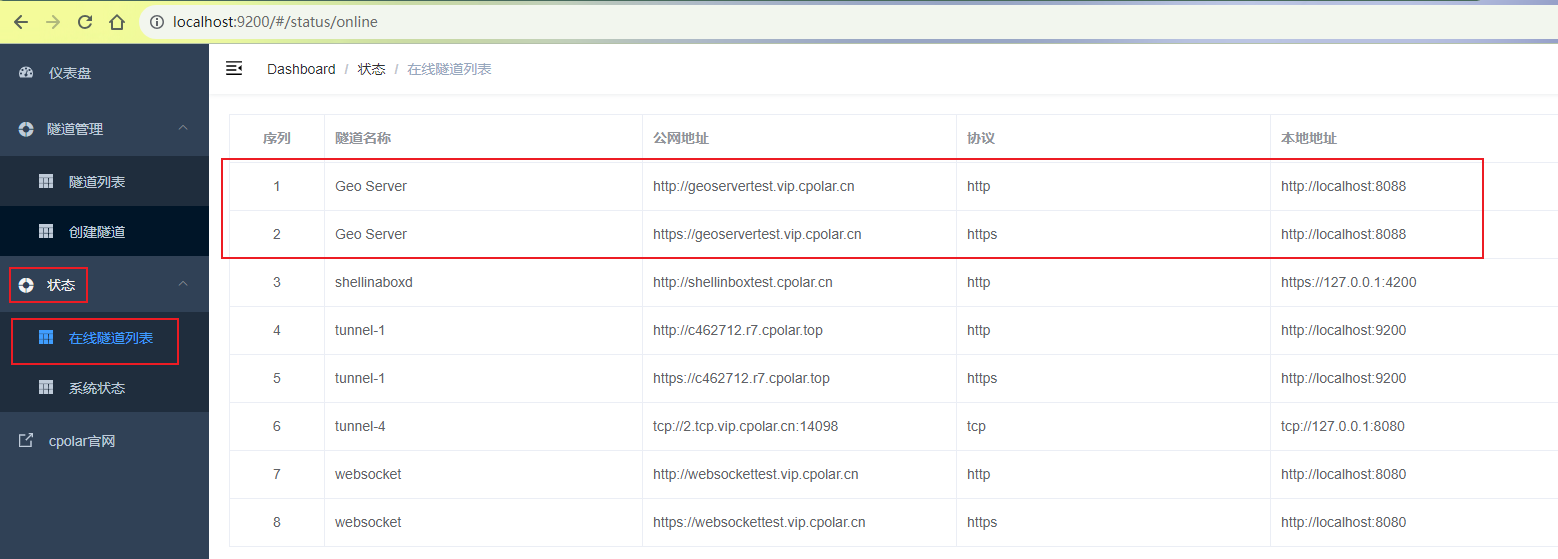
After the tunnel is successfully created, click on the status on the left - online tunnel list to view the generated public network access address. There are two access methods, one is http and https
4. Access the Geo Servcer service from the public network
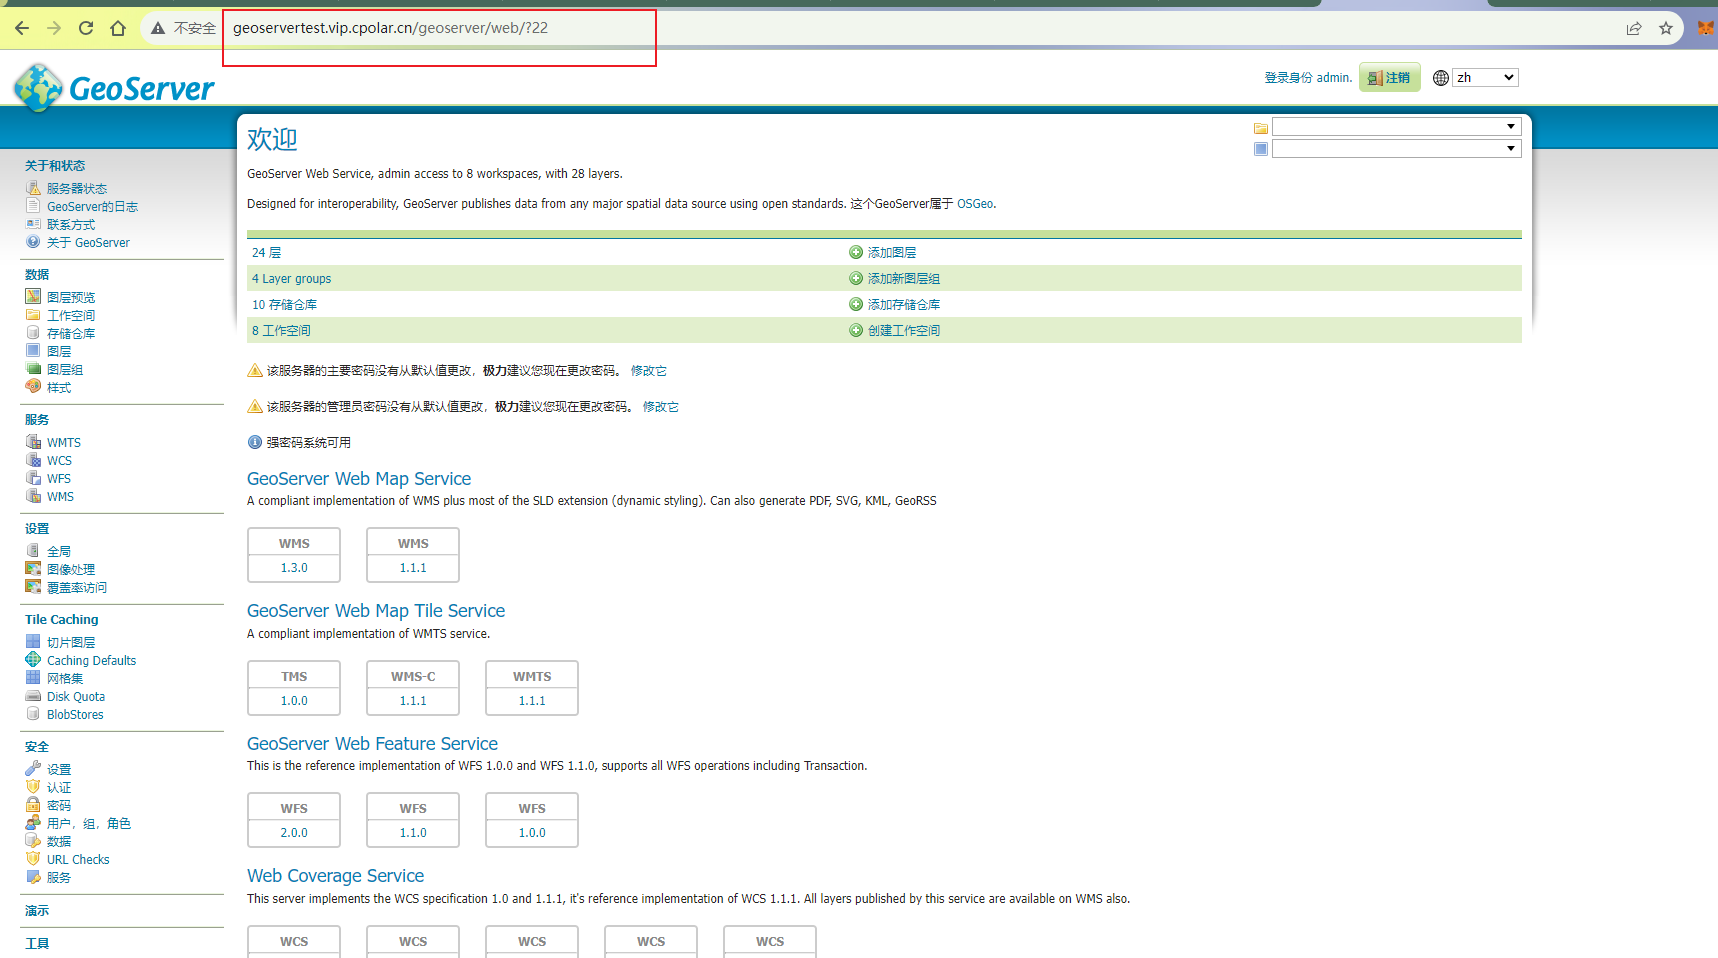
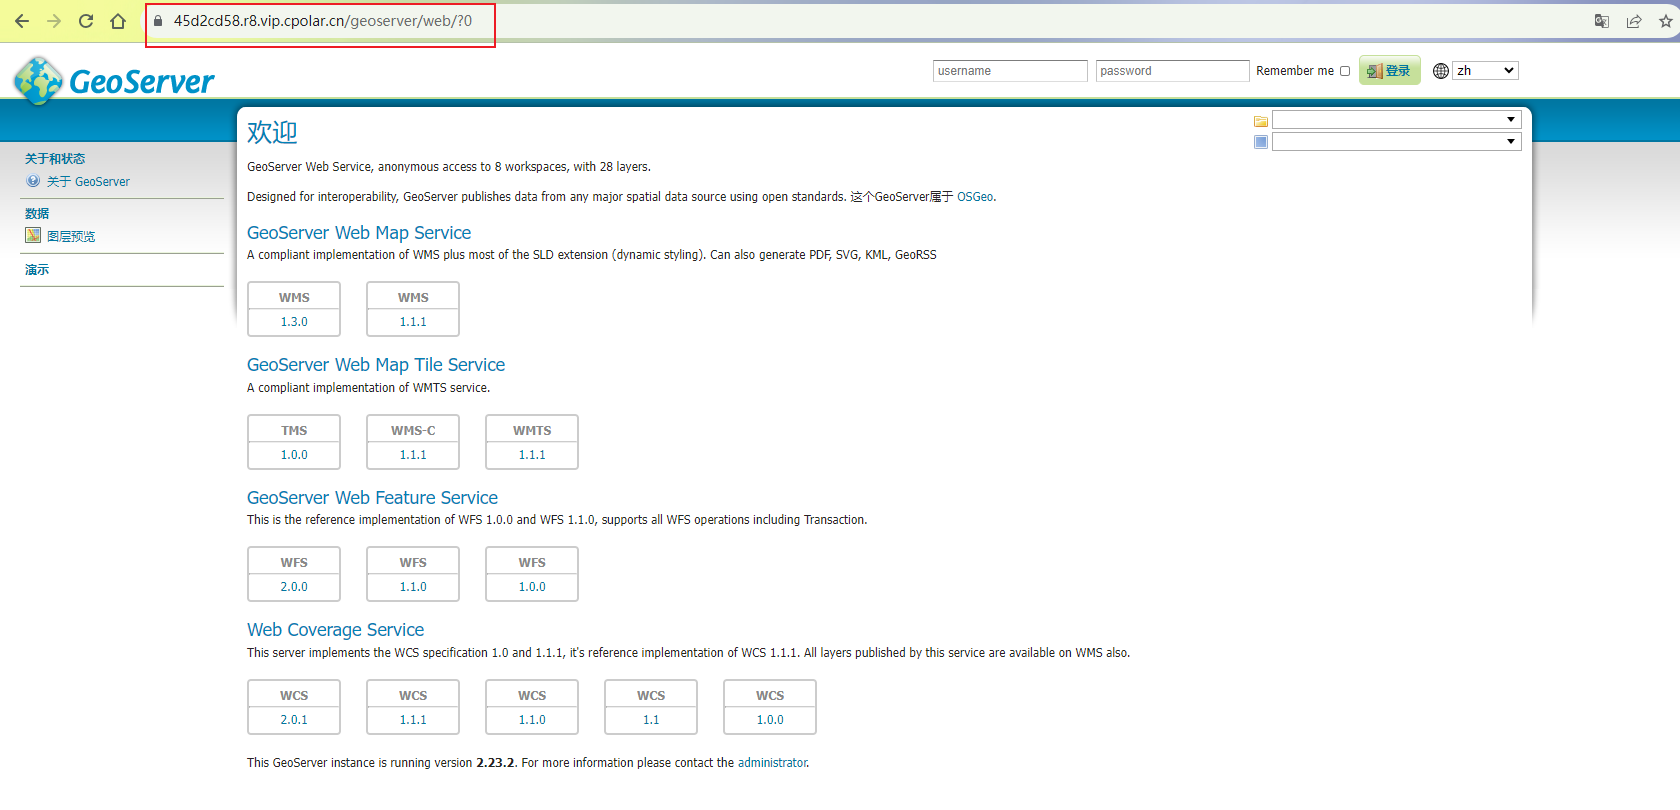
Above in cpolar, we created the public network address of the http protocol, open the browser, use the cpolar public network address plus the resource path to /geoserveraccess, you can see that the access is successful, such a public network address accessed by a remote or any device browser is set up.
5. Fixed public network HTTP address
Since the above tunnel created by using cpolar uses a random public network address, it will change randomly within 24 hours, which is not conducive to long-term remote access. Therefore, we can configure a second-level subdomain name for it, which is a fixed address and will not change randomly [ps: cpolar.cn has been filed]
Note that the cpolar package needs to be upgraded to the basic package or above, and the bandwidth corresponding to each package is different. [cpolar.cn has been filed]
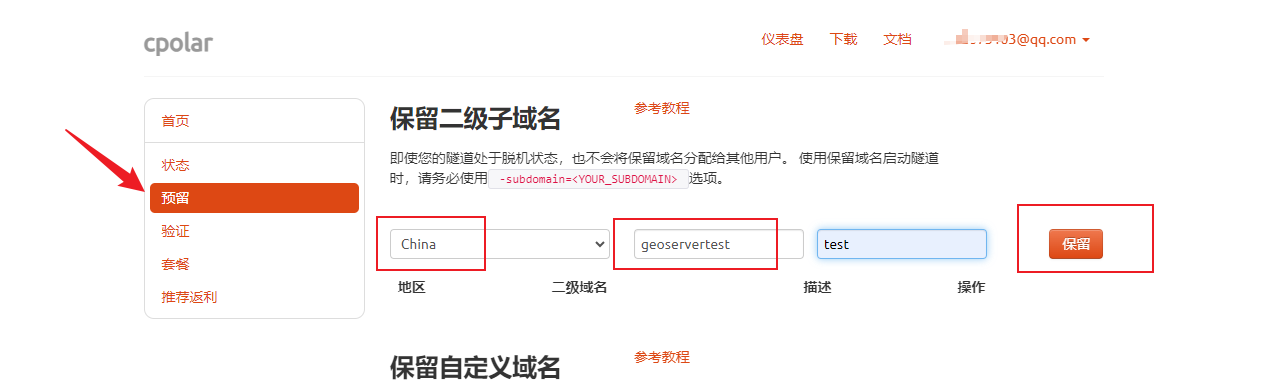
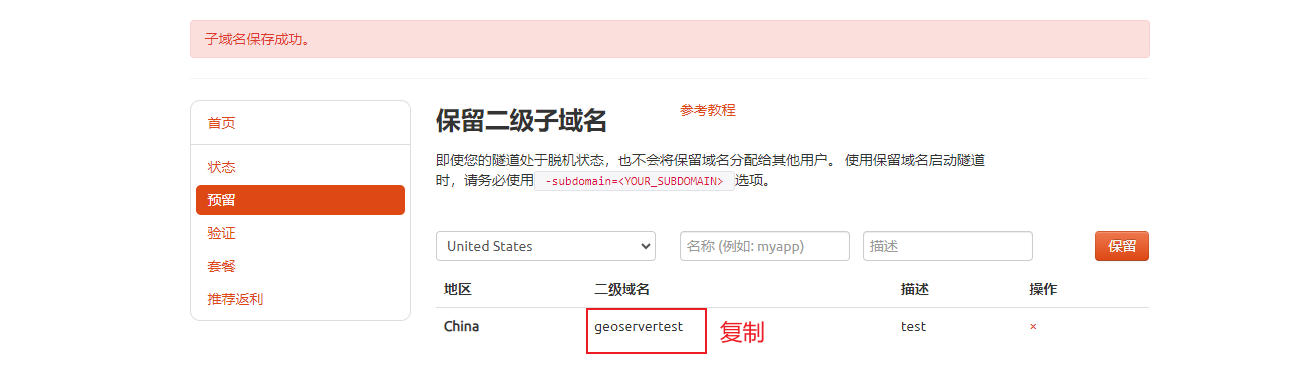
Log in to the background of the cpolar official website , click Reserve on the left, choose to reserve the second-level subdomain name, set a second-level subdomain name, click Reserve, and copy the reserved second-level subdomain name after the reservation is successful
After the reservation is successful, copy the reserved second-level subdomain address
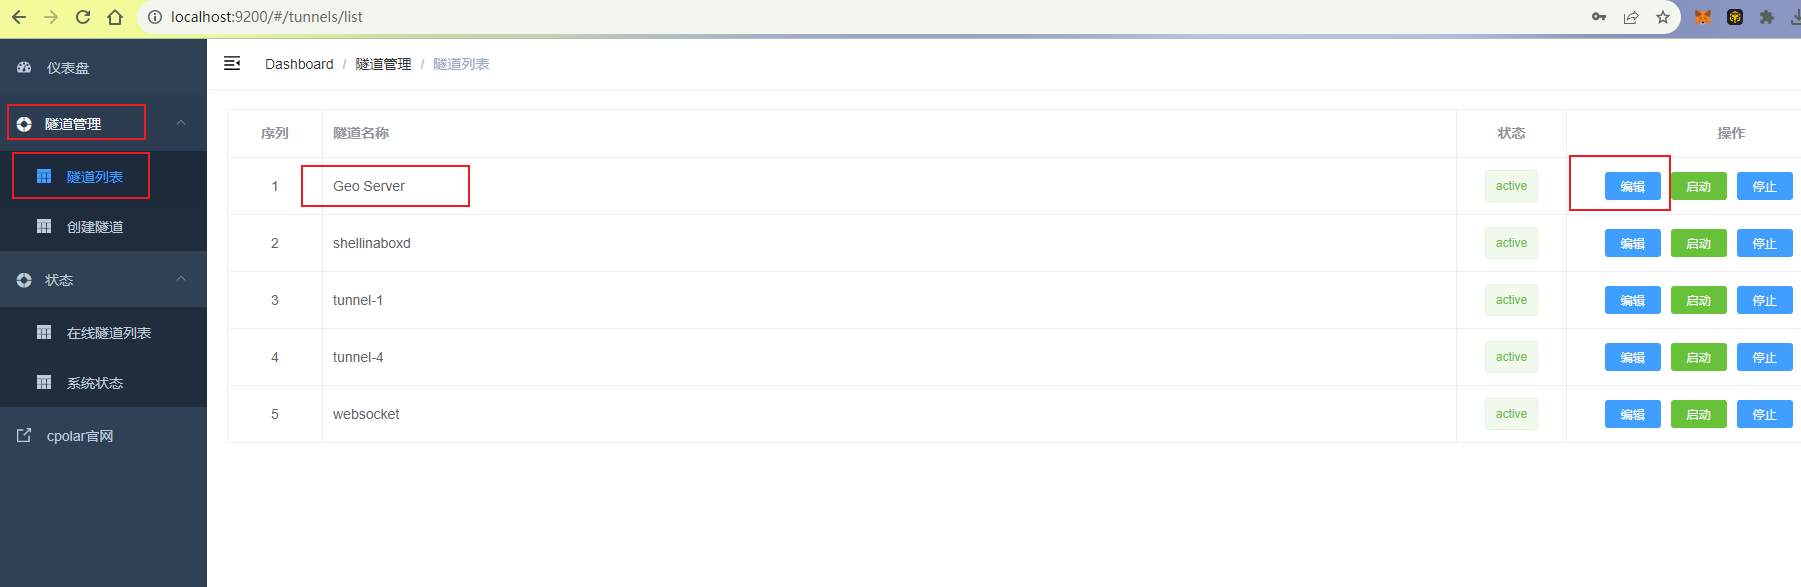
Log in to the cpolar web UI management interface, click Tunnel Management on the left dashboard - Tunnel List, find the tunnel to be configured, and click Edit on the right
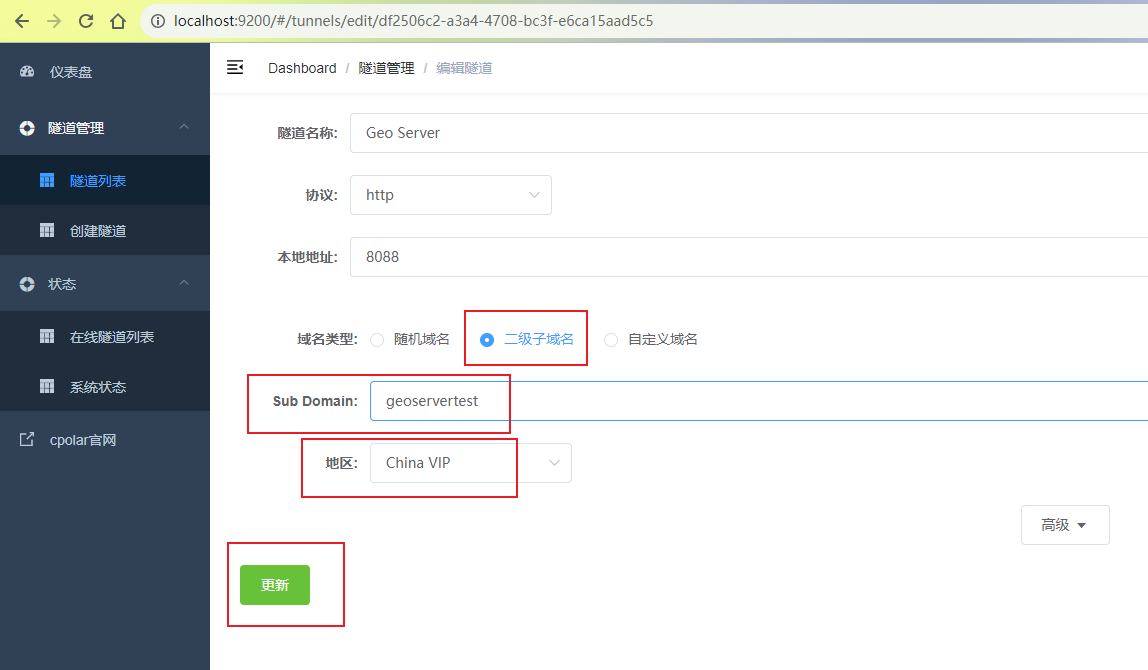
Modify the tunnel information, and configure the successfully reserved second-level subdomain name into the tunnel
- Domain name type: select a second-level subdomain name
- Sub Domain: Fill in the reserved sub-domain name
click更新
After the update is complete, open the online tunnel list, and you can see that the public network address has changed, and the address name has also become a reserved and fixed second-level subdomain name
After the address is set, replace the random domain name address with our fixed public network address to access, and you can see that the access is also successful, so a permanent fixed public network address is set.