I. Introduction
After deploying Stable Diffusion on the two cloud platforms Kaggle and AutoDL , this week I decided to deploy Stable Diffusion locally on the Mac!
In fact, looking at the Github official website of Stable Diffusion WebUI , the steps are relatively clear and simple.

But in the actual deployment process, I still encountered a lot of problems, so by the way, I recorded the pits I stepped on one by one, which should cover the problems that most students will encounter. Yes, I will help you fill them up. The problem also gives a variety of solutions.
Therefore, friends of the Mac party want to deploy Stable Diffusion locally, take this nanny-level tutorial, and just rush to finish!
2. Mac configuration
MacBook Pro (2021)
Chip : Apple M1 Pro
Total number of cores : 8 + 14
Memory : 16GB
Storage : 512GB
macOS : Coming 13.3.1
Under this configuration, what is the efficiency of drawing pictures ?
In the fifth part of the article "Performance Test", based on the same model and different sampling methods, after conducting multiple sets of tests, the efficiency of drawing is simply recorded. You can refer to it~
3. Installation steps
1. Install Homebrew
Method 1: Official installation (may fail due to network problems)
/bin/bash -c "$(curl -fsSL https://raw.githubusercontent.com/Homebrew/install/HEAD/install.sh)"

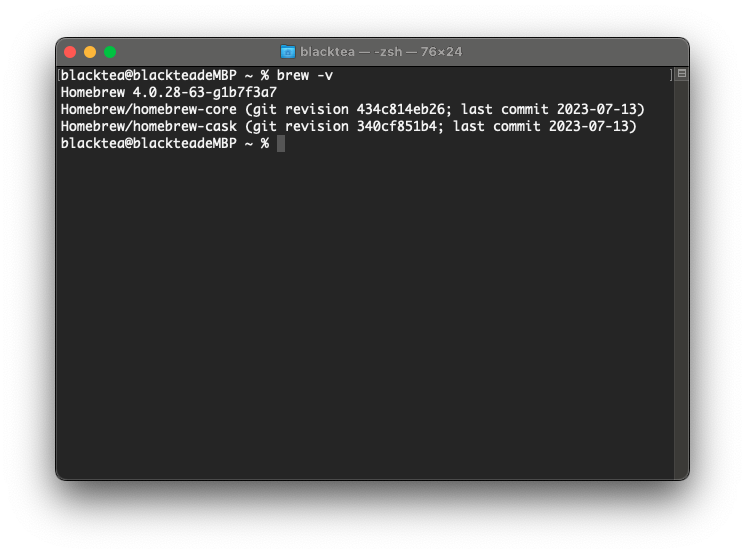
Enter brew -vto verify whether Homebrew is successfully installed: the version number appears to indicate that Homebrew has been installed successfully.
Supplementary knowledge:
- Homebrew official website: https://brew.sh/
- Installed through the official website, the way to uninstall Homebrew is as follows (note: if it is installed on a domestic mirror, do not use this command to uninstall):
/bin/bash -c "$(curl -fsSL https://raw.githubusercontent.com/Homebrew/install/master/uninstall.sh)"
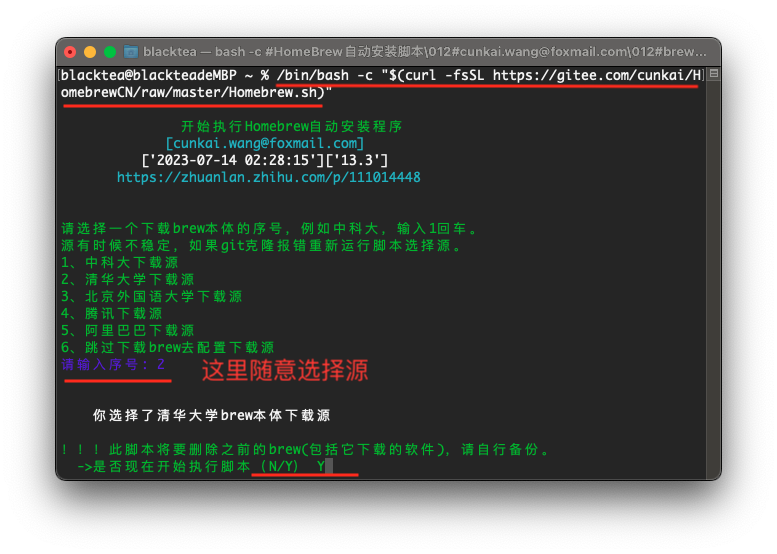
Method 2: Domestic mirror installation
If there is no response to the input command in the first way, or an error occurs during the installation process, most of it is due to network problems. Homebrew can be installed using domestic mirrors.
/bin/bash -c "$(curl -fsSL https://gitee.com/cunkai/HomebrewCN/raw/master/Homebrew.sh)"
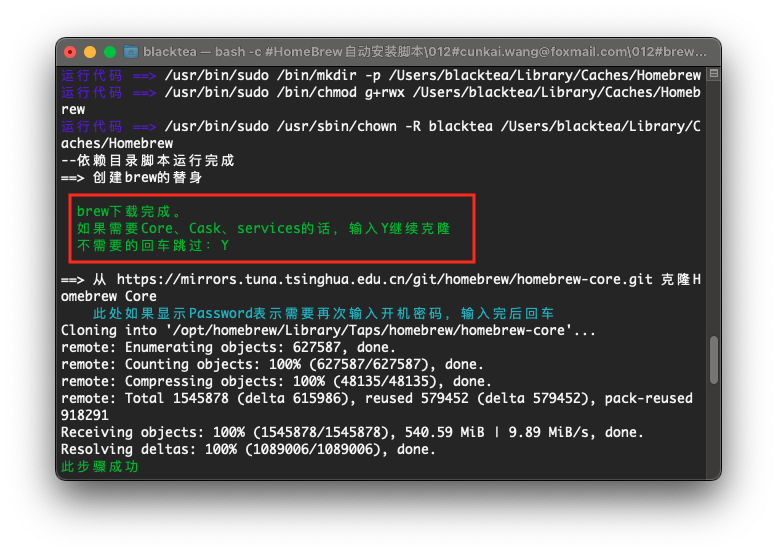
Core, Cask, and services are other components of Homebrew, and should not be necessary to deploy Stable Diffusion WebUI. For the sake of safety, it is installed directly here.

Some computers have messed up xcode and git. Run it again. If there is an error here, it will be normal.

After the installation is successful, you need to restart the terminal or run source /Users/your_user_name/.zprofileto take effect.
Enter brew -vto verify whether Homebrew is successfully installed: the version number appears to indicate that Homebrew has been installed successfully.

Supplementary knowledge
-
If Homebrew has been installed before, the previous Homebrew will be backed up in the Old_Homebrew folder on the desktop. If there is nothing you need, you can delete it.
-
Common commands
- Check the version: brew -v
- Update brew version: brew update
- Search: brew search xxx (where xxx is replaced by the keyword to be found)
- Installation: brew install xxx
- View the list of local software repositories: brew ls
-
Uninstall Homebrew If Homebrew is installed through a domestic mirror, use this command to uninstall:
/bin/zsh -c "$(curl -fsSL https://gitee.com/cunkai/HomebrewCN/raw/master/HomebrewUninstall.sh)"
-
Installation location On Mac M1, the installation location of Homebrew is not in the previous /usr/local/, but in /opt/homebrew, please pay attention to this.
-
If you encounter other problems during the installation process, you can read the problems you may encounter in the fourth part of the article to see if there is any explanation.
2. Install Python and other environmental dependencies
cmake, protobuf, rust, [email protected], git, wget, these are the dependencies that need to be used when installing Stable Diffusion WebUI later, here they are installed directly through a single command.
brew install cmake protobuf rust [email protected] git wget
The github of Stable Diffusion WebUI recommends using 3.10.6, because higher versions of Python do not support torch:
Install Python 3.10.6 (Newer version of Python does not support torch), checking “Add Python to PATH”.
The article was written in July 2023, and it should be supported in the future~
3. Clone
After the previous step is executed successfully, we clone the Stable Diffusino WebUI.
git clone https://github.com/AUTOMATIC1111/stable-diffusion-webui
In this step, you may encounter the problem that the download cannot be downloaded, or an error occurs during the download process. You can read the problems you may encounter in the fourth part of the article to see if there is an explanation.
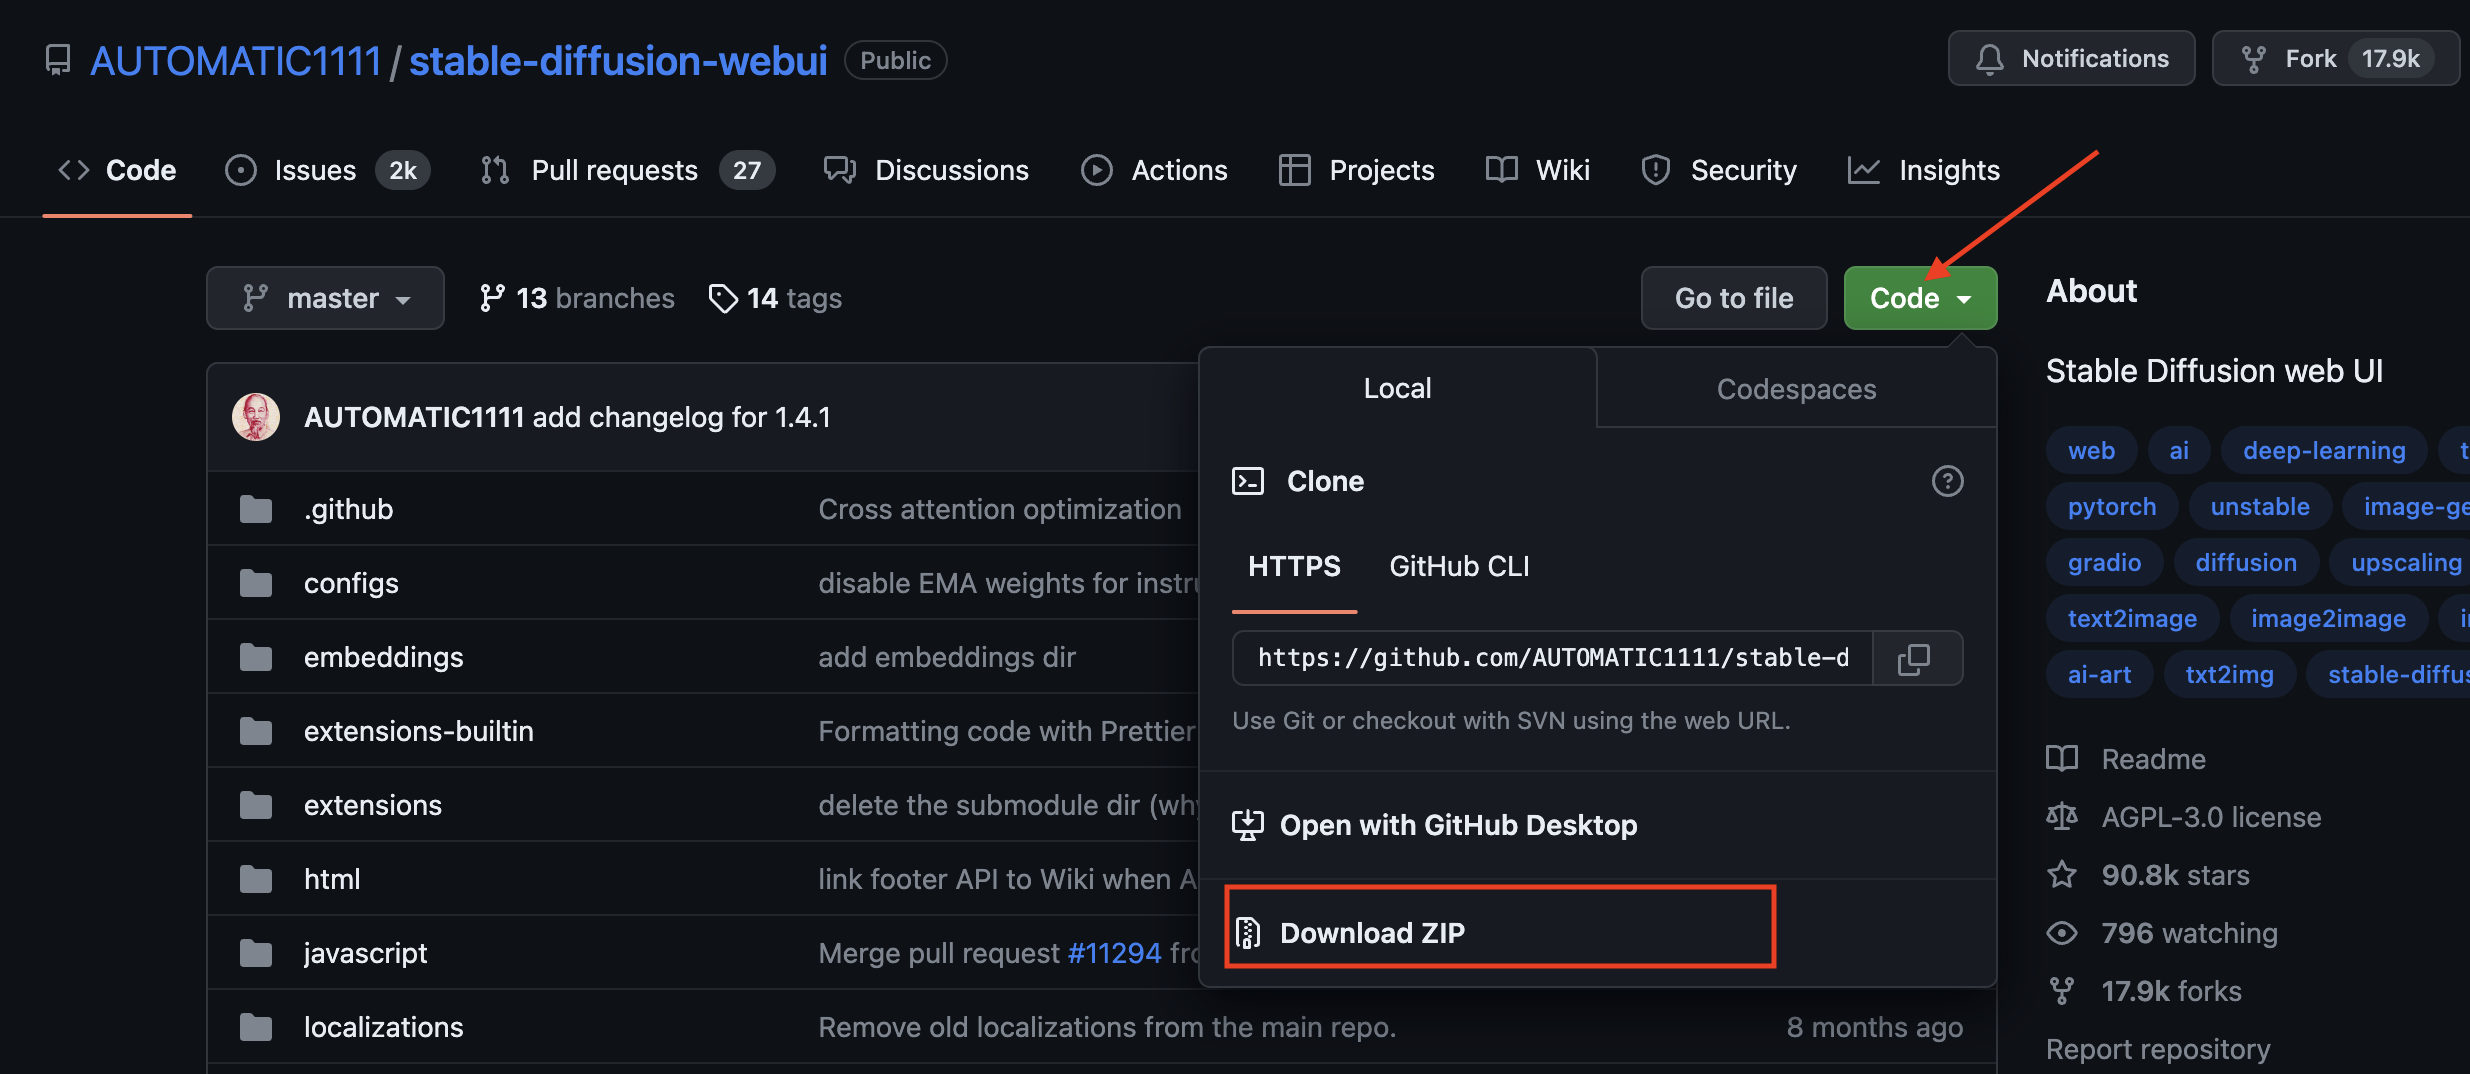
If it is still not resolved, directly, simply, go to the SDW Github homepage , download the Zip directly to the local, and then unzip it.
4. Download the model
There are three categories here: large models, Lora models, and VAE models. (Of course there are other subdivided small models, which will be introduced later)
In this step, you can throw a large model up first, and then download others slowly if necessary later.
If you don't want to download it yourself, you can ask me for a link to the network disk.
large model
Put it under stable-diffusion-webui/models/Stable-diffusion
File suffix: ckpt or safetensors
Lora model
Put it under stable-diffusion-webui/models/Lora (before executing ./webui.sh, there is no Lora directory, so you can keep it for now)
VAE model
Variational Auto Encoder
Can be simply understood as a filter
Put it under stable-diffusion-webui/models/VAE
Download method 1: download from station C (requires a special network)
Select "Models" - "Filter" - select "Model types" (is it a large model, or LoRA, or VAE, etc.) - then select a model and click in.
If you know the name of the model you want to download, you can also directly search for the model name in the search box, and then click on the model.

Click the "Download" button directly to download.

Download method 2: Download from huggingface
If you can't log on to station C, you can try huggingface, and the method is relatively simple.
Select "Text-to-Image", sort by downloads, we choose the first one with the most downloads, and then click in.

Switch to "Files and versions", the following four suffixes are satetensors or ckpt are large models, just download one at will.
Among them, v1-5-pruned-emaonly is relatively small, more than 4 GB, requires less video memory, and is suitable for reasoning.
v1-5-pruned is relatively small, more than 7 GB, requires more video memory, and is suitable for fine-tuning.

5. Start WebUI
Go to the installation directory corresponding to Stable Diffusion WebUI:
cd stable-diffusion-webui
Start the Stable Diffusion WebUI:
./webui.sh
When starting for the first time, some component libraries and dependencies will be downloaded, which may be slow, please wait patiently.
Notice
If the model was not downloaded in the previous step, it will automatically download a default model for us here. Because the large model is generally several GB, it is slow to download, so it is recommended that you download the model first in the previous step (at least put a large model in, so that this step will not automatically download the model).
Of course, the most mistakes are also in the process of starting the WebUI. During this process, various errors will be encountered. We need to stop, resolve, and re-execute many times ./webui.sh.
But don't worry about the previous installation being in vain, because it will continue to install from where you installed it last time.
If an error is reported during the installation process, you can read the fourth part of the article "Problems you may encounter" to see if there is a corresponding explanation.
When Running on local URL: http://127.0.0.1:7860 appears, it means that the Stable Diffusion WebUI has been started.
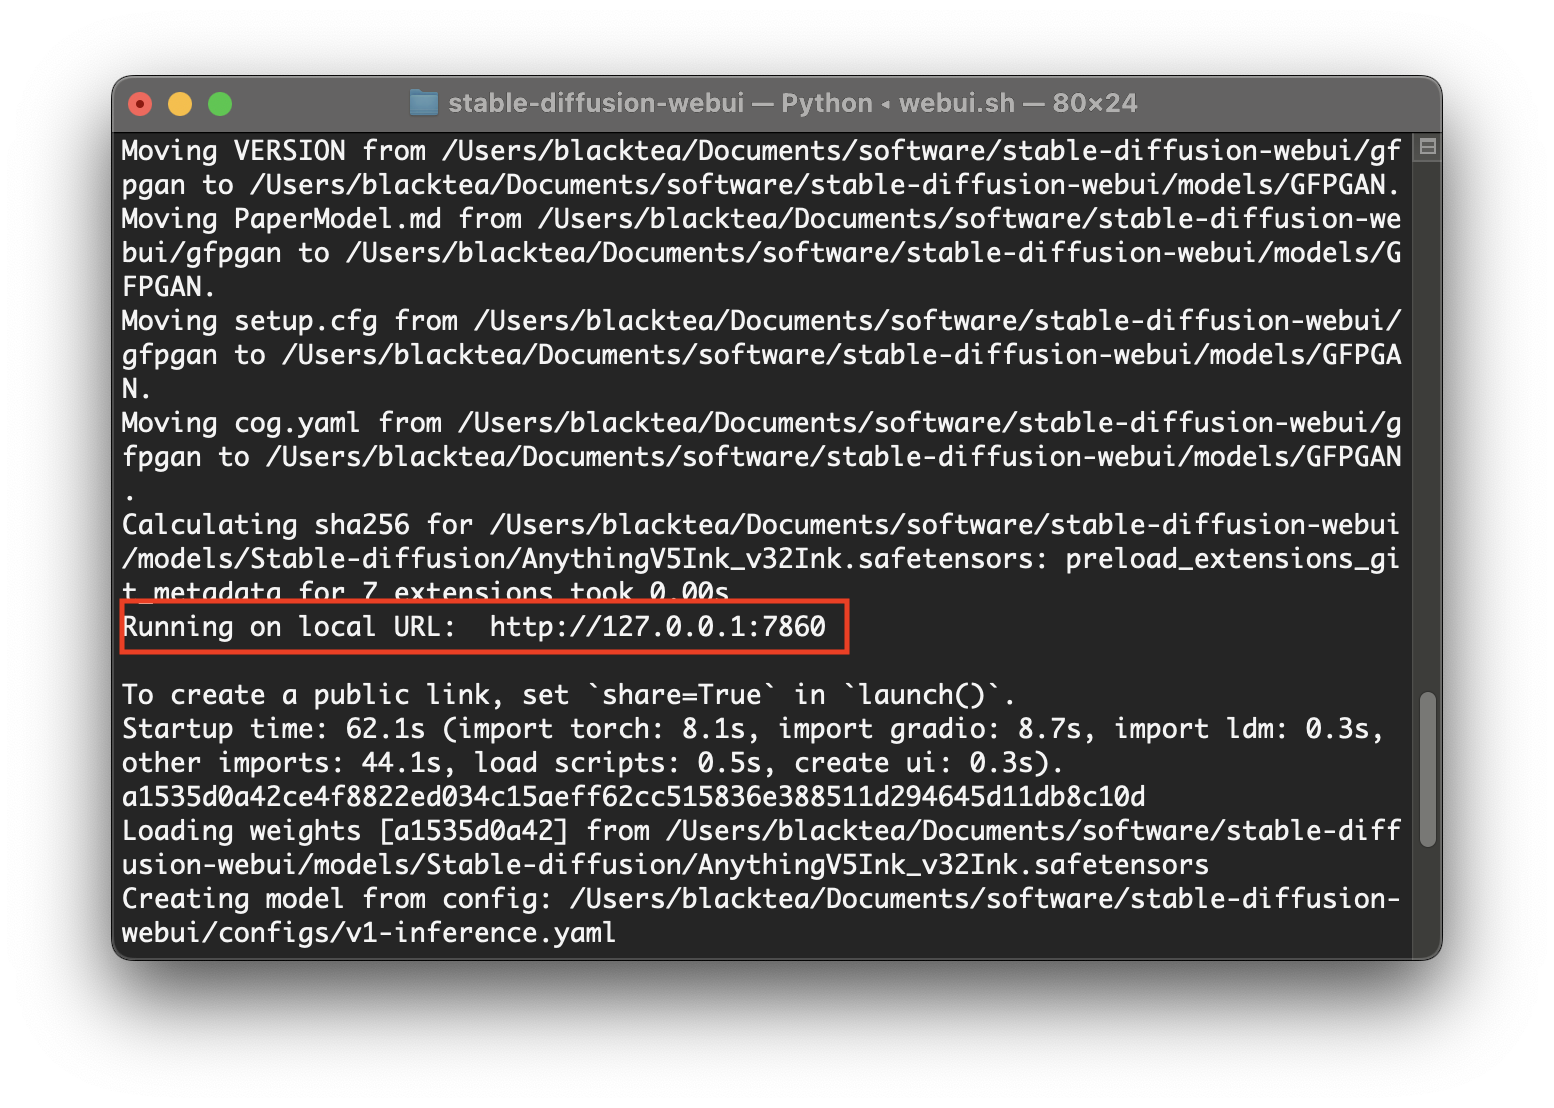
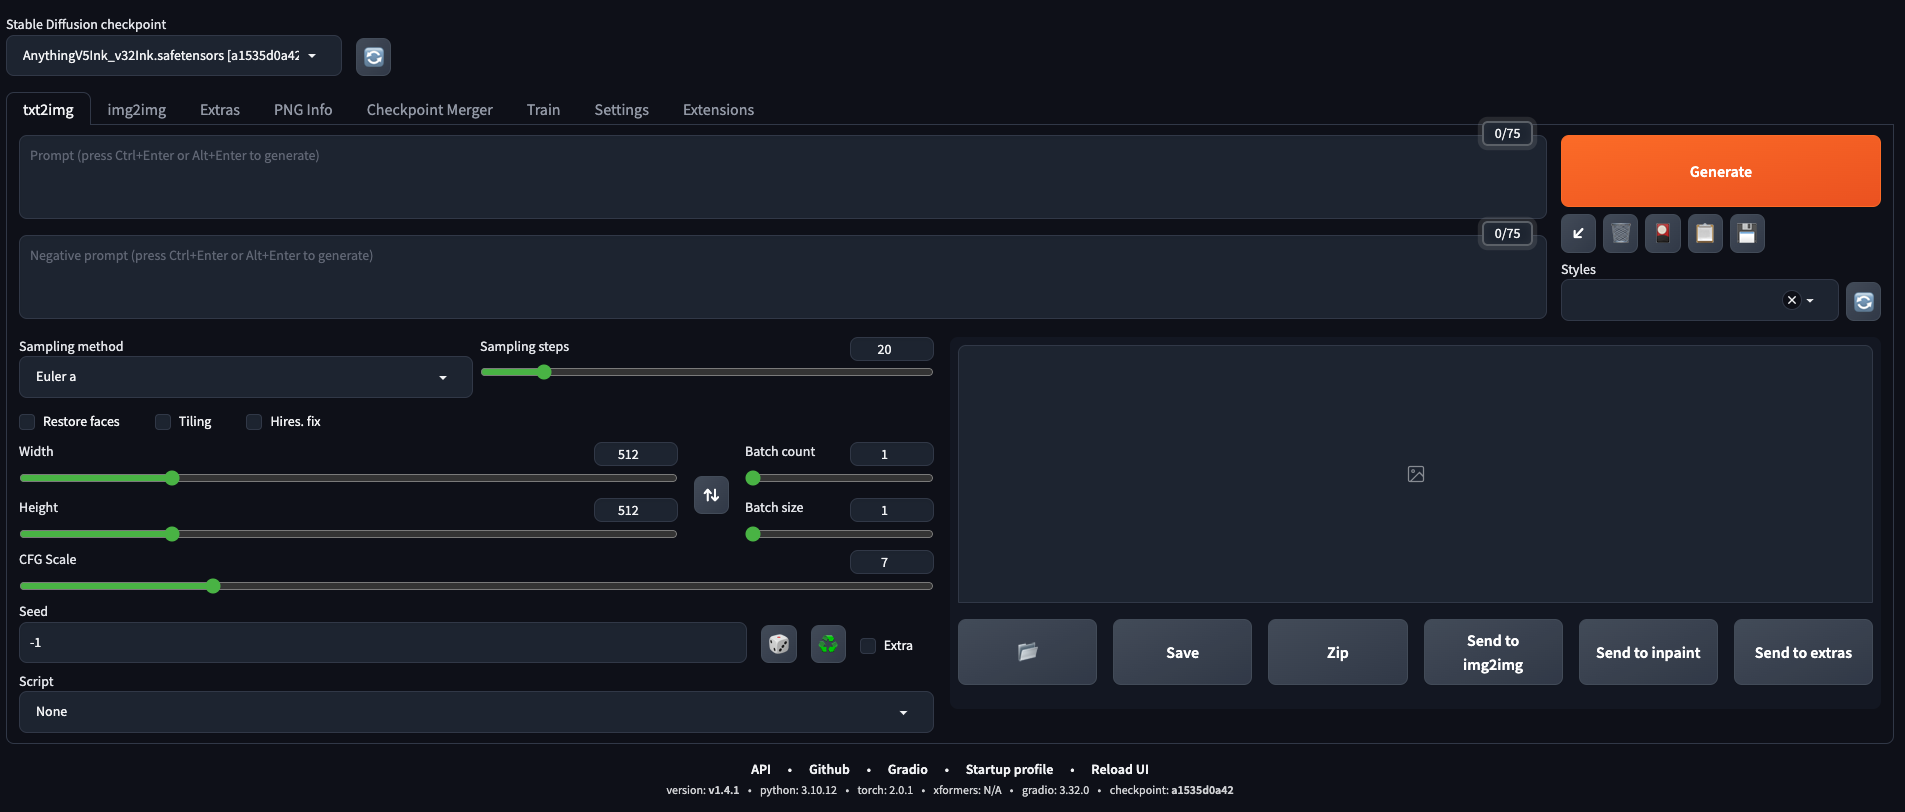
Enter http://127.0.0.1:7860 in the browser to see the Stable Diffusion WebUI interface.
Kind tips
-
During the running process, do not close the Terminal, otherwise the page will not open.
-
Restart next time, go to the directory corresponding to Stable Diffusion WebUI, and execute
./webui.sh. -
If an error is reported during the installation process, you can read the fourth part of the article "Problems You May Encounter" to see if there is any explanation.
4. Possible problems
1. Problems that may arise when installing Homebrew with a domestic image
Problem Description

solve
Roughly translated, it means that suspicious ownership was detected in the warehouse of "/opt/homebrew/Library/Taps/homebrew/homebrew-core". To add an exception to this directory, call:
git config --global --add safe.directory /opt/homebrew/Library/Taps/homebrew/homebrew-core。
Another error below has a similar meaning. So we only need to follow the above prompts and enter these two lines on the command line, and it will be perfectly solved. When brew -v is executed again, no error will be reported!
git config --global --add safe.directory /opt/homebrew/Library/Taps/homebrew/homebrew-core
git config --global --add safe.directory /opt/homebrew/Library/Taps/homebrew/homebrew-cask

2. HTTP/2 stream 1 was not closed cleanly before end of the underlying stream
Problem Description
When git clone reports:
Fatal error: Unable to access 'https://github.com/AUTOMATIC1111/stable-diffusion-webui/': HTTP/2 stream 1 was not closed cleanly before end of the underlying stream

Solution: Change the communication protocol to http/1.1
git config --global http.version HTTP/1.1
After changing the communication protocol to http/1.1, I found that it can be downloaded normally.

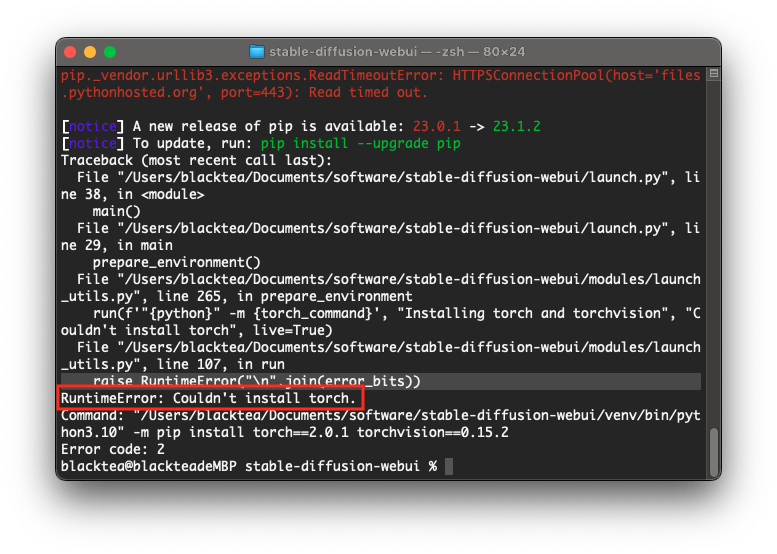
3. Couldn’t install torch.
./webui.shReport "RuntimeError: Couldn't install torch." after execution
See this comment in modules/launch_utils.py:
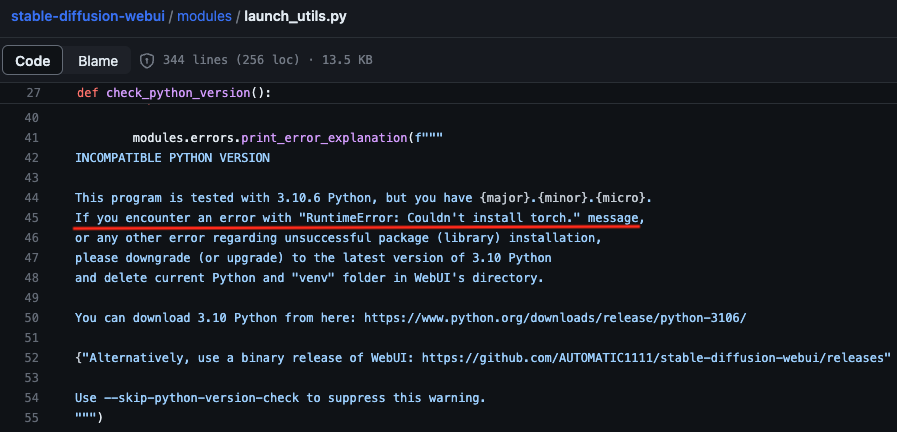
This comment means that if you encounter "RuntimeError: Couldn't install torch." or other problems, it may be a problem with the Python version. Upgrade or downgrade to the latest version of 3.10, then delete the venv directory under the WebUI directory and try again. try.
But above we clearly executed brew install cmake protobuf rust [email protected] git wgetthis command, which installed Python 3.10. Logically speaking, it shouldn't be.
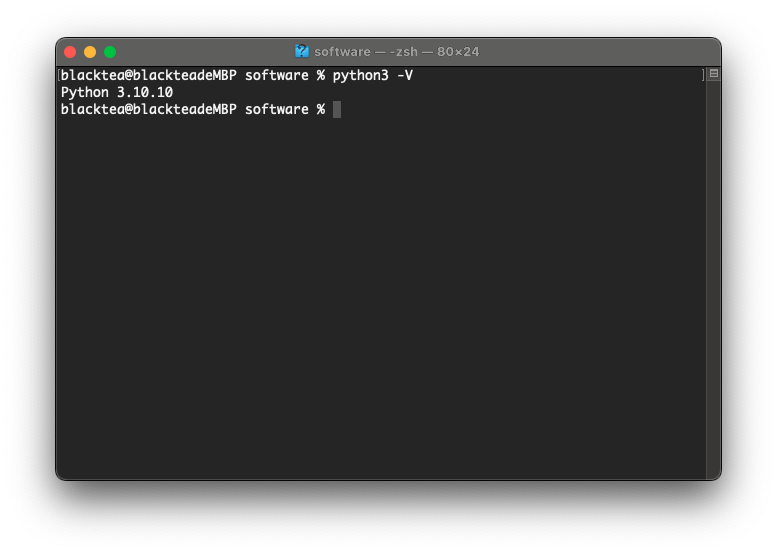
With a skeptical attitude, I typed in the command line python3 -Vto check.
Hey, it's amazing to see, why is this version 3.9.6?

This 3.9 Python version should be the Python that comes with Mac. It may be because of this reason that the download library error occurred at startup.
So I downloaded the Python 3.10.10 version from the Python official website . Just follow the prompts for fool-proof installation. Then configure the environment variables.
# 编辑 ~/.bash_profile
vim ~/.bash_profile
Add these three lines to the file
PATH="/opt/homebrew/bin/:${PATH}"
export PATH=${PATH}
alias python="/opt/homebrew/bin/python3.10"
# 使配置生效
source ~/.bash_profile
Then the version becomes 3.10.10.
Then delete the venv directory under the WebUI directory, and execute it again ./webui.sh, and finally no error is reported! It's just a little slow~

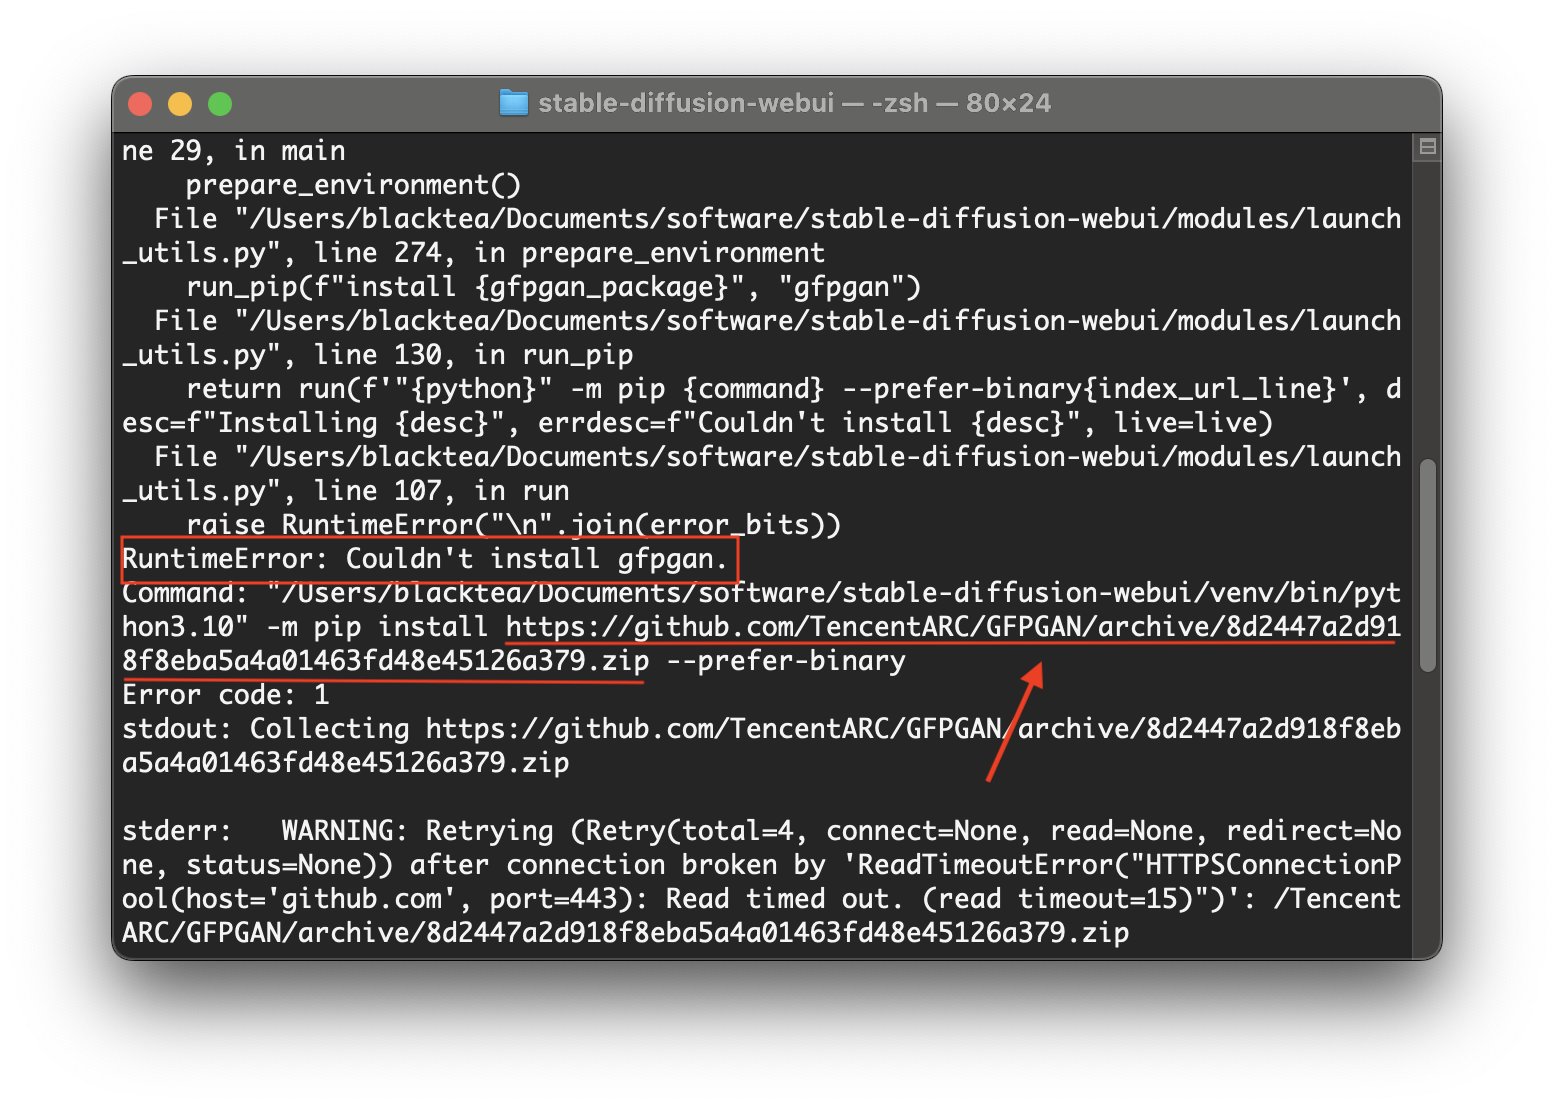
4. Couldn’t install gfpgan.
./webui.shReport "RuntimeError: Couldn't install gfpgan." after execution
In fact, it is because gfpgan has not been downloaded. We can find the download link from the error message, as shown in the horizontal line in the figure below, and then copy the link to the browser to download, then pressurize the downloaded zip file, change the directory name to GFPGAN, and drag it to stable -diffusion-webui This directory is fine. When it is executed again ./webui.sh, it is found that GFPGAN has been crossed, and other dependencies are continued to be downloaded. Perfect solution!

5. Couldn’t install clip.
./webui.shReport "RuntimeError: Couldn't install clip." after execution
It can be downloaded and installed manually, just like solving the "Couldn't install gfpgan" problem. But here we change a solution.
Open modules/launch_utils.py, search for https://github.com/, and add https://ghproxy.com/ in front of each place. After adding, it looks like https://ghproxy.com/https: //github.com/xxxxx, as shown below.
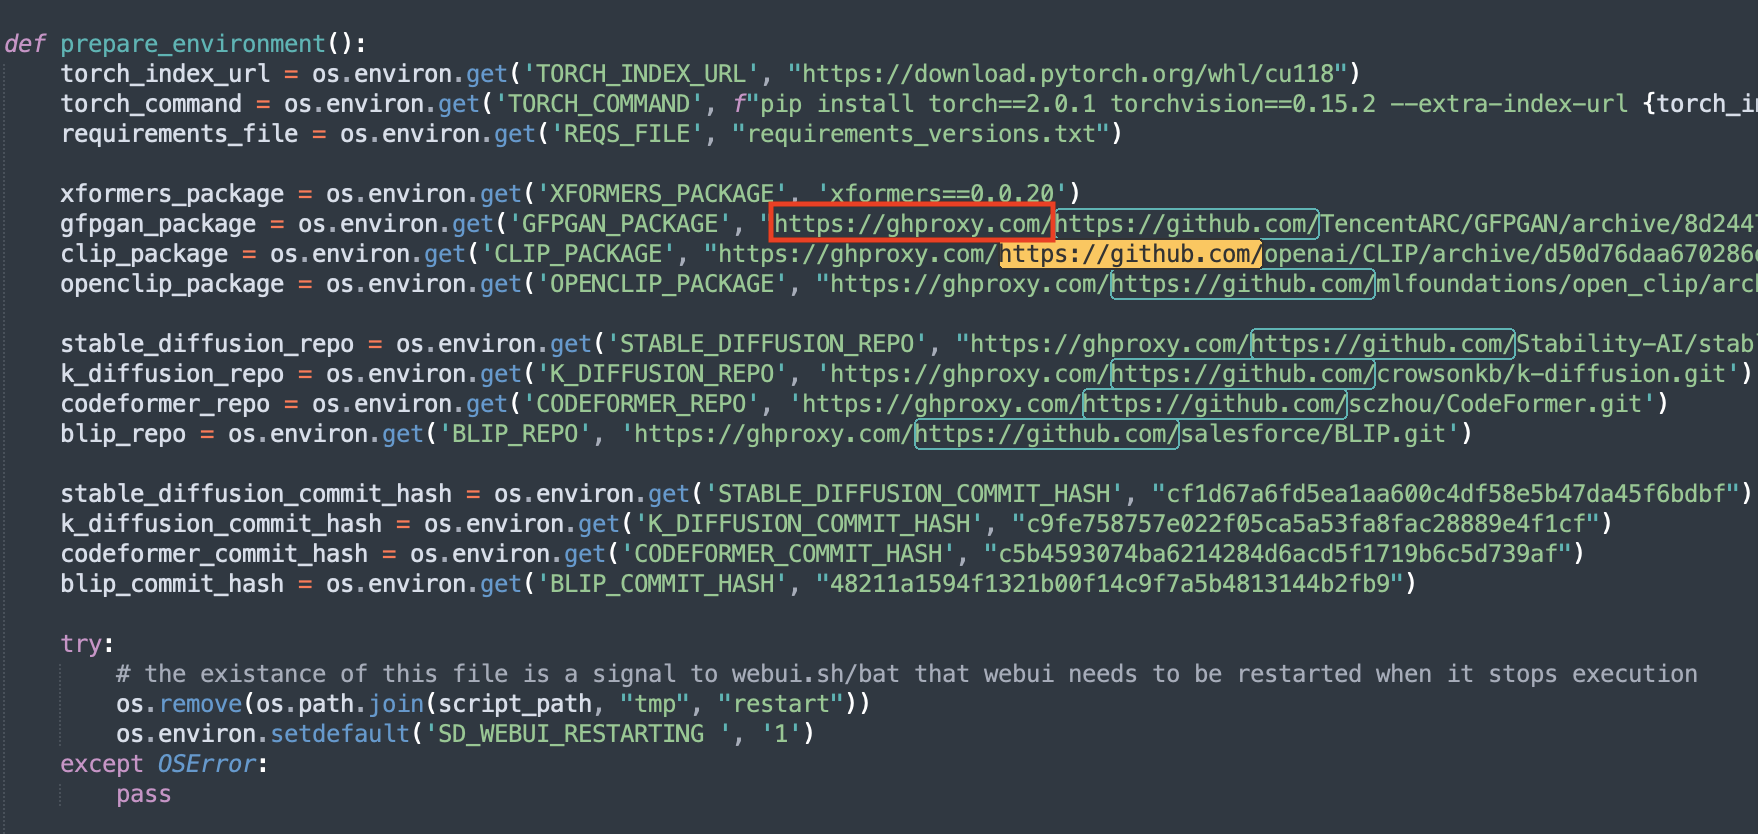
There are 7 places in total, save after modification. Execute again ./webui.sh, there will be no problem.
Why not use the above method to solve the manual download of gfpgan here?
In prepare_environment()this method, a total of 7 download addresses are defined. If you do not need to add a proxy, there is a high probability that an error will be reported when downloading K-diffusion, CodeFormer, and BLIP. So change it here together, and everything will be fine!
This method can also solve the following errors:
Couldn’t install K-diffusion
Couldn’t install CodeFormer
Couldn’t install BLIP
6. Couldn’t install K-diffusion
See 5 for a solution.
7. Couldn’t install CodeFormer
See 5 for a solution.
8. Couldn’t install BLIP
See 5 for a solution.
5. Performance test
Large model: dreamshaper
Euler: Produce a 512 * 512 picture, about 20 ~ 30s
DPM++ SDE Karras: Produce a 512 * 512 picture, about 1 ~ 1.5 min
6. Conclusion
The two biggest advantages of Stable Diffusion local deployment over Stable Diffusion cloud deployment are:
More freedom (know everything)!
No cost, absolutely free!
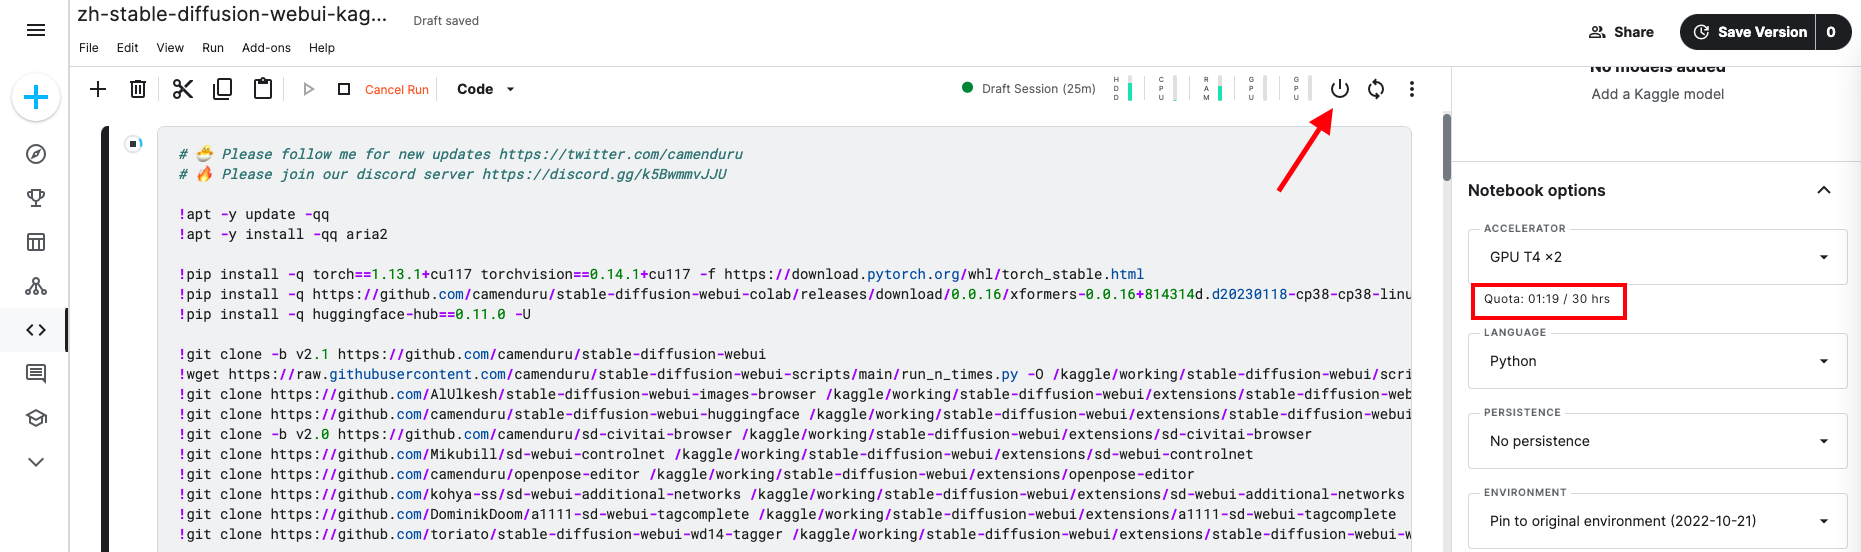
Although Kaggle can prostitute 30 hours of computing power every month, it is too easy to be blocked, and it will be blocked if it draws a little bit. My account was sacrificed.
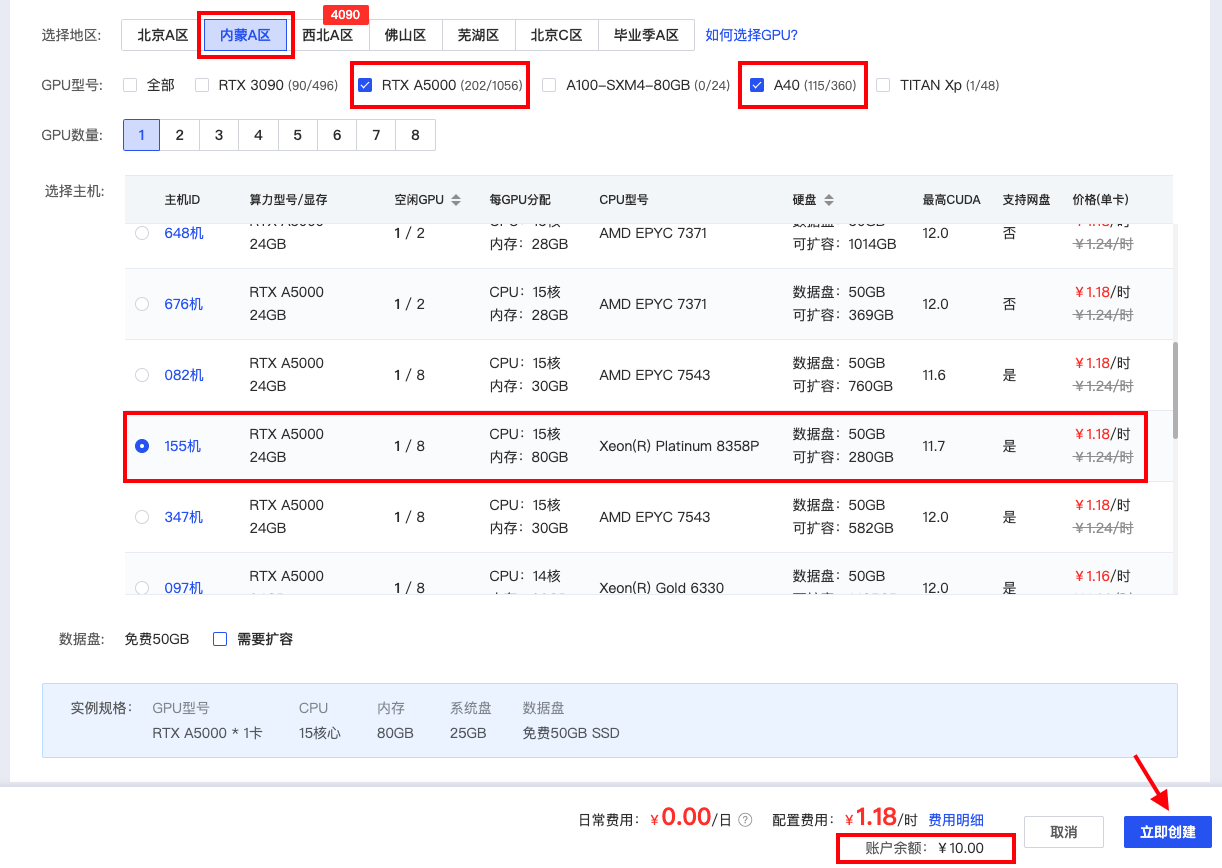
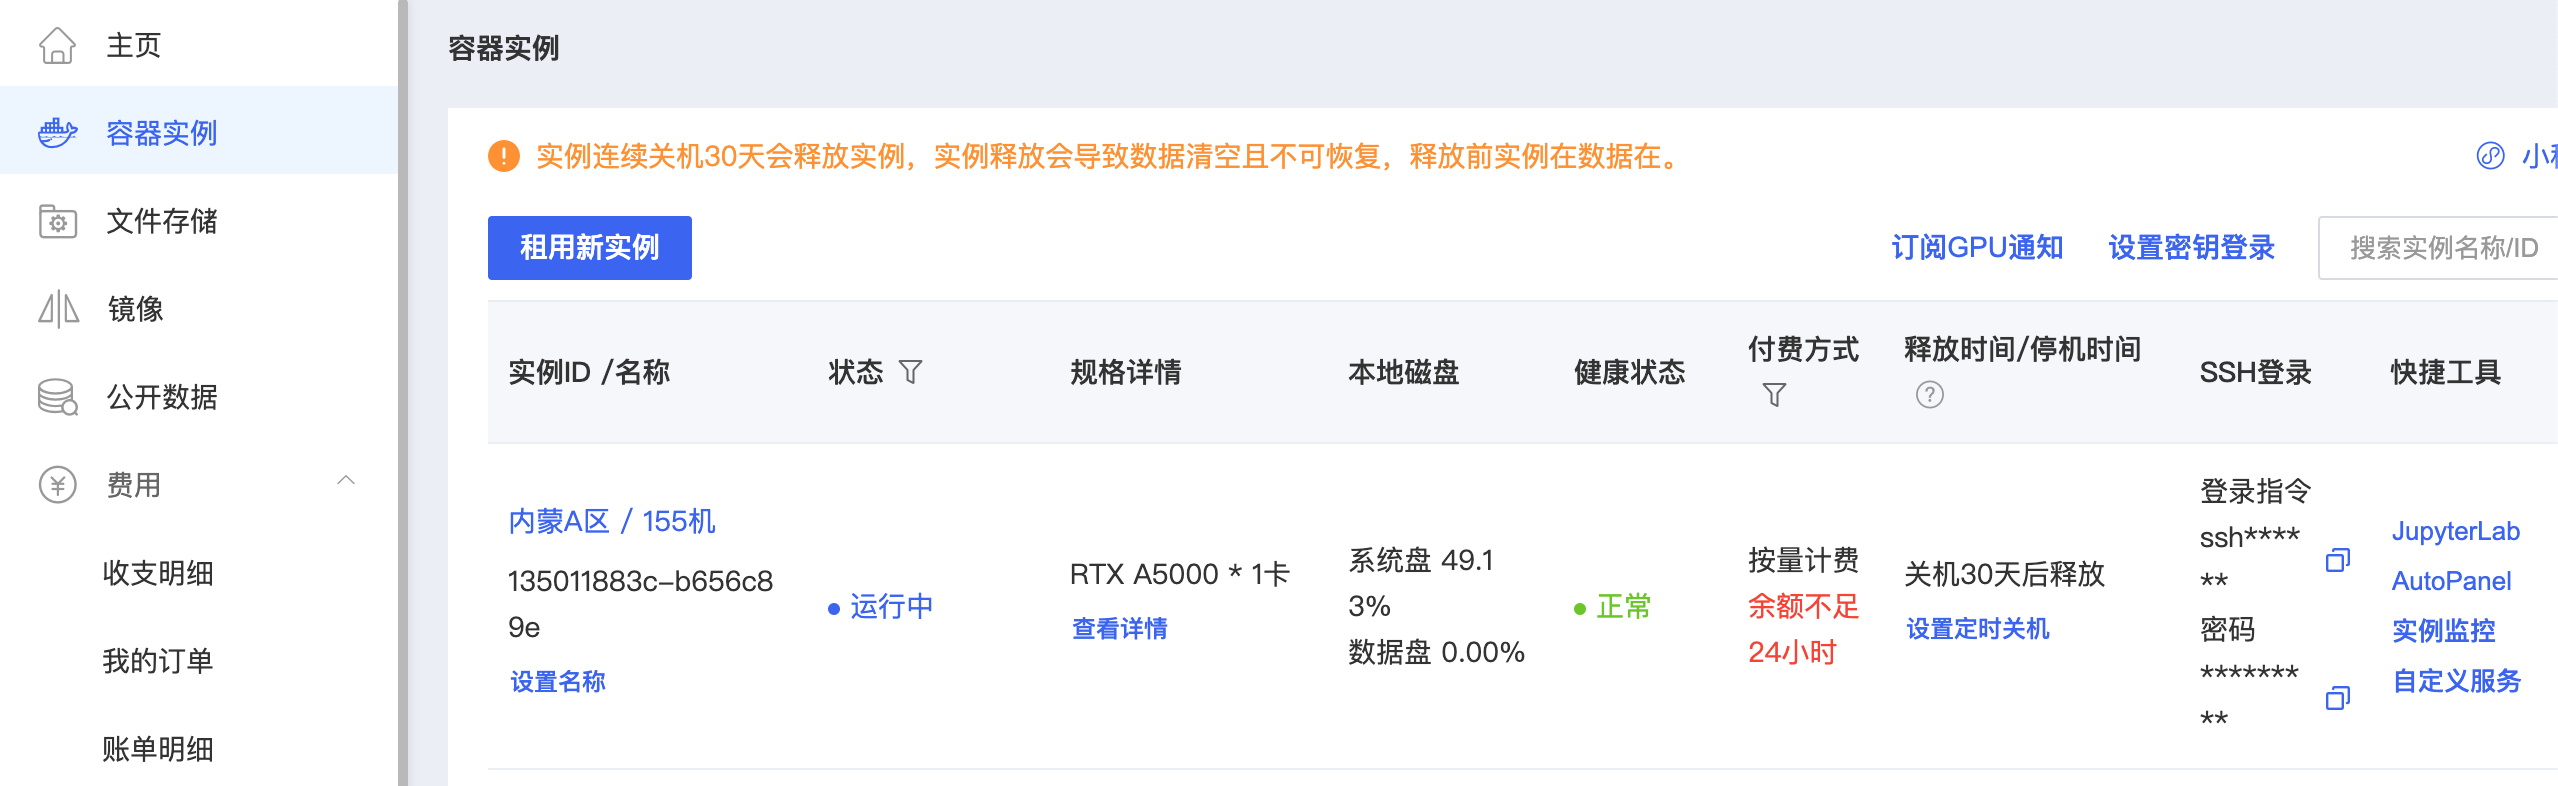
After Kaggle was blocked, he switched to AutoDL. Compared with Kaggle, it is not so easy to be blocked, but it costs money. Most machine instances cost 1 to 2 yuan per hour, which is not expensive, but if you forget to shut down the instance after use, dozens of instances will go out a day. uh, this. . .
So this week, after a fierce operation, I finally successfully deployed Stable Diffusion on Mac and realized the freedom of Stable Diffusion ! All the pits stepped on were also filled and recorded one by one. Hope it can help students who want to deploy Stable Diffusion on Mac.
In fact, most of the problems encountered when deploying Stable Diffusion locally on Mac are basically caused by the network. Everyone's computer configuration and network environment are different, so sometimes you will encounter situations that cannot be solved after trying several solutions. Actually me too. Netizens said that he made this change successfully, but I changed it like that, but it still didn't work.
So the last thing I want to say to everyone is, be patient, be patient, there is always a way, and the problem will always be solved!
Come on, everybody!