Table of contents
1.2 Common GUI programming tools and libraries
1.3 Composition and architecture of GUI applications
2 GUI programming using Tkinter library
2.1 Basic flow of GUI programming using Tkinter library
2.2 GUI programming using Tkinter library
3 Detailed use of Tkinter components
3.1.1 Absolute Layout vs. Auto Layout
3.1.2 Using Grid layout and Pack layout
3.1.3 Grouping components using Frame and LabelFrame
3.2.1 Binding events and callback functions
3.3.1 Get and set the content of the text box
3.3.2 Handling the button click event
3.3.3 Create popup dialogs and message boxes
3.4 Window and interface design
3.4.2 Add menu bar and toolbar
3.4.3 Making a scrollable interface
3.5.1 Drawing basic graphics in GUI
3.5.3 Charting and drawing tools
3.6.2 Using scroll bars and sliders
3.6.3 Creating check boxes, radio buttons, etc.
4 Practice: Create a simple calculator GUI application
Column Guide

Column subscription address: https://blog.csdn.net/qq_35831906/category_12375510.html

1 GUI programming overview
GUI (Graphical User Interface) programming is a technique used to create a graphical user interface that enables a user to interact with a program through graphical elements such as windows, buttons, text boxes, etc.

A GUI (Graphical User Interface) is a way of interacting with a computer program through graphical elements such as windows, buttons, text boxes, images, etc. GUIs enable users to communicate with applications in a visual manner without having to memorize complex commands or syntax. GUI can greatly improve user experience, enabling users to operate applications more intuitively and conveniently.
1.1 Why do you need a GUI?
User-friendliness : GUI makes the application easier to use, no need to remember command line parameters or codes. Users can perform operations intuitively through a graphical interface.
Visualization : Through graphic elements, users can directly see information, data and operation results on the interface, making it easier to understand the functions of the application.
Interactivity : GUI allows users to interact with applications through mouse, keyboard, touch, etc., so as to achieve more kinds of operations.
Increased efficiency : GUI tools provide a simplified interface for complex tasks, allowing users to perform tasks more quickly, thereby increasing productivity.
Cross-platform : Many GUI libraries and tools support multiple operating systems, allowing developers to create similar user experiences across different platforms.
1.2 Common GUI programming tools and libraries :
Tkinter : Python's standard GUI library, suitable for simple GUI applications, easy to learn and use.
Qt : A cross-platform GUI library with rich features and professional appearance, supporting multiple programming languages such as C++ and Python.
wxWidgets : Another cross-platform GUI library that provides a native look and feel for many programming languages.
GTK : An open source GUI toolkit for creating applications under Linux and UNIX systems.
PyQt : Qt bindings for Python, bringing Qt functionality into the Python world, providing advanced features and customization options.
Kivy : A Python library for developing mobile applications and other multi-touch interfaces, supporting multiple platforms.
1.3 Composition and architecture of GUI application :
Window manager : responsible for managing and displaying the windows of the application, including the size, position and appearance of the window.
User interface elements : including buttons, text boxes, labels, menus, toolbars, etc., are used for user-program interaction.
Event processing : Respond to user actions (such as clicking buttons, entering text, etc.) and perform corresponding operations to realize the interaction between users and applications.
Layout management : Arranging and organizing the position and size of interface elements to present a consistent interface across different screen sizes and resolutions.
Graphical drawing and display : Display images, charts, and plots for presenting data and graphics.
Data interaction : Communicate with back-end logic to acquire, process and display data.
Event loop : GUI applications are usually event-driven, which will continuously monitor user operations and system events, and then perform corresponding operations.
Main loop : responsible for monitoring and distributing events, and managing the display and update of windows.
User experience : Provide a good user experience, including user-friendly interface, feedback and error handling.
To sum up, GUI is a technology used to create a graphical user interface, which can significantly improve the interaction and usability between users and applications. Different GUI libraries and tools provide different levels of functionality and flexibility, and you can choose the appropriate GUI development solution according to your project needs.
2 GUI programming using Tkinter library
Tkinter is Python's standard GUI library, which can be used to create windows and various GUI components, such as labels, buttons, text boxes, etc. It is a lightweight and easy-to-use tool suitable for creating small to medium desktop applications.
2.1 Basic flow of GUI programming using Tkinter library
Import the Tkinter library : First, you need to import the Tkinter library. Generally used
import tkinter as tkto simplify calls.Create main window : Use
Tk()the function to create a main window object, which is the main interface of the application.Add GUI components : Add different GUI components, such as Label, Button, Entry, etc., through various classes of Tkinter. Layout components using methods like .pack(), .grid(), etc.
Define event handling functions : If you need to respond to component events, such as button click events, you need to define corresponding event handling functions.
Layout management : use layout managers (such as .pack(), .grid(), .place()) to arrange and place components to ensure that the interface is neatly laid out.
Start the main loop : Use the .mainloop() method to start the main loop of the GUI application, keeping the application running and waiting for user operations.
2.2 GUI programming using Tkinter library
2.2.1 Import Tkinter library
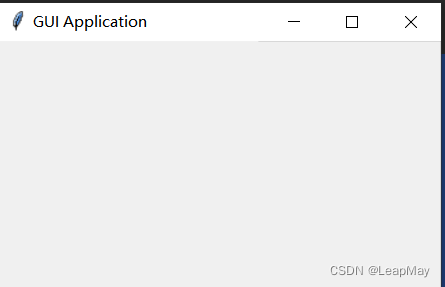
First, import the Tkinter library and create the main window object.
import tkinter as tk

# 创建主窗口
root = tk.Tk()
root.title("GUI Application")


root.mainloop()  #启动主循环
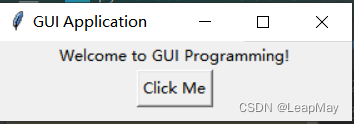
2.2.2 Add labels and buttons
Use the Label and Button classes to add label and button components.
# 添加标签
label = tk.Label(root, text="Welcome to GUI Programming!")
label.pack()

# 添加按钮
def button_clicked():
    label.config(text="Button Clicked!")

button = tk.Button(root, text="Click Me", command=button_clicked)
button.pack()
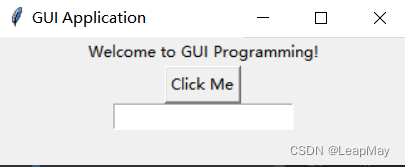
2.2.3 Add text box
Use the Entry class to add text boxes.
# 添加文本框
entry = tk.Entry(root)
entry.pack()
2.2.4 Layout Management
Use the pack() method to lay out components.
label.pack()
button.pack()
entry.pack()
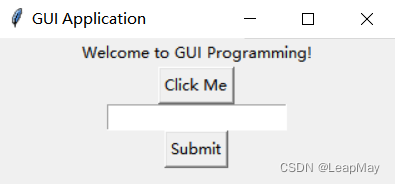
2.2.5 Event Handling
Define the callback function for the button click event.
def button_clicked():
    label.config(text="Hello, " + entry.get())

button = tk.Button(root, text="Submit", command=button_clicked)
button.pack()

2.2.6 Start the main loop
Start the main loop of the GUI through the mainloop() method.
root.mainloop()
3 Detailed use of Tkinter components
3.1 Layout Management
3.1.1 Absolute Layout vs. Auto Layout
Absolute layout refers to precisely positioning the position of each component through pixel coordinates. However, absolute layout can cause instability and misalignment of the interface as the window size changes, so it is not recommended in most cases. Automatic layout uses layout managers to automatically adjust and arrange components to adapt to changes in window size, making the interface more responsive and adaptable.
3.1.2 Using Grid layout and Pack layout
Tkinter provides two common layout managers: .grid()and .pack(). .grid()Layout components using rows and columns, .pack()automatically arrange components in the order they were added.
import tkinter as tk

root = tk.Tk()
root.title("Layout Example")

# 使用Grid布局
label1 = tk.Label(root, text="Label 1")
label2 = tk.Label(root, text="Label 2")
label1.grid(row=0, column=0)
label2.grid(row=1, column=1)

# 使用Pack布局
button1 = tk.Button(root, text="Button 1")
button2 = tk.Button(root, text="Button 2")
button1.pack()
button2.pack()

root.mainloop()
3.1.3 Grouping components using Frame and LabelFrame
Frame and LabelFrame are container components in Tkinter that can be used to group and organize other components.
frame = tk.Frame(root)
frame.pack()

label_frame = tk.LabelFrame(root, text="Group")
label_frame.pack()
3.2 Event Handling
Event processing is an important concept in GUI programming, which involves the interaction between the user and the interface, such as mouse click, button click, keyboard input, etc. The following are detailed explanations and examples of event handling to help you understand how to handle different types of events in Tkinter.
In GUI programming, user operations and actions will trigger different events, and the program will respond to these events through event processing functions. Events can be mouse clicks, keystrokes, window closes, etc.
3.2.1 Binding events and callback functions
In Tkinter, you can use .bind()methods to bind events and corresponding callback functions together. When an event occurs, the function bound to it will be called.
import tkinter as tk

def button_clicked(event):
    label.config(text="Button Clicked!")

root = tk.Tk()
root.title("Event Handling Example")

label = tk.Label(root, text="Click the Button")
label.pack()

button = tk.Button(root, text="Click Me")
button.bind("<Button-1>", button_clicked)  # 绑定鼠标左键点击事件
button.pack()

root.mainloop()
In this example, when the button is left-clicked, button_clicked()the function is called, updating the content of the label.
3.2.2 Common events
In addition to button click events, there are many other common events, such as mouse events and keyboard events. You can bind these events using different event descriptors.
def mouse_enter(event):
    label.config(text="Mouse Entered!")

def key_pressed(event):
    label.config(text="Key Pressed: " + event.char)

label.bind("<Enter>", mouse_enter)  # 鼠标进入事件
label.bind("<KeyPress>", key_pressed)  # 键盘按键事件
In this example, when the mouse enters the label area, mouse_enter()the function is called; when the keyboard is pressed, key_pressed()the function is called, and the pressed key is displayed.
3.2.3 Event object
When an event occurs, an event object is automatically created, which can be used in the event handler to obtain information about the event.
def mouse_clicked(event):
    x = event.x  # 获取鼠标点击位置的x坐标
    y = event.y  # 获取鼠标点击位置的y坐标
    label.config(text=f"Mouse Clicked at ({x}, {y})")

label.bind("<Button-1>", mouse_clicked)  # 鼠标左键点击事件
In this example, when the left mouse button is clicked, mouse_clicked()the function is called and the coordinates of the mouse click are displayed.
By understanding the basic concepts of event handling, binding different events, and using event objects, you can add more interactivity and responsiveness to GUI applications, making the interaction between users and the interface more rich and real-time.
3.3 User Input and Output
3.3.1 Get and set the content of the text box
You can use .get()the and .insert()methods to get and set the content of the text box.
entry = tk.Entry(root)
entry.pack()
text = entry.get()  # 获取文本框内容
entry.insert(0, "Hello")  # 在光标处插入文本
3.3.2 Handling the button click event
The processing of the button click event can be realized by binding the callback function.
import tkinter as tk

def button_clicked():
    label.config(text="Button Clicked!")

root = tk.Tk()
root.title("Button Click Event Example")

label = tk.Label(root, text="Click the Button")
label.pack()

button = tk.Button(root, text="Click Me", command=button_clicked)  # 绑定回调函数
button.pack()

root.mainloop()
In this example, we create a button (
button) and bind a function as the button's callback function viacommanda parameter .button_clickedWhen the button is clicked,button_clickedthe function is automatically called, updating the content of the label.This way decouples the operation and function of the button from the callback function, making the code more modular and clear. Various operations can be performed in the callback function, such as updating the interface, performing calculations, displaying information, and so on.
3.3.3 Create popup dialogs and message boxes
Tkinter provides tkinter.messageboxmodules for creating various dialog boxes and message boxes.
import tkinter.messagebox as messagebox

def show_alert():
    messagebox.showinfo("Alert", "This is an alert message!")

button = tk.Button(root, text="Show Alert", command=show_alert)
button.pack()
3.4 Window and interface design
3.4.1 Create multiple windows
In Tkinter, you can create multiple windows by creating new Tk objects. Each Tk object represents an application window. Here is an example showing how to create multiple windows:
import tkinter as tk

# 创建第一个窗口
root1 = tk.Tk()
root1.title("Window 1")
label1 = tk.Label(root1, text="Window 1")
label1.pack()

# 创建第二个窗口
root2 = tk.Tk()
root2.title("Window 2")
label2 = tk.Label(root2, text="Window 2")
label2.pack()

root1.mainloop()
root2.mainloop()
In this example, we create two different Tk objects ( root1and root2), each representing a window. mainloop()Enables two windows to operate independently by calling their respective methods.
3.4.2 Add menu bar and toolbar
Tkinter supports the creation of menu bars and toolbars to enhance the functionality of GUI applications. Here is an example showing how to create a simple menu bar:
import tkinter as tk
from tkinter import Menu

def do_something():
    label.config(text="Menu Item Clicked")

root = tk.Tk()
root.title("Menu Example")

# 创建菜单栏
menu_bar = Menu(root)
root.config(menu=menu_bar)

# 创建菜单
file_menu = Menu(menu_bar, tearoff=0)
menu_bar.add_cascade(label="File", menu=file_menu)
file_menu.add_command(label="New", command=do_something)
file_menu.add_command(label="Open", command=do_something)
file_menu.add_separator()
file_menu.add_command(label="Exit", command=root.quit)

# 添加标签
label = tk.Label(root, text="Menu Example")
label.pack()

root.mainloop()
In this example, we create a menu bar ( menu_bar) and add a menu called "File" to the menu bar ( file_menu). The menu contains some menu items, each menu item has a corresponding command ( command), and when the menu item is clicked, the corresponding function will be triggered.
By creating multiple windows and adding menu bars, you can implement more complex and feature-rich GUI applications that allow users to easily operate and interact.
3.4.3 Making a scrollable interface
In Tkinter, you can implement a scrollable interface by using scrollbars (Scrollbar), especially when the content exceeds the visible area. Here is an example showing how to create a scrollable interface in a Tkinter application:
import tkinter as tk
from tkinter import ttk

root = tk.Tk()
root.title("Scrollable Interface Example")

# 创建滚动条
scrollbar = tk.Scrollbar(root)
scrollbar.pack(side="right", fill="y")

# 创建文本框并绑定滚动条
text = tk.Text(root, yscrollcommand=scrollbar.set)
text.pack(side="left", fill="both", expand=True)

# 将滚动条与文本框关联
scrollbar.config(command=text.yview)

# 添加大量文本
for i in range(100):
    text.insert("end", f"Line {i}\n")

root.mainloop()
In this example, we create a textbox (
text) and associate a vertical scrollbar (scrollbar) to scroll when the text content exceeds the visible area of the textbox. By setting the parameter of the scroll barcommandtotext.yview, the linkage between the scroll bar and the text box is realized.You can add different types of components to the scrollable interface as needed, enabling users to browse and view large amounts of content without taking up too much space on the interface.
3.5 Graphics and Images
3.5.1 Drawing basic graphics in GUI
Components can be used Canvasto draw graphics in the GUI.
canvas = tk.Canvas(root, width=200, height=200)
canvas.pack()
canvas.create_rectangle(50, 50, 150, 150, fill="blue")
3.5.2 Display image files
A library can be used PILto display image files in Tkinter.
from PIL import Image, ImageTk

image = Image.open("image.png")
photo = ImageTk.PhotoImage(image)
label = tk.Label(root, image=photo)
label.pack()
3.5.3 Charting and drawing tools
In GUI applications, charts, graphs, and data visualizations can be created by using drawing tools. Tkinter itself does not have built-in powerful drawing tools, but you can combine other libraries to achieve drawing and charting functions. Some commonly used drawing libraries and examples are introduced below.
- Matplotlib: is a widely used plotting library for creating various types of charts and graphs in Python. It provides a wealth of drawing functions, including line graphs, scatter plots, histograms, pie charts, etc. You can use Matplotlib to embed a drawing area in a Tkinter application to display charts in a GUI interface.
- Plotly : for creating interactive charts and visualizations.
- Seaborn : Based on Matplotlib, used to create statistical charts and data visualization.
- Pillow : for image processing and drawing.
You can choose a suitable drawing tool according to project requirements, and embed charts and visualizations into Tkinter applications to achieve data display and interactive data analysis.
3.6 Interactive elements
3.6.1 Making tables and lists
Components can be used Treeviewto make tables and lists.
tree = ttk.Treeview(root, columns=("Name", "Age"))
tree.heading("#1", text="Name")
tree.heading("#2", text="Age")
tree.insert("", "end", values=("Alice", 25))
tree.pack()
3.6.2 Using scroll bars and sliders
Scrollbars and sliders can Scrollbarbe added via components.
scrollbar = tk.Scrollbar(root)
scrollbar.pack(side="right", fill="y")

listbox = tk.Listbox(root, yscrollcommand=scrollbar.set)
for i in range(50):
    listbox.insert("end", "Item " + str(i))
listbox.pack(side="left", fill="both")

scrollbar.config(command=listbox.yview)
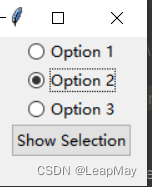
3.6.3 Creating check boxes, radio buttons, etc.
Checkboxes and radio buttons can be created using Checkbuttonand Radiobutton.
check_var = tk.IntVar()
checkbox = tk.Checkbutton(root, text="Check me", variable=check_var)
checkbox.pack()

radio_var = tk.StringVar()
radio_button1 = tk.Radiobutton(root, text="Option 1", variable=radio_var, value="option1")
radio_button2 = tk.Radiobutton(root, text="Option 2", variable=radio_var, value="option2")
radio_button1.pack()
radio_button2.pack()
In Tkinter, you can select options through components such as checkboxes (Checkbutton) and radio buttons (Radiobutton). Here is sample code that demonstrates how to create checkboxes and radio buttons:
Create checkbox example:
import tkinter as tk
from tkinter import ttk

def show_selection():
    selected_items = []
    for var, text in zip(check_vars, check_texts):
        if var.get():
            selected_items.append(text)
    selection_label.config(text="Selected Items: " + ", ".join(selected_items))

root = tk.Tk()
root.title("Checkboxes Example")

check_texts = ["Option 1", "Option 2", "Option 3"]
check_vars = [tk.IntVar() for _ in check_texts]

for i, text in enumerate(check_texts):
    check = ttk.Checkbutton(root, text=text, variable=check_vars[i])
    check.pack()

selection_button = ttk.Button(root, text="Show Selection", command=show_selection)
selection_button.pack()

selection_label = tk.Label(root, text="")
selection_label.pack()

root.mainloop()


In this example, we create three checkboxes (
check) andIntVarbind the state of the checkboxes using When the user checks or unchecks a checkbox, the correspondingIntVarvalue changes. By iterating over allIntVar, we can get the options selected by the user.
Example of creating radio buttons:
import tkinter as tk
from tkinter import ttk

def show_selection():
    selected_item = radio_var.get()
    selection_label.config(text="Selected Item: " + selected_item)

root = tk.Tk()
root.title("Radiobuttons Example")

radio_texts = ["Option 1", "Option 2", "Option 3"]
radio_var = tk.StringVar()

for text in radio_texts:
    radio = ttk.Radiobutton(root, text=text, variable=radio_var, value=text)
    radio.pack()

selection_button = ttk.Button(root, text="Show Selection", command=show_selection)
selection_button.pack()

selection_label = tk.Label(root, text="")
selection_label.pack()

root.mainloop()

4 Practice: Create a simple calculator GUI application
Here is a sample code to create a simple calculator GUI application using Tkinter:
import tkinter as tk

# 定义按钮点击事件
def button_click(number):
    current = entry.get()
    entry.delete(0, tk.END)
    entry.insert(0, current + str(number))

def clear():
    entry.delete(0, tk.END)

def calculate():
    try:
        result = eval(entry.get())
        entry.delete(0, tk.END)
        entry.insert(0, str(result))
    except:
        entry.delete(0, tk.END)
        entry.insert(0, "Error")

# 创建主窗口
root = tk.Tk()
root.title("Simple Calculator")

# 创建文本框
entry = tk.Entry(root, font=("Helvetica", 16))
entry.grid(row=0, column=0, columnspan=4)

# 创建按钮
buttons = [
    ("7", 1, 0), ("8", 1, 1), ("9", 1, 2), ("/", 1, 3),
    ("4", 2, 0), ("5", 2, 1), ("6", 2, 2), ("*", 2, 3),
    ("1", 3, 0), ("2", 3, 1), ("3", 3, 2), ("-", 3, 3),
    ("0", 4, 0), (".", 4, 1), ("=", 4, 2), ("+", 4, 3),
]

for (text, row, col) in buttons:
    button = tk.Button(root, text=text, font=("Helvetica", 16), command=lambda t=text: button_click(t))
    button.grid(row=row, column=col, sticky="nsew")

# 清除按钮和等号按钮单独处理
clear_button = tk.Button(root, text="C", font=("Helvetica", 16), command=clear)
clear_button.grid(row=5, column=0, columnspan=2, sticky="nsew")

equal_button = tk.Button(root, text="=", font=("Helvetica", 16), command=calculate)
equal_button.grid(row=5, column=2, columnspan=2, sticky="nsew")

# 设置网格布局权重
for row in range(5):
    root.grid_rowconfigure(row, weight=1)
for col in range(4):
    root.grid_columnconfigure(col, weight=1)

# 启动主循环
root.mainloop()
The output is as follows:
