1. Configure the OpenHarmony development environment
1.1 Software requirements
1) Download and install DevEco Studio 2.1 Release and above, download link: https://developer.harmonyos.com/cn/develop/deveco-studio#download
2) Obtain and decompress the OpenHarmony SDK package, download link: https://mirror.iscas.ac.cn/OpenHarmony/sdk/OpenHarmony-SDK-2.0-Canary.7z
1.2 Configure the OpenHarmony SDK
On the DevEco main interface, click File> Settings > Appearance & Behavior > System Settings > HarmonyOS SDK interface in the toolbar, click HarmonyOS SDK Location to load the SDK, as shown in Figures 1.2.1, 1.2.2, 1.2.3, and 1.2.4 Show:
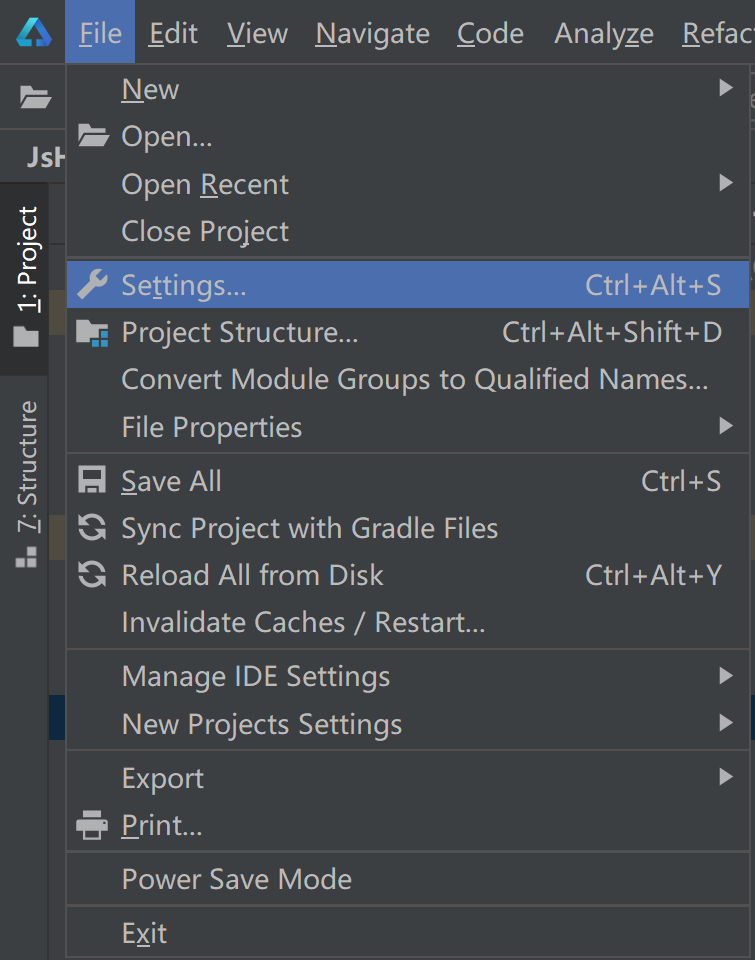
Figure 1.2.1
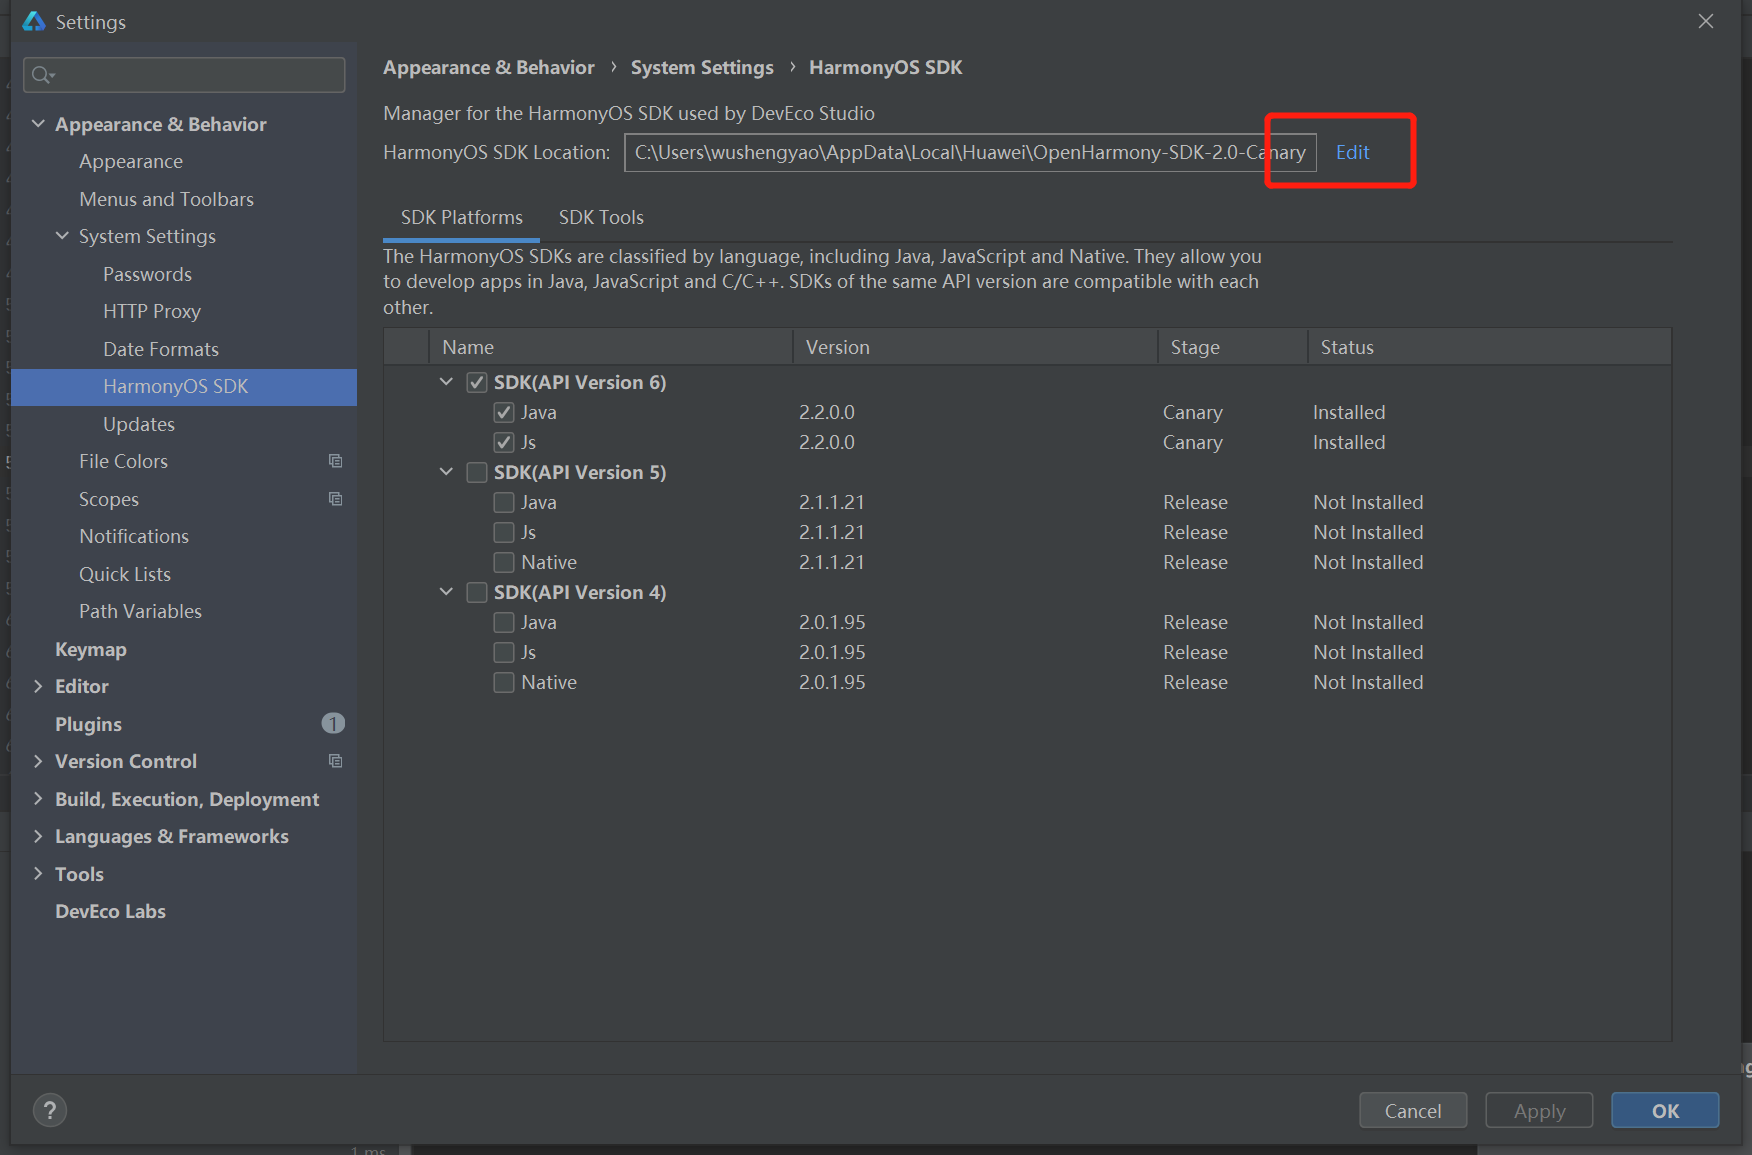
Figure 1.2.2
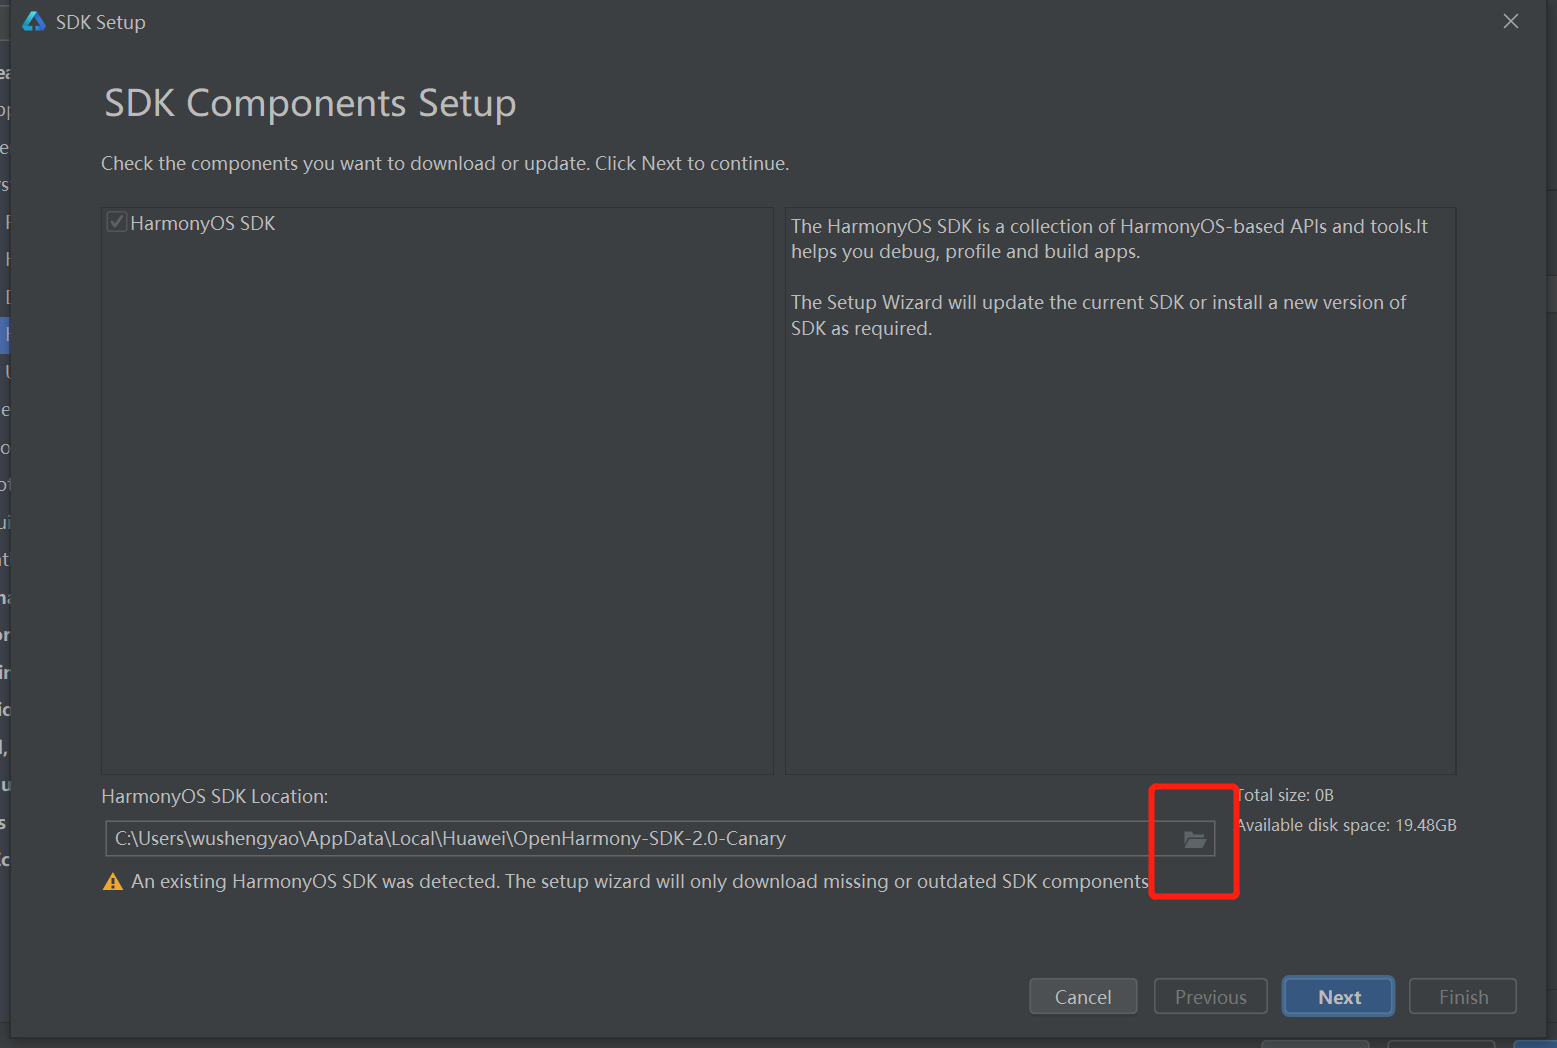
Figure 1.2.3
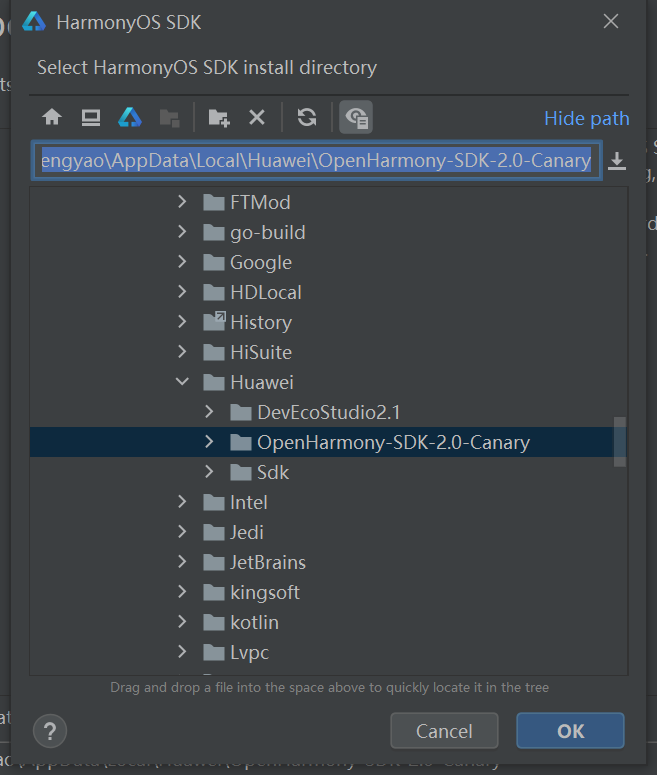
Figure 1.2.4
After that, click Next and Finish all the way to complete the configuration.
1.3 Install additional packages
Enter the OpenHarmony-SDK-2.0-Canary\js\2.2.0.0\build-tools\ace-loader directory, then run the command line tool in this directory, and execute the following commands until the installation is complete, as shown in Figure 1.3.1 Show:
npm cache clean -f

npm install
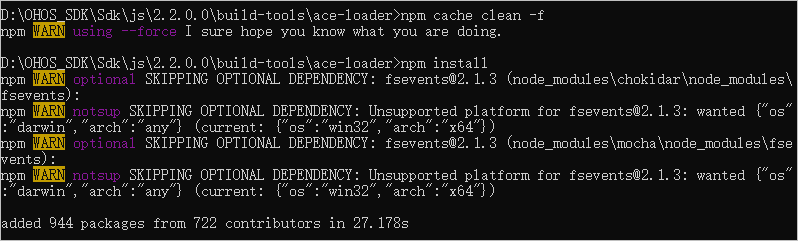
Figure 1.3.1
So far, the OpenHarmony development environment configuration is complete.
2. Create and open the OpenHarmony JS project
2.1 Use DevEco2.1 Release version
The 2.1 version of DevEco is aimed at OpenHarmony application development. You can only create a new project by importing the Sample project. Currently, for the Sample project that supports OpenHarmony application development, please choose to import the sample project that contains **“This sample is intended for novices at developing OpenHarmony applications."**Described Sample, for example, select JsHelloWorld in the common category. As shown in Figure 2.1.1 and 2.1.2:
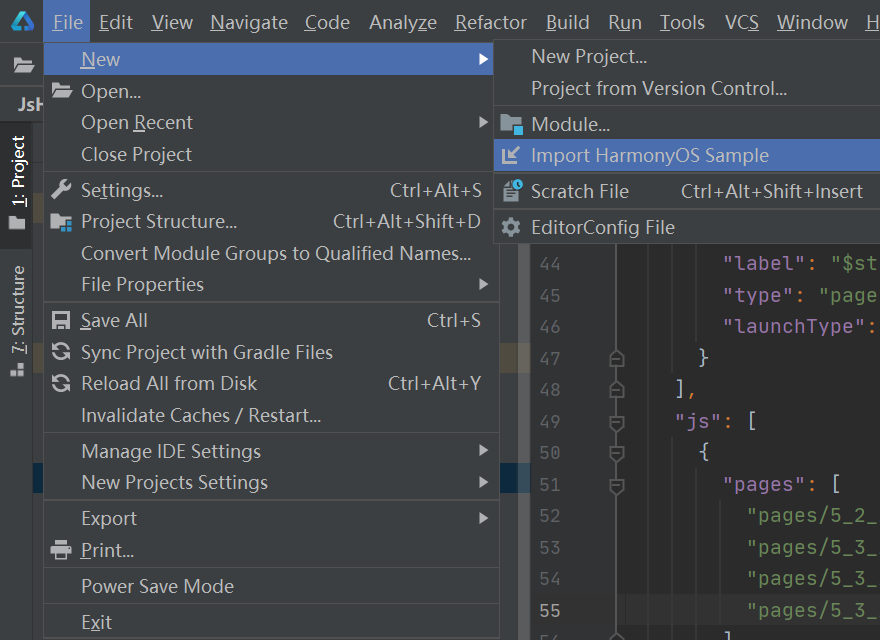
Figure 2.1.1
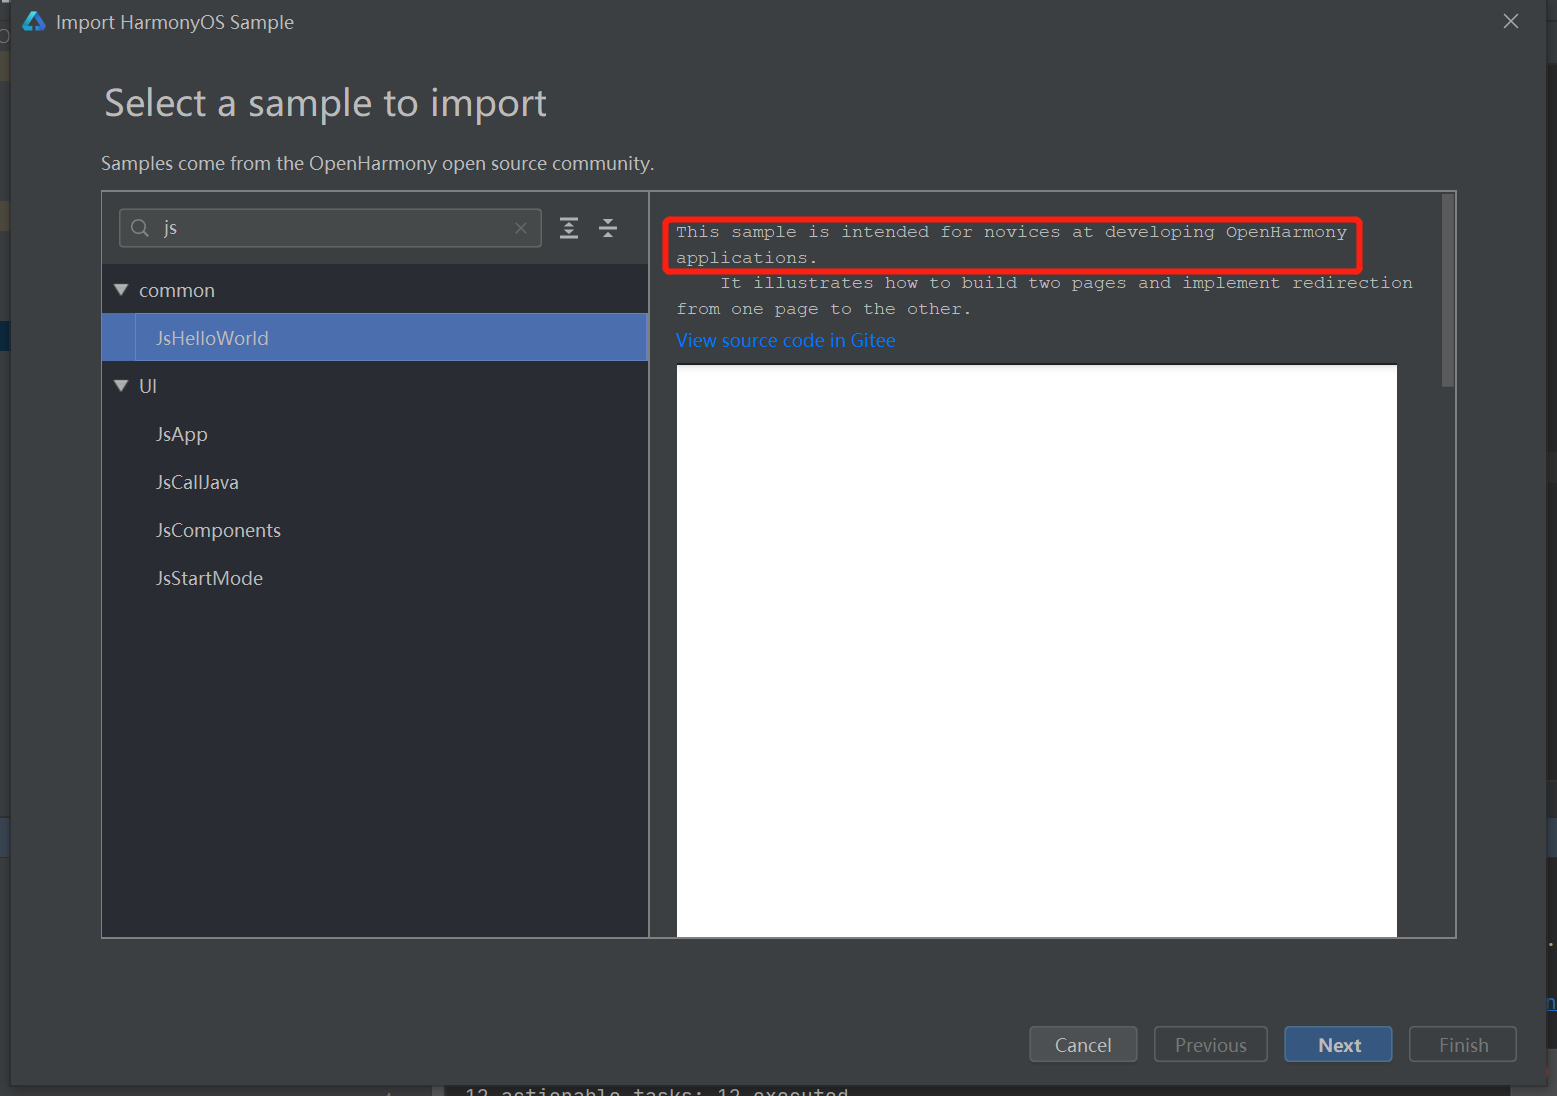
Figure 2.1.2
After the Sample is imported, please open the build.gradle under the project, and modify the version number of the hap plugin to **"2.4.4.3-RC"**, as shown in Figure 2.1.3:
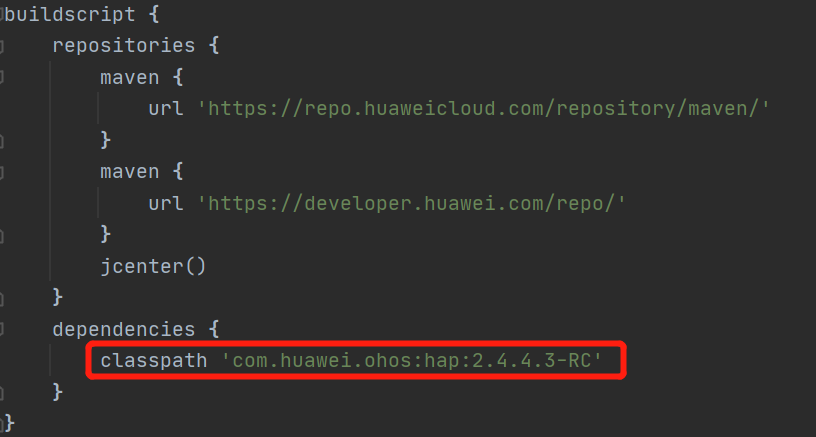
Figure 2.1.3
Finally execute gradle sync and wait for the synchronization to complete. After successful synchronization, you can start OpenHarmony application development.
2.2 Use DevEco2.2 beta version
In DevEco version 2.2, you can select File > New > New Project in the menu bar to create an OpenHarmony project, which is consistent with the creation method of HarmonyOS projects.
3. Configure the signing certificate and compile
After completing the application development, it needs to be compiled and packaged as Hap before it can be installed on the OpenHarmony development board. And Hap without a certificate cannot be installed on the OpenHarmony development board, so you need to configure the certificate first before packaging the Hap.
3.1 Apply for a certificate
The certificates of OpenHarmony and HarmonyOS are not common, so an additional application is required. For the specific application process, please refer to: https://gitee.com/openharmony/docs/blob/master/zh-cn/application-dev/quick-start/% E9%85%8D%E7%BD%AEOpenHarmony%E5%BA%94%E7%94%A8%E7%AD%BE%E5%90%8D%E4%BF%A1%E6%81%AF.md
3.2 Configure certificate
The certificate configuration method of OpenHarmony and HarmonyOS is the same, you can also refer to: https://gitee.com/openharmony/docs/blob/master/zh-cn/application-dev/quick-start/%E9%85%8D% E7%BD%AEOpenHarmony%E5%BA%94%E7%94%A8%E7%AD%BE%E5%90%8D%E4%BF%A1%E6%81%AF.md
3.3 compile
After configuring the certificate, you can compile it. The compilation method of OpenHarmony and HarmonyOS applications is the same. Click Build->Build Hap(s)/APP(s)->Build Hap(s) on the toolbar , as shown in Figure 3.3.1:
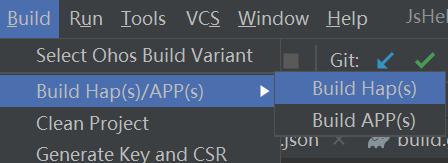
Figure 3.3.1
Wait for the project to be compiled. Figure 3.3.2 shows the successful compilation:
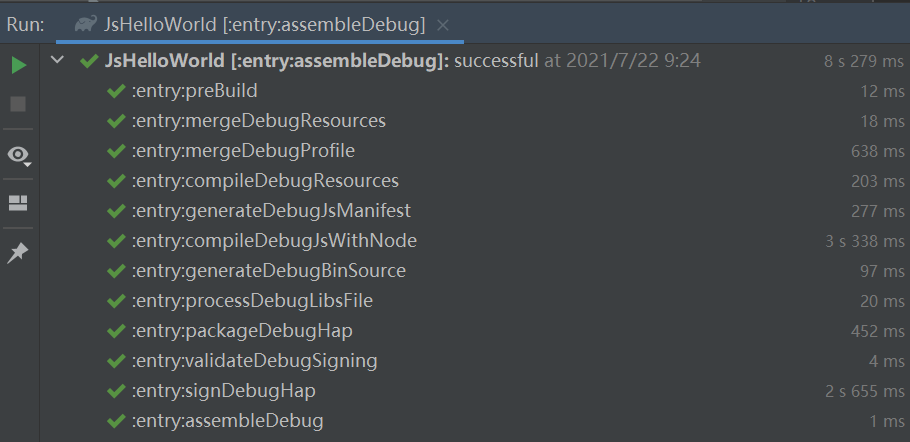
Figure 3.3.2
Find XXXXXX-signed.hap in the build directory of the project file . This is the Hap package that can be installed on the development board, as shown in Figure 3.3.3.
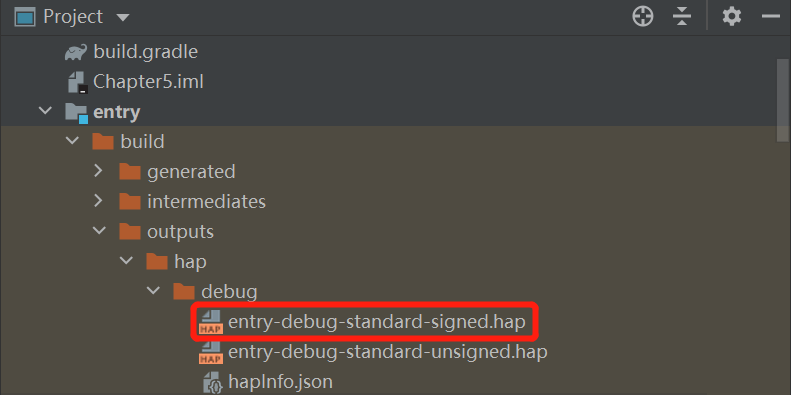
Figure 3.3.3
4. Push to the development board/device
4.1 Download the hdc_std tool
Different from the hdc tool used by HarmonyOS devices, OpenHarmony needs hdc_std as a debugging tool, hdc-std download link: developtools_hdc_standard: Device debug connector that provides the device connection capability and a command line tool | Device debug connector, which provides the ability to connect devices , and provides an external command line tool
4.2 Configure environment variables (Windows)
Add hdc_std.exe to the environment variables of the system. Enter **"hdc_std -h"** in cmd to verify whether the environment variable is added successfully.
4.2 Install Hap using hdc_std
After connecting the development board with usb, use **"hdc_std install <file_path>"** to install Hap compiled in Section 3.3, as shown in Figure 4.2.1:

Figure 4.2.1
Five, run
Taking the Hi3516DV300 development board as an example, click the application icon on the development board screen to open the application.