Ultra-simple front-end static resource server deployment--nginx
-
- illustrate
- premise
- Step 1: Connect to the server
- Step 2: Install Nginx
- Step 3: Test
- Step 4: Deploy other projects
- Some notes on Nginx.conf configuration
-
- 1. The difference between front-end routing hash and history deployment
-
- Routing function:
- Hash mode and history mode realize functions:
- hash mode - url with #
- History mode - without # after the url
- Deployment requirements
- After packaging in hash mode, deploy it on nginx
- Remarks (the following are some records of problems encountered)
- Use the history method to package (commonly speaking, your URL does not have # after it)
- 2. The nginx proxy cannot upload files larger than 1M
- 3.location matching rules
- epilogue
illustrate
- This article aims to use the simplest and fastest method to solve the deployment requirements of front-end static resources.
- The company usually uses tomcat to deploy a lot of static resources. I bought a server in March this year. I have been busy working overtime and haven't started using it. I just used it today:
premise
You need to have a server~~
After purchasing, open it like this below
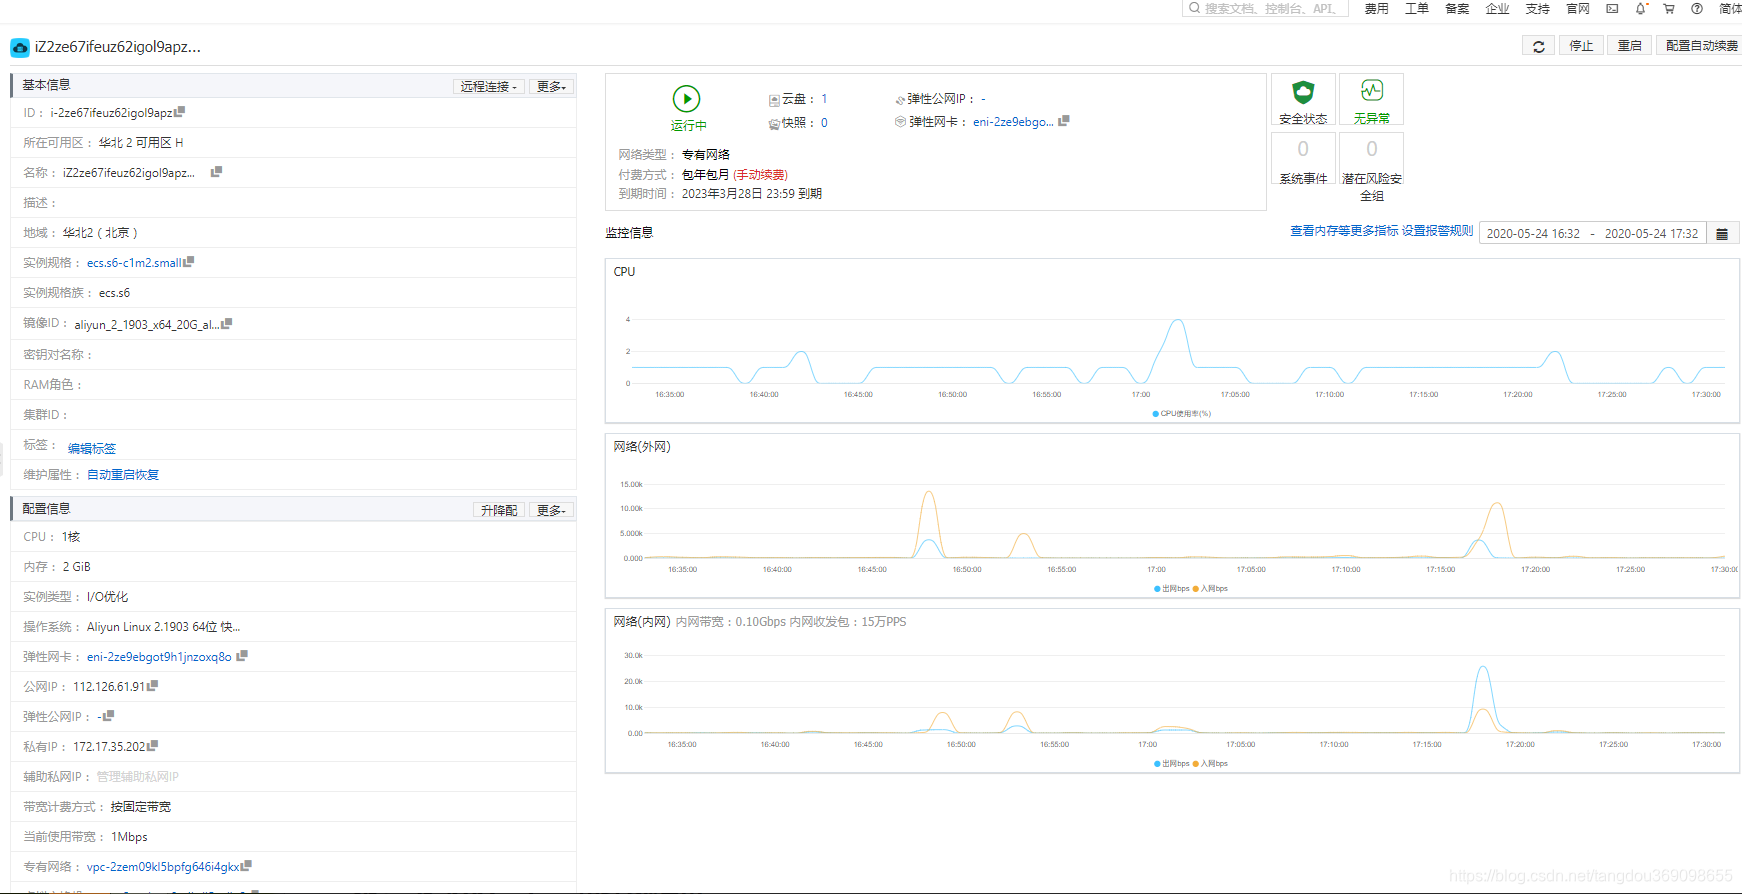
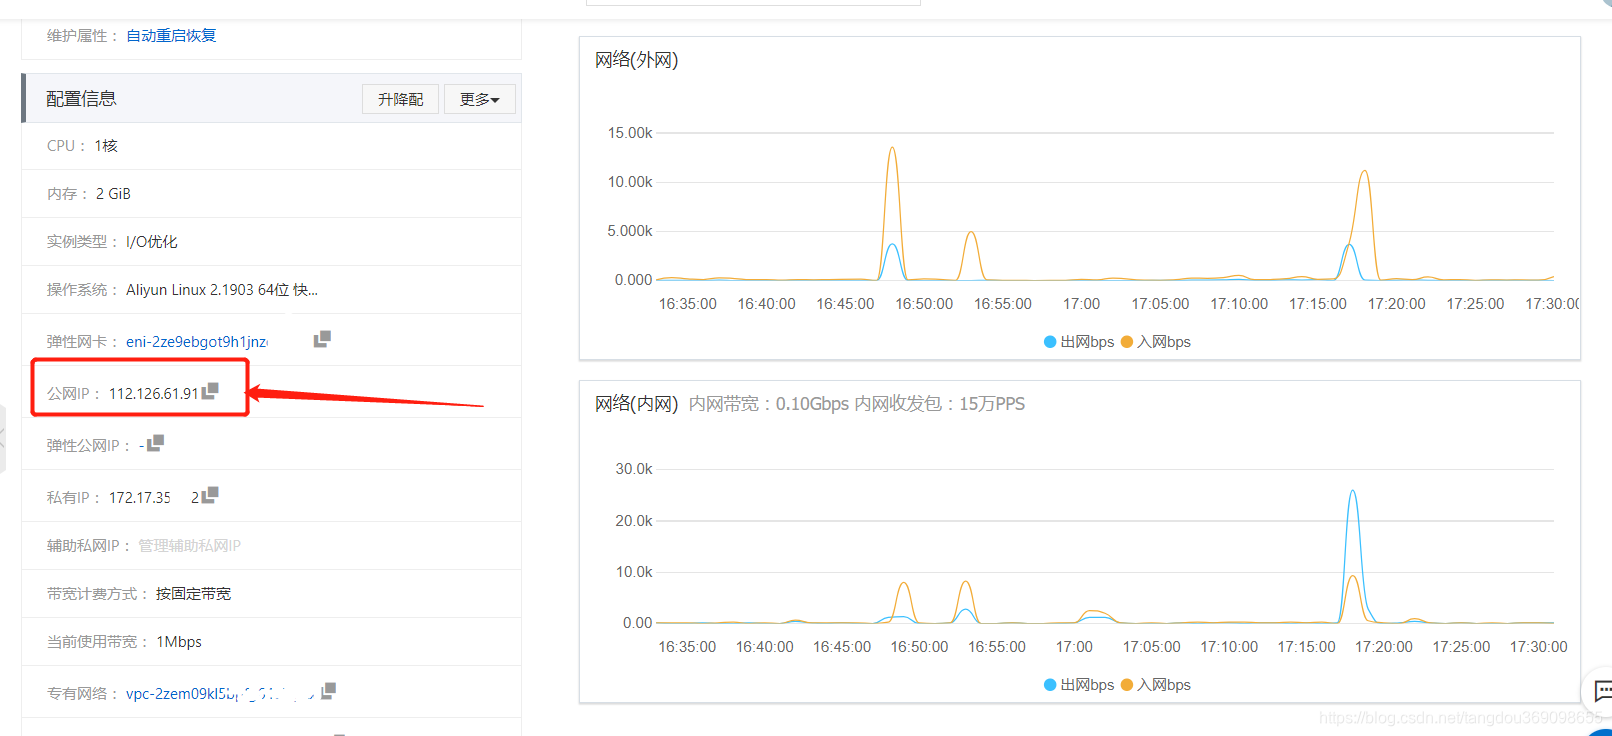
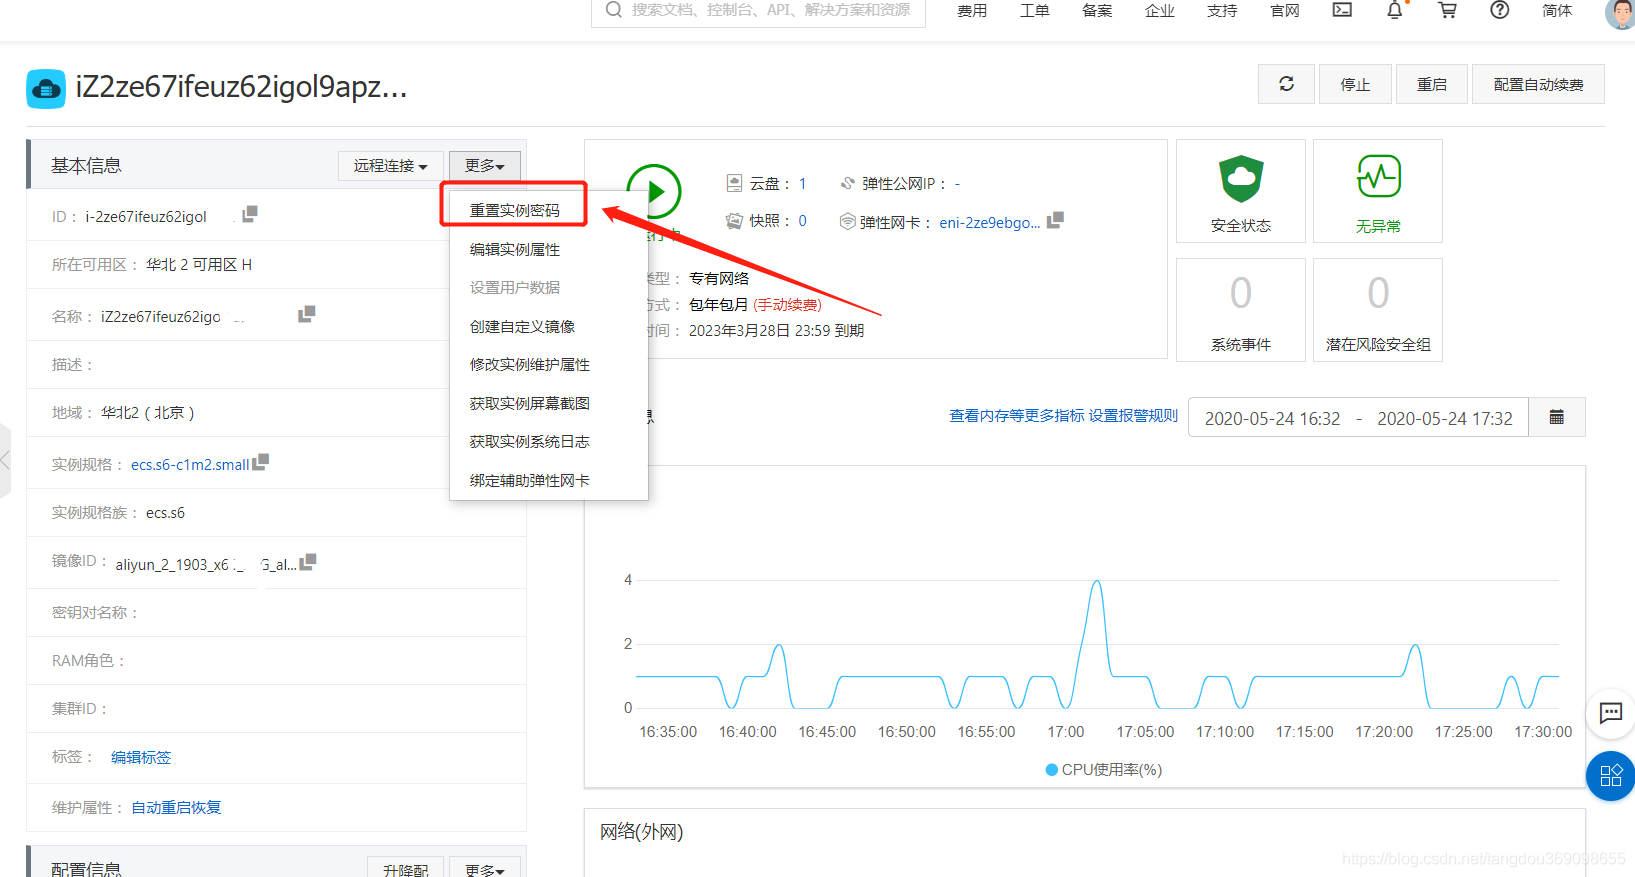
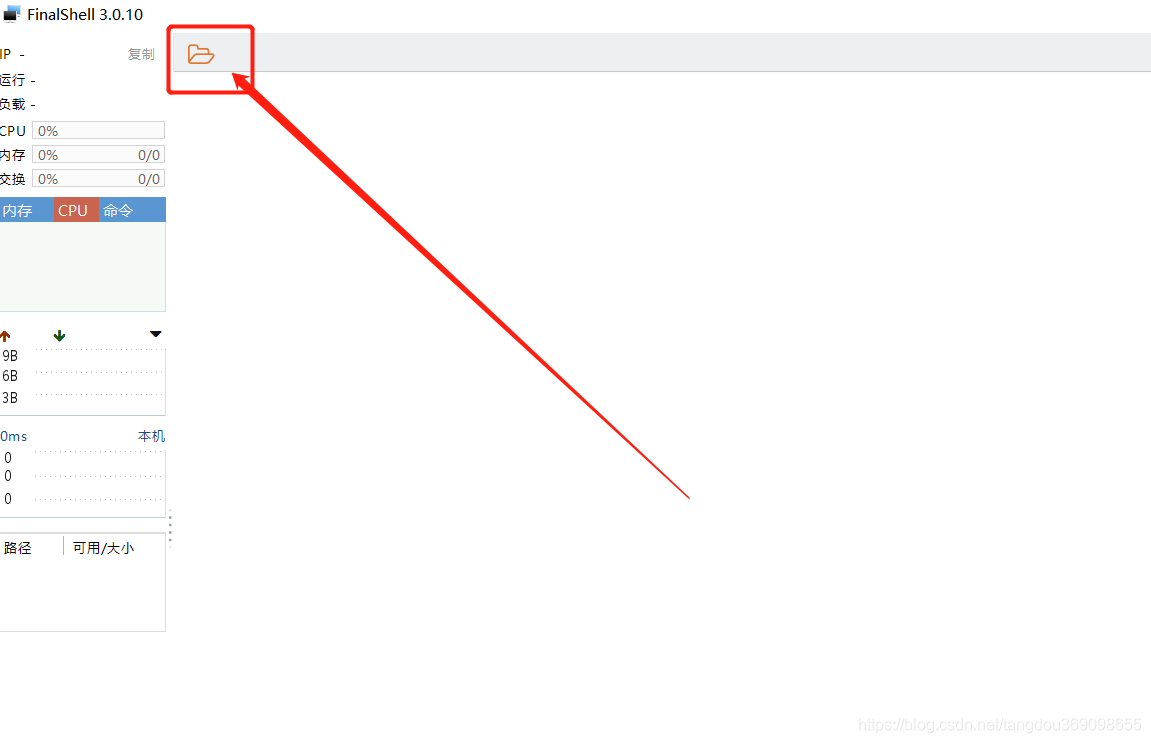
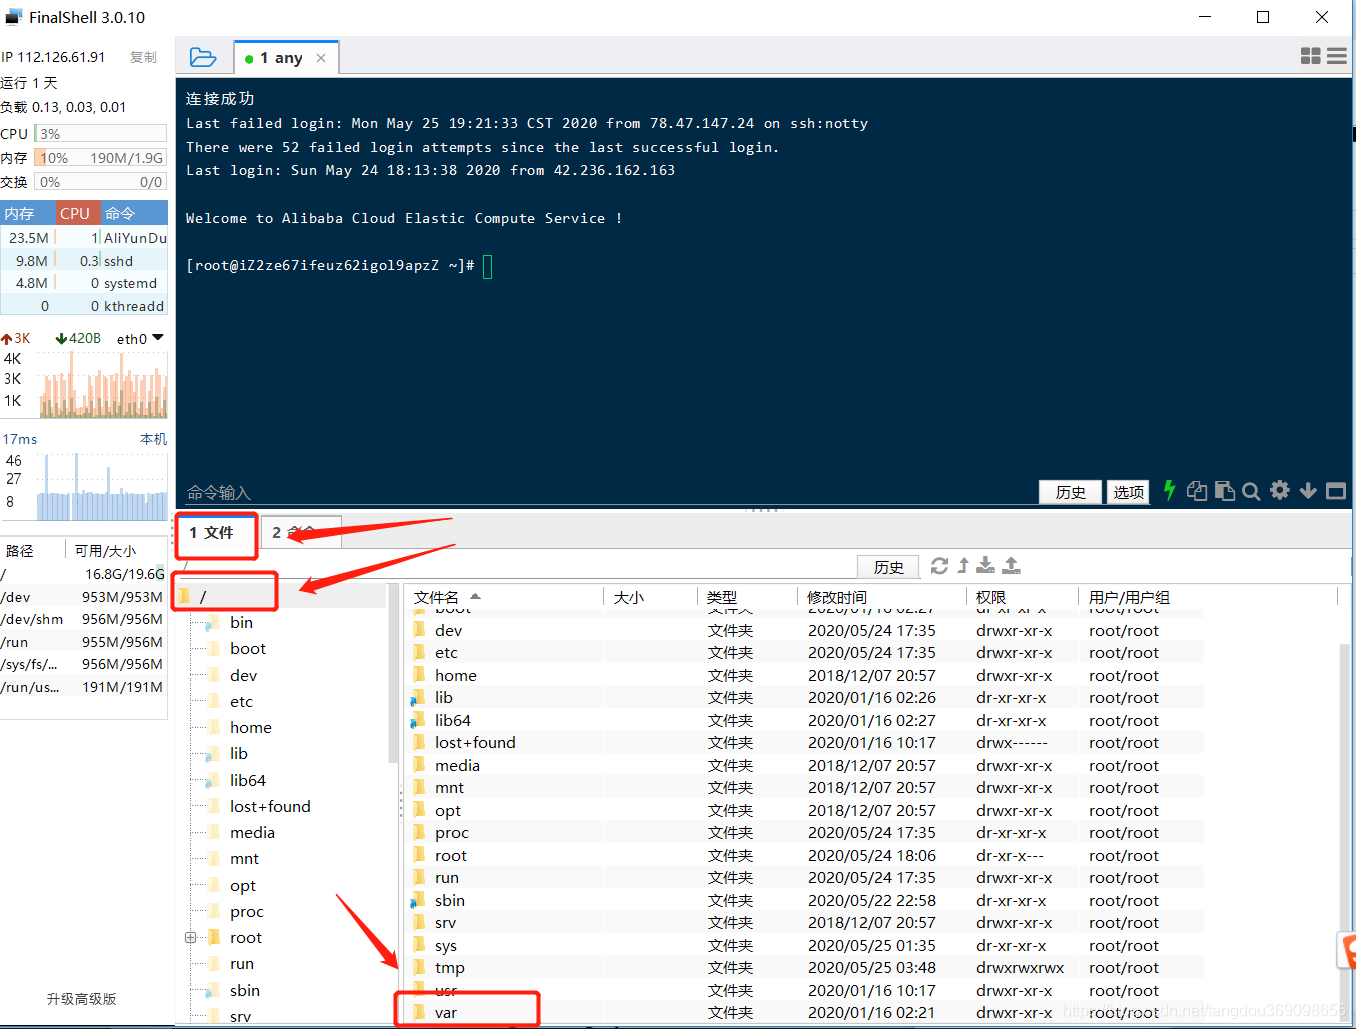
Step 1: Connect to the server
- Find the public IP
- change Password
- Download FinalShell, install and open
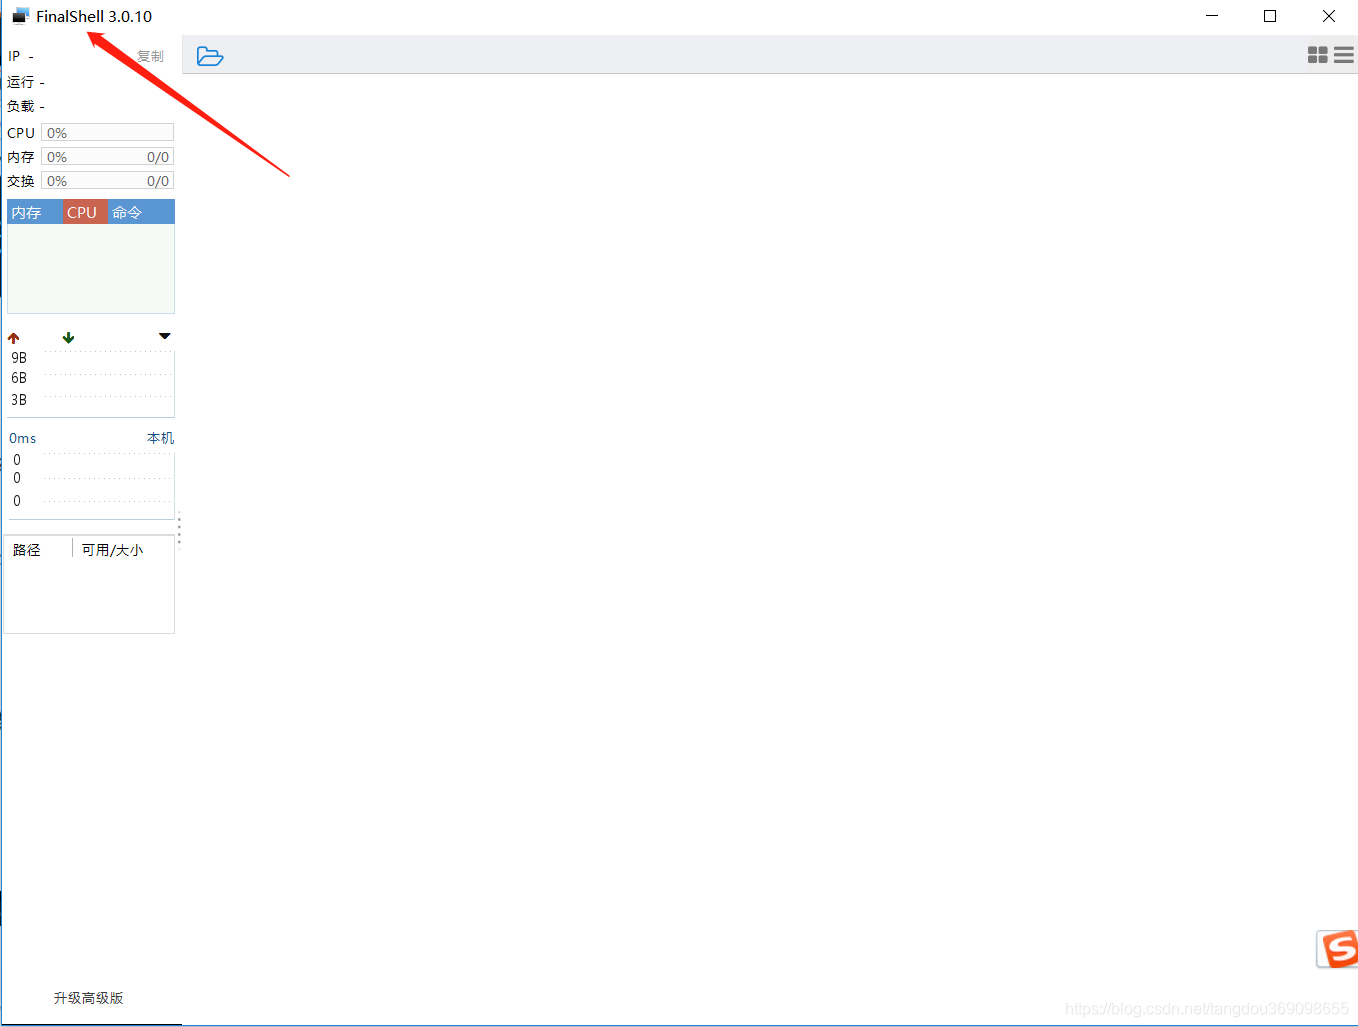
- Open the FinalShell
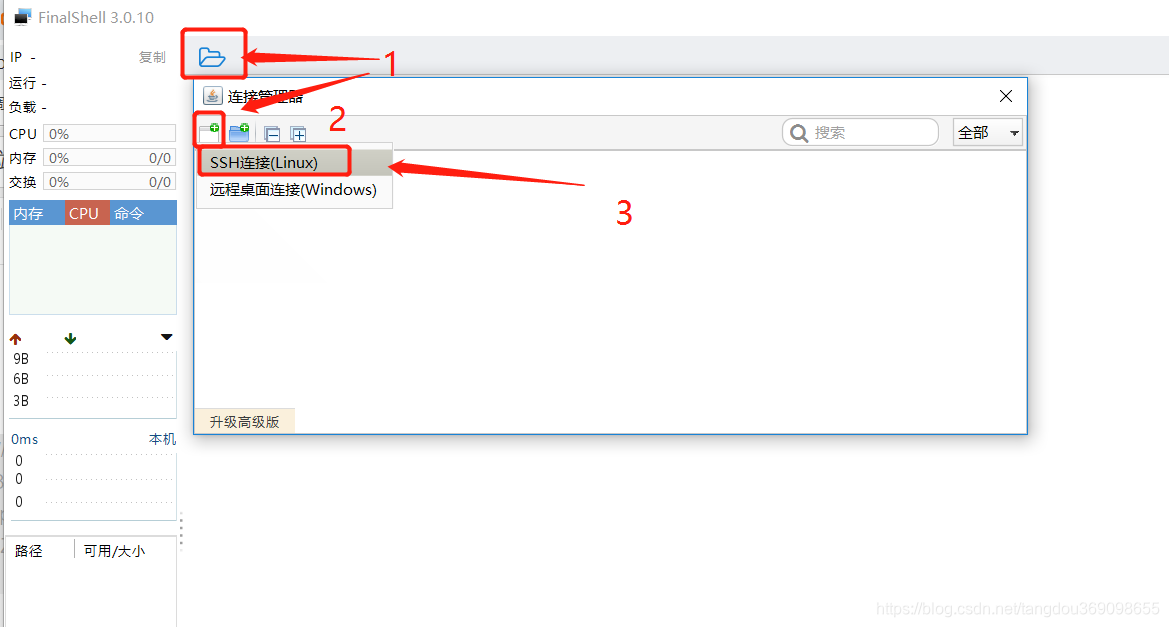
name and you can fill in whatever you like~~ Create a name for the server by yourself, which is convenient for future link use.

- Double-click to open, the link is successful


Step 2: Install Nginx
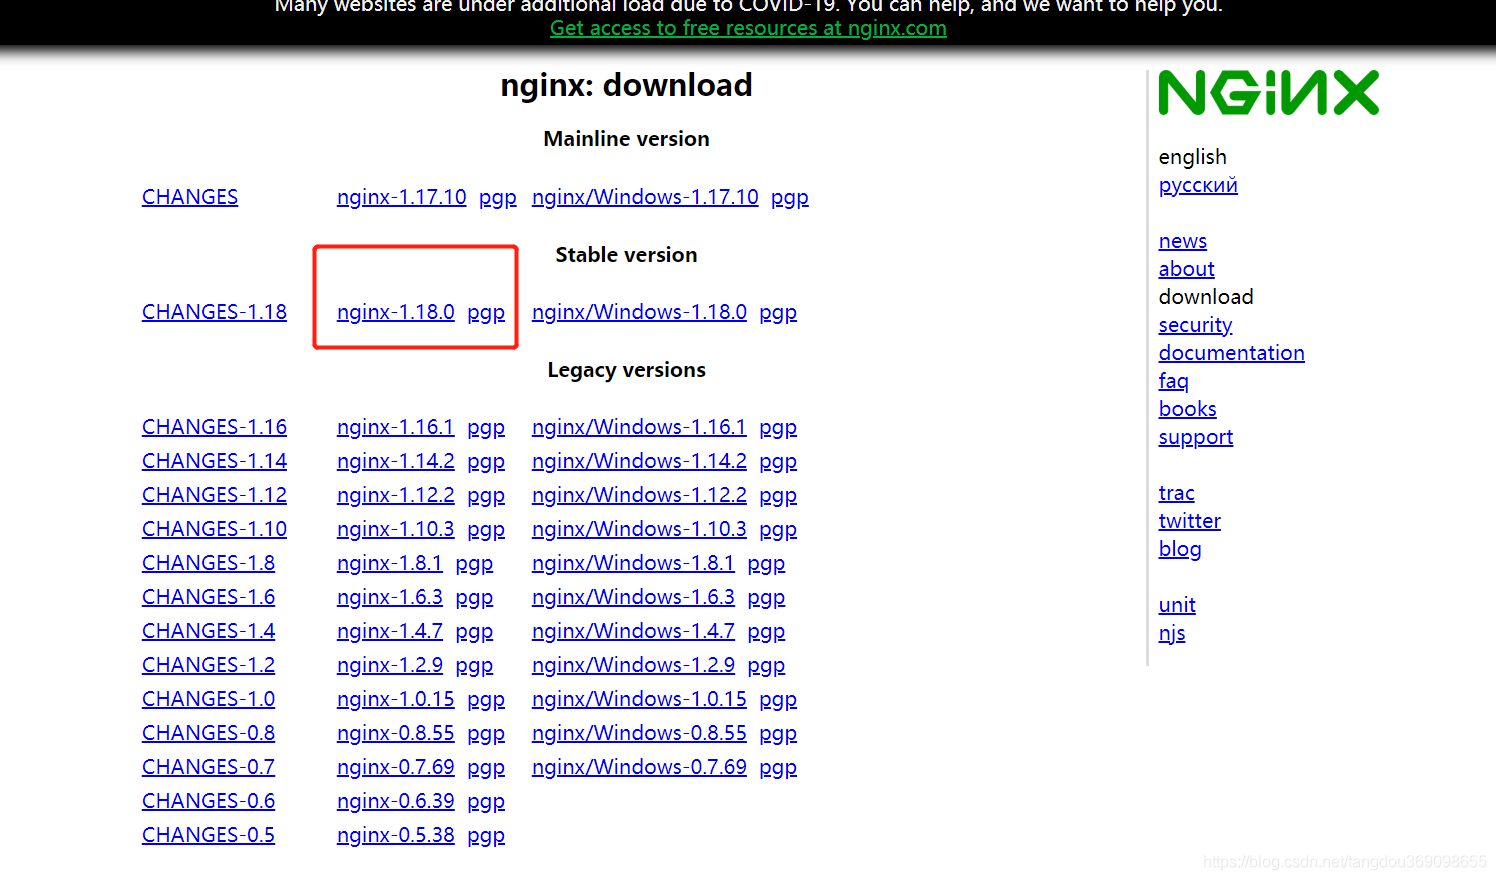
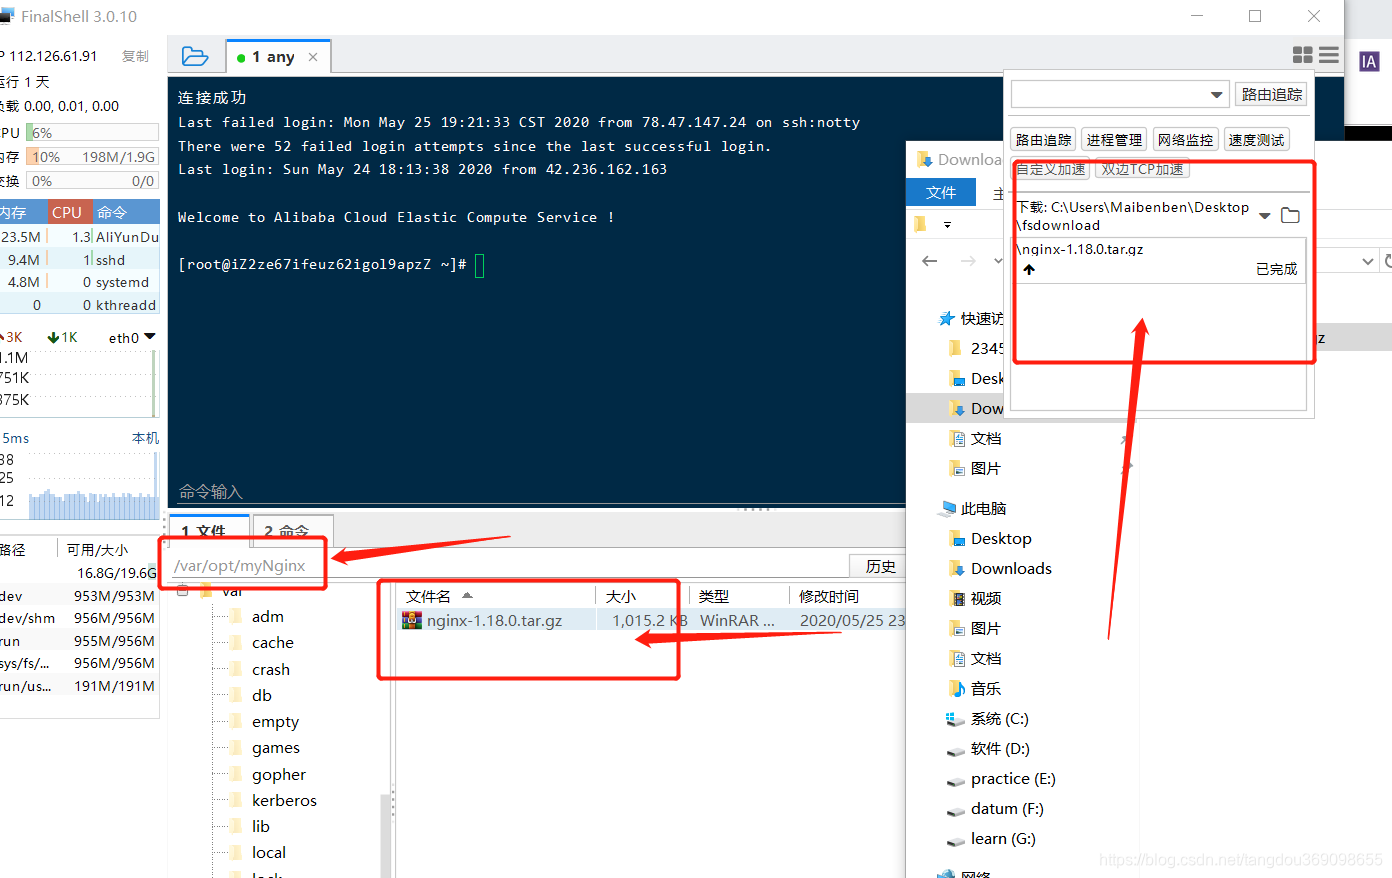
- Download nginx compressed package;
click me to download nginx
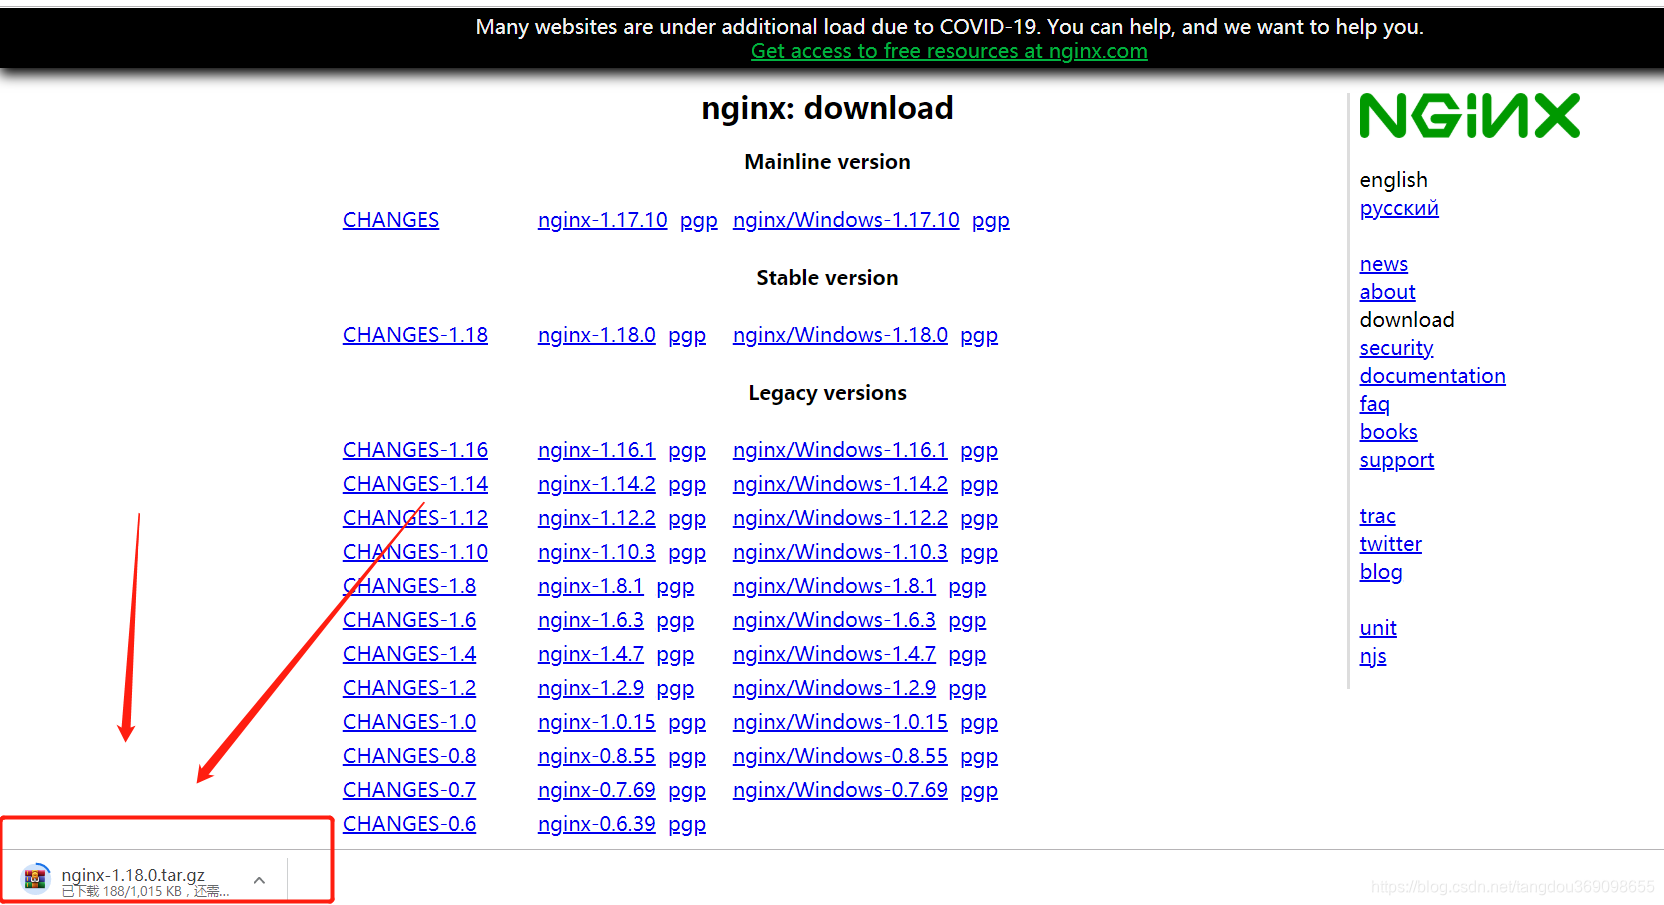
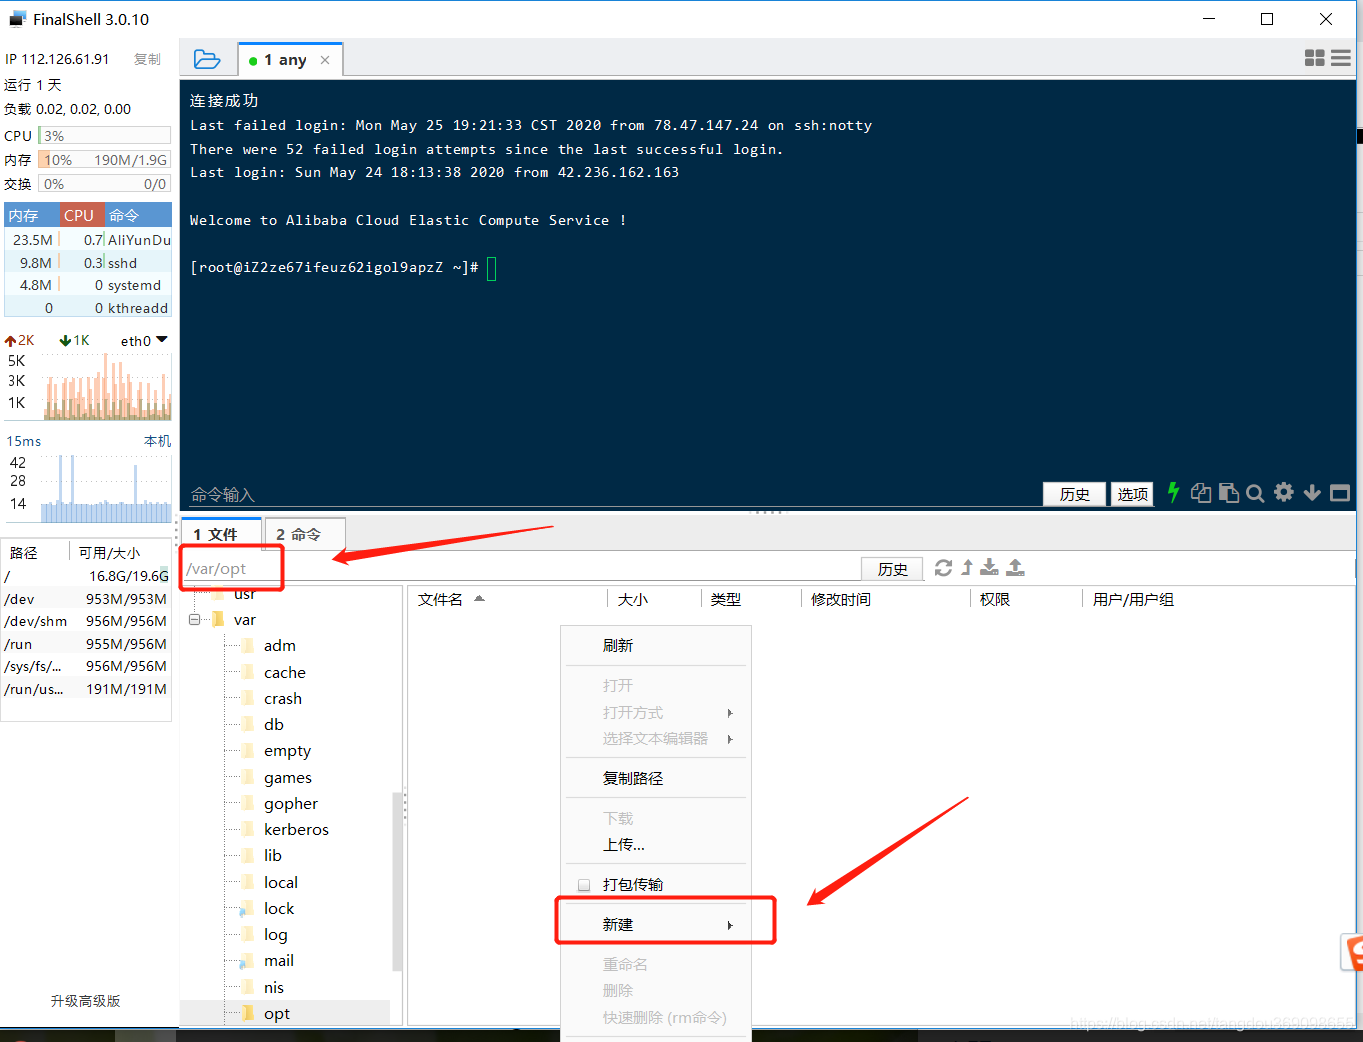
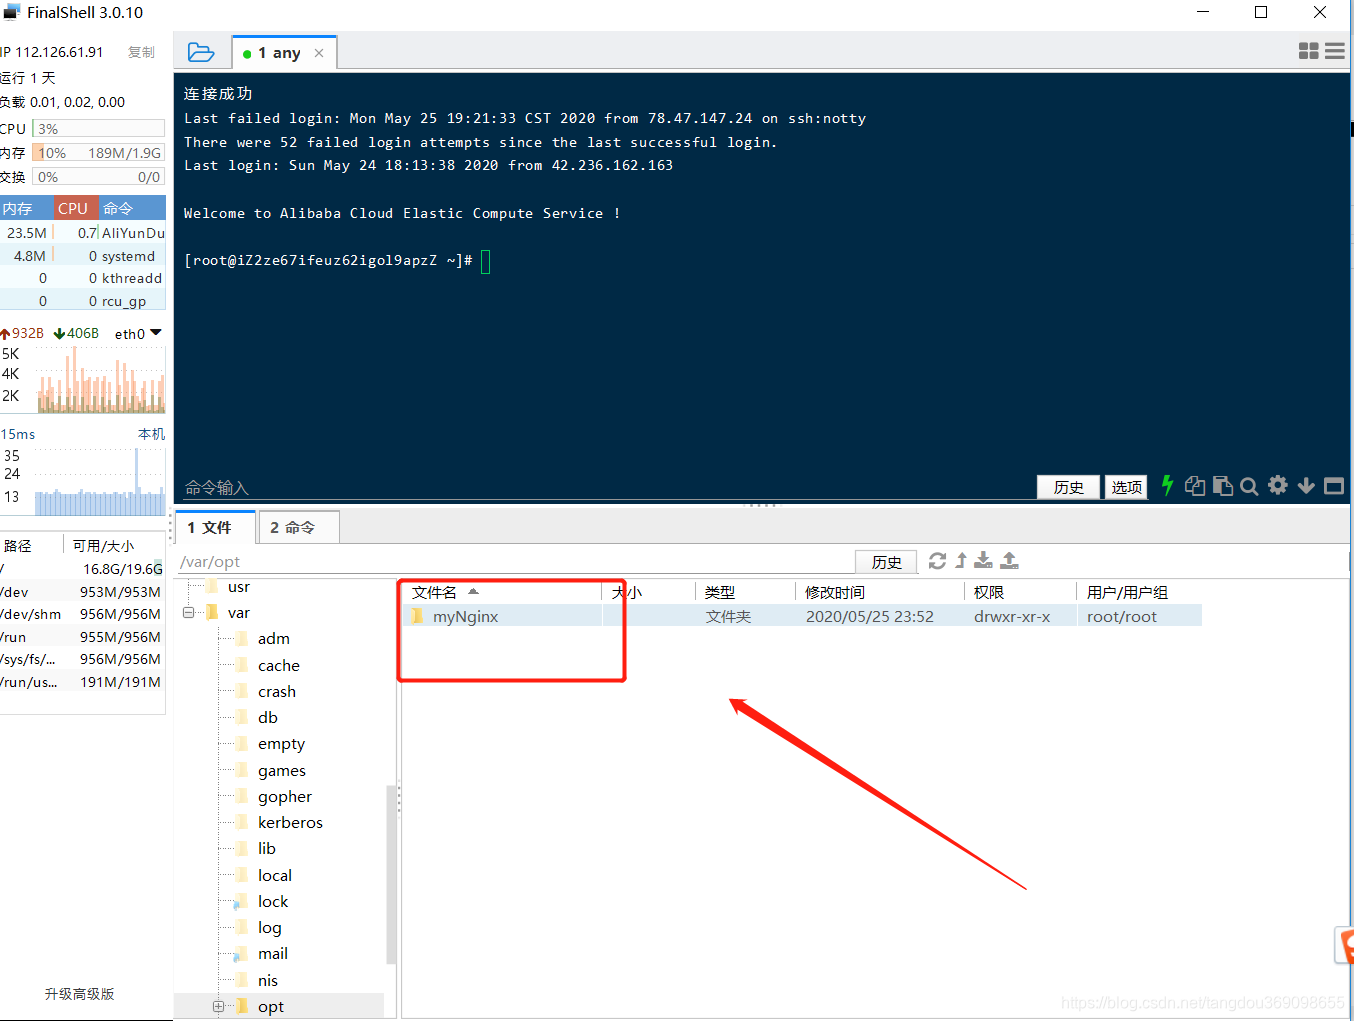
- Find the path that needs to be installed, and drag the compressed package just downloaded into it;
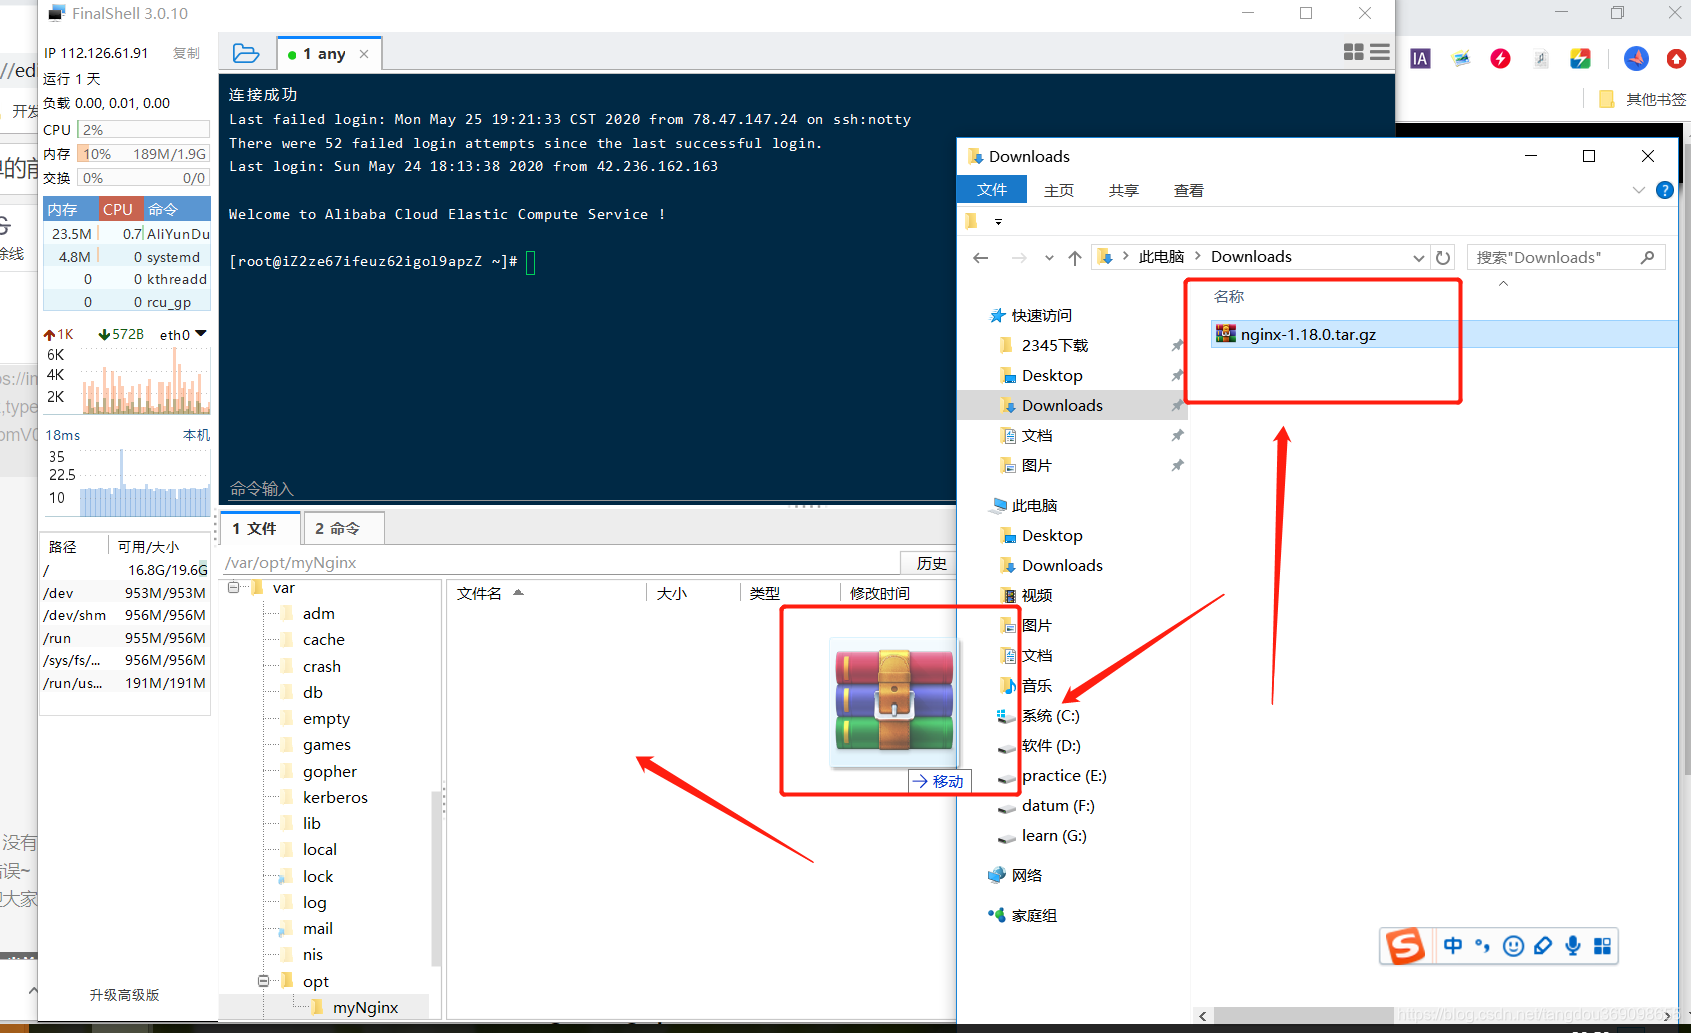
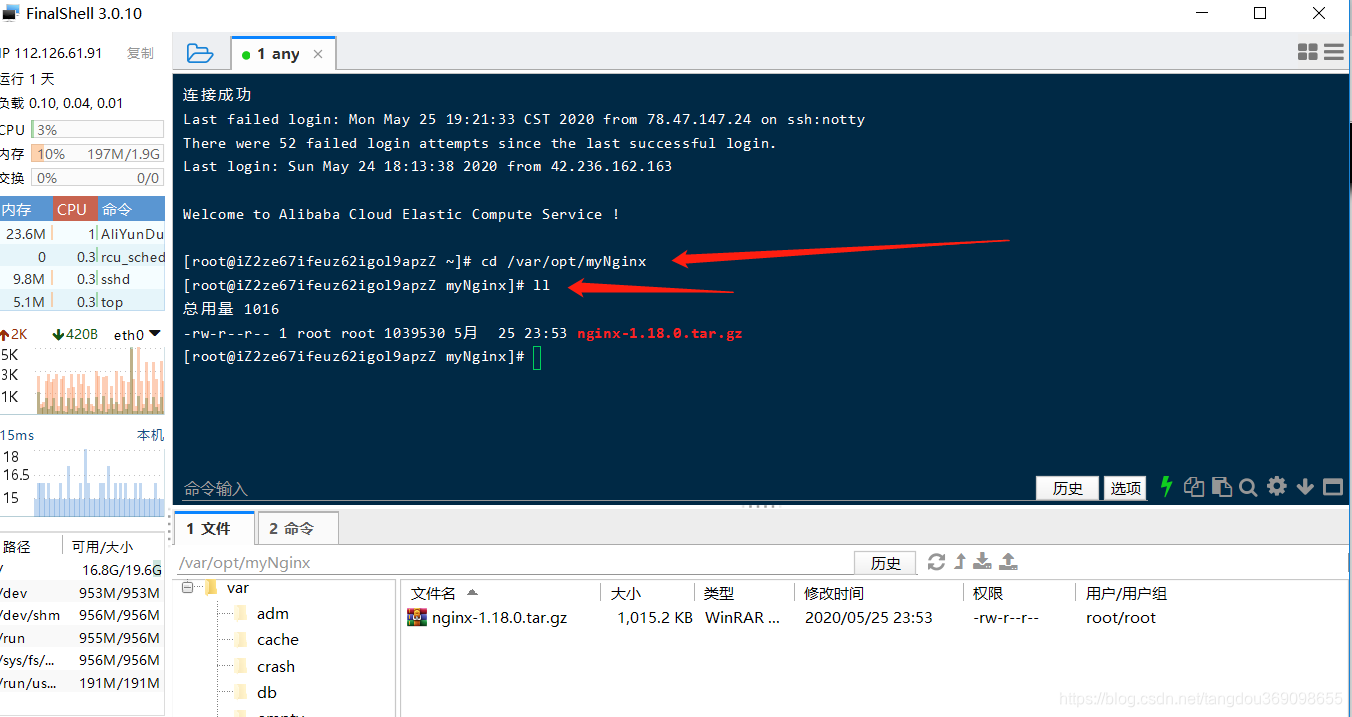
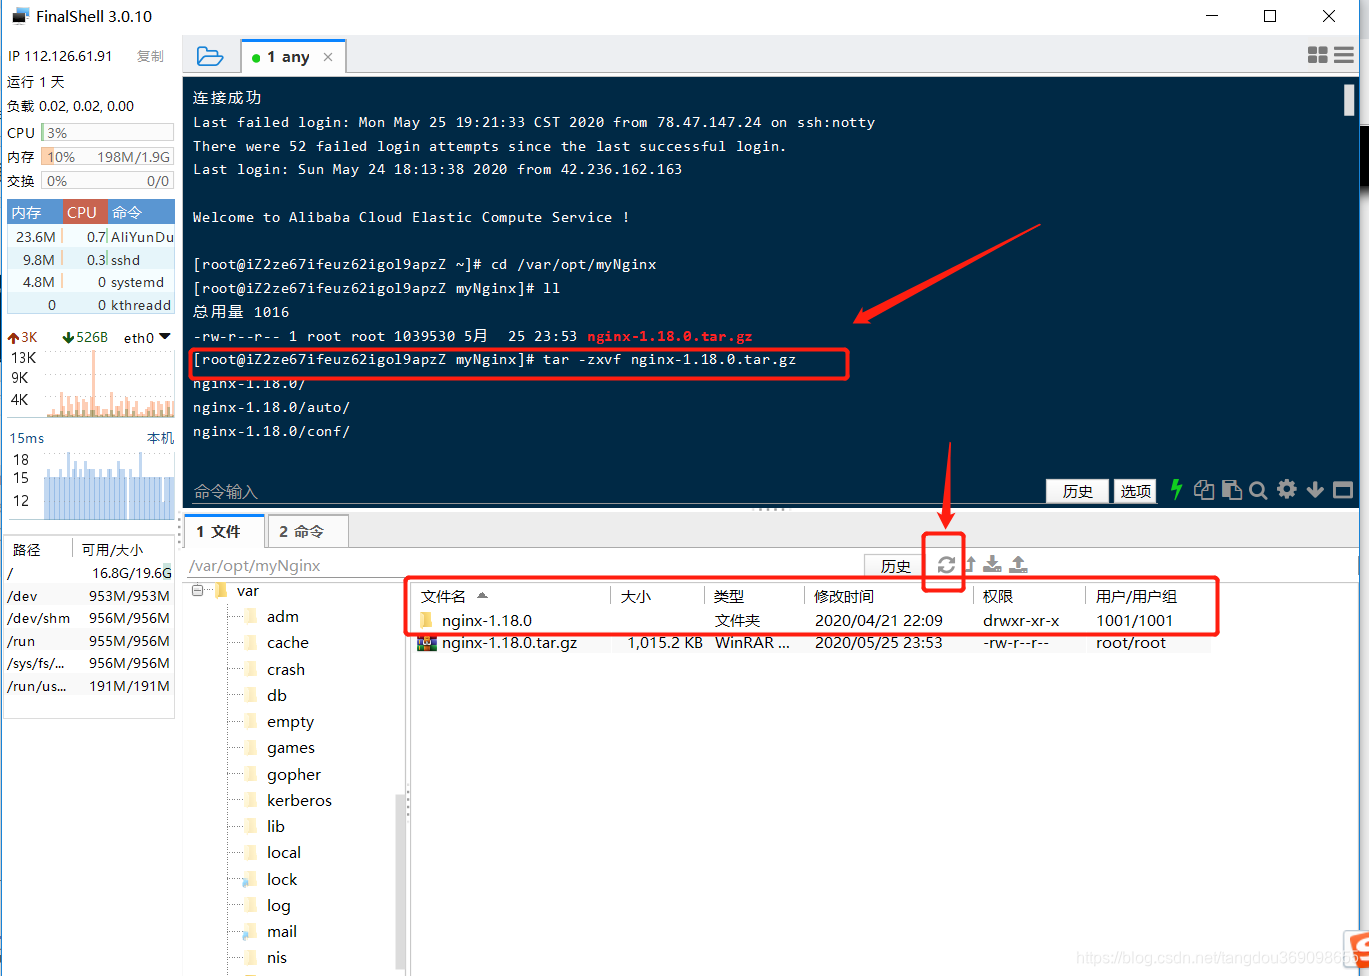
3. Unzip the file and refresh the directory
tar -zxvf nginx-1.18.0.tar.gz
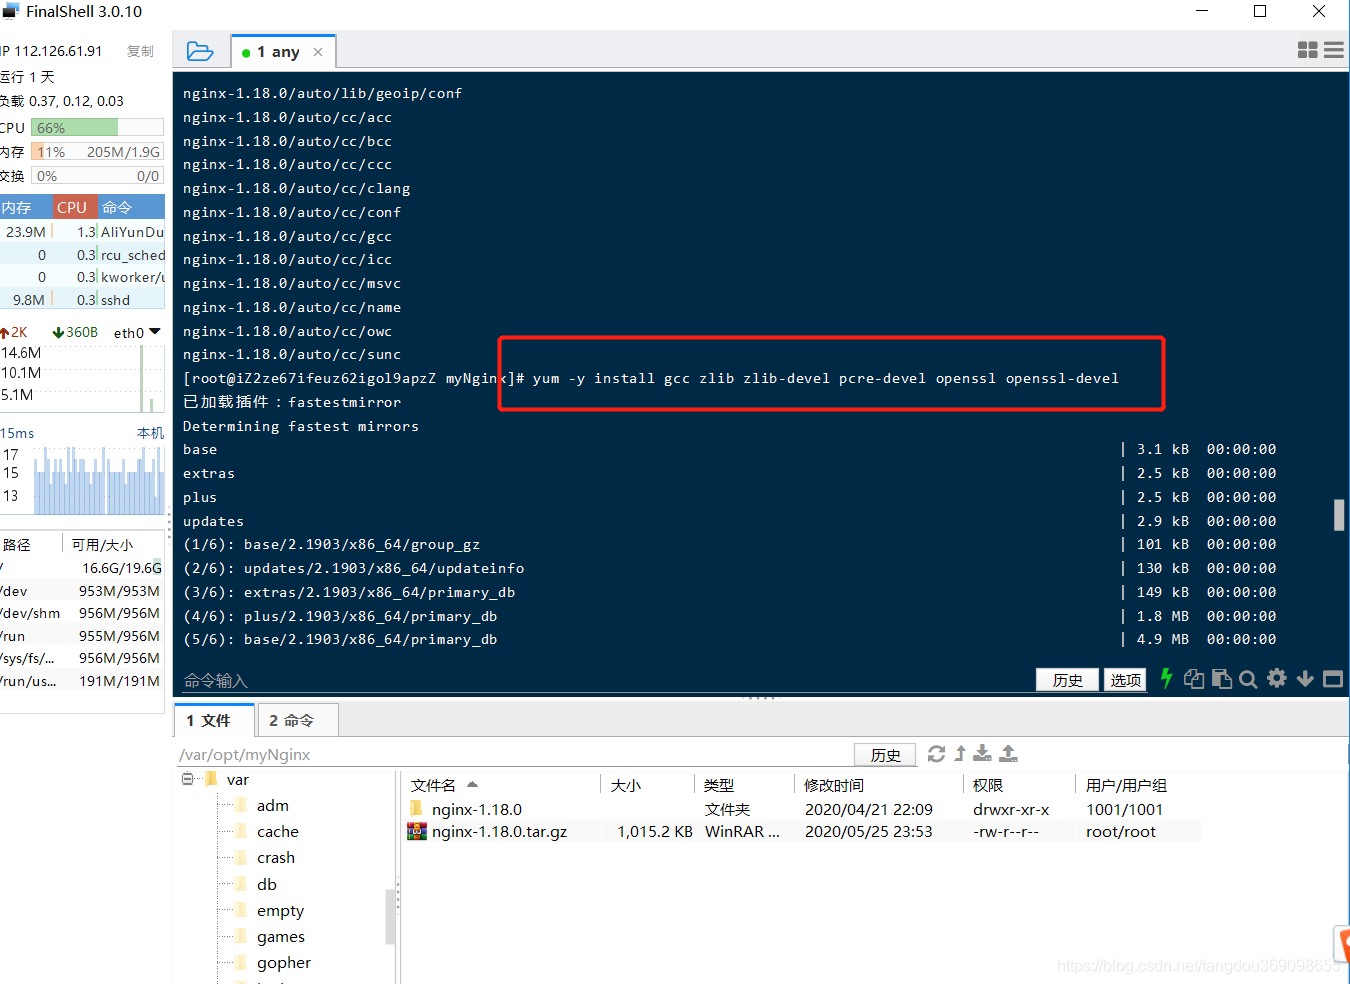
4. Install dependencies
yum -y install gcc zlib zlib-devel pcre-devel openssl openssl-devel
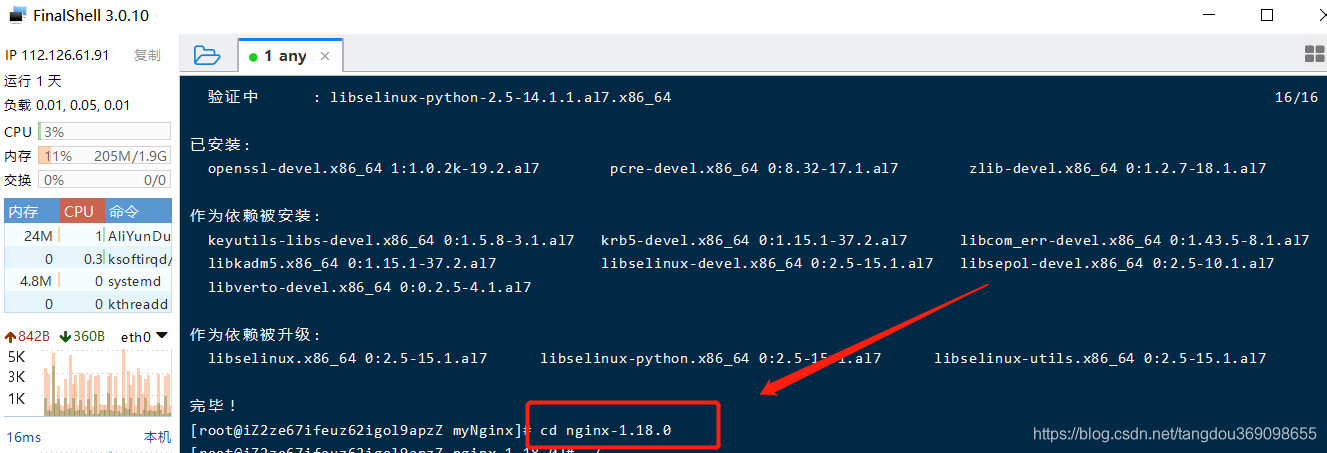
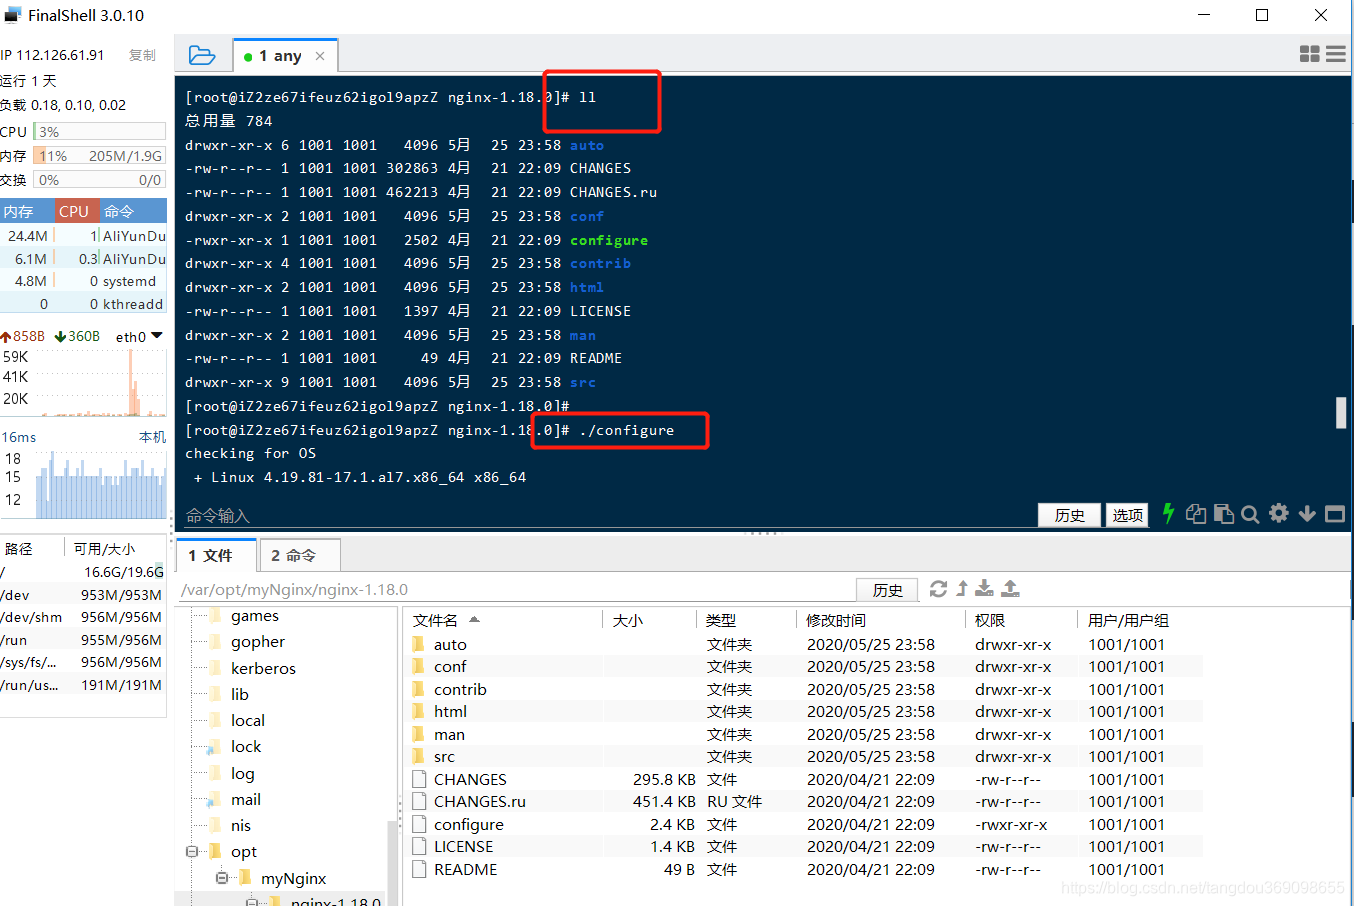
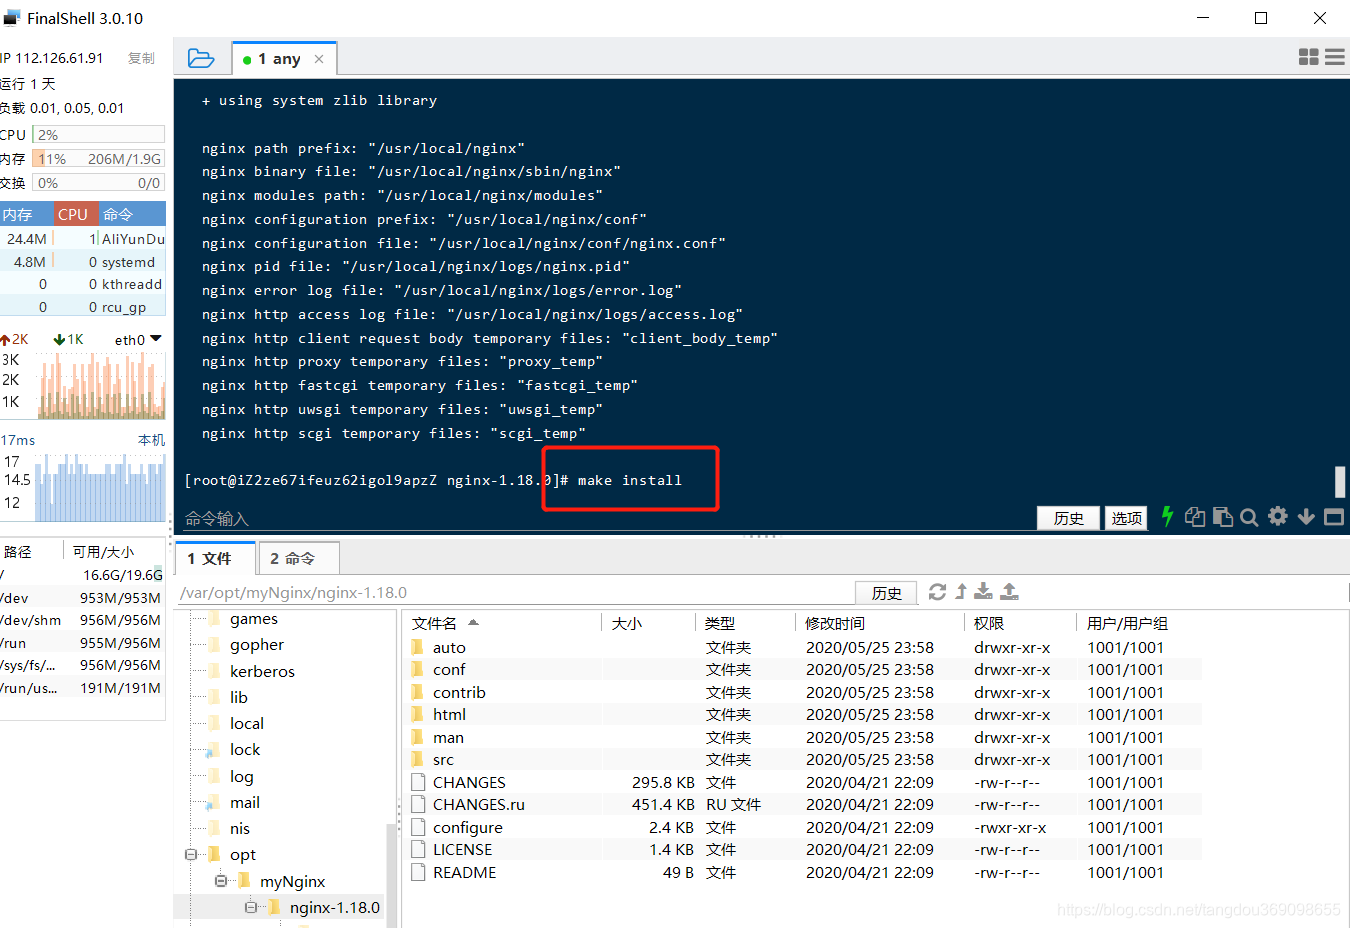
5. Enter the directory and execute the command
cd nginx-1.18.0

./configure

make install
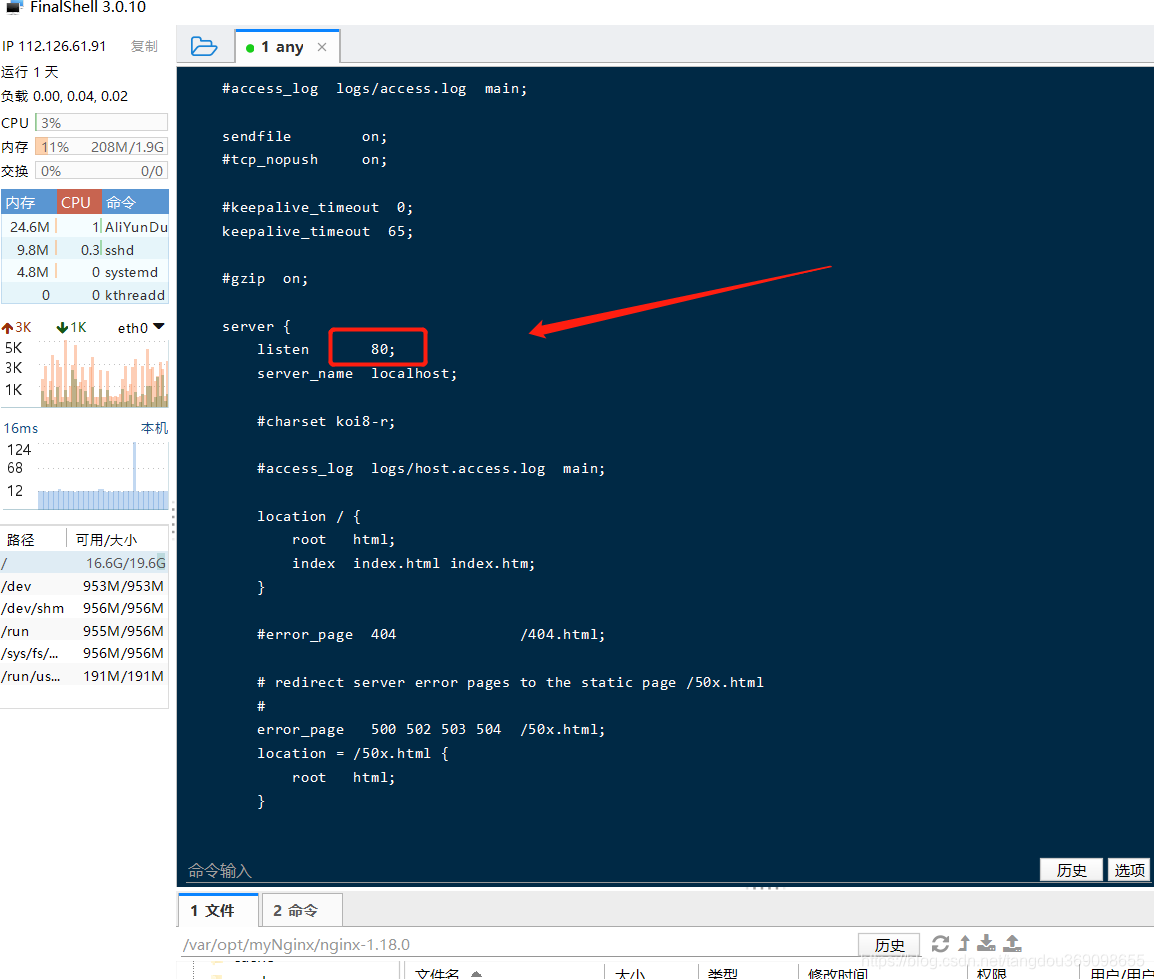
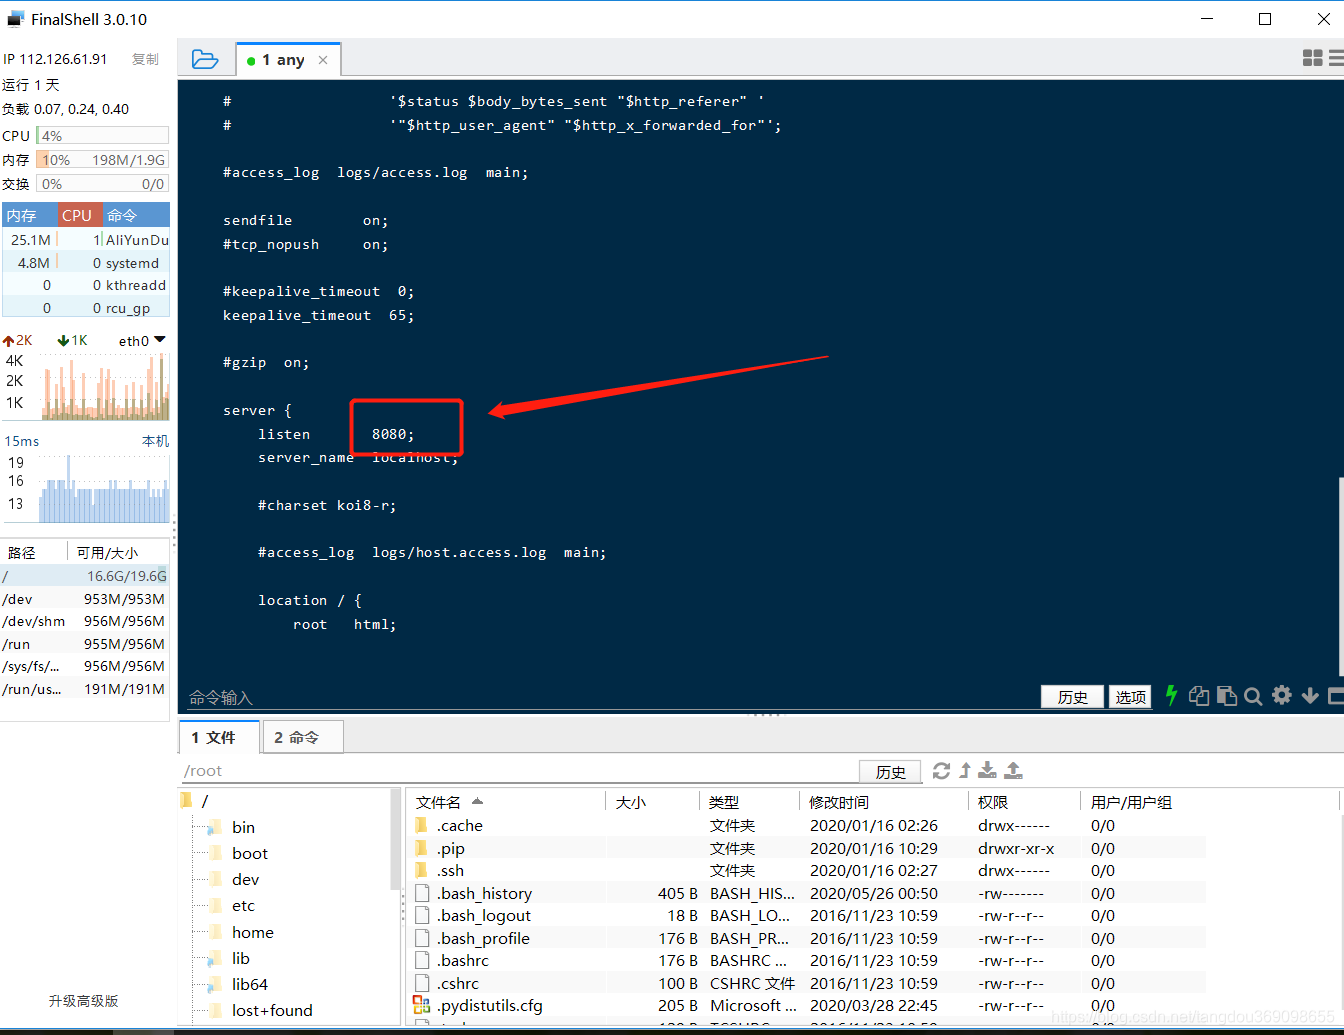
6. Configure nginx.conf
This item can be operated according to requirements, or not configured, and the default port number is used.
# 打开配置文件
vi /usr/local/nginx/conf/nginx.conf
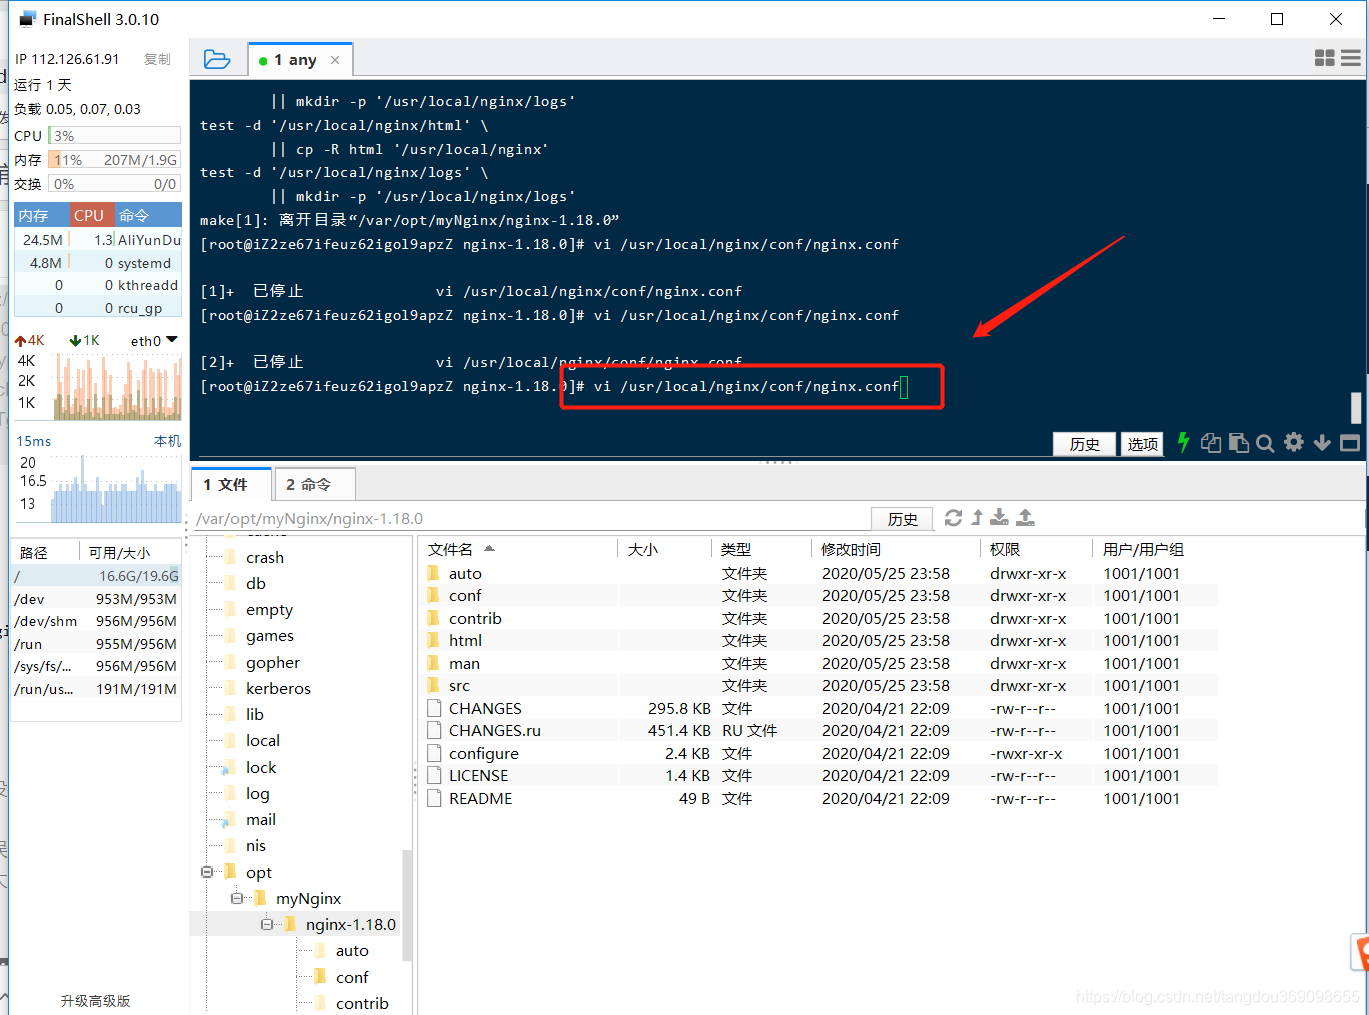
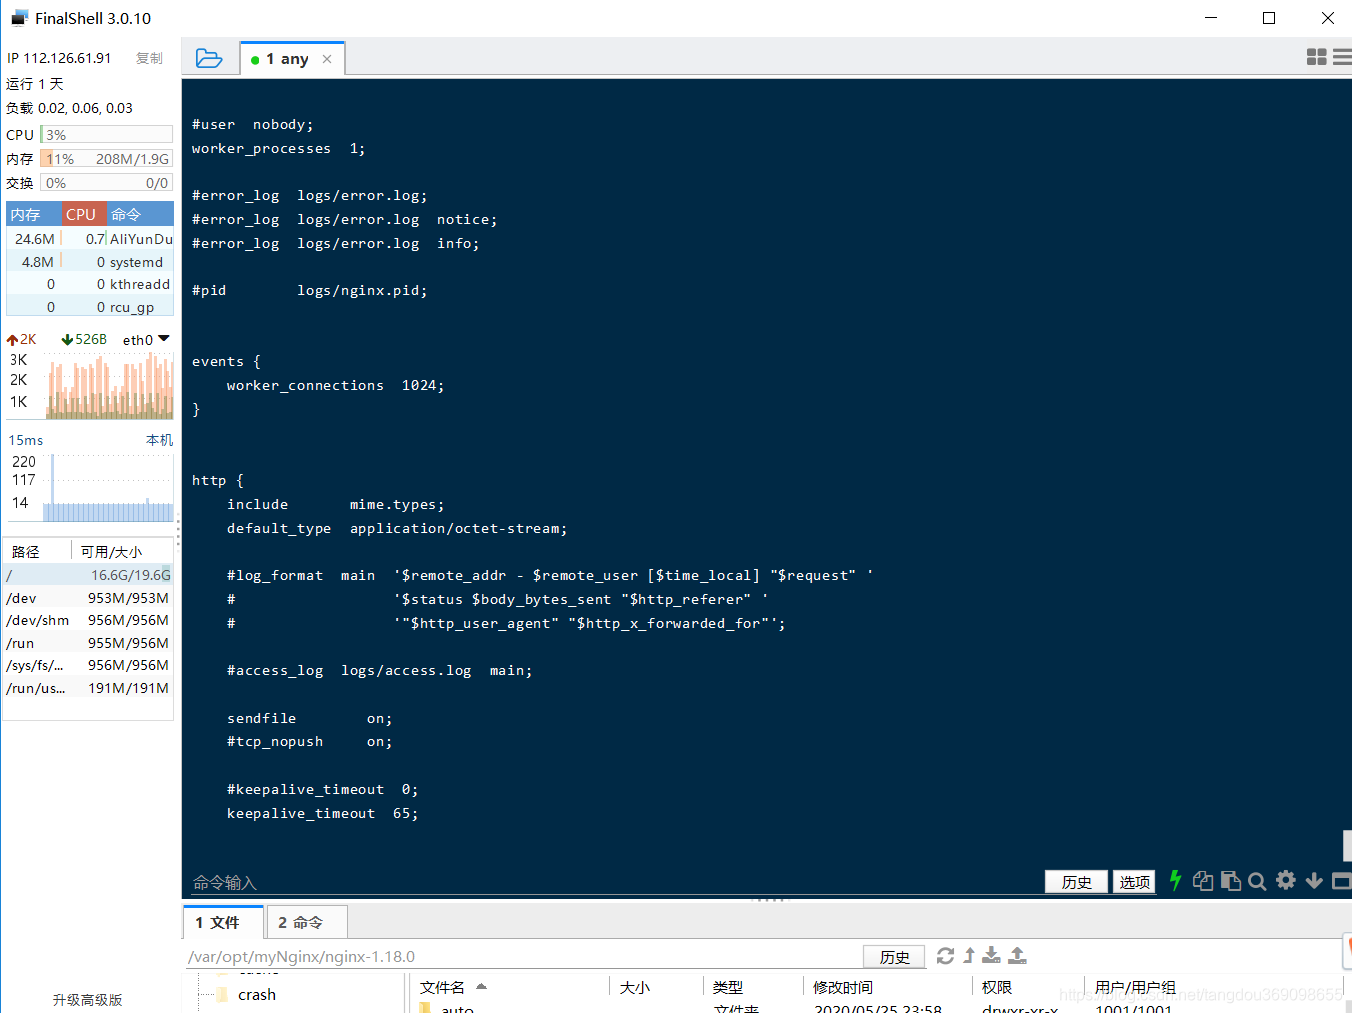
Press and hold the down arrow, look down for the port number, and modify the port number
Edit the file and save it under Linux
- cd to the directory of the file
- vi The name of the file to be edited, enter normal mode, and view the contents of the file
- Enter i to enter edit mode and start editing text
- After editing, press ESC to exit to normal mode.
- In normal mode, enter: to enter command mode
- Enter wq in command mode to save and exit
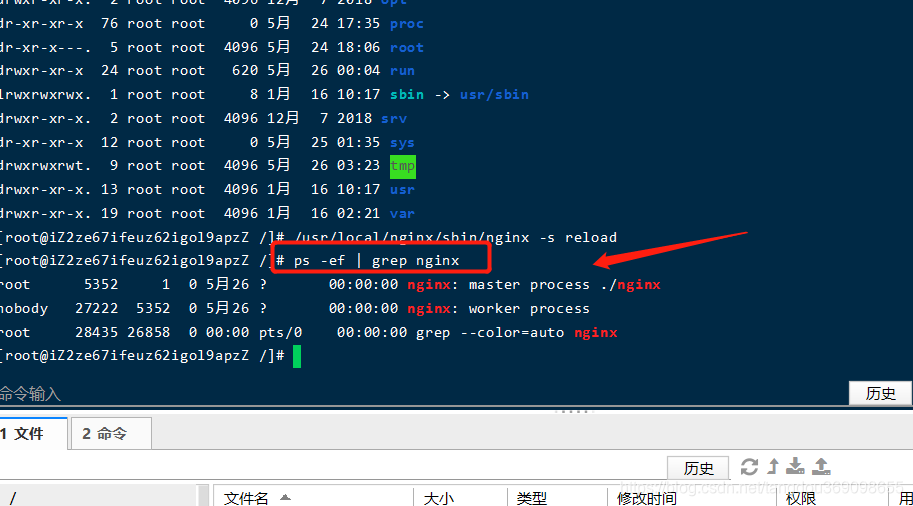
7. Start nginx
/usr/local/nginx/sbin/nginx -s reload
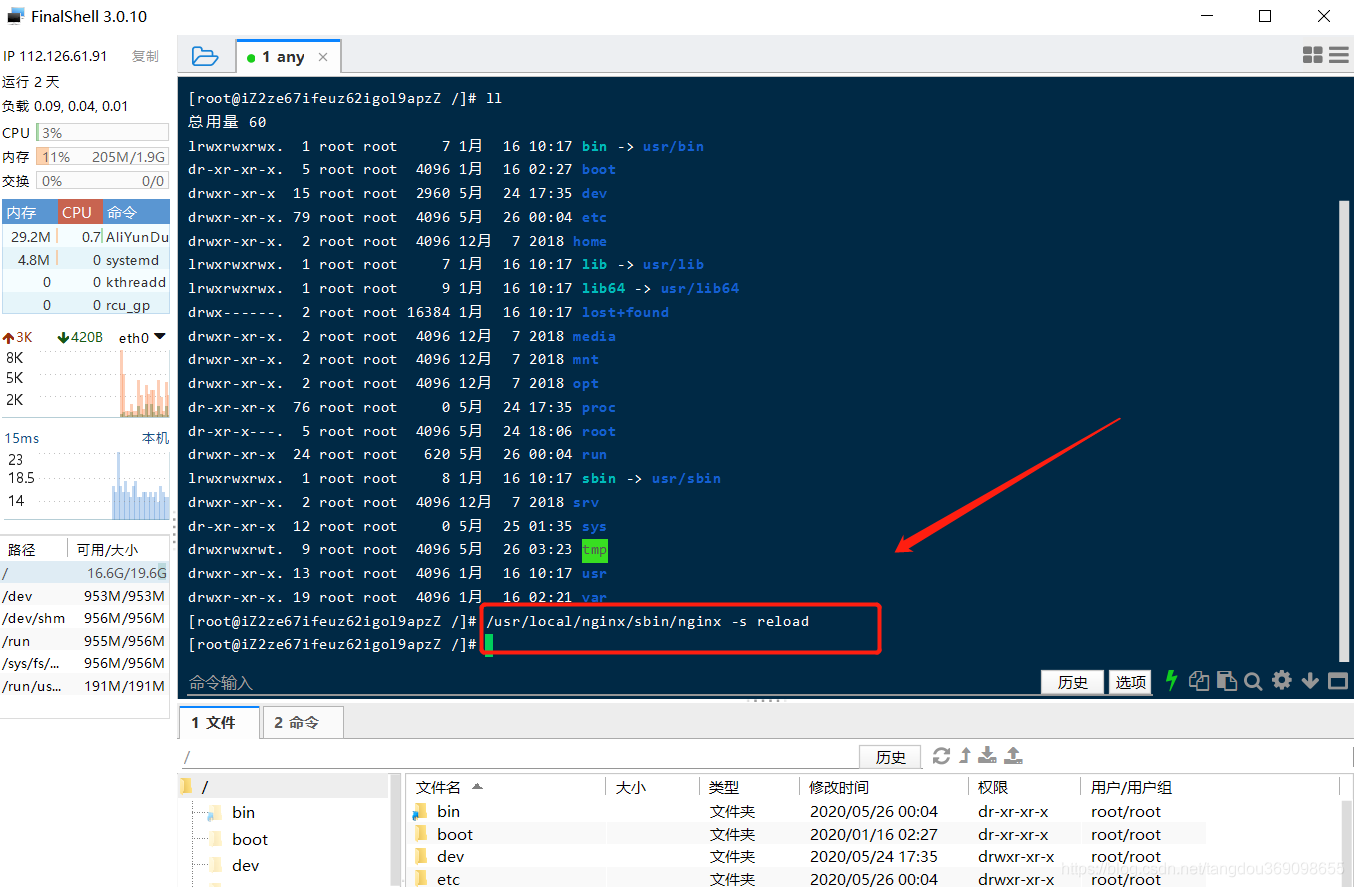
8. Check whether the nginx process is started
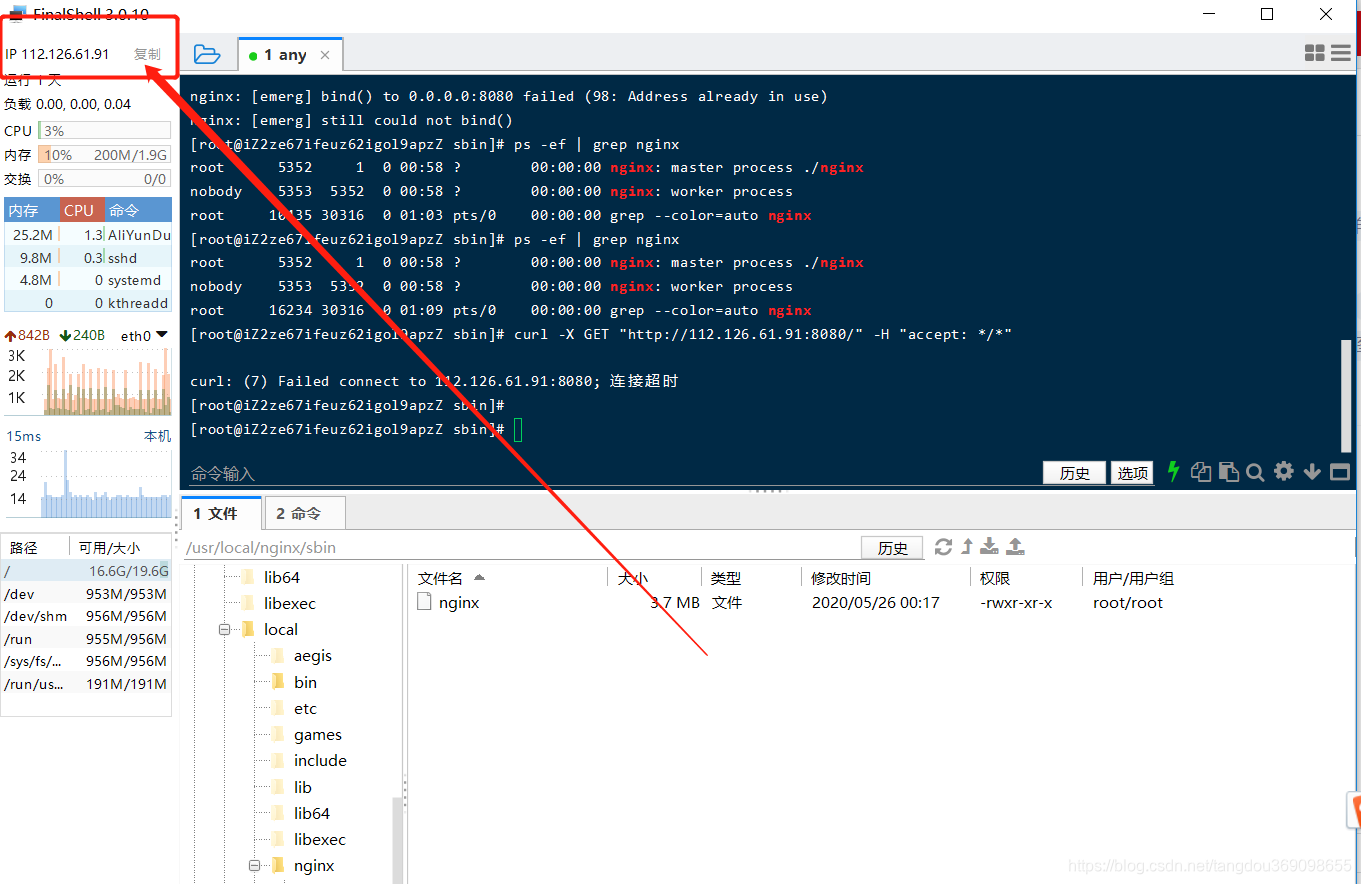
ps -ef | grep nginx
Remarks: If the startup is unsuccessful, there is only one below when viewing.
We can use this to start.
Start nginx
./usr/local/nginx/sbin/nginx
instead of using reload
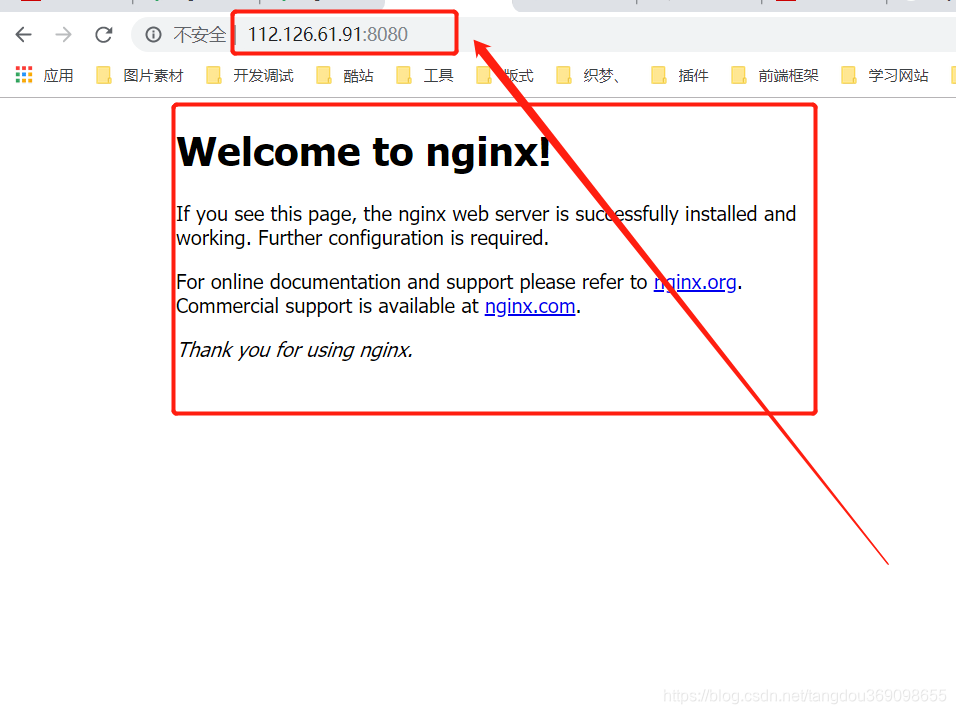
Step 3: Test
- Enter the server management interface and configure the security group;
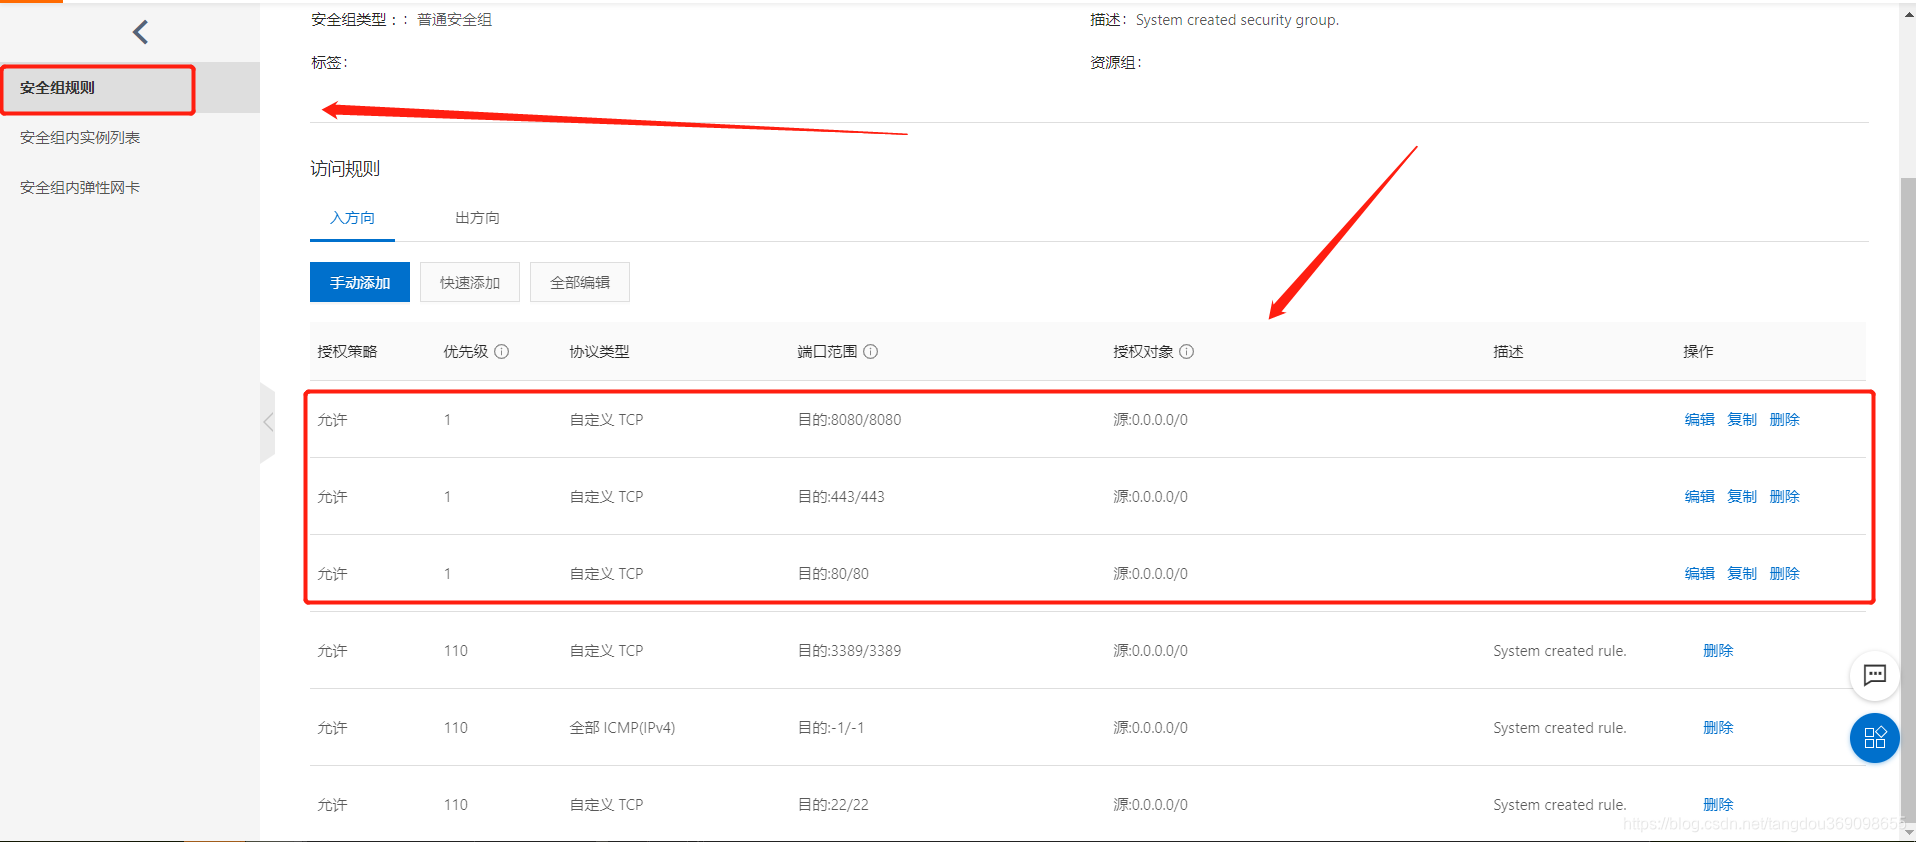
- Test interface access
Step 4: Deploy other projects
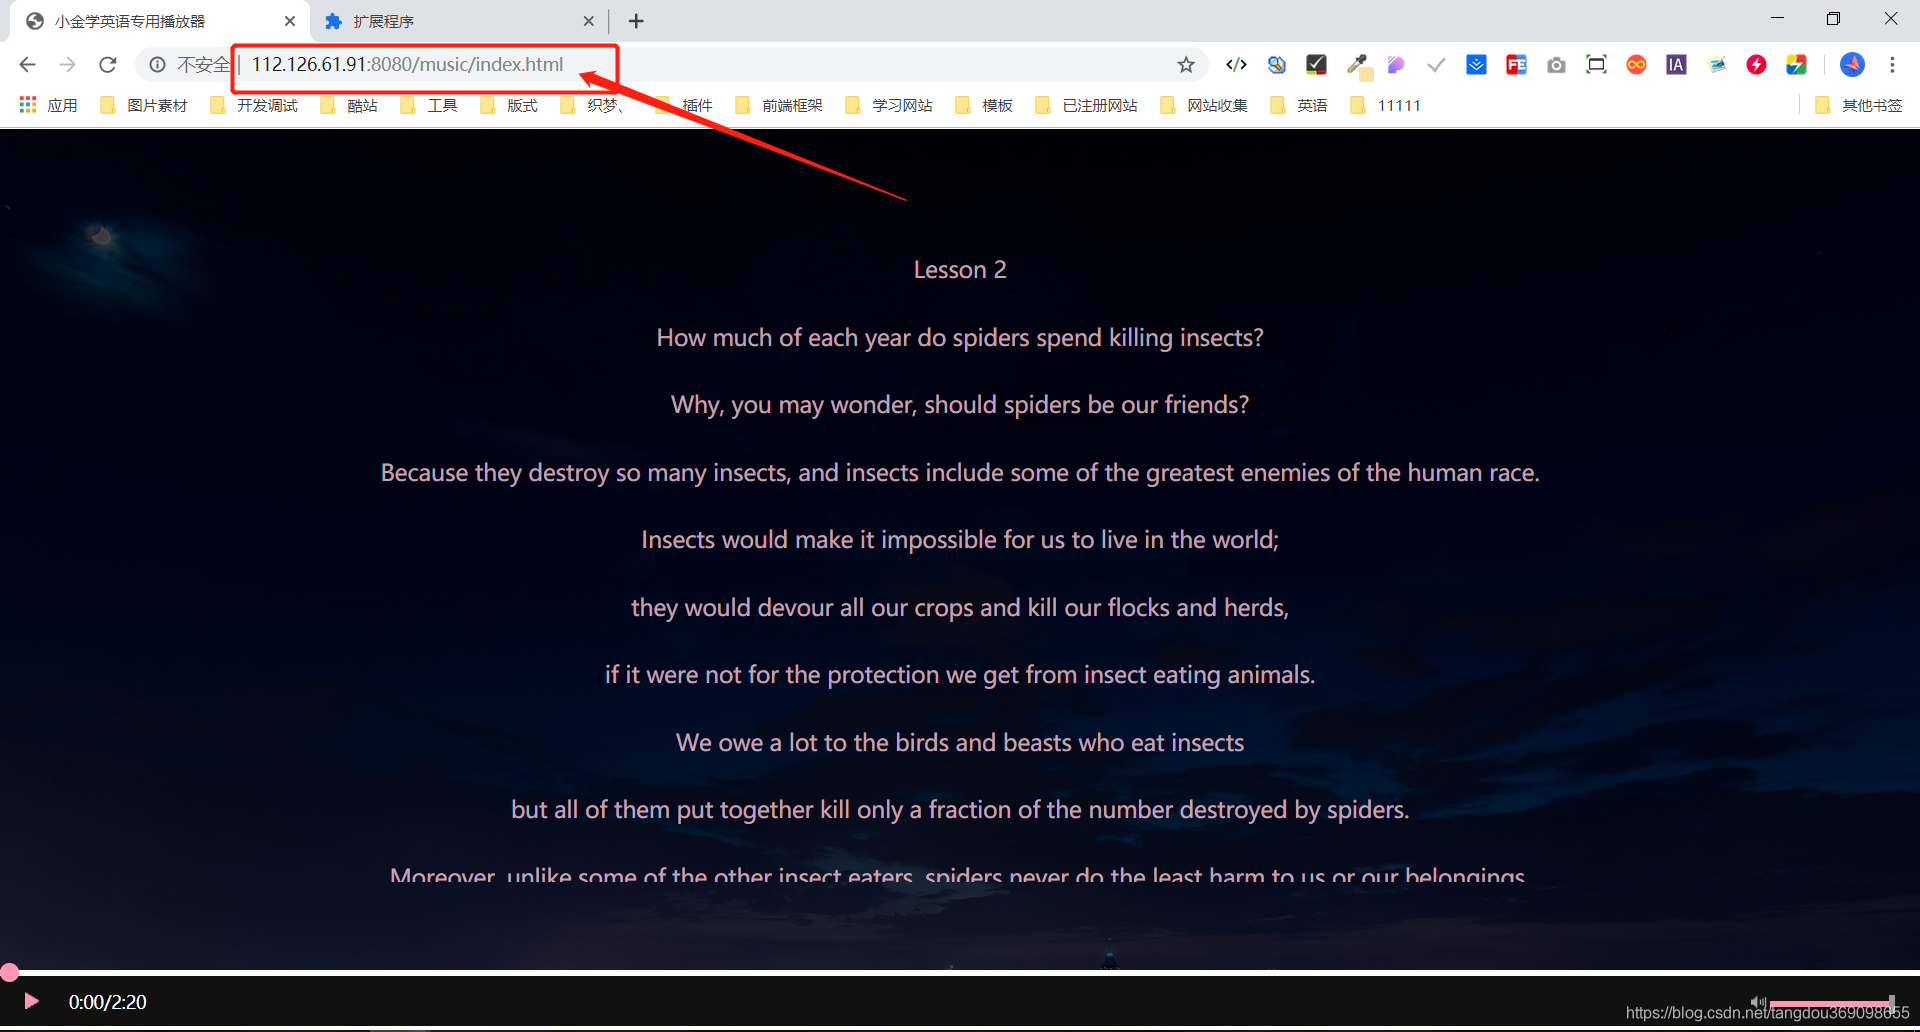
- Enter the server static resource directory, drag the packaged project into it;
directory address: /usr/local/nginx/html
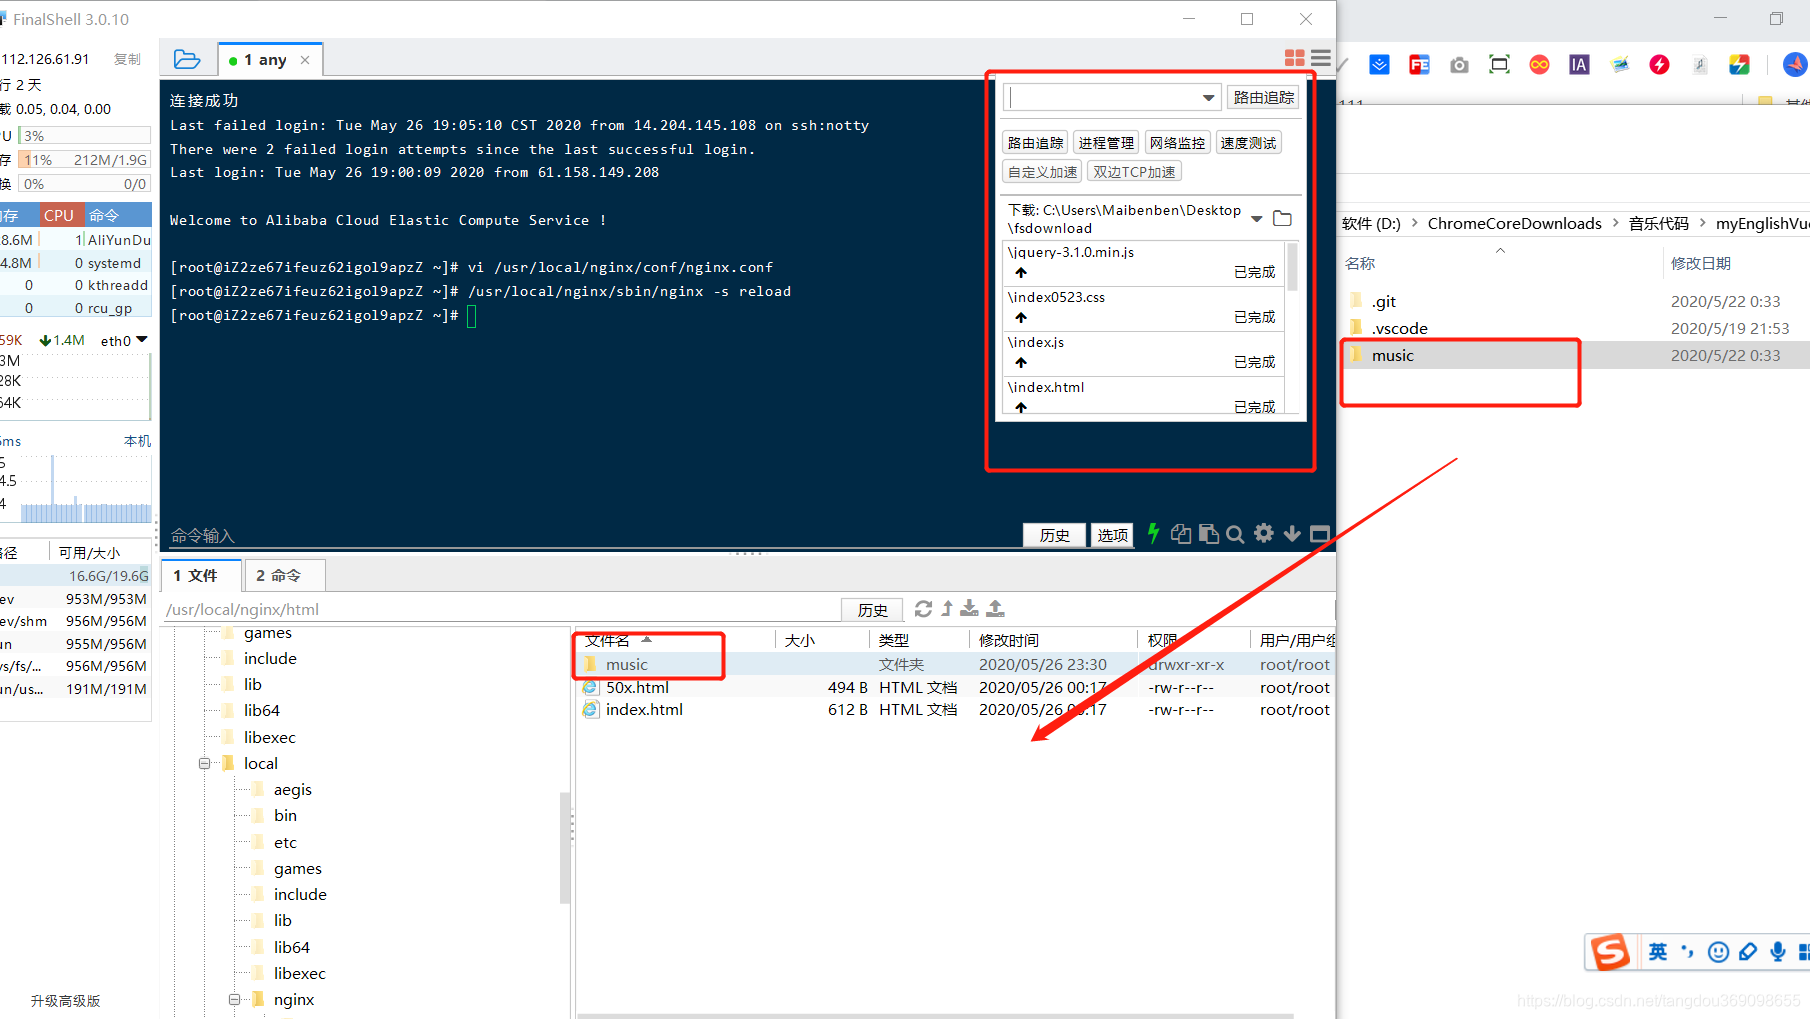
2. Access
Some notes on Nginx.conf configuration
1. The difference between front-end routing hash and history deployment
Routing function:
1. Record the state of the current page (save or share the url of the current page, and when the url is opened again, the state of the webpage is still saved (shared)); 2. Use the forward and backward functions of the browser (such as clicking the back button
, You can make the page return to the state before the ajax update page, and the url also returns to the previous state)
Hash mode and history mode realize functions:
1. Change the url and prevent the browser from sending a request to the server;
2. Monitor the change of the url;
3. Intercept the url address and parse out the required information to match the routing rules.
hash mode - url with #
Features:
The change of the hash value will not cause the browser to send a request to the server, and the change of the hash will not reload the page. The change of the hash
will trigger the hashchange event, which can also be controlled when the browser advances and retreats.
The hash is originally used for page positioning. If it is used for routing, the original anchor function cannot use
hash, and the parameter passing is based on url. If you want to pass complex data, there will be a volume limit.
History mode - without # after the url
Features:
The history mode can not only put parameters in the url, but also store data in a specific object.
history——Using the new pushState() and replaceState() methods in the HTML5 History Interface
history does not support versions below IE8
Deployment requirements
Different packaging configurations and deployments are performed according to different needs. Here I take the deployment path /usr/local/nginx/html as an example:
1. One nginx deploys one static resource, or deploys multiple static resources?
2. Should we use hash mode or history mode for routing after packaging?
After packaging in hash mode, deploy it on nginx
- Deploy a single project without adding too much configuration, just put static resources here, we can use ip+port number to access

- Deploy multiple projects in one nginx, access through ip+port number+folder name

Remarks (the following are some records of problems encountered)
- About the link access problem of hash routing multi-project deployment on the same server
Take IIS as an example, if we put an index.html in the root directory, and then want to add another test project.
The first step is to create a new one next to index.html A TEST folder
Step 2, open the TEST folder, and put the new project into it
Step 3, visit http://10.10.10.10:8088/TEST/#/
Note: Do not add TEST after #, otherwise It will jump to the index.html on the outer layer~~
If you find it troublesome, you can use folders to frame them all, and add a folder name to all items to avoid this problem.
Use the history method to package (commonly speaking, your URL does not have # after it)
- Here you need to configure nginx
location / {
    try_files $uri $uri/ /index.html;
}
- try_files try to visit the page requested by the current browser
- $uri The currently requested path is returned if found
- $uri/ Find the path of the current request, find the following file, and return if found
- /index.html Guaranteed solution: If the above two are not found, return directly to index.html
- root specifies the single-page static resource directory corresponding to /

2. The nginx proxy cannot upload files larger than 1M
- Add the following 2 lines to the location of proxy_pass to solve.
client_max_body_size  512m;

client_body_buffer_size 10m;
3.location matching rules
-
location ~ url {…} takes precedence over location url {…}. [In the case of partial matching]
-
location ~ url {...} is a regular match, as long as the url meets the regular rules, it will enter the relevant matching segment.
-
location url {…} is the initial match, as long as the initial part of the url matches the url specified in location, it will enter the relevant matching segment. [Note, this no modifier rule, url does not support regular expressions]
epilogue
This tutorial aims to quickly complete the project deployment, and other configuration items are not listed...I will add configuration articles when I have time later~~ You are welcome to
point out the articles that need to be corrected~
If there is a better method, you are welcome to propose it and work together progress~~