What are microservices? A series will be seen at a glance!
2. Teach you how to build a SpringCloud project (2) Producers and consumers
3. Teach you how to build a SpringCloud project (3) Integrate the Eureka service registration center
4. Teach you how to build the SpringCloud project (4) Eureka cluster version construction
5. Teach you how to build the SpringCloud project (5) Build the producer cluster version
6. Teach you how to build a SpringCloud project (6) Eureka realizes service discovery
7. Teach you how to build a SpringCloud project (7) Integrate the Consul service registration center
8. Teach you how to build a SpringCloud project (8) Integrated Ribbon load balancer
9. Teach you how to build a SpringCloud project (9) Integrate OpenFeign service interface calls
10. Teach you how to build a SpringCloud project (10) Integrate Hystrix service downgrade
11. Teach you to build a SpringCloud project (11) Integrating Hystrix's service fuse
13. Teach you how to build a SpringCloud project (13) Integrate a new generation of Gateway
15. Teach you how to build a SpringCloud project (15) Integrated Bus message bus
16. Teach you how to build a SpringCloud project (16) Integrated Stream message driver
17. Teach you how to build a SpringCloud project (17) Integrating Sleuth distributed link tracking
Continue to update, welcome to like and follow!
1. Understand Consul
This article learns Consul, another service registry, so what is Consul?
Consul is a service grid (TCP/IP between microservices, responsible for network calls, current limiting, fusing and monitoring between services) solution, it is a distributed, highly available system, and development and use Very easy. It provides a full-featured control plane, the main features are: service discovery, health check, key-value storage, secure service communication, multi-data center.
Compared with other distributed service registration and discovery solutions, Consul's solution is more "one-stop" - built-in service registration and discovery framework, distributed consistency protocol implementation, health check, Key/Value storage, multi-data center solution , no longer need to rely on other tools. Consul itself is developed using the go language, which has the characteristics of cross-platform and efficient operation, and is also very convenient to use with Docker.
2. Consul installation and operation
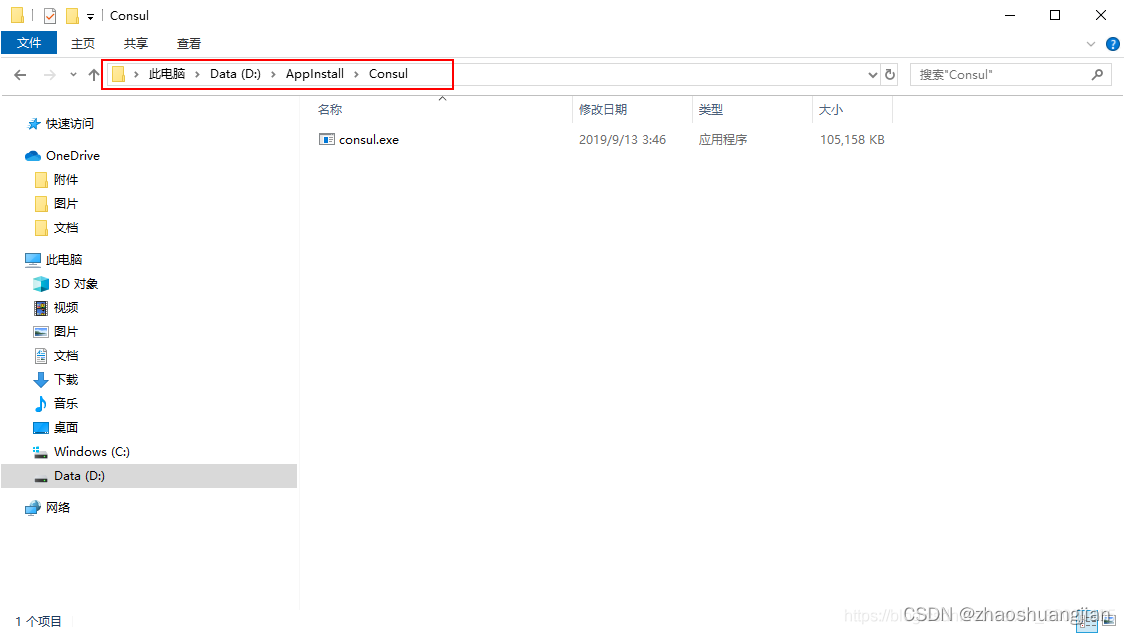
Click to visit the official website of Consul, enter the official website, we click to download, there are three types of versions, the Windows version we installed here, the download is a zip compressed package, after we decompress, there will be a consul.exe application program, As shown below:

No need to install, we find the file address of the application, as shown below:
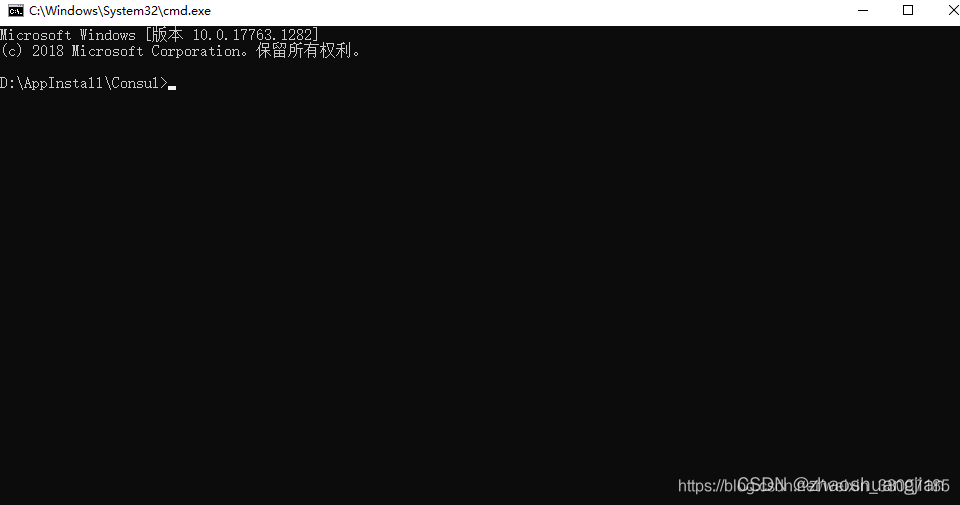
Then we directly enter cmd in the address bar of the opened folder to enter the following interface:
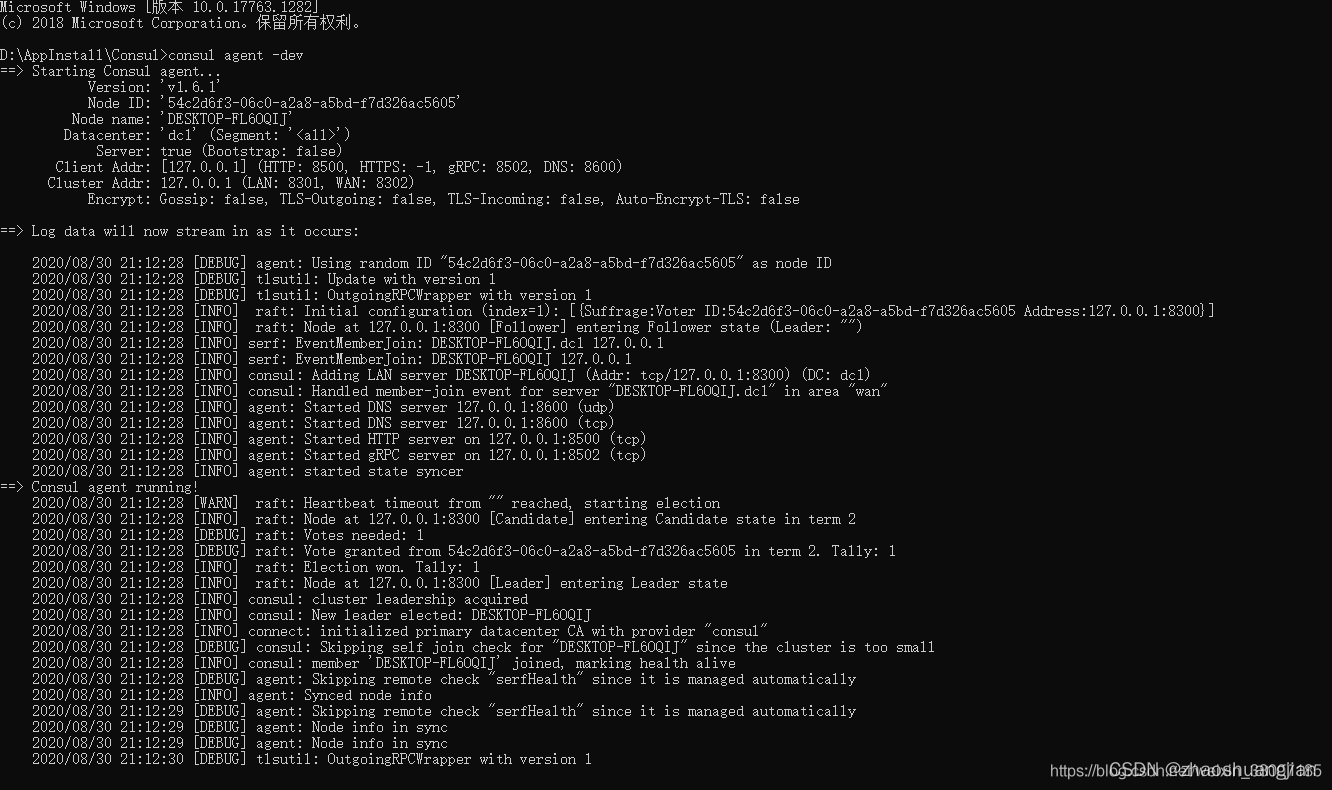
We enter the command consul agent -dev to enter the development mode, as shown below:
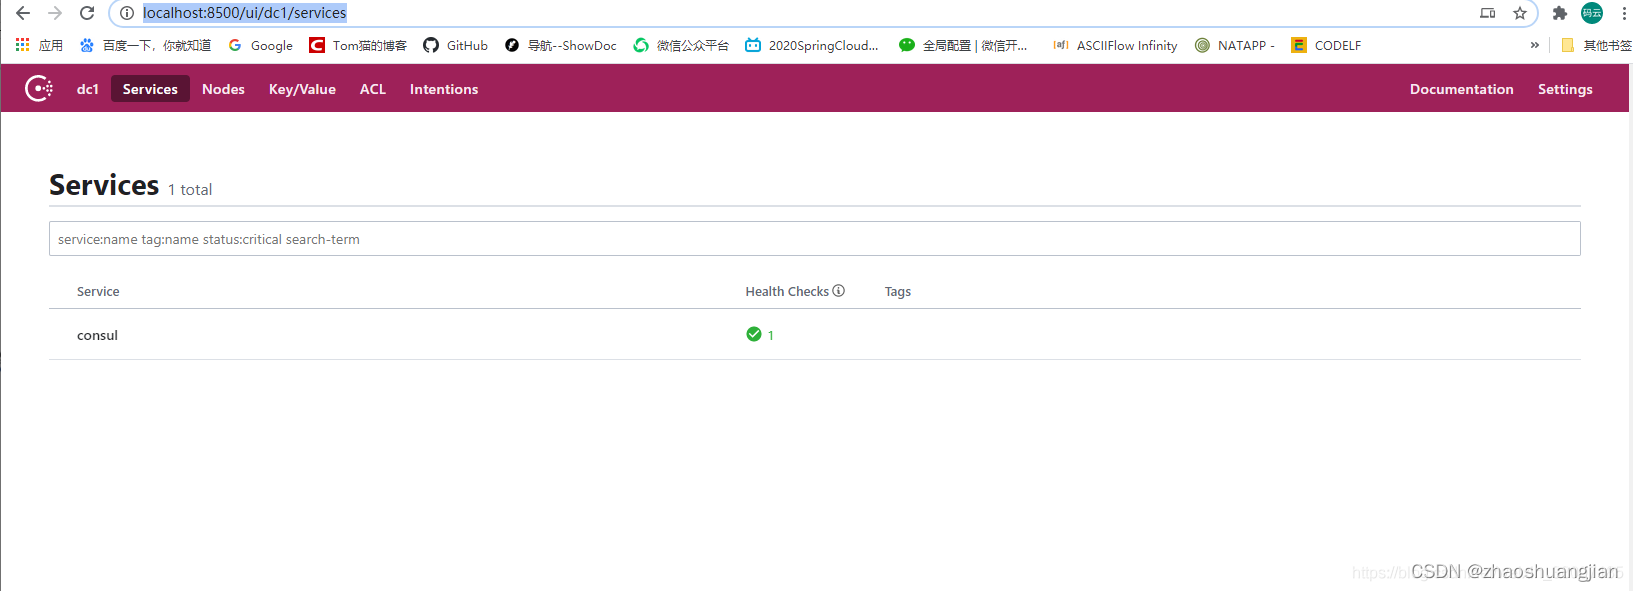
You can visit the home page of Consul by visiting http://localhost:8500/ui/dc1/services address, as shown below:
3. Build producer services
Create a new module, see the previous article for specific steps, here we start from the configuration file to paste the code, modify the pom, xml file, mainly to add the dependency package of consul.
<?xml version="1.0" encoding="UTF-8"?>
<project xmlns="http://maven.apache.org/POM/4.0.0"
         xmlns:xsi="http://www.w3.org/2001/XMLSchema-instance"
         xsi:schemaLocation="http://maven.apache.org/POM/4.0.0 http://maven.apache.org/xsd/maven-4.0.0.xsd">
    <parent>
        <artifactId>mcroservice</artifactId>
        <groupId>com.study.springcloud</groupId>
        <version>1.0-SNAPSHOT</version>
    </parent>
    <modelVersion>4.0.0</modelVersion>

    <artifactId>cloud-providerconsul-payment04</artifactId>

    <dependencies>
        <!--SpringCloud consul-server-->
        <dependency>
            <groupId>org.springframework.cloud</groupId>
            <artifactId>spring-cloud-starter-consul-discovery</artifactId>
        </dependency>
        <dependency>
            <groupId>com.study.springcloud</groupId>
            <artifactId>cloud-api-commons</artifactId>
            <version>${project.version}</version>
        </dependency>
        <dependency>
            <groupId>org.springframework.boot</groupId>
            <artifactId>spring-boot-starter-web</artifactId>
        </dependency>
        <dependency>
            <groupId>org.springframework.boot</groupId>
            <artifactId>spring-boot-starter-actuator</artifactId>
        </dependency>
        <dependency>
            <groupId>org.springframework.boot</groupId>
            <artifactId>spring-boot-devtools</artifactId>
            <scope>runtime</scope>
            <optional>true</optional>
        </dependency>
        <dependency>
            <groupId>org.projectlombok</groupId>
            <artifactId>lombok</artifactId>
            <optional>true</optional>
        </dependency>
        <dependency>
            <groupId>org.springframework.boot</groupId>
            <artifactId>spring-boot-starter-test</artifactId>
            <scope>test</scope>
        </dependency>
    </dependencies>

</project>
New yml file configuration
server:
  # consul服务端口
  port: 8004
spring:
  application:
    name: cloud-provider-payment
  cloud:
    consul:
      # consul注册中心地址
      host: localhost
      port: 8500
      discovery:
        #hostname: 127.0.0.1
        service-name: ${spring.application.name}
New main startup class
package com.buba.springcloud;

import org.springframework.boot.SpringApplication;
import org.springframework.boot.autoconfigure.SpringBootApplication;
import org.springframework.cloud.client.discovery.EnableDiscoveryClient;

@SpringBootApplication
@EnableDiscoveryClient
public class PaymentMain04 {


    public static void main(String[] args) {


        SpringApplication.run(PaymentMain04.class,args);
    }
}
New test business class
package com.buba.springcloud.controller;

import lombok.extern.slf4j.Slf4j;
import org.springframework.beans.factory.annotation.Value;
import org.springframework.web.bind.annotation.RequestMapping;
import org.springframework.web.bind.annotation.RestController;
import java.util.UUID;
@RestController
@Slf4j
public class PaymentController {


    @Value("${server.port}")
    private String serverPort;

    @RequestMapping(value = "payment/consul")
    public String paymentConsul() {


        return "SpringCloud with consul:" + serverPort + "\t" + UUID.randomUUID().toString();
    }

}
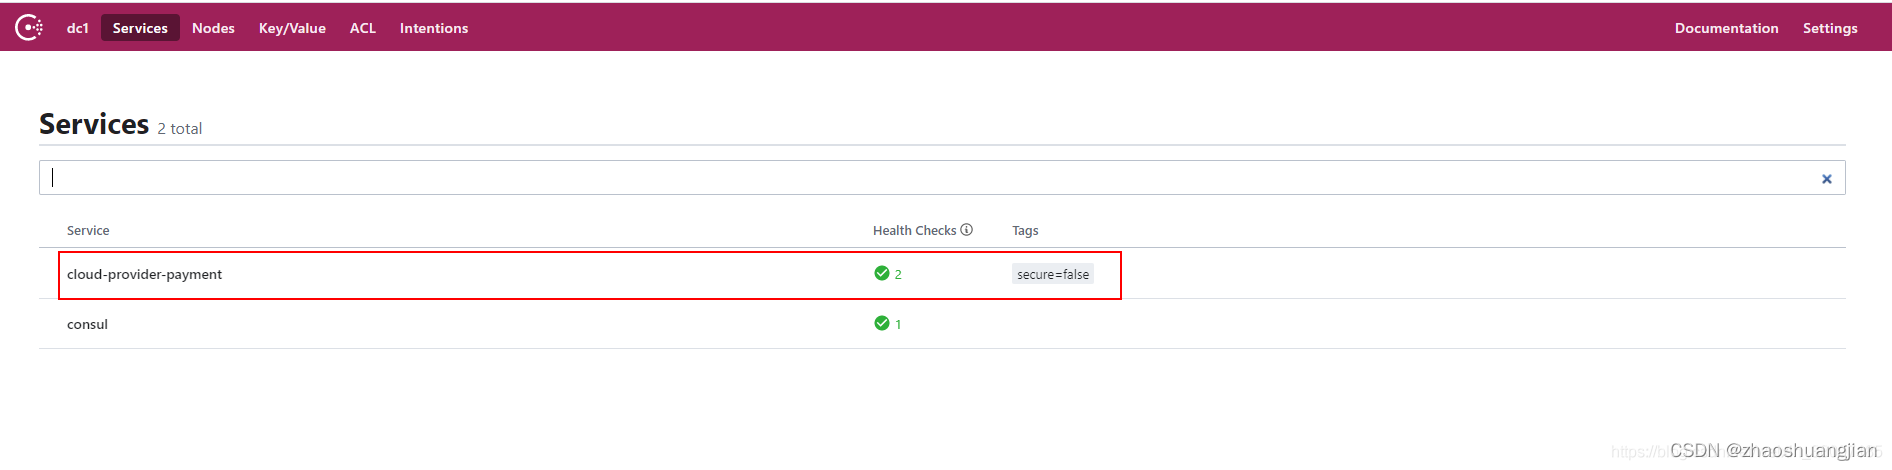
First start the consul we installed on windows, and then start our module project, you can see that cloud-provider-payment has been successfully registered to the consul registration center.
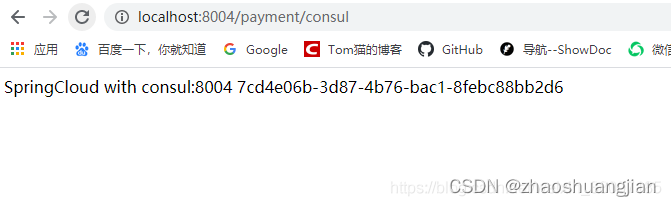
Then we visit the business interface http://localhost:8004/payment/consul just now to see if we can get the information. It can be accessed successfully, as shown in the figure below:
4. Build consumer services
Create a new module, the service name is to modify the pom.xml file, mainly to add the dependency package of consul. As shown below:
<?xml version="1.0" encoding="UTF-8"?>
<project xmlns="http://maven.apache.org/POM/4.0.0"
         xmlns:xsi="http://www.w3.org/2001/XMLSchema-instance"
         xsi:schemaLocation="http://maven.apache.org/POM/4.0.0 http://maven.apache.org/xsd/maven-4.0.0.xsd">
    <parent>
        <artifactId>mcroservice</artifactId>
        <groupId>com.study.springcloud</groupId>
        <version>1.0-SNAPSHOT</version>
    </parent>
    <modelVersion>4.0.0</modelVersion>

    <artifactId>cloud-consumerconsul-order</artifactId>
    <description>服务消费者之注册中心consul</description>

    <dependencies>
        <!--SpringCloud consul-server-->
        <dependency>
            <groupId>org.springframework.cloud</groupId>
            <artifactId>spring-cloud-starter-consul-discovery</artifactId>
        </dependency>
        <dependency>
            <groupId>com.study.springcloud</groupId>
            <artifactId>cloud-api-commons</artifactId>
            <version>${project.version}</version>
        </dependency>
        <dependency>
            <groupId>org.springframework.boot</groupId>
            <artifactId>spring-boot-starter-web</artifactId>
        </dependency>
        <!--监控-->
        <dependency>
            <groupId>org.springframework.boot</groupId>
            <artifactId>spring-boot-starter-actuator</artifactId>
        </dependency>
        <!--热部署-->
        <dependency>
            <groupId>org.springframework.boot</groupId>
            <artifactId>spring-boot-devtools</artifactId>
            <scope>runtime</scope>
            <optional>true</optional>
        </dependency>
        <dependency>
            <groupId>org.projectlombok</groupId>
            <artifactId>lombok</artifactId>
            <optional>true</optional>
        </dependency>
        <dependency>
            <groupId>org.springframework.boot</groupId>
            <artifactId>spring-boot-starter-test</artifactId>
            <scope>test</scope>
        </dependency>
    </dependencies>


</project>
Create a new yml file, as shown below:
server:
  port: 80
spring:
  application:
    name: cloud-consumer-order
  cloud:
    consul:
      # consul注册中心地址
      host: localhost
      port: 8500
      discovery:
        #hostname: 127.0.0.1
        service-name: ${spring.application.name}
Create a new main startup class, as shown below:
package com.buba.springcloud.order;

import org.springframework.boot.SpringApplication;
import org.springframework.boot.autoconfigure.SpringBootApplication;
import org.springframework.cloud.client.discovery.EnableDiscoveryClient;

@SpringBootApplication
@EnableDiscoveryClient
public class OrderconsulMain {


    public static void main(String[] args) {


        SpringApplication.run(OrderconsulMain.class,args);
    }
}
Create a new ApplicationContextConfig configuration file, as shown below:
package com.buba.springcloud.order.config;

import org.springframework.cloud.client.loadbalancer.LoadBalanced;
import org.springframework.context.annotation.Bean;
import org.springframework.context.annotation.Configuration;
import org.springframework.web.client.RestTemplate;

@Configuration
public class ApplicationContextConfig {


    @Bean
    //RestTemplate 的负载均衡能力
    @LoadBalanced
    public RestTemplate getRestTemplate(){


        return new RestTemplate();
    }
}
Write the business class, as shown below;
package com.buba.springcloud.order.controller;


import lombok.extern.slf4j.Slf4j;
import org.springframework.beans.factory.annotation.Autowired;
import org.springframework.web.bind.annotation.GetMapping;
import org.springframework.web.bind.annotation.RestController;
import org.springframework.web.client.RestTemplate;

@RestController
@Slf4j
public class OrderConsulController {


    public static final  String PAYMENT_URL = "http://cloud-provider-payment";
    @Autowired
    private RestTemplate restTemplate;

    @GetMapping("/consumer/payment/consul")
    public String getPayment(){


        return restTemplate.getForObject(PAYMENT_URL+"/payment/consul/",String.class);
    }
}
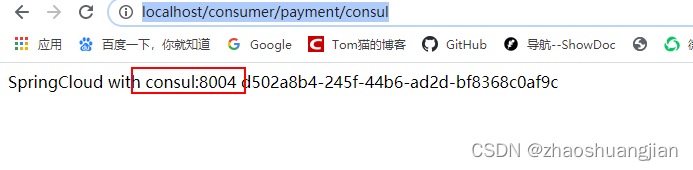
Now start the Consul server, cloud-providerconsul-payment04 producer service, cloud-consumerconsul-order consumer service respectively, and then visit http://localhost/consumer/payment/consul, you can also call the producer's service through the consumer, getting information. The successful interface is as follows:
Simple integration of consul is complete. so easy!!!