foreword
Recently, I will officially start writing a flutter project. When I was browsing how flutter performs framework design, I suddenly saw an article about how to manage the state of flutter. State management in flutter is not well understood, but you must change the state when you need to pass values between pages or change a value in a component. When I saw in this article that the author used the Getx component, it is very easy to use. In addition to helping you manage the state, it can also manage routing, themes, and multiple languages, so I started to learn Getx.
Getx github![]() https://github.com/jonataslaw/getx
https://github.com/jonataslaw/getx
use
Create a new flutter empty project (the default is a counter demo). First add Getx to the pubspec.yaml file
dependencies:
get:
Then on the basis of this default counter demo, let's use the powerful functions of Getx
first step
void main() => runApp(GetMaterialApp(home: Home()));-
Note: This does not modify Flutter's MaterialApp, GetMaterialApp is not a modified MaterialApp, it is just a pre-configured Widget, and its subcomponents are the default MaterialApp. You can configure it manually, but it is absolutely not necessary. GetMaterialApp will create routes, inject them, inject translations, inject everything you need for route navigation. If you only use Get for state management or dependency management, there is no need to use GetMaterialApp. GetMaterialApp is necessary for routing, snackbar, internationalization, bottomSheet, dialog, and high-level apis related to routing and without context.
-
Note 2: This step is only required if you are going to use route management (
Get.to(),Get.back()etc). If you are not going to use it, then there is no need to do step 1
second step
Create a business logic class, and put all variables, methods, and controllers in this business logic class. Here is an extra code that we can't understand, "0.obs", don't worry about the use of this code, let's continue down first.
class Controller extends GetxController{
  var count = 0.obs;
  increment() => count++;
}
third step
Create the homepage Home and the second page Other. After using the Get framework, there is basically no need to create stateful components, namely StatefulWidget
class Home extends StatelessWidget {

  @override
  Widget build(context) {

    // 使用Get.put()实例化你的类,使其对当下的所有子路由可用。
    final Controller c = Get.put(Controller());

    return Scaffold(
      // 使用Obx(()=>每当改变计数时,就更新Text()。
      appBar: AppBar(title: Obx(() => Text("Clicks: ${c.count}"))),

      // 用一个简单的Get.to()即可代替Navigator.push那8行,无需上下文!
      body: Center(child: ElevatedButton(
              child: Text("Go to Other"), onPressed: () => Get.to(Other()))),
      floatingActionButton:
          FloatingActionButton(child: Icon(Icons.add), onPressed: c.increment));
  }
}

class Other extends StatelessWidget {
  // 你可以让Get找到一个正在被其他页面使用的Controller,并将它返回给你。
  final Controller c = Get.find();

  @override
  Widget build(context){
     // 访问更新后的计数变量
     return Scaffold(body: Center(child: Text("${c.count}")));
  }
}
At this point, we can run and open the app directly, and we can see that we have implemented the state change in the StatelessWidget component. How is this done? ?


Principle of use
We declared a variable count = 0.obs in the Controller class. Due to the syntactic sugar of dart, we don't know what type this variable is. We can print out the type of the count variable in the life cycle of this GetxController.
class Controller extends GetxController{
  var count = 0.obs;
  increment() => count++;
  @override
  void onInit() {
    super.onInit();
    print(count.runtimeType);
  }
}![]()
It can be seen that the printed type is RxInt, we are familiar with the Int type, but what is Rx added in front of it?
This is actually a type defined in the Getx framework called a responsive variable , Rx_Type, followed by Type can be any basic type, including list, map, etc., and can also declare custom responsive variables.
There are three official methods for declaring responsive variables. The first two are not commonly used, and the third method is the most practical.
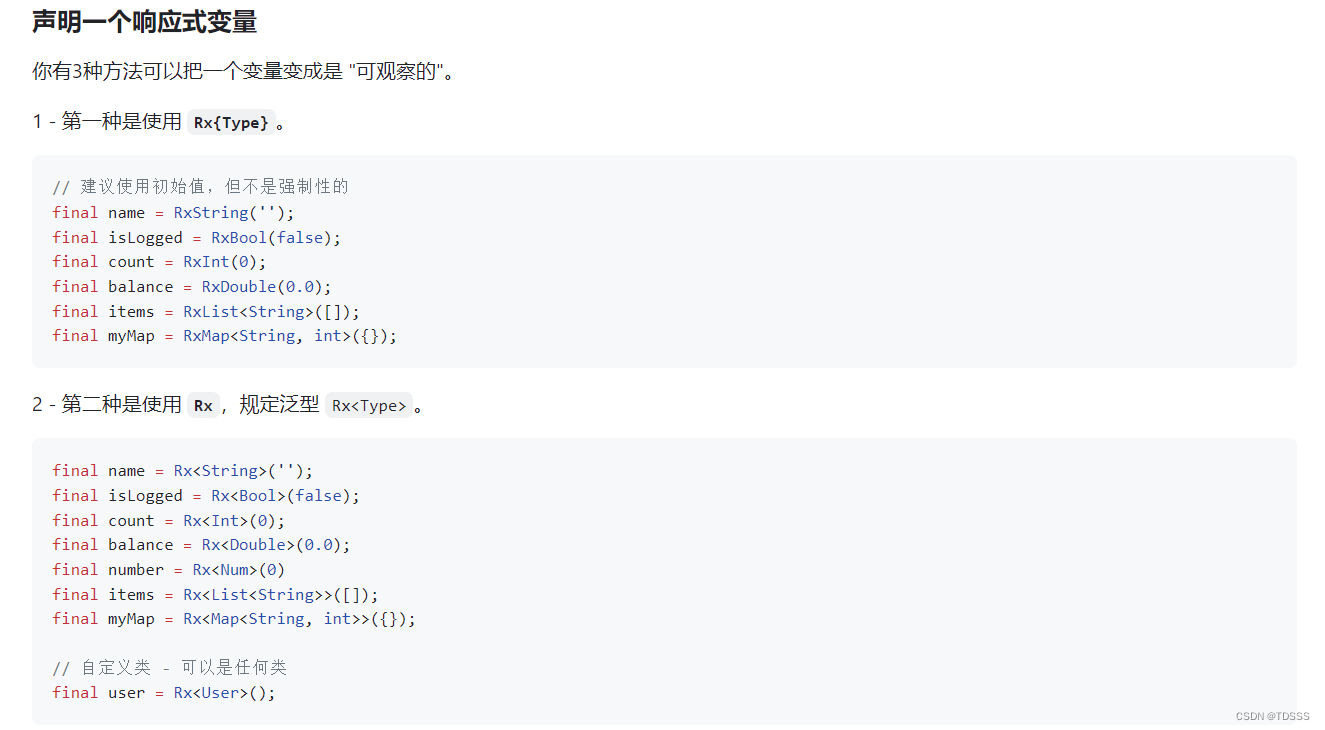
The third method:
final name = ''.obs;
final isLogged = false.obs;
final count = 0.obs;
final balance = 0.0.obs;
final number = 0.obs;
final items = <String>[].obs;
final myMap = <String, int>{}.obs;

// 自定义类 - 可以是任何类
final user = User().obs;
Just add an .obs to the end of the variable to make the variable observable.
When using it, you need to wrap the component with Obx(), as long as the observed value changes, the component will be rebuilt