Write a tutorial today to explain how to use Reqable for traffic analysis on the Android emulator.
1. Android system certificate policy
First of all, a brief overview of the certificate policy of the Android system can help us better analyze the problem.
On any system, there will be a CA certificate manager, which has built-in most commonly used CA root certificates. Only SSL certificates issued by these root certificates can be trusted by the system (trust can make connections based on SSL protocols such as HTTPS handshake normally), and the Android system is no exception. We can search and view all certificates in the system in the settings .信任的凭据
On the Android system, certificates are divided into two types: system certificates and user certificates . The system certificate is built-in by the system (or OTA), and the user certificate is installed by the user.
So, what is the difference between a system certificate and a user certificate?
At present, the Android system has been iterated to version 14.0, and there is a very important watershed for the certificate mechanism: Android 7.0 . Before version 7.0 (excluding) the authority of user certificates and system certificates is equivalent, that is, the system will unconditionally trust user certificates. Obviously, this may bring some security risks, so starting from 7.0, Android no longer trusts user certificates by default. Under normal circumstances, system certificate users do not have permission to modify (add or delete certificate files), while user certificates are unlimited.
For our analysis of the traffic of the Android system, there have been restrictions since Android 7.0 . The certificates of debugging tools such as Reqable/Charles/Fiddler are invalid when installed in the user certificate directory. They are only valid when installed in the system directory.
Strictly speaking, the above paragraph is not entirely correct. For the sake of compatibility, the Android system
targetSDKVersion < 24can also trust the user certificate if the app is running on the Android 7.0+ system. Of course, the targetSDKVersion of most Apps currently exceeds 24.
This limitation is also quite unfriendly to Android developers, so Android has additionally supplemented the network security profile function, which can support developers to configure which user certificates can be trusted in the App. See here for details on how to configure .
The only feasible way to solve the certificate problem fundamentally is to put the CA certificate of the debugging tool in the system directory. Recompiling the system image is one way, but it is a bit rough. The conventional way is to unlock the system partition, and then manually write the CA certificate file.
2. Android emulator
The previous background knowledge is over. Let's take the official Android emulator as an example to explain how to use Reqable for traffic analysis.
2.1 Simulator installation
First download and install Android Studio , no need for a ladder, the direct download speed is very fast.

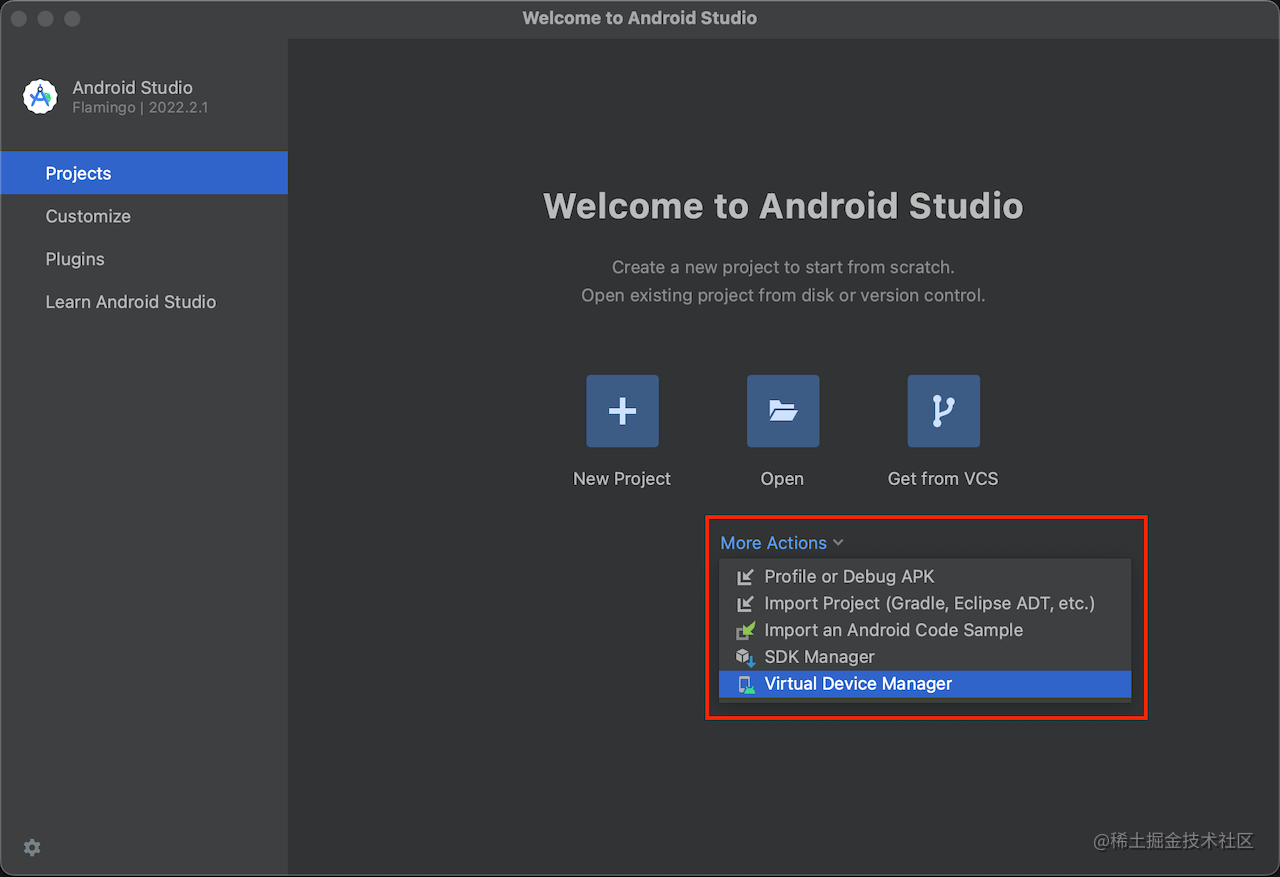
Start after the installation is complete, no need to create a new project after startup, click More Actions-> Virtual Devices Managerto open the emulator manager interface.
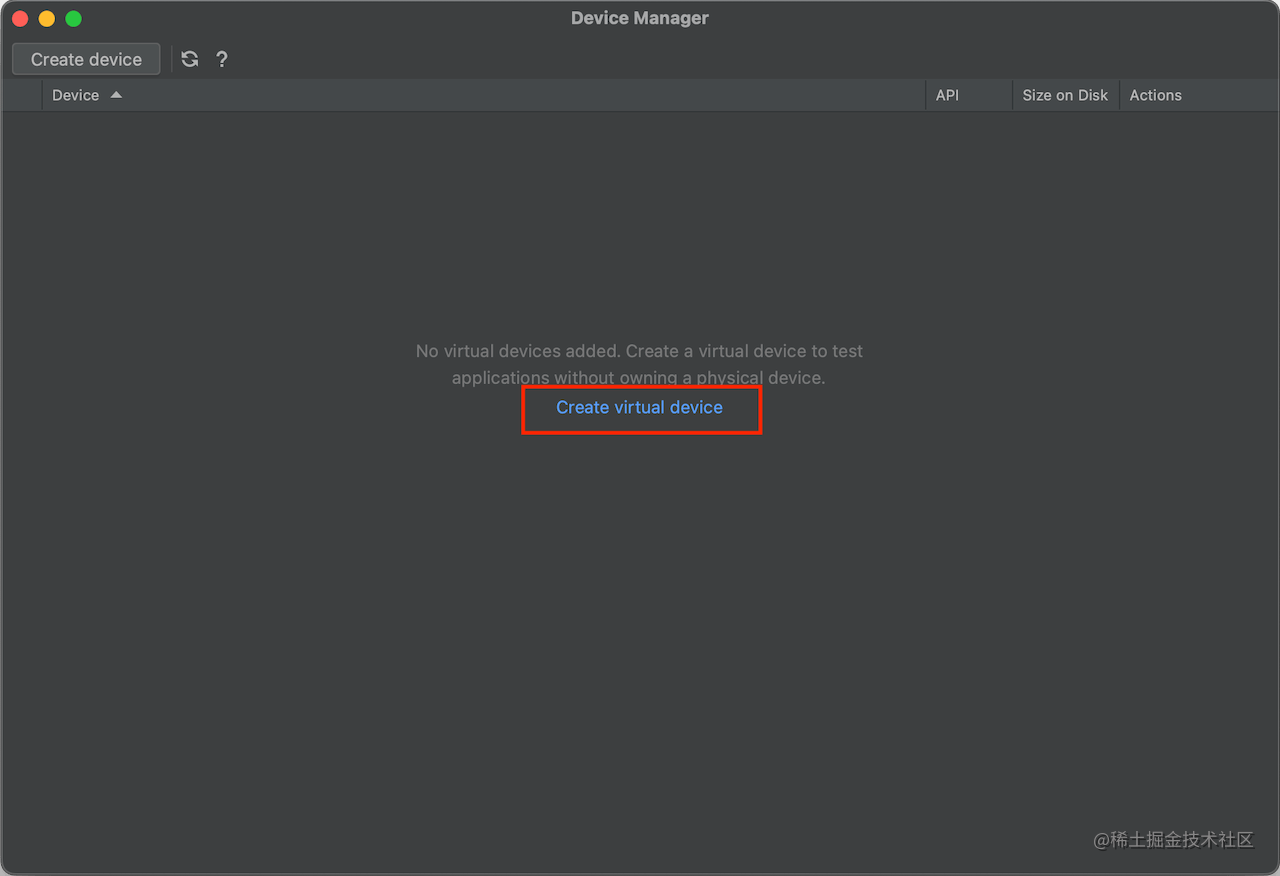
Click Create virtual Deviceto open the emulator list interface:
Android officially provides a large number of emulator models, including mobile phones, tablets, TVs, wearable devices, etc. Here we choose to create a mobile phone emulator Pixel 6 .
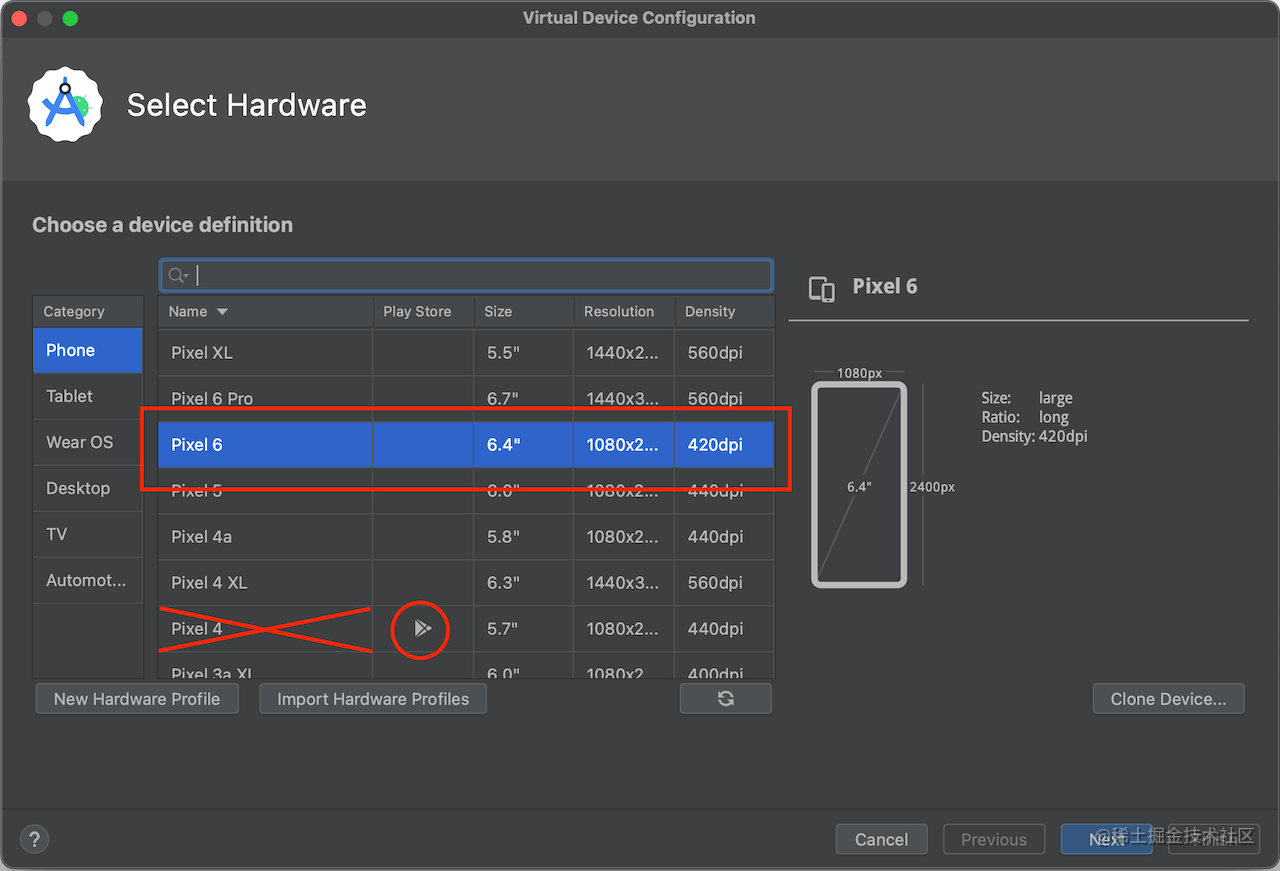
Note, do not select the included
Play Storemodel, Root operation cannot be performed. Under different systems, the architecture of the simulator is different. For example, here I am a MacBook M2, and the recommended emulators are all arm64 architecture simulators, and the performance is the best. Under the Windows x64 platform, emulators with x64 architecture are generally recommended.
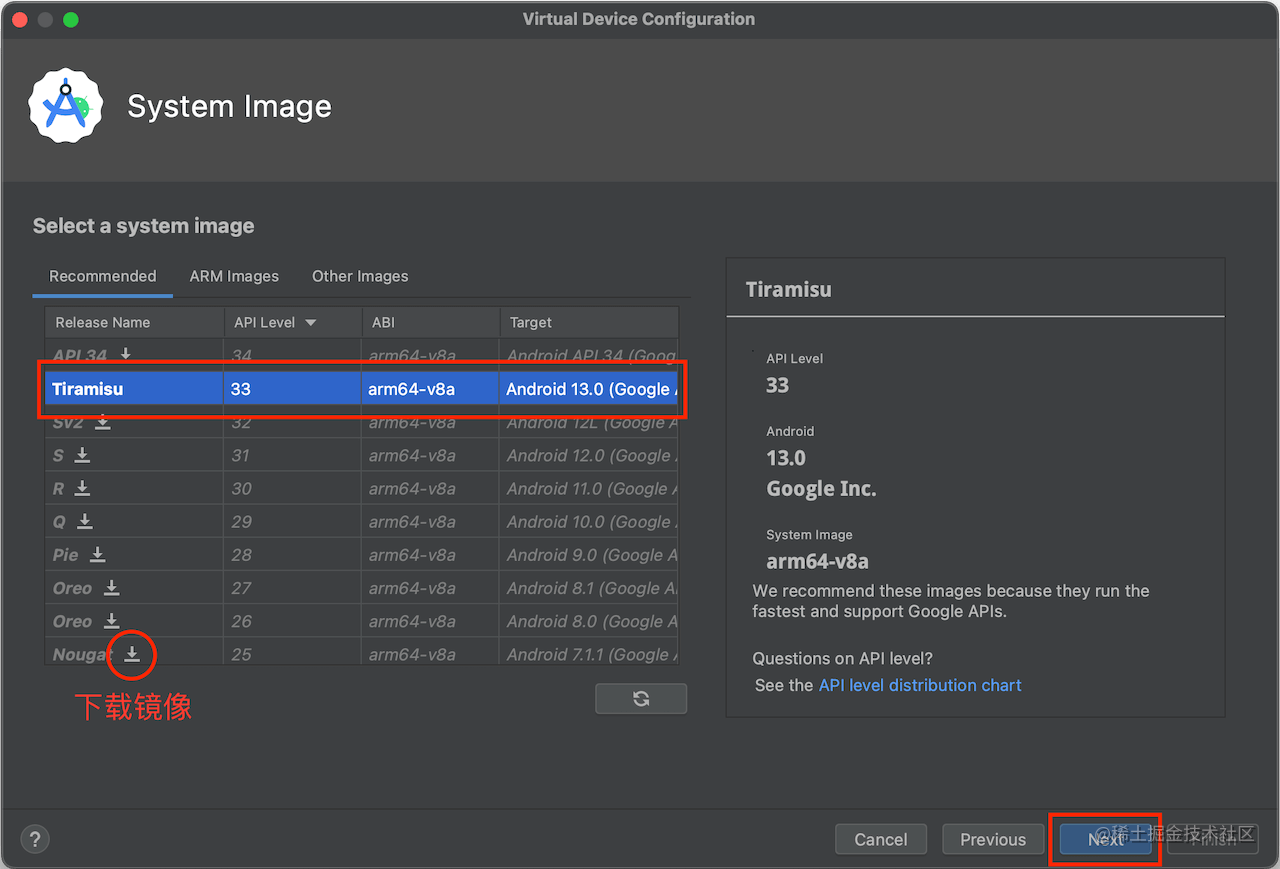
Next, select the system version, and then click Release Namethe download icon on the right to download the system image. Here we take Android 13.0 as an example. After the system image download is complete, click Nextto proceed to the next step.
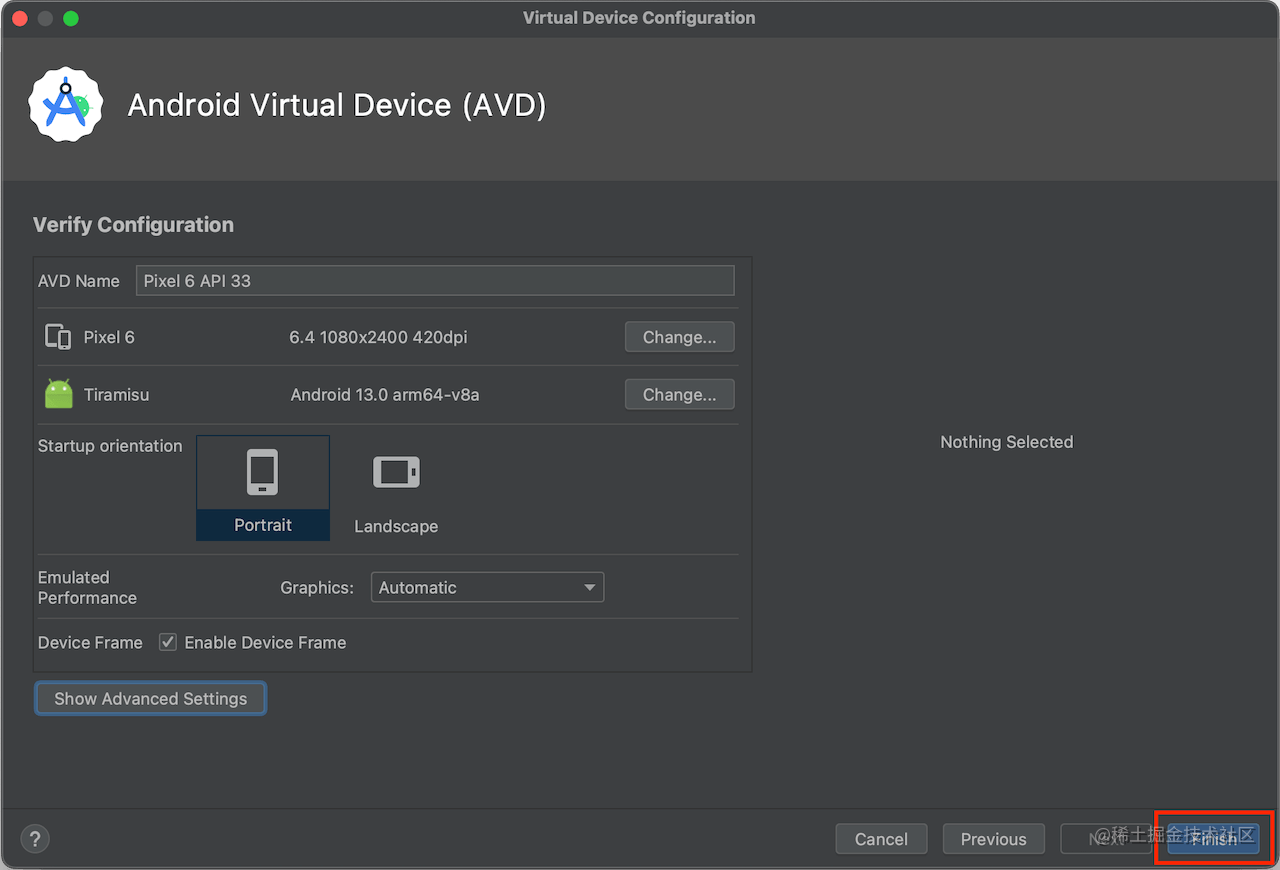
In this step, you can configure some parameters of the simulator, such as memory size, storage space, etc. We ignore this configuration. Finally, click Finishto complete the creation of the emulator.
2.2 Simulator startup
Note that here we start the emulator through the command instead of the GUI, because startup parameters need to be added.
First of all, Android SDKthe environment variables under configuration are convenient for us to use adband emulatorcommand.
export PATH="$PATH:/Users/megatronking/Library/Android/sdk/platform-tools"
export PATH="$PATH:/Users/megatronking/Library/Android/sdk/emulator"
export PATH="$PATH:/Users/megatronking/Library/Android/sdk/tools"
export JAVA_HOME="/Applications/Android Studio.app/Contents/jbr/Contents/Home"
Here is the environment variable configuration for MacOS, Windows is slightly different. Be sure to pay attention to the sequence here PATH, otherwise the emulator may not start.
Next, we emulatorstart the emulator with the command, Pixel_6_API_33is the name of the emulator. We can see the name of the simulator Android Studioin Device Manager, just replace the spaces with underscores.
emulator -avd Pixel_6_API_33 -writable-system
If there is no error, we will see that the emulator has started successfully.
2.3 Unlock the system partition
We need to run adbthe service in root mode, open a new command line window, and enter the command:
adb root
# 输出 restarting adbd as root
To disable secure boot verification, enter the command:
adb shell avbctl disable-verification
# 输出 Successfully disabled verification. Reboot the device for changes to take effect.
remountFor all partitions, enter the command:
adb remount
# 输出 Using overlayfs for /system
# 输出 Using overlayfs for /vendor
# 输出 Using overlayfs for /product
# 输出 Using overlayfs for /system_ext
# 输出 Now reboot your device for settings to take effect
# 输出 remount succeeded
You can see systemthat it has been unlocked, and the CA certificate can be imported below.
2.4 Import CA certificate
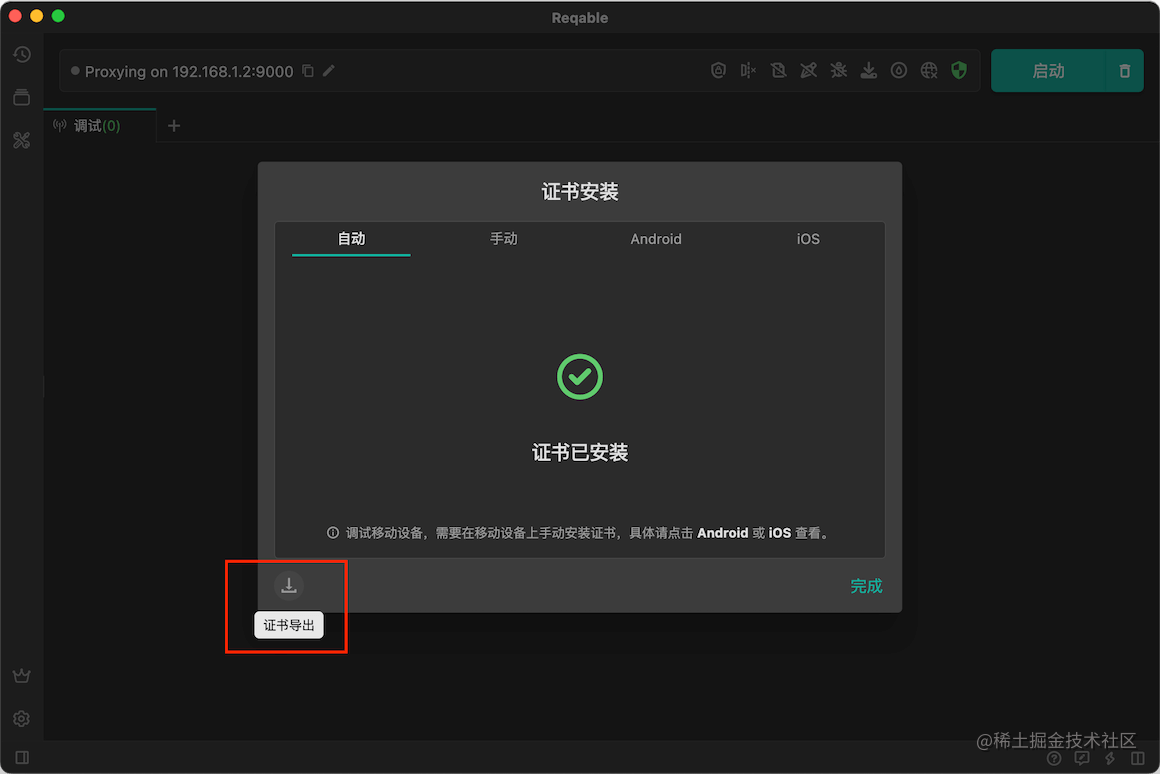
We first export the CA certificate in Reqable, click the download button in the lower left corner.
Use the following command to import the certificate downloaded in the previous step into the emulator system certificate directory:
adb push reqable-ca.crt /system/etc/security/cacerts/364618e0.0
SettingsAfter importing, we search in the emulator system credentialand click Trusted Credentialsto check whether the CA certificate of Reqable exists in Systemthe directory.
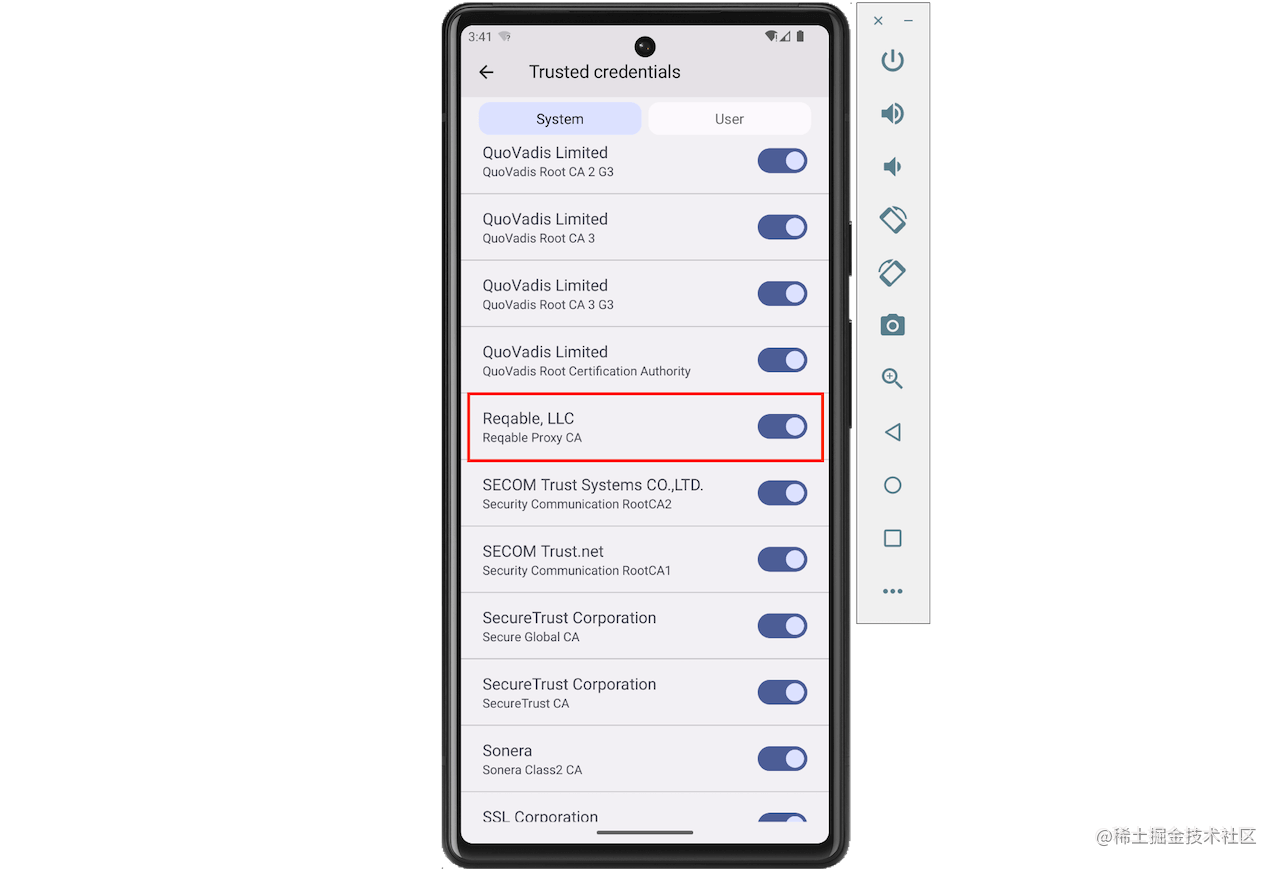
The figure above indicates that the CA certificate has been imported successfully.
3. Traffic forwarding
We need to forward the traffic of the Android emulator to Reqable on the PC side for analysis. There are two ways.
3.1 Proxy Forwarding
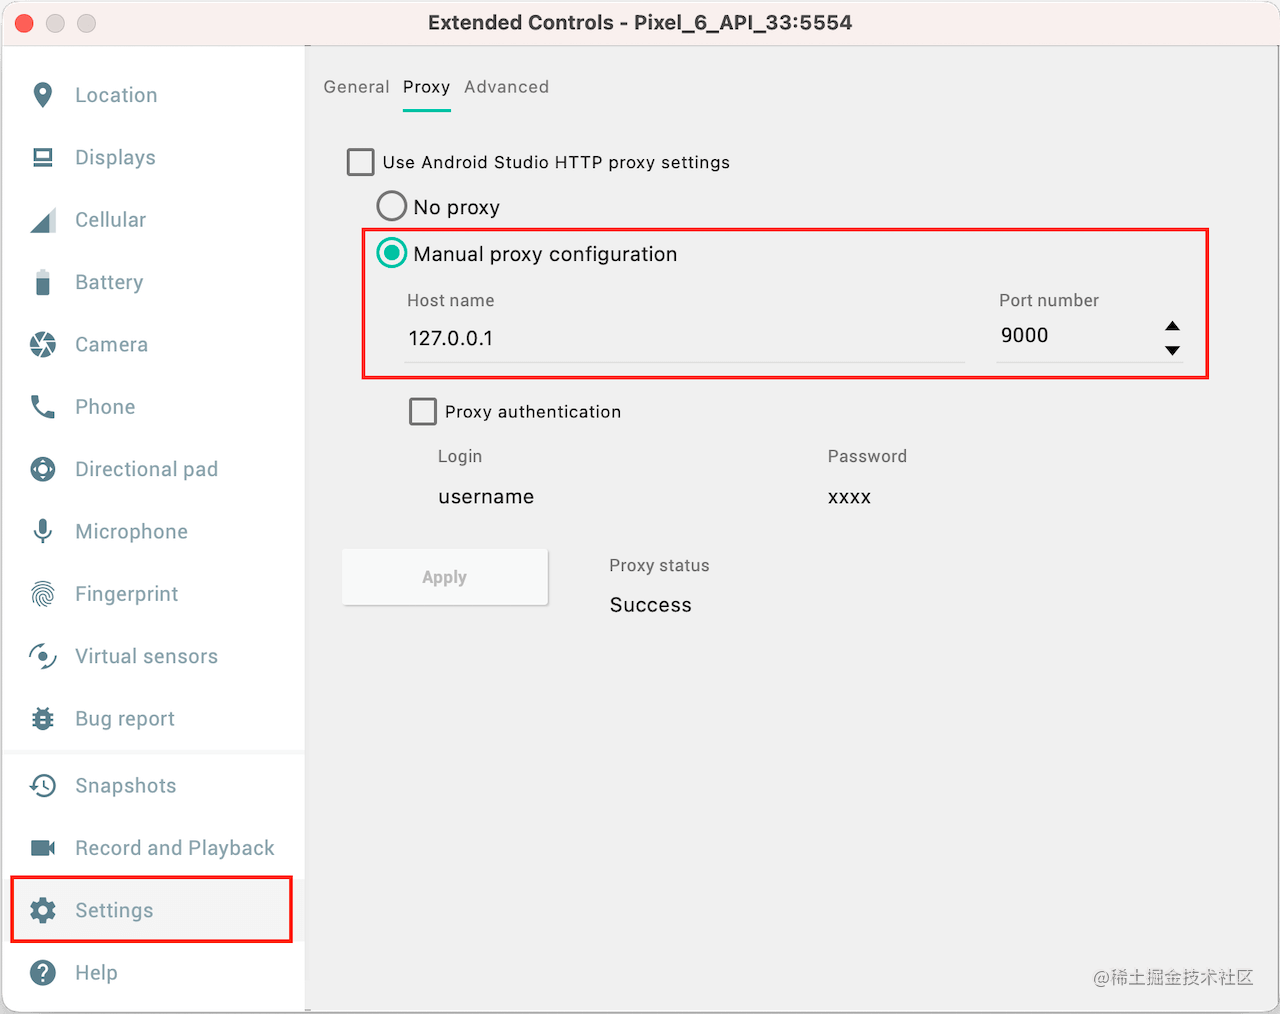
Set the simulator's proxy configuration to Reqable's proxy server address, and click ...the button at the bottom of the function operation bar on the right side of the simulator to open the simulator settings page.
3.2 VPN forwarding
Install on the emulator socksdroid, open the address below to download the apk file.
https://github.com/bndeff/socksdroid/releases/download/1.0.3/socksdroid-1.0.3.apk
Drag the downloaded one socksdroiddirectly to the emulator window to install it, or you can use it adbto install it.
adb install socksdroid-1.0.3.apk
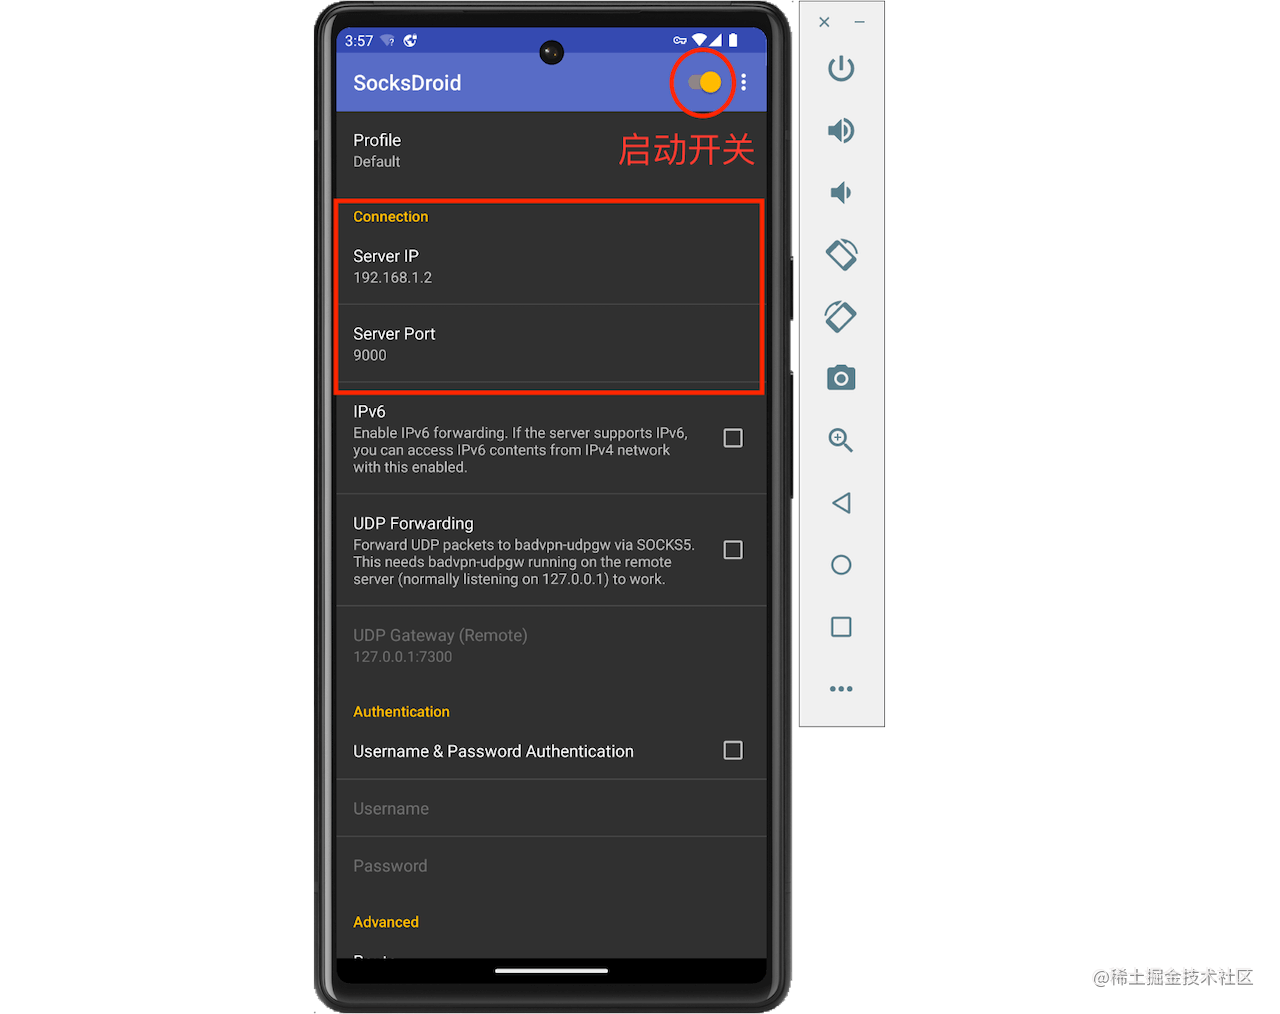
After the installation is complete, open it socksdroid, configure the computer's IP address and Reqable proxy port, and activate the switch in the upper right corner.
4. Traffic Analysis
Start debugging in Reqable, note that there is no need to configure the system proxy at this time, because we don't need to analyze the traffic of the computer.
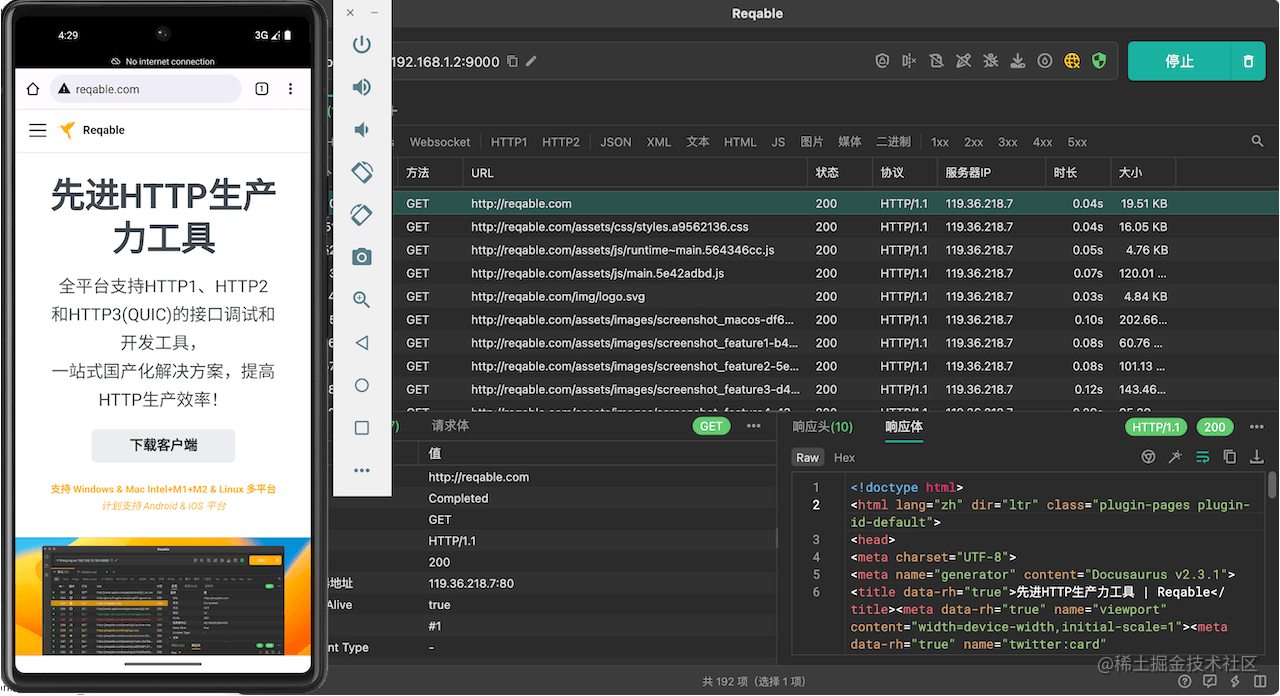
In the emulator Chrome, the effect is OK under the test of opening the official website of Reqable.
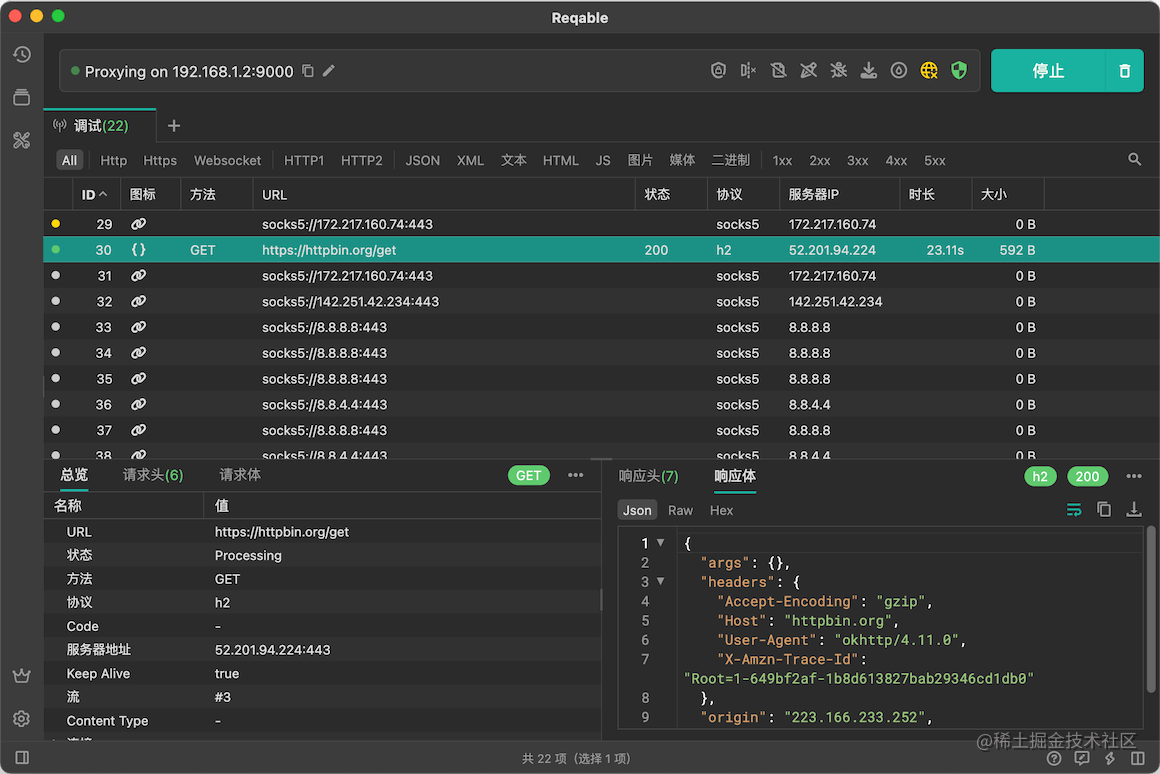
Let's test the native application again, and Android Studiotry writing a demo to send a request:
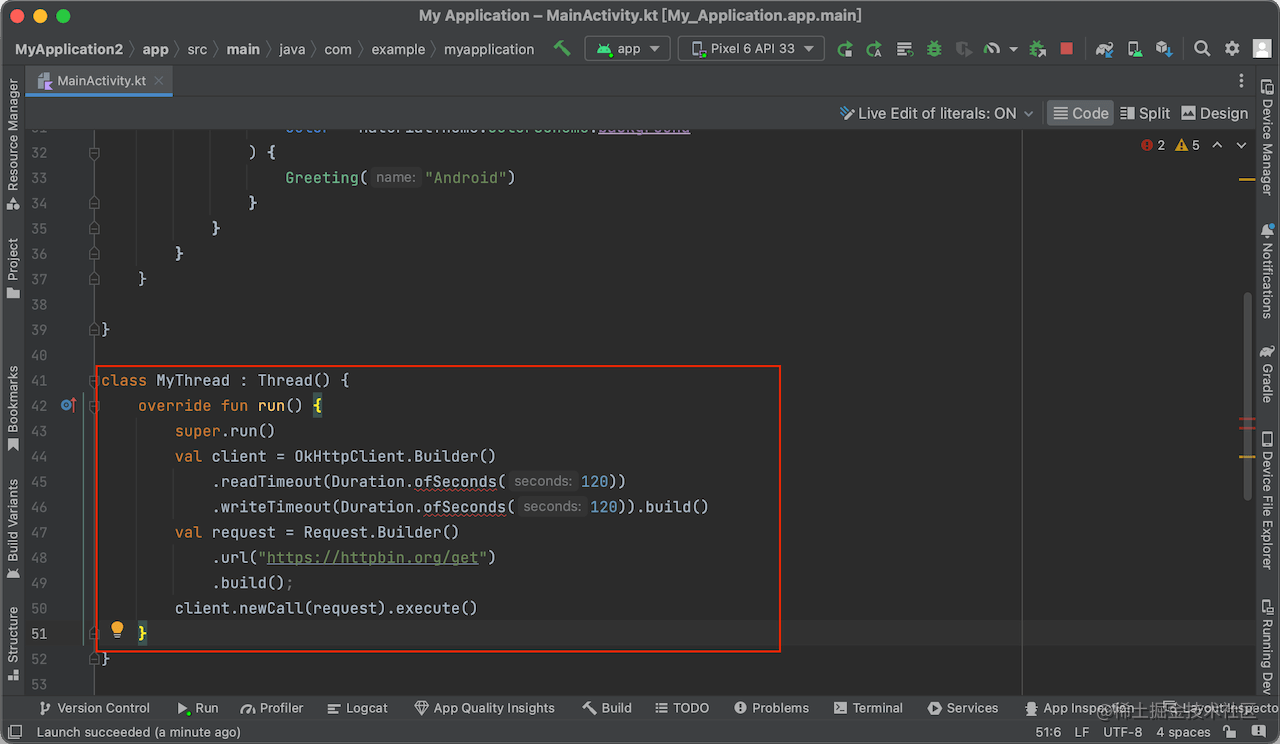
Looks okay too, done.
4. Ending
For more tutorials on how to use Reqable , please check:
- How to use the Reqable script function to improve the efficiency of API testing
- How to Use the Reqable Mirroring Function to Improve API Testing Efficiency
Thanks for reading, bye!
Original link: https://juejin.cn/post/7249623814149406778
Author: MegatronKing
at last
If you want to become an architect or want to break through the 20-30K salary range, then don't be limited to coding and business, but you must be able to select models, expand, and improve programming thinking. In addition, a good career plan is also very important, and the habit of learning is very important, but the most important thing is to be able to persevere. Any plan that cannot be implemented consistently is empty talk.
If you have no direction, here is a set of "Advanced Notes on Eight Android Modules" written by a senior architect of Ali, to help you organize the messy, scattered and fragmented knowledge systematically, so that you can systematically and efficiently master various knowledge points of Android development.

Compared with the fragmented content we usually read, the knowledge points of this note are more systematic, easier to understand and remember, and are arranged strictly according to the knowledge system.
Full set of video materials:
1. Interview collection
2. Source code analysis collection
3. The collection of open source frameworks
welcomes everyone to support with one click and three links. If you need the information in the article, just click the CSDN official certification WeChat card at the end of the article to get it for free↓↓↓