Author: tour
Preface : Some customers are not satisfied with the existing functions of iDesktop, and want to develop plug-ins for iDesktop by themselves, but they have no idea about plug-in development, are at a loss, and the instructions in the help documents are too old. The editor recently wrote a simple plug-in based on SuperMap iDesktop. Now I have sorted out the steps from development to packaging and installation of the plug-in. It is very friendly to beginner plug-in developers. I hope it can be helpful to programmers. The plug-in link of this document is as follows: https://download.csdn.net/download/supermapsupport/87354853 If you need it, you can download it and view it yourself .
Table of contents
1. Preparation and environment configuration
Regarding the pre-preparation and environment configuration, you can refer to the preparation and environment configuration in the blog . The link is as follows: https://blog.csdn.net/supermapsupport/article/details/127007251 , I will not introduce too much about it. For referenced files, users can reference them according to their needs.
注意:使用窗体程序还需引入DevExpress.Utils.v17.1.dll文件。
2. Plug-in development
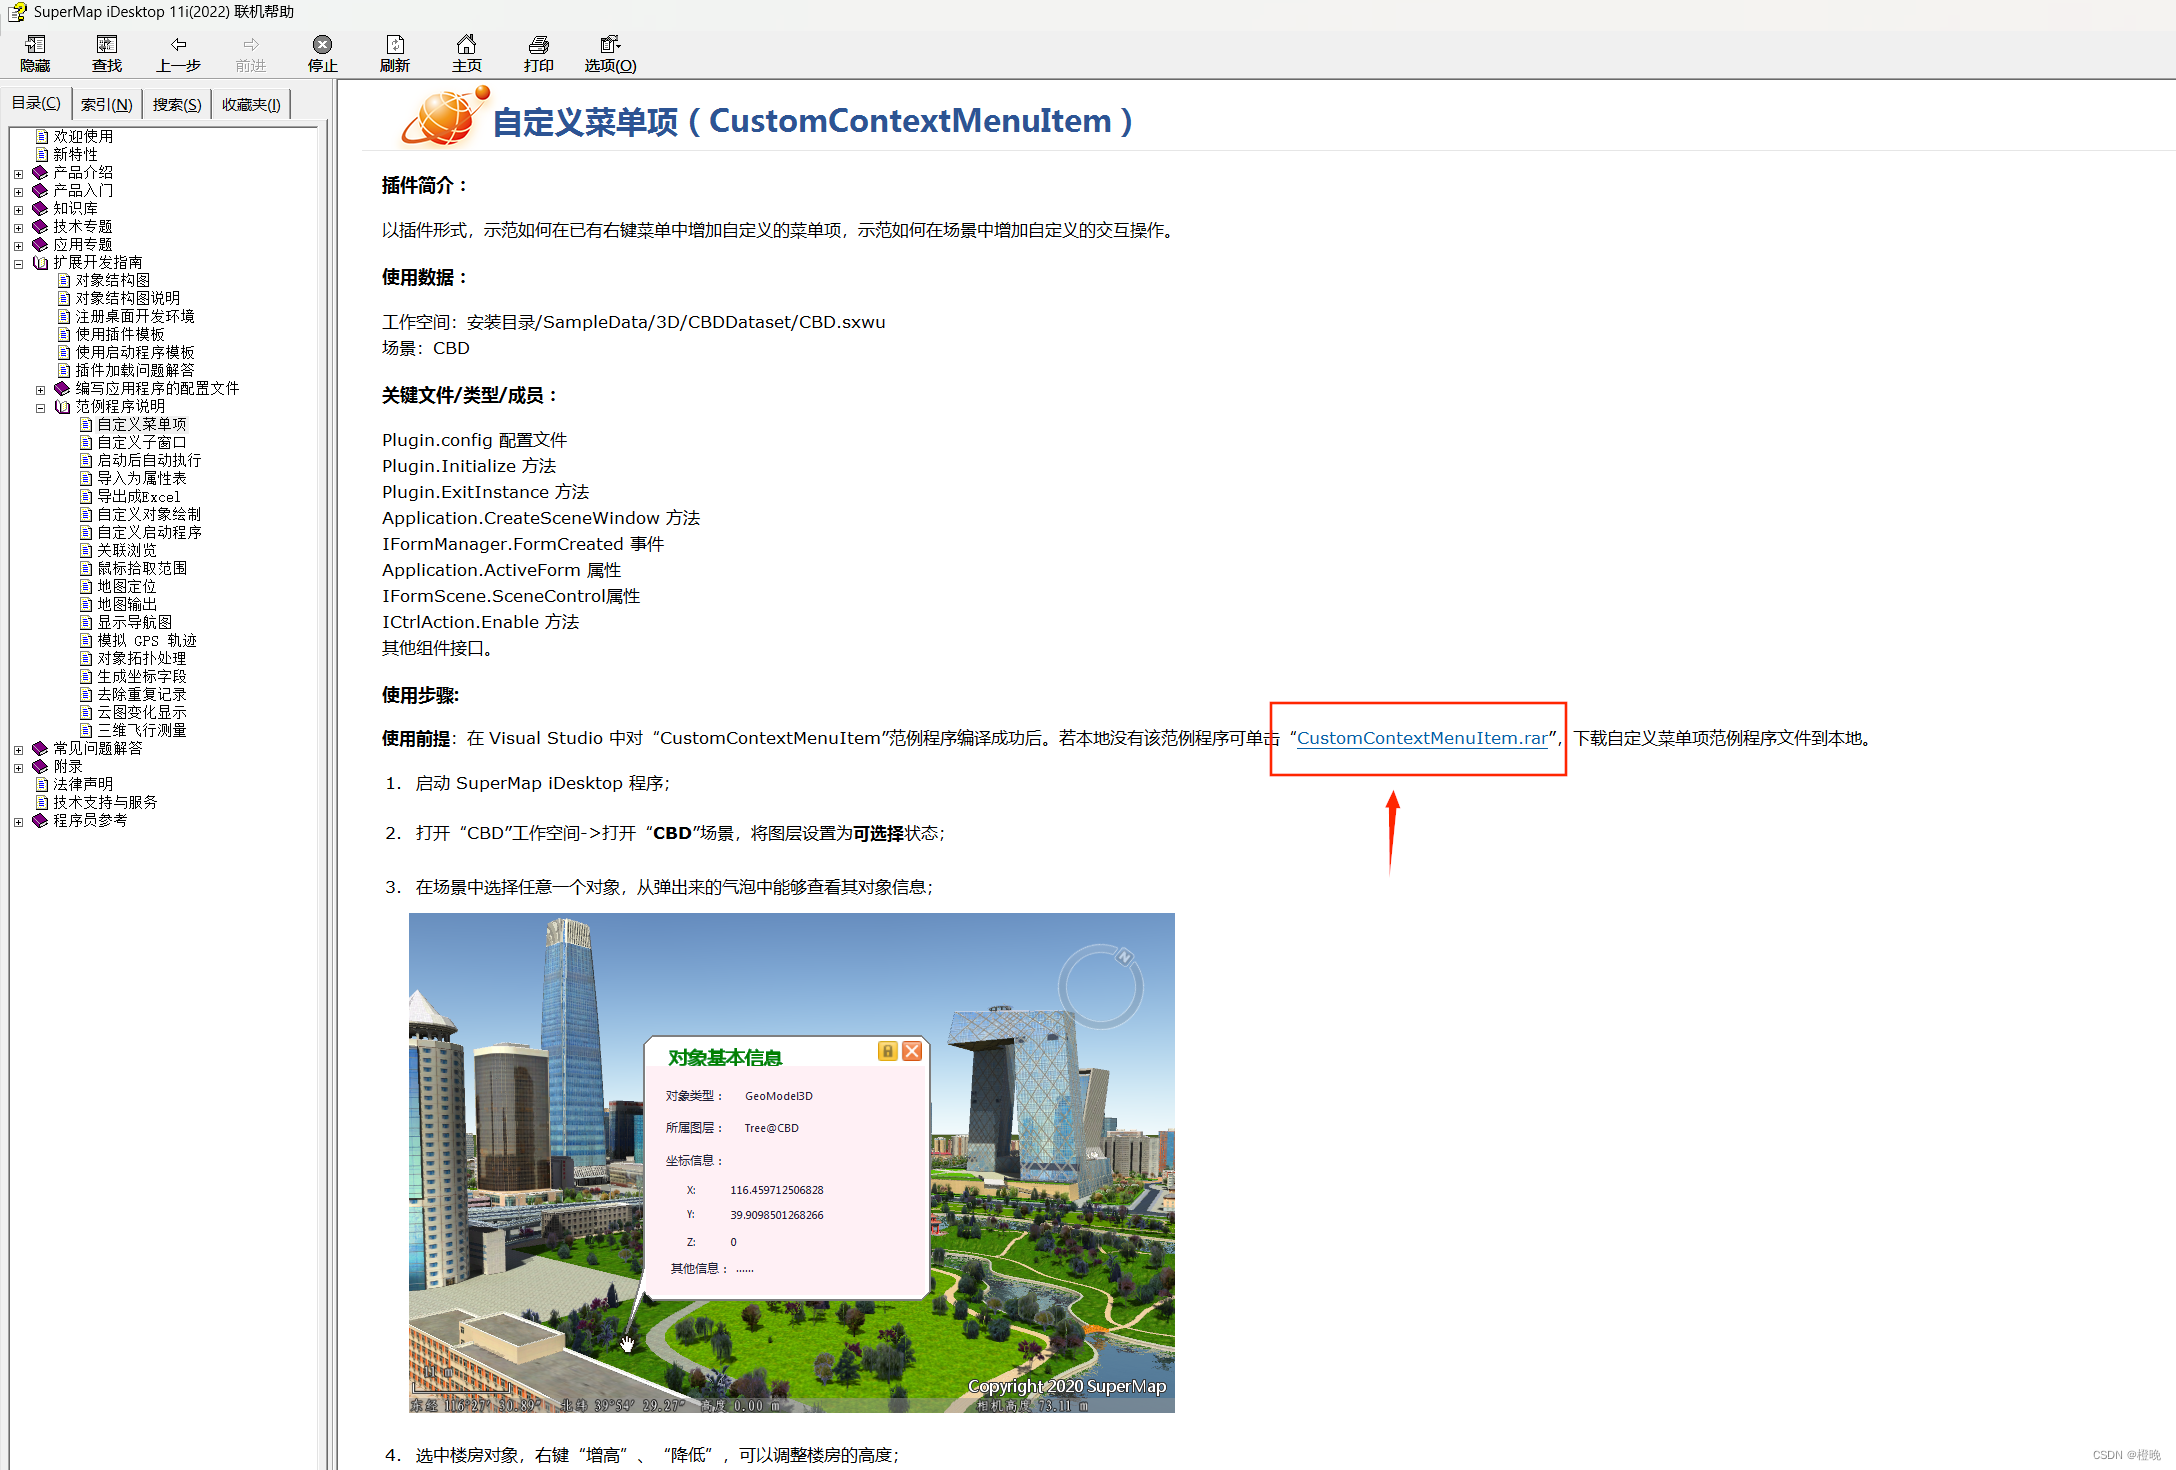
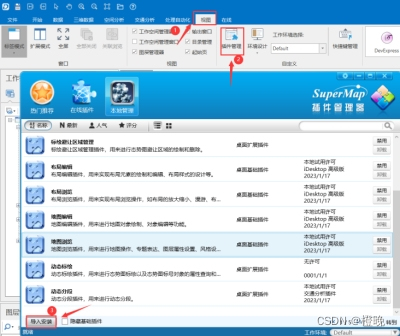
Users can refer to the original sample code to run and view. The SampleCode directory under the SuperMap iDesktop 10i / 11i installation directory has some sample codes for iDesktop plug-in development. Users can directly modify the existing sample code to realize SuperMap iDesktop 10i / 11i custom plug-in development. If not, you can download it in the offline help document, as shown in the figure below:
Users can also refer to this document to create C# library classes from scratch for plug-in development.
2.1. Configuration file
Users can easily adjust the layout and status of the custom extension plug-in on the SuperMap iDesktop desktop through the plug-in configuration file (*.config). Every time a user develops a plug-in, a corresponding configuration file must be provided for the plug-in. The plug-in configuration file mainly includes plug-in configuration, interface element configuration, and help system configuration. SuperMap iDesktop configuration files all have *.config as the extension and are written and stored in standard XML format. At the same time, plug-ins must have a namespace whose value is http://www.supermap.com/desktop.
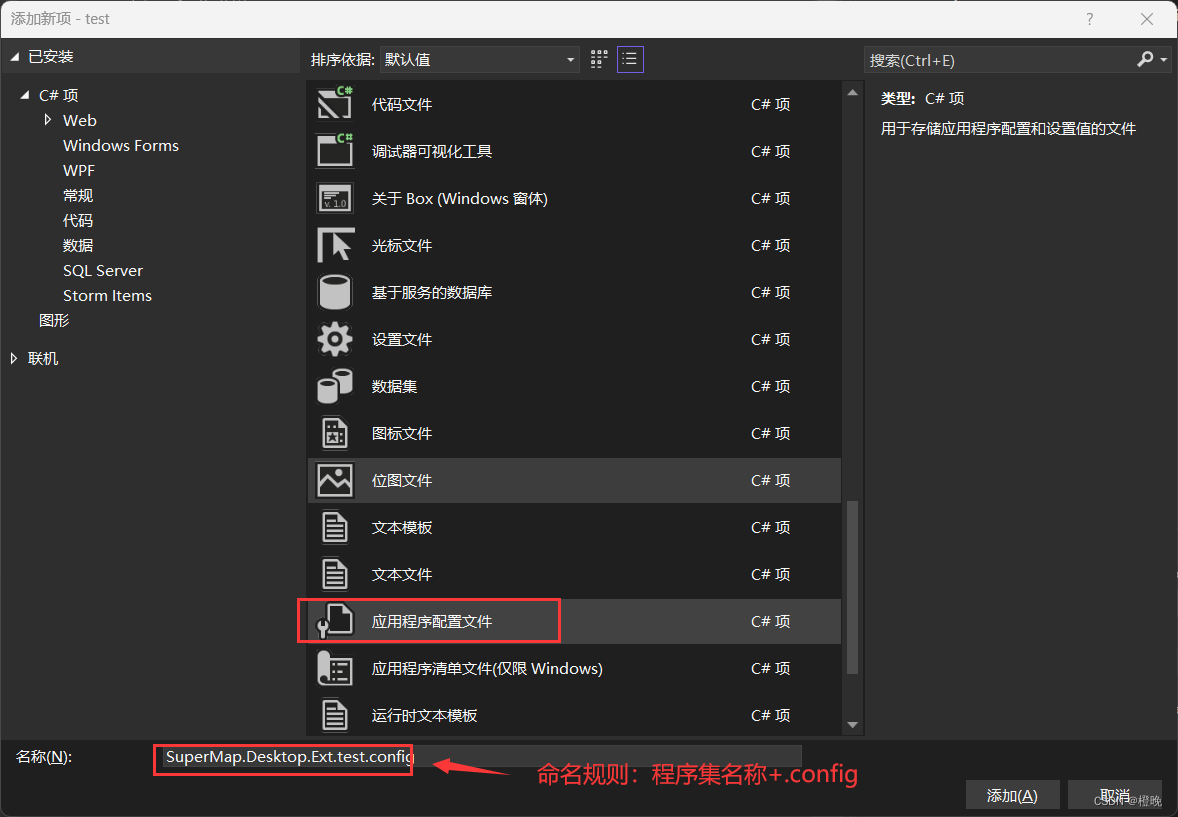
2.1.1. Create a new application configuration file
as shown in the figure below:
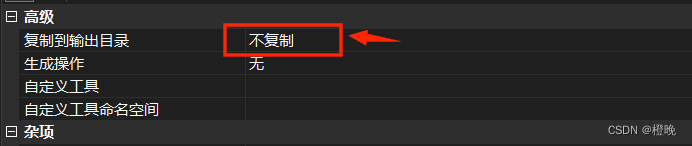
Since the above steps have configured the post-build event command of the project to copy the newly created application configuration file, there is no need to output the configuration file when compiling.
2.1.2. Writing configuration files
You can configure the file menu, configure the shortcut button bar, configure the status bar, configure the right-click menu, configure the functional area, etc.
Regarding the writing of configuration files, you can refer to the [Extended Development Guide] -> [Writing Application Configuration Files] section in the help document. Only a few important parameters are explained in this document.
The configuration file in this example is written as follows, and you can modify it on the following basis for your reference:
<?xml version="1.0" encoding="utf-8"?>
<plugin xmlns="http://www.supermap.com.cn/desktop" name="test" author="test" url="www.supermap.com.cn"
 description="DesktopPlugin1 Plugin" helpLocalRoot="" helpOnlineRoot="">
	<runtime assemblyName="./Plugins/test/SuperMap.Desktop.Ext.test.dll" className="SuperMap.Desktop.Ext.DesktopPlugin" loadOrder="2000" enabled="True" />
	<!--Ribbon上自定义各种控件-->
	<toolbox>
		<ribbon>
			<tabs>
				<tab index="3" id="DataProcess" label="数据" formClass="" visible="true">
					<group index="3" id="DataProcess" label="数据处理" image="" visible="true">
						<gallery index="10" id="DataProcess" visible="" style=""  >
							<galleryItems index="1" id="Vector" visible="" label="">
								<buttonGallery index="30" label="查询重叠点线面" visible="" checkState="" assemblyName="./Plugins/test/SuperMap.Desktop.Ext.test.dll"
								  onAction="SuperMap.Desktop.Ext.myCtrlAction" image="./Plugins/test/img/重复.png"
								  style="" screenTip="打开对话框,进行重叠的点或线或面重叠的查询。" screenTipImage=""
								  helpURL="WebHelp\UseExplanation\Ribbon\tabs\datasource\groups\newcreatedataset\CreateDatasetPoint.html" />
							</galleryItems>
						</gallery>
					</group>
				</tab>
			</tabs>
		</ribbon>
	</toolbox>
</plugin>
Explain several more important parameter configurations:
- runtime : The tag is used to provide information about the plugin runtime.
- assemblyName: The name of the assembly file, which can be a relative path relative to the executable program or an absolute path, and the value of this property must be set correctly.
- className: The name of the class that implements the plugin, which must inherit from the Plugin class. The class name of the implementation plugin given here must be a full name, that is, its namespace needs to be specified. The value of this property must be set correctly.
- loadOrder: The loading order of the plug-in, using an integer to identify the loading order of the plug-in, the smaller the value, the earlier the plug-in is loaded, the value of this attribute must be set correctly. Note: When the user's new plug-in depends on the plug-in provided by the system, it must be ensured that the plug-in provided by the system is started first.
- enabled: Used to control whether to load the plugin. true means loading, the plugin can be used; false means not loading, and the plugin is disabled.
- buttonGallery button
- index: It is used to sort the tabs (tab pages) on the ribbon, that is, when there are multiple tabs in the ribbon, each tab will use the value of this item to determine its order in the ribbon.
- id: The tab supports multiple items in different configuration files to be merged and displayed. The basis for merging is realized by id. That is to say, we can configure a tab in the configuration file of the A plug-in, specify an id, and configure a tab in the B plug-in, specify the same id. When the system displays, the items in the two tabs will be merged together and displayed on one tab.
- assemblyName: Same as above.
- onAction: This attribute can be used to specify the content to be executed in response to the click event of the buttonGallery button. This attribute can be specified as a class that inherits from the CtrlAction class or implements the ICtrlAction interface. To specify the full name of the class, it is necessary to point out the namespace of the class. For example, in this example, the file name bound to onAction is the library class myCtrlAction.cs (this class will be explained later in this article), and the workspace of this class is SuperMap.Desktop.Ext, so the wording here is SuperMap.Desktop.Ext.myCtrlAction.
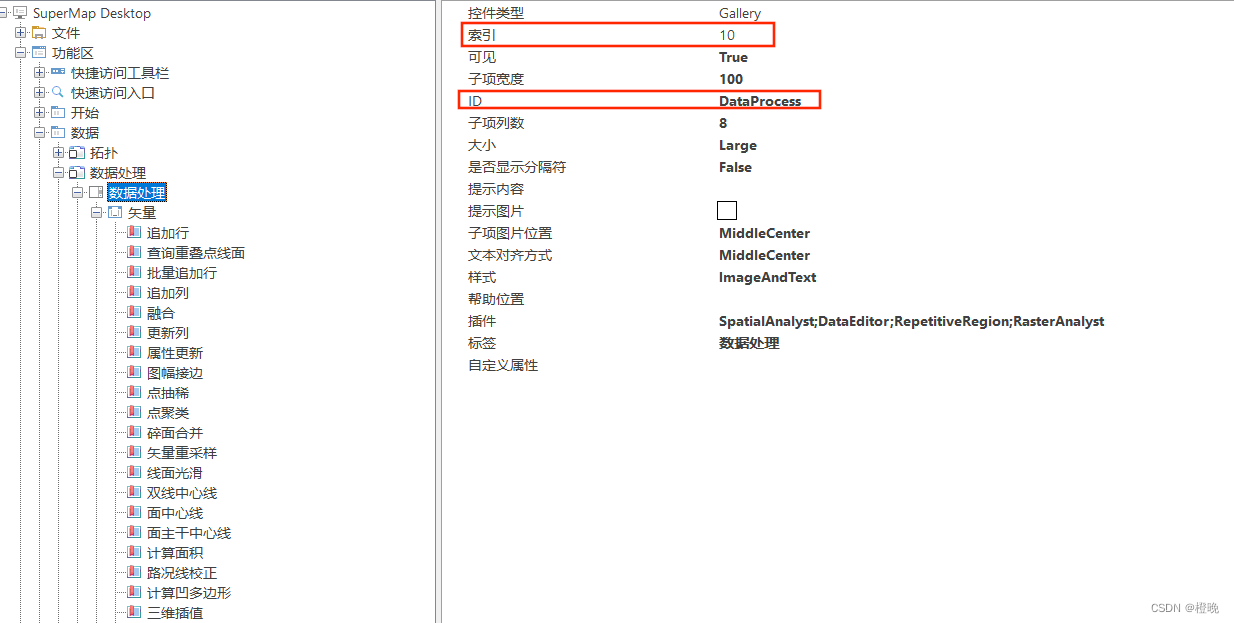
Note: For the settings of the two parameters index and id, you can check them in [View] -> [Environment Design].

2.2. Build plugin class
This class is used to set the plugin definition class. Each plugin must exist in a class, which is derived from the plugin class and is mainly responsible for the initialization and exit of the plugin and other related work
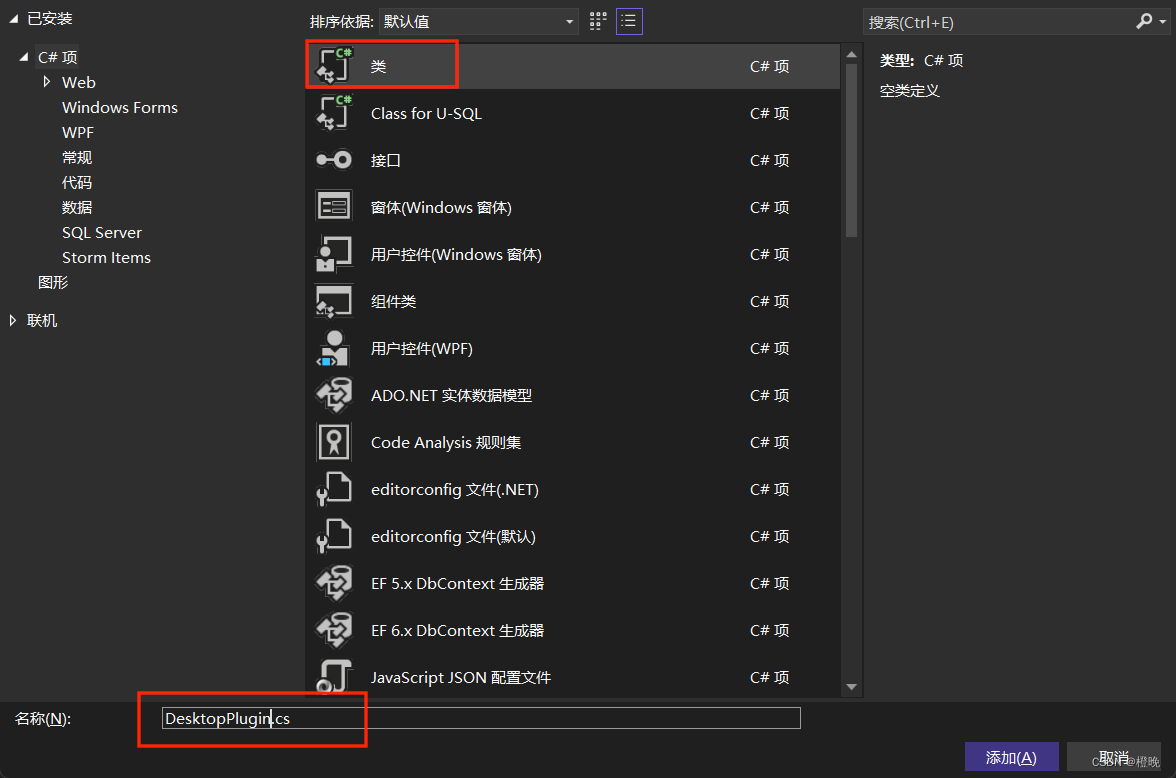
2.2.1 Create a new plugin class
Create a new class, as shown in the figure below:
2.2.2 Code writing:
After the creation is completed, you need to set the reference to using SuperMap.Desktop;
and this class needs to inherit from Plugin. code show as below:
using System;
using System.Collections.Generic;
using System.Linq;
using System.Text;
using System.Threading.Tasks;
using SuperMap.Desktop;

namespace SuperMap.Desktop.Ext
{


    internal class DesktopPlugin:Plugin
    {


        public DesktopPlugin(PluginInfo pluginInfo)
    : base(pluginInfo)
        {


        }
        public override Boolean Initialize()
        {


            return true;
        }

        public override Boolean ExitInstance()
        {


            return true;
        }

    }
}
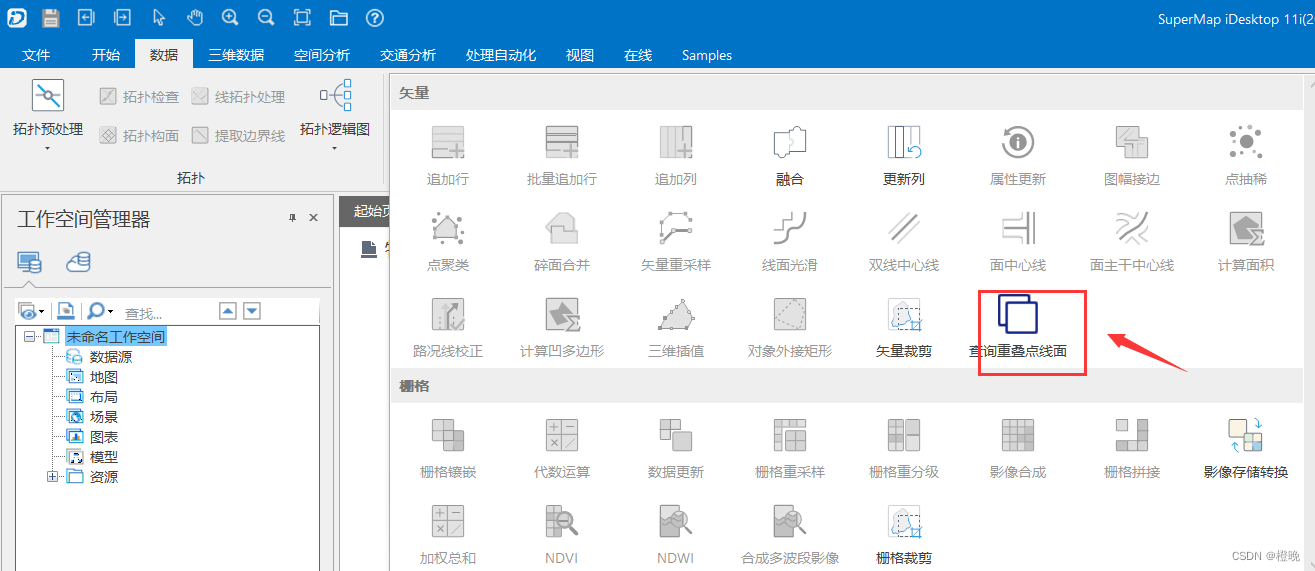
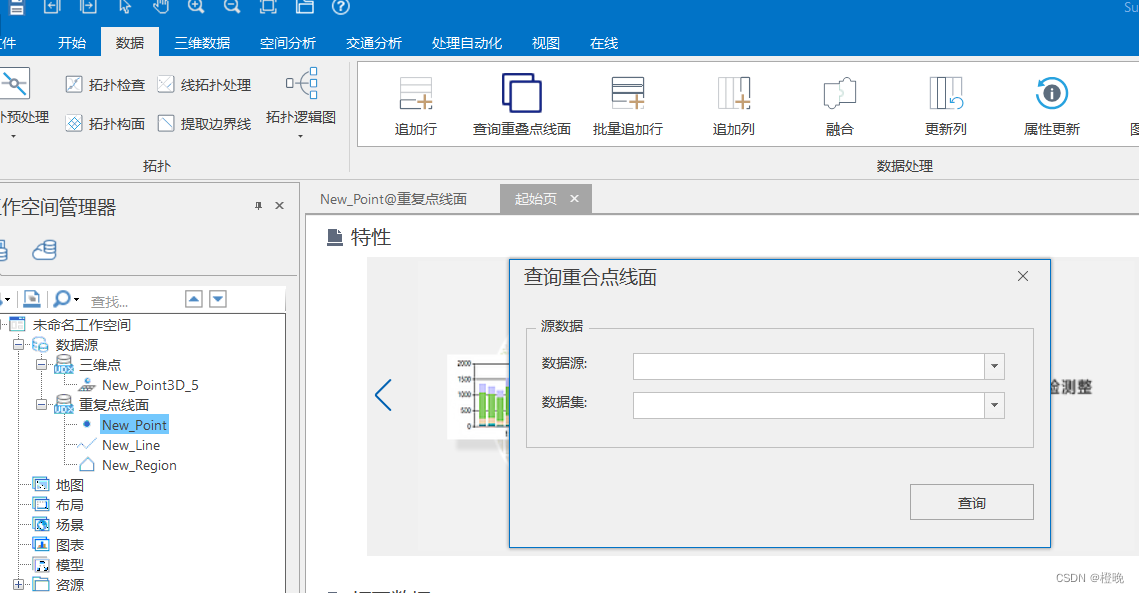
At this point, you can run the program normally by running the program, and you can see the label button at the corresponding position. As shown in the figure below:
The next step is to set the entry program after the plug-in program is started, and complete it by creating a new CtrlAction.
2.3. Realize the Run function
The Run function is the entry program after the plug-in program is started, that is, the entry point of the program. Simply put, it is the event of clicking the plug-in to run in iDesktop.
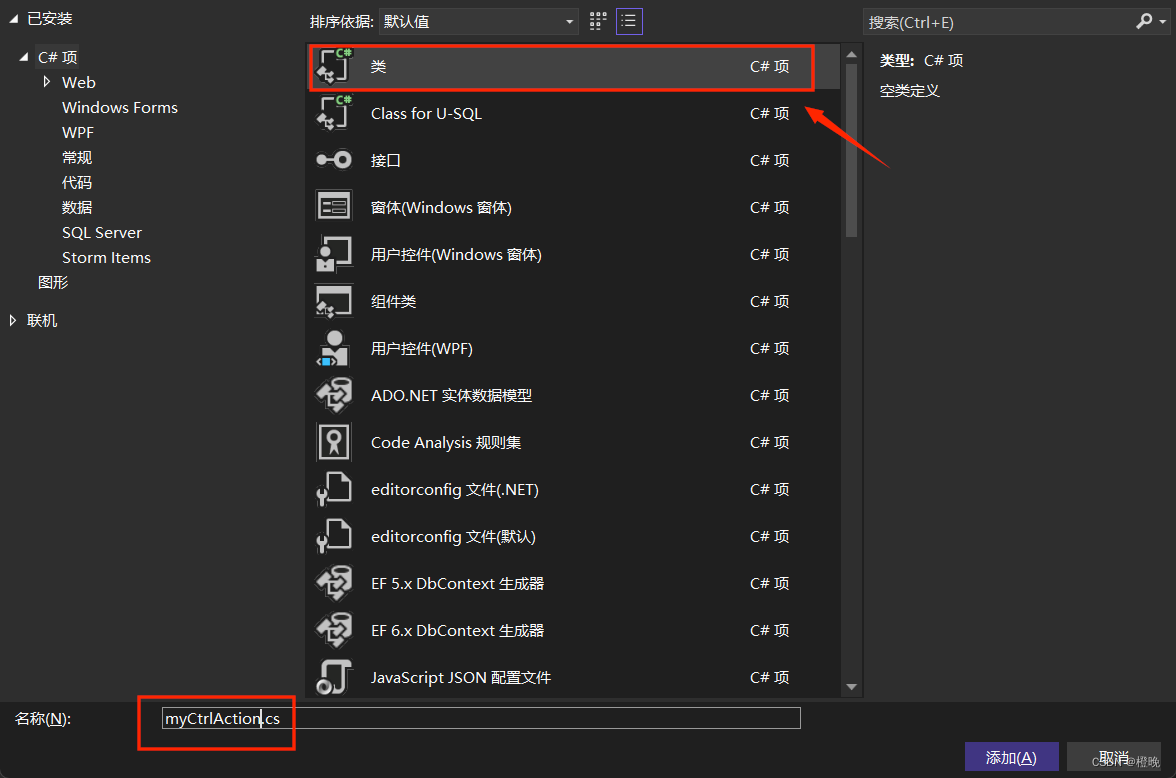
2.3.1. Create a new class myCtrlAction
as shown in the figure below:
2.3.2 Code writing
This class inherits from CtrlAction, and the public override void Run() method is overloaded in this class, that is, when the control event is triggered, the Run() method of the object will be called, and the code is added as follows: (This code demonstrates that when the button on the desktop is clicked, the Form1 form will pop up)
namespace SuperMap.Desktop.Ext
{


    class myCtrlAction:CtrlAction
    {


        public myCtrlAction(IBaseItem caller)
    : base(caller)
        {


        }
        public override void Run()
        {


            Form1 form = new Form1();
            form.ShowDialog();
        }
    }
}
2.4. Form design
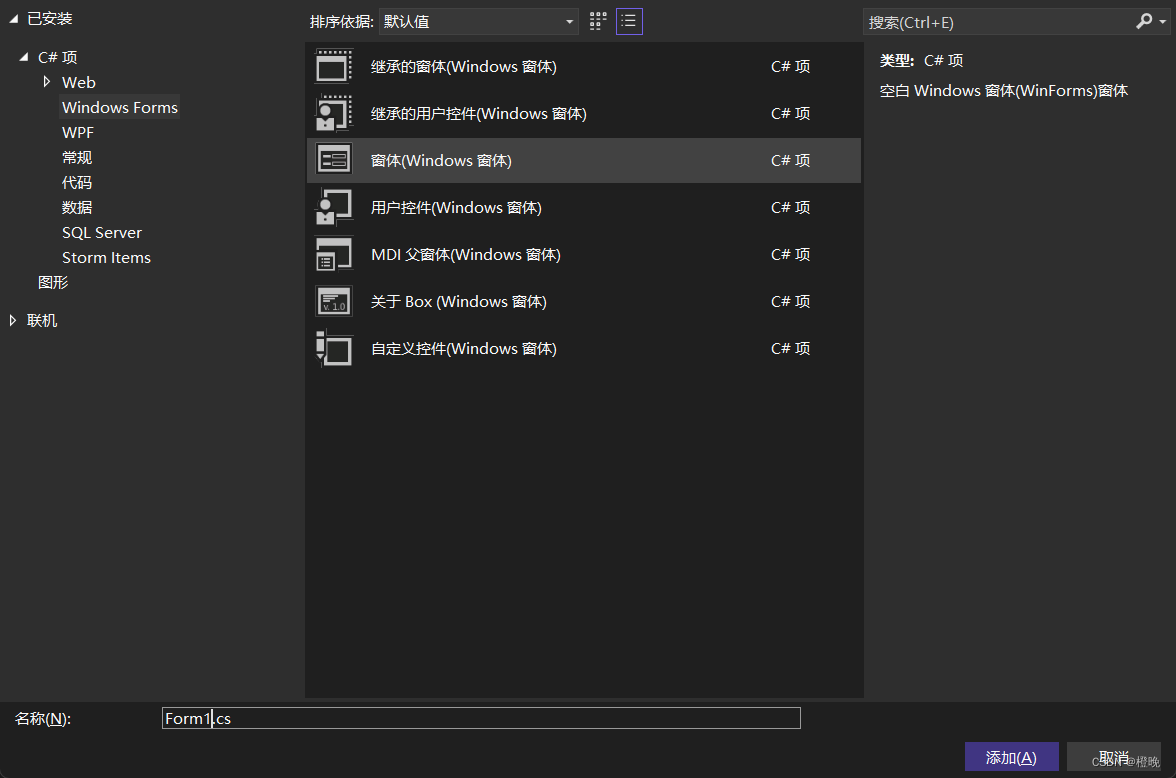
2.4.1. Create a new user control (Windows Form)
as shown below:
2.4.2. Configure the form environment
After the form is successfully created, right click in the newly created form to view the code and edit it.
1) The plug-ins for expansion and development all have a unified basic interface IForm, so modify the parent class inherited by the form: Form1 -> UIForm
2), introduce at least 4 namespaces: using SuperMap.Desktop.UI, using SuperMap.Data, using DevExpress.Utils
2.4.3. Interface design
There are two methods:
1) Users can design the form through vs2022, which supports 64-bit control drag and drop
2) Form design through code
If you want to design a control with the same style as the desktop, you need to use SuperMap.Desktop.UI when designing. For example: SuperMap.Desktop.UI.UIButton(), SuperMap.Desktop.UI.UIGroupBox(), etc.
Obviously, you can see that the style is consistent with iDesktop. The interface design is shown in the figure below:
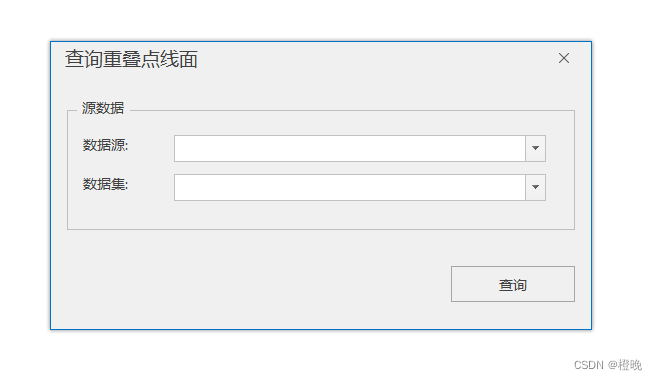
So far, we can run the program to take a look. At this moment, we can see that by clicking the button, the window can pop up normally, as shown in the figure below. The next step is to write the function code.
2.5. Program function writing
The premise of the first operation is that we want to obtain the workspace workspace, so how to obtain the workspace of the current program in the subform?
This will use our Application class .
Application class : Application class, which implements functions such as starting the main window, plug-in management, and code segment compilation and execution. For SuperMap iDesktop desktop products, a main window and related resources correspond to an Application class (application class). The content of instance object management includes: workspace (Workspace), plug-in manager (PluginManager) for managing plug-ins in the application program, code segment compilation executor (IScript), application main window (IFormMain), application startup interface (ISplashForm) and application output information management.
The most commonly used function in plug-in development is to obtain the current workspace and output window information.
Obtain the workspace of the current program: SuperMap.Desktop.Application.ActiveApplication.Workspace
Since the workspace has been obtained, the rest of the code is not much different from the writing of iObjects.net. Everyone can write according to their own needs.
Information output and logging : SuperMap.Desktop.Application.ActiveApplication.Output, the sample code is as follows:
 // 信息一:单参数输出方法,会自动当做 InfoType.Information 类型输出信息。
    SuperMap.Desktop.Application.ActiveApplication.Output.Output("单参数输出方法,会自动当做 InfoType.Information 类型输出信息。");

    // 信息二:信息(InfoType.Information)类型的输出信息。
    SuperMap.Desktop.Application.ActiveApplication.Output.Output("信息(InfoType.Information)类型的输出信息。", InfoType.Information);

    // 信息三:异常(InfoType.Exception)类型的输出信息。
    SuperMap.Desktop.Application.ActiveApplication.Output.Output("异常(InfoType.Exception)类型的输出信息。", InfoType.Exception);

    // 结果:
    // 当桌面全局选项设置仅输出“信息”的时候,会在输出窗口中看到信息一和信息二;
    // 当桌面全局选项设置仅输出“异常”的时候,会在输出窗口中看到信息三;
    // 当桌面全局选项设置输出“异常和信息”的时候,会在输出窗口看到所有三条信息
3. Packing
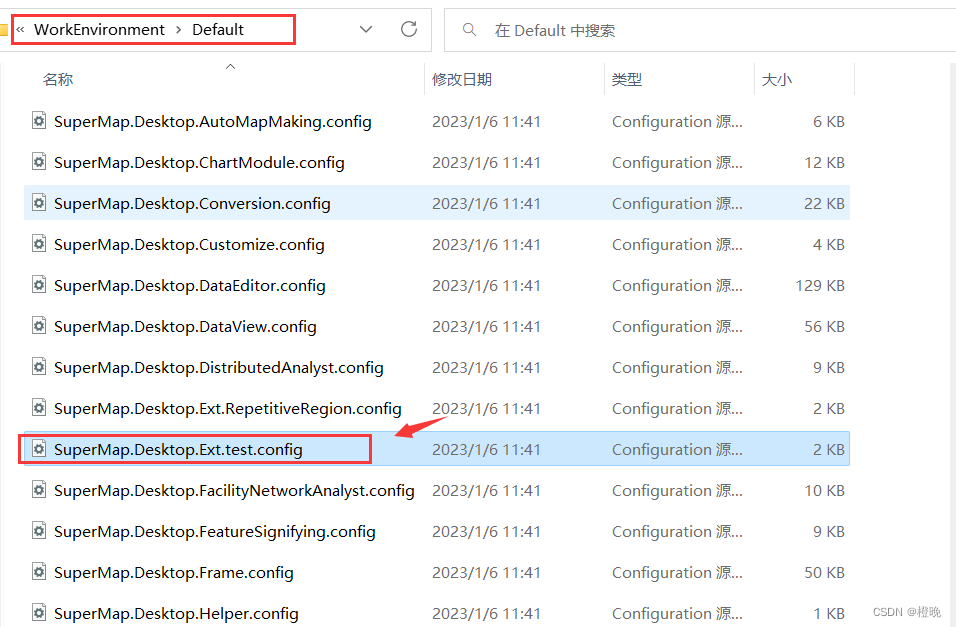
During the project generation process , the configuration file will be copied to the SuperMap iDesktop installation directory\WorkEnvironment\Default directory according to the post-generation event command configured in the above steps , as shown in the following figure:
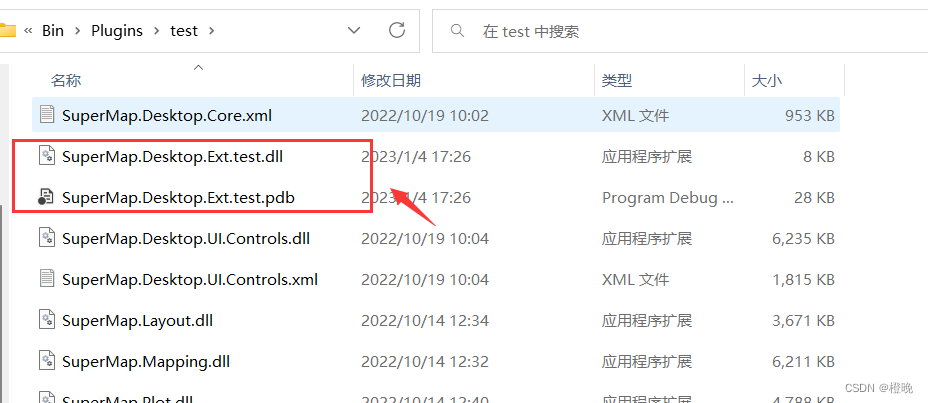
After the project is built successfully, the plug-in package will be output to the SuperMap iDesktop installation directory\Bin\Plugins\test directory according to the output path configured in the above steps , as shown in the following figure:
After the program is written and the program code is confirmed to be correct, the last step is to package it.
Find the program output path, and find the corresponding folder under \Bin\Plugins\, for example: .\supermap-idesktop-11.1.0-1019-43617-97920-win64-bin-zip-chs\Bin\Plugins\RepetitiveRegion in this example.
注意:检查该文件夹下的.config文件,确保是自己项目中新建的.config文件,如有其他配置文件,请删除,只保留一个配置文件,否则会插件导入会解析失败。
After compressing the folder into a zip package, the packaging is complete.
Four, plug-in copy installation
At this time, the zip package can be imported as a plug-in into iDesktop of other versions or other computers. You can import it in [View]-[Plug-in Management]
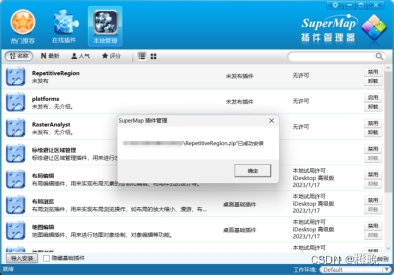
Directly import the downloaded .zip compressed package, and the successful installation interface will be displayed after successful import.
5. Plug-in uninstallation
If the user wants to remove the plug-in function from SuperMap iDesktop, just delete the SuperMap.Desktop.Samples.test.config file in the "Installation Directory\WorkEnvironment\Default" directory and the "Installation Directory\Bin\Plugins\test" folder; if the user wants to use the plug-in function again, he needs to reinstall it.
Well, this is the end of a simple plug-in development, I hope it can be helpful to programmers. Of course, the implementation requirements of each project are inconsistent, and different solutions need to be sought for different requirements.
If there are mistakes, I hope everyone can criticize and correct them in the comment area!