foreword
yolov5 updated v6.2 and added a classification model, so I wanted to try the classification performance of yolov5 on a whim. This time, I used the yolov5s-cls model and trained only five times to see how much accuracy can be achieved on the classic data set mnist. At the same time, for the sake of justice, only use official instructions for training, and submit the test accuracy on kaggle.
Dataset preparation
If you need to download, enter the link
by yourself Here we just download test.csv and sample_submission.csv directly.
Create a new py script in the same directory, and enter the following content to convert each piece of data in it into a 28x28 image.
#oom.py
import pandas as pd
import imageio
df = pd.read_csv('test.csv')
for index,row in df.iterrows():
    print(index) #打印序号方便看进度
    pixels = row.values.reshape((28, 28))
    imageio.imwrite('E:/image/'+str(index) + '.png', pixels)
Modify the save directory by yourself. Here I am in the image folder of the E disk, and then run it directly with the command line . If the computer memory is not enough to run under an ide like vs, it may overflow.
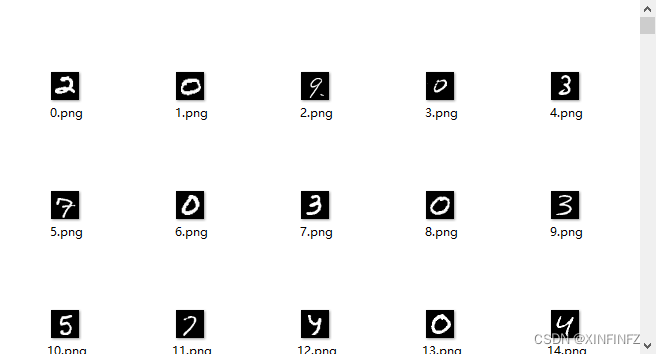
Open the directory, you can find that it has been converted into a picture.
Yolov5 training
Link
First, you must download the latest source code of yolov5, and then go to the release page. You can see that there are many models: here, if
your computer graphics card is rubbish, referring to an old graphics card without 8g memory, it is recommended to choose the smallest yolov5n-cls model, because my 8g video memory graphics card runs yolov5s-cls and needs to set num_workers to 6 to run normally.
Put the model into the source code directory, then start the command line in the current directory , and enter the following training:
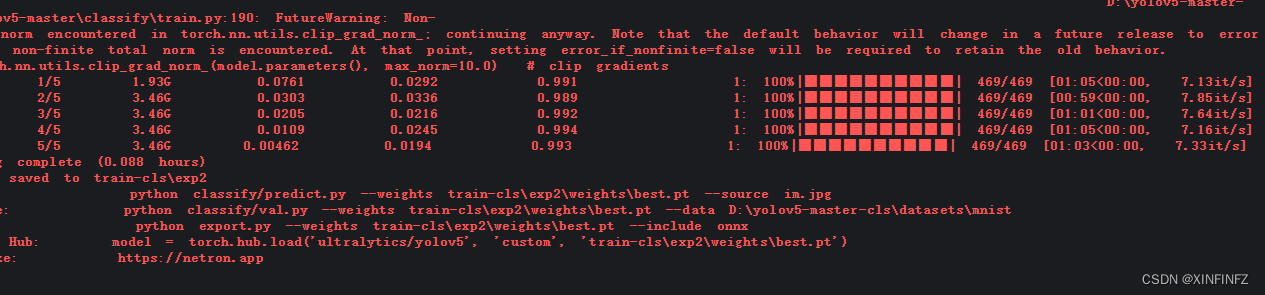
python classify/train.py --model yolov5s-cls.pt --data mnist --epochs 5 --img 224 --batch 128
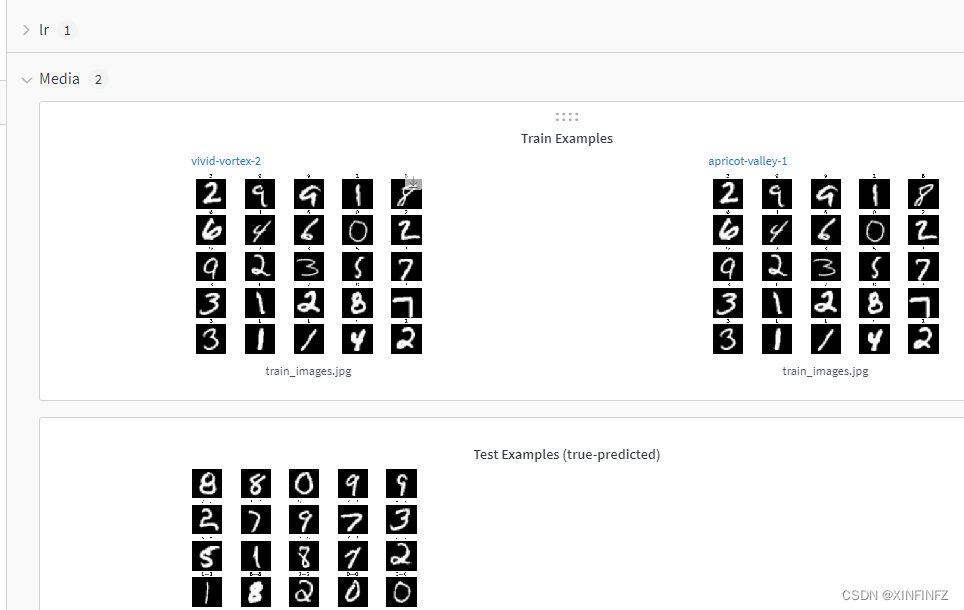
Then the new version seems to force you to use the wandb webpage software to record the training process. It is recommended to register one in advance, and then enter the api key given to you by wandb to activate during training (I can’t paste it here, I can only type it in by hand)
.
It can be seen that the accuracy rate of training four times has reached 0.994, and the next step is to predict and save the output.
Yolov5 forecast
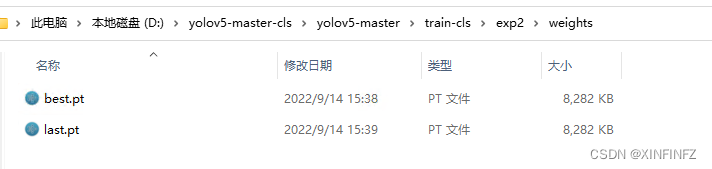
First go to the training directory and take out the best model (best.pt) and put it in the root directory:
Then put the previously prepared data set image folder into the root directory: put

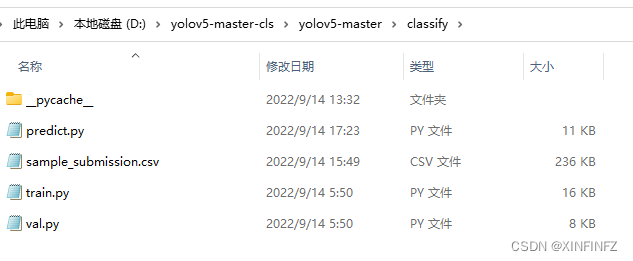
sample_submission.csv into the classify folder for easy reading:
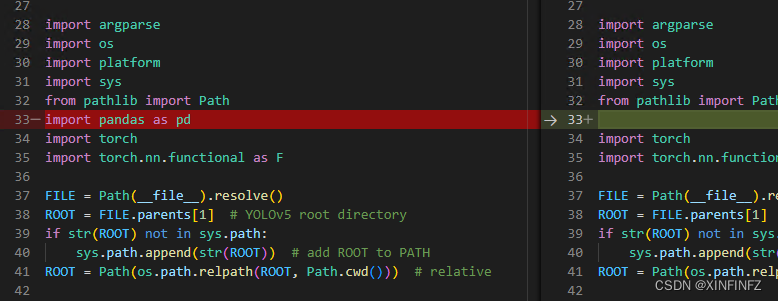
modify predict.py as follows. In order to see it more clearly, I used vs to compare the original and modified py (the left is the modified one): first add a reference
.
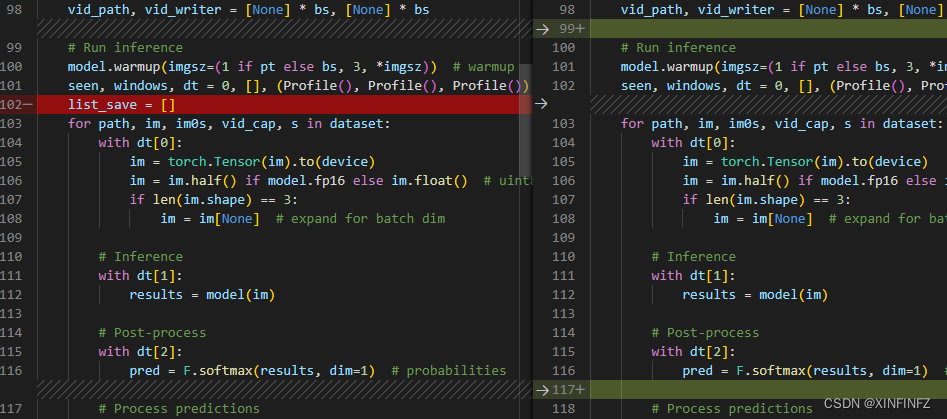
Create a new list_save to save the predicted results.
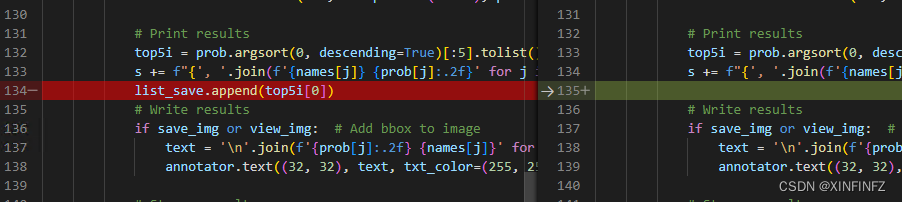
Put top5i[0] (its official output is to output the top five categories with the highest probability, here we only take the first one) into list_save.

Read the Label tag in the sample_submission.csv file and overwrite the result. It should be noted here that when yolov5 reads the file path for sorting, there are strings in front of it, that is to say, it will not be sorted according to the normal numerical order, but it is sorted one by one, such as 1, 10, 100, so the order is messy, and it needs to be processed later.
Let's predict first, enter the following command on the command line, and finally get the sub.csv file.
python classify/predict.py --weights best.pt --source image/ --nosave
–weights specifies the weight, –source is directly followed by a folder, below are all pictures, –nosave means not to save pictures.
Then we take out the sub.csv file generated under the classify folder and continue to read and process. The general idea is to simulate the sorting with str in front, and then use regular expressions to take out the numbers to cover the serial number column in sub.csv, and then sort the whole, and get the correct result:
import re
import pandas as pd
unorder_df = pd.read_csv('sub.csv')
list_a=[]
for i in range(0,28000):
    list_a.append('image'+str(i)+'.png')
list_b = sorted(list_a) #模拟yolov5文件路径排序
list_c = []
for i in list_b:
    x = re.findall("\d+", i) #只匹配数字
    x = int(x[0]) #从str转换为数字
    list_c.append(x + 1) #加一是因为序号是从1开始的
unorder_df['ImageId']=list_c
df = unorder_df.sort_values(by=['ImageId']) #根据序号列排序
df.to_csv('sub2.csv',index=None)
upload result
Return to kaggle and click submit predictions to submit sub2.csv:


You can see that the accuracy rate is very high. Of course, this experiment is still not rigorous, that is, the training set provided by kaggle is not used for training, and the training set automatically downloaded by yolov5 is used. Maybe the training set and the test set overlap.