Recently, due to engineering needs, I studied how to configure pytorch and yolov8 under windows, and collected data for training and prediction by myself, and used the usb camera for real-time prediction. Record the whole process here
1. Software installation and configuration
1. vscode installation
To develop python on the windows platform, I use vscode as the basic development platform. Click https://code.visualstudio.com/ to enter the official website of vscode and download the corresponding stable version.
After the download and installation is complete, search for python on the plug-in interface, find the first one to install the python development environment. 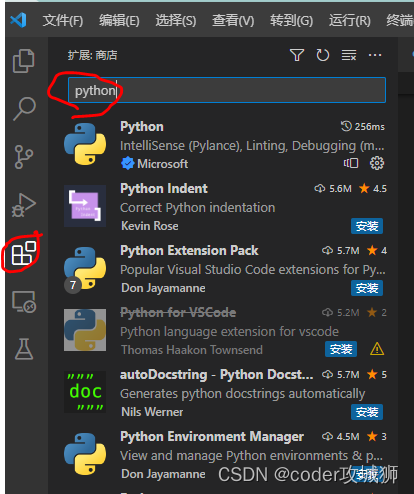
I installed python version 3.10
2. miniconda3 installation
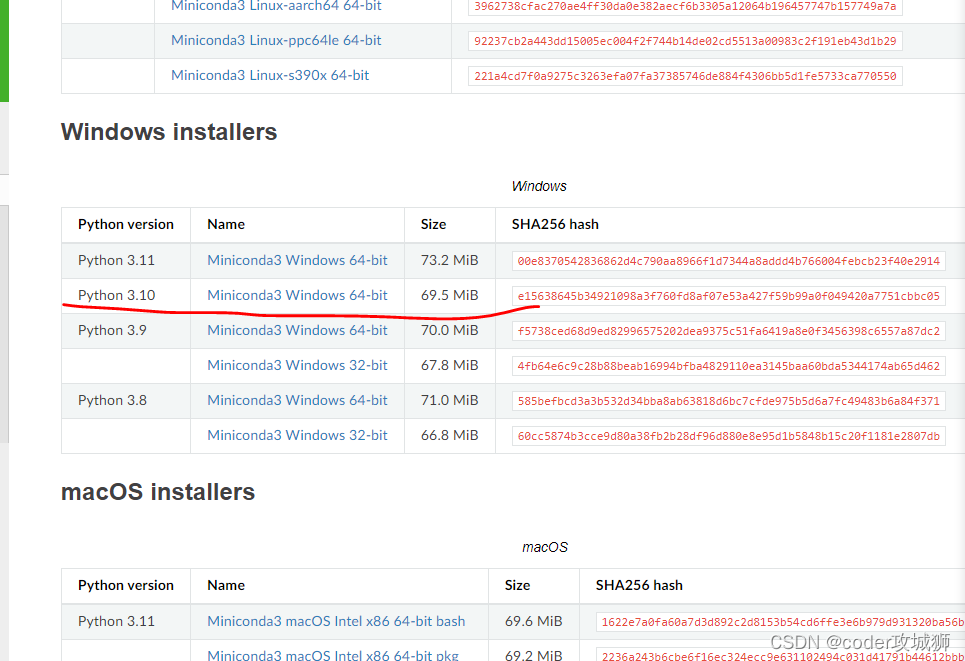
miniconda3 can be used to configure the development environment of pytorch, https://docs.conda.io/en/latest/miniconda.html can download the corresponding version on the official website, mine is python3.10, windows64, so the download is as shown in the figure The installation package shown
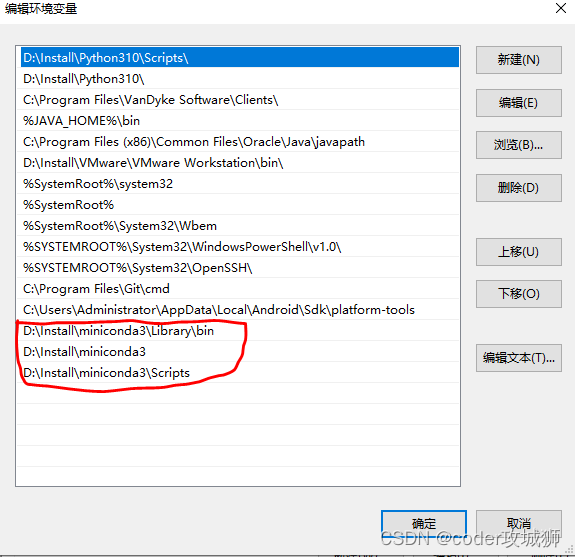
configures the path variable: find the miniconda3 installation path, and set the environment variable as shown in the figure below
After the setting is complete, find Anaconda Prompt (miniconda3) in the start menu and open it.
- Add Tsinghua mirror source to improve software download speed
conda config --add channels https://mirrors.tuna.tsinghua.edu.cn/anaconda/pkgs/free/
conda config --add channels https://mirrors.tuna.tsinghua.edu.cn/anaconda/pkgs/main/
conda config --add channels https://mirrors.tuna.tsinghua.edu.cn/anaconda/cloud/bioconda/
conda config --add channels https://mirrors.tuna.tsinghua.edu.cn/anaconda/cloud/conda-forge/
conda config --add channels https://mirrors.tuna.tsinghua.edu.cn/anaconda/cloud/pytorch/
conda config  --set show_channel_urls yes
- Configure the miniconda development environment
Use the following command to create a pytorch virtual environment
conda create -n pytorch python=3.10
-n followed by the virtual environment name
python=set python version
- Activate the virtual environment with the following command
conda activate pytorch
After that, pytorch can be configured in this environment
3. pytorch installation
Enter the pytorch official website https://pytorch.org/ , find the corresponding download command, mine is windows, CPU, python version, so select the configuration as shown in the figure below Copy the
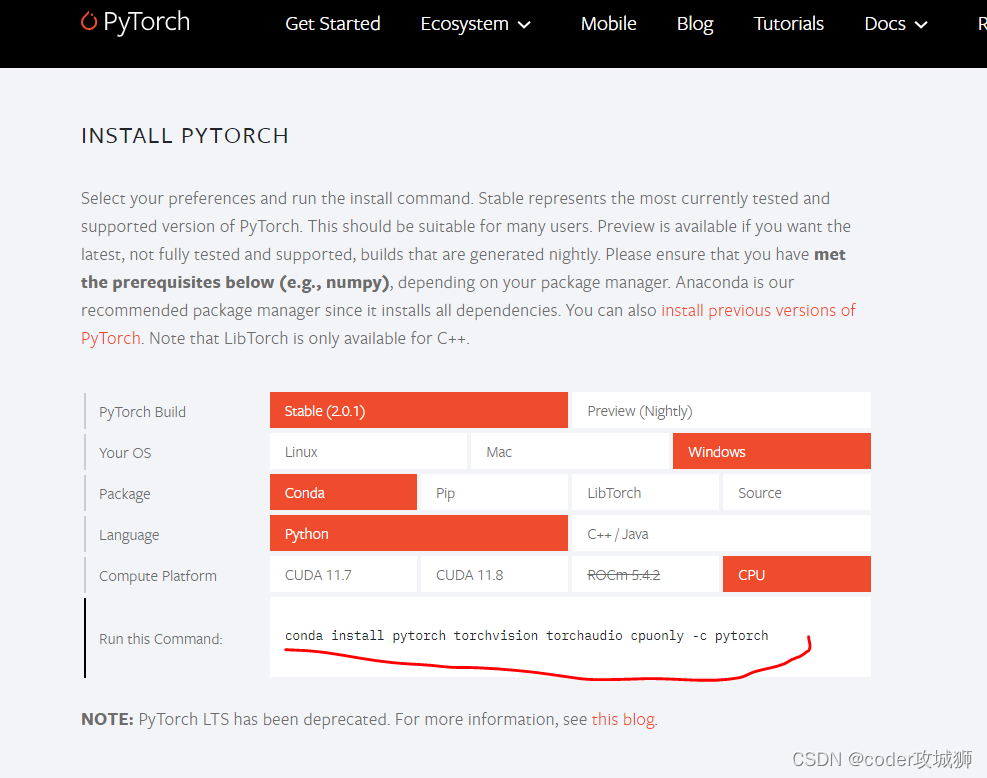
corresponding installation command in the figure to install pytorch
conda install pytorch torchvision torchaudio cpuonly -c pytorch
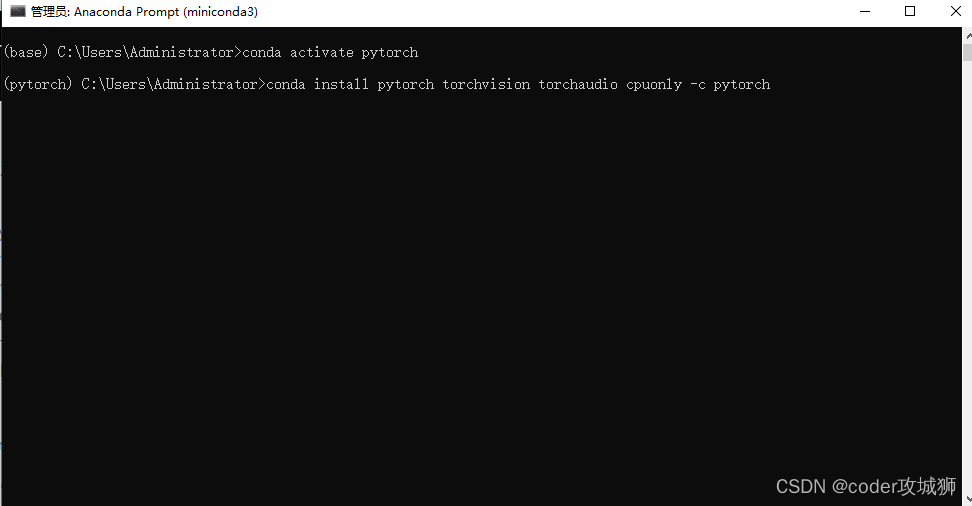
Note that this command is installed under the activated pytorch environment
- Open vscode and configure the pytorch environment
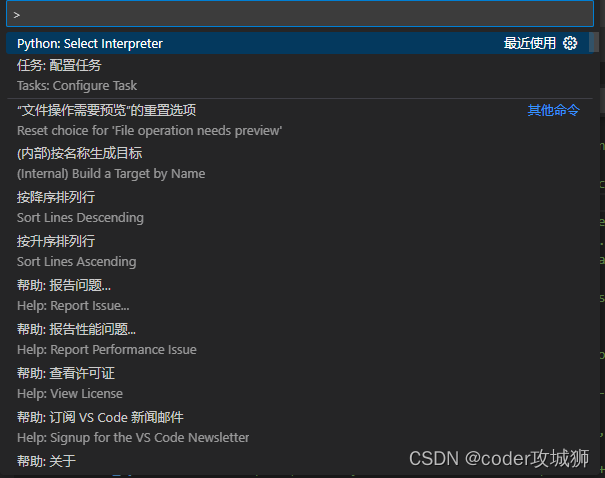
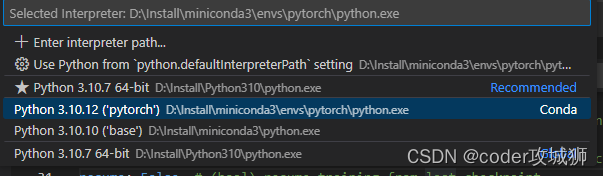
Enter ctrl+shif+p in vscode to open the command line interface, enter Python: Select Interpreter to select the python development and compilation environment
Select Python 3.10.12 ('pytorch') as the current environment to
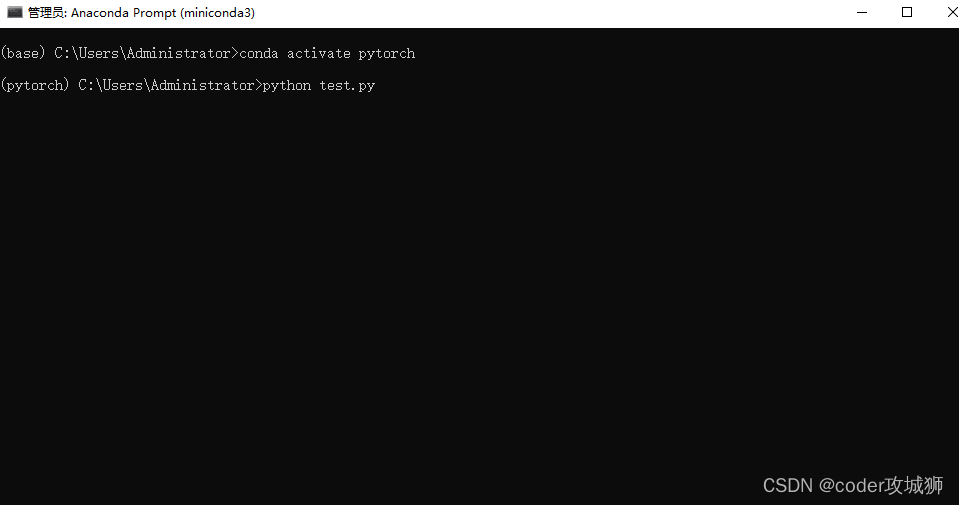
create a new test.py file, enter the following code, press F5 to execute, if successful, the pytorch configuration is successful.
import torch
print(torch.__version__)
print(torch.cuda.is_available())
or execute
python test.py
4. yolov8 installation configuration
With the pytorch environment activated, use the following command to install yolov8
pip install ultralytics
After the installation is complete, test it with the command
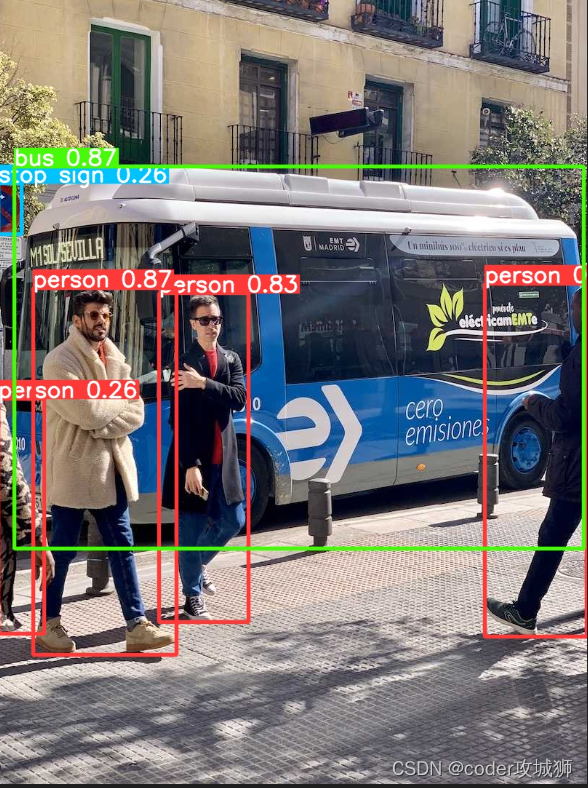
yolo task=detect mode=predict model=yolov8n.pt imgsz=640 show=True save=True
The command will download the corresponding test data bus.jpg and zidane.jpg from github and the default weight file yolov8n.pt.
If you cannot download yolov8n.pt, you can download it yourself and copy it to the corresponding path.
D:\Install\miniconda3\envs\pytorch\Lib\site-packages\ultralytics\yolo\v8\detect
If the environment is missing, download the ultralytics source code and execute the following command to install dependencies
pip install -r requirements.txt
Two, yolov8 custom data set
- Data collection, according to the needs of your own project, collect scene pictures, the size of the image does not matter, later yolo will automatically adjust the size according to the configuration
- Label the data Install
the labelImg data labeling tool, and then label the data
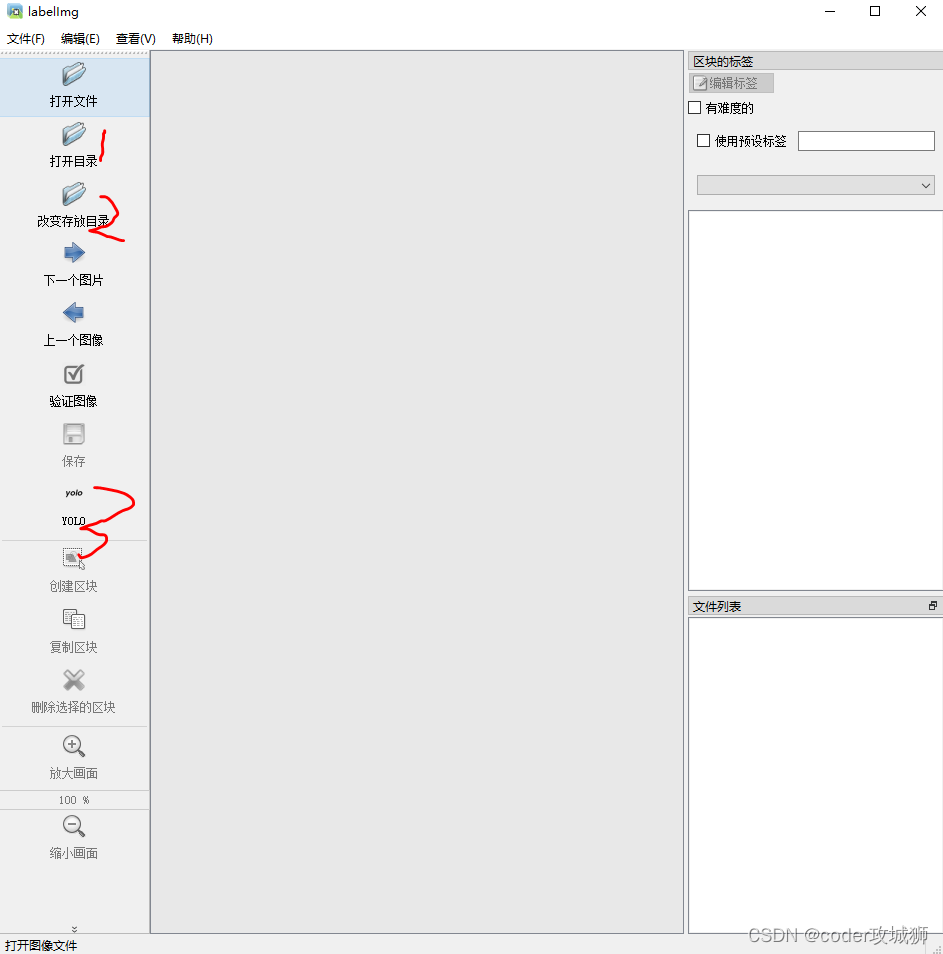
1. Open the folder where the image data before labeling is located
2. Set the label file storage location after labeling. Only txt type label data will be saved in this location
类别 box中心x box中心y box宽  box高
0 0.044531 0.735417 0.023438 0.048611
0 0.084766 0.625694 0.025781 0.054167
0 0.154297 0.620833 0.022656 0.058333
0 0.275000 0.584028 0.037500 0.076389
0 0.289844 0.868750 0.034375 0.070833
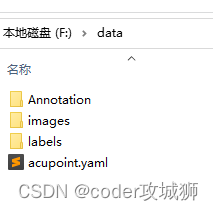
3. Data classification
Create new folders according to images and labels, and create new train and val folders under each folder. Note that there should be no Chinese in the path. The path is as follows Use the following code to classify the

original image data and labeled data
import sys,os
import shutil
imgPath = "F:/images/"
labelPath = "F:/data/Annotation"
yoloImagePath = "F:/data/images"
yoloLabelsPath = "F:/data/labels"

# labels = os.listdir(labelPath)
f=os.walk(labelPath)
#80%数据做训练,20%做矫正
persent=0.8
for dirpath,dirNames,filenames in f:
	trainNum = int(len(filenames)*persent)
	for i,filename in enumerate(filenames):
		name=filename.split('.')[0]
		if name=='classes':
			continue

		imgSrc=imgPath+name+".jpg"
		imgDst=''
		labelSrc=labelPath+"/"+filename
		labelDst=''
		# 训练数据
		if i<trainNum:
			imgDst = yoloImagePath+"/train"
			labelDst = yoloLabelsPath+"/train"
		else:
		    #矫正数据
			imgDst = yoloImagePath+"/val"
			labelDst = yoloLabelsPath+"/val"
		shutil.copy(imgSrc,imgDst)
		shutil.copy(labelSrc,labelDst)
4. Create a new configuration file.yaml, which is used to specify the path of training data and verification data
#训练数据路径
train: F:/data/images/train
#验证数据路径
val: F:/data/images/val
# number of classes
nc: 1
# class names
names: ['acupoint']
Since then, the collection and labeling of custom data has been completed
3. Custom data training
Next, start training. Open the anaconda prompt (miniconda3) in the start menu. After using conda activate pytorch, use the following command
yolo task=detect mode=train model=yolov8n.pt data=F:/data/acupoint.yaml epochs=100 batch=16
task: specify the type of task to run, including detect\segment\classify\init
mode: specify train, predict, val
model: select the configuration value weight model
data: specify the location of .yaml,
epochs: number of iterations
batch: how many sheets to load at a time Update weights after images After
training, the results are saved in the following directory by default,
D:\Install\miniconda3\envs\pytorch\Lib\site-packages\ultralytics\yolo\v8\detect\runs\detect\train2
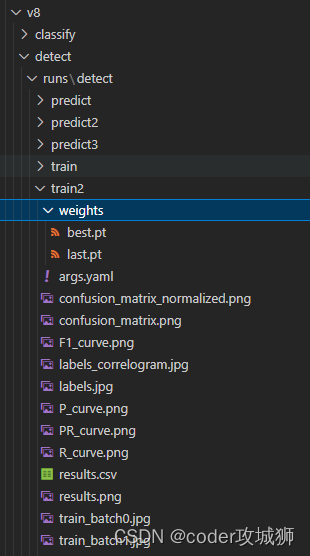
Among them, best.pt is the model file that needs to be used for subsequent predictions
4. Camera Data Prediction
After training, use
yolo task=detect mode=predict model=./runs/detect/train2/weights/best.pt source=0 show=True save=True
Turn on the camera to start prediction, the default image size is 480x640.
Among them, model: the model result of custom data training
source: specify the prediction data, which can be a picture path or a video path, 0 means use the usb camera 0 to read data in real time
show: whether it is real-time Display the result
save: whether to save the result
The above is after a few days of exploration, and has been verified by practice, it can work. Follow-up will continue to study how to use code to obtain prediction results.