One nmap official website download
1.1 Introduction to nmap.
Nmap ("Network Mapper") is an open source tool for network exploration and security auditing. It is designed for fast scanning of large networks, although it works well on a single host. Nmap uses raw IP packets in a novel way to determine what hosts are available on the network, what services those hosts provide (application name and version), what OS (and OS version) they are running, what packet filters are used /firewall type, and many other features. While Nmap is commonly used for security auditing, many system and network administrators find it useful for everyday tasks such as network inventory, managing service upgrade schedules, and monitoring host or service uptime. (Copied from the official website of 1.2).
To put it simply, the scanning is more careful, but the scanning speed is relatively slow. It is recommended to use the arp discovery tool and ping scanning tool to scan the network in advance to discover assets in advance, and then use nmap to perform detailed information on some "information leakage" ports of acquisition.
1.2 Download link of nmap official website.
https://nmap.org/
https://nmap.org/download#windows
1.3 Windows nmap download link.
For Windows 11, I recommend the following stable version. It is now the beginning of 2023. The latest version has the incompatibility of openssh.
https://nmap.org/dist/nmap-7.92-setup.exe
2. Use the target machine to test the nmap command
2.1 Start three VMware virtual machines. One Win7, one Win10, one CentOS7. The network cards are all in host-only mode, and the network is clean and does not affect others .
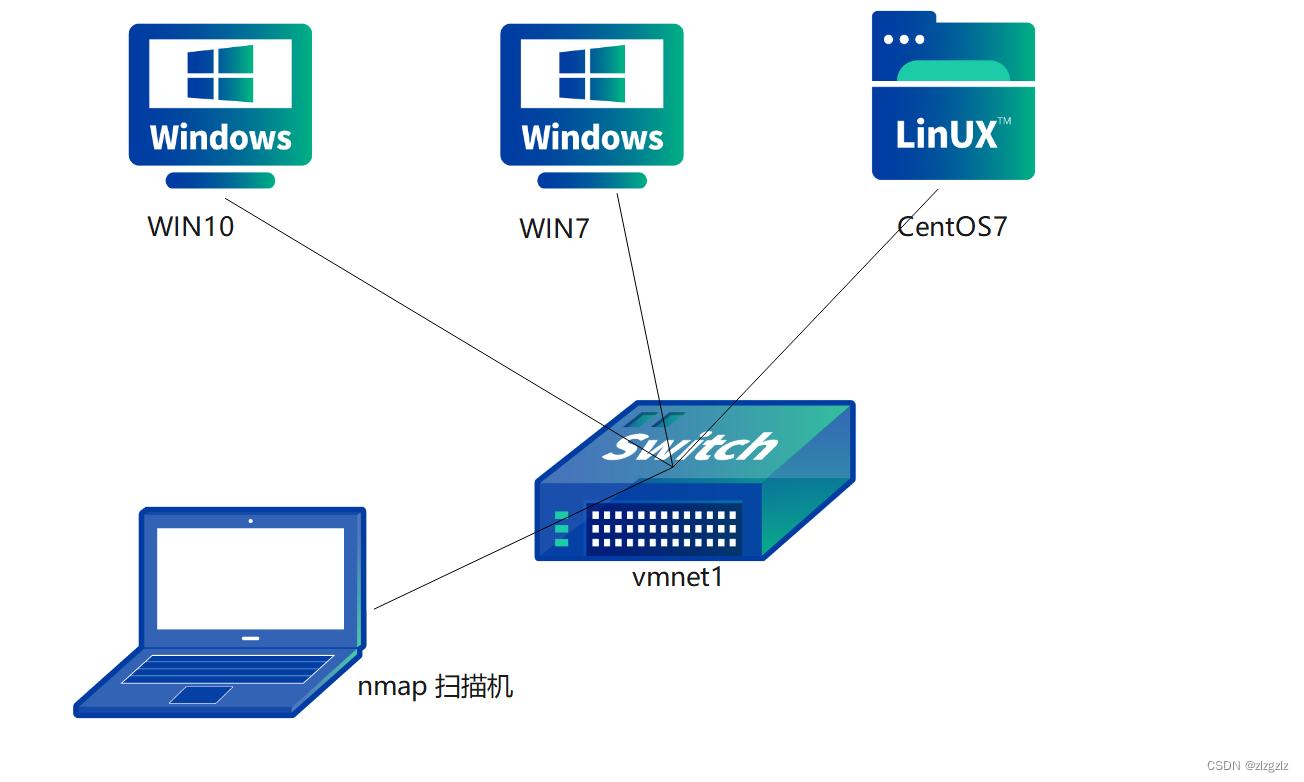
2.2 View the network segment of VMware's host-only mode.

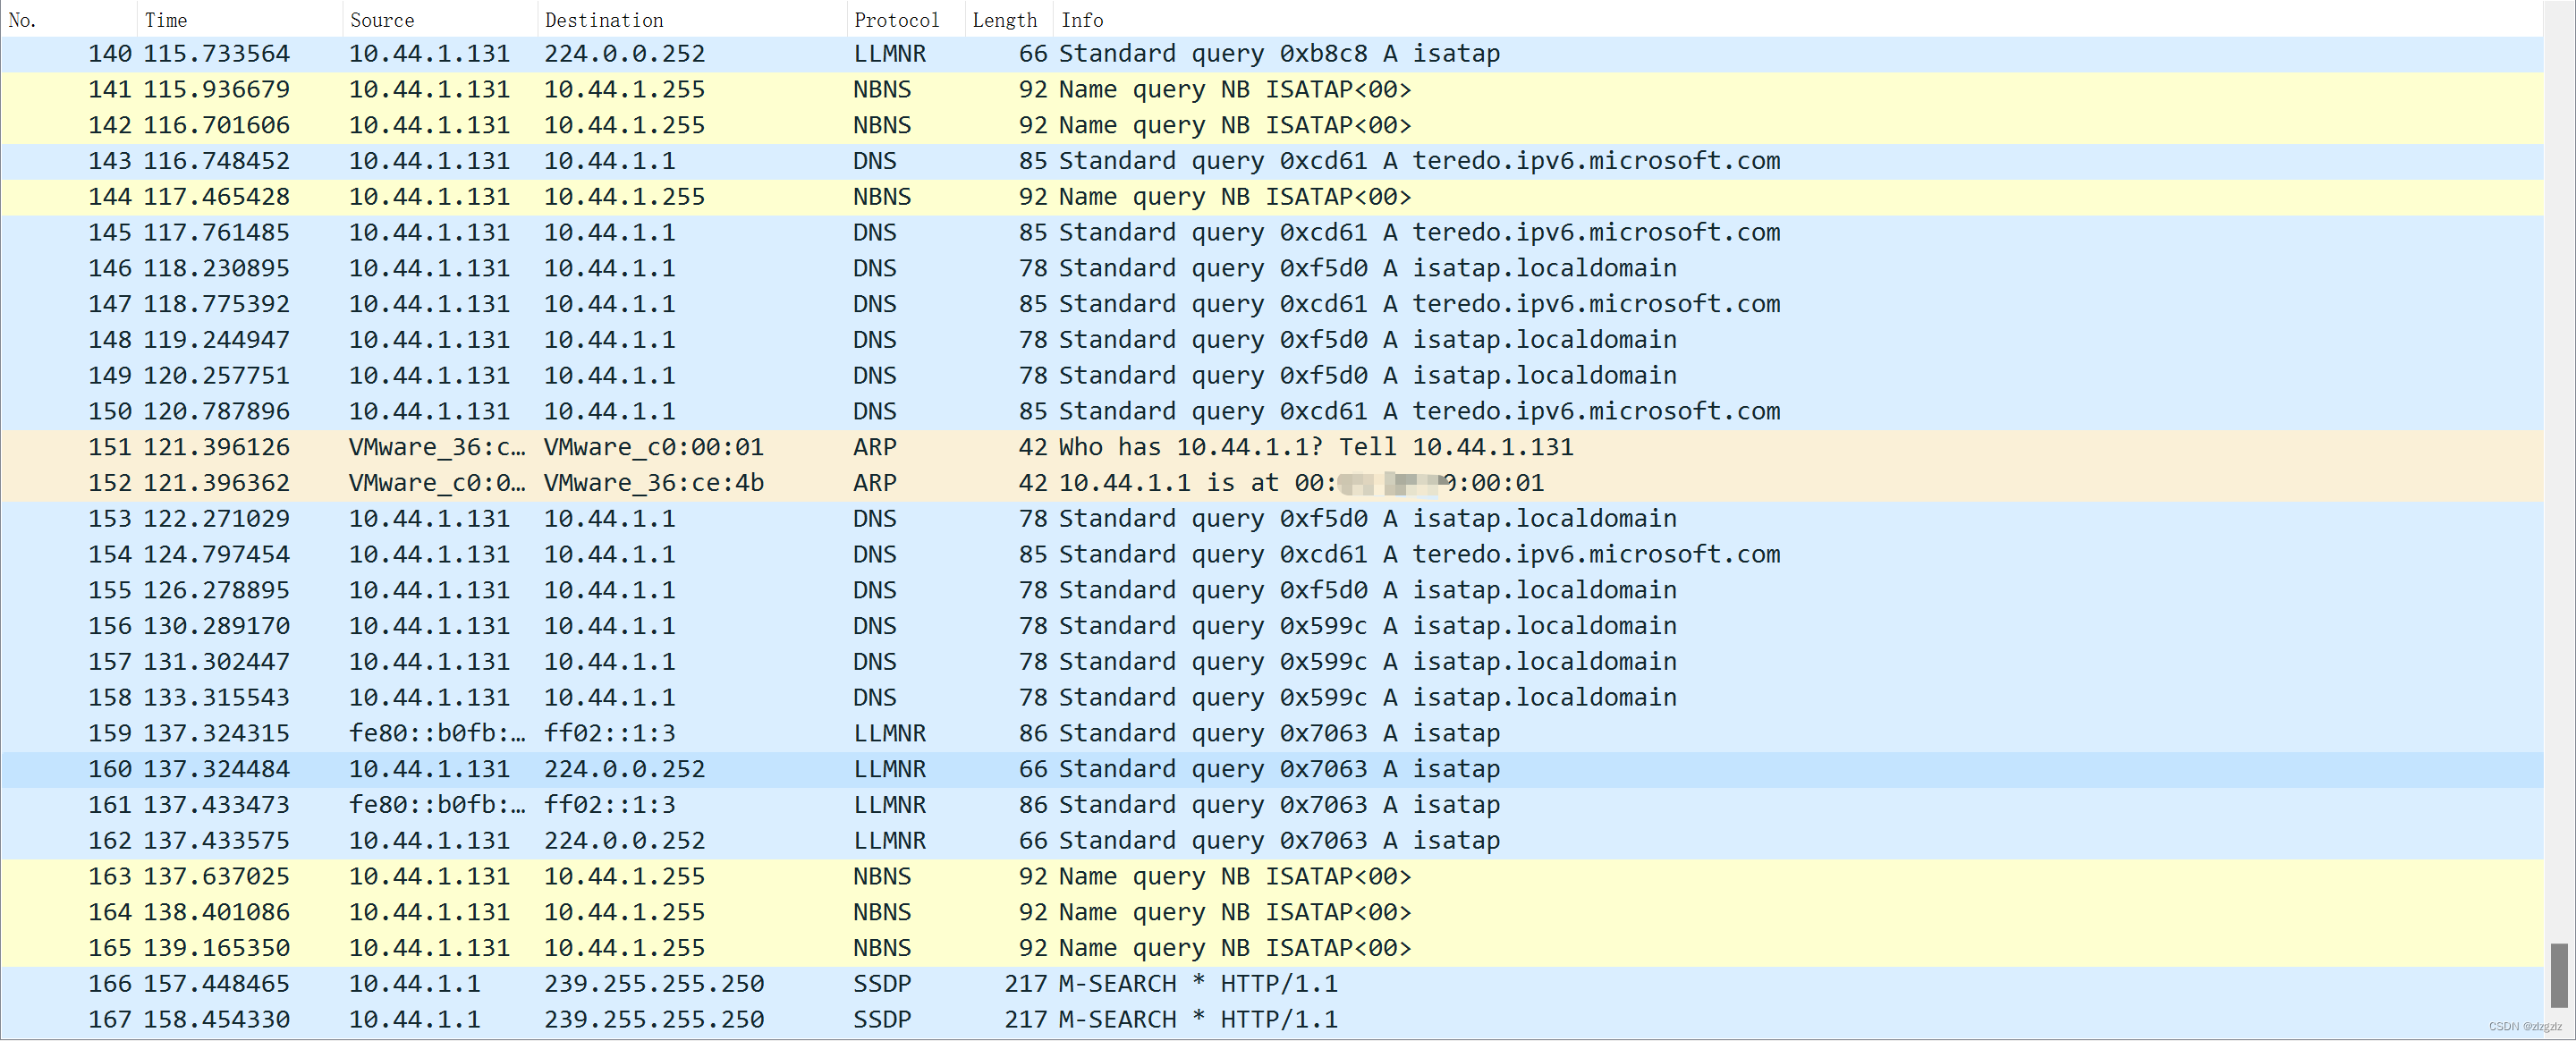
2.3 Open wireshark on the physical machine. Host-only mode is the VMnet1 NIC. In the network environment, there are only a small amount of data packets such as dns sent by the virtual machine.
2.4 Test the command below. The physical machine win11 is the attack machine.
2.4.1 Command: nmap xxxx/mask (target IP/network segment)
nmap 10.44.1.0/24
Through packet capture, it was found that the arp request packet was sent twice.
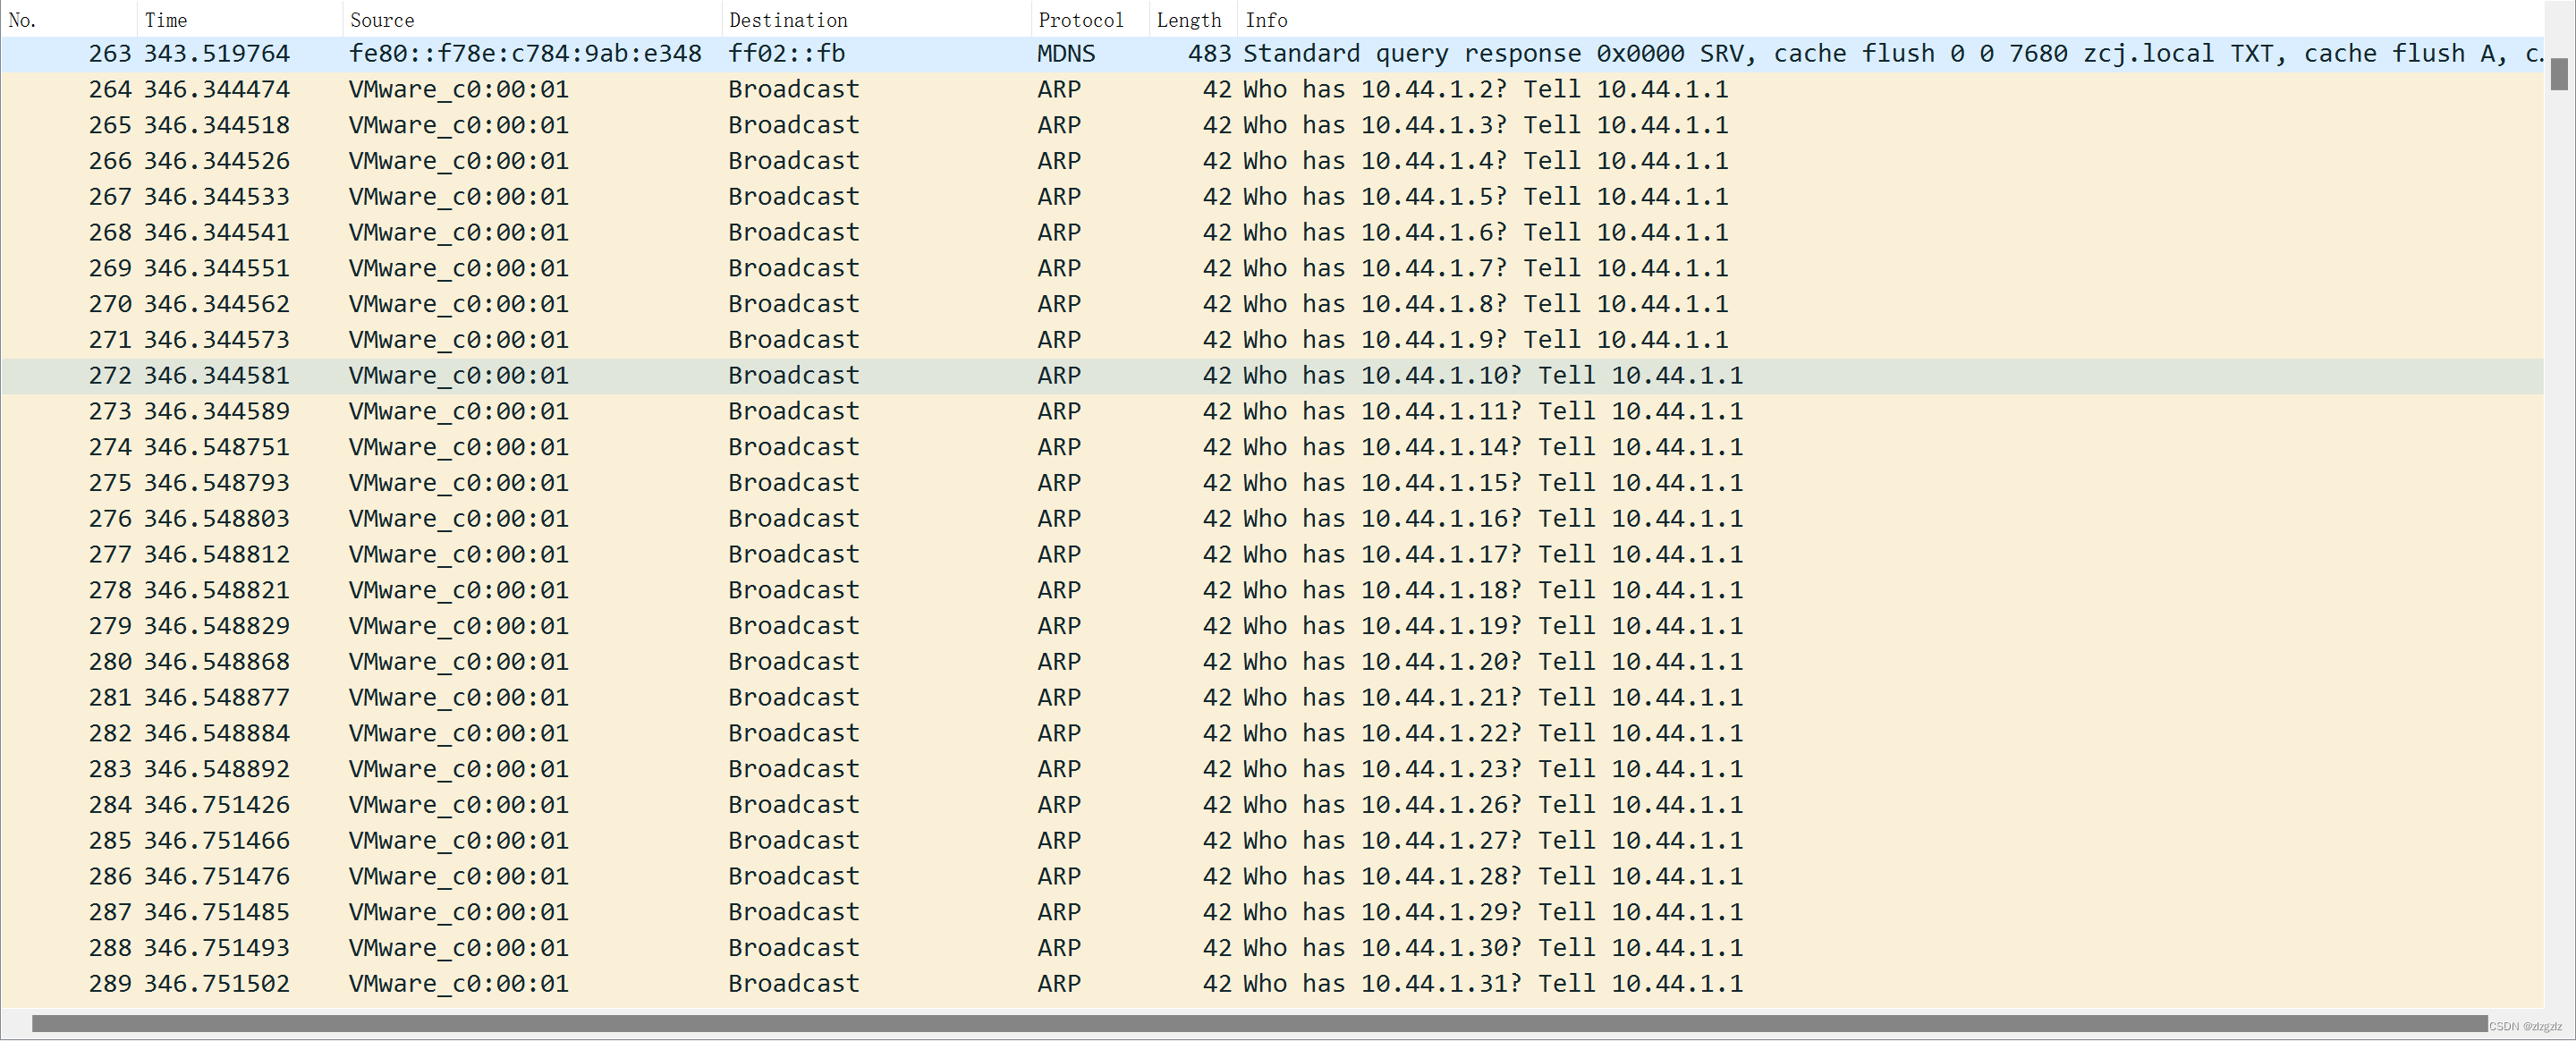
A total of about 8000 tcp syn request packets were sent. Different ports were tested, non-sequential ports, which appeared to be commonly used ports. I tested the high-risk ports using tcp.dstport==445, all of them are present.
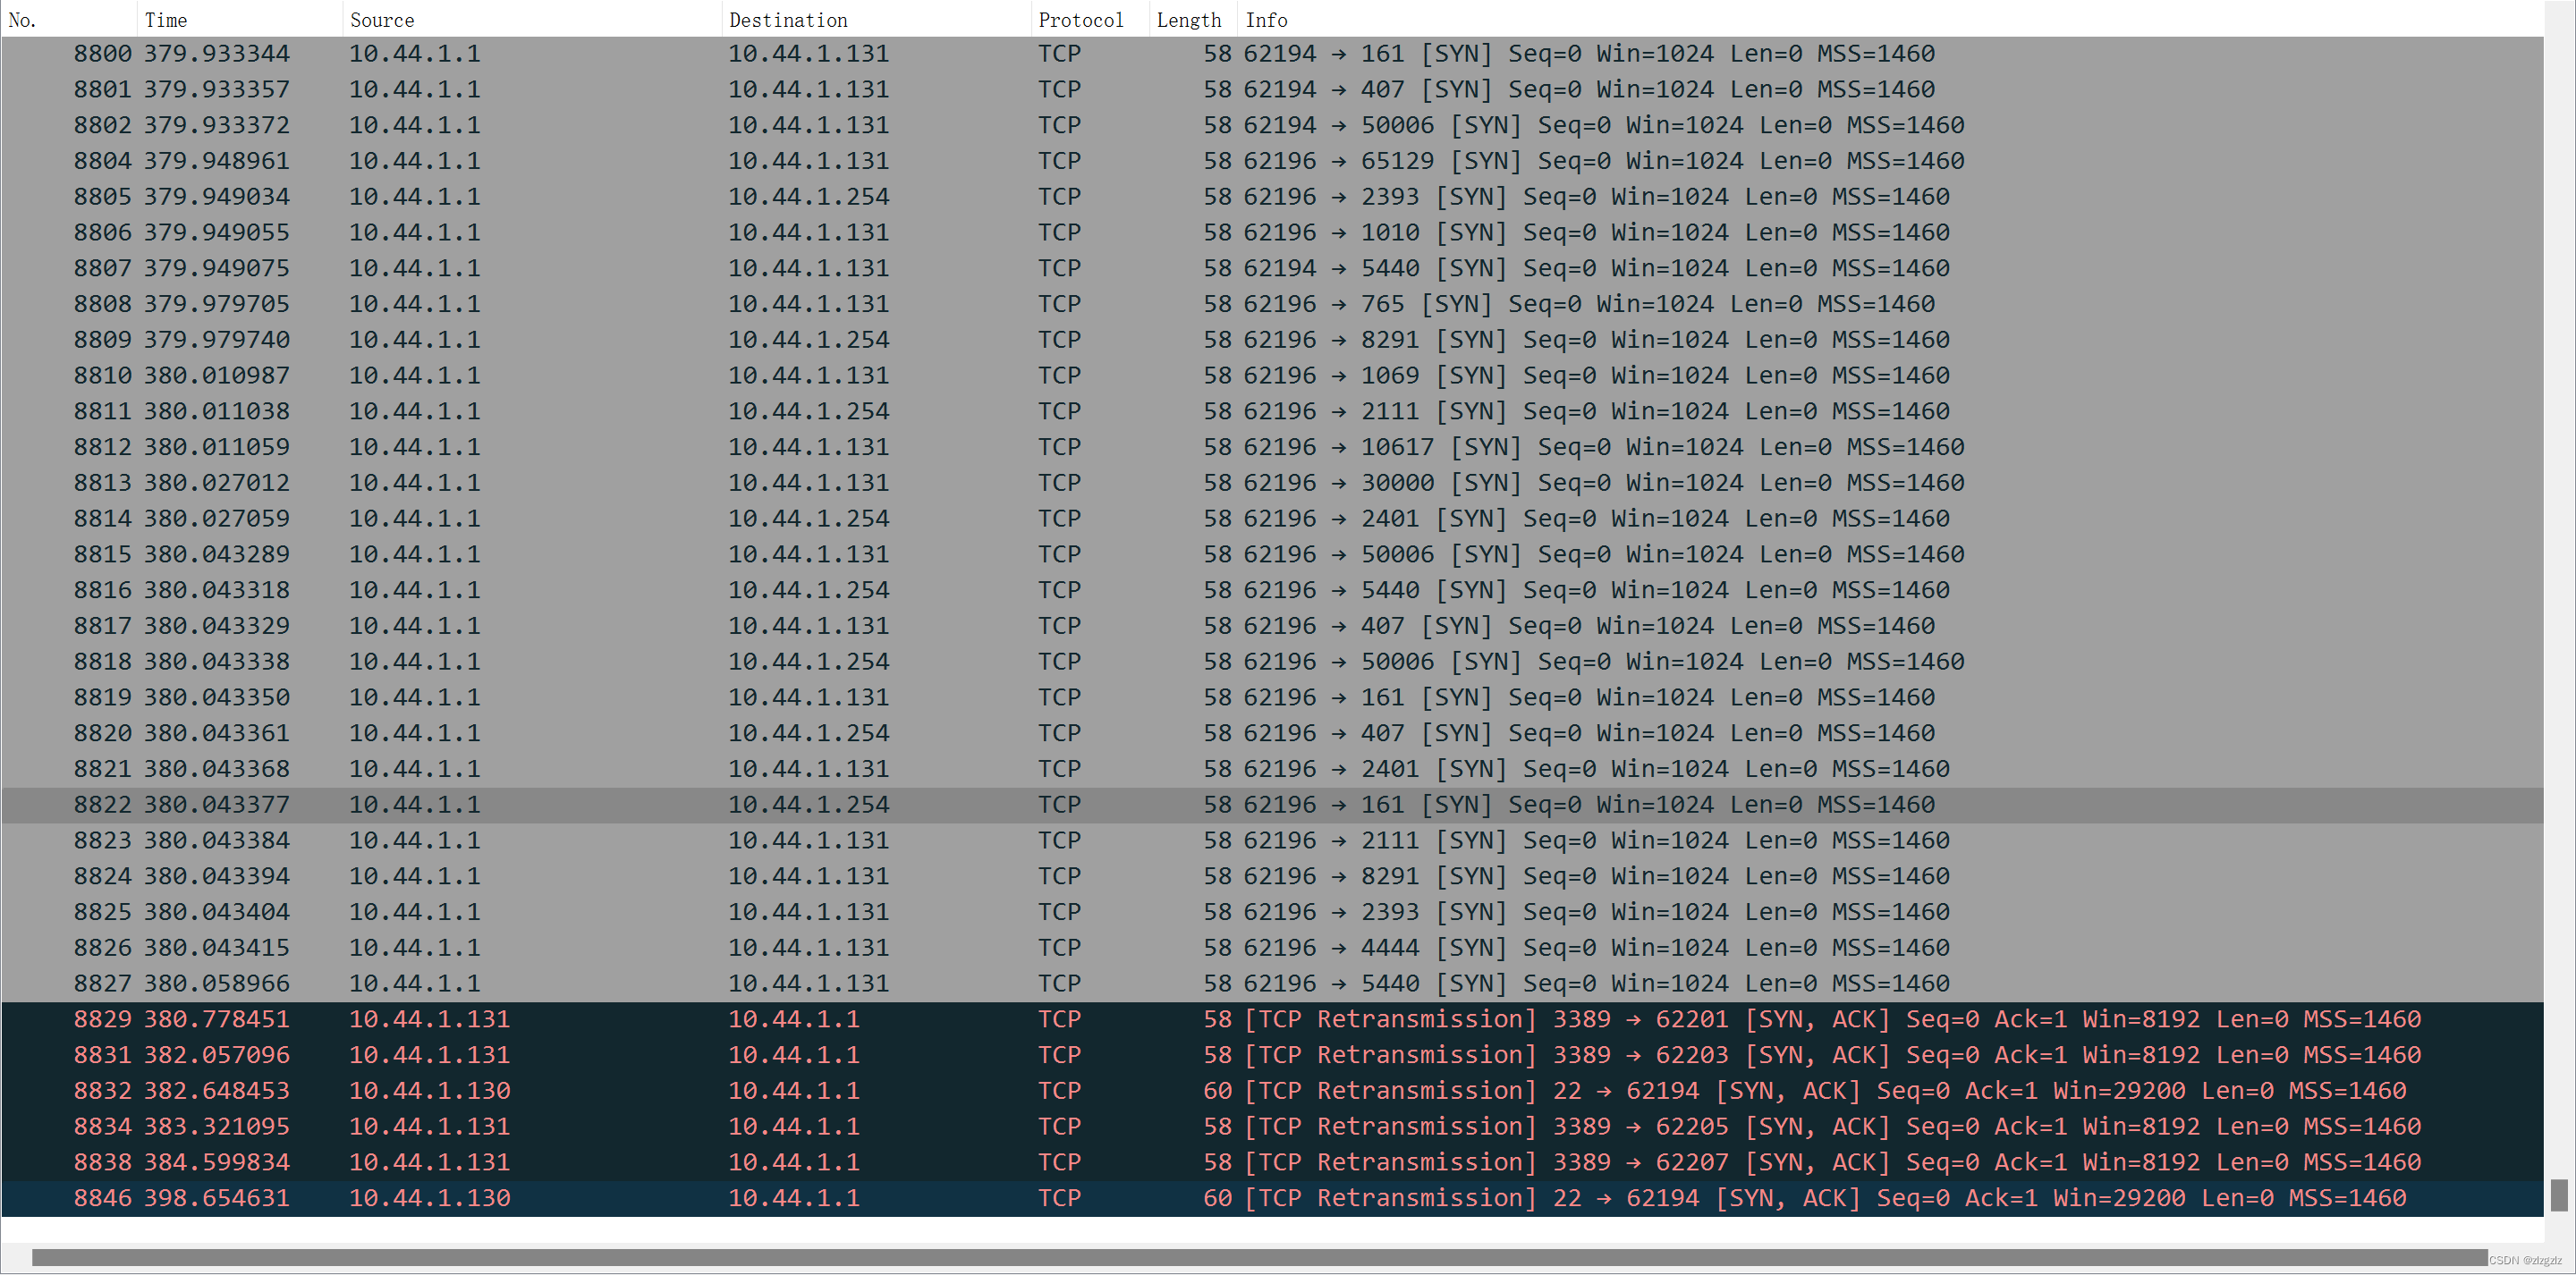
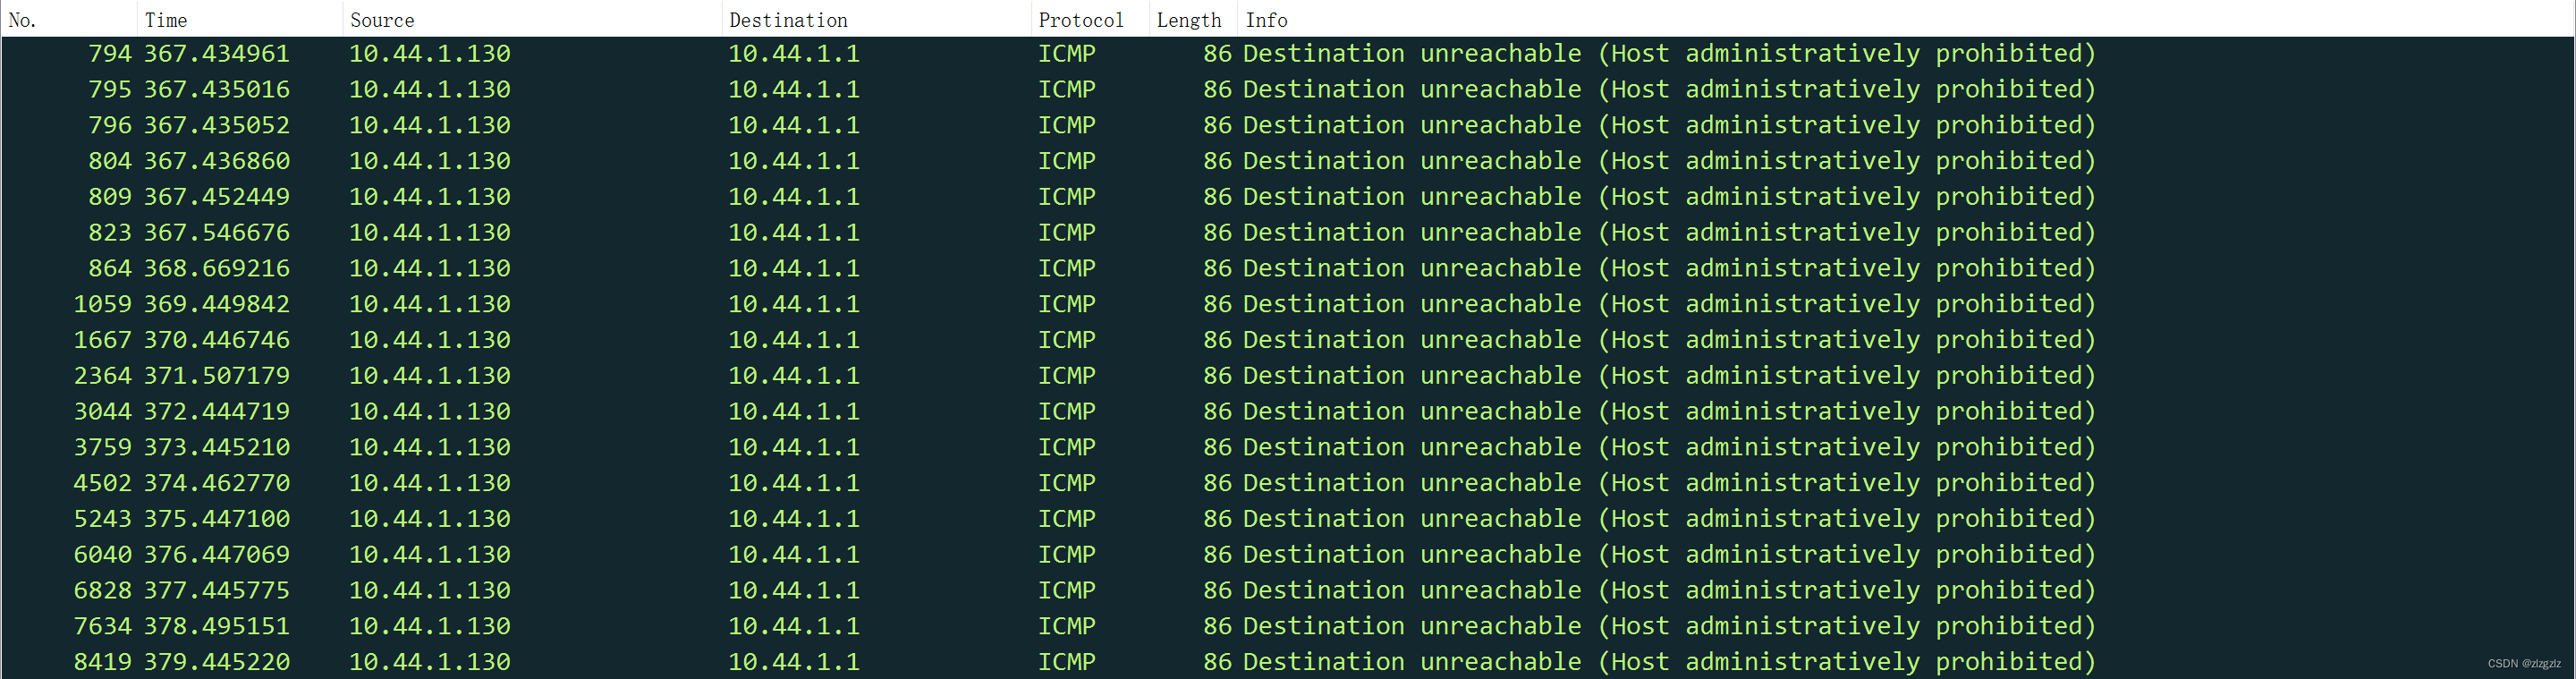
There were still some ping packets during the period, and the virtual machine 130 pinged my physical machine during the period, but my physical machine had a firewall turned on, so it couldn't ping.
Now look at the scan results.
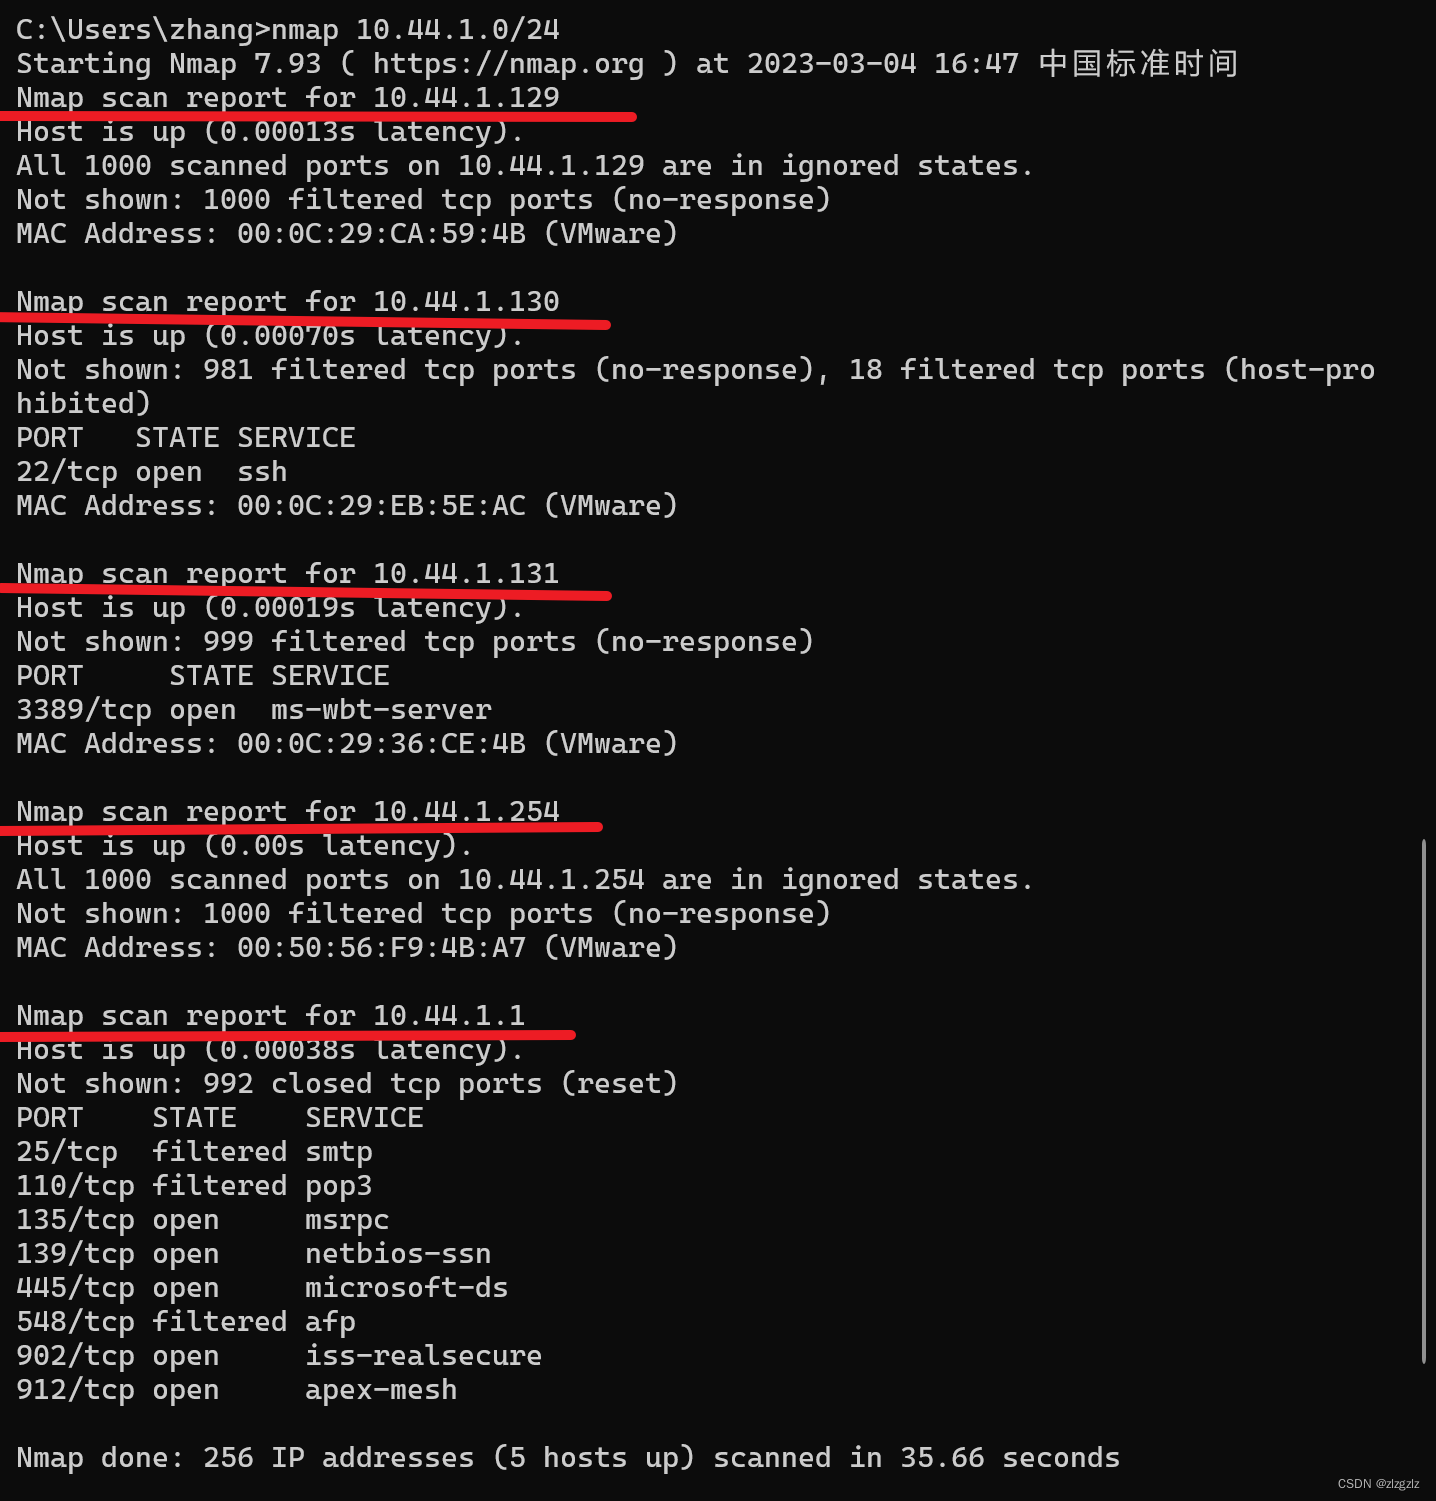
The 129 host is a win10 virtual machine, and the Windows system firewall is turned on, and only the mac address can be scanned.
The 130 host is a centos7 virtual machine, and the firewall service is also enabled, so it can only scan to the ssh remote port.
The 131 host is a win7 virtual machine, and the Windows system firewall is turned on, and the mac address and port 3389 of the remote desktop service are scanned.
2.4.2 Command for host discovery: nmap -sn
nmap -sn 10.44.1.0/24
By capturing packets, we can see that this command only sends arp packets. So only mac address information is returned.
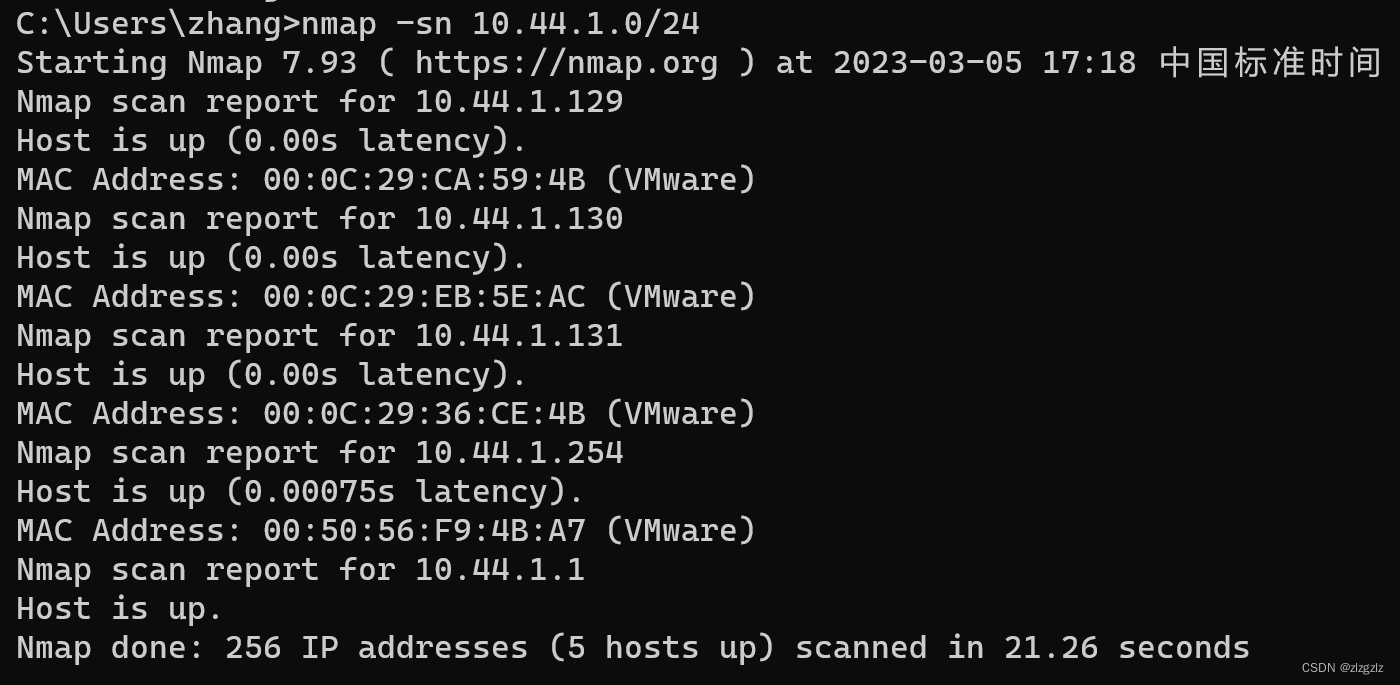
Through the nmp help manual, you can see that the function of the sn parameter is to cancel port scanning.
C:\Users\zhang>nmap -h | findstr "sn"
  -sn: Ping Scan - disable port scan
  nmap -v -sn 192.168.0.0/16 10.0.0.0/8
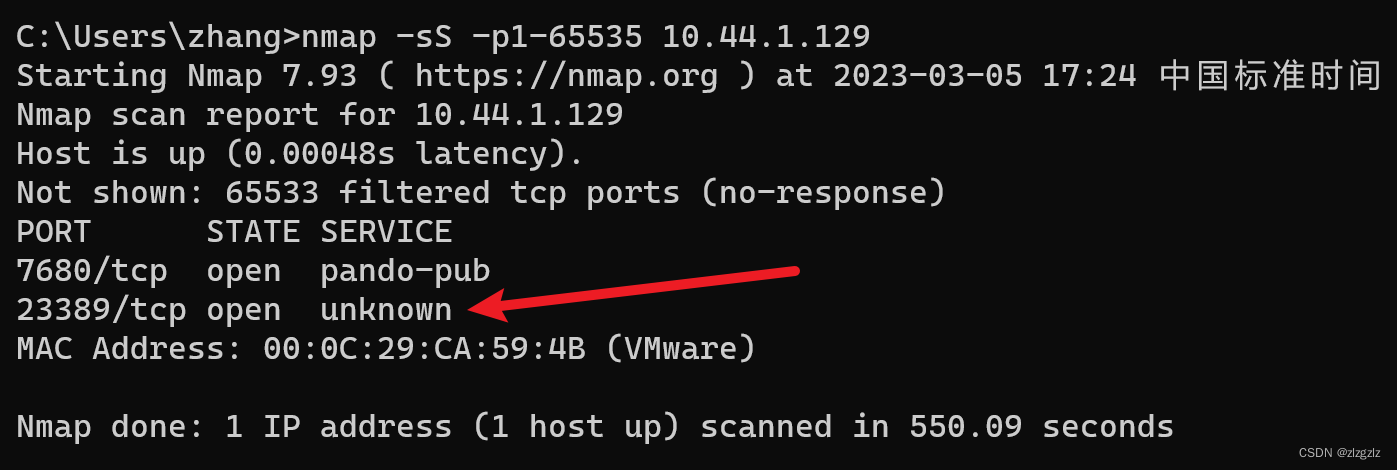
2.4.3 Command nmap -sS -p1-65535 for full port scanning.
nmap -sS -p1-65535 10.44.1.129
Equivalent to
nmap -sS -p- 10.44.1.129
This time, a single win10 virtual machine was scanned, and a full port scan sent 130,000 SYN packets. It is time-consuming. It is worth mentioning that neither Huorong nor Windows defense alerted.
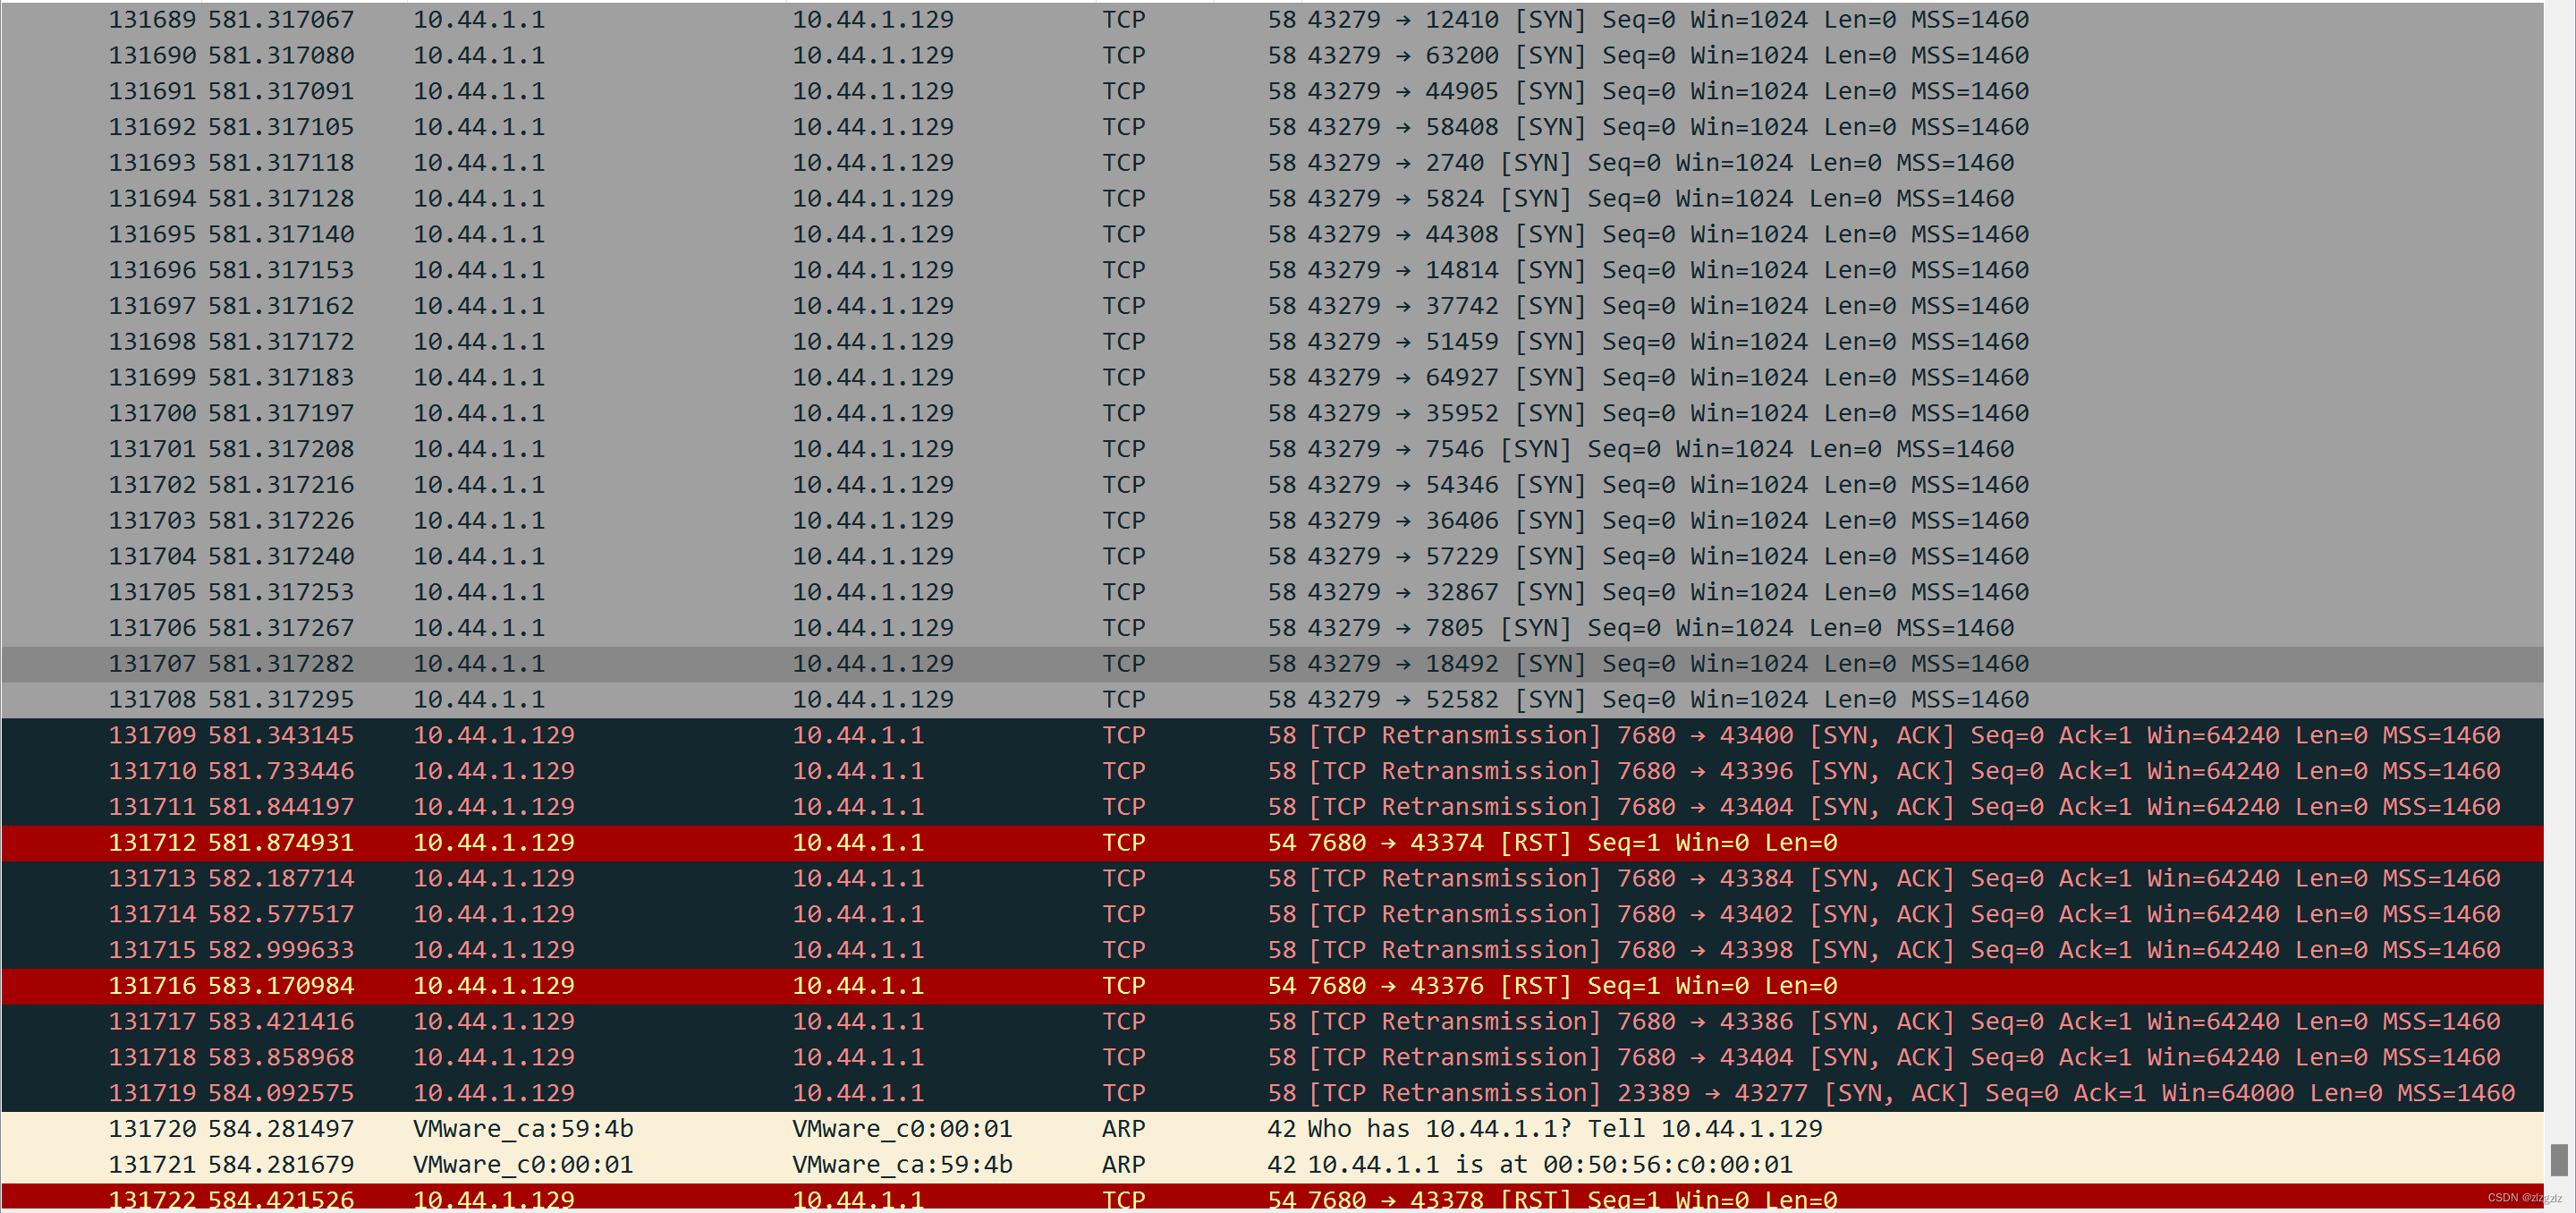
A full port scan found the port 23389 of the remote desktop service that I changed. There is also a Microsoft patch update port 7680 found from friends at CSDN.
Port query command (extended).
C:\Users\zhangcj>netstat -ano | findstr "7680"
  TCP    0.0.0.0:7680           0.0.0.0:0              LISTENING       1048
  TCP    [::]:7680              [::]:0                 LISTENING       1048

C:\Users\zhangcj>tasklist /svc | findstr "1048"
svchost.exe                   1048 DoSvc
The following is the help manual for nmap.
PORT SPECIFICATION AND SCAN ORDER:端口规格和扫描顺序:
  -p <port ranges>: Only scan specified ports仅扫描指定端口
    Ex: -p22; -p1-65535; -p U:53,111,137,T:21-25,80,139,8080,S:9
  --exclude-ports <port ranges>: Exclude the specified ports from scanning从扫描中排除指定的端口
  -F: Fast mode - Scan fewer ports than the default scan快速模式-扫描比默认扫描更少的端口
  -r: Scan ports sequentially - don't randomize 按顺序扫描端口-不要随机化
  --top-ports <number>: Scan <number> most common ports扫描<number>最常见的端口
  --port-ratio <ratio>: Scan ports more common than <ratio>扫描端口比<比率>更常见
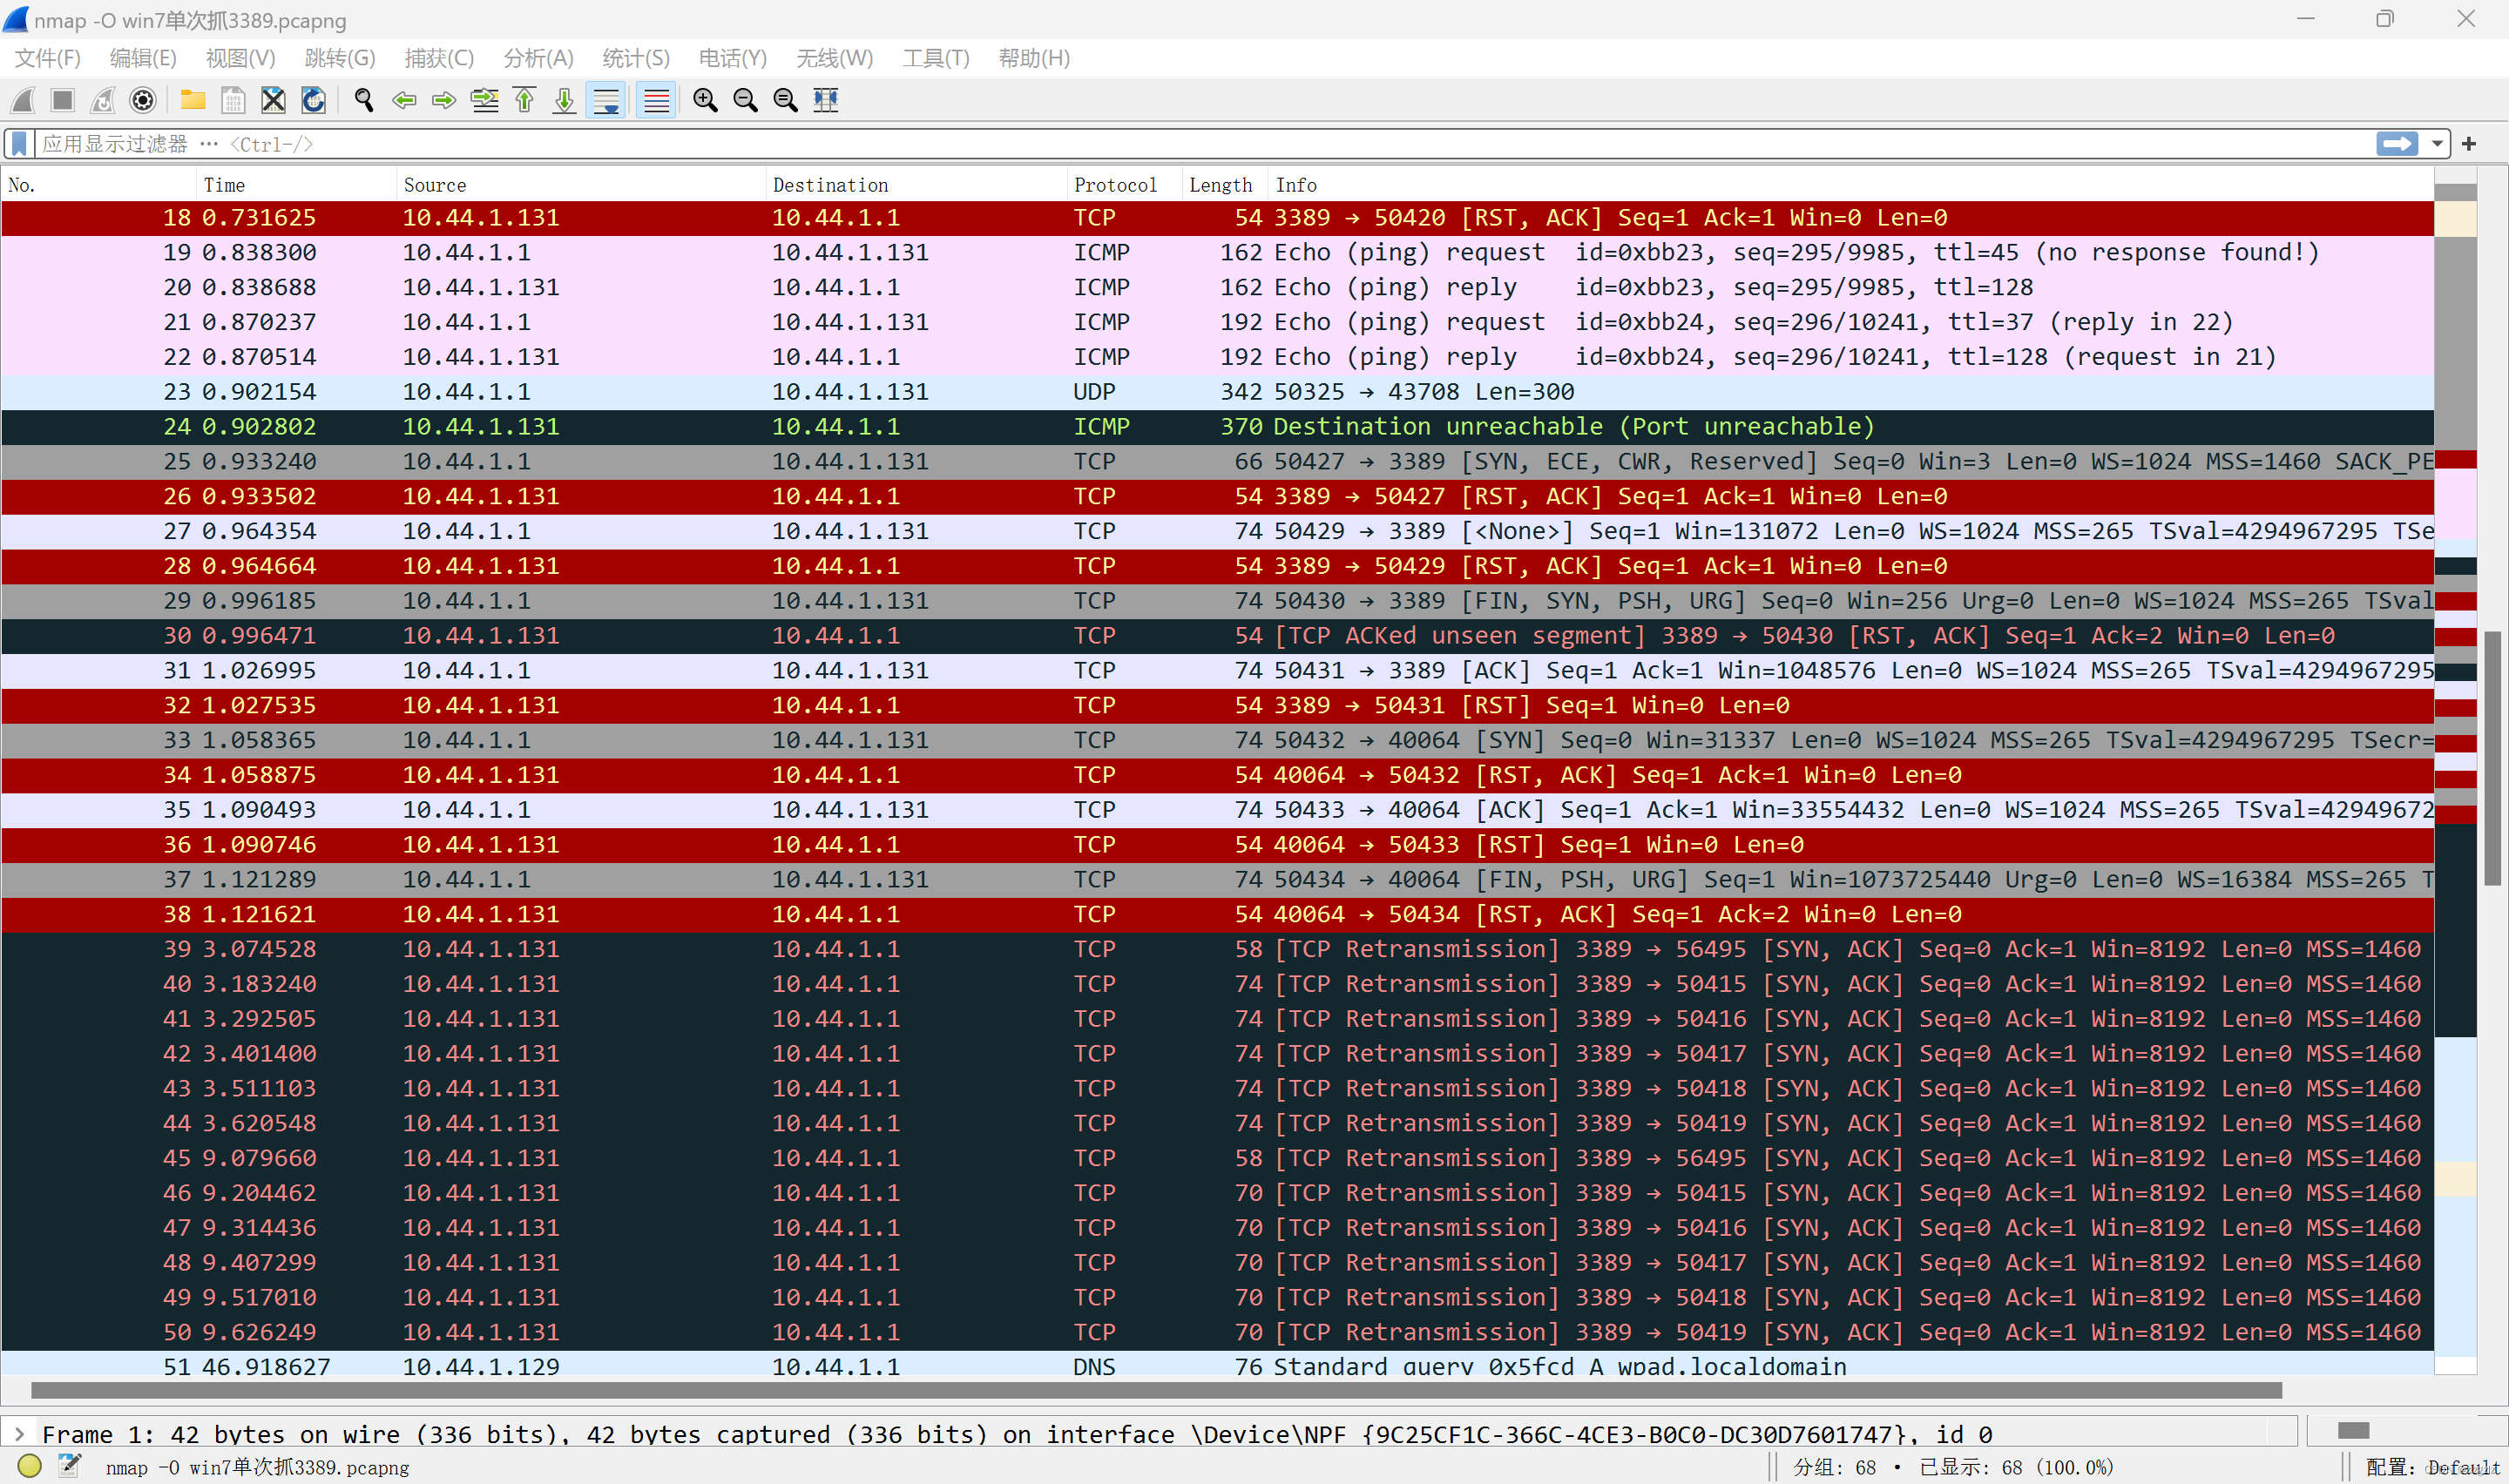
2.4.4 System scan command nmap -O.
nmap -O 10.44.1.0/24
This time also sent 8k packets, both arp and tcp. and some ping packets. At this time open the system firewall.
 Through the information leaks of 22 and 3389, nmap scanned out some vague operating system information.
Now turn off the system firewall of the win7 virtual machine and scan the system again through port 3389.
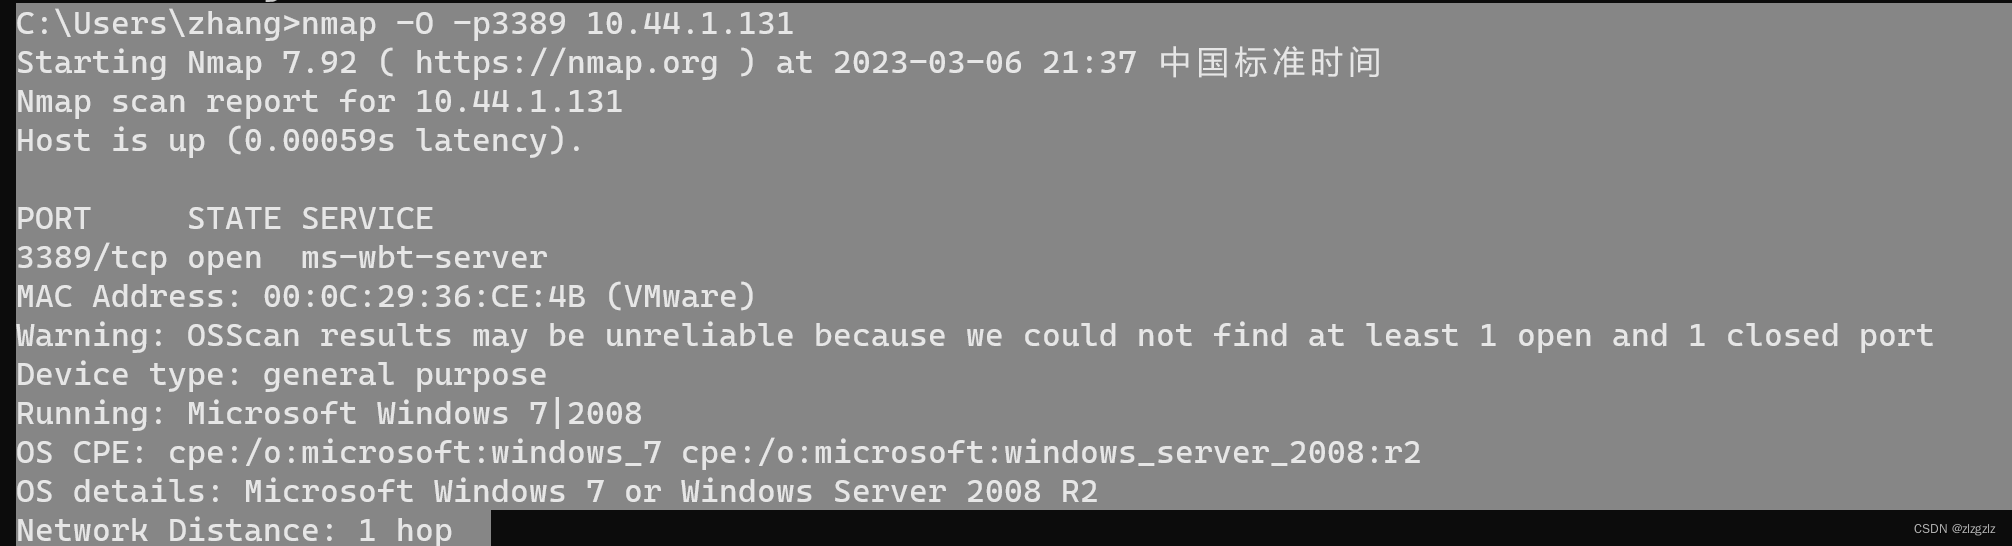
The detection result of turning off the system firewall this time is that only through the connection detection (TCP, UDP) of the transport layer, the operating system of the target machine can be roughly guessed.
It can be seen that if the system firewall is turned off, the information leakage of the server is obvious. (According to my understanding, existing security measures are difficult to defend against this kind of system scanning.)
View nmap -h
OS DETECTION:
  -O: Enable OS detection 开启系统探测
  --osscan-limit: Limit OS detection to promising targets将OS检测限制在有希望的目标上
  --osscan-guess: Guess OS more aggressively猜测操作系统更激进
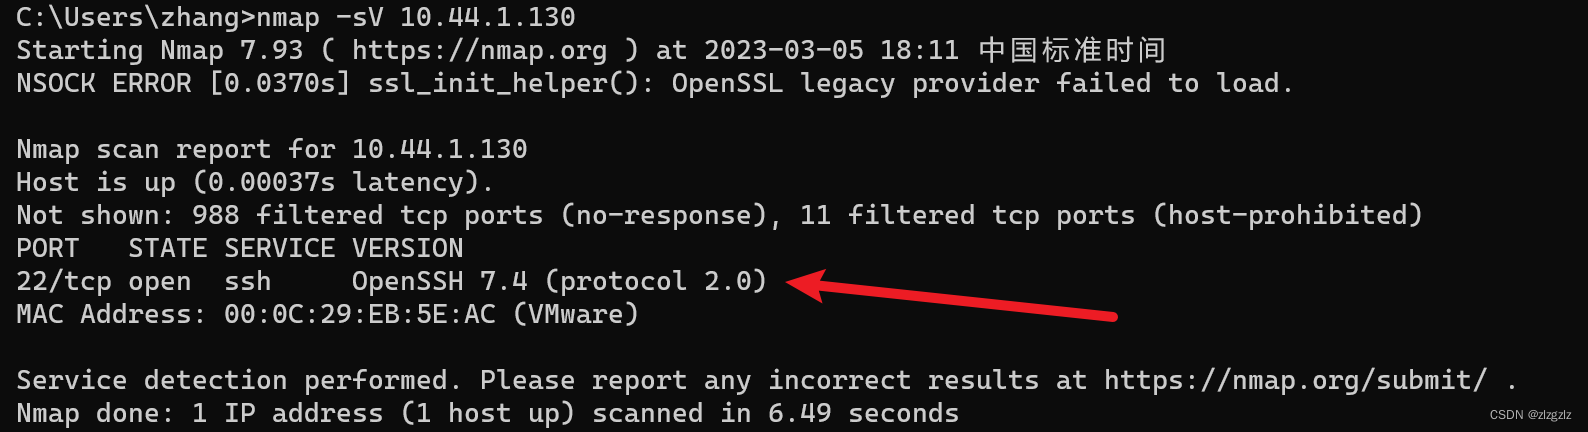
Version 2.4.5 scan command nmap -sV.
nmap -sV 10.44.1.130
This time, the CentOS virtual machine only sends 2k packets and scans 1k ports.
This time I finally found other packets except ARP and TCP packets, SSH packets. Tracing the TCP flow, it was found that a complete TCP handshake (three handshakes and four breakups) was done, and the content of the data flow only had SSH version information.

Corresponding to the internal viewing command of the CentOS virtual machine.

View nmap -h
SERVICE/VERSION DETECTION:服务/版本检测
  -sV: Probe open ports to determine service/version info探测打开的端口以确定服务/版本信息
  --version-intensity <level>: Set from 0 (light轻度) to 9 (try all probes尝试所有探测)版本强度探测
  --version-light: Limit to most likely probes (intensity 2)限制为最可能的探测(强度2)
  --version-all: Try every single probe (intensity 9)所有测试,强度9
  --version-trace: Show detailed version scan activity (for debugging)显示详细的版本扫描活动(用于调试)
So far this time, there will be more command tests in the future.