foreword
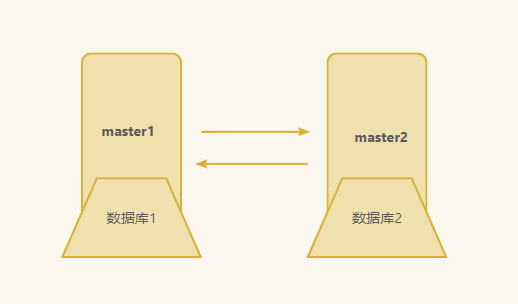
从数据库MySQL master-master synchronization is actually upgraded on the basis of master-slave synchronization 主数据库, so that they can read and write databases with each other, and the slave database becomes the master database; master-slave mutual authorization connection, read each other's binlog log and update it to the local database In the process, as long as the other party's data changes, you will change accordingly.
1. Advantages and disadvantages of master-master synchronization
In fact, each technology has its advantages and disadvantages. We need to choose the technical service that is more suitable for our own use among the functions.
Advantages of master-master synchronization
- Improve data availability : MySQL master-master synchronization can synchronize data between multiple MySQL servers. When one of the servers fails, other servers can continue to provide services, thereby improving data availability.
- Enhanced data security : MySQL master-master synchronization can realize data backup and replication. When data is lost or damaged on one of the servers, other servers can provide backup data, thereby enhancing data security.
- Support read-write separation : MySQL master-master synchronization can realize read-write separation, that is, distribute read requests and write requests to different MySQL servers, thereby improving the read-write performance of the database.
Disadvantages of master-master synchronization
- Data synchronization delay : MySQL master-master synchronization has the problem of data synchronization delay, that is, data inconsistency may occur during data synchronization. When a MySQL server modifies data, other servers need a certain amount of time to complete data synchronization, so data synchronization delays may occur.
- Need to coordinate multiple MySQL servers : MySQL master-master synchronization needs to coordinate data synchronization between multiple MySQL servers, so more management and maintenance work is required, including configuration, monitoring, and troubleshooting.
- Database performance degradation : MySQL master-master synchronization may reduce the performance of the database, especially in the process of data synchronization, which may occupy too many system resources, thus affecting the performance of the database.
To sum up, MySQL master-master synchronization has the advantages of improving data availability, enhancing data security, and supporting read-write separation, but it also has disadvantages such as data synchronization delays, the need to coordinate multiple MySQL servers, and database performance degradation. Therefore, when selecting a database synchronization method, it is necessary to comprehensively consider the actual situation.
1. Deploy the MySQL database
It is still necessary to install the MySQL8.0 database on both servers at the same time, here is a quick demonstration.
1.1 Early preparations
In order for the whole experimental procedure to be relatively smooth, the firewall and selinux need to be closed in advance.
iptables -F
systemctl stop firewalld.service
setenforce 0
Here the second server is no longer a slave, but both are master databases.
| system | IP | database version |
|---|---|---|
| CentOS7.9 | 192.168.116.166(master1) | mysql8.0 |
| CentOS7.9 | 192.168.116.128(master2) | mysql8.0 |
1.2 Install the database
Both servers need to install the database, which is a prerequisite and must be installed.
For detailed steps, please refer to "Installing and Deploying MySQL8.0"
#备份源
[root@localhost yum.repos.d]# mv CentOS-Base.repo CentOS-Base.repo.bak

#下载网络源
[root@localhost yum.repos.d]# wget -O /etc/yum.repos.d/CentOS-Base.repo https://mirrors.aliyun.com/repo/Centos-7.repo

#清空现有的文件和软件包
[root@localhost yum.repos.d]# rpm -qa | grep mysql
[root@localhost yum.repos.d]# rpm -qa | grep mariadb
mariadb-libs-5.5.68-1.el7.x86_64
[root@localhost yum.repos.d]# rpm -e mariadb-libs --nodeps

[root@localhost yum.repos.d]# find / -name mysql
/etc/selinux/targeted/active/modules/100/mysql
/usr/lib64/mysql
[root@localhost yum.repos.d]# rm -rf /etc/selinux/targeted/active/modules/100/mysql /usr/lib64/mysql

#下载安装MySQL8.0
[root@localhost yum.repos.d]# rpm -ivh https://repo.mysql.com/mysql80-community-release-el7.rpm
[root@localhost yum.repos.d]# yum install mysql-community-server -y
[root@localhost yum.repos.d]# systemctl restart mysqld

#找到初始化密码,为下一步登录修改密码做准备
[root@localhost yum.repos.d]# grep -iwa "Password" /var/log/mysqld.log
2023-03-07T06:56:53.564861Z 6 [Note] [MY-010454] [Server] A temporary password is generated for root@localhost: h-Ijft/b/9W*

#修改数据库密码
[root@localhost yum.repos.d]# mysql -uroot -p
Enter password:
Welcome to the MySQL monitor.  Commands end with ; or \g.
Your MySQL connection id is 8
Server version: 8.0.32

Copyright (c) 2000, 2023, Oracle and/or its affiliates.

Oracle is a registered trademark of Oracle Corporation and/or its
affiliates. Other names may be trademarks of their respective
owners.

Type 'help;' or '\h' for help. Type '\c' to clear the current input statement.

mysql> alter user 'root'@'localhost' identified by 'Admin#123';
Query OK, 0 rows affected (0.00 sec)

mysql> exit
Once installed, you can start configuring master-master synchronization.
1.3 Ideas
Set the first server as the master master1, and the second server as the master master2.
The master master1 and the master master2 perform master-slave synchronization first to make them master-slave with each other. The second time is reversed to let the master act as the slave. , let the subordinates decide.
On this basis, it is definitely necessary to modify the configuration file, so we will modify master1 first.
2. Configure master master1
To increase recognition, modify the host name of the first server in advance
[root@localhost ~]# hostname master1
[root@localhost ~]# bash
[root@master1 ~]#
2.1 Modify the configuration file
[root@master1 ~]# vim /etc/my.cnf
[root@master1 ~]# sed 4,+5p -n /etc/my.cnf
[mysqld]
server-id=11
log-bin=mysql-bin
auto_increment_increment=2
auto_increment_offset=1
replicate-do-db=demo_db
- server-id=11 #The unique ID of the database
- log-bin=mysql-bin #Store log file location
- auto_increment_increment=2 #Control the step size of the primary key auto-increment, set a few for several servers
- auto_increment_offset=1 #Set the auto-increment start value. This is the first one, then it is 1, and the next one is 2.
- replicate-do-db=demo_db #Select the database to be synchronized.
After modifying the configuration file, remember to restart the service, because modifying the configuration file is equivalent to reassigning variables; without restarting the service, the inode value of the file will not be synchronized to the kernel, so restarting the service is to let the kernel know the new inode value a process.
[root@master1 ~]# systemctl restart mysqld
2.2 Create user master1
Create a master1 user in the database
[root@master1 ~]# mysql -uroot -p'Admin#123'
mysql: [Warning] Using a password on the command line interface can be insecure.
Welcome to the MySQL monitor.  Commands end with ; or \g.
Your MySQL connection id is 8
Server version: 8.0.32 MySQL Community Server - GPL

Copyright (c) 2000, 2023, Oracle and/or its affiliates.

Oracle is a registered trademark of Oracle Corporation and/or its
affiliates. Other names may be trademarks of their respective
owners.

Type 'help;' or '\h' for help. Type '\c' to clear the current input statement.

mysql> create user 'master1'@'%' identified with mysql_native_password by '#Master1';
Query OK, 0 rows affected (0.01 sec)

mysql>  grant replication slave on *.* to 'master1'@'%';
Query OK, 0 rows affected (0.00 sec)

mysql> flush privileges;
Query OK, 0 rows affected (0.00 sec)

mysql> show grants for 'master1'@'%';
+-------------------------------------------------+
| Grants for master1@%                            |
+-------------------------------------------------+
| GRANT REPLICATION SLAVE ON *.* TO `master1`@`%` |
+-------------------------------------------------+
1 row in set (0.00 sec)
create user 'master1'@'%' identified with mysql_native_password by '#Master1';
- The meaning of this statement is to create a user named master1. The name of the user can be defined by oneself; @'%' means that the database can be logged in remotely, and the statement identified with mysql_native_password by is a fixed way of writing in MySQL8. set password.
grant replication slave on *.* to 'master'@'%';
- This statement indicates the authority to authorize the database to this user, *. basically means to grant all permissions, the first indicates all databases, and the second indicates the database table.
flush privileges;
- This statement means to refresh the database, so that the previously set content can be synchronized to the database.
show grants for 'master1'@'%';
- Check whether the previously set permissions have been written into the database, and the displayed content indicates that the write has been successful.
Next, continue to check the status of master1
mysql> show master status;
+------------------+----------+--------------+------------------+-------------------+
| File             | Position | Binlog_Do_DB | Binlog_Ignore_DB | Executed_Gtid_Set |
+------------------+----------+--------------+------------------+-------------------+
| mysql-bin.000002 |      157 |              |                  |                   |
+------------------+----------+--------------+------------------+-------------------+
1 row in set (0.00 sec)
- File is the storage file of the log-bin we just set up, which is used to record the log file of mysql operation.
- Position represents the offset
- Binlog_Do_DB The database that needs to be synchronized
- Binlog_Ignore_DB does not synchronize the database
The value of this offset will change every time the database is operated. Therefore, after checking the status, it is best not to continue to operate any content on the master1 database.
Then start to modify the second database.
3. Configure slave1 from the database
This configuration operates on the second server
to modify the host name
[root@localhost ~]# hostname master2
[root@localhost ~]# bash
[root@master2 ~]#
3.1 Modify the configuration file
Modify the configuration file /etc/my.cnf, this is the second server, so idboth and auto_increment_offsetneed to be adjusted to 2.
[root@master2 ~]# vim /etc/my.cnf
[root@master2 ~]# sed 4,+5p -n /etc/my.cnf
[mysqld]
server-id=12
log-bin=mysql-bin
auto_increment_increment=2
auto_increment_offset=2
replicate-do-db=demo_db
Still the same, modify the configuration file must restart the service
[root@master2 ~]# systemctl restart mysqld
3.2 Bind the main master1 database
mysql> change master to master_host='192.168.116.166',
    -> master_user='master1',
    -> master_password='#Master1',
    -> master_log_file='mysql-bin.000002',
    -> master_log_pos=157;
Query OK, 0 rows affected, 8 warnings (0.00 sec)

mysql> start slave;
Query OK, 0 rows affected, 1 warning (0.01 sec)

mysql> show slave status \G
*************************** 1. row ***************************
               Slave_IO_State: Waiting for source to send event
                  Master_Host: 192.168.116.166
                  Master_User: master1
                  Master_Port: 3306
                Connect_Retry: 60
              Master_Log_File: mysql-bin.000002
          Read_Master_Log_Pos: 157
               Relay_Log_File: master2-relay-bin.000002
                Relay_Log_Pos: 326
        Relay_Master_Log_File: mysql-bin.000002
             Slave_IO_Running: Yes
            Slave_SQL_Running: Yes
              Replicate_Do_DB: demo_db
          Replicate_Ignore_DB:
           Replicate_Do_Table:
......
1 row in set, 1 warning (0.00 sec)
In fact, there are only a few sentences in the above statement that need to be executed. Let’s take a look together.
The template of this piece of information can be copied directly, and the IP, user name, password, log file, and offset of your own definition need to be modified after the equal sign.
change master to master_host='192.168.116.166',  #填写您自己的IP
master_user='master1', 		#填写您自己在第一台服务器上创建的用户名称
master_password='#Master1',   #填写在第一台服务器上创建的用户密码
master_log_file='mysql-bin.000002',  #填写第一台服务器上master的日志信息
master_log_pos=157;  			#填写在第一台服务器上master的偏移量
Use this statement to view the status of the slave database;
show slave status \G

Seeing that these two values are yes means that the synchronization has been successful.
4. Configure the master2 database
Next, continue to configure the current master2 server
4.1 Create user master2
Create a master2user named
mysql> create user 'master2'@'%' identified with mysql_native_password by '#Master2';
Query OK, 0 rows affected (0.01 sec)

mysql>  grant replication slave on *.* to 'master2'@'%';
Query OK, 0 rows affected (0.00 sec)

mysql> flush privileges;
Query OK, 0 rows affected (0.00 sec)
View the status of master2
mysql> show master status;
+------------------+----------+--------------+------------------+-------------------+
| File             | Position | Binlog_Do_DB | Binlog_Ignore_DB | Executed_Gtid_Set |
+------------------+----------+--------------+------------------+-------------------+
| mysql-bin.000004 |      157 |              |                  |                   |
+------------------+----------+--------------+------------------+-------------------+
1 row in set (0.00 sec)
At this point, you don't need to continue to operate, or you can directly exit the mysql management system.
Go back to the first server and continue to synchronize the second database user
5. Configure slave2 database
In fact, slave2 is also master1, and it is still bound in the same way.
5.1 Bind and synchronize the main master2 database
mysql> change master to master_host='192.168.116.128', master_user='master2',
    -> master_password='#Master2',master_log_file='mysql-bin.000004',
    -> master_log_pos=157;
Query OK, 0 rows affected, 8 warnings (0.00 sec)

mysql> start slave;
Query OK, 0 rows affected, 1 warning (0.02 sec)

mysql> show slave status \G
*************************** 1. row ***************************
               Slave_IO_State: Connecting to source
                  Master_Host: 192.168.116.128
                  Master_User: master2
                  Master_Port: 3306
                Connect_Retry: 60
              Master_Log_File: mysql-bin.000004
          Read_Master_Log_Pos: 157
               Relay_Log_File: master1-relay-bin.000001
                Relay_Log_Pos: 4
        Relay_Master_Log_File: mysql-bin.000004
             Slave_IO_Running: Connecting
            Slave_SQL_Running: Yes
              Replicate_Do_DB: demo_db
          Replicate_Ignore_DB:
           Replicate_Do_Table:
       Replicate_Ignore_Table:
      Replicate_Wild_Do_Table:
  Replicate_Wild_Ignore_Table:
                   Last_Errno: 0
                   Last_Error:
                 Skip_Counter: 0
          Exec_Master_Log_Pos: 157
              Relay_Log_Space: 157
              Until_Condition: None
               Until_Log_File:
                Until_Log_Pos: 0
           Master_SSL_Allowed: No
           Master_SSL_CA_File:
           Master_SSL_CA_Path:
              Master_SSL_Cert:
            Master_SSL_Cipher:
               Master_SSL_Key:
        Seconds_Behind_Master: NULL
Master_SSL_Verify_Server_Cert: No
                Last_IO_Errno: 2003
                Last_IO_Error: error connecting to master '[email protected]:3306' - retry-time: 60 retries: 1 message: Can't connect to MySQL server on '192.168.116.128:3306' (113)
               Last_SQL_Errno: 0
               Last_SQL_Error:
  Replicate_Ignore_Server_Ids:
......
1 row in set, 1 warning (0.00 sec)
As you can see, when viewing the slave status, there is a value that is not yes.
Slave_IO_Running: Connecting
Slave_SQL_Running: Yes

You can see the cause of the error here. Of course, there are many reasons that affect the value of IO is Connecting. Let's check them one by one.
5.2 Solutions
It is not terrible to encounter errors. You can think about the steps you have performed before, and go back to check whether the previous steps are executed correctly. If it is correct, check whether it is a selinux, firewall, network and other problems.
Reason for configuration failure:
- The network is not available – you can try to ping the domain name of the website
- Firewall, selinux is not closed – re-execute the closed operation
- The user password is entered incorrectly – reconfigure it again, confirm it clearly and then enter it
- IP error – confirm whether it is the IP of the local server
- Offset and log file errors – restart the service and reconfigure it again
Both servers need to be checked
[root@master1 ~]# hostname -I
192.168.116.166 192.168.122.1
[root@master1 ~]# systemctl status firewalld
● firewalld.service - firewalld - dynamic firewall daemon
   Loaded: loaded (/usr/lib/systemd/system/firewalld.service; enabled; vendor preset: enabled)
   Active: inactive (dead) since 五 2023-02-10 10:52:45 CST; 1 months 12 days ago
     Docs: man:firewalld(1)
 Main PID: 804 (code=exited, status=0/SUCCESS)

2月 10 10:51:06 localhost.localdomain systemd[1]: Starting firewalld - dynamic f....
2月 10 10:51:10 localhost.localdomain systemd[1]: Started firewalld - dynamic fi....
2月 10 10:51:11 localhost.localdomain firewalld[804]: WARNING: AllowZoneDrifting ...
2月 10 10:52:44 localhost.localdomain systemd[1]: Stopping firewalld - dynamic f....
2月 10 10:52:45 localhost.localdomain systemd[1]: Stopped firewalld - dynamic fi....
Hint: Some lines were ellipsized, use -l to show in full.
[root@master1 ~]# ping -c 1 www.baidu.com
PING www.a.shifen.com (14.215.177.38) 56(84) bytes of data.
64 bytes from 14.215.177.38 (14.215.177.38): icmp_seq=1 ttl=53 time=37.8 ms

--- www.a.shifen.com ping statistics ---
1 packets transmitted, 1 received, 0% packet loss, time 0ms
rtt min/avg/max/mdev = 37.807/37.807/37.807/0.000 ms
[root@master1 ~]# getenforce
Permissive
[root@master1 ~]# iptables -L
Chain INPUT (policy ACCEPT)
target     prot opt source               destination

Chain FORWARD (policy ACCEPT)
target     prot opt source               destination

Chain OUTPUT (policy ACCEPT)
target     prot opt source               destination
The first server test is OK
Next test the second server
[root@master2 ~]# hostname -I
192.168.116.128 192.168.122.1

[root@master2 ~]# systemctl status firewalld
● firewalld.service - firewalld - dynamic firewall daemon
   Loaded: loaded (/usr/lib/systemd/system/firewalld.service; enabled; vendor preset: enabled)
   Active: active (running) since 六 2023-03-25 15:28:38 CST; 2s ago
     Docs: man:firewalld(1)
 Main PID: 70425 (firewalld)
    Tasks: 2
   CGroup: /system.slice/firewalld.service
           └─70425 /usr/bin/python2 -Es /usr/sbin/firewalld --nofork --nopid

3月 25 15:28:39 master2 firewalld[70425]: WARNING: COMMAND_FAILED: '/usr/sbin/ipt...).
3月 25 15:28:39 master2 firewalld[70425]: WARNING: COMMAND_FAILED: '/usr/sbin/ipt...).
3月 25 15:28:39 master2 firewalld[70425]: WARNING: COMMAND_FAILED: '/usr/sbin/ipt...).
3月 25 15:28:39 master2 firewalld[70425]: WARNING: COMMAND_FAILED: '/usr/sbin/ipt...e.
3月 25 15:28:39 master2 firewalld[70425]: WARNING: COMMAND_FAILED: '/usr/sbin/ipt...e.
3月 25 15:28:39 master2 firewalld[70425]: WARNING: COMMAND_FAILED: '/usr/sbin/ipt...).
3月 25 15:28:39 master2 firewalld[70425]: WARNING: COMMAND_FAILED: '/usr/sbin/ipt...).
3月 25 15:28:39 master2 firewalld[70425]: WARNING: COMMAND_FAILED: '/usr/sbin/ipt...).
3月 25 15:28:39 master2 firewalld[70425]: WARNING: COMMAND_FAILED: '/usr/sbin/ipt...).
3月 25 15:28:39 master2 firewalld[70425]: WARNING: COMMAND_FAILED: '/usr/sbin/ipt...).
Hint: Some lines were ellipsized, use -l to show in full.
It was found that the firewall of the second server was not closed, which was most likely affected by these problems, and then the firewall was turned off.
[root@master2 ~]# systemctl stop firewalld.service
After closing, continue to bind the server on the first server.
It is easier to deal with the problem of the firewall. First, close the slave, reset it, and then open it.
stop slave;
reset slave;
start slave;
mysql> stop slave;
Query OK, 0 rows affected, 1 warning (0.00 sec)

mysql> reset slave;
Query OK, 0 rows affected, 1 warning (0.00 sec)

mysql> start slave;
Query OK, 0 rows affected, 1 warning (0.04 sec)

mysql> show slave status \G
*************************** 1. row ***************************
               Slave_IO_State: Waiting for source to send event
                  Master_Host: 192.168.116.128
                  Master_User: master2
                  Master_Port: 3306
                Connect_Retry: 60
              Master_Log_File: mysql-bin.000004
          Read_Master_Log_Pos: 157
               Relay_Log_File: master1-relay-bin.000006
                Relay_Log_Pos: 373
        Relay_Master_Log_File: mysql-bin.000004
             Slave_IO_Running: Yes
            Slave_SQL_Running: Yes
              Replicate_Do_DB: demo_db
          Replicate_Ignore_DB:
......
1 row in set, 1 warning (0.00 sec)
Check that both values are yes, indicating that the synchronization has been successful.
6. Test results
The above is the whole content of the master-master synchronization. It is time to verify whether it has been completely successful.
We create the database that we chose to synchronize on the first master1, then create a table for this database, and then insert a few rows of information into the table.
6.1 The first database test
[root@master1 ~]# mysql -uroot -pAdmin#123
mysql: [Warning] Using a password on the command line interface can be insecure.
Welcome to the MySQL monitor.  Commands end with ; or \g.
Your MySQL connection id is 32
Server version: 8.0.32 MySQL Community Server - GPL

Copyright (c) 2000, 2023, Oracle and/or its affiliates.

Oracle is a registered trademark of Oracle Corporation and/or its
affiliates. Other names may be trademarks of their respective
owners.

Type 'help;' or '\h' for help. Type '\c' to clear the current input statement.

mysql> create database demo_db;
Query OK, 1 row affected (0.01 sec)

mysql> use demo_db
Database changed
mysql> create table demo_tb(id int not null,name varchar(20) default 'username');
Query OK, 0 rows affected (0.02 sec)

mysql> insert into demo_tb values(1,'zhangsan'), (2,'lisi'), (3,'kunkun');
Query OK, 3 rows affected (0.00 sec)
Records: 3  Duplicates: 0  Warnings: 0
6.2 Second database test
[root@master2 ~]# mysql -uroot -p
Enter password:
Welcome to the MySQL monitor.  Commands end with ; or \g.
Your MySQL connection id is 16
Server version: 8.0.32 MySQL Community Server - GPL

Copyright (c) 2000, 2023, Oracle and/or its affiliates.

Oracle is a registered trademark of Oracle Corporation and/or its
affiliates. Other names may be trademarks of their respective
owners.

Type 'help;' or '\h' for help. Type '\c' to clear the current input statement.

mysql> show databases;
+--------------------+
| Database           |
+--------------------+
| demo_db            |
| information_schema |
| mysql              |
| performance_schema |
| sys                |
+--------------------+
5 rows in set (0.00 sec)

mysql> select * from demo_db.demo_tb;
+----+----------+
| id | name     |
+----+----------+
|  1 | zhangsan |
|  2 | lisi     |
|  3 | kunkun   |
+----+----------+
3 rows in set (0.01 sec)

mysql> use demo_db
Reading table information for completion of table and column names
You can turn off this feature to get a quicker startup with -A

Database changed
mysql> insert into demo_tb values(4,'liao'),
    -> (5,'chengpi'),
    -> (6,'mahua');
Query OK, 3 rows affected (0.01 sec)
Records: 3  Duplicates: 0  Warnings: 0
On the first database, see if the content inserted by the second one can also be successfully written.
mysql> select * from demo_tb;
+----+----------+
| id | name     |
+----+----------+
|  1 | zhangsan |
|  2 | lisi     |
|  3 | kunkun   |
|  4 | liao     |
|  5 | chengpi  |
|  6 | mahua    |
+----+----------+
6 rows in set (0.00 sec)
Check the input content of the second database, and it can also be synchronized to the first database, indicating that it has been successful.
Summarize
The above is the whole content of this article. If you have read yesterday's "MySQL Database Realizes Master-Slave Synchronization", you will find that master-slave synchronization is only a master-slave synchronization on the master-slave synchronization. If you think the above content is okay, you can like it and support it!
