1. Introduction
1. In the selenium module, we always have to log in to a certain website before he will give us data, but when we log in, we will also encounter verification codes. The easiest way is to connect to the coding platform , but here I introduce a simple verification method.
2. Processing of sliding verification code
1. I won’t explain too much about the previous login, just upload the code directly. The simulated login here is the website of JD Finance.
import base64
import re
import time
import numpy as np
import cv2
from PIL import Image
from selenium import webdriver
from selenium.webdriver.common.by import By
from matplotlib import pyplot as plt
import random
from selenium.webdriver import ChromeOptions, ActionChains

# 浏览器的自动化的实现
driver = webdriver.Chrome()
driver.get('https://union.jd.com/index')
driver.implicitly_wait(10)
driver.maximize_window()

# 切换到嵌套的页面
driver.switch_to.frame(0)
time.sleep(1)
driver.find_element(By.ID, 'loginname').send_keys('17740597')
driver.find_element(By.ID, 'nloginpwd').send_keys('0521')
driver.find_element(By.ID, 'paipaiLoginSubmit').click()
time.sleep(1)

input()
driver.quit()
2. After logging in, this is the interface, and the next step is our highlight, to search through the cv2 module and others.


3. Save these two pictures, their addresses are as follows. Their encoding format is in string format, which needs to be converted tobinarypictures can be saved.

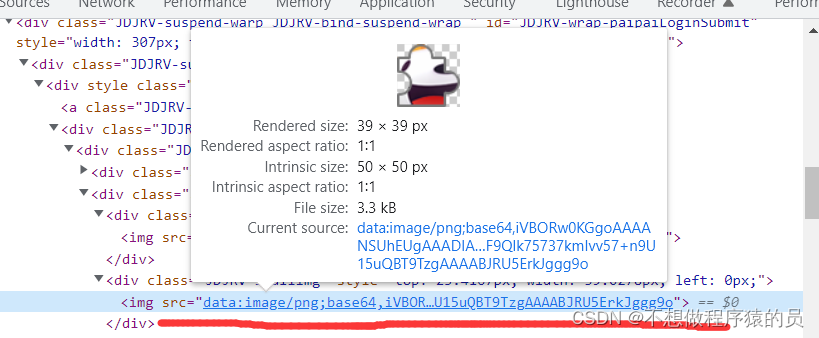
# 保存获取到的图片
big_url = driver.find_element(By.CSS_SELECTOR, 'div.JDJRV-bigimg>img').get_attribute('src')
small_url = driver.find_element(By.CSS_SELECTOR, 'div.JDJRV-smallimg>img').get_attribute('src')

# 正则表达式提取需要的部分
big_base64_str = re.sub(r'data:[a-z]*/[a-z]*;base64,', '', big_url)
small_base64_str = re.sub(r'data:[a-z]*/[a-z]*;base64,', '', small_url)

# 利用split的来进行数据的分割也可以
# big_base64_str = big_url.split(',')[-1]
# small_base64_str = big_url.split(',')[-1]


# 图片的二进制的数据
big_binary_content = base64.b64decode(big_base64_str)
small_binary_content = base64.b64decode(small_base64_str)

with open('big.png',mode='wb') as f:
    f.write(big_binary_content)
with open('small.png',mode='wb') as f:
    f.write(small_binary_content)
4. Calculate the zoom ratio of the picture, because the picture loaded in the browser is different from the original picture, and the data of the browser is basically passed throughrenderingof.
# 计算缩放比例
time.sleep(1)
local_img = Image.open('big.png')
size_loc = local_img.size
zoom = 281 / int(size_loc[0])  # 第0项就是x轴的长度,就是宽度
print("计算缩放比例 zoom = %f" % round(zoom, 4))
5 Let’s process small pictures first
big_img = cv2.imread('big.png')
small_img = cv2.imread('small.png')

"""处理小图片"""
# 误差来源就在于滑块的背景图为透明
# 将图片灰度化
gray = cv2.cvtColor(small_img, cv2.COLOR_BGR2GRAY)
# 打印为灰色的
cv2.imwrite('small-gray1.png', gray)
# 灰化背景(将黑色内容变成灰色)
width, heigth = gray.shape
for h in range(heigth):
    for w in range(width):
        if gray[w, h] == 0:
            gray[w, h] = 96
cv2.imwrite('small-gray2.png', gray)

# 去滑块的前景噪声内核
binary = cv2.inRange(gray, 96, 96)
kernel = np.ones((8, 8), np.uint8)
cv2.imwrite('small-kernel.png', kernel)

# 开运算去除白色噪点
tpl = cv2.morphologyEx(binary, cv2.MORPH_OPEN, kernel)
cv2.imwrite('small-gray3.png', tpl)
6. Working with large images
"""模板处理"""
# 图片高斯滤波
blurred = cv2.GaussianBlur(big_img, (3, 3), 0)
cv2.imwrite("target-blurred1.png", blurred)

# 图片灰度化
target_img_gray = cv2.cvtColor(blurred, cv2.COLOR_BGR2GRAY)
cv2.imwrite("big-blurred2.png", target_img_gray)

# 获取图片的宽与高
width, height = tpl.shape[:2]


# 灰度化模板匹配
result = cv2.matchTemplate(target_img_gray, tpl, cv2.TM_CCOEFF_NORMED)  # 使用灰度化图片
# print("result = {}".format(len(np.where(result >= 0.5)[0])))

# 查找数组中匹配的最大值
min_val, max_val, min_loc, max_loc = cv2.minMaxLoc(result)
# print(min_val, max_val, min_loc, max_loc)

# 返回 左 上 角
left_up = max_loc
# 计算 右 下 角
right_down = (left_up[0] + height, left_up[1] + width)
# print(right_down)
7. Match the position of the picture, find the position of the x-axis, this distance is the distance that needs to be moved.
##############绘制出匹配的位置###################
# 将匹配到的图片在图像中的绘制出来
cv2.rectangle(big_img, left_up, right_down, (7, 279, 151), 2)
# print('匹配结果区域起点x坐标为:%d' % max_loc[0])
cv2.imwrite('dectected.png', big_img)

# 左上角的宽乘以缩放比例就是实际要移动的距离
distance = max_loc[0]*zoom
print('distance的大小为: ',distance)
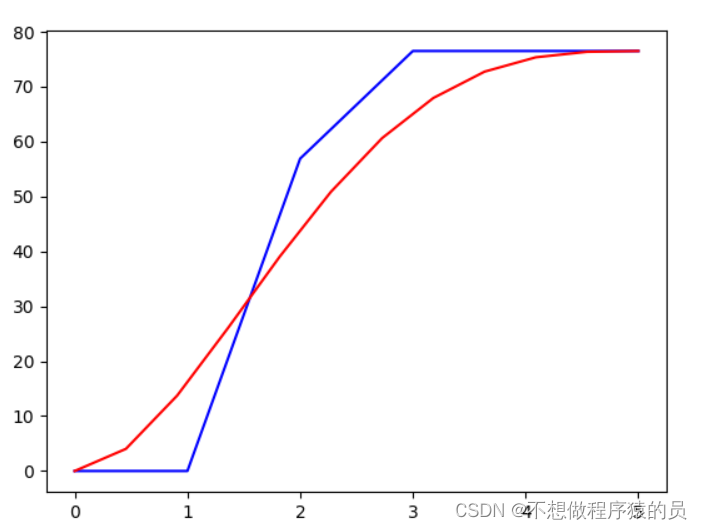
8. Use the Bezier formula to simulate the movement of human hands. When we move the verification code, we always move from slow to fast and then to slow, so like a Bezier curve,
# 套用别人的公式
# #################贝塞尔曲线公式 开始##########
# n表示阶数
# k表示索引
def one_bezier_curve(a, b, t):
    return (1 - t) * a + t * b
def n_bezier_curve(xs, n, k, t):
    if n == 1:
        return one_bezier_curve(xs[k], xs[k + 1], t)
    else:
        return (1 - t) * n_bezier_curve(xs, n - 1, k, t) + t * n_bezier_curve(xs, n - 1, k + 1, t)
def bezier_curve(xs, ys, num):
    """
    :param xs: x 轴位置
    :param ys: y 轴位置
    :param num: 构建的贝塞尔曲线返回的次数
    :return:
    """
    b_xs, b_ys = [], []
    n = 5  # 采用5次bezier曲线拟合
    t_step = 1.0 / (num - 1)
    # t_step = 1.0 / num
    t = np.arange(0.0, 1 + t_step, t_step)
    for each in t:
        b_xs.append(n_bezier_curve(xs, n, 0, each))
        b_ys.append(n_bezier_curve(ys, n, 0, each))
    return b_xs, b_ys
# #################贝塞尔曲线公式 结束##########

def get_random_range(min_, max_):
    """获取指定范围里面的小数"""
    ran = random.random()
    if max_ > ran > min_:
        return ran
    else:
        return get_random_range(min_, max_)

# 时间/移动次数
xs = [0.0, 1.0, 2.0, 3.0, 4.0, 5.0]
# 0.4-0.7   0.8-0.9
ys = [0, 0, distance * get_random_range(0.4, 0.8), distance, distance, distance]

# 贝塞尔曲线的 基础线
plt.figure()
plt.plot(xs, ys, 'b')  # 原曲线,绘制为蓝色的

# 在10-15步之间滑动完毕
num = random.randint(10, 15)

# 调用公式求出贝塞尔曲线的结果
b_xs, b_ys = bezier_curve(xs, ys, num)

# 或者 bezier曲线
plt.plot(b_xs, b_ys, 'r')  #绘制为红色的
plt.show()
print('贝塞尔曲线Y点位置b_ys:', b_ys)
print('贝塞尔曲线X点位置b_xs:', b_xs)

# 每次移动距离
diff_y = list(map(lambda i: b_ys[i + 1] - b_ys[i], range(len(b_ys) - 1)))
print('由Y位置求出每次移动的距离diff_y:', diff_y)
# 总的移动的位置加起来就是要移动的总距离,有偏差
9. When we slide, we always shake the mouse up and down, and rarely keep the same height.
# ########## 计算抖动上下抖动 开始 ########
# 求每次移动的平均值
mid = sum(diff_y) / len(diff_y)
# 将每次移动小于平均值的当前次设置符号位负
symbol = list(map(lambda i: 1 if i > mid else -1, diff_y))
# 移动的距离相比点位会少一个,所以在最前面插入 0
symbol.insert(0, 1)
print(symbol)
# 每一次移动的立方根作为抖动,立方根算抖动
diff_three_sqrt = list(map(lambda i: pow(abs(i), get_random_range(0.22, 0.35)), diff_y))
# 为了绘制立方根,需要加一个数字
diff_three_sqrt.insert(0, 0)
# 每次抖动之后的位移
diff_shake_y = list(map(lambda i: diff_three_sqrt[i] * symbol[i], range(len(diff_three_sqrt))))
# 每次抖动的距离
print('每次抖动的距离diff_shake_y:', diff_shake_y)
diff_y_shake = list(map(lambda i: sum(diff_shake_y[:i]) + diff_shake_y[i], range(len(diff_shake_y))))
print('抖动的总距离(用于绘图)diff_y_shake:', diff_y_shake)

# 黄色抖动线
plt.plot(b_xs, diff_y_shake, 'y')
plt.show()


# ########## 计算抖动上下抖动 结束 ########
10. Calculate the sliding distance.
diff_shake_y = diff_shake_y[1:]

# 清除贝塞尔曲线的小数位,因为selenium只能滑动整数
# 返回的结果 :  [3, 7, 11, 13, 14, 13, 12, 10, 8, 6, 3, 1, 0] 先快后慢
forward_tracks = []
temp = 0
for i in diff_y:
    # 遍历每一次移动的距离,然后进行 round取整
    t_i = round(i)
    temp += i - t_i
    forward_tracks.append(t_i)

# 计算清除之后不需要回调绘制补充的距离
back_tracks = [distance - sum(forward_tracks)]
tracks = {

    'forward_tracks': forward_tracks, 'back_tracks': back_tracks, 'forward_tracks_y': diff_shake_y}
print(tracks)
print('移动的距离tracks', sum(tracks['forward_tracks']))
11. Slide the slider to simulate the sliding of the human hand
"""移动滑块"""
time.sleep(1)
slider = driver.find_element(By.CSS_SELECTOR, '.JDJRV-slide-btn')
ActionChains(driver).click_and_hold(slider).perform()


# 正向滑动
for track_x, track_y in zip(tracks['forward_tracks'], tracks['forward_tracks_y']):
    ActionChains(driver).move_by_offset(xoffset=track_x, yoffset=track_y).perform()
# 反向滑动
for back_tracks in tracks['back_tracks']:
    yoffset_random = random.uniform(-2, 2)
    ActionChains(driver).move_by_offset(xoffset=back_tracks, yoffset=yoffset_random).perform()
ActionChains(driver).release().perform()
input()
driver.quit()
3. Complete code
# 开发日期  2023/5/27
# 专业     计算机科学与技术

import base64
import re
import time
import numpy as np
import cv2
from PIL import Image
from selenium import webdriver
from selenium.webdriver.common.by import By
from matplotlib import pyplot as plt
import random
from selenium.webdriver import ChromeOptions, ActionChains

# 浏览器的自动化的实现
driver = webdriver.Chrome()
driver.get('https://union.jd.com/index')
driver.implicitly_wait(10)
driver.maximize_window()

# 切换到嵌套的页面
driver.switch_to.frame(0)
time.sleep(1)
driver.find_element(By.ID, 'loginname').send_keys('1397')
driver.find_element(By.ID, 'nloginpwd').send_keys('5521')
driver.find_element(By.ID, 'paipaiLoginSubmit').click()
time.sleep(1)


# 保存获取到的图片
big_url = driver.find_element(By.CSS_SELECTOR, 'div.JDJRV-bigimg>img').get_attribute('src')
small_url = driver.find_element(By.CSS_SELECTOR, 'div.JDJRV-smallimg>img').get_attribute('src')

# 正则表达式提取需要的部分
big_base64_str = re.sub(r'data:[a-z]*/[a-z]*;base64,', '', big_url)
small_base64_str = re.sub(r'data:[a-z]*/[a-z]*;base64,', '', small_url)

# 利用split的来进行数据的分割也可以
# big_base64_str = big_url.split(',')[-1]
# small_base64_str = big_url.split(',')[-1]


# 图片的二进制的数据
big_binary_content = base64.b64decode(big_base64_str)
small_binary_content = base64.b64decode(small_base64_str)

with open('big.png',mode='wb') as f:
    f.write(big_binary_content)
with open('small.png',mode='wb') as f:
    f.write(small_binary_content)


# 计算缩放比例
time.sleep(1)
local_img = Image.open('big.png')
size_loc = local_img.size
zoom = 281 / int(size_loc[0])  # 第0项就是x轴的长度,就是宽度
print("计算缩放比例 zoom = %f" % round(zoom, 4))


big_img = cv2.imread('big.png')
small_img = cv2.imread('small.png')

"""处理小图片"""
# 误差来源就在于滑块的背景图为透明
# 将图片灰度化
gray = cv2.cvtColor(small_img, cv2.COLOR_BGR2GRAY)
# 打印为灰色的
cv2.imwrite('small-gray1.png', gray)
# 灰化背景(将黑色内容变成灰色)
width, heigth = gray.shape
for h in range(heigth):
    for w in range(width):
        if gray[w, h] == 0:
            gray[w, h] = 96
cv2.imwrite('small-gray2.png', gray)

# 去滑块的前景噪声内核
binary = cv2.inRange(gray, 96, 96)
kernel = np.ones((8, 8), np.uint8)
cv2.imwrite('small-kernel.png', kernel)

# 开运算去除白色噪点
tpl = cv2.morphologyEx(binary, cv2.MORPH_OPEN, kernel)
cv2.imwrite('small-gray3.png', tpl)


"""模板处理"""
# 图片高斯滤波
blurred = cv2.GaussianBlur(big_img, (3, 3), 0)
cv2.imwrite("target-blurred1.png", blurred)

# 图片灰度化
target_img_gray = cv2.cvtColor(blurred, cv2.COLOR_BGR2GRAY)
cv2.imwrite("big-blurred2.png", target_img_gray)

# 获取图片的宽与高
width, height = tpl.shape[:2]


# 灰度化模板匹配
result = cv2.matchTemplate(target_img_gray, tpl, cv2.TM_CCOEFF_NORMED)  # 使用灰度化图片
# print("result = {}".format(len(np.where(result >= 0.5)[0])))

# 查找数组中匹配的最大值
min_val, max_val, min_loc, max_loc = cv2.minMaxLoc(result)
# print(min_val, max_val, min_loc, max_loc)

# 返回 左 上 角
left_up = max_loc
# 计算 右 下 角
right_down = (left_up[0] + height, left_up[1] + width)
# print(right_down)

##############绘制出匹配的位置###################
# 将匹配到的图片在图像中的绘制出来
cv2.rectangle(big_img, left_up, right_down, (7, 279, 151), 2)
# print('匹配结果区域起点x坐标为:%d' % max_loc[0])
cv2.imwrite('dectected.png', big_img)

# 左上角的宽乘以缩放比例就是实际要移动的距离
distance = max_loc[0]*zoom
print('distance的大小为: ',distance)


# 套用别人的公式
# #################贝塞尔曲线公式 开始##########
# n表示阶数
# k表示索引
def one_bezier_curve(a, b, t):
    return (1 - t) * a + t * b
def n_bezier_curve(xs, n, k, t):
    if n == 1:
        return one_bezier_curve(xs[k], xs[k + 1], t)
    else:
        return (1 - t) * n_bezier_curve(xs, n - 1, k, t) + t * n_bezier_curve(xs, n - 1, k + 1, t)
def bezier_curve(xs, ys, num):
    """
    :param xs: x 轴位置
    :param ys: y 轴位置
    :param num: 构建的贝塞尔曲线返回的次数
    :return:
    """
    b_xs, b_ys = [], []
    n = 5  # 采用5次bezier曲线拟合
    t_step = 1.0 / (num - 1)
    # t_step = 1.0 / num
    t = np.arange(0.0, 1 + t_step, t_step)
    for each in t:
        b_xs.append(n_bezier_curve(xs, n, 0, each))
        b_ys.append(n_bezier_curve(ys, n, 0, each))
    return b_xs, b_ys
# #################贝塞尔曲线公式 结束##########

def get_random_range(min_, max_):
    """获取指定范围里面的小数"""
    ran = random.random()
    if max_ > ran > min_:
        return ran
    else:
        return get_random_range(min_, max_)

# 时间/移动次数
xs = [0.0, 1.0, 2.0, 3.0, 4.0, 5.0]
# 0.4-0.7   0.8-0.9
ys = [0, 0, distance * get_random_range(0.4, 0.8), distance, distance, distance]

# 贝塞尔曲线的 基础线
plt.figure()
plt.plot(xs, ys, 'b')  # 原曲线,绘制为蓝色的

# 在10-15步之间滑动完毕
num = random.randint(10, 15)

# 调用公式求出贝塞尔曲线的结果
b_xs, b_ys = bezier_curve(xs, ys, num)

# 或者 bezier曲线
plt.plot(b_xs, b_ys, 'r')  #绘制为红色的
plt.show()
print('贝塞尔曲线Y点位置b_ys:', b_ys)
print('贝塞尔曲线X点位置b_xs:', b_xs)

# 每次移动距离
diff_y = list(map(lambda i: b_ys[i + 1] - b_ys[i], range(len(b_ys) - 1)))
print('由Y位置求出每次移动的距离diff_y:', diff_y)
# 总的移动的位置加起来就是要移动的总距离,有偏差


# ########## 计算抖动上下抖动 开始 ########
# 求每次移动的平均值
mid = sum(diff_y) / len(diff_y)
# 将每次移动小于平均值的当前次设置符号位负
symbol = list(map(lambda i: 1 if i > mid else -1, diff_y))
# 移动的距离相比点位会少一个,所以在最前面插入 0
symbol.insert(0, 1)
print(symbol)
# 每一次移动的立方根作为抖动,立方根算抖动
diff_three_sqrt = list(map(lambda i: pow(abs(i), get_random_range(0.22, 0.35)), diff_y))
# 为了绘制立方根,需要加一个数字
diff_three_sqrt.insert(0, 0)
# 每次抖动之后的位移
diff_shake_y = list(map(lambda i: diff_three_sqrt[i] * symbol[i], range(len(diff_three_sqrt))))
# 每次抖动的距离
print('每次抖动的距离diff_shake_y:', diff_shake_y)
diff_y_shake = list(map(lambda i: sum(diff_shake_y[:i]) + diff_shake_y[i], range(len(diff_shake_y))))
print('抖动的总距离(用于绘图)diff_y_shake:', diff_y_shake)

# 黄色抖动线
plt.plot(b_xs, diff_y_shake, 'y')
plt.show()


# ########## 计算抖动上下抖动 结束 ########

diff_shake_y = diff_shake_y[1:]

# 清除贝塞尔曲线的小数位,因为selenium只能滑动整数
# 返回的结果 :  [3, 7, 11, 13, 14, 13, 12, 10, 8, 6, 3, 1, 0] 先快后慢
forward_tracks = []
temp = 0
for i in diff_y:
    # 遍历每一次移动的距离,然后进行 round取整
    t_i = round(i)
    temp += i - t_i
    forward_tracks.append(t_i)

# 计算清除之后不需要回调绘制补充的距离
back_tracks = [distance - sum(forward_tracks)]
tracks = {

    'forward_tracks': forward_tracks, 'back_tracks': back_tracks, 'forward_tracks_y': diff_shake_y}
print(tracks)
print('移动的距离tracks', sum(tracks['forward_tracks']))


"""移动滑块"""
time.sleep(1)
slider = driver.find_element(By.CSS_SELECTOR, '.JDJRV-slide-btn')
ActionChains(driver).click_and_hold(slider).perform()


# 正向滑动
for track_x, track_y in zip(tracks['forward_tracks'], tracks['forward_tracks_y']):
    ActionChains(driver).move_by_offset(xoffset=track_x, yoffset=track_y).perform()
# 反向滑动
for back_tracks in tracks['back_tracks']:
    yoffset_random = random.uniform(-2, 2)
    ActionChains(driver).move_by_offset(xoffset=back_tracks, yoffset=yoffset_random).perform()
ActionChains(driver).release().perform()
input()
driver.quit()