Table of contents
2. Use tools Xshell7 and MobaXterm
3. Connect and open the CSI camera
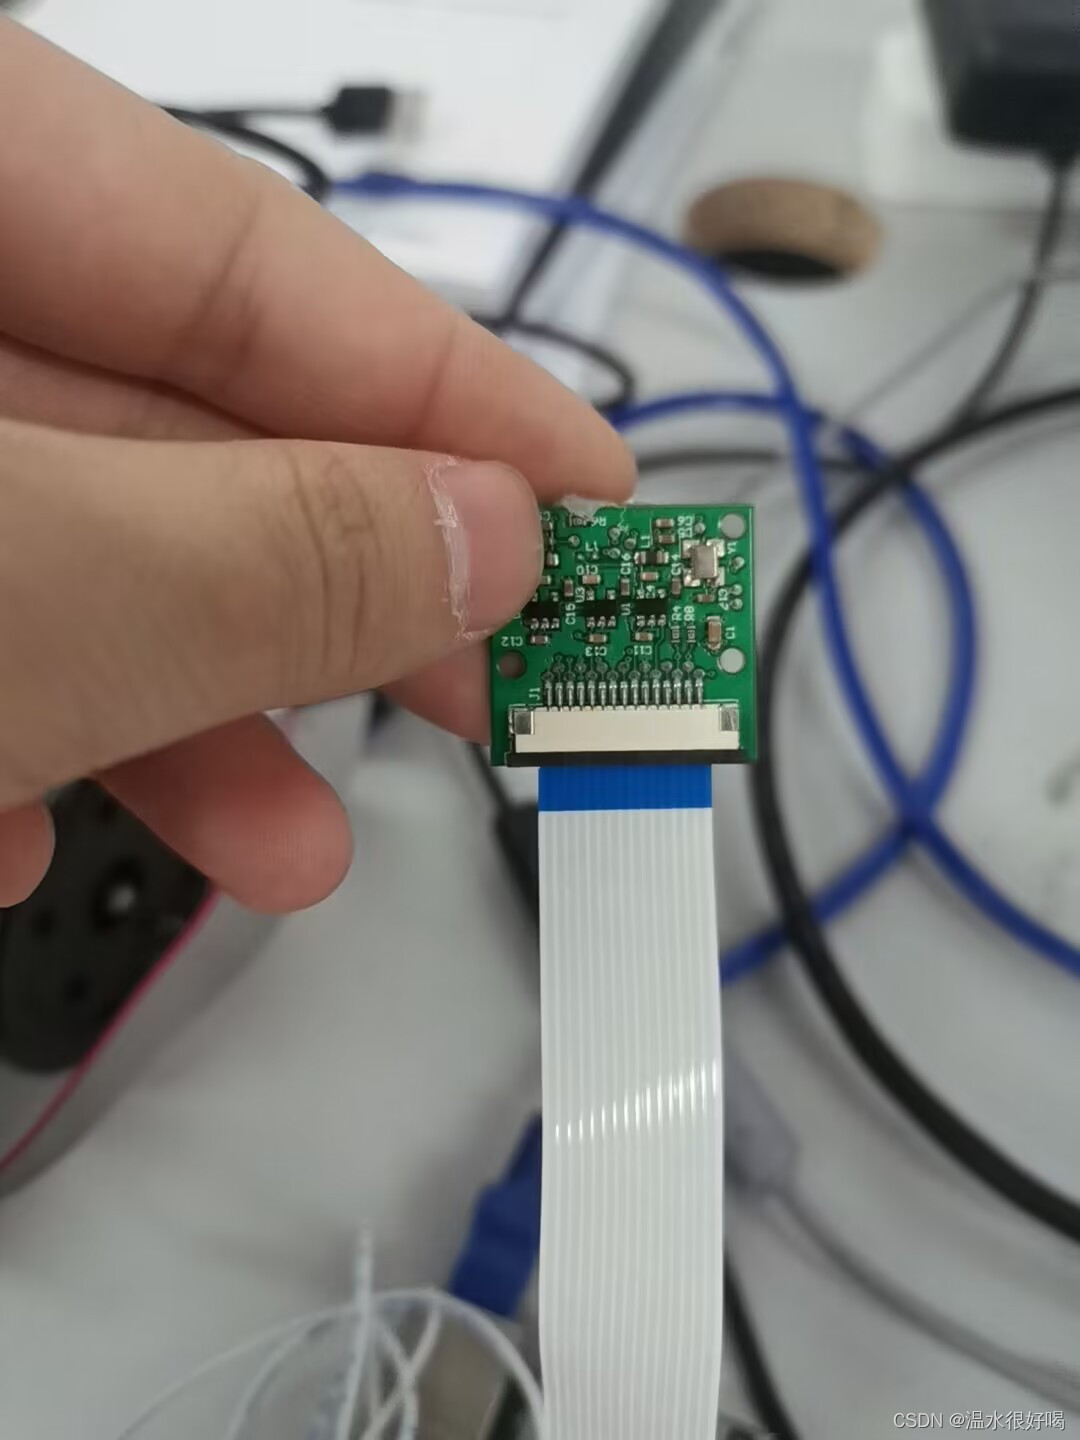
3.1 Connection as shown in the figure:
4. Write the camera code to call the camera
1. Install python-opencv.
Be sure to choose the configured python-opencv to install, do not configure the installation, and then compile it with cmake. It is not necessary. Basically, 2-3 errors will be reported during the installation process, and it is very troublesome to modify the errors.
2. Use tools Xshell7 and MobaXterm
Personally, I suggest not to choose putty+vncviewer, because VNC is really uncomfortable to use, sometimes it will be stuck, sometimes it will be smooth, and the screen will be black when calling the camera because of the resolution, sometimes it can be adjusted, sometimes it can’t (maybe I don’t know how to use it personally) , but I strongly discourage).
3. Connect and open the CSI camera
3.1 Connection as shown in the figure:


3.2 Turn on the camera
Log in to MobaXterm Use SSH (Xshell7) to enter the IP to log in to the Raspberry Pi interface:

enter
sudo raspi-configEnter the Raspberry Pi configuration interface

Select 3 Interface Options to enter
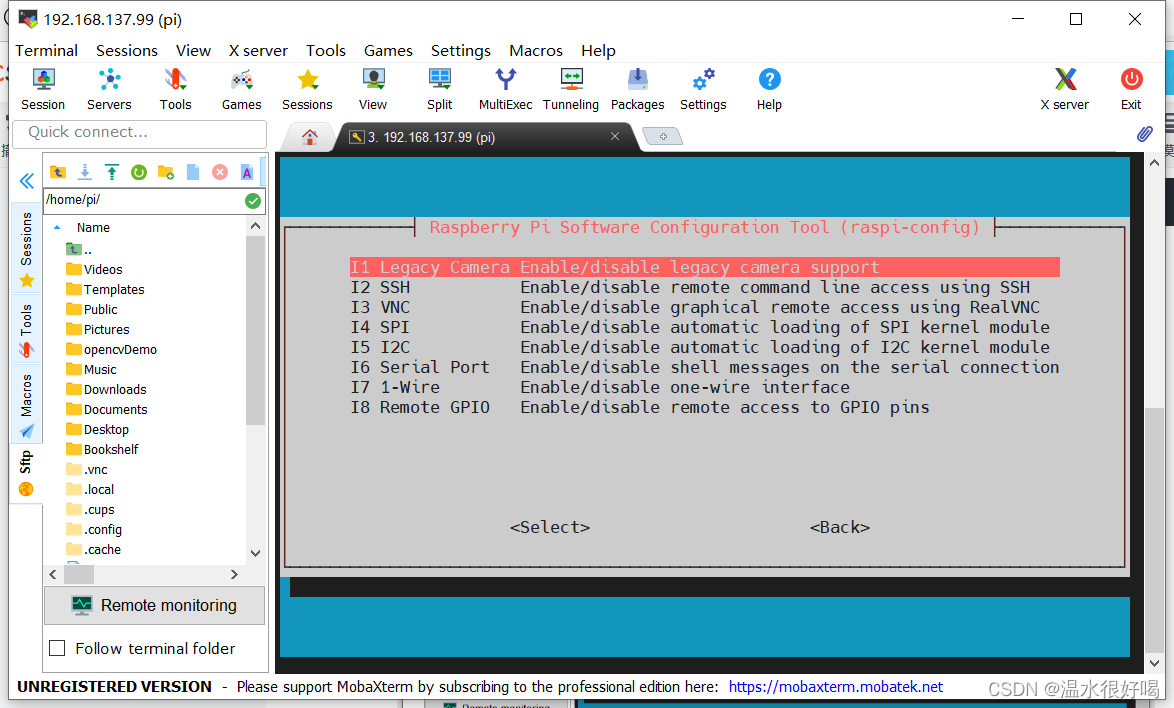
Select 1 Legacy Camera

Then YES→OK→Finsh is all right, usually you may need to restart it.
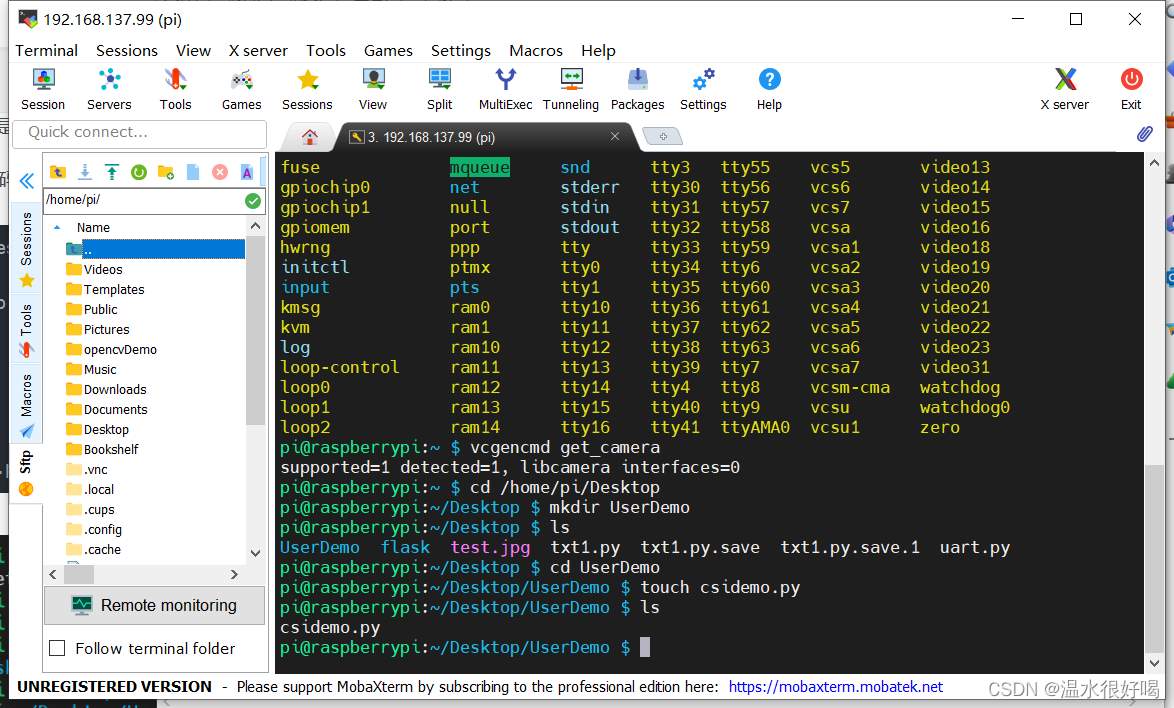
Enter ls /dev to check if the Raspberry Pi is connected to the camera, check if the right video0 is not, then your cable is not plugged in tightly.
ls /dev
Enter vcgencmd get_camera to see if the camera is on
vcgencmd get_camera
supported=1; that is, there is no problem and it can be used.
4. Write the camera code to call the camera
cd /home/pi/Desktop    #进入树莓派桌面

mkdir UserDemo         #在树莓派桌面下mkdir创建UserDemo文件夹存放用户代码

ls                     #查看树莓派桌面所有文件夹,用于检测上面的命令

cd UserDemo            #进入UserDemo文件夹

touch csidemo.py       #touch创建csidemo.py文件用于编写CSI摄像头代码
Click Desktop→UserDemo→csidemo.py on the left Double-click csidemo.py

Open csidemo.py to start writing code

import cv2     #导入库
import time

cap = cv2.VideoCapture(0)    #捕获摄像头设备图像数据存入cap。
cap.set(3,600)               #cap.set 摄像头参数设置
cap.set(4,480)               #3代表图像高度,4代表图像宽度,5代表图像帧率
cap.set(5,40)                #图像高为600,宽度为480,帧率为40

while True:
    ret, frame = cap.read()
    #frame读取cap的图像数据,返回ret,读取成功返回true,失败返回flase
    if ret:
        cv2.imshow('video', frame)        #读取成功,显示窗口名为'video'的摄像头图像
    if cv2.waitKey(1) & 0xFF == ord('q'): #按下键盘'q'键退出窗口
        break

cv2.destroyAllWindows()  #关闭窗口
cap.release()            #关闭摄像头数据读取
After writing the code, ctrl+s to save the code, enter it under /home/pi/Desktop/UserDemo
python3 csidemo.pyRun the code: get the following picture

Open the camera to read the camera image and complete.