Article directory
foreword
WPF data binding is especially important for WPF applications. This article will describe the four-step usage of data binding using MVVM mode: We can first
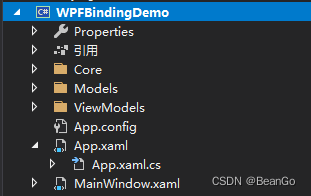
create several directories under the project: Core, Models, ViewModels
1. Declare a class to implement the interface INotifyPropertyChanged
Create a new class file in the Core folder: NotifyPropertyObject.cs
sample code is as follows
public class NotifyPropertyObject : INotifyPropertyChanged
{


    public event PropertyChangedEventHandler PropertyChanged;

    public void OnPropertyChanged(string propertyName)
    {


        if(PropertyChanged != null)
        {


            PropertyChanged.Invoke(this, new PropertyChangedEventArgs(propertyName));
        }
    }


}
2. Instantiate the ViewModel object
1. Create a new MainViewModel model class
Create a new class file in the ViewModels folder: MainViewModel.cs
sample code is as follows
public class MainViewModel: NotifyPropertyObject
{


     private int _MyValue;

     public int MyValue
     {


         get {

     return _MyValue; }
         set
         {


             _MyValue = value;
             OnPropertyChanged("MyValue");
         }
     }

     public List<string> StrList {

     get; set; }

     public MyStudent MyStudent {

     get; set; }

     public MainViewModel()
     {


         MyStudent = new MyStudent();

         StrList = new List<string>() {

     "1","2","3","4","5"};

     }
 }
2. Instantiate the object
Edit the code in App.xaml.cs
as follows (example):
public static ViewModels.MainViewModel MainViewModel {

     get; private set; }

public App()
{


    MainViewModel = new ViewModels.MainViewModel();
}
Declare ViewModel in the background code of the main interface
public partial class MainWindow : Window
{


    public ViewModels.MainViewModel ViewModel {

     get {

     return App.MainViewModel; } }

	public MainWindow()
    {


        InitializeComponent();

        this.DataContext = ViewModel;

        this.Loaded += MainWindow_Loaded;
    }
}
Create its model class for each interface, such as MainViewModel, AzimuthWindowVM..., this type of class also needs to inherit from the class NotifyPropertyObject
Note: (1) This class mainly adds background implementation code, one is to make the background code as simple as possible ; The second is to facilitate data binding (2) In most cases in this class, properties and methods are written
3. Binding in the interface design code
.xaml file
<StackPanel Orientation="Vertical" Grid.Row="0">
    <TextBox Text="{Binding MyStudent.Age ,Mode=TwoWay,UpdateSourceTrigger=PropertyChanged}" Width="100" Height="40" Margin="10"></TextBox>
    <Button Content="Click1" Click="Button_Click1" Width="100" Height="50"></Button>
</StackPanel>

<StackPanel Orientation="Vertical" Grid.Row="1">
    <TextBox Text="{Binding MyValue ,Mode=OneWay,UpdateSourceTrigger=PropertyChanged}" Width="100" Height="40" Margin="10"></TextBox>
    <Button Content="Click" Click="Button_Click" Width="100" Height="50"></Button>
</StackPanel>
4. Application
Background code:
 private void Button_Click(object sender, RoutedEventArgs e)
 {


     Console.WriteLine(ViewModel.MyValue);

     ViewModel.MyValue = 20;

     //OneWayToSource ----编辑框编辑值时 ViewModel.MyValue可以获取到值,但是ViewModel.MyValue改变时,binding的编辑框无法更改
     //OneWay         ----编辑框编辑值时 ViewModel.MyValue值无法更新。但是ViewModel.MyValue改变时,binding的编辑框更新了
     //TwoWay         ----编辑框编辑值时 ViewModel.MyValue可以获取到值,且ViewModel.MyValue改变时,binding的编辑框也更新了

     //对于OneWay绑定:在界面中显示的数据可以随数据源的值的变化而变化,但更改界面的数据不会影响到数据源。
     //对于TwoWay绑定:界面中显示的数据及数据源的数据可以双向显示及更新。
     //对于OneWayToSource绑定:初始时界面的数据为空;更改界面的数据可以影响数据源的值,但是更改数据源的值不会体现在界面上。
     //对于OneTime绑定:在界面中显示的为数据源的初始值,更改数据源的值的时候,不会更改界面的数据显示;更改界面的数据也不会影响到数据源的数据。


     //UpdateSourceTrigger 属性的角色:
     //PropertyChanged:当绑定目标属性更改时,立即更新绑定源。
     //LostFocus:当绑定目标元素失去焦点时,更新绑定源。
     //Explicit:仅在调用 UpdateSource 方法时更新绑定源。
     //注释:多数依赖项属性的UpdateSourceTrigger 值的默认值为 PropertyChanged,而 Text 属性的默认值为 LostFocus。
 }

 private void Button_Click1(object sender, RoutedEventArgs e)
 {


     Console.WriteLine(ViewModel.MyStudent.Age);
 }