1. Video demonstration:
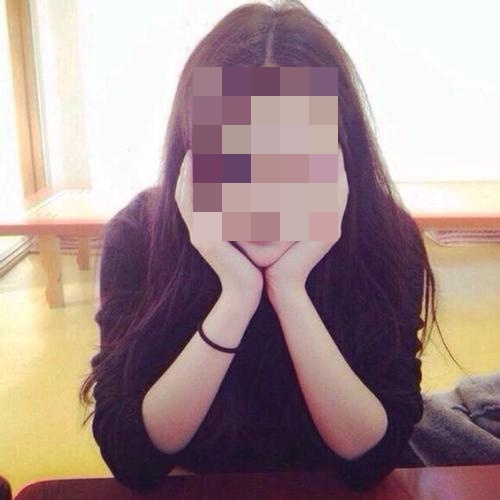
2. Picture demonstration:
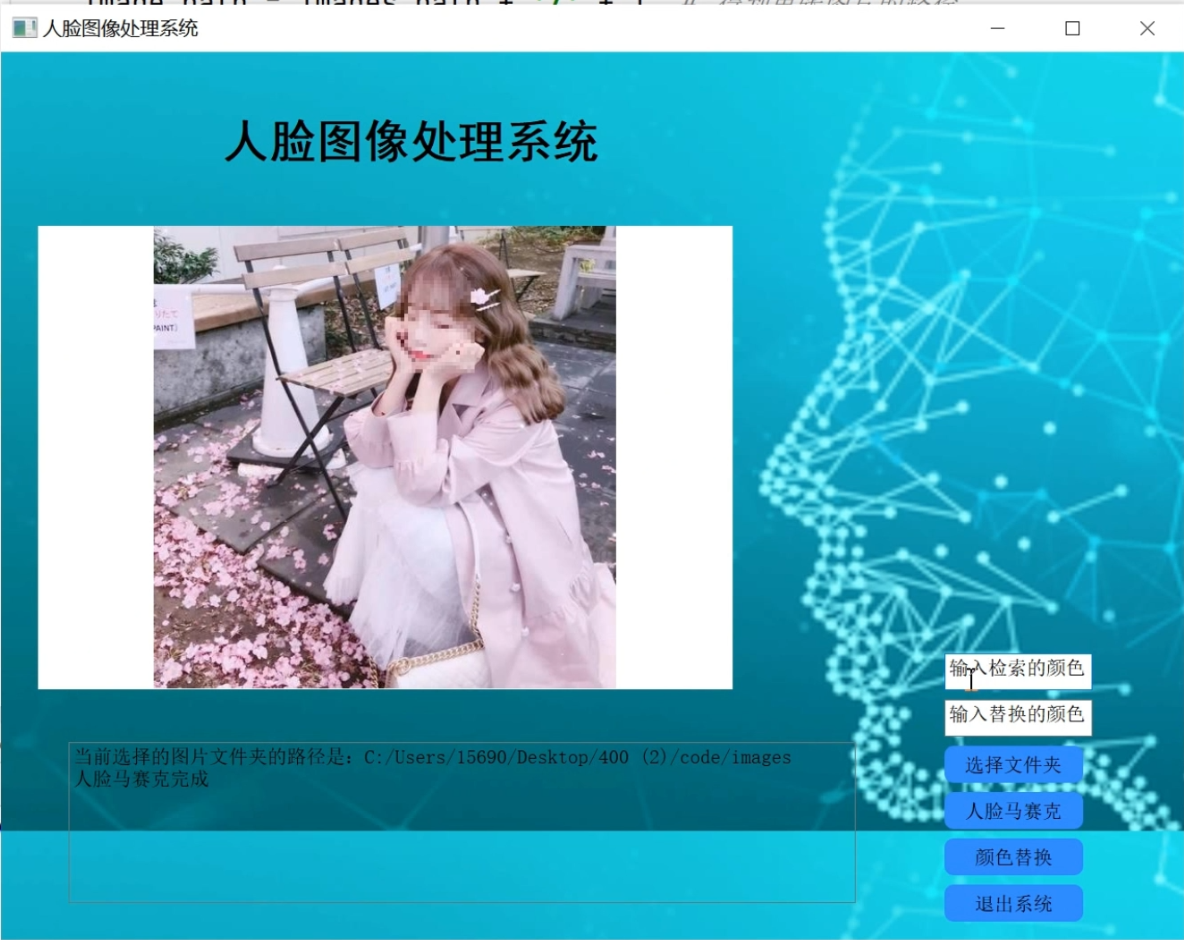

3. Image color retrieval & replacement:
4. Mosaic classification:
Use haarcascade_frontalface_default.xml in the opencv library for face detection.
1. Use Gaussian noise for blurring.
2. Use the Gaussian filter function to perform blurring at the corresponding position.
Gaussian noise, the resulting mosaic is multi-point. The original video is named output.avi, and the saved video after code compilation is named 1111.avi. Remember to modify your file path.
import numpy as np
import cv2 as cv

cap = cv.VideoCapture('output.avi')
face_cascade = cv.CascadeClassifier("/usr/share/opencv/haarcascades/haarcascade_frontalface_default.xml")
#eye_cascade = cv.CascadeClassifier("/usr/share/opencv/haarcascades/haarcascade_eye.xml")#眼睛

fourcc = cv.VideoWriter_fourcc(*'XVID')
out = cv.VideoWriter('1111.avi',fourcc, 20.0, (640,480))

def facedetection(img):
    # gray = cv2.cvtColor(img, cv2.COLOR_BGR2GRAY)
    faces = face_cascade.detectMultiScale(img, 1.3, 5)
    for (x, y, w, h) in faces:
        #方框
        img = cv2.rectangle(img, (x, y), (x+w, y+h), (255, 0, 0), 2)
        roi_gray = gray[y:y+h, x:x+w]

        #圆框
        #cv.circle(img, (int(x+w/2), int(y+h/2)), 100, (0, 0, 255), 2)
    return img

while True:
    # 读取当前帧
    ret, frame = cap.read()
    # 转为灰度图像
    gray = cv.cvtColor(frame, cv.COLOR_BGR2GRAY)
    Rects = face_cascade.detectMultiScale(gray, scaleFactor = 1.2, minNeighbors = 3, minSize = (32,32))
    if len(Rects) > 0:
      for Rect in Rects:
        x, y, w, h = Rect
    # 打码:使用高斯噪声替换识别出来的人眼所对应的像素值
        frame[y+10:y+h-10,x:x+w,0]=np.random.normal(size=(h-20,w))
        frame[y+10:y+h-10,x:x+w,1]=np.random.normal(size=(h-20,w))
        frame[y+10:y+h-10,x:x+w,2]=np.random.normal(size=(h-20,w))
    im = facedetection(frame)
    out.write(im)

cap.release()
out.release()
cv2.destroyAllWindows()
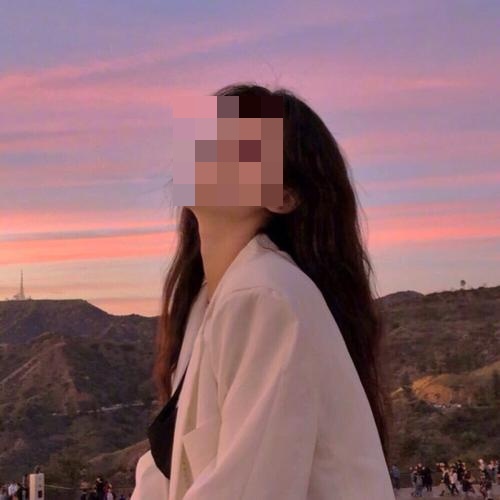
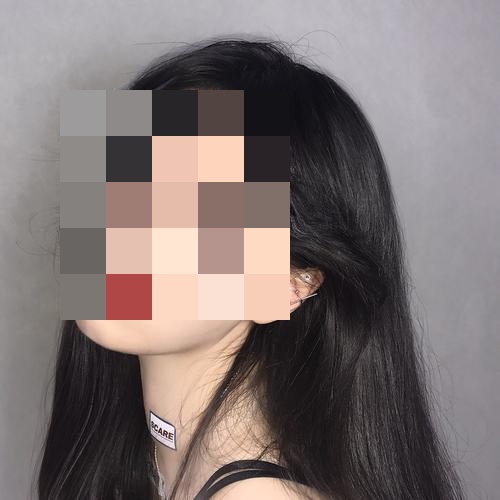
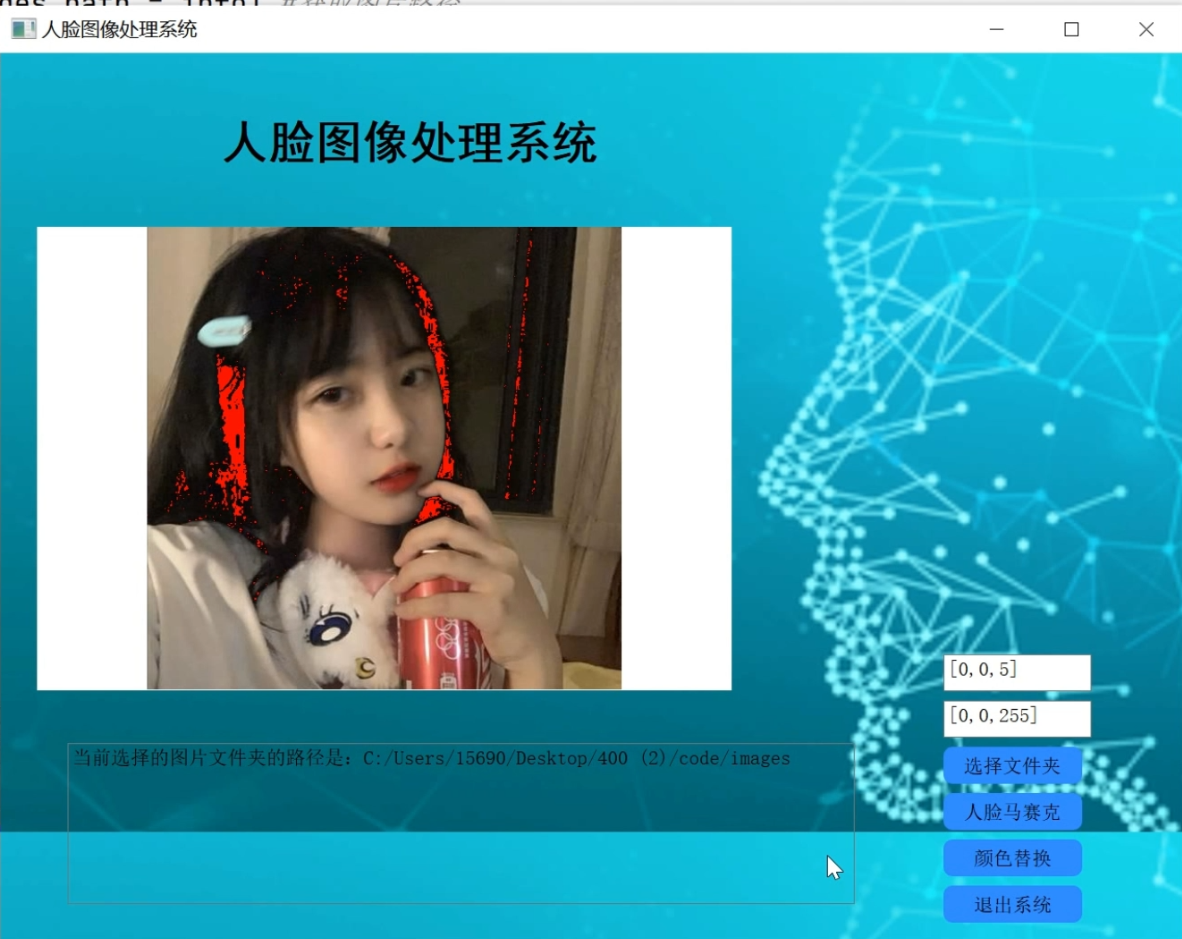
The picture is composed of a three-dimensional array. Mosaicing is to replace the value of a specific area with other values. The project has undergone an upgrade during the project. At the beginning, Gaussian mosaic was used. Later, at the request of customers, it was upgraded to manual with other software. The mosaic is the same as the regular mosaic
Gaussian mosaic
To replace specific area values with Gaussian distribution values, you can use np.random.normal(size=(h,w)) in numpy to generate some random values, and then replace them
regular mosaic
The realization principle of mosaic is to replace all the points in a certain neighborhood of a certain pixel on the image with the color of the upper left pixel in the neighborhood, so that the details can be blurred, but the general outline can be preserved. Just use the value in the upper left corner to replace the value of a small square in the lower right, and replace it step by step.
5. Code implementation:
Gaussian mosaic
import cv2
import numpy as np

face_location=[430,500,730,870]  #x1,y1,x2,y2  x1,y1为人脸左上角点;x2,y2为人脸右下角点
img=cv2.imread('./tongliya.jpg')  #opencv读取的是BGR数组

##高斯马赛克
def normal_mosaic(img, x1, y1, x2, y2):
    img[y1:y2, x1:x2, 0] = np.random.normal(size=(y2-y1, x2-x1))
    img[y1:y2, x1:x2, 1] = np.random.normal(size=(y2-y1, x2-x1))
    img[y1:y2, x1:x2, 2] = np.random.normal(size=(y2-y1, x2-x1))

    return img

x1=face_location[0]
y1=face_location[1]
x2=face_location[2]
y2=face_location[3]
img_mosaic=normal_mosaic(img, x1, y1, x2, y2)
cv2.imwrite('img_mosaic_normal.jpg',img_mosaic)
regular mosaic
import cv2
import numpy as np

face_location=[430,500,730,870]  #x1,y1,x2,y2  x1,y1为人脸左上角点;x2,y2为人脸右下角点
img=cv2.imread('./tongliya.jpg')  #opencv读取的是BGR数组

#正规马赛克
def do_mosaic(img, x, y, w, h, neighbor=9):
    """
    :param rgb_img
    :param int x :  马赛克左顶点
    :param int y:  马赛克左顶点
    :param int w:  马赛克宽
    :param int h:  马赛克高
    :param int neighbor:  马赛克每一块的宽
    """
    for i in range(0, h , neighbor):
        for j in range(0, w , neighbor):
            rect = [j + x, i + y]
            color = img[i + y][j + x].tolist()  # 关键点1 tolist
            left_up = (rect[0], rect[1])
            x2=rect[0] + neighbor - 1   # 关键点2 减去一个像素
            y2=rect[1] + neighbor - 1
            if x2>x+w:
                x2=x+w
            if y2>y+h:
                y2=y+h
            right_down = (x2,y2)
            cv2.rectangle(img, left_up, right_down, color, -1)   #替换为为一个颜值值

    return img

x=face_location[0]
y=face_location[1]
w=face_location[2]-face_location[0]
h=face_location[3]-face_location[1]
img_mosaic=do_mosaic(img, x, y, w, h, neighbor=15)
cv2.imwrite('img_mosaic.jpg',img_mosaic)
6. Complete source code & environment deployment video tutorial & custom UI interface:
7. References:
- [1] Seat belt detection system based on Adaboost [J]. Chen Yanxiang, Li Geng. Electronic Measurement Technology. 2015(04)
- [2] Research on moving target detection method based on Gaussian mixture model [J]. Ma Dezhi, Li Bajin, Dong Zhixue. Electronic Measurement Technology. 2013(10)
- [3] Multi-pose collaborative face detection based on hypersphere support vector machine [J]. Teng Shaohua, Chen Haitao, Zhang Wei. Computer Application. 2013(07)
- [4] Face detection algorithm based on LBP operator and class coverage capture graph [J]. Zhao Haifeng, Sun Shanshan, Yan Weihong, Wang Yilong, Sun Dengdi. Practice and Understanding of Mathematics. 2013(07)
- [5] Vibration hammer recognition based on Haar-like features and cascaded AdaBoost algorithm [J]. Jin Lijun, Yan Shujia, Liu Yuan. Journal of System Simulation. 2012(09)
- [6] Improved Gaussian skin color model and its application in face detection [J]. Liu Chunsheng, Chang Faliang, Chen Zhenxue, Li Shuang. Journal of Instrumentation. 2012(05)
- [7] Face color detection method under complex lighting [J]. Li Quanbin, Wang Xiaoming, Liu Jingao, Li Ming. Computer Application. 2010(06)
- [8] Face detection method with complex background and changing illumination [J]. Li Quanbin, Sun Qiaoyu, Liu Jingao, Li Ming. Computer Engineering and Application. 2009(18)