Blog Summary: Python | Face Recognition System — Blog Index
GitHub address: Su-Face-Recognition
Note: Please refer to before reading this blog
Tool Installation, Environment Configuration: Python | Face Recognition System—Introduction
1. UI interface writing
1. Basic use
This project uses the PyQt library as the writing of the UI interface, and uses Qt-Designer and PyUIC to automatically generate the UI interface code.
For detailed use of the PyQt library, please refer to this series of blogs:
2. Use PyQt to develop a graphical interface Python application column directory
Open PyCharm, select Tools -> External Tools -> Qt-Designal .
Note: Qt-Designer does not come with PyCharm, you need to install it yourself, you can refer to the blog: PyCharm installs PyQt5 and its tools (Qt Designer, PyUIC, PyRcc) detailed tutorial

After opening the tool, select MainWindow and click Create.

Select the component you need from the left end of the interface, drag it to the workspace, and select the layout.
Double-click the component to modify the content that needs to be displayed, such as "button 1"

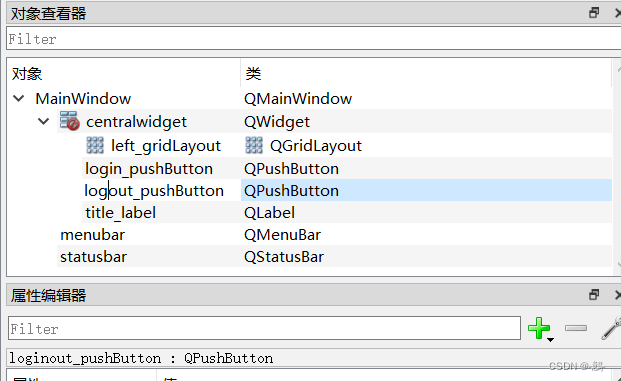
Modify the component name at the right end of the interface. The default component name of the tool is "component type + number" , so that you don't know what the component is for when you output the code. It is recommended to modify the component to "component function + component type" , such as login_button
Click Save and select the save path (usually under your project directory). After saving, you will find that there is an additional file ending with .ui under the project.
![]()
Click on the .ui file (be sure to click once) . Then select Tools -> External Tools -> PyUIC .
Note: PyUIC is also not included with PyCharm, you need to install it yourself, you can refer to the above blog: PyCharm installs PyQt5 and its tools (Qt Designer, PyUIC, PyRcc) detailed tutorial

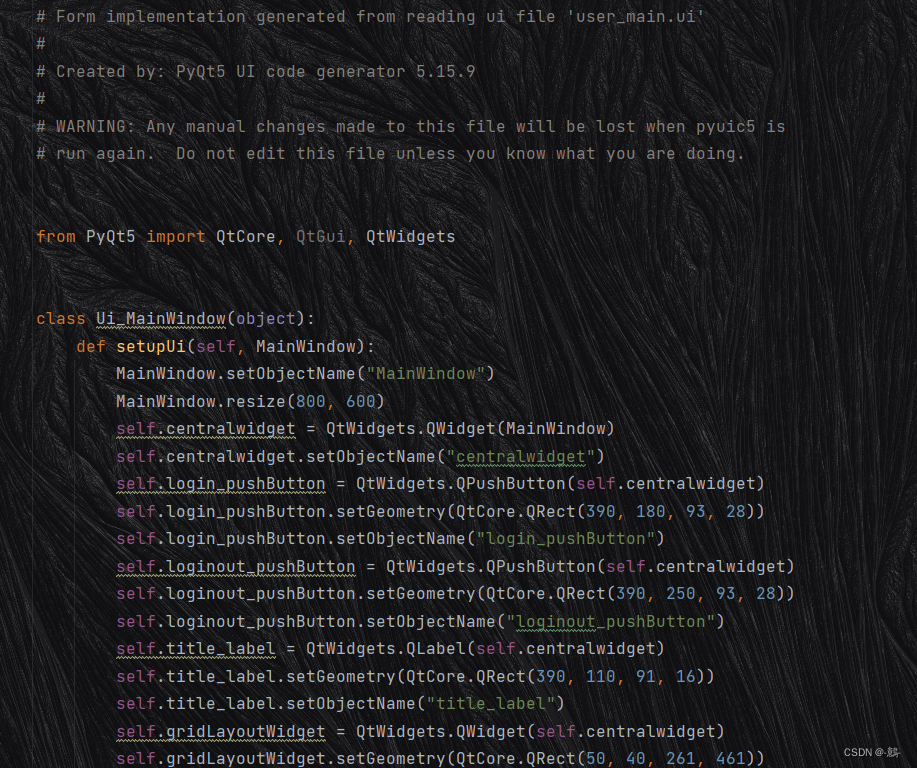
After running, you will find that there is a .py file with the same name under the ui file. This is the code automatically generated by the tool for us. Just add the following code below, you can run to see the effect:

Generated code:
Add the following code:
import sys
if __name__ == '__main__':
app = QtWidgets.QApplication(sys.argv)
widgets = QtWidgets.QMainWindow()
ui = Ui_MainWindow()
ui.setupUi(widgets)
widgets.show()
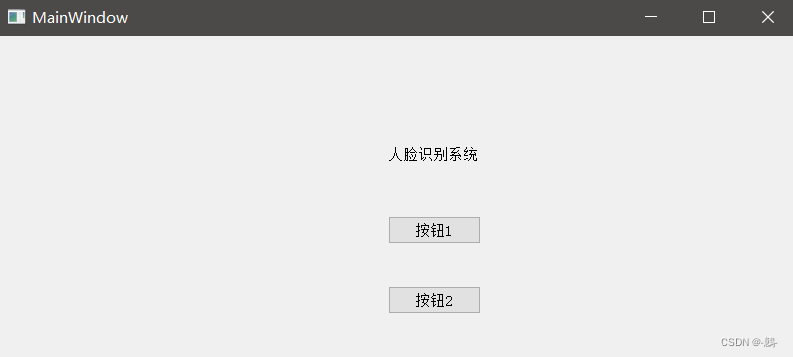
sys.exit(app.exec_())running result:
This is the basic process of PyQt writing the UI interface. The layout of the UI interface of this project is basically written according to this method.
2. Project UI basics
Only the code of the main user interface is shown here. For more codes, please refer to the GitHub address of this project:
The initial interface of the project is as follows:
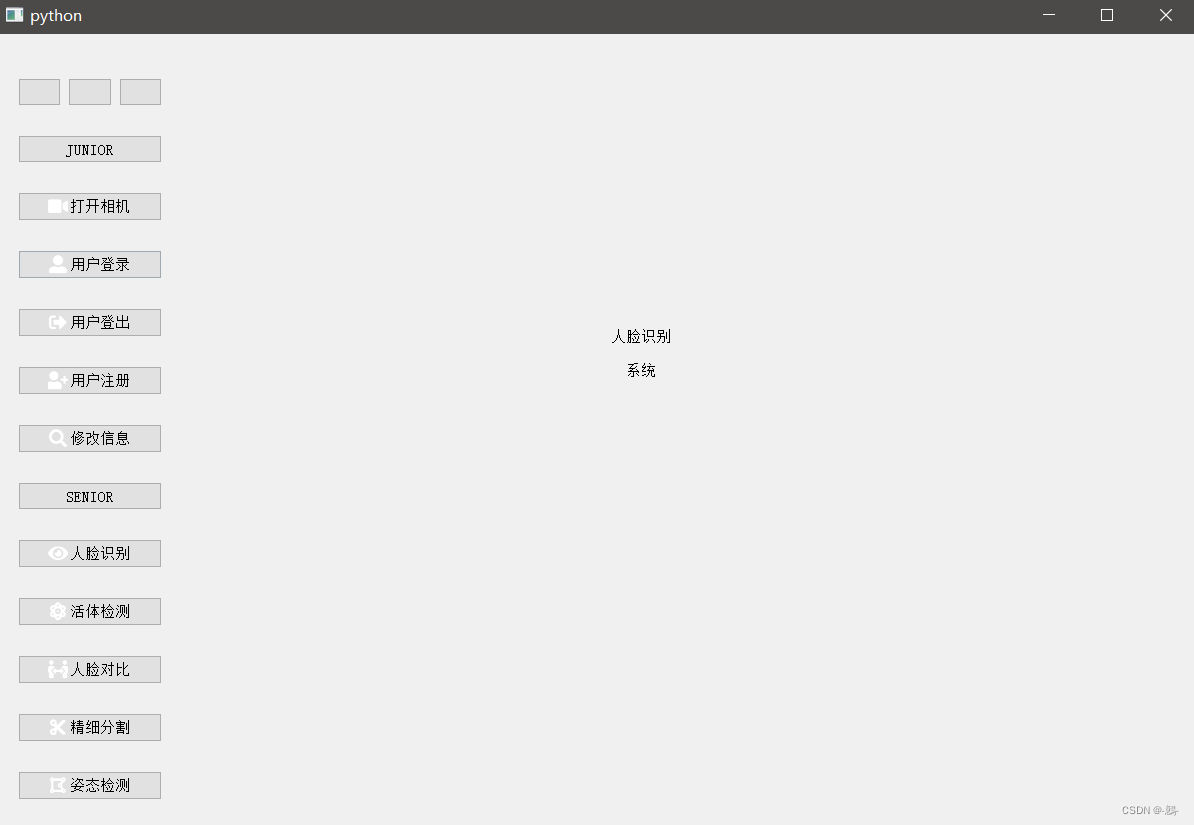
The initial code of the project is as follows:
Note: The icon next to the button uses the qtawesome library, which needs to be downloaded by yourself. You can refer to the blog for downloading: Qt5 development tools --- commonly used Qt5 development tools
# -*- coding: utf-8 -*-
import sys
import qtawesome
from PyQt5 import QtCore, QtWidgets
from PyQt5.QtCore import Qt
from PyQt5.QtGui import *


class UserMainUi(object):
    def setupUi(self, MainWindow):
        MainWindow.setObjectName("UserMainWindow")
        MainWindow.resize(1200, 800)

        # ------------ 整体界面设计,使用网格布局 ------------ #
        self.main_widget = QtWidgets.QWidget(MainWindow)  # 创建窗口主部件
        self.main_layout = QtWidgets.QGridLayout()  # 创建主部件的网格布局
        self.main_widget.setLayout(self.main_layout)  # 设置窗口主部件布局为网格布局

        self.left_widget = QtWidgets.QWidget(MainWindow)  # 创建左侧部件
        self.left_widget.setObjectName('left_widget')
        self.left_layout = QtWidgets.QGridLayout()
        self.left_widget.setLayout(self.left_layout)  # 设置左侧部件布局为网格

        self.right_widget = QtWidgets.QWidget(MainWindow)  # 创建右侧部件
        self.right_widget.setObjectName('right_widget')
        self.right_layout = QtWidgets.QGridLayout()
        self.right_widget.setLayout(self.right_layout)  # 设置右侧部件布局为网格

        self.main_layout.addWidget(self.left_widget, 0, 0, 15, 2)  # 左侧部件在第0行第0列,占15行2列
        self.main_layout.addWidget(self.right_widget, 0, 2, 15, 10)  # 右侧部件在第0行第2列,占15行10列
        MainWindow.setCentralWidget(self.main_widget)  # 设置窗口主部件

        # ------------ 左侧菜单模块,使用网格布局 ------------ #
        # 关闭按钮
        self.close_button = QtWidgets.QPushButton("")
        # 空白按钮
        self.other_button = QtWidgets.QPushButton("")
        # 最小化按钮
        self.minimize_button = QtWidgets.QPushButton("")

        # JUNIOR 标志
        self.left_label_1 = QtWidgets.QPushButton("JUNIOR")
        self.left_label_1.setObjectName('left_label')
        # SENIOR 标志
        self.left_label_2 = QtWidgets.QPushButton("SENIOR")
        self.left_label_2.setObjectName('left_label')

        # 打开摄像头 按钮
        self.camera_button = QtWidgets.QPushButton(qtawesome.icon('fa5s.video', color='white'), "打开相机")
        self.camera_button.setObjectName('left_button')
        # 用户登录 按钮
        self.login_button = QtWidgets.QPushButton(qtawesome.icon('fa5s.user-alt', color='white'), "用户登录")
        self.login_button.setObjectName('left_button')

        # 用户登出 按钮
        self.logout_button = QtWidgets.QPushButton(qtawesome.icon('fa5s.sign-out-alt', color='white'), "用户登出")
        self.logout_button.setObjectName('left_button')
        # 用户注册 按钮
        self.register_button = QtWidgets.QPushButton(qtawesome.icon('fa5s.user-plus', color='white'), "用户注册")
        self.register_button.setObjectName('left_button')
        # 查询用户 按钮
        self.query_user_button = QtWidgets.QPushButton(qtawesome.icon('fa5s.search', color='white'), "修改信息")
        self.query_user_button.setObjectName('left_button')

        # 人脸识别 按钮
        self.recognition_button = QtWidgets.QPushButton(qtawesome.icon('fa5s.eye', color='white'), "人脸识别")
        self.recognition_button.setObjectName('left_button')
        # 人脸对比 按钮
        self.face_compare_button = QtWidgets.QPushButton(qtawesome.icon('fa5s.people-arrows', color='white'),
                                                         "人脸对比")
        self.face_compare_button.setObjectName('left_button')
        # 活体检测 按钮
        self.biopsy_testing_button = QtWidgets.QPushButton(qtawesome.icon('fa5s.atom', color='white'), "活体检测")
        self.biopsy_testing_button.setObjectName('left_button')
        # 精细分割 按钮
        self.fine_segmentation_button = QtWidgets.QPushButton(qtawesome.icon('fa5s.cut', color='white'), "精细分割")
        self.fine_segmentation_button.setObjectName('left_button')
        # 关键点检测 按钮
        self.attitude_detection_button = QtWidgets.QPushButton(qtawesome.icon('fa5s.draw-polygon', color='white'),
                                                               "姿态检测")
        self.attitude_detection_button.setObjectName('left_button')

        # 添加左侧按钮
        self.left_layout.addWidget(self.close_button, 0, 0, 1, 1)
        self.left_layout.addWidget(self.minimize_button, 0, 2, 1, 1)
        self.left_layout.addWidget(self.other_button, 0, 1, 1, 1)

        self.left_layout.addWidget(self.left_label_1, 1, 0, 1, 3)
        self.left_layout.addWidget(self.camera_button, 2, 0, 1, 3)
        self.left_layout.addWidget(self.login_button, 3, 0, 1, 3)
        self.left_layout.addWidget(self.logout_button, 4, 0, 1, 3)
        self.left_layout.addWidget(self.register_button, 5, 0, 1, 3)
        self.left_layout.addWidget(self.query_user_button, 6, 0, 1, 3)

        self.left_layout.addWidget(self.left_label_2, 7, 0, 1, 3)
        self.left_layout.addWidget(self.recognition_button, 8, 0, 1, 3)
        self.left_layout.addWidget(self.biopsy_testing_button, 9, 0, 1, 3)
        self.left_layout.addWidget(self.face_compare_button, 10, 0, 1, 3)
        self.left_layout.addWidget(self.fine_segmentation_button, 11, 0, 1, 3)
        self.left_layout.addWidget(self.attitude_detection_button, 12, 0, 1, 3)

        # ------------ 右侧模块,使用网格布局 ------------ #
        # 摄像头展示部分
        self.camera_label = QtWidgets.QLabel('\n人脸识别\n\n系统')
        self.camera_label.setAlignment(Qt.AlignCenter)
        self.camera_label.setObjectName('camera_label')

        # 信息展示界面
        self.img_label_1 = QtWidgets.QLabel('')
        self.img_label_2 = QtWidgets.QLabel('')
        self.img_label_3 = QtWidgets.QLabel('')
        self.msg_label_1 = QtWidgets.QLabel('')
        self.msg_label_2 = QtWidgets.QLabel('')
        self.msg_label_3 = QtWidgets.QLabel('')
        self.remind_label = QtWidgets.QLabel('')

        self.right_layout.addWidget(self.camera_label, 1, 0, 3, 10)
        self.right_layout.addWidget(self.img_label_1, 5, 1, )
        self.right_layout.addWidget(self.img_label_2, 5, 3, )
        self.right_layout.addWidget(self.img_label_3, 5, 5, )
        self.right_layout.addWidget(self.msg_label_1, 5, 2, )
        self.right_layout.addWidget(self.msg_label_2, 5, 4, )
        self.right_layout.addWidget(self.msg_label_3, 5, 6, )
        self.right_layout.addWidget(self.remind_label, 5, 3, )

        self.camera_label.setMinimumSize(QtCore.QSize(900, 560))
        self.camera_label.setMaximumSize(QtCore.QSize(900, 560))

        labels = [self.img_label_1, self.msg_label_1,
                  self.img_label_2, self.msg_label_2,
                  self.img_label_3, self.msg_label_3]
        for label in labels:
            label.setMinimumSize(QtCore.QSize(150, 200))
            label.setMaximumSize(QtCore.QSize(150, 200))

        self.remind_label.setMinimumSize(QtCore.QSize(170, 200))
        self.remind_label.setMaximumSize(QtCore.QSize(170, 200))


if __name__ == '__main__':
    app = QtWidgets.QApplication(sys.argv)
    widgets = QtWidgets.QMainWindow()
    ui = UserMainUi()
    ui.setupUi(widgets)
    widgets.show()
    sys.exit(app.exec_())
3. Project UI beautification
Beautify the interface in the following ways:
(1) Beautify the control button
Set the button size through the setFixedSize method, and set the button CSS style through the setStyleSheet method:
        self.close_button.setFixedSize(28, 28)
        self.other_button.setFixedSize(28, 28)
        self.minimize_button.setFixedSize(28, 28)

        self.close_button.setStyleSheet('''
            QPushButton{
                background:#F76677;
                border-radius:7px;}
            QPushButton:hover{
                background:red;}''')
        self.other_button.setStyleSheet('''
            QPushButton{
                background:#F7D674;
                border-radius:7px;}
            QPushButton:hover{
                background:yellow;}''')
        self.minimize_button.setStyleSheet('''
            QPushButton{
                background:#6DDF6D;
                border-radius:7px;}
            QPushButton:hover{
                background:green;}''')
Effect:

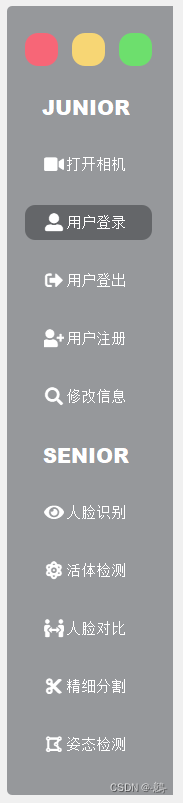
(2) Beautify the left layout
Set the style of the left layout left_widget through the setStyleSheet method, where the CSS-style QWidget #left_label and other fields correspond to the value of the setObjectName method of the initialization code component above, such as:
self.left_label_1.setObjectName('left_label')Beautify code:
        # 设置左侧菜单按钮
        self.left_widget.setStyleSheet('''
            QPushButton{
                border:none;
                color:white;
                height:35px;
                padding-left:5px;
                padding-right:10px;
                font-size:15px;}

            QWidget#left_widget{
                background:#96989B;
                border-top-left-radius:5px;
                border-bottom-left-radius:5px;}

            QPushButton#left_label{
                border:none;
                font-size:20px;
                font-weight:700;
                font-family: "Helvetica Neue", Helvetica, Arial, sans-serif;}

            QPushButton#left_button:hover{
                color:white;
                border-radius:10px;
                background:#646669;}''')
Effect:
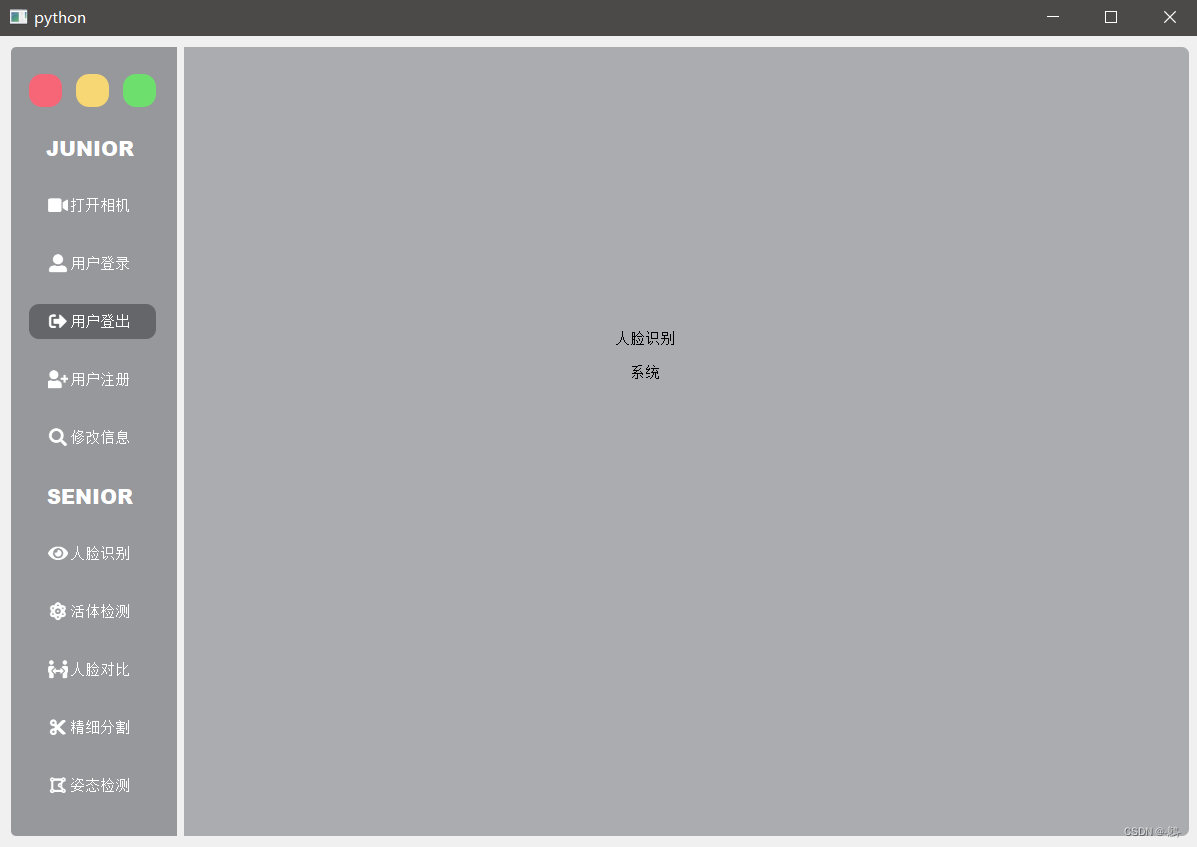
(3) Beautify the right layout
The method is as above, the code:
    self.right_widget.setStyleSheet('''
        QWidget#right_widget{
        background:#AAACAF;
        border-top-right-radius:5px;
        border-bottom-right-radius:5px;}''')
Effect:
(4) Remove gaps between components
code show as below:
        # 设置右边布局间距为0
        self.right_layout.setContentsMargins(0, 0, 2, 1)
        # 设置布局内部件间隙
        self.main_layout.setSpacing(0)
        self.right_layout.setSpacing(0)
        self.left_layout.setSpacing(0)
Effect:

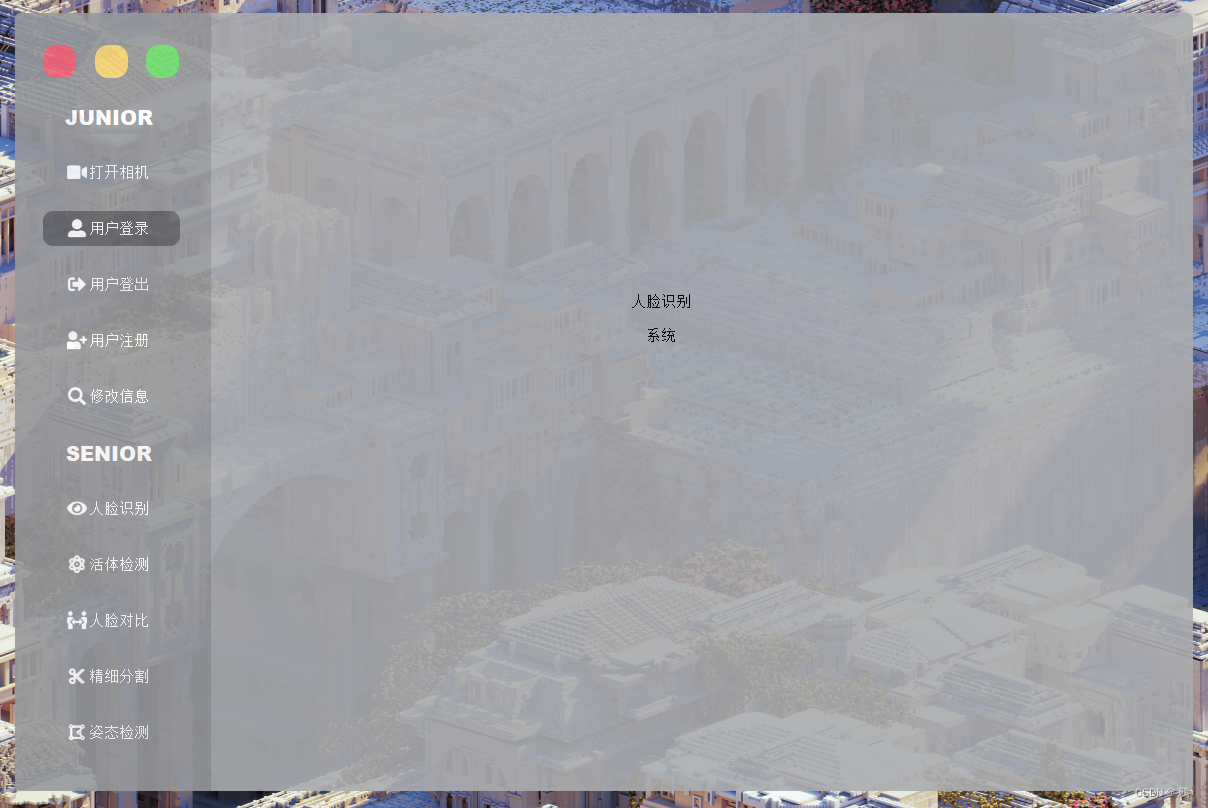
(5) Overall style beautification
Set transparency through the setWindowOpacity method
Hide the peripheral border by the setAttribute(QtCore.Qt.WA_TranslucentBackground) method
Generate a borderless window through the setWindowFlag(QtCore.Qt.FramelessWindowHint) method, the user cannot move and change the size
Set the window title through the setWindowTitle("face recognition") method
Set the window logo by the setWindowIcon(QIcon('logo.jpg')) method
Note: logo.jpg in QIcon('logo.jpg') is the name path of the imported image, you can write whatever name the imported image is called.
        # 设置整体样式
        MainWindow.setWindowOpacity(0.9)  # 设置窗口透明度
        MainWindow.setAttribute(QtCore.Qt.WA_TranslucentBackground)  # 隐藏外围边框
        MainWindow.setWindowFlag(QtCore.Qt.FramelessWindowHint) # 产生一个无边框的窗口,用户不能移动和改变大小
        MainWindow.setWindowTitle("人脸识别")  # 设置窗口标题
        MainWindow.setWindowIcon(QIcon('logo.jpg'))  # 设置窗口logo
Effect:
(6) Beautification of other components
code:
        self.camera_label.setStyleSheet('''
                                        color:#F8FCFF;
                                        font-size:60px;
                                        font-weight:bold;
                                        font-family:Roman times;''')
        self.remind_label.setStyleSheet('''
                                        color:#F0F7F4;
                                        font-size:30px;
                                        font-family:Microsoft YaHei;''')
        self.remind_label.setWordWrap(True)
        self.remind_label.setAlignment(Qt.AlignRight)
Effect:
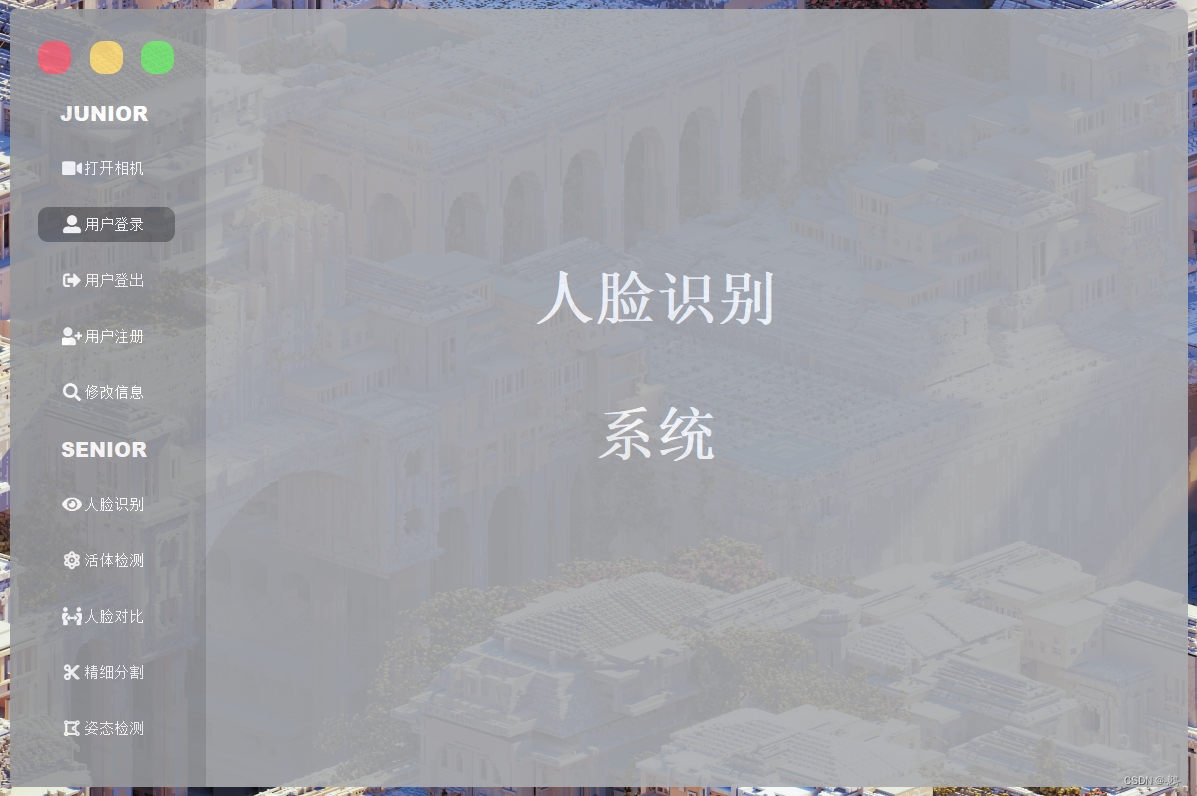
4. Beautified UI code
Final code:
# -*- coding: utf-8 -*-
import sys
import qtawesome
from PyQt5.QtGui import *
from PyQt5.QtCore import Qt
from PyQt5 import QtCore, QtWidgets

class UserMainUi(object):
    def setupUi(self, MainWindow):
        MainWindow.setObjectName("UserMainWindow")
        MainWindow.resize(1200, 800)

        # ------------ 整体界面设计,使用网格布局 ------------ #
        self.main_widget = QtWidgets.QWidget(MainWindow)  # 创建窗口主部件
        self.main_layout = QtWidgets.QGridLayout()  # 创建主部件的网格布局
        self.main_widget.setLayout(self.main_layout)  # 设置窗口主部件布局为网格布局

        self.left_widget = QtWidgets.QWidget(MainWindow)  # 创建左侧部件
        self.left_widget.setObjectName('left_widget')
        self.left_layout = QtWidgets.QGridLayout()
        self.left_widget.setLayout(self.left_layout)  # 设置左侧部件布局为网格

        self.right_widget = QtWidgets.QWidget(MainWindow)  # 创建右侧部件
        self.right_widget.setObjectName('right_widget')
        self.right_layout = QtWidgets.QGridLayout()
        self.right_widget.setLayout(self.right_layout)  # 设置右侧部件布局为网格

        self.main_layout.addWidget(self.left_widget, 0, 0, 15, 2)  # 左侧部件在第0行第0列,占15行2列
        self.main_layout.addWidget(self.right_widget, 0, 2, 15, 10)  # 右侧部件在第0行第2列,占15行10列
        MainWindow.setCentralWidget(self.main_widget)  # 设置窗口主部件

        # ------------ 左侧菜单模块,使用网格布局 ------------ #
        # 关闭按钮
        self.close_button = QtWidgets.QPushButton("")
        # 空白按钮
        self.other_button = QtWidgets.QPushButton("")
        # 最小化按钮
        self.minimize_button = QtWidgets.QPushButton("")

        # JUNIOR 标志
        self.left_label_1 = QtWidgets.QPushButton("JUNIOR")
        self.left_label_1.setObjectName('left_label')
        # SENIOR 标志
        self.left_label_2 = QtWidgets.QPushButton("SENIOR")
        self.left_label_2.setObjectName('left_label')

        # 打开摄像头 按钮
        self.camera_button = QtWidgets.QPushButton(qtawesome.icon('fa5s.video', color='white'), "打开相机")
        self.camera_button.setObjectName('left_button')
        # 用户登录 按钮
        self.login_button = QtWidgets.QPushButton(qtawesome.icon('fa5s.user-alt', color='white'), "用户登录")
        self.login_button.setObjectName('left_button')

        # 用户登出 按钮
        self.logout_button = QtWidgets.QPushButton(qtawesome.icon('fa5s.sign-out-alt', color='white'), "用户登出")
        self.logout_button.setObjectName('left_button')
        # 用户注册 按钮
        self.register_button = QtWidgets.QPushButton(qtawesome.icon('fa5s.user-plus', color='white'), "用户注册")
        self.register_button.setObjectName('left_button')
        # 查询用户 按钮
        self.query_user_button = QtWidgets.QPushButton(qtawesome.icon('fa5s.search', color='white'), "修改信息")
        self.query_user_button.setObjectName('left_button')

        # 人脸识别 按钮
        self.recognition_button = QtWidgets.QPushButton(qtawesome.icon('fa5s.eye', color='white'), "人脸识别")
        self.recognition_button.setObjectName('left_button')
        # 人脸对比 按钮
        self.face_compare_button = QtWidgets.QPushButton(qtawesome.icon('fa5s.people-arrows', color='white'),
                                                         "人脸对比")
        self.face_compare_button.setObjectName('left_button')
        # 活体检测 按钮
        self.biopsy_testing_button = QtWidgets.QPushButton(qtawesome.icon('fa5s.atom', color='white'), "活体检测")
        self.biopsy_testing_button.setObjectName('left_button')
        # 精细分割 按钮
        self.fine_segmentation_button = QtWidgets.QPushButton(qtawesome.icon('fa5s.cut', color='white'), "精细分割")
        self.fine_segmentation_button.setObjectName('left_button')
        # 关键点检测 按钮
        self.attitude_detection_button = QtWidgets.QPushButton(qtawesome.icon('fa5s.draw-polygon', color='white'),
                                                               "姿态检测")
        self.attitude_detection_button.setObjectName('left_button')

        # 添加左侧按钮
        self.left_layout.addWidget(self.close_button, 0, 0, 1, 1)
        self.left_layout.addWidget(self.other_button, 0, 1, 1, 1)
        self.left_layout.addWidget(self.minimize_button, 0, 2, 1, 1)

        self.left_layout.addWidget(self.left_label_1, 1, 0, 1, 3)
        self.left_layout.addWidget(self.camera_button, 2, 0, 1, 3)
        self.left_layout.addWidget(self.login_button, 3, 0, 1, 3)
        self.left_layout.addWidget(self.logout_button, 4, 0, 1, 3)
        self.left_layout.addWidget(self.register_button, 5, 0, 1, 3)
        self.left_layout.addWidget(self.query_user_button, 6, 0, 1, 3)

        self.left_layout.addWidget(self.left_label_2, 7, 0, 1, 3)
        self.left_layout.addWidget(self.recognition_button, 8, 0, 1, 3)
        self.left_layout.addWidget(self.biopsy_testing_button, 9, 0, 1, 3)
        self.left_layout.addWidget(self.face_compare_button, 10, 0, 1, 3)
        self.left_layout.addWidget(self.fine_segmentation_button, 11, 0, 1, 3)
        self.left_layout.addWidget(self.attitude_detection_button, 12, 0, 1, 3)

        # ------------ 右侧模块,使用网格布局 ------------ #
        # 摄像头展示部分
        self.camera_label = QtWidgets.QLabel('\n人脸识别\n\n系统')
        self.camera_label.setAlignment(Qt.AlignCenter)

        # 信息展示界面
        self.msg_label_a = QtWidgets.QLabel('')
        self.msg_label_b = QtWidgets.QLabel('')
        self.msg_label_c = QtWidgets.QLabel('')
        self.remind_label = QtWidgets.QLabel('')

        self.right_layout.addWidget(self.camera_label, 1, 0, 3, 10)
        self.right_layout.addWidget(self.msg_label_a, 5, 2, )
        self.right_layout.addWidget(self.msg_label_b, 5, 4, )
        self.right_layout.addWidget(self.msg_label_c, 5, 6, )
        self.right_layout.addWidget(self.remind_label, 5, 3, )

        self.camera_label.setMinimumSize(QtCore.QSize(900, 560))
        self.camera_label.setMaximumSize(QtCore.QSize(900, 560))

        labels = [self.msg_label_a, self.msg_label_b, self.msg_label_c]
        for label in labels:
            label.setMinimumSize(QtCore.QSize(150, 200))
            label.setMaximumSize(QtCore.QSize(150, 200))

        self.remind_label.setMinimumSize(QtCore.QSize(170, 200))
        self.remind_label.setMaximumSize(QtCore.QSize(170, 200))

        # ----------------------美化------------------ #
        # 美化控制按钮
        self.close_button.setFixedSize(28, 28)
        self.other_button.setFixedSize(28, 28)
        self.minimize_button.setFixedSize(28, 28)

        self.close_button.setStyleSheet('''
            QPushButton{
                background:#F76677;
                border-radius:7px;}
            QPushButton:hover{
                background:red;}''')
        self.other_button.setStyleSheet('''
            QPushButton{
                background:#F7D674;
                border-radius:7px;}
            QPushButton:hover{
                background:yellow;}''')
        self.minimize_button.setStyleSheet('''
            QPushButton{
                background:#6DDF6D;
                border-radius:7px;}
            QPushButton:hover{
                background:green;}''')

        # 美化左侧布局
        self.left_widget.setStyleSheet('''
            QPushButton{
                border:none;
                color:white;
                height:35px;
                padding-left:5px;
                padding-right:10px;
                font-size:15px;}

            QWidget#left_widget{
                background:#96989B;
                border-top-left-radius:5px;
                border-bottom-left-radius:5px;}

            QPushButton#left_label{
                border:none;
                font-size:20px;
                font-weight:700;
                font-family: "Helvetica Neue", Helvetica, Arial, sans-serif;}

            QPushButton#left_button:hover{
                color:white;
                border-radius:10px;
                background:#646669;}''')

        # 美化右侧布局
        self.right_widget.setStyleSheet('''
            QWidget#right_widget{
                background:#AAACAF;
                border-top-right-radius:5px;
                border-bottom-right-radius:5px;}''')

        # 去除组件间间隙
        self.right_layout.setContentsMargins(0, 0, 2, 1)
        self.main_layout.setSpacing(0)
        self.right_layout.setSpacing(0)
        self.left_layout.setSpacing(0)

        # 设置整体样式
        MainWindow.setWindowOpacity(0.9)  # 设置窗口透明度
        MainWindow.setAttribute(QtCore.Qt.WA_TranslucentBackground)  # 隐藏外围边框
        MainWindow.setWindowFlag(QtCore.Qt.FramelessWindowHint) # 产生一个无边框的窗口,用户不能移动和改变大小
        MainWindow.setWindowTitle("人脸识别")  # 设置标题
        MainWindow.setWindowIcon(QIcon('Logo.jpg'))  # 设置logo

        # 其他组件美化
        self.camera_label.setStyleSheet('''
                                        color:#F8FCFF;
                                        font-size:60px;
                                        font-weight:bold;
                                        font-family:Roman times;''')
        self.remind_label.setStyleSheet('''
                                        color:#F0F7F4;
                                        font-size:30px;
                                        font-family:Microsoft YaHei;''')
        self.remind_label.setWordWrap(True)
        self.remind_label.setAlignment(Qt.AlignRight)


if __name__ == '__main__':
    app = QtWidgets.QApplication(sys.argv)
    widgets = QtWidgets.QMainWindow()
    ui = UserMainUi()
    ui.setupUi(widgets)
    widgets.show()
    sys.exit(app.exec_())
Final style:
Note: In the completed UI interface, each button cannot be clicked yet, that is, the code of the logic part has not been written yet.
continue reading:
UI event processing: Python | Face recognition system - UI event processing
Camera screen display: Python | Face recognition system - camera screen display
Client side logic:
- Face Recognition: Python | Face Recognition System—Face Recognition
- Liveness Detection: Python | Face Recognition System - Liveness Detection
- Background Blurring: Python | Face Recognition System - Background Blurring
- Pose Detection: Python | Face Recognition System - Pose Detection
- Face comparison: Python | Face recognition system - face comparison
- User Operations: Python | Face Recognition System—User Operations
Admin side logic:
- Administrator Operations: Python | Face Recognition System——Administrator Operations
Note: The above code is for reference only. To run it, refer to the GitHub source code: Su-Face-Recognition