Preface: Most of the online materials are cloud services used. I used the server I built for the experiment, and I will record the process next.
1. Server construction
1. Use cloud server
There are many types of cloud servers, and there are many teachings on the Internet. I won’t explain too much here. The Alibaba Cloud domestic server I used in the experiment will be introduced later here.
2. Build your own server - Dell R620 (used in this experiment)
This experiment mainly used to build a server by itself. When sorting out, I found that there was an R620 that I didn't want him to eat ashes and I could build a server.
The U disk installation system we use can be referred to here
Make ubuntu 18.04 U disk boot disk_AllyLi0224's Blog-CSDN Blog_U Disk Make Ubuntu System Disk

After the boot disk is burned in, perform BIOS settings and install the operating system. There are many materials that will not be demonstrated. The process is the same as creating a virtual machine. Anyone who has played a virtual machine can understand it.
After entering the interface, we need to configure the network, firewall configuration, mainly firewall port configuration and router configuration, because you are a self-built server unlike a cloud server that can directly manage security groups in the background.
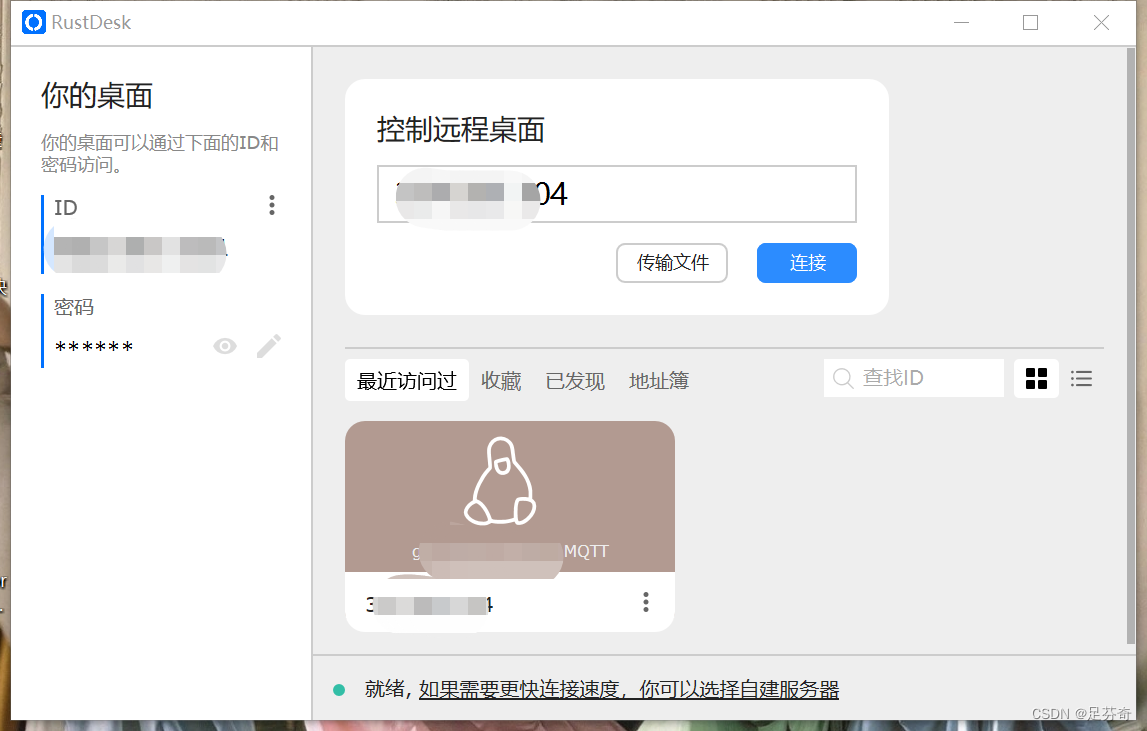
1) Remote control artifact rustdesk
After completing the basic settings of the server, we need to perform remote control. You can get rid of the monitor and other remote control of the server (the server only needs to plug in the power cord and network cable to continue eating dust). Here we recommend rustdesk, an open source software with high security and TLS encryption. transmission.
Installation: There are many client and server versions, you need to see the installation clearly

Second, select the message server
1.rabbitmq
Rabbitmq's webpage is not very friendly for novices. It is all in English, but compared with emqx, it has great advantages in the amount of bandwidth and data it can withstand. The disadvantage is that the construction and configuration process is not very simple compared to empx. I have also built it, but for For simple experiments, empqx is simple, you can refer to the information here
[Learning to accompany] Kuangshen said RabbitMQ notes (simple use of RabbitMQ)
Install and configure RabbitMQ (start SSL) and test cases - Programmer Sought
RabbitMQ development history and installation
Initial explanation of rabbitmq-c source code (1) - Programmer Sought
2.emqx (used in this experiment)
To install empx on the server, refer to the official website manual, which is very clear https://www.emqx.io/zh/downloads?os=Ubuntu
Choose your own operating system and install it with one click

The use guide is very important not only for server construction, but also for mobile terminal configuration (single chip microcomputer configuration, WeChat applet configuration, web page configuration). Do not change the ip after deployment .
The server built by yourself must pay attention to whether the port is open, 1) linux firewall 2) router firewall
I built it at school and couldn’t connect to it. After checking the error, I found that the ping was not working. After contacting the network administrator, I found out that the school closed all ports to prevent being attacked, and the external network could not be accessed. With the China Unicom network cable that was pulled later, the port used was opened after logging in to the router page, and the ping from the external network was able to pass.
Enter the following code to judge whether empx is working normally, and you can also see the port used.
sudo systemctl status emqx

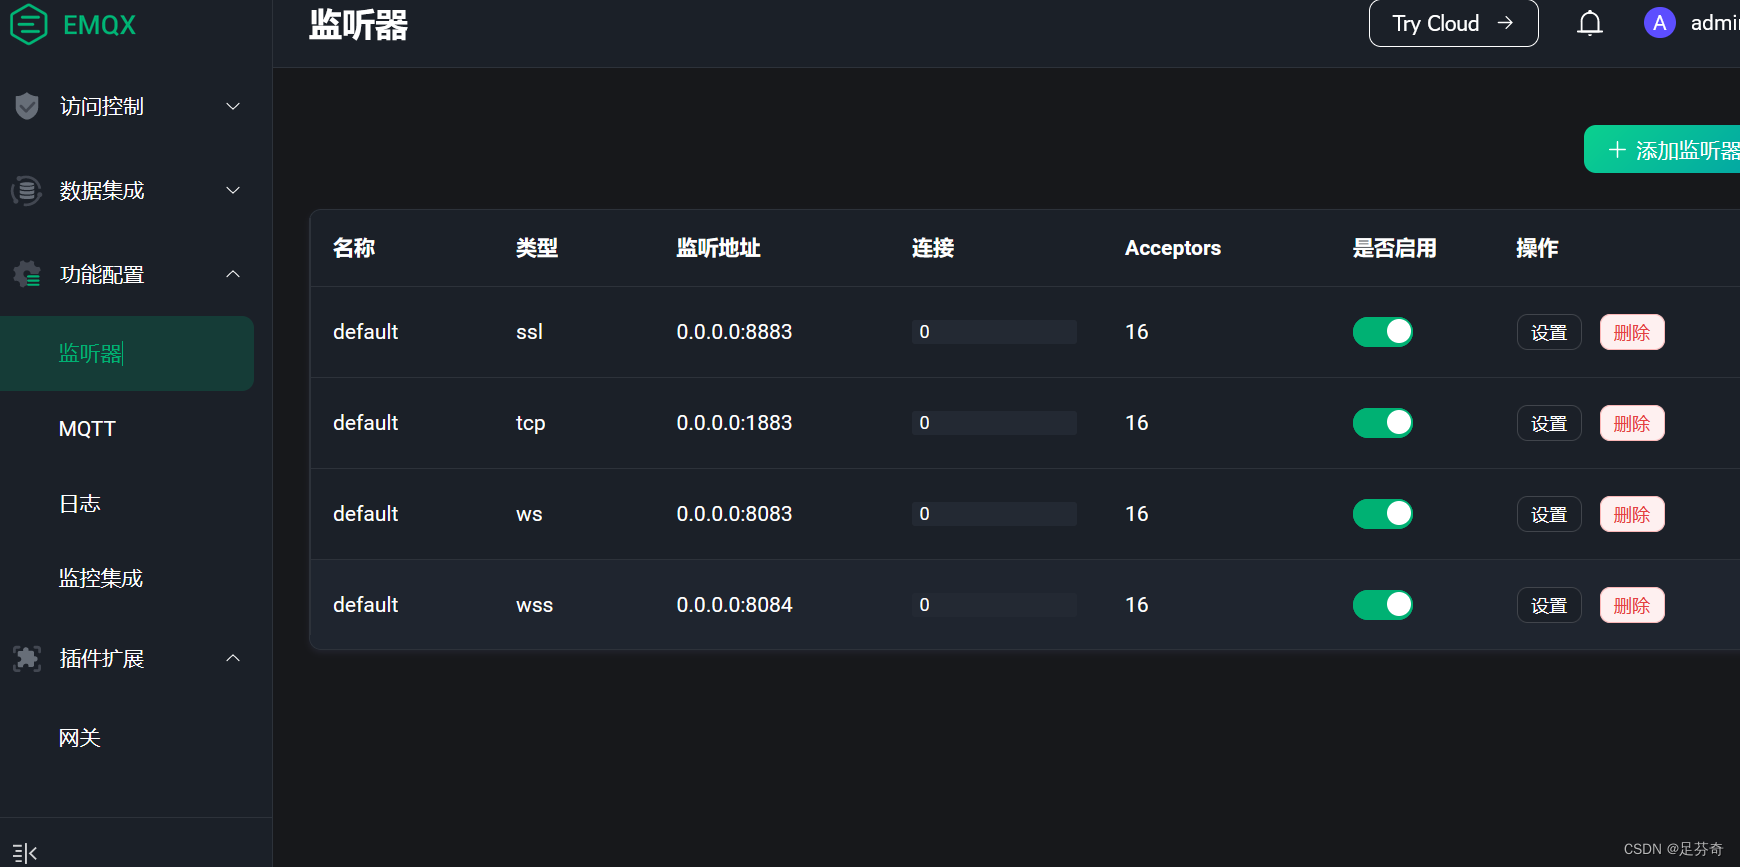
Next, we log in to the web version of emqx, enter your external ip or domain name port number is 18083

Here we can also see the port being monitored. The newly installed empx may not have ssl, and there are only two ws and tcp. You need to install ssl on the server to open it.
8883, 1883, 8083, 8084, 18083 and other ports, 8083 is mainly used for unencrypted websocket protocol port (ws), 8084 is the encrypted port used for WeChat applet connection (wss), 18083 is mainly used to access EMQX control The port of the platform, 1883 is the basic TCP port here is the port for the MCU to connect to the server, and 8883 is the encrypted port (https).
The WeChat applet development document states that only the websocket/TLS protocol is supported for security reasons, so this experiment must open the port of the wss protocol to connect the applet to the server for use.
Turning on ssl is not necessary for most people, unless you want to make WeChat applets that require encryption. This part will be introduced later.
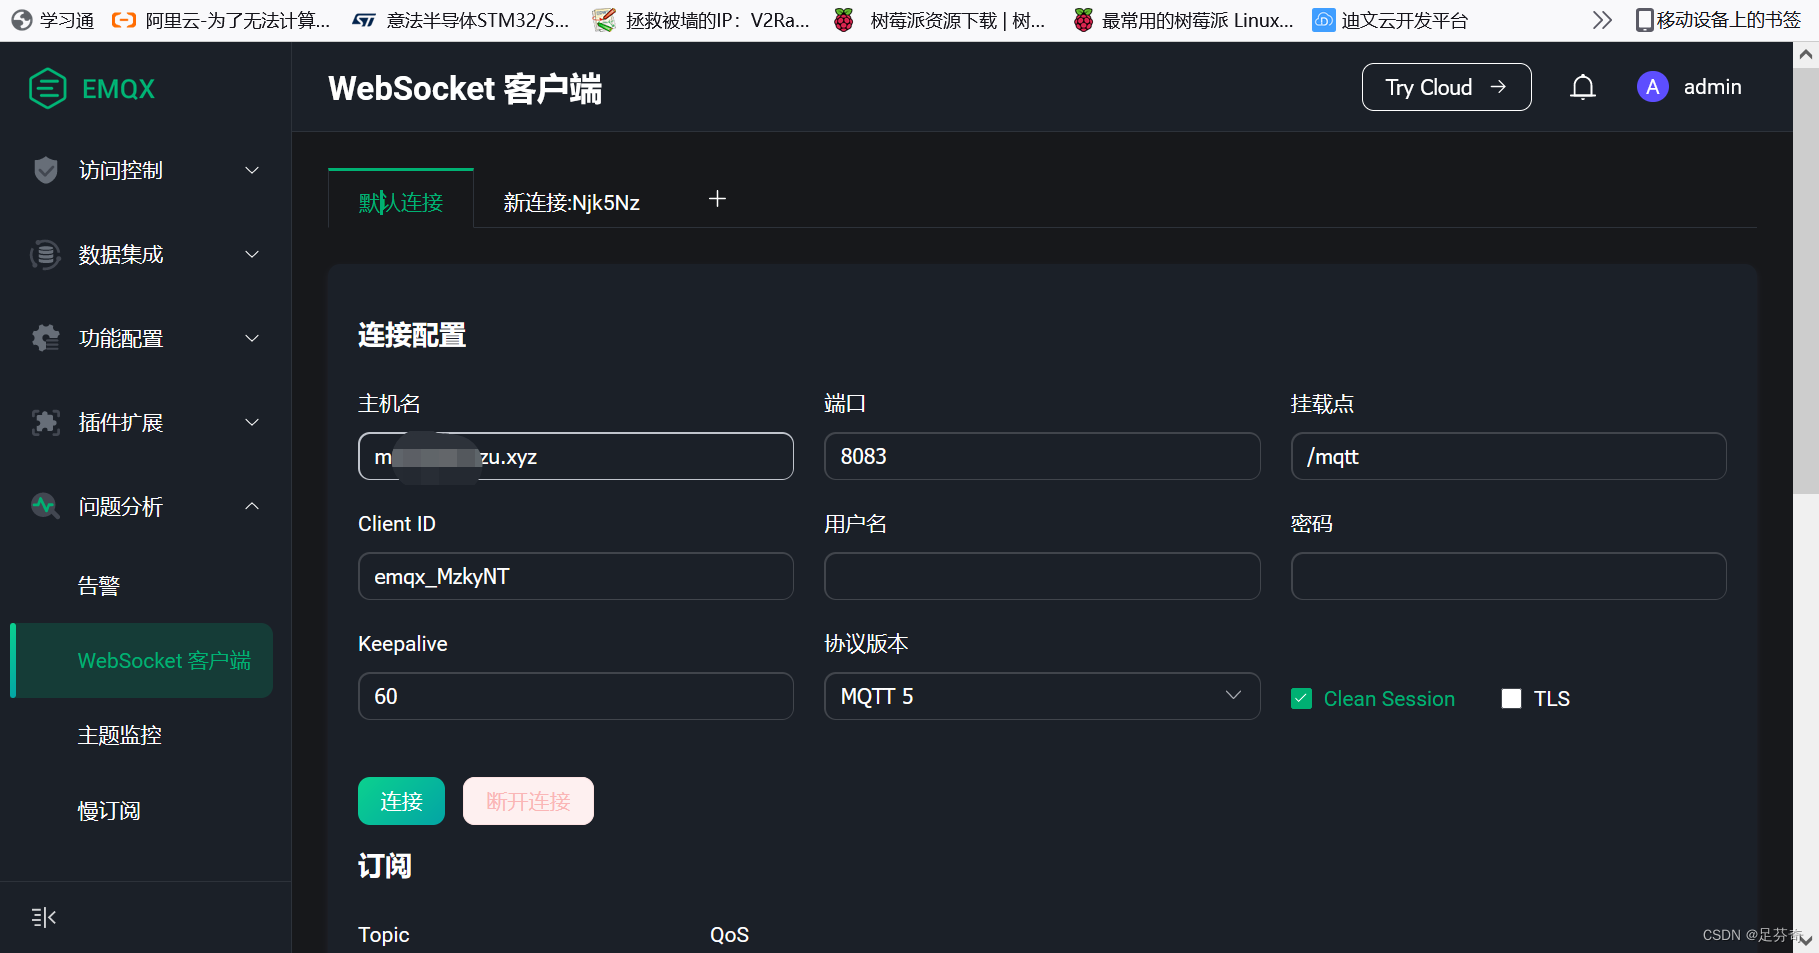
There is a client in emqx, no need to use clients such as mqtttx, which is very convenient for testing
Later update below
Three, the client
1. Device side (single chip microcomputer)
2. Mobile terminal (WeChat applet)
3. Desktop (mqttx)
If there are any mistakes, please comment and correct them in time, thank you guys