You can visit my personal blog A Fat Orange This is a blog running on 3B+
#preface
I wanted to play with the Raspberry Pi during the summer vacation, so I bought a Raspberry Pi 3B+, but I didn’t play much after buying it, so I put it in the dormitory to eat ashes. Recently, I suddenly became interested in the website, so I searched for information on the Internet to build it. This web server is a server composed of nginx+PHP7+typecho.
#First install the raspbian system
The download address of the Raspberry Pi Lab is quoted, and you can download it directly.
Download link: http://downloads.raspberrypi.org/raspbian_latest
Default account: Username: pi Password: raspberry
Use win32 Disk Imager to burn the system.

When it pops up Write Successful, it means the burning is successful

- Also note that the system does not enable SSH by default, so after programming the system, create an SSH file without a suffix in the file
#System Configuration
Use the Raspberry Pi to connect to the laptop through a network cable. First, you need to go to the Network and Sharing Center > Change Adapter Settings > WLAN Properties > Sharing > Allow Connection

Next, open the cmd command and use arp -a to find the IP address of the Raspberry Pi, and use putty to connect


* After connecting, you can set a static IP address to facilitate the next connection
- Open /etc/network/interfaces
- According to the comments inside, it is found that the file that needs to be modified to set static ip is /etc/dhcpcd.conf
- Set static ip, gateway, DNS according to the comments in dhcpcd.conf
For example, to set the static ip of wlan0, add it at the end of the file
Use the command:
sudo nano /etc/dhcpcd.conf
Add the following at the end
	interface eth0
	static ip_address=192.168.137.233/24 #修改成自己需要的IP
	static routers=192.168.137.1  #同上只需修改倒数第二位保持和上面相同
	static domain_name_servers=114.114.114.114 8.8.8.8
114.114.114.114 is a relatively fast DNS server in China 8.8.8.8 is Google's DNS server
Use CTRL+O to save, CTRL+X to exit
Restart:
sudo reboot
Use your own IP connection
* Install NTP for automatic time synchronization
After connecting, in order to check the time conveniently, it is best to change the system time zone. At this time, we need to install NTP, which is mainly for automatic time synchronization, and there is no need to manually set it every time.
Install NTP:
sudo apt-get install ntpdate
Enable NTP:
sudo timedatectl set-ntp true
Modify the local time zone:
sudo dpkg-reconfigure tzdata
In this step, select "Asia->Shanghai"
Check if the time is correct:
date
You can see that the time has been changed to Beijing time. After setting the time, you need to update the software source. It is recommended to update the source address to Alibaba Cloud source first.
Edit source:
sudo nano /etc/apt/sources.list
After opening, comment out the code inside with #, and add the following code:
deb http://mirrors.aliyun.com/raspbian/raspbian/ wheezy main non-free contrib
deb-src http://mirrors.aliyun.com/raspbian/raspbian/ wheezy main non-free contrib
deb http://mirrors.tuna.tsinghua.edu.cn/raspbian/raspbian/ stretch main contrib non-free rpi
deb-src http://mirrors.tuna.tsinghua.edu.cn/raspbian/raspbian/ stretch main contrib non-free rpi

sudo nano /etc/apt/sources.list.d/raspi.list
After opening, comment out the code inside with #, and add the following code:
deb http://mirror.tuna.tsinghua.edu.cn/raspberrypi/ stretch main ui
deb-src http://mirror.tuna.tsinghua.edu.cn/raspberrypi/ stretch main ui

After replacing, update the source:
sudo apt-get update
After updating, update the installed packages:
sudo apt-get upgrade
If you encounter (Y/n) during the installation process, select Y
After the update, the setting displays Chinese.
* Raspberry Pi setting Chinese display
First, install Chinese fonts
sudo apt-get install ttf-wqy-zenhei
If you encounter (Y/n) during the installation process, select Y
After the installation is complete, execute the following command to perform localization settings:
sudo raspi-config


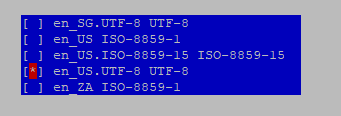
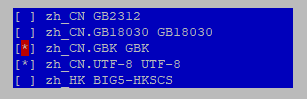

Tips: Press the space bar to tick or remove the tick in front, PageUp PageDown to turn the page quickly, and the Tab key to switch the cursor position.

Restart to take effect
sudo reboot
#Install and configure Nginx/PHP/SQLite3
Considering that the performance of the Raspberry Pi is relatively weak, if you use MySQL or other databases, it will basically go down every day. Comprehensive consideration is still suitable for the configuration of Nginx + SQLite3. Of course, PHP is essential.
Install nginx:
sudo apt-get install nginx
Install SQLite3:
sudo apt-get install sqlite3
Install PHP (PHP7):
sudo apt-get install nginx php7.0-fpm php7.0-cli php7.0-curl php7.0-gd php7.0-mcrypt php7.0-cgi php7.0-sqlite php7.0-xml
Install PHP-APC optimization:
sudo apt-get install php-apc
After the installation is complete, start the configuration.
*Start configuration
Configure Nginx:
sudo nano /etc/nginx/nginx.conf
After opening, find the following location and modify it:
user www-data;
worker_processes 1; #修改这里
pid /var/run/nginx.pid;
events {
worker_connections 64; #修改这里
#multi_accept on;
}
Continue to find gzip backward, remove the previous comment and modify it as follows:
gzip on;
gzip_disable “msie6”;
gzip_vary on;
gzip_proxied any;
gzip_comp_level 6;
gzip_buffers 16 8k;
gzip_http_version 1.1;
gzip_types text/plain text/css application/json application/x-javascript text/xml application/xml application/xml+rss text/javascript;
CTRL+O to save, CTRL+X to exit (will be directly replaced by save and exit later)
Configure PHP:
sudo nano /etc/php/7.0/fpm/php.ini
After opening, find the following code and modify it:
; Maximum amount of memory a script may consume (128MB)
;http://php.net/memory-limit
memory_limit = 32M #修改这里
Save and exit.
Configure PHP-FPM:
sudo nano /etc/php/7.0/fpm/php-fpm.conf
Find the code and modify it:
; The maximum number of processes FPM will fork. This has been design to control
; the global number of processes when using dynamic PM within a lot of pools.
; Use it with caution.
; Note: A value of 0 indicates no limit
; Default Value: 0
process.max = 4 #修改这里
Save and exit.
To configure the relevant configuration of the website, it is safer to back up a copy first:
sudo cp /etc/nginx/sites-available/default /etc/nginx/sites-available/default.bak
Modify the configuration file:
sudo nano /etc/nginx/sites-available/default
Put the following content in it:
location / {


      # First attempt to serve request as file, then
      # as directory, then fall back to displaying a 404.
      try_files $uri $uri/ =404;
        }
Replace with:
location / {
index  index.html index.htm index.php default.html default.htm default.php;
if (-f $request_filename/index.html){
    rewrite (.*) $1/index.html break;
}
if (-f $request_filename/index.php){
    rewrite (.*) $1/index.php;
}
if (!-f $request_filename){
    rewrite (.*) /index.php;
}
}

location ~\.php(\/.*)*$ {
fastcgi_pass unix:/run/php/php7.0-fpm.sock;
#fastcgi_pass 127.0.0.1:9000;
fastcgi_param SCRIPT_FILENAME $document_root$fastcgi_script_name;
include fastcgi_params;
}
Save and exit.
After the modification is completed, test whether the PHP is working normally, please get iTunes immediately
sudo nano /var/www/html/index.php
The input content is as follows:
<?php
      phpinfo();
?>
Restart nginx and PHP7-FPM
sudo /etc/init.d/nginx restart
sudo /etc/init.d/php7.0-fpm restart
Enter the IP address of the Raspberry Pi in the computer browser to check whether it is successful:
the following interface appears as success:

#install typecho
After the above configuration is completed, it is basically an environment that can already run normally, but in order to install smoothly, you need to authorize the folder directory:
sudo chmod 755 /var/www/html -R
After authorization, download the latest installation package and decompress it. After decompressing, move the directory:
cd /var/www/html
sudo wget http://typecho.org/downloads/1.1-17.10.30-release.tar.gz
tar zxvf 1.1-17.10.30-release.tar.gz
mv build/* /var/www/html
*Visit your own blog address:
Enter the IP address of the Raspberry Pi directly in the computer browser
The following interface appears

Click Next:

Modify according to your actual situation, and click to start the installation after completion.
If appear:

You can manually create a new database file, using the following code:
sqlite3 blog.db
create table test(test text);

CTRL+Z to exit
and then click Next in the browser to succeed.
Enter the IP address of the Raspberry Pi in the browser:
for example: 192.168.137.222/admin to enter the background,
if such an interface appears, it means you have succeeded

Start writing your first article.
Reprint please indicate the original address