Table of contents
Environment configuration
Install the IDE
References: CSDN
First download the Arduino IDE
, please note that you must choose the 1.8+ version, and never use the 2.0+ version! ! !
It is recommended to download the ZIP compressed package of windows directly, and it is very convenient to use after decompression
Official download link: https://www.arduino.cc/en/software
download firmware
Open the IDE, click文件->首选项
Follow the diagram below:
- Modify the location of the project folder: You don't want all the files to take up space on the C drive, do you?
- Additional development board address:
https://dl.espressif.com/dl/package_esp32_index.json
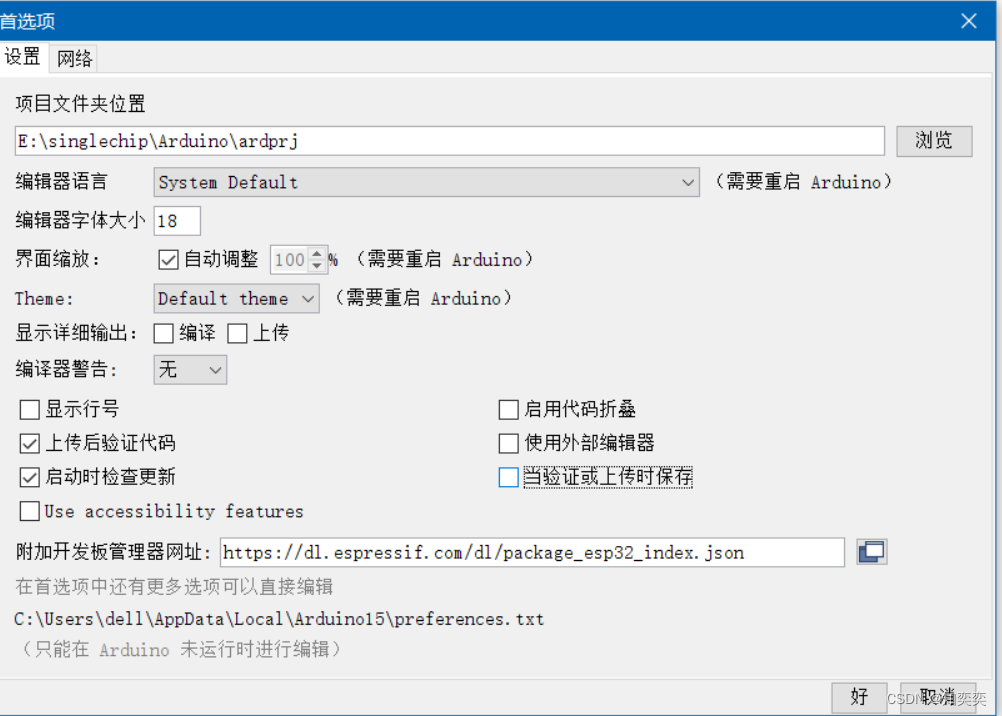
Then click OK to close the window
Click Tools -> Development Board -> Development Board Manager
Search for esp32, select 1.0.6 (the latest version of firmware at the time of writing this article), and install!
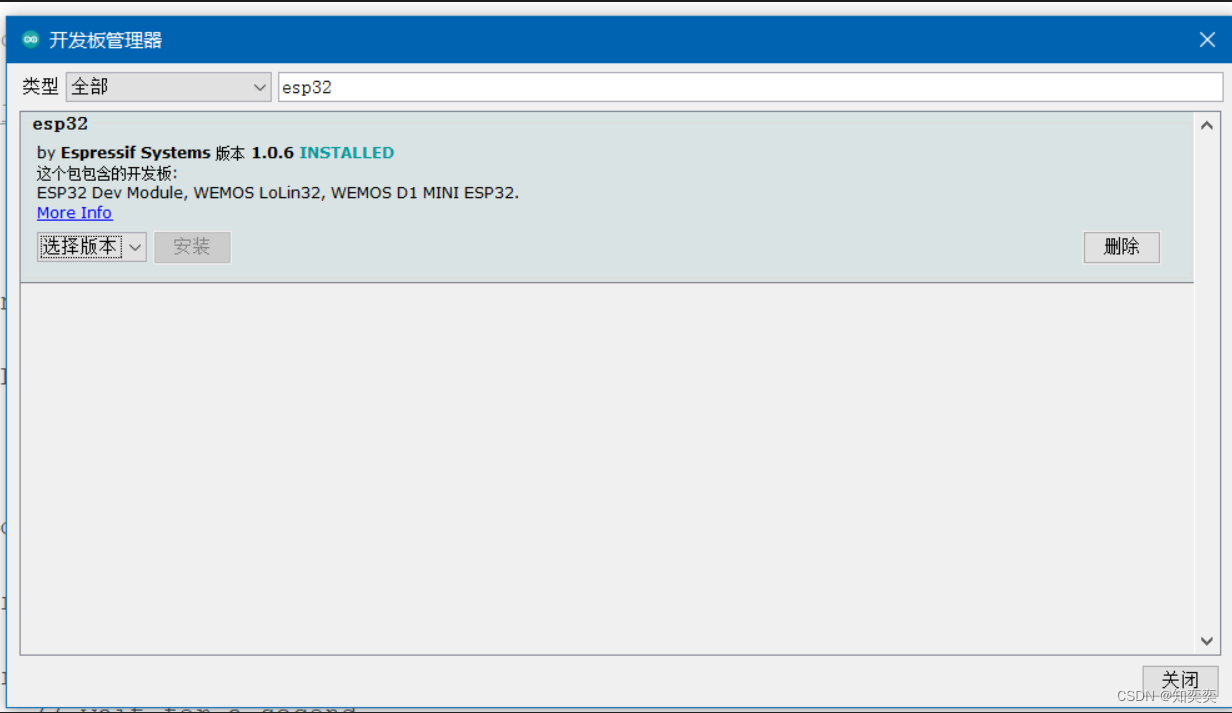
Notes on installation: You can open a proxy (dev-sidercar) or use magic (clash); but it is highly recommended to use a mobile phone hotspot to link to the computer and then download, which is very fast, much faster than connecting directly to the router!
Scientific Internet access is not necessary, but the speed will be slower
The firmware is installed, we are now going to switch the development board
Choose according to the picture below工具->开发板->ESP32 Arduino->ESP32 Dev Module
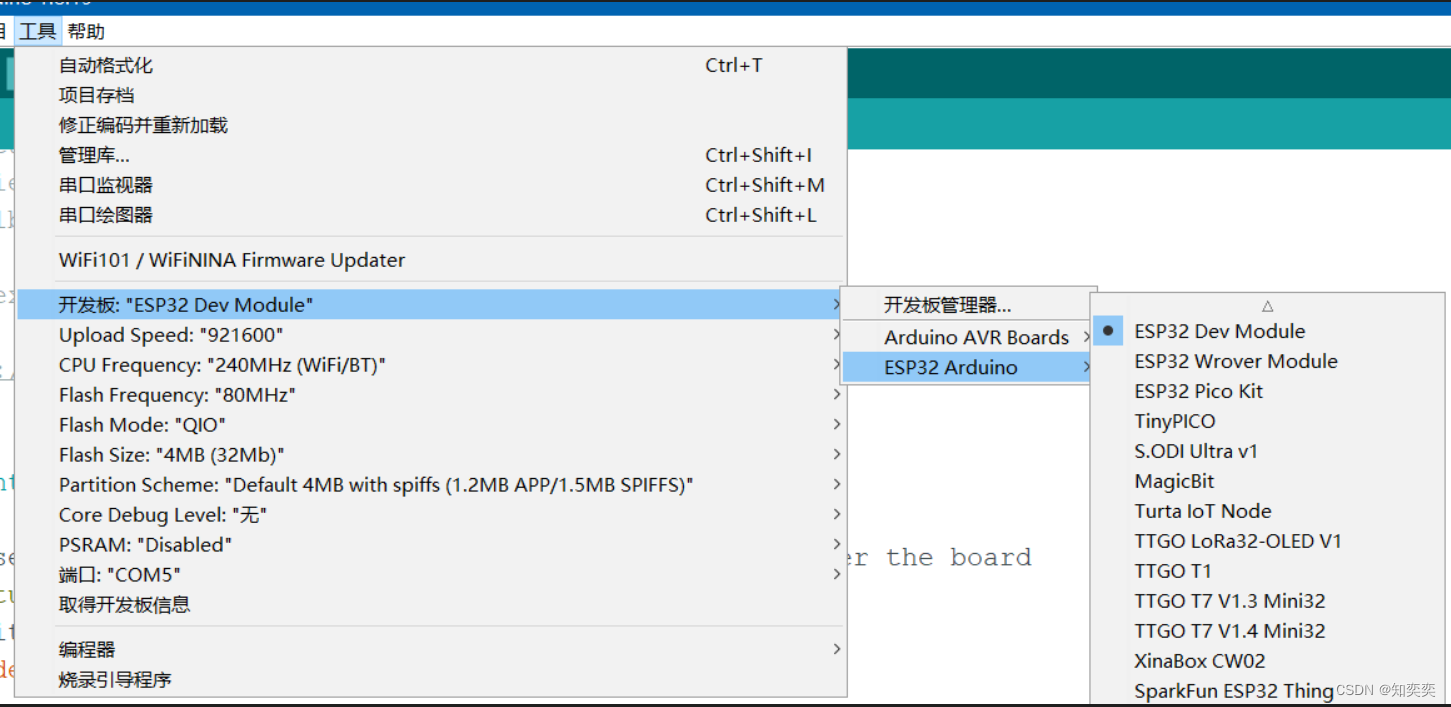
At this point, we will see the picture, which shows the baud rate, CPU frequency and flash size of the board.
These parameters can be modified manually, but it is recommended to keep the default value!
project test
The firmware has been installed, and we are going to test it with a simple blinking light bulb applet
First connect the board (ESP32) to the computer
and then in the IDE, select 工具->端口to find the port corresponding to the board and select it!
Then select the corresponding arduino default example project according to the figure below
文件->示例->01.basic->blink
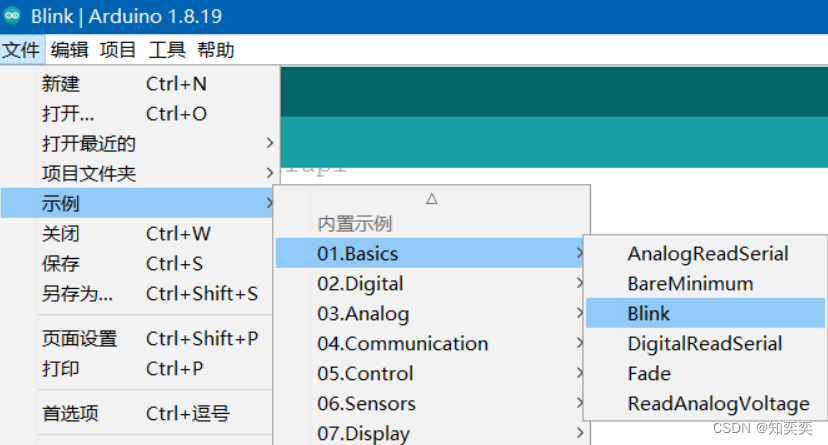
At this point, a new window will open to display our blink code, so we close the old window;
At this time, the blink file is in a read-only state, and it must be saved before it can be burned;
the save location is arbitrary, and the path does not have Chinese characters.
Next, look at the code. Since the code supports the arduino development board by default, the corresponding GPIO port must be inconsistent with the ESP32. We only need to reset it to the IO port corresponding to the LED light!
// 重新设定GPIO口,设为ESP32板子上的LED灯
const int LED = 2;

// the setup function runs once when you press reset or power the board
void setup() {


  // initialize digital pin LED_BUILTIN as an output.
  pinMode(LED, OUTPUT);
}

// the loop function runs over and over again forever
void loop() {


  digitalWrite(LED, HIGH);   // turn the LED on (HIGH is the voltage level)
  delay(200);                       // wait for a second
  digitalWrite(LED, LOW);    // turn the LED off by making the voltage LOW
  delay(200);                       // wait for a second
}
The code is very simple, it is to make the LED light turn on and off every 200ms
Now enter the burning process
Click a small right arrow in the upper left corner of the IDE, and the code will start uploading to the board
The image of the successful upload is as follows, and the output window output Hard resetting via RTS pin...indicates that the upload is successful

Troubleshooting
micropython firmware conflict problem
If we used thonny for micropython development before, it means that the board has been flashed into the micropython firmware, and the c++ code cannot be executed at this time
Micropython must use the official software provided by Espressif to flash the firmware, while arduino provides automatic flashing, which is very convenient
When we test the above sample code, after clicking the upload button, the board will automatically convert the firmware to the Arduino architecture, and there is no need to manually re-flash the firmware again
This means that if you want to go back to writing under micropython, you have to flash the corresponding firmware again. . .
The rest of the troubleshooting will be updated continuously