Article Directory
1. How to install software in Linux
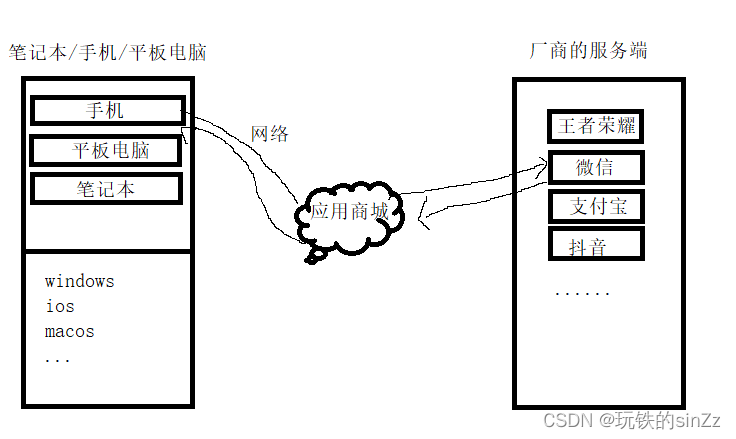
In daily operation and use, most of our software installation methods on the PC side are to download the installation package from the official website. On the mobile side, we usually go to the application store provided by the operating system to install the software we need. Under Linux, we usually have the following three ways to install software:
1. Source code installation (more troublesome), source code installation has higher requirements for us, because compilation errors are prone to occur, and it is more troublesome to handle.
2. Rpm installation (troublesome), rpm installation usually needs to resolve the dependencies between software, for example, you downloaded software a, but you also need to download software b and software c if you want to install it. However, you also need to deal with the dependencies between software b and software c.
3. Yum installation (recommended), yum installation does not care about installation sources, installation dependencies, version adaptation, etc. The software that can be installed by yum can be used directly.
2. The software ecology of Linux
2.1. The concept of software ecology
In the daily life of ordinary users, the ecology of software depends on the application store that comes with the operating system when the manufacturer leaves the factory or downloads from the official website by itself. Manufacturers will also generate revenue by providing software installation services. The software provided by the manufacturer can usually be installed and used directly, with better security, stability and convenience. So first question. Why does the app store know where to download it? In fact, the essence of the application store is to deploy the installation package of the software publisher or manufacturer on the remote server in advance. When we need to download an application, the software store will apply to the server of the manufacturer's application store through the network to obtain the corresponding software installation package.
2.2.Linux software ecology
Yum is actually similar to the application store we usually use for ordinary users, and yum is an application store under centos. apt-get is the application store under Ubuntu. Due to the different customer groups, the software ecology under the Linux system is aimed at professional IT industry workers. Therefore, you will not see players who can play games such as Yuanshen and King of Glory under the Linux system. Therefore, a large part of the software ecology is related to the applicable population. The software downloaded by yum is provided from the official yum source.
3. Linux Ecology
First of all, we all know that most Linux distributors will provide open source. Let me briefly talk about the open source ecology. We mentioned earlier that the Linux user group is a professional IT worker.
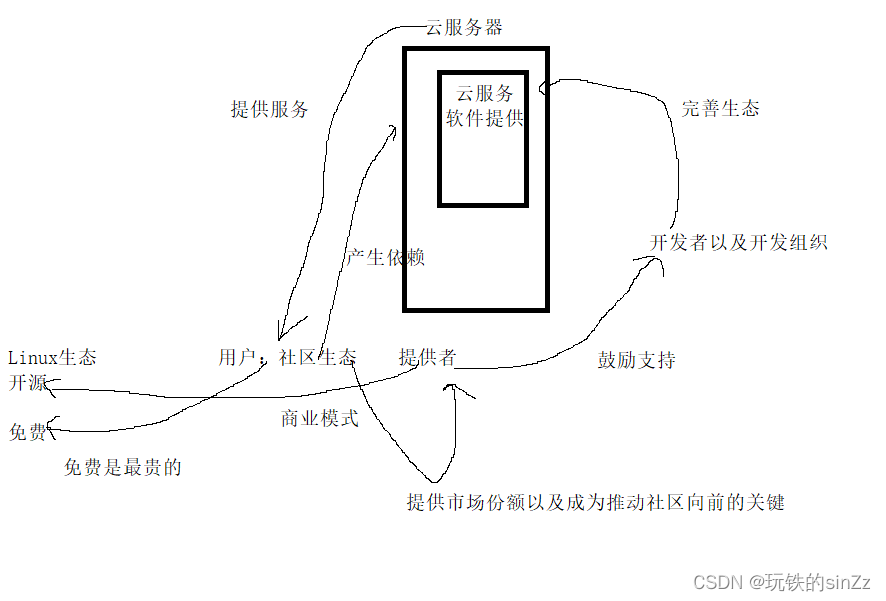
Assume that one day, I will work for a first-line Internet company. One day my leader came to me and said, Xiao Xie, our department is currently selecting an operating system. Do you have any suggestions or opinions? Simply put. At this time, if I say that I think centos is good, because I used this Linux system when I was in college. It is inevitable to be reprimanded by the leader. However, if I say this from an objective point of view. centos 7 is a free Linux system with an excellent community ecology, and many Internet vendors will choose to use it. Because the community ecology is excellent, many hidden problems will be discovered and solved, and it is relatively stable in use. There will also be many developers with geek spirit to develop software on the system, so the software ecology is also relatively good. This is from the user's point of view.
Look at it from the provider's point of view. The corresponding ecology will be continuously maintained and improved. Developers and development organizations will be vigorously encouraged to develop software applications and improve the software ecosystem. Maintenance personnel will also be organized to solve problems and defects at the system level to make the user experience better. More cloud servers will be rented to provide services.
But there is a saying that is true, "the free is the most expensive". As the open source system is getting better and better, our corresponding providers cannot bear such great pressure to provide stable services. At this time, it is said that because there are too many service users on the system cloud server, we cannot provide stable services due to cost constraints. Enterprises using this ecology have already relied on this system. At this time, there will be donation servers or direct donations to support the healthy development of the system ecology. And then gradually occupy the market share.
4.yum install software
4.1. Verify the network
You can use the ping command to verify whether the current client is connected to the Internet
ping www.baidu.com
4.2. Use yum to install lrzsz
4.2.1. What is lrzsz
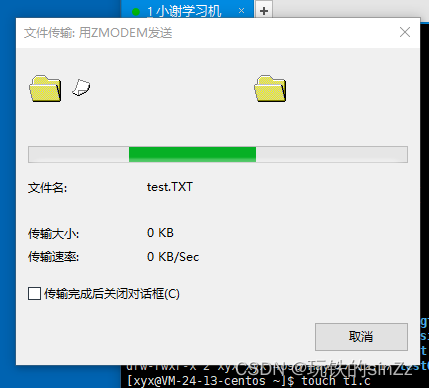
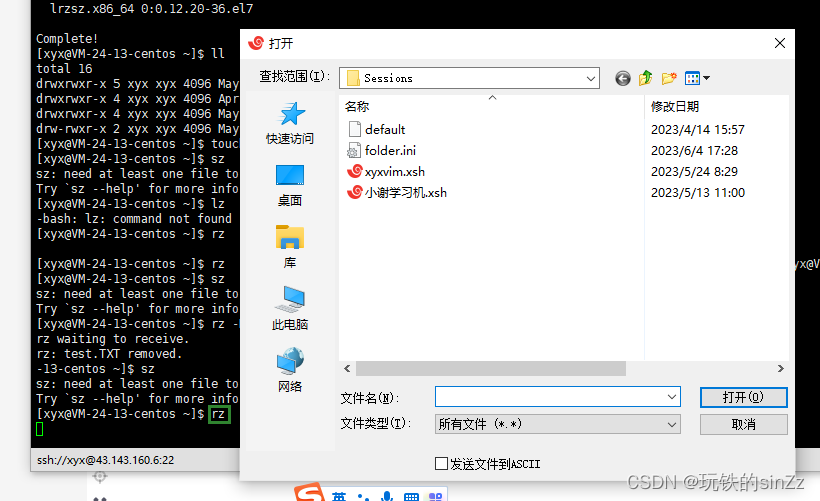
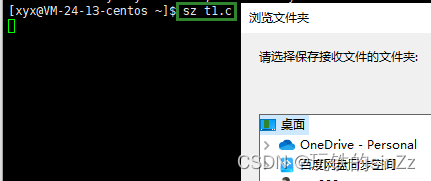
lrzsz is a set of tools for file transfer in Unix-like operating systems, including two commands lrz and lsz, which are used to upload and download files between the local host and the remote host. Using the lrzsz tool, you can transfer files between the local host and the remote host through the terminal window without relying on a graphical interface.
4.2.2. Install lrzsz
To view the software list of the yum client, you can enter the following command, which will output all the software of the yum client under the current system.
yum list
You can enter the following command to view lrzsz tool information
yum list | grep lrzsz

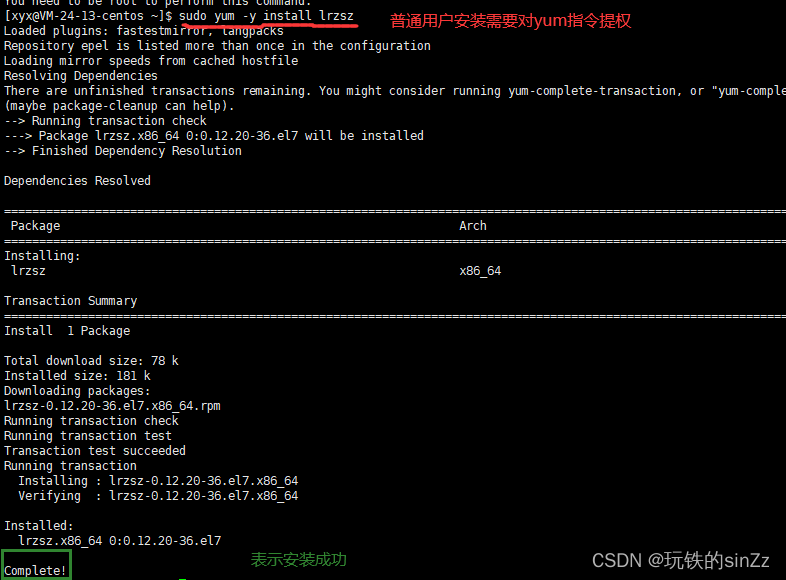
You can enter the following command to install lrzsz
sudo yum -y install lrzsz
The -y option means to agree without asking me.
You can also enter the command below to uninstall lrzsz
sudo yum -y remove lrzsz
Let's briefly look at the use of the rz and sz instructions
4.3. How does yum find the software installed from the official yum source?
The official yum source can be accessed through the configuration file on the cloud server. On most Linux-based cloud servers, yum's configuration files are located /etc/yum.repos.d/in a directory. Under this directory, you can find configuration files associated with each yum source. There will be official yum resources corresponding to the mirror website.
/etc/yum.repos.d/CentOS-Base.repo

Through the yum configuration file, the cloud server can directly access the mirror URL of the official yum source and obtain the required installation packages and updates.
4.4. Briefly introduce the extended yum source
Although the official yum source provides us with a lot of software. However, there are some fun and interesting software that are not officially provided. This requires us to use the extended yum element to download. This is like on a mobile phone, the app store does not provide all the software. Some are due to risk issues, some are due to special issues, etc. Therefore, we need to test and load some software by ourselves, usually these behaviors are more dangerous. Below I will briefly introduce the extended yum source.
This command can view the configuration file information of the current local extended yum source.
ll /etc/yum.repos.d/epel.repo
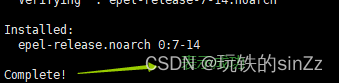
Extending the yum source requires us to install it ourselves. The command is as follows.
sudo yum install -y epel-release
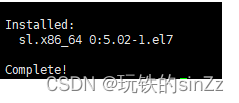
Next, you can install some software that expands the yum source. Here is an interesting tool, that is, the sl train. This is also the first installed software for many people to learn yum installation extension source. Similar to the programmer's first program, it prints hello world on the screen.
sudo yum install -y sl
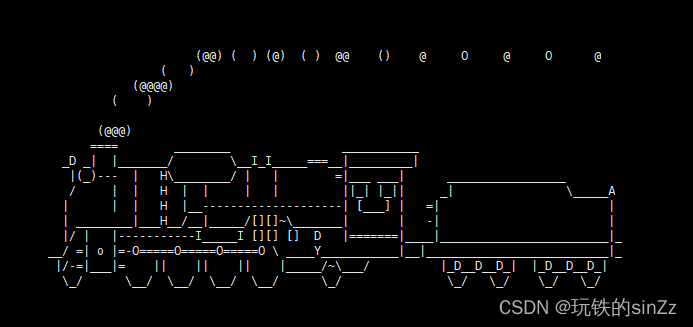
Next, I will let the little train run!
sl
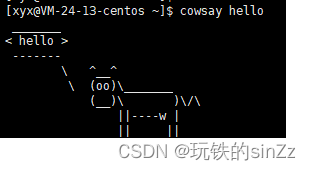
Introducing an interesting extension of the software provided by the yum source, cowsay
sudo yum install -y cowsay
4.5. Some questions about yum
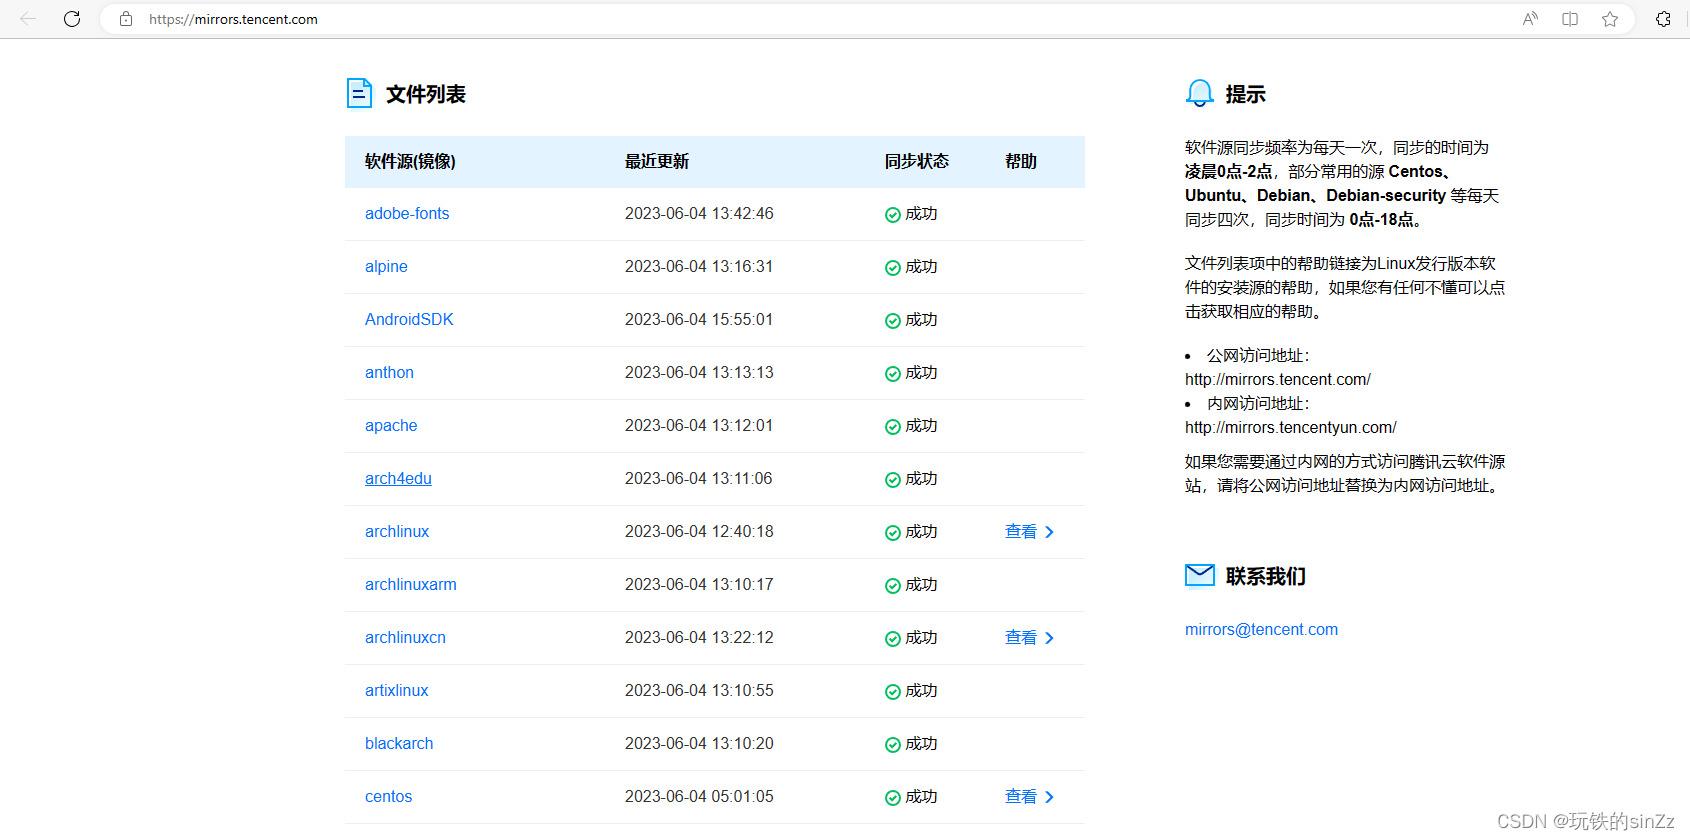
First of all, the default yum source of the general Linux operating system is foreign, so the access may be slow or even impossible. So if you have this kind of problem, you can try to search it in the search engine. You can find configuration documents for domestic yum sources. Copy and replace it.
When installing the software, it is necessary to write content to the system directory, which generally requires sudo or switching to the root account to complete.
The yum installation software can only install one after the other is installed. In the process of installing a software with yum, if you try to install another software with yum, yum will report an error.
If yum reports an error, go to the search engine to search for related problems and usually there will be corresponding solutions.
5. Introduction to vim
5.1. What is vim?
Vim is a powerful text editor widely used for writing and editing various types of text files. It is an improved version of the Vi editor with many extra features and extensions. Vim supports multiple operating modes, including command mode, insert mode, and bottom line mode, enabling users to edit text efficiently. Vim is very popular with programmers and system administrators because it is highly customizable with shortcut keys and custom configurations.
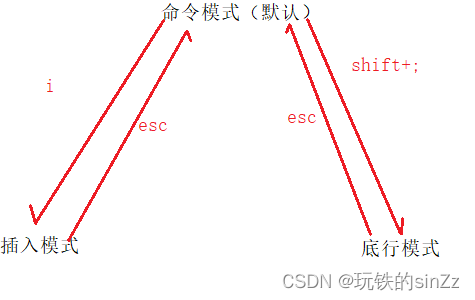
5.2. Briefly introduce the three modes of vim
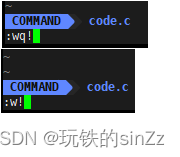
First, we open vim, which enters the command mode by default. Control the movement of the screen cursor, delete characters, words or lines, move and copy a section and enter Insert mode, or go to last line mode. In the default mode, all our input will be treated as commands, and generally we will not be allowed to enter text. Press i to enter the insert mode. In the insert mode, you can perform text editing operations, that is, write code or something. If we need to save our code at this time, we must first return to the command mode, enter the bottom line mode through shift+; (ie:), enter wq, and then save and exit vim.

5.3. Simply write a c code with vim
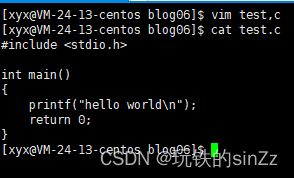
First, enter the command to open the vim editor
vim XXX.c
In the second step, enter i to enter insert mode. Then start writing code. After writing, press esc to return to command mode. Press shift+; to enter the bottom line mode, enter wq to write and exit. Complete the first c code.
6. Briefly introduce the common commands of vim's command mode
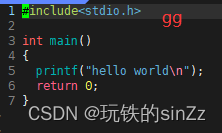
gg: position the cursor to the beginning of the text line
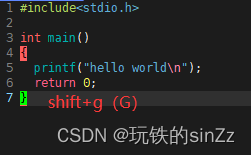
shift+g: position the cursor to the last line of the text
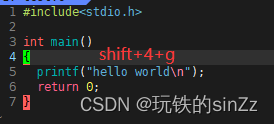
shift+n+g: position the cursor to the nth line of the text
shift+$: position the cursor to the end of the current line

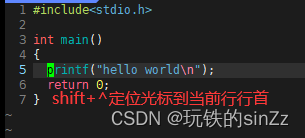
shift+^: position the cursor to the beginning of the current line
b, w: the cursor moves left and right across words within the line
h, j, k, l: corresponding to the left, down, up, and right arrow keys
Why does hjkl correspond to the left, lower, upper, and right arrow keys? This is because the early keyboards actually did not have up, down, left, and right arrow keys. The operating system at that time was also a command-line operating system. Therefore, hjkl is the early arrow keys.
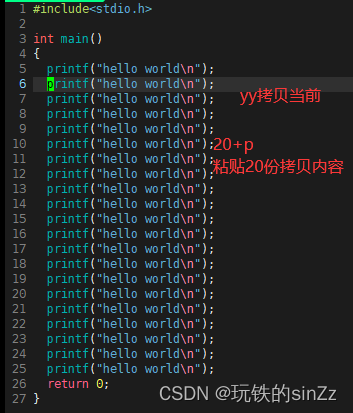
(n)yy: Copy the content of n lines, the default is the current line
(n)p: Paste n copies of the content, the default is one copy
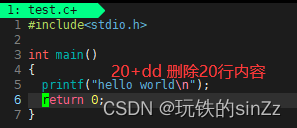
(n)dd: Cut and delete the content of n lines, the default is the current line
u: undo, similar to CTRL+z under windows
CTRL+r: undo the previous undo
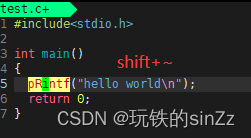
shift+~: Convert the uppercase and lowercase of the letter marked by the cursor
(n)r: Replace the content of the cursor position by n positions
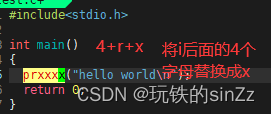
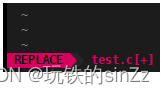
shift+r: Enter the replacement mode, and the text content can be replaced. Press esc to exit and return to command mode.
(n)x: Delete n characters after the cursor.

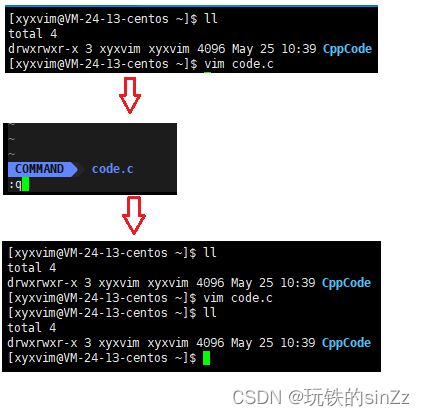
You can see that vim enters a .c file and can create it directly. However, we exit without saving. At this point, you can see that the code.c file has not been written to the disk.
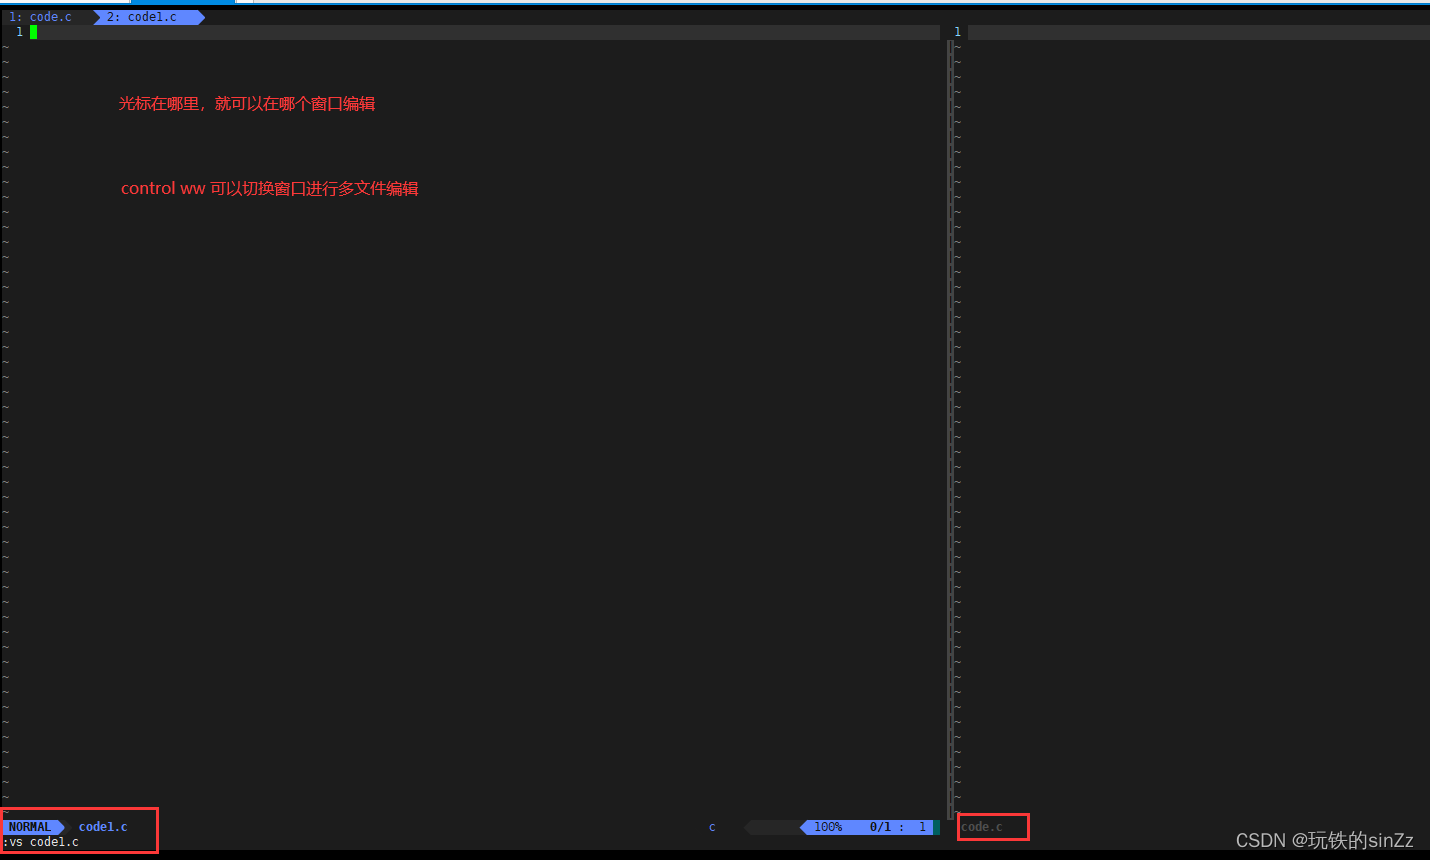
With this concept, let me briefly introduce vim's editing window for opening multiple files. First, we enter the bottom line mode, just enter vs + file name.
7. Briefly introduce the common commands of vim's bottom line mode
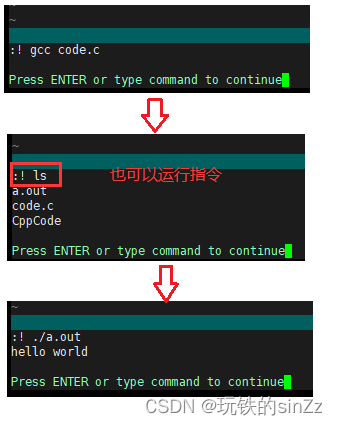
!: Indicates a mandatory operation, generally used with w or wq, indicating forced writing and forced writing and exit.
You can also compile and execute the code on the bottom line command line.
! gcc xxx.c
! ./a.out
!ls
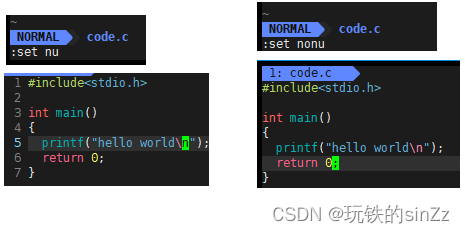
Set the editor to display line numbers
set nu
Cancel editor display line number
set nonu
8. Simple configuration vim
We have introduced many ways to use vim before, but it is very uncomfortable to use it at first, because vim has not been configured correspondingly, such as some syntax reminders, code indentation optimization, etc. So, let me briefly introduce the configuration of vim for fools. Add the last point, it is not recommended for novices to configure with root, it is better to configure with ordinary users.
Steps
Click the link: vim configuration file (only centos7 is supported, do not use root)
Enter the following command to install the vim configuration file configured by Dashen.
curl -sLf https://gitee.com/HGtz2222/VimForCpp/raw/master/install.sh -o ./install.sh && bash ./install.sh