development environment
The following is my development environment
- JDK 1.8
- Maven 3.6.3
- Tomcat 9.0
- IDEA 2019 (Fearless in 2019 even though it's 2023 hahaha)
The original Java Web project
The following content may vary depending on the version of IDEA, and some options are different, but the same.
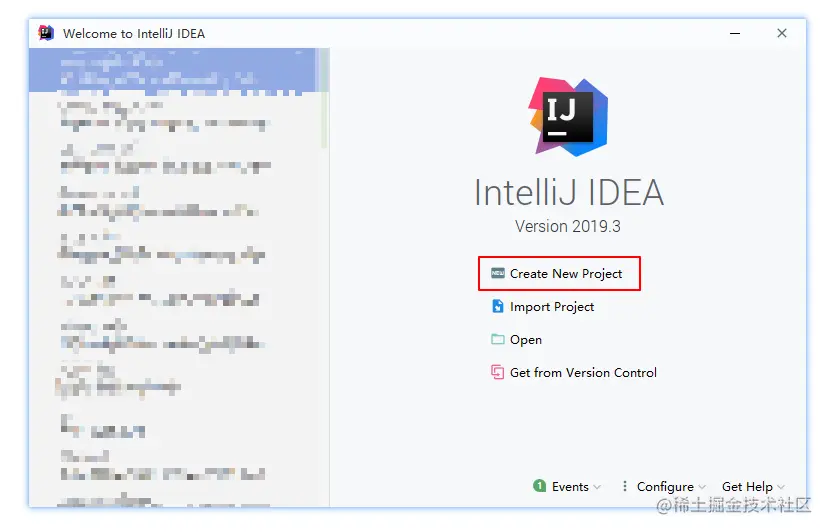
1. Open IDEA
clickCreate New Project

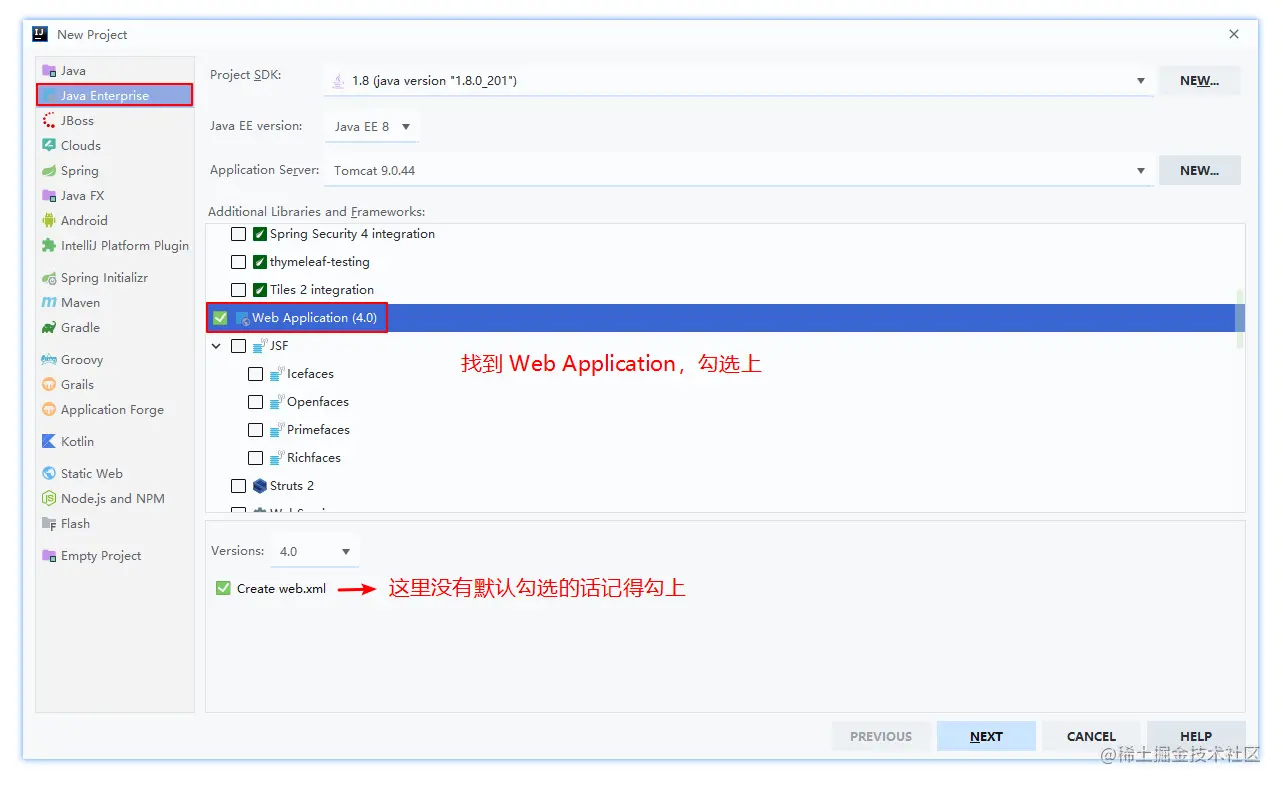
2. Click Java Enterprise
Click on the left Java Enterprise, the default options are shown in the figure below. Find Web Application, check it, and check it at the same time Create web.xml. Click Next to go to the next step.
3. Enter project information
Enter the project name and the location where the project is stored, and the configuration below is fine by default. Then click Finish to complete the creation.

4. Improve project structure
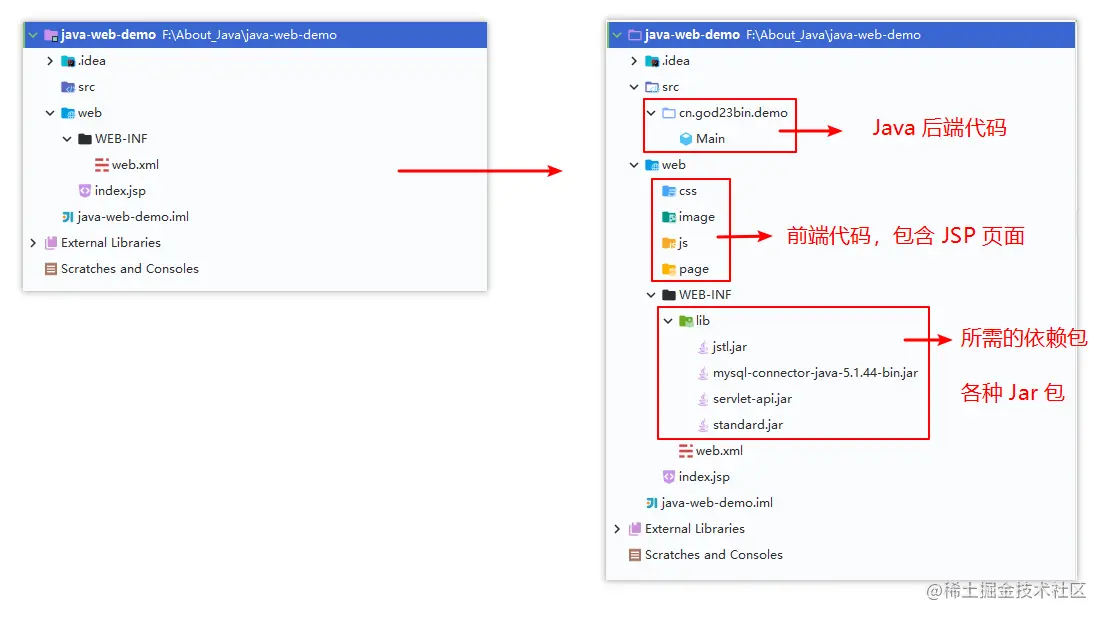
At this point, the Web project has been successfully created. The directory structure is as shown in the figure below. In Eclipse, webthe name of the directory is WebContent. srcThe directory stores the Java back-end code, and webthe directory stores the front-end code.
We can create css,js,image,pagethese to store corresponding files respectively, among which page is used to store front-end page files, including JSP pages.
In web/WEB-INFthe directory , our web.xmlconfiguration files are stored. In this directory, we create a libdirectory to store the dependent packages required by the project, such as servlet, jstletc.
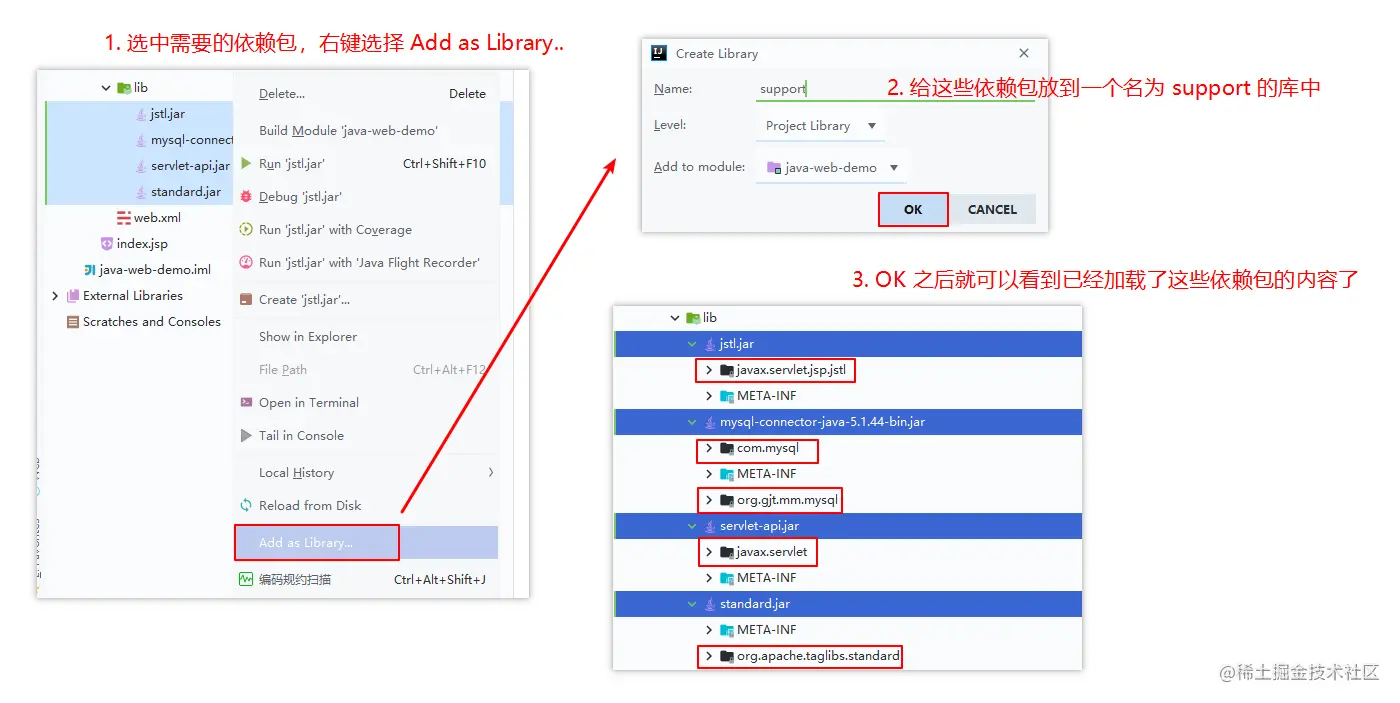
libFor .jarthe files in the directory, that is, the dependent packages required by the project, we can right-click Add as Library..these dependent packages as a Java class library for us to use.
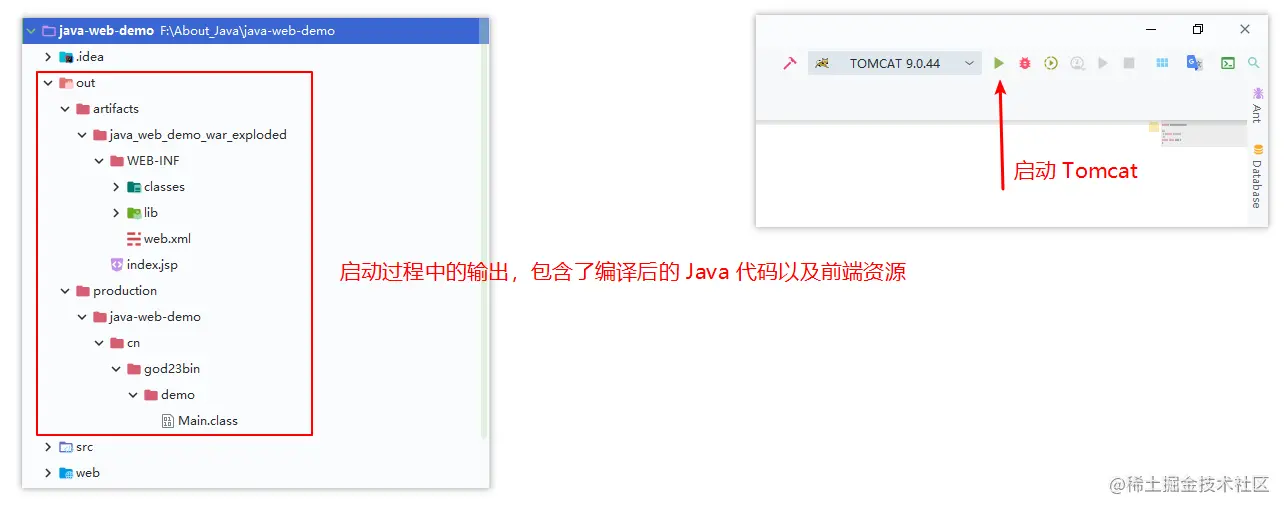
5. Configure Tomcat and start it
Configure Tomcat. Since we have configured the Application Server option and selected Tomcat when creating the project, there is no need to configure it here. Click the triangle symbol in the upper right corner of IDEA to start Tomcat
If the startup is successful, it will automatically jump to the default index.jsppage . The corresponding URL is:http://localhost:8080/java_web_demo_war_exploded/
The URL here can be modified. If you want to modify it, you can click Tomcat in the upper right corner to configure it, as shown in the following figure:
For example, if I change the content Application contextof to /demo, click OK, then restart Tomcat, and now to access the web application, just enter the URL: http://localhost:8080/demo/, and you can access it.
Use Maven to create and manage Java Web projects
1. Open IDEA
clickCreate New Project
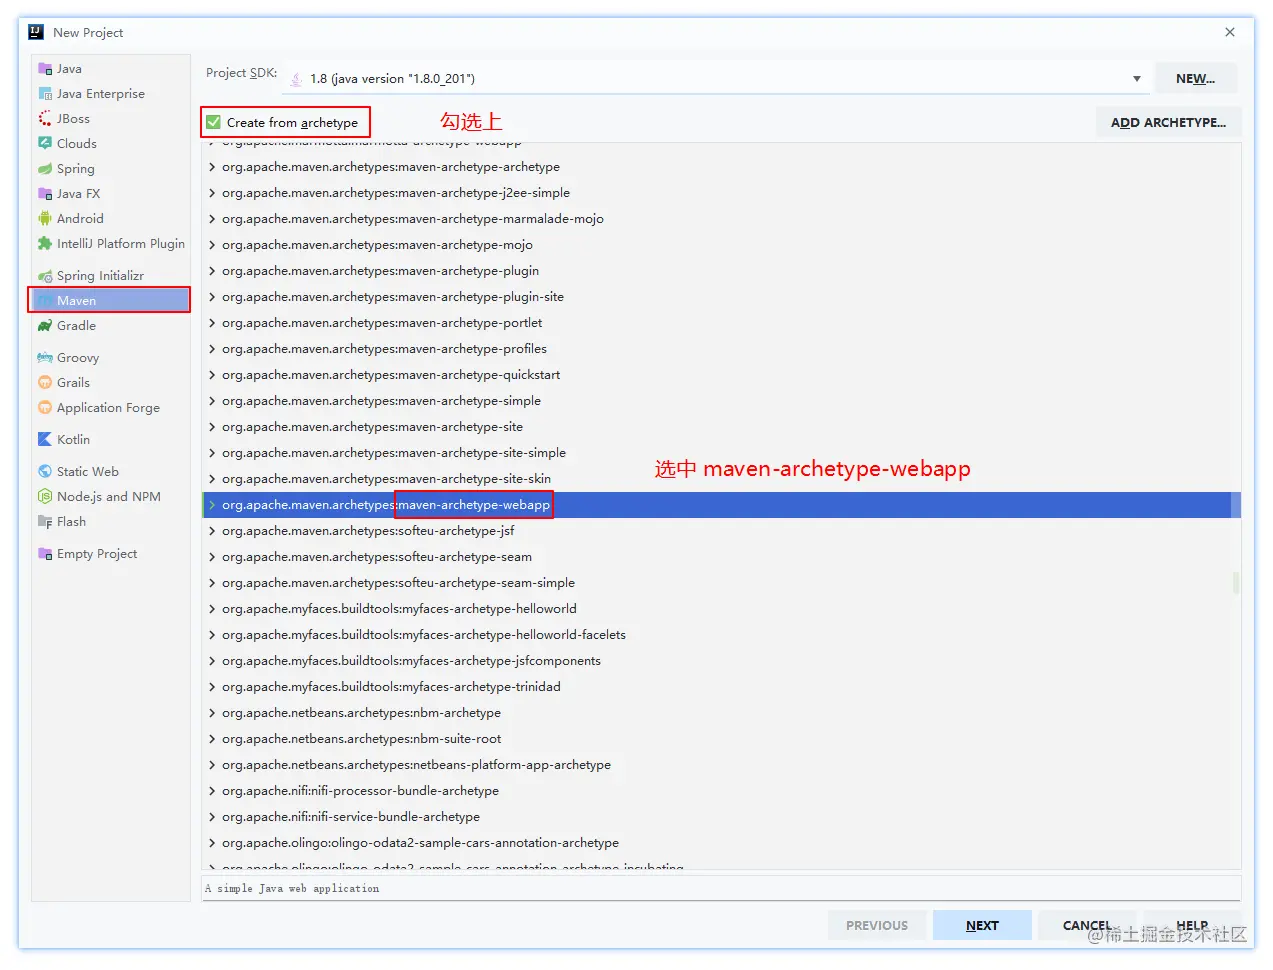
2. Click Maven
Click Maven on the left, check it Create from archetype, find maven-archetype-webappand select it, and click Next to enter the next step.
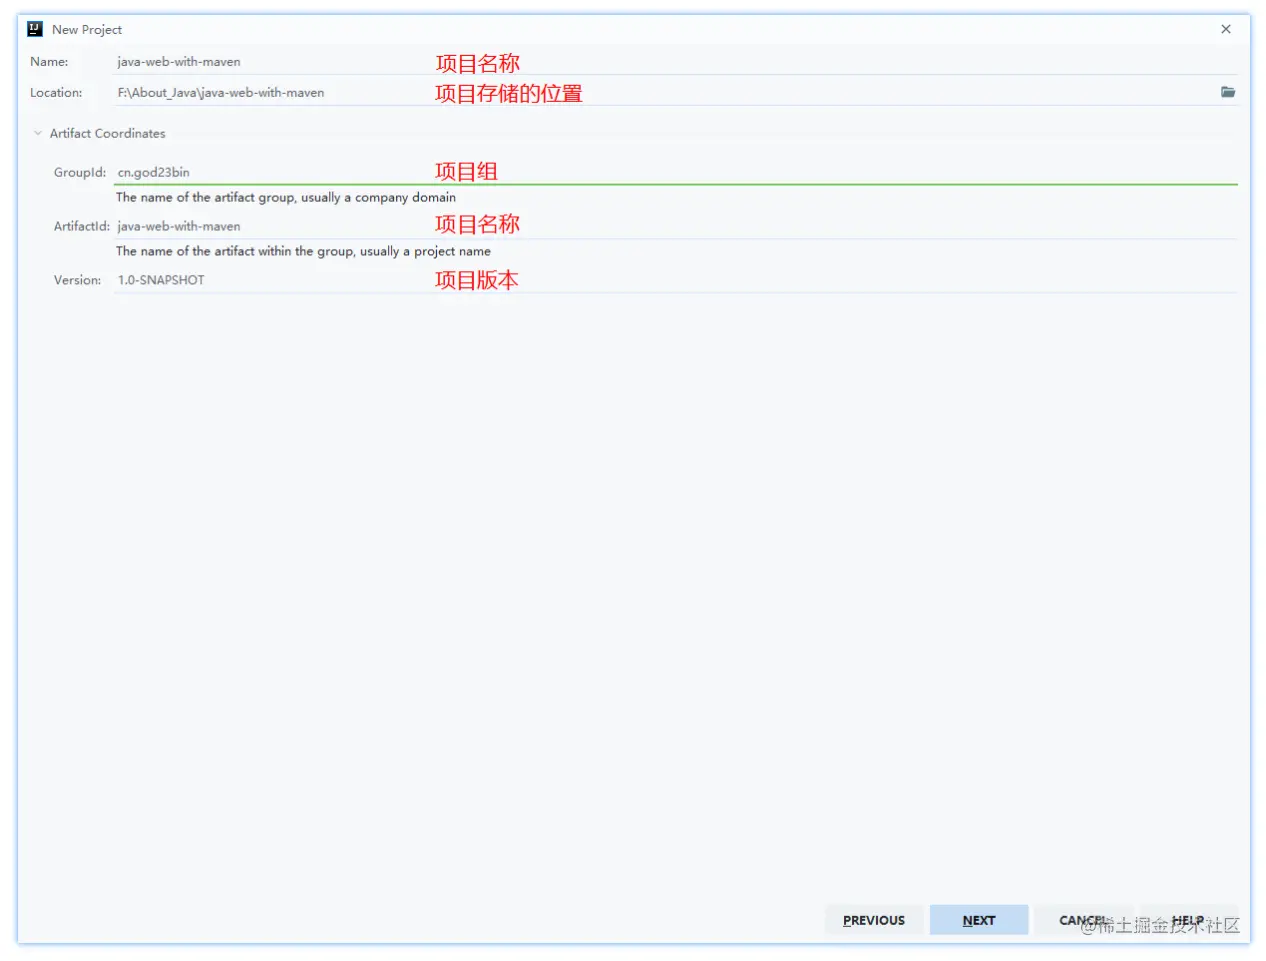
3. Enter project information
Enter the relevant information of the project and click Next.
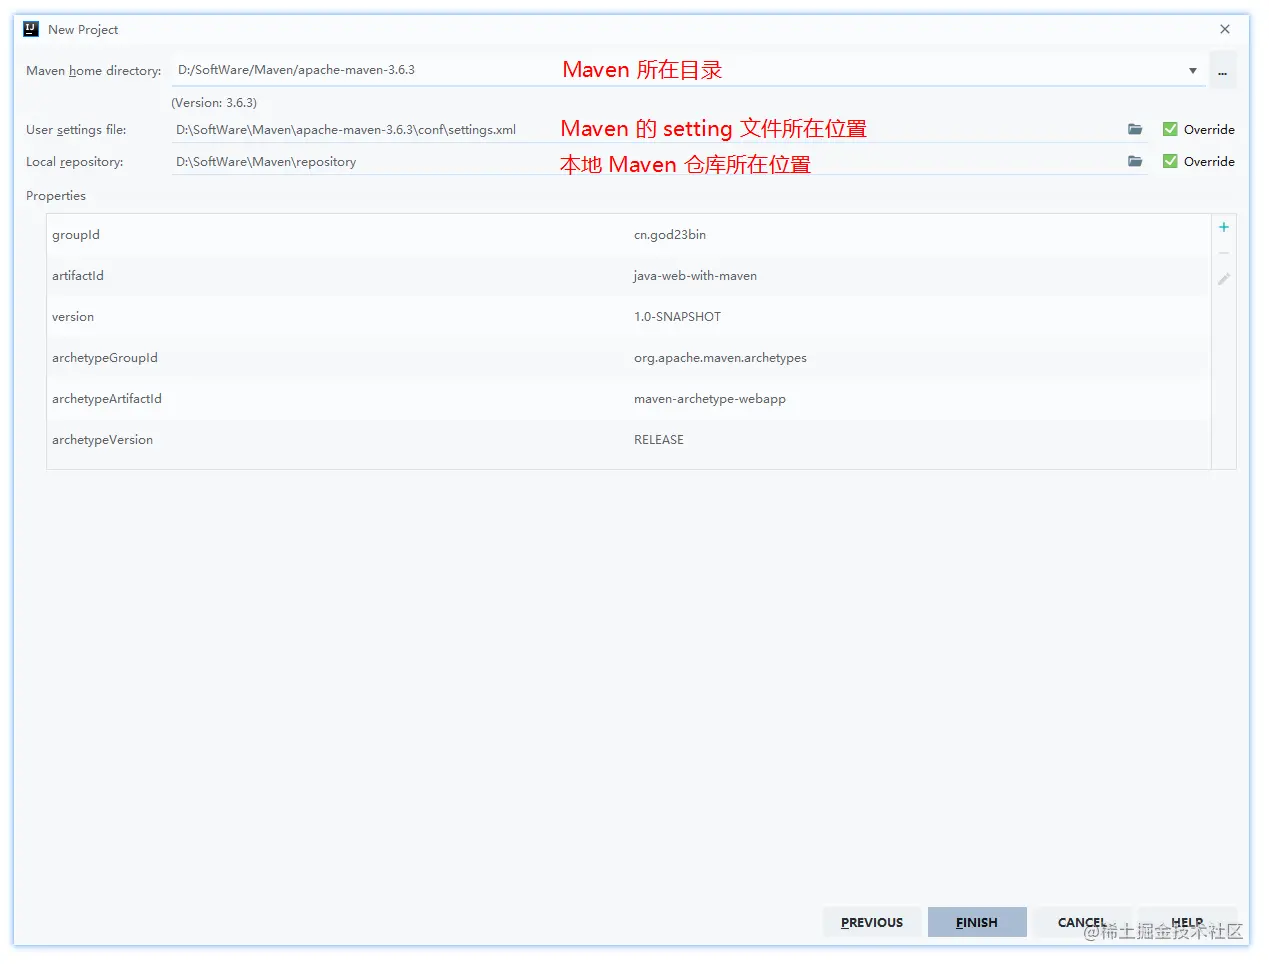
4. Get Maven information
Get Maven-related information, setting.xmlfiles and local Maven warehouse can not be configured, check the Override option on the right to configure. Click Finish when finished.
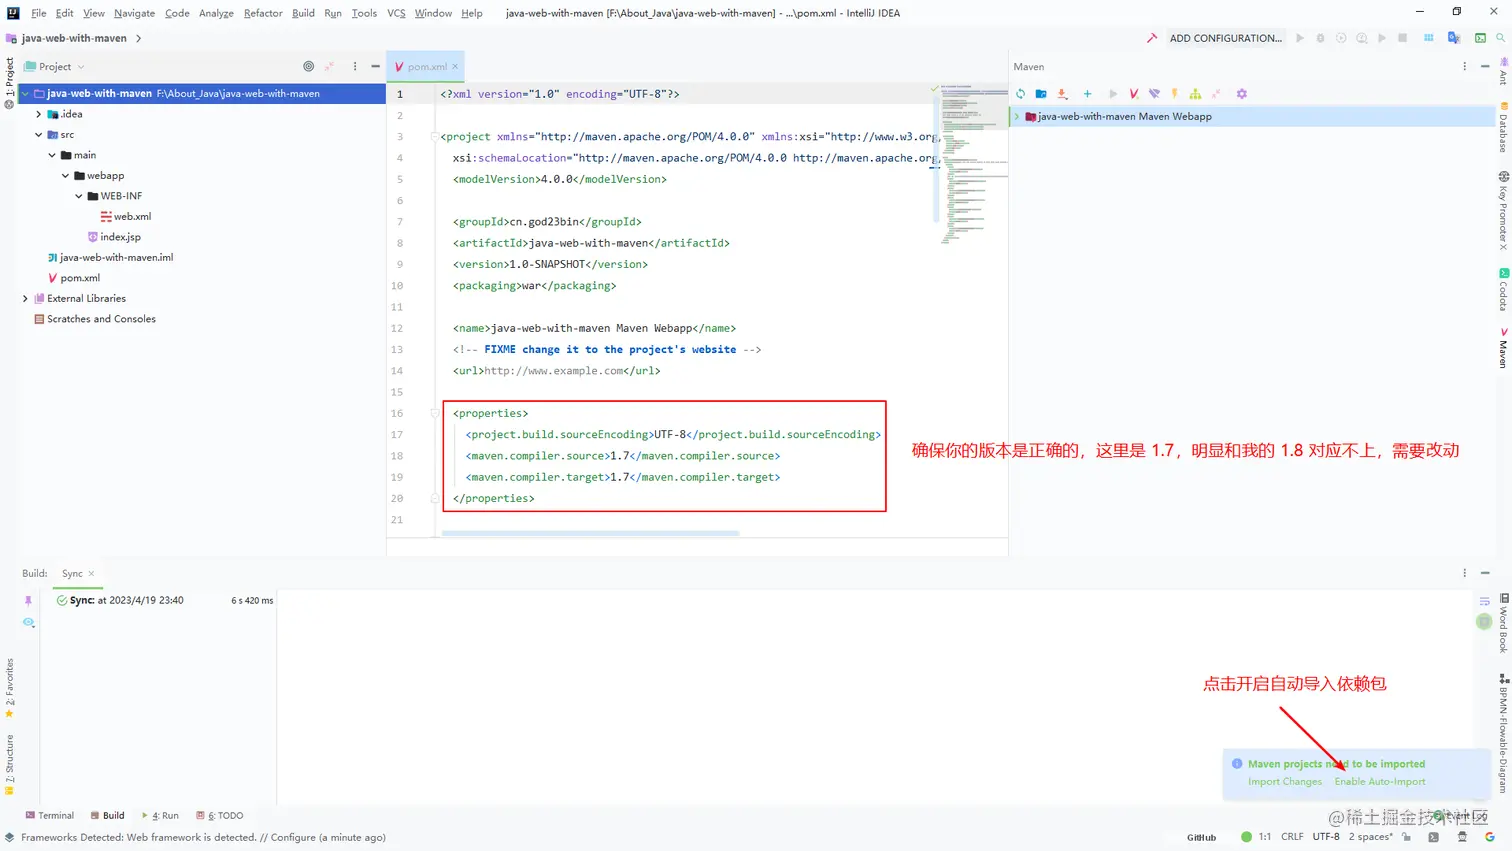
5. Enable automatic import of dependent packages to ensure that the pom.xml information is correct
Click Enable Auto-Importto let IDEA automatically refresh and import the dependency packages required by the project introduced in pom.xmlthe file . Make sure the configuration in pom.xmlthe file is correct.
6. Improve project structure
To improve the structure of the entire project, create four directories, , , and respectively src/main/java, src/main/resourcesas shownsrc/main/webapp/WEB-INF/classes in the figure below.src/main/webapp/WEB-INF/lib

javaDirectories are used to store Java code.
resourcesThe directory is used to store various resource files or configuration files.
classesThe directory is used to store the compiled Java bytecode files, ie .classfiles .
libThe directory is used to store externally imported jarpackages . When the Maven warehouse cannot import related dependencies, the corresponding jarpackages can be placed in this lib directory.
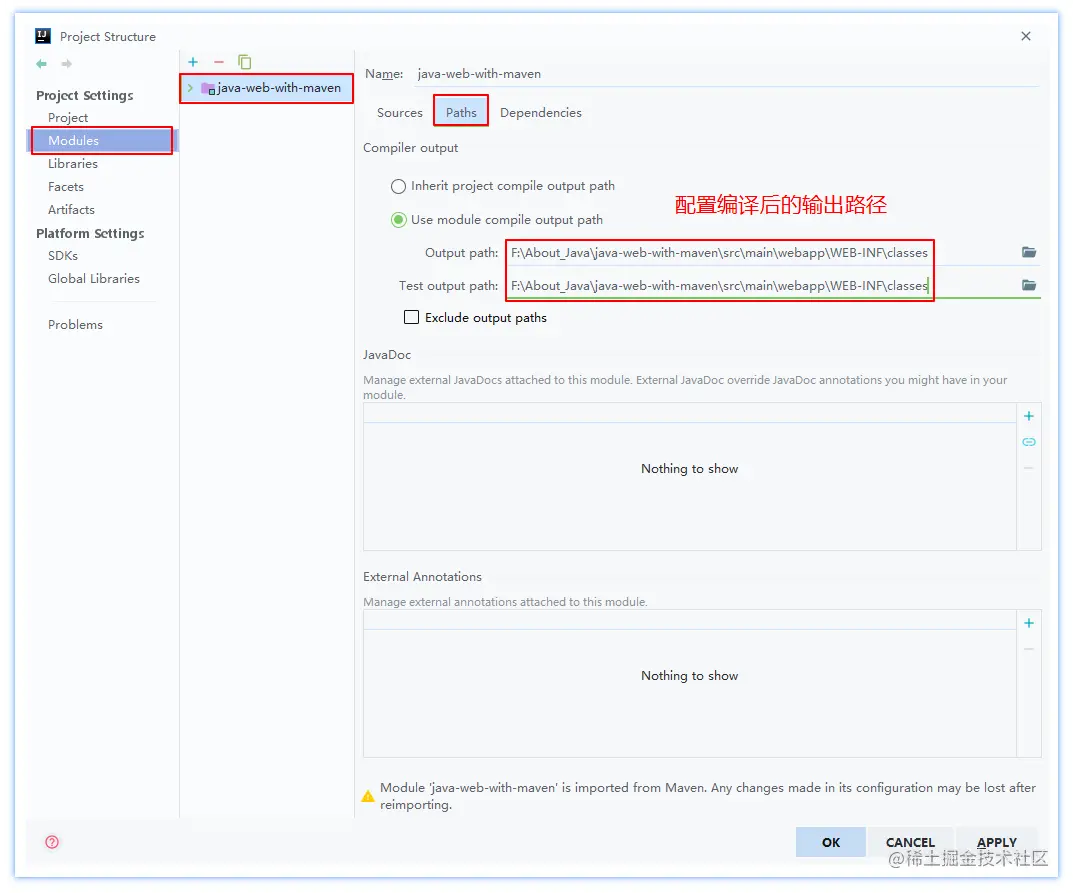
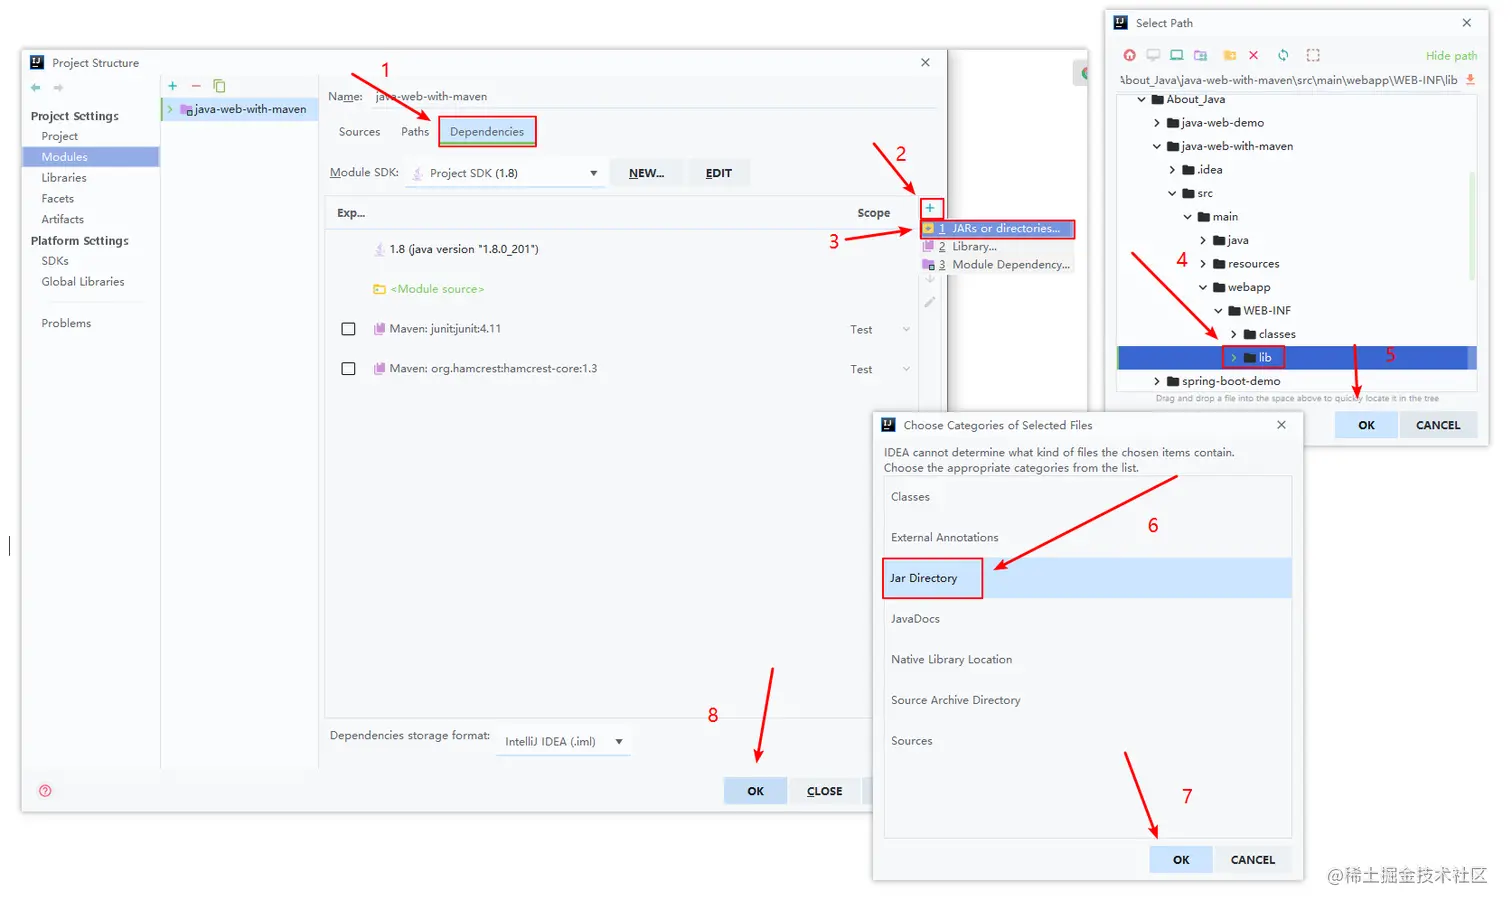
7. Configure the classes and lib directories
configuration classesand libdirectory
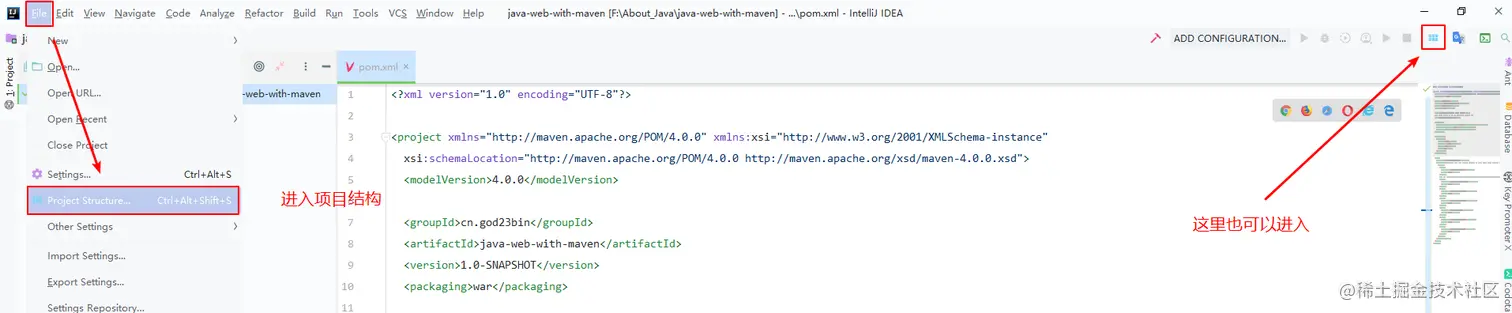
First enter the project structure, you can Ctrl + Alt + Shift + Senter it or the way shown in the figure below.
After entering, click on the left Modules, select your project, that is, the current module, and then click PathsOptions , select classesthe path of the directory you just created, and click Apply.
Then click Dependenciesto configure the dependent package (dependency), as shown in the figure below.
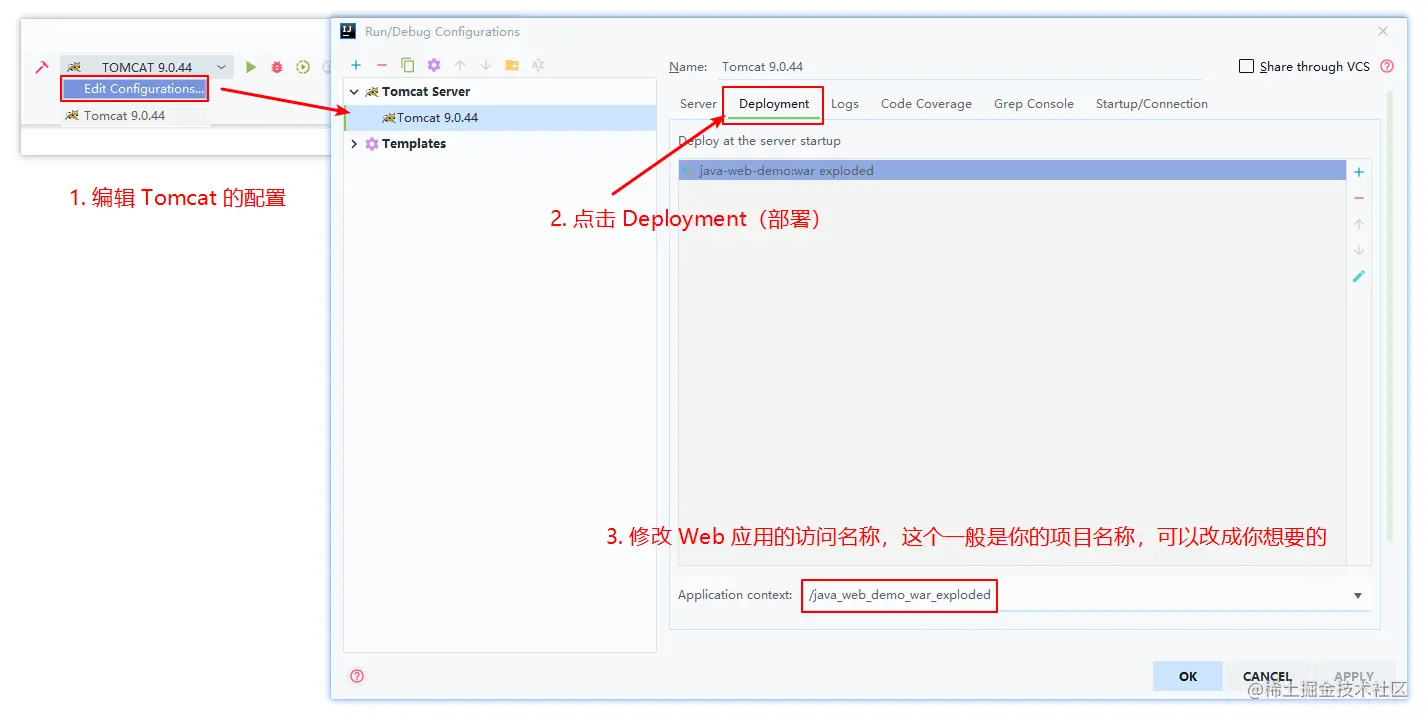
8. Configure Tomcat and start it
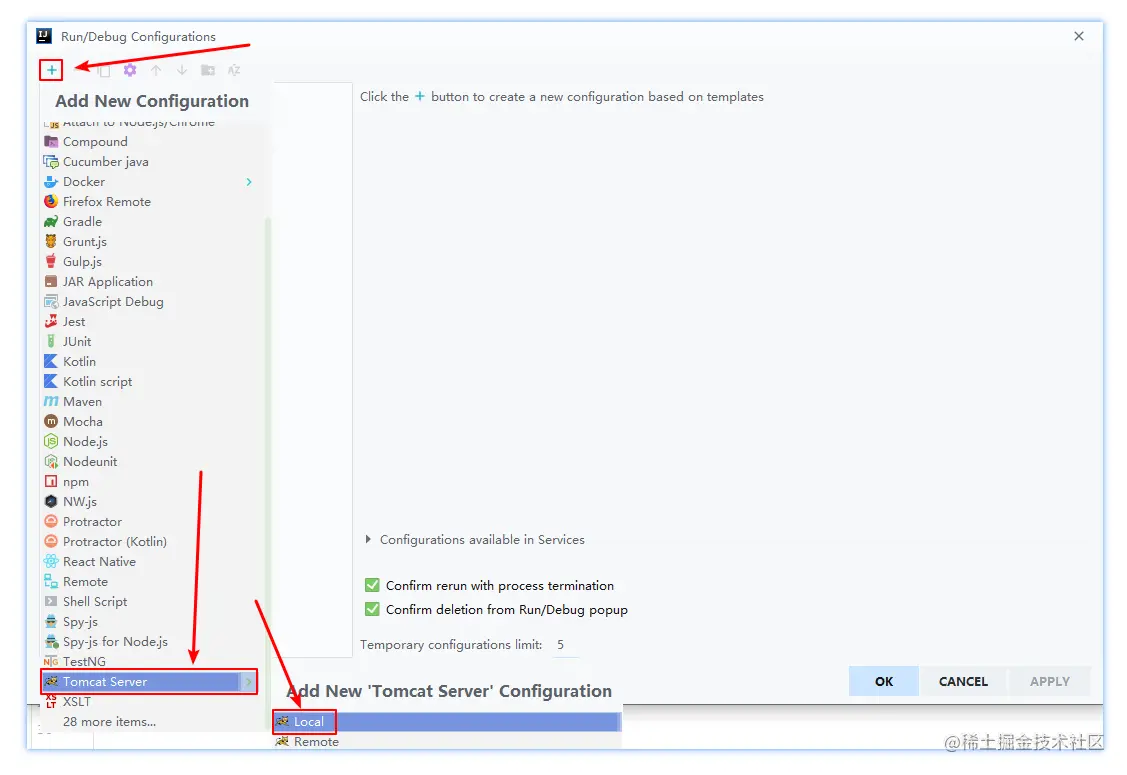
Click in the upper right corner ADD CONFIGURATIONto configure Tomcat, that is, tell IDEA the location of Tomcat, the access path of deployment and other information.

+Click to add a new Tomcat configuration item, and select the local Tomcat.
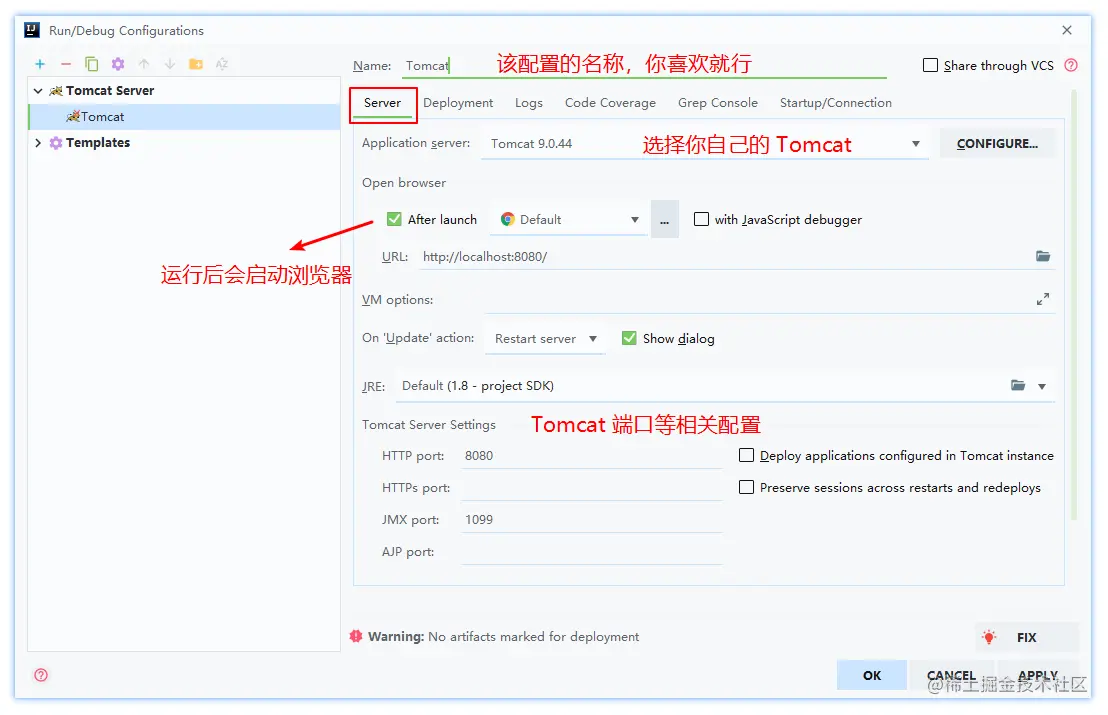
Enter your favorite configuration name in Name; choose your own Tomcat for Application Server, and the others are OK by default.
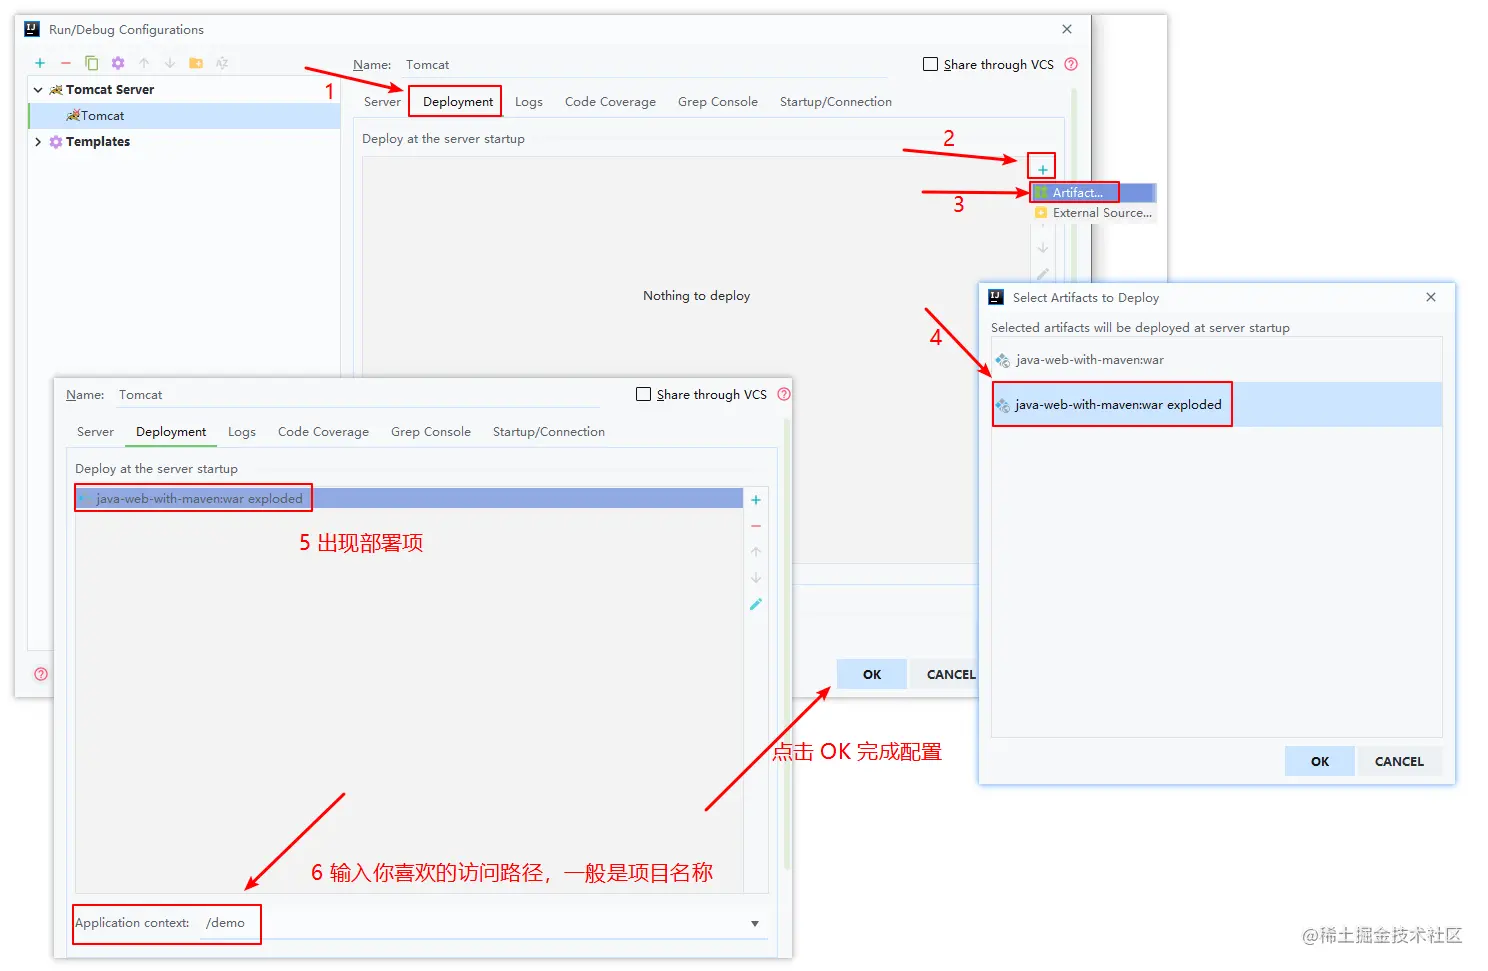
Then click Deployment, click +the number , configure the deployment item, and deploy our Web project when Tomcat starts.
Complete the configuration and start it.

last of the last
I hope everyone in front of the screen 靓仔靓女们will give a three-in-one! You gave a thumbs up lightly, that will add a bright and dazzling star to the world in my heart!
Author: god23bin
Link: https://juejin.cn/post/7231553590282682428