Use Android Studio to develop weather forecast APP
Today I will share how to use Android Studio to develop a weather forecast APP. In this article, we will use a third-party interface to obtain real-time weather data and display it on the APP interface.
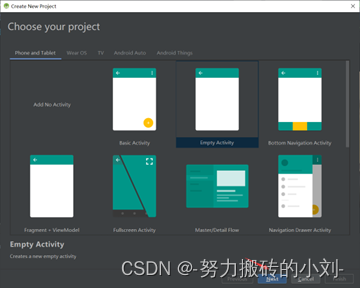
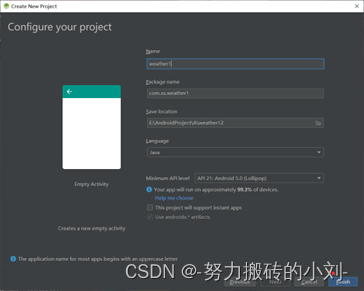
Step 1: Create a new project
First, open Android Studio and create a new project. When creating a new project, we need to set the project name, package name and minimum supported API level.
Step 2: Import third-party library
In order to get real-time weather data, we need to import a third-party library called "Retrofit". You can use the following code to add the dependency of the Retrofit library in the build.gradle file.
dependencies {
    implementation 'com.squareup.retrofit2:retrofit:2.9.0'
    implementation 'com.squareup.retrofit2:converter-gson:2.9.0'
}
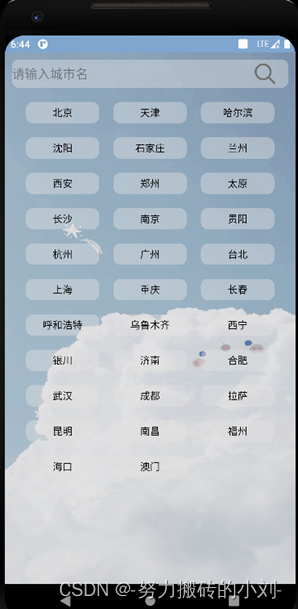
Step 3: Design the APP interface
When designing the APP interface, we can use the design editor of Android Studio. The main layout of a weather forecast app can be created by adding the following code in the xml layout file.
<RelativeLayout
    xmlns:android="http://schemas.android.com/apk/res/android"
    android:layout_width="match_parent"
    android:layout_height="match_parent" >

    <TextView
        android:id="@+id/textView"
        android:layout_width="wrap_content"
        android:layout_height="wrap_content"
        android:layout_centerInParent="true"
        android:text="请输入城市名称" />

</RelativeLayout>
Step 4: Get weather data
Next, we need to send a request to the third-party API through the Retrofit library and get real-time weather data. You can use the following code to create an API interface and define the method for obtaining weather data.
public interface WeatherAPI {

    @GET("weather")
    Call<WeatherResponse> getWeather(@Query("city") String city, @Query("key") String key);

}
Among them, WeatherResponseis a data model class used to receive the JSON data returned by the API. You can add the Gson library dependency in the build.gradle file to parse the JSON data and populate it into the model class.
dependencies {
    implementation 'com.google.code.gson:gson:2.8.7'
}
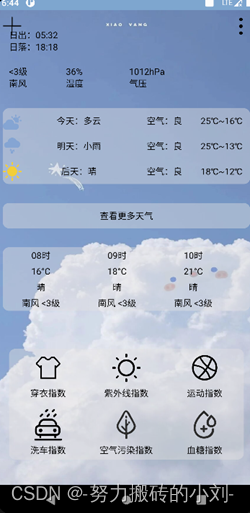
Step 5: Display weather data
Finally, we display the acquired weather data on the APP interface. The following code can be used to update the TextView control to display the weather data on the control.
public void updateUI(WeatherResponse response) {

    String cityName = response.getCityName();
    String temp = response.getTemperature();

    String weather = cityName + " : " + temp;
    textView.setText(weather);

}
Running effect display:

epilogue
So far, we have learned how to use Android Studio to develop a weather forecast APP. In actual development, we may also need to handle network request failures, add more weather information and charts, etc. But in this project, we have completed the basic development process.