
Semantic/vector search is a powerful technique that can greatly improve the accuracy and relevance of search results. Unlike traditional keyword-based search methods, semantic search uses the meaning and context of words to understand the intent behind a query and deliver more accurate results. One of the most popular tools for implementing semantic search is Elasticsearch, a highly scalable and powerful search engine that can be used to index and search large amounts of data. In this article, we'll explore the basics of semantic search and how to implement it with Elasticsearch. By the end of this article, you'll have a solid understanding of how semantic search works and practical skills to implement it in your own projects.
Before proceeding with the following explanation, I need to point out that Elastic provides eland to help us upload the model on huggingface.co . When we ingest documents, we can use the inference processor to conveniently vectorize data fields. eland upload and machine learning are paid items of Elastic. This article will use Tensorflow to obtain the vector through code and upload it to Elasticsearch. For more information on how to upload models using eland and machine learning, please read the " NLP - Natural Language Processing and Vector Search " chapter in " Elastic: A Developer's Guide " in detail.
Elasticsearch
Elasticsearch is a powerful and extensible free and open search engine based on Lucene library. It is designed to handle large amounts of unstructured data and provide fast and accurate search results. Elasticsearch uses a distributed architecture, which means it can scale out to multiple servers to handle large amounts of data and traffic.
Elasticsearch is built on top of RESTful API, which makes it easy to integrate with various programming languages and tools. It supports complex search queries, including full-text search, faceted search, and geographic search. Elasticsearch also provides a powerful aggregation framework that allows you to perform complex data analysis on search results.
Transformers
Transformers are machine learning models that have revolutionized natural language processing (NLP) tasks such as language translation, text summarization, and sentiment analysis. Transformers were first introduced by Vaswani et al. In a 2017 paper "Attention Is All You Need", it has since become the state-of-the-art model for many NLP tasks.
Unlike traditional NLP models of recurrent neural network (RNN) and convolutional neural network (CNN), Transformer uses a self-attention mechanism to capture the relationship between words in a sentence. Self-attention allows the model to focus on different parts of the input sequence to determine the most important relationships between words. This enables the Transformer to handle long-range dependencies and contextual relations between words more efficiently than conventional models.
For this article, I will encode/vectorize my data using TensorFlow's Universal Sentence Encoder. You can also choose any other form of encoder. Also worth pointing out : tensorflow is not supported on Apple's silicon. You need an x86 machine for the exercises.
In order to make it easier for everyone to learn, I put the code at the address: https://github.com/liu-xiao-guo/Semantic-Search-ElasticSearch
Preparation
Elasticsearch 及 Kibana
If you have not installed your own Elasticsearch and Kibana, please refer to the article:
- How to install Elasticsearch on Linux, MacOS and Windows
- Kibana: How to install Kibana in the Elastic stack on Linux, MacOS and Windows
For our exercise, we will be using Elastic Stack version 8.8. When Elasticsearch starts for the first time, it will present the following screen:
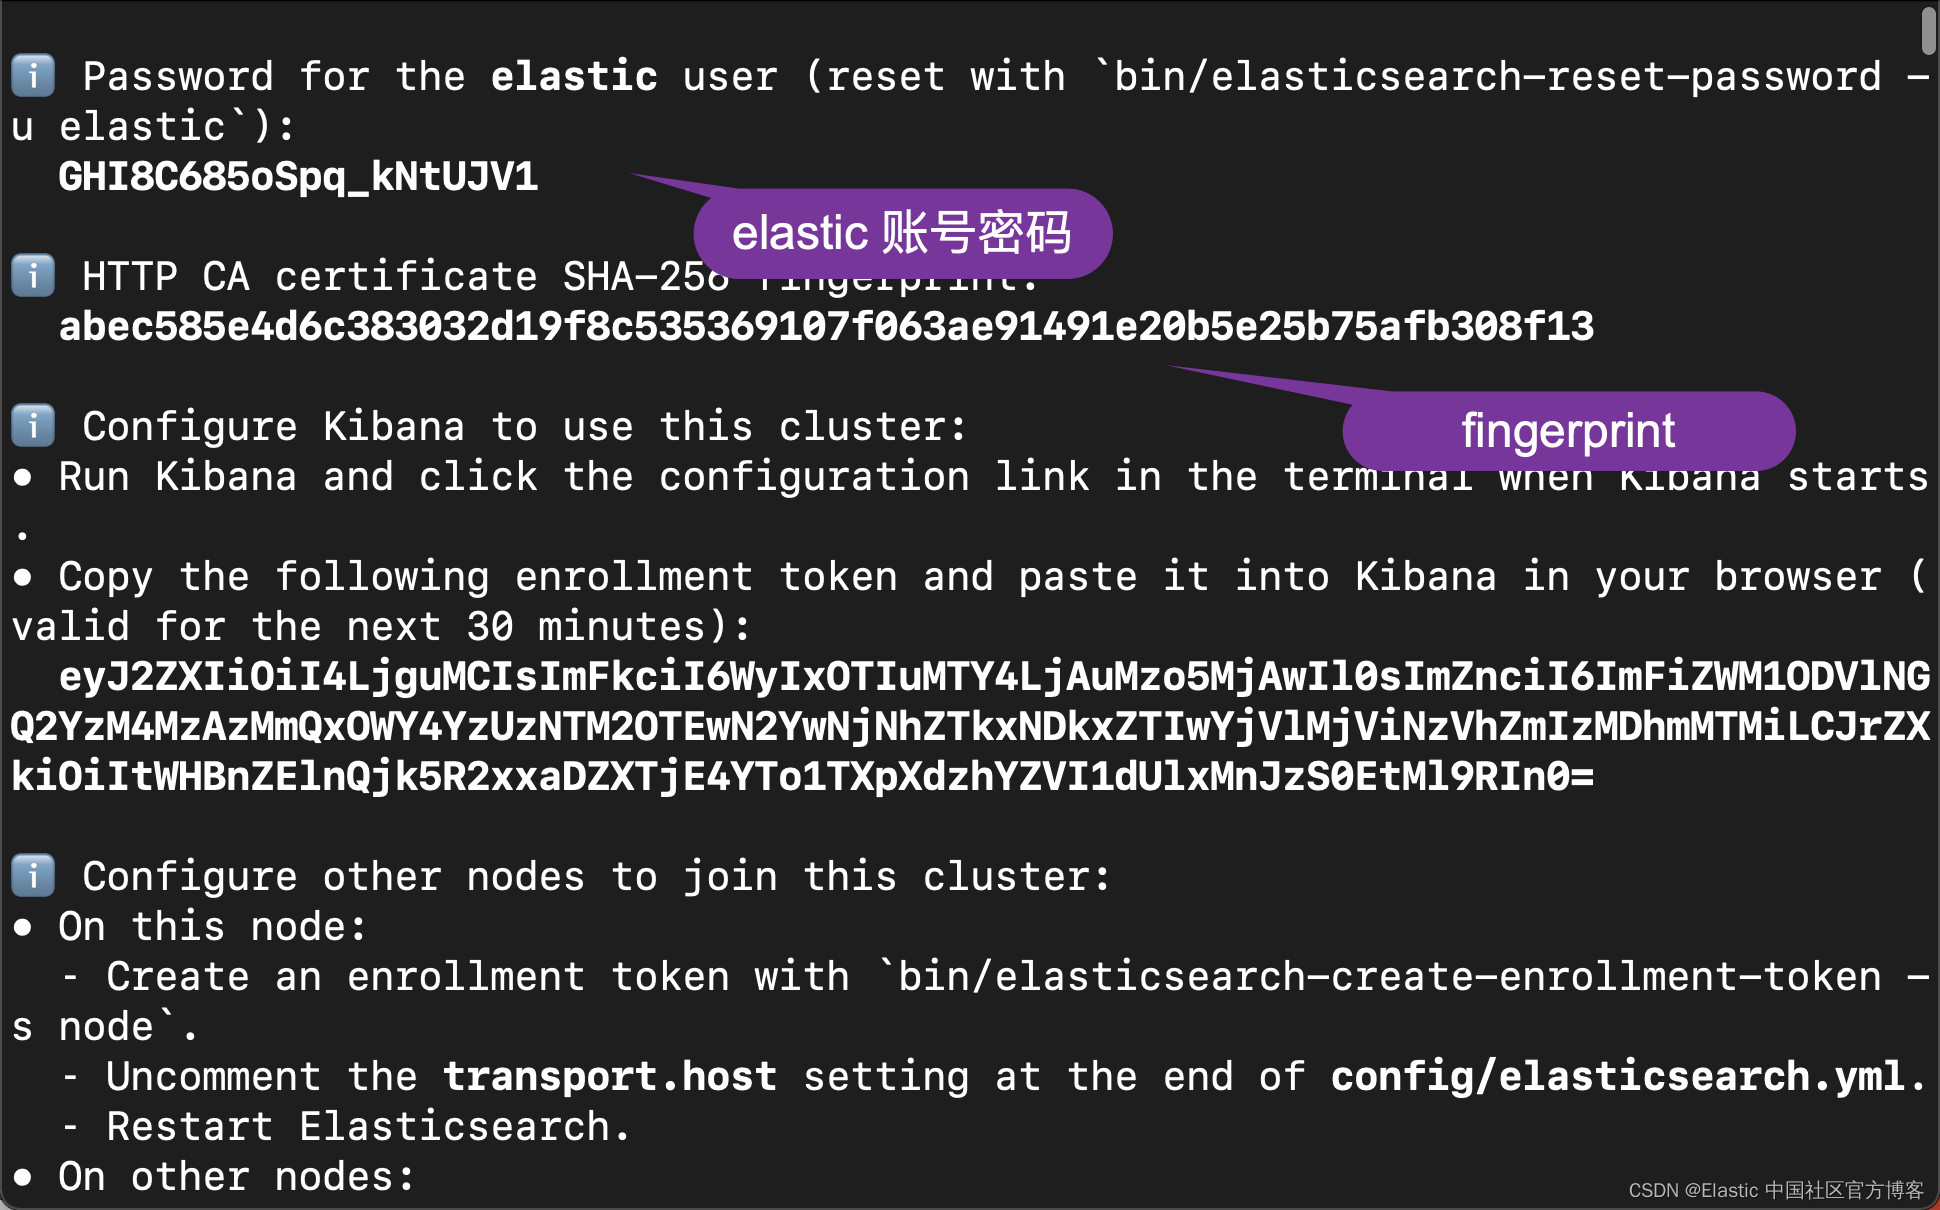
We write down the password and fingerprint of the elastic user. This information is used in the following code.
Python
You need to have Python installed on your computer:
$ python --version
Python 3.10.6
You also need to install the following Python libraries:
pip3 install elasticsearch
pip3 install tensorflow_hub
pip3 install tensorflow
pip3 install pandas
pip3 install numpy
Tensorflow model
You need to go to the address https://tfhub.dev/google/universal-sentence-encoder/4 to download the universal-sentence-encoder model. After downloading, you put it in the model subdirectory of the root directory of the code:
$ pwd
/Users/liuxg/python/Semantic-Search-ElasticSearch
$ ls
README.md                        model
Semantic_Search_ElasticSearch.py sample.csv
$ tree -L 3
.
├── README.md
├── Semantic_Search_ElasticSearch.py
├── model
│   ├── assets
│   ├── saved_model.pb
│   ├── universal-sentence-encoder_4.tar.gz
│   └── variables
│       ├── variables.data-00000-of-00001
│       └── variables.index
└── sample.csv
We enter the following command in the model subdirectory to decompress the file universal-sentence-encoder_4.tar.gz:
tar xzf universal-sentence-encoder_4.tar.gzsample file
As shown above, I prepared a file called sample.csv. Its content is very simple:
sample.csv
Text,Price,Quantity
"The latest phone model",5000,10
"The best seller phone",2000,50
That is, there are only two documents. You can modify this document according to your own situation.
the code
I'll post the code first:
Semantic_Search_ElasticSearch.py
from elasticsearch import Elasticsearch
import tensorflow_hub as hub
import tensorflow.compat.v1 as tf
import pandas as pd
import numpy as np
df = pd.read_csv('./sample.csv')
print(df['Text'][0])
model = hub.load("./model")
graph = tf.Graph()
with tf.Session(graph = graph) as session:
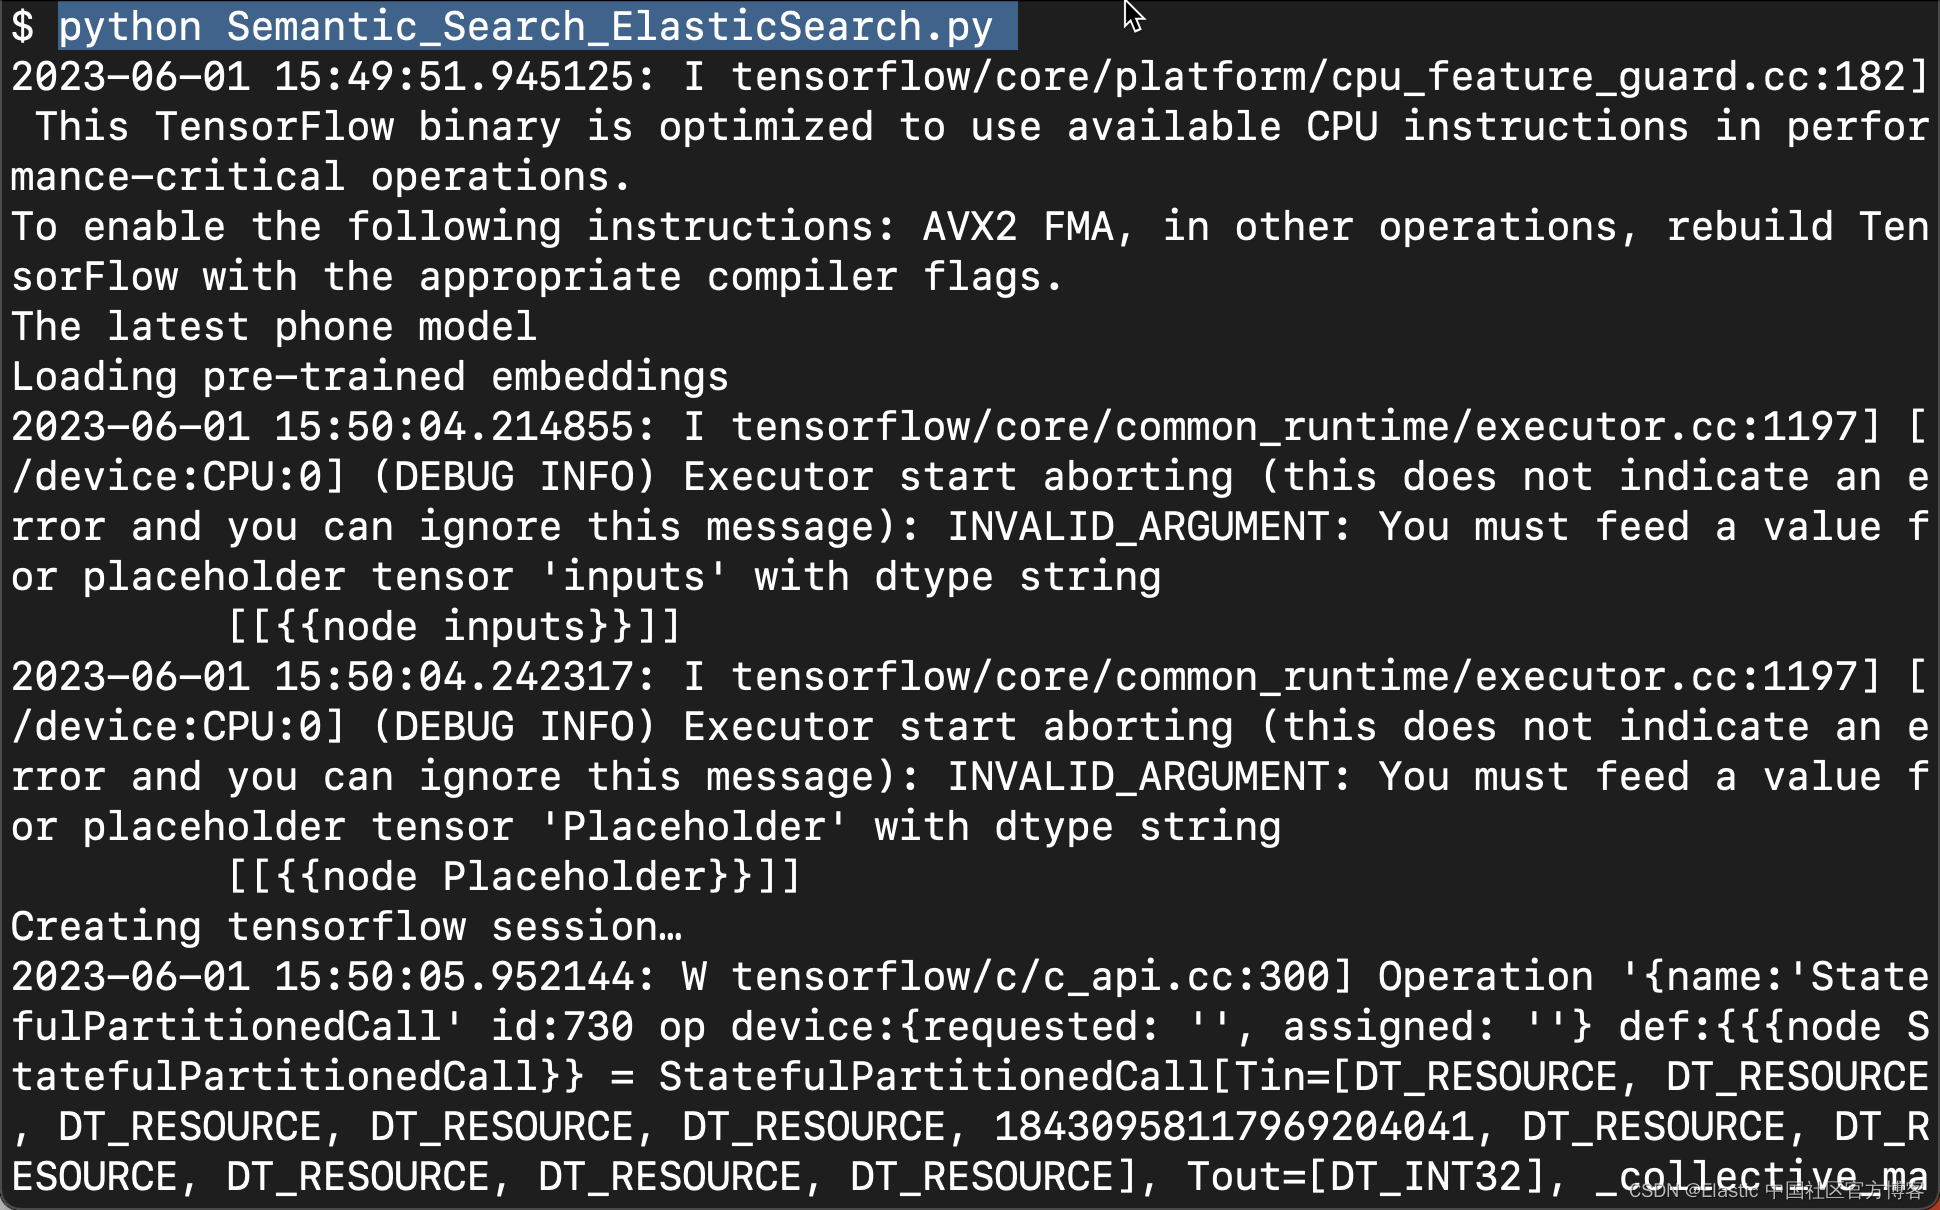
print("Loading pre-trained embeddings")
embed = hub.load("./model")
text_ph = tf.placeholder(tf.string)
embeddings = embed(text_ph)
print("Creating tensorflow session…")
session = tf.Session()
session.run(tf.global_variables_initializer())
session.run(tf.tables_initializer())
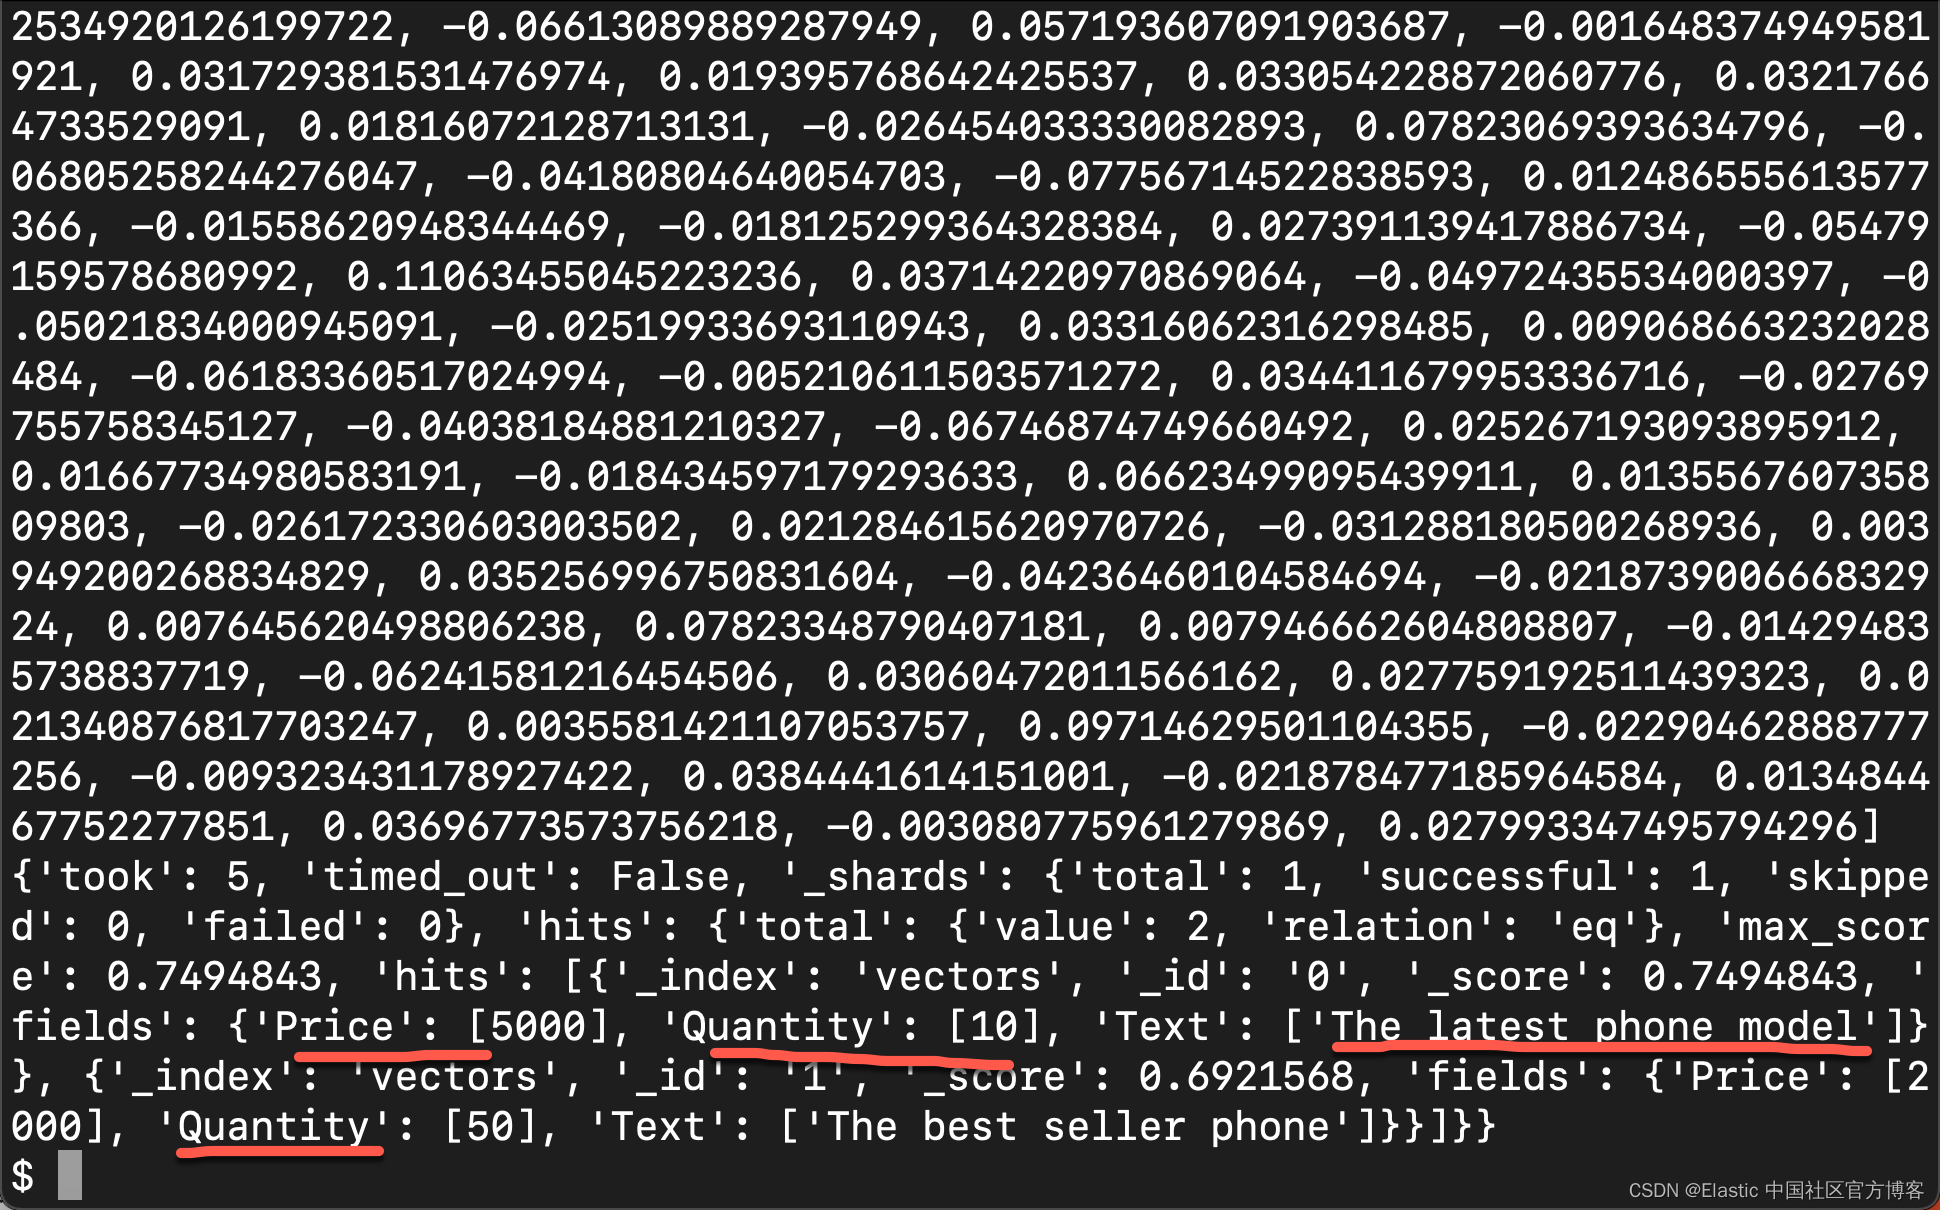
vectors = session.run(embeddings, feed_dict={text_ph: df['Text']})
print("vectors length: ", len(vectors))
print(vectors)
vector = []
for i in vectors:
vector.append(i)
df["Embeddings"] = vector
# Connect to the elastic cluster
# Password for the 'elastic' user generated by Elasticsearch
USERNAME = "elastic"
PASSWORD = "GHI8C685oSpq_kNtUJV1"
ELATICSEARCH_ENDPOINT = "https://localhost:9200"
CERT_FINGERPRINT = "abec585e4d6c383032d19f8c535369107f063ae91491e20b5e25b75afb308f13"
es = Elasticsearch(ELATICSEARCH_ENDPOINT,
ssl_assert_fingerprint = (CERT_FINGERPRINT),
basic_auth=(USERNAME, PASSWORD),
verify_certs = True)
resp = es.info()
print(resp)
configurations = {
"settings": {
"index": {"number_of_replicas": 2},
"analysis": {
"filter": {
"ngram_filter": {
"type": "edge_ngram",
"min_gram": 2,
"max_gram": 15,
}
},
"analyzer": {
"ngram_analyzer": {
"type": "custom",
"tokenizer": "standard",
"filter": ["lowercase", "ngram_filter"],
}
}
}
},
"mappings": {
"properties": {
"Embeddings": {
"type": "dense_vector",
"dims": 512,
"index": True,
"similarity": "cosine"
},
}
}
}
INDEX_NAME = "vectors"
if(es.indices.exists(index=INDEX_NAME)):
print("The index has already existed, going to remove it")
es.options(ignore_status=404).indices.delete(index=INDEX_NAME)
es.indices.create( index=INDEX_NAME,
settings=configurations["settings"],
mappings=configurations["mappings"]
)
actions = []
for index, row in df.iterrows():
action = {"index": {"_index": INDEX_NAME, "_id": index}}
doc = {
"id": index,
"Text": row["Text"],
"Price": row["Price"],
"Quantity": row["Quantity"],
"Embeddings": row["Embeddings"]
}
actions.append(action)
actions.append(doc)
es.bulk(index=INDEX_NAME, operations=actions, refresh=True)
query = "Which is the latest phone available in your shop"
def embed_text(text):
vectors = session.run(embeddings, feed_dict={text_ph: text})
return [vector.tolist() for vector in vectors]
query_vector = embed_text([query])[0]
print(query_vector)
query = {
"field": "Embeddings",
"query_vector": query_vector,
"k": 10,
"num_candidates": 100
}
source_fields = ["Text", "Price", "Quantity"]
response = es.search(
index="vectors",
fields=source_fields,
knn=query,
source=False)
print(response)Here is the whole code. Although it looks simple, there are still some situations when debugging.
After installing the Python dependencies, you'll need text data to get started. After getting the text data, use python in your favorite IDE to read it.
from elasticsearch import Elasticsearch
import tensorflow_hub as hub
import tensorflow.compat.v1 as tf
import pandas as pd
import numpy as np

df = pd.read_csv('./sample.csv')
print(df['Text'][0])
After reading text data, the first task is to convert it into vectors or embeddings. Here, as I mentioned before, I'm using TensorFlow's Universal Sentence Encoder, which outputs a vector/embedding of "512" dimension when provided with a string.
This will be different for other converters/vectorizers, you need to keep this in mind for further steps.
model = hub.load("./model")After successfully loading the model, now our next task is to convert the text in the dataset into vectors/embeddings and store them in a new field/column called "Embeddings".
graph = tf.Graph()

with tf.Session(graph = graph) as session:
    print("Loading pre-trained embeddings")
    embed = hub.load("./model")
    text_ph = tf.placeholder(tf.string)
    embeddings = embed(text_ph)

    print("Creating tensorflow session…")
    session = tf.Session()
    session.run(tf.global_variables_initializer())
    session.run(tf.tables_initializer())

    vectors = session.run(embeddings, feed_dict={text_ph: df['Text']})

print("vectors length: ", len(vectors))
print(vectors)

vector = []
for i in vectors:
    vector.append(i)

df["Embeddings"] = vector
NOTE : In my dataset, I have a field/column called "Text". Change it to the field name according to your dataset.
Once the embedding is complete and stored in a new field, this data can be inserted into Elasticsearch in our system, which you should have installed at the beginning of this tutorial.
To insert data, we first have to connect to Elasticsearch, all of this will be done using python.
USERNAME = "elastic"
PASSWORD = "GHI8C685oSpq_kNtUJV1"
ELATICSEARCH_ENDPOINT = "https://localhost:9200"
CERT_FINGERPRINT = "abec585e4d6c383032d19f8c535369107f063ae91491e20b5e25b75afb308f13"

es = Elasticsearch(ELATICSEARCH_ENDPOINT,
                   ssl_assert_fingerprint = (CERT_FINGERPRINT),
                   basic_auth=(USERNAME, PASSWORD),
                   verify_certs = True)
resp = es.info()
print(resp)
For a description of this section, please read my previous article " Elasticsearch: Everything you need to know about using Elasticsearch in Python - 8.x ".
To verify that the connection is established, you can open https://localhost:9200 on your preferred browser and check. You can also check connectivity from your IDE by running es.ping(). For a successful connection, the output should be True.
Now that we have established a connection to Elasticsearch, let's move on to configuring the Elasticsearch index.
configurations = {
    "settings": {
        "index": {"number_of_replicas": 2},
        "analysis": {
            "filter": {
                "ngram_filter": {
                    "type": "edge_ngram",
                    "min_gram": 2,
                    "max_gram": 15,
                }
            },
            "analyzer": {
                "ngram_analyzer": {
                    "type": "custom",
                    "tokenizer": "standard",
                    "filter": ["lowercase", "ngram_filter"],
                }
            }
        }
    },
    "mappings": {
        "properties": {
          "Embeddings": {
            "type": "dense_vector",
            "dims": 512,
            "index": True,
            "similarity": "cosine"
          },
          }
        }
    }


INDEX_NAME = "vectors"

if(es.indices.exists(index=INDEX_NAME)):
    print("The index has already existed, going to remove it")
    es.options(ignore_status=404).indices.delete(index=INDEX_NAME)

es.indices.create(  index=INDEX_NAME,
                    settings=configurations["settings"],
                    mappings=configurations["mappings"]
                 )
With the help of the above configuration, we are able to configure the index for inserting data. That said, let's take a closer look at some important parameters.
- "type": type must always be set to "dense_vector". This is done so that ElasticSearch knows that these are vectors and will not assign the float type to the field itself.
- "dims": Also dimensions. Like I mentioned before, the Universal Sentence Encoder produces and outputs 512 dimensions, that's why we provide 512 in the parameters.
- "index": Index must be set to True in order for the field to be created and have a dense_vector type in ElasticSearch.
- "similarity": We are looking for cosine similarity and have already mentioned it. You can also choose other options. For details, please refer to the link .
After configuring the index, let us now proceed to create this index. In our application, we choose the index name to be vectors.
Here, I named the index vectors. With this our index has been created with our configuration and finally we are ready to insert our data into this index on Elasticsearch.
actions = []
for index, row in df.iterrows():
    action = {"index": {"_index": INDEX_NAME, "_id": index}}
    doc = {
        "id": index,
        "Text": row["Text"],
        "Price": row["Price"],
        "Quantity": row["Quantity"],
        "Embeddings": row["Embeddings"]
    }
    actions.append(action)
    actions.append(doc)

es.bulk(index=INDEX_NAME, operations=actions, refresh=True)
In the above code, we must pay attention that refresh must be set to True, otherwise we may not get any results when searching immediately below, because under normal circumstances, it takes 1 minute to Make the document just written searchable. With the help of the above code, you will be able to insert data into Elasticsearch.
search data
With the data inserted, we can now search this data and ask some relevant questions. To do this, let's start with a question we want an answer to.
query = "Which is the latest phone available in your shop?"Now, since we need to do semantic search on Elasticsearch, we need to convert this text into embeddings/vectors.
query = "Which is the latest phone available in your shop"


def embed_text(text):
    vectors = session.run(embeddings, feed_dict={text_ph: text})
    return [vector.tolist() for vector in vectors]

query_vector = embed_text([query])[0]
print(query_vector)
Now query_vector contains the vector transformed from "Which is the latest phone available in your shop".
Once the text is converted to embeddings/vectors, we can search this text against existing data in Elasticsearch. To do this, we first have to construct a query to fetch data from Elasticsearch.
query = {
    "field": "Embeddings",
    "query_vector": query_vector,
    "k": 10,
    "num_candidates": 100
  }

source_fields = ["Text", "Price", "Quantity"]

response = es.search(
    index="vectors",
    fields=source_fields,
    knn=query,
    source=False)

print(response)
Using the code provided above, we can query from Elasticsearch. But before we look at the next step, let's take a closer look at this query and understand it.
- "knn": Elasticsearch supports the K-Nearest Neighbors aka kNN algorithm and is already available in Elasticsearch. You don't need to train it separately.
- "field": The field where your embeddings/vectors are stored in Elasticsearch.
- "query_vector": your input as a vector/embedding.
- "k": the number of output/search results you want.
- “num_candidates”:earch API finds a
num_candidatesnumber of approximate nearest neighbor candidates on each shard.
With the help of the above query, you will be able to get search results from the index where the data was previously stored.
Remember that you can only perform semantic searches on indexes with a configuration field that contains embeddings/vectors as "type": "dense_vector" and the vector dimensions must be exactly the same as your query/question and the data stored in Elasticsearch . For example, in the above tutorial, our data in Elasticsearch is 512 dimensions, and the query/question is also converted to 512 dimensions before we proceed with the search operation.
in conclusion
In conclusion, semantic search is a powerful tool that can greatly improve the accuracy and relevance of search results by understanding the meaning and context of words. Elasticsearch is a highly scalable and flexible search engine that can be used to implement semantic search for applications ranging from e-commerce to healthcare. By leveraging Elasticsearch's powerful search and indexing capabilities, as well as technologies such as query expansion, synonym detection, and entity recognition, you can build a semantic search system that provides fast and accurate results. Whether you're a developer, data scientist, or business owner, mastering semantic search with Elasticsearch can help you unlock new insights and opportunities from your data. So why wait? Start exploring the power of semantic search with Elasticsearch today!