1 Introduction
I have worked hard for two days to learn the installation and deployment of GeoScene Enterprise in the window environment, and hope to help everyone. If there is something wrong, I hope you can point it out.
2 preparation stage
This installation selects Java8 and Tomcat9.
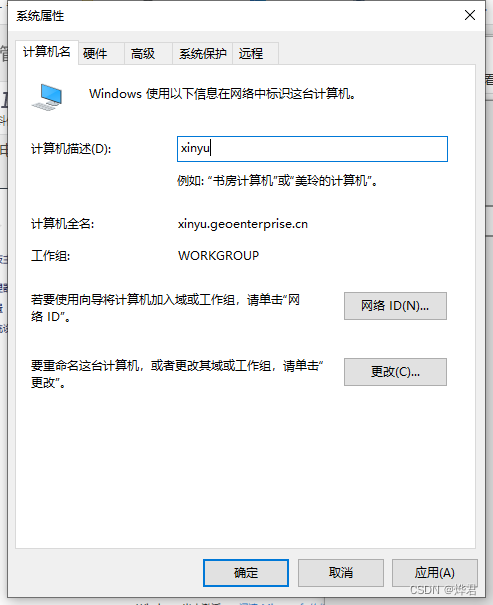
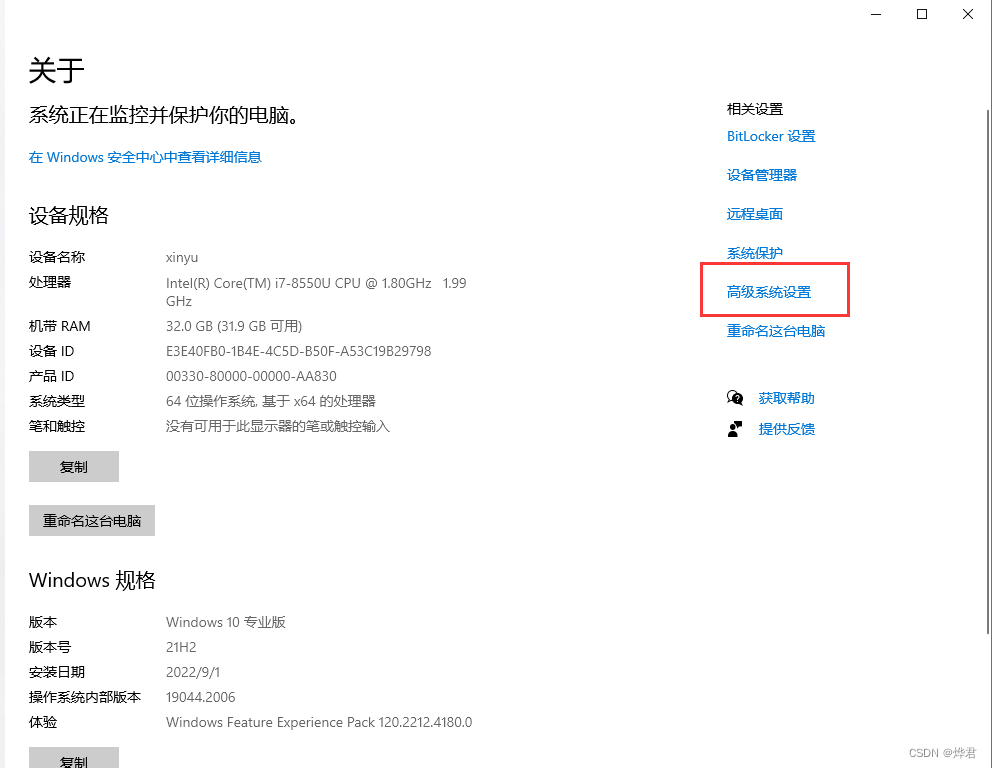
2.1 Change of computer name
We need to use a fully qualified domain name , which means adding a DNS suffix to the original computer name. Regarding the installation and configuration of the software, use the domain name directly instead of the IP, otherwise the configuration will fail.
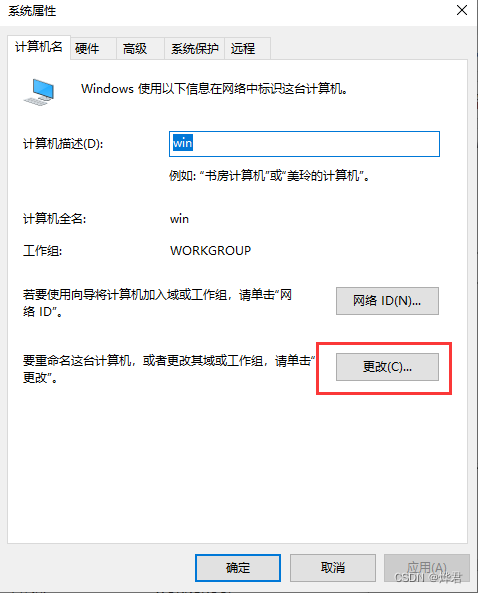
First right click on "My Computer" - Properties - Rename This Computer
1. Enter to rename
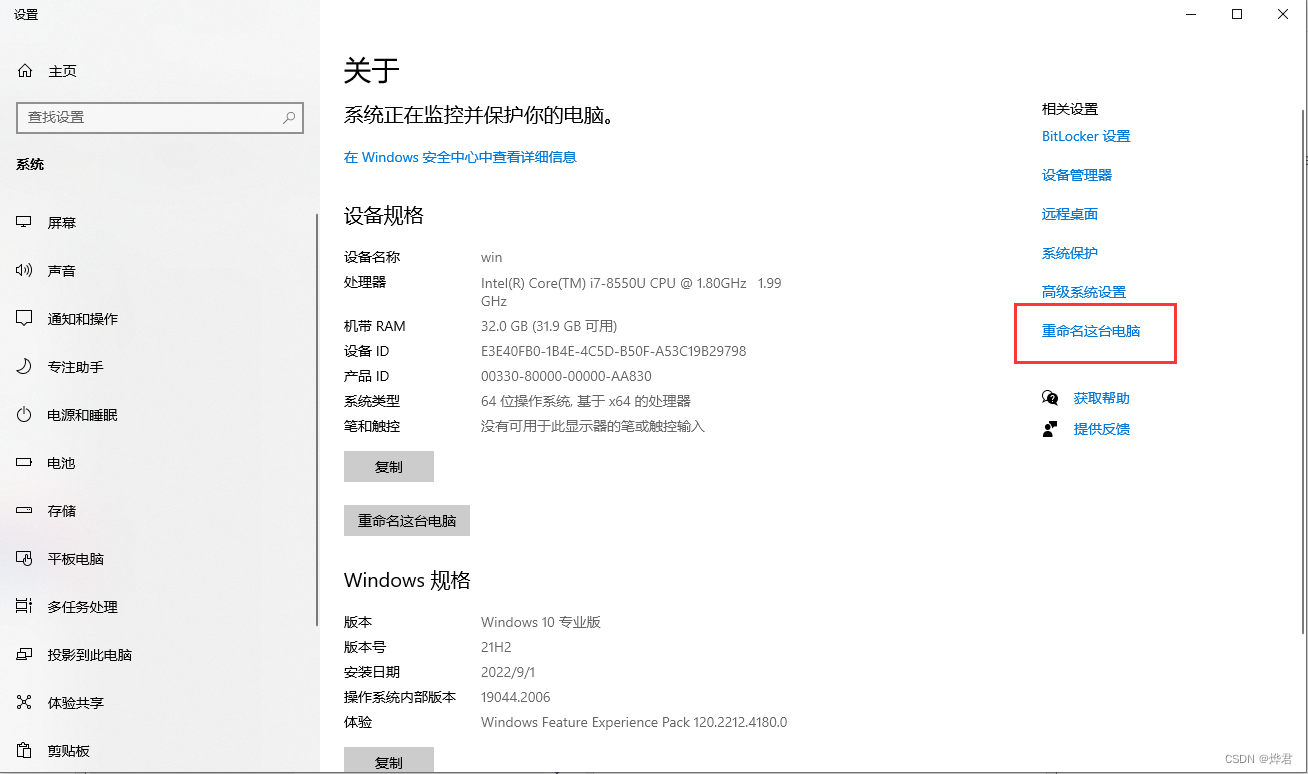
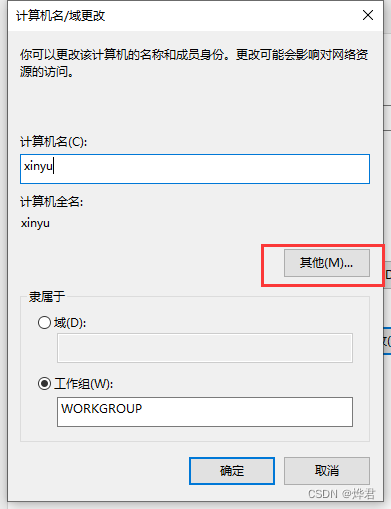
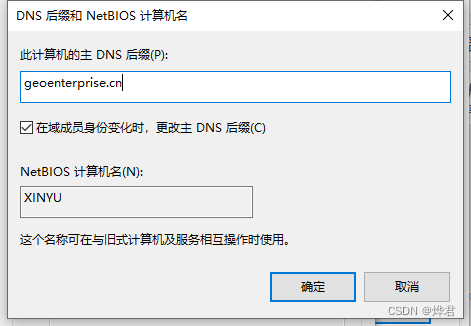
2.Click Change - set the computer name (try to choose a meaningful name) - click Other - modify the primary DNS suffix of this computer (geoenterprise.cn) - click OK after confirming that it is correct 3
. Restart the computer. After restarting, you can view that the computer name has been modified. The effect is as follows
2.2 Install JAVA
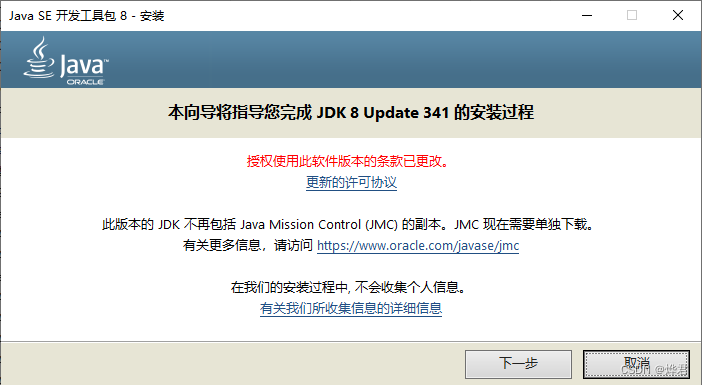
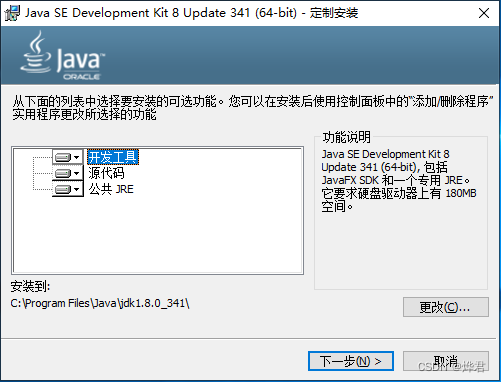
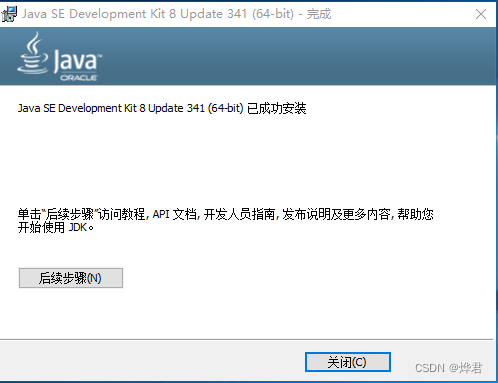
1. Download the installer of Java SE 8 from the official website and open
https://www.oracle.com/java/technologies/downloads/
2.Configure environment variables
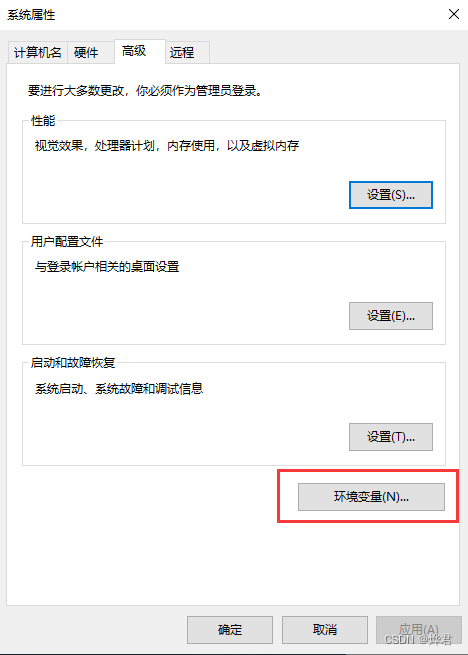

The following three variables need to be configured. The first two variables JAVA_HOME and CLASSPATH need to create new system variables, and the last one is to add a Java path to the system Path variable.
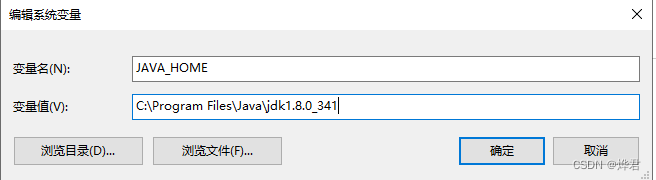
1. Variable name: JAVA_HOME
Variable value: C:\Program Files\Java\jdk1.8.0_341 (to be configured according to your actual path)
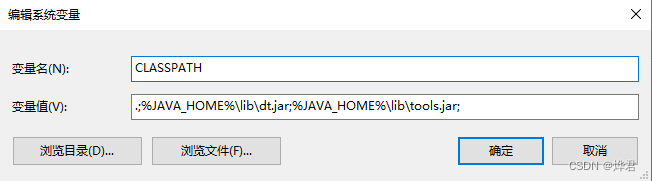
2. Variable name: CLASSPATH
Variable value: .;%JAVA_HOME%\lib\dt.jar ;%JAVA_HOME%\lib\tools.jar;
3. Variable name: Path
variable value: %JAVA_HOME%\bin;%JAVA_HOME%\jre\bin;
Add the Java path to the system variable Path, do not delete the original system path
Add the Java path to the system variable Path, do not delete the original system path 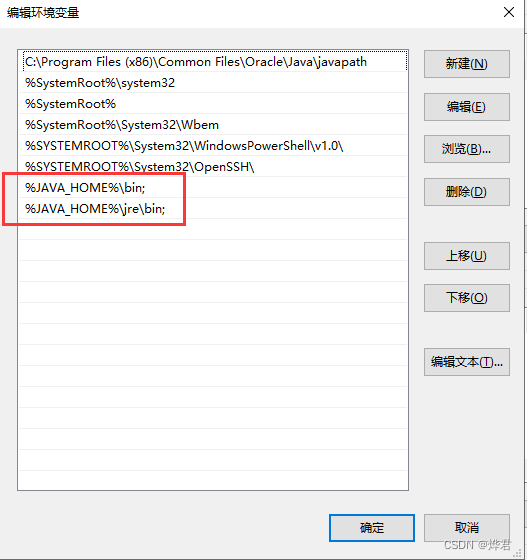
3. To verify whether the configuration is successful, enter java -version; java; javac in cmd, and the following information appears, indicating that the configuration is successful.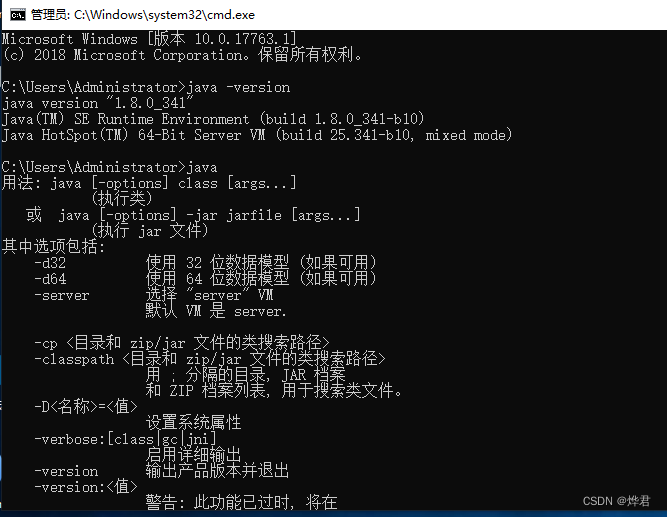
2.3 Install Tomcat
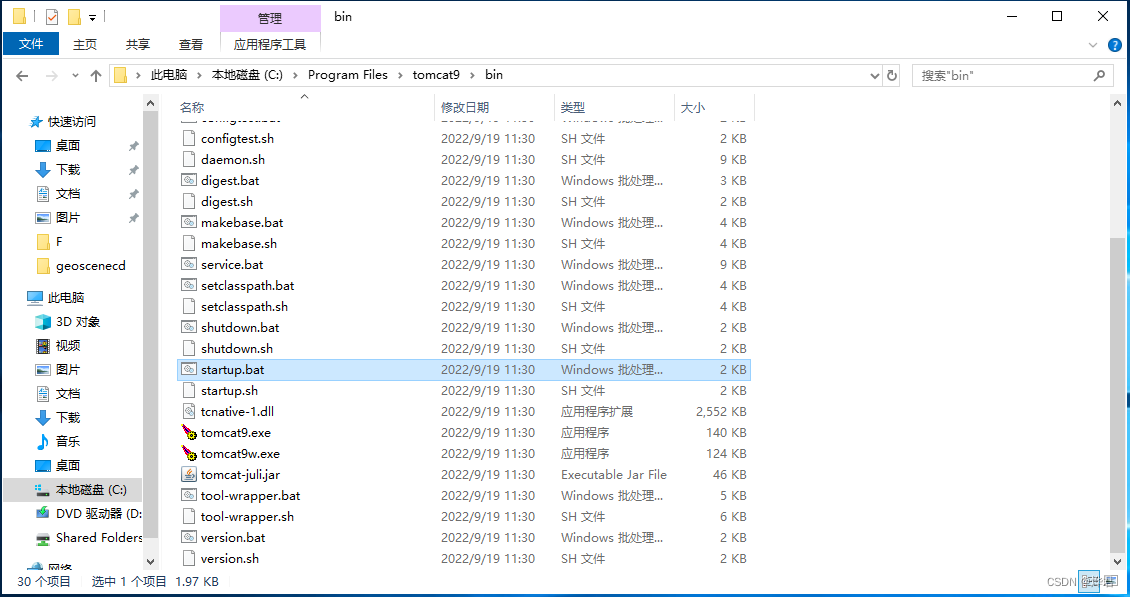
1. Download Tomcat from the official website: http://tomcat.apache.org/. After downloading the installation file, decompress the file and remember the decompression path. Run the startup file in the bin directory to start Tomcat.
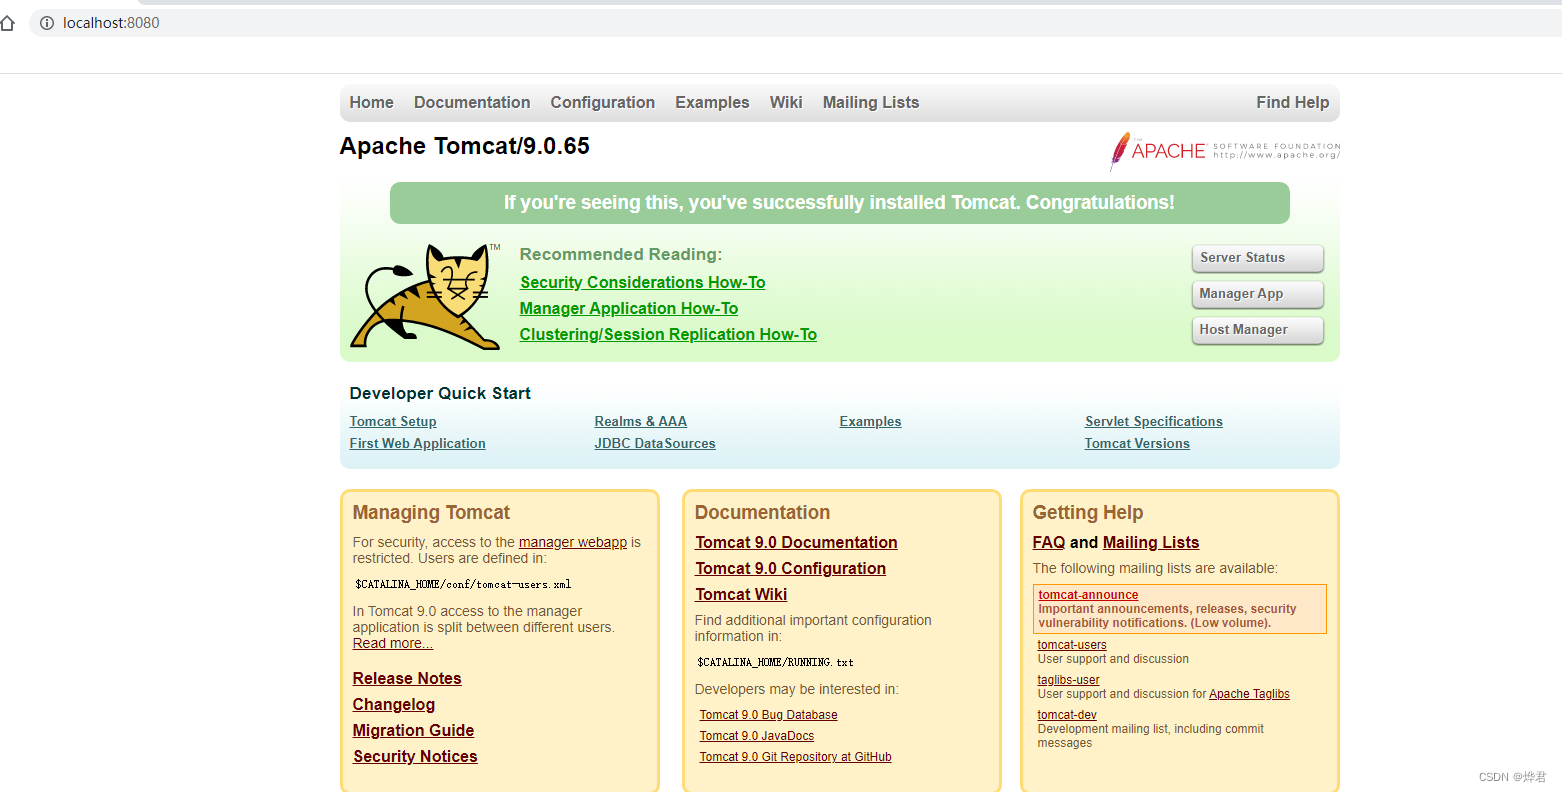
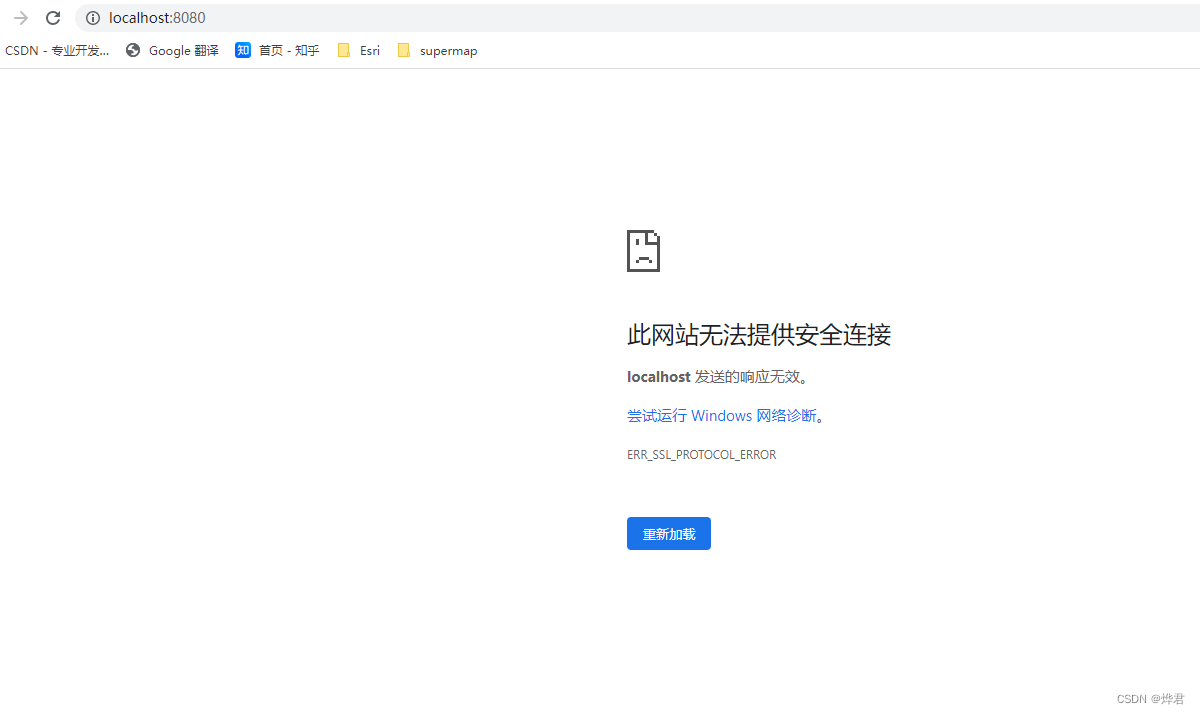
2. Open http://localhost:8080 in the browser, and the following screen appears, indicating that Tomcat is installed successfully.
But https://localhost:8080/ is still inaccessible.
3. In the java installation directory, enter the bin folder, enter cmd in the folder directory, and open the command window.
4. Enter the command:
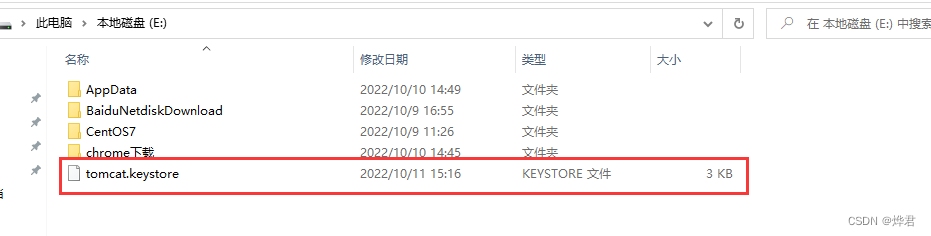
keytool -genkey -v -alias tomcat -keyalg RSA -keystore E:\tomcat.keystore -validity 36500
tomcat is the name of the certificate, and E:\tomcat.keystore is the path to save the certificate.
Set the secret key password and enter the answer according to the prompt
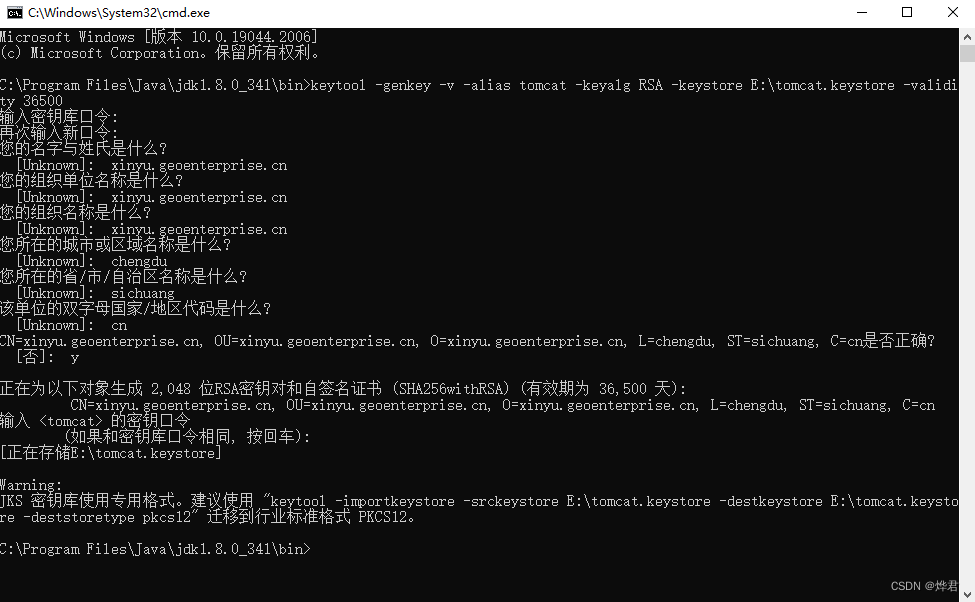
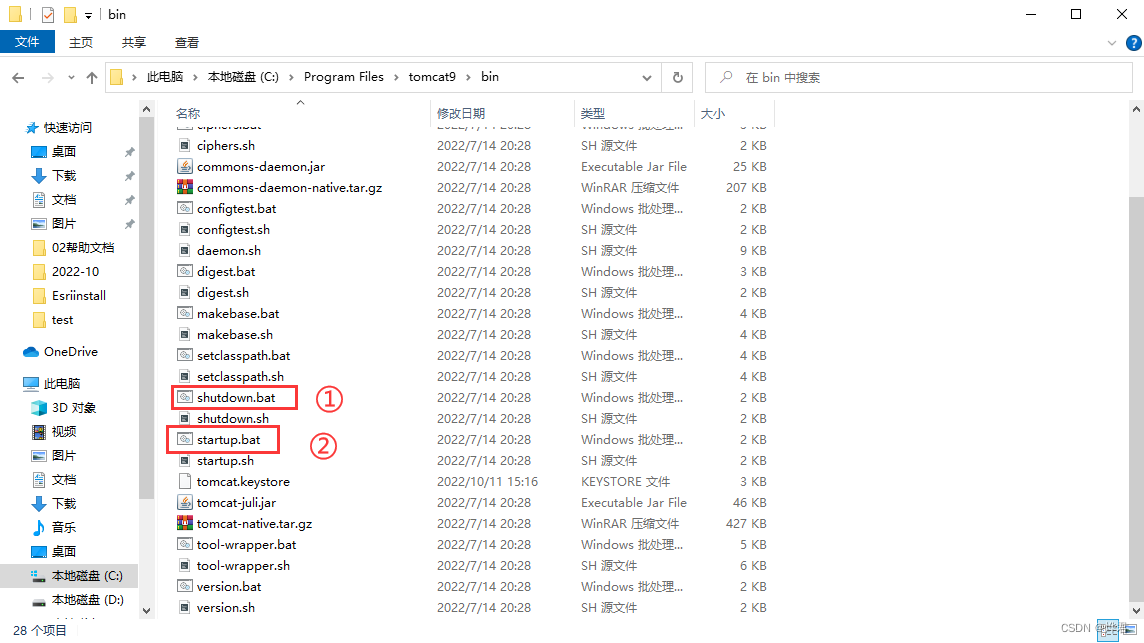
5. Generate a certificate6
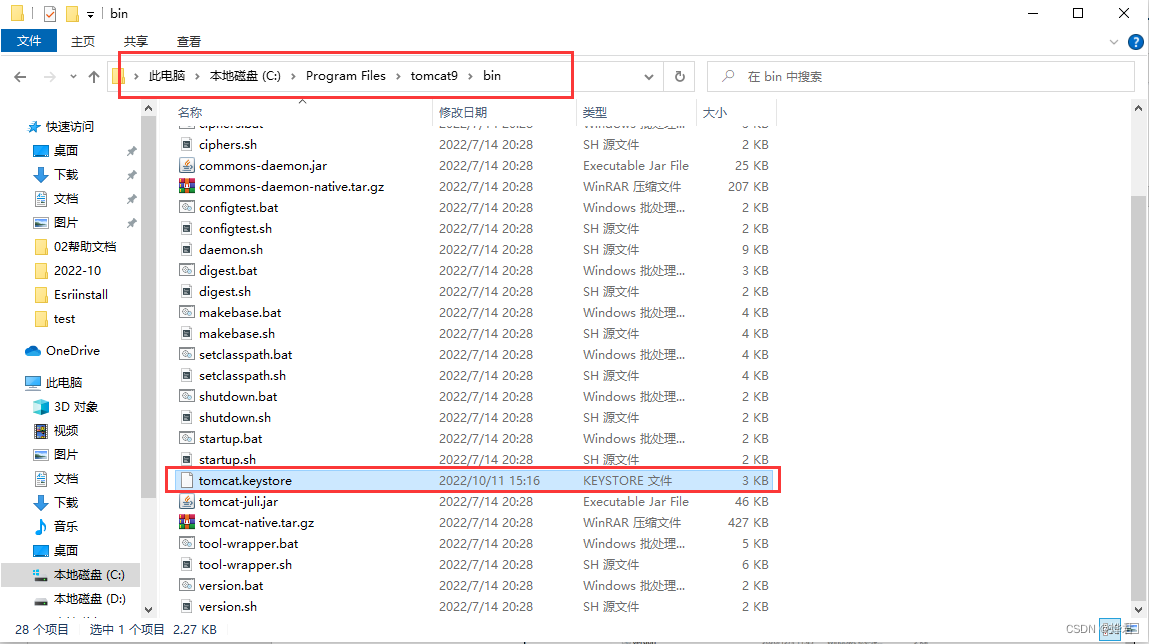
. Copy it to the bin directory of Tomcat
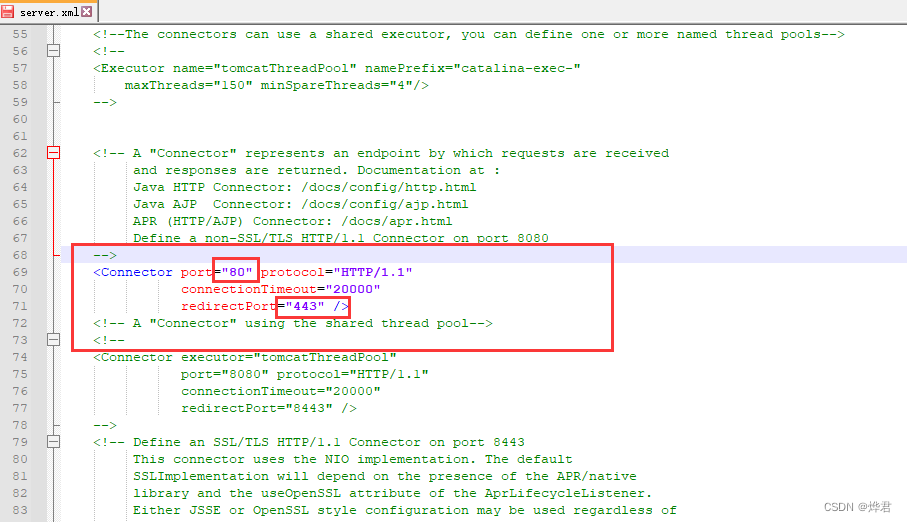
7. Back up the server.xml file in the conf folder under the tomcat installation directory (you need to modify this file, and back it up to prevent modification errors). Open this file and change the 8080 in the red box to 80 and 8443 to 443.
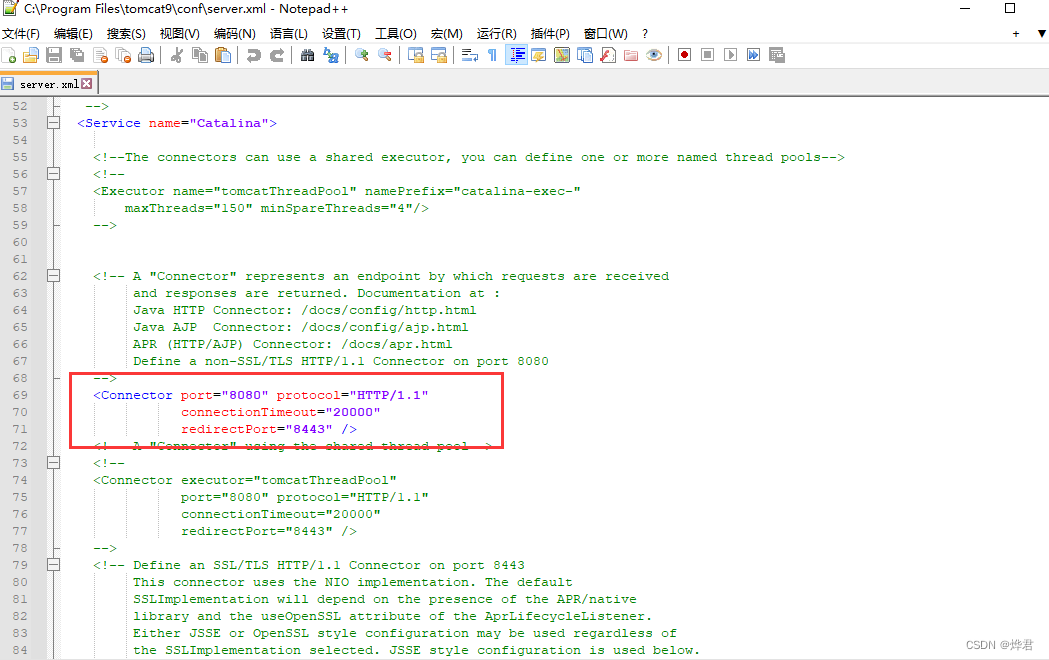
And add the following content in the position shown below
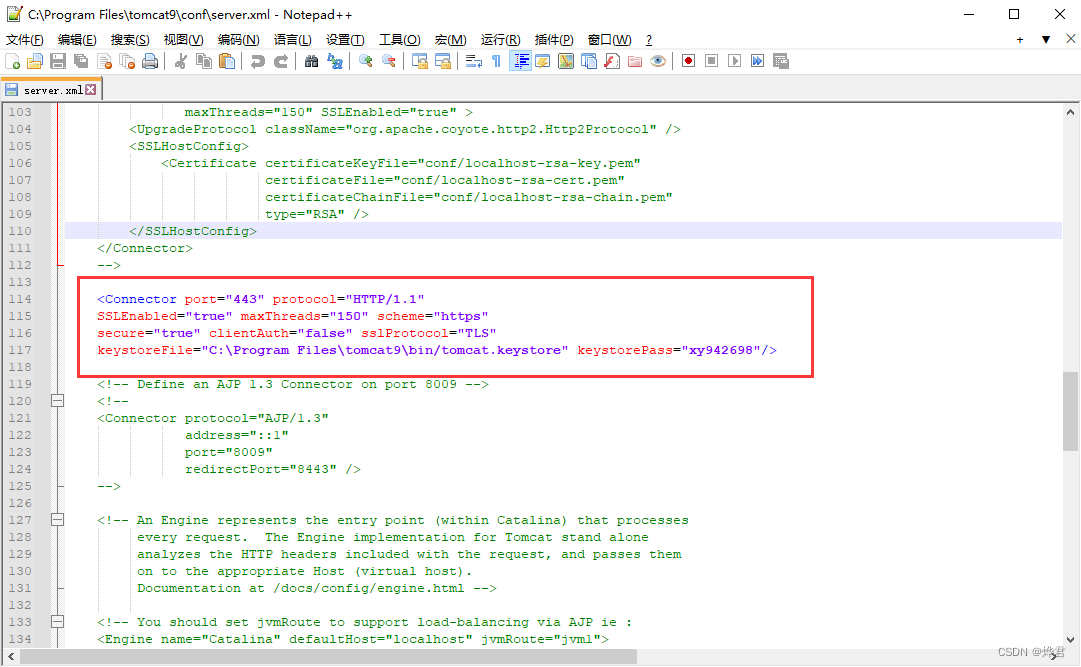
<Connector port="443" protocol="HTTP/1.1"
           SSLEnabled="true" maxThreads="150"
           scheme="https" secure="true"
           clientAuth="false" sslProtocol="TLS"
           keystoreFile="C:\Program Files\tomcat9\bin/tomcat.keystore"
           keystorePass="xy942698"/>
Among them, keystoreFile is the certificate address path, and keystorePass is the set key password (I set xy942698, and fill in the certificate keystore password set in the previous section) 8
. Run the file in the picture in the bin directory of Tomcat, and restart tomcat
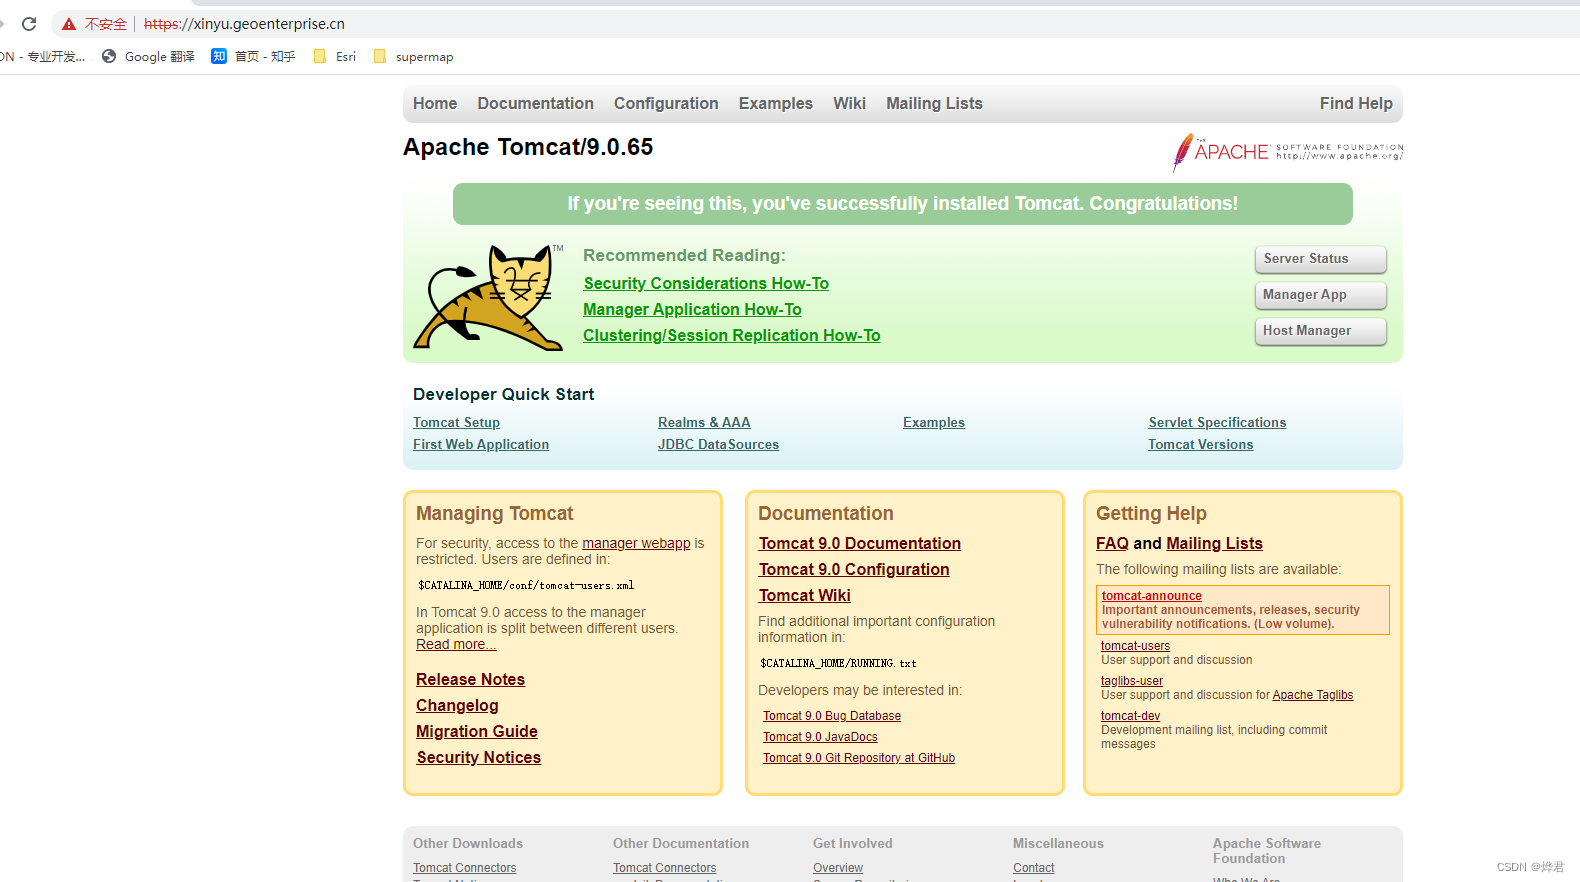
9. Browser input: Both
http://xinyu.geoenterprise.cn/ and https://xinyu.geoenterprise.cn/
will display the following screen, indicating that the certificate configuration is successful
2.4 About disk space preparation
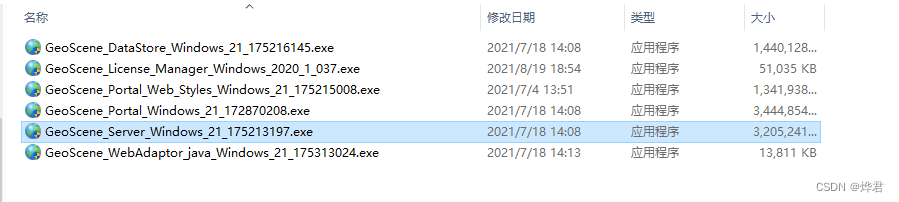
1. The size of GeoScene Enterprise's complete installation software is close to 8G
2.When GeoScene DataStore configures the 'space-time' type database, the disk space where the installation directory is located must not be less than 20%. For example, the C disk with 221G must reserve more than 44.2G of space for configuration.
3 GeoScene Server installation
3.1 Install GeoScene Server
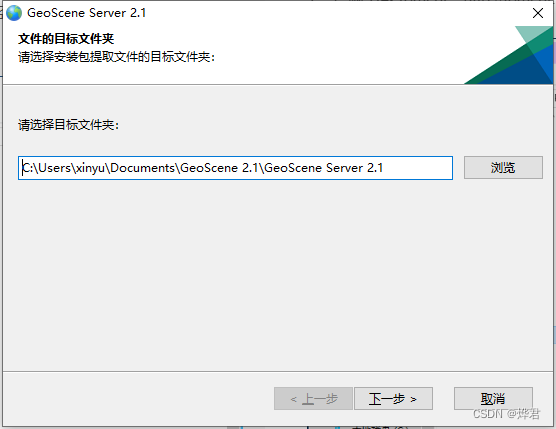
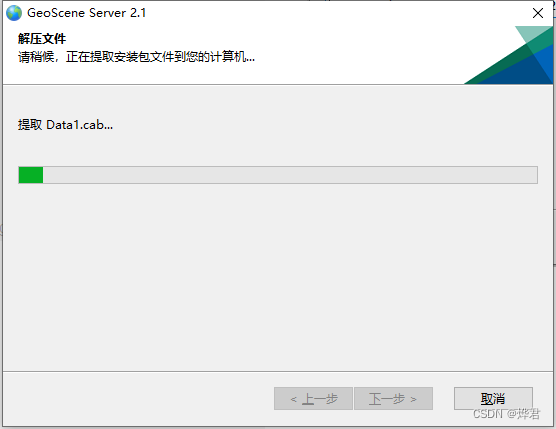
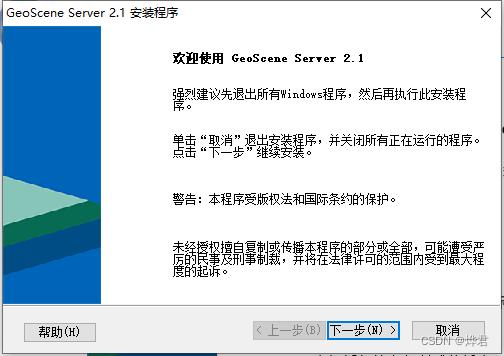
1. Double-click the software to decompress, select the target folder (try to keep the default), click Next, and click Close to install immediately after completion.

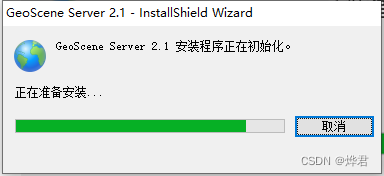
2. Wait for the installer to initialize, click Next.
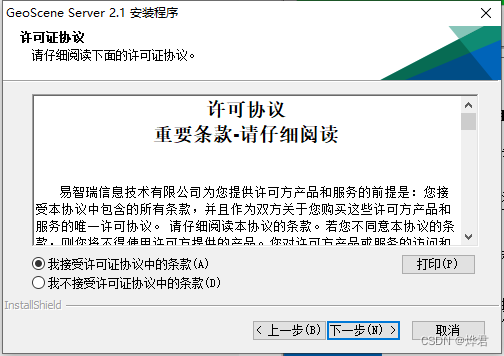
3. Select to accept the terms of the license agreement and click Next.
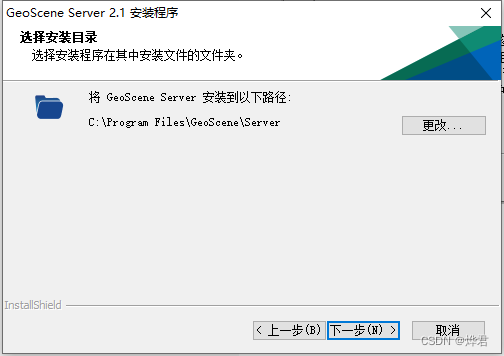
4. Select the installation path and click Next (Note: It is recommended not to change the default installation directory, otherwise problems may occur during configuration).
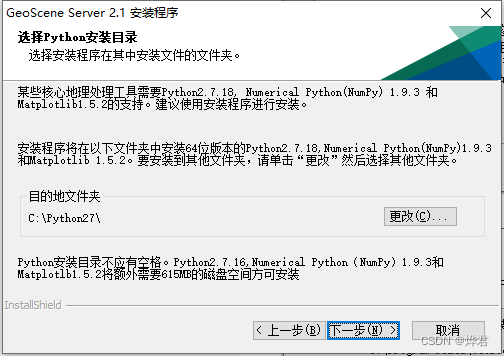
5. Select the Python installation path (it is recommended not to change the default installation directory), and click Next.
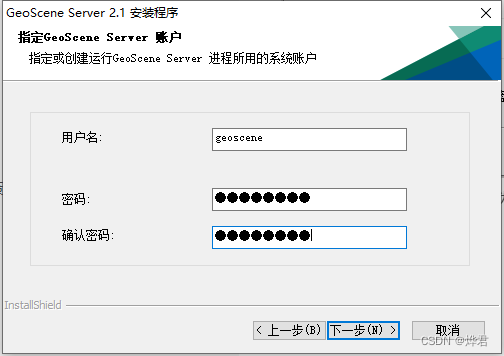
6. Enter the password of the Server account (because after installing the Server, the computer will have an additional login account), please enter a password that complies with the security policy. If the password is not strong enough, the installer will prompt you to choose a new password. Then click Next.
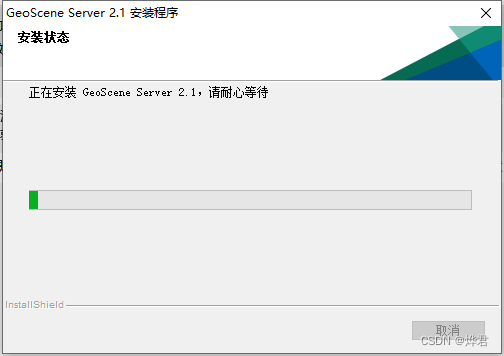
7. Click Install and wait for the program to finish installing.

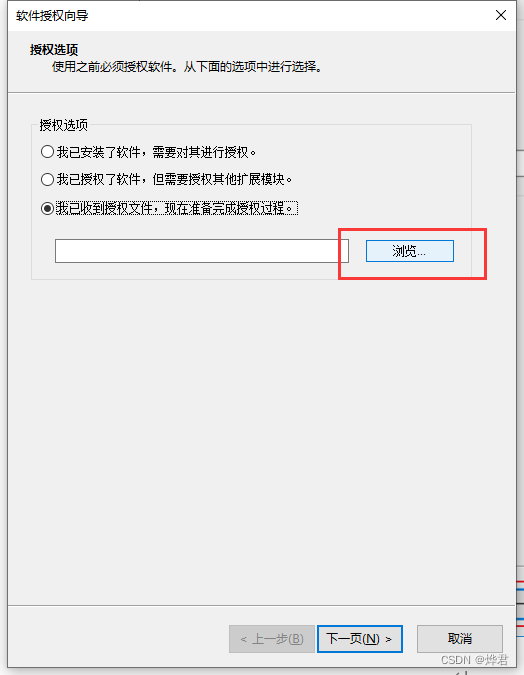
8. Click Finish to prepare the authorized software. In the pop-up authorization wizard interface, select the file authorization method, select the obtained authorization file, and click Next after confirming.

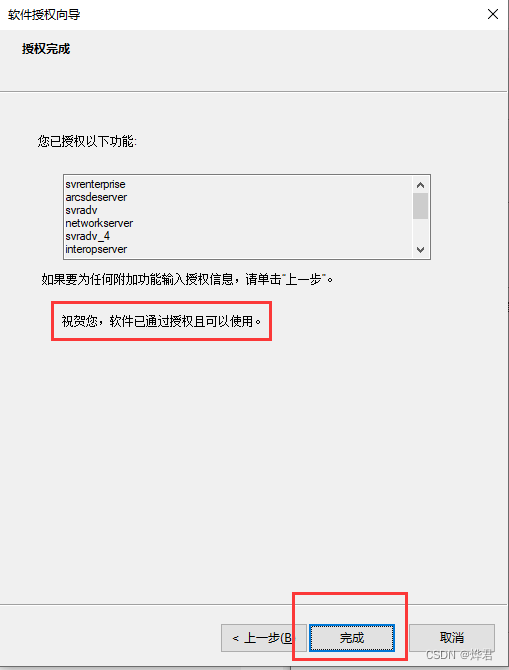
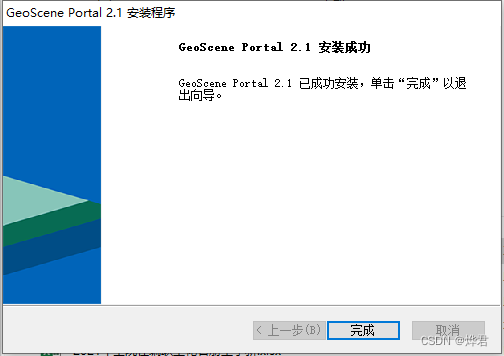
After the authorization is successful, it will prompt "Congratulations, the software has been authorized and can be used", click Finish to enter the server configuration.
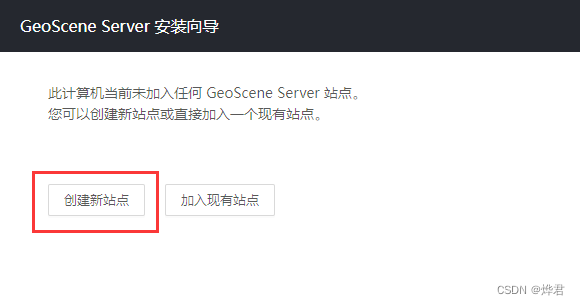
3.2 Create a site
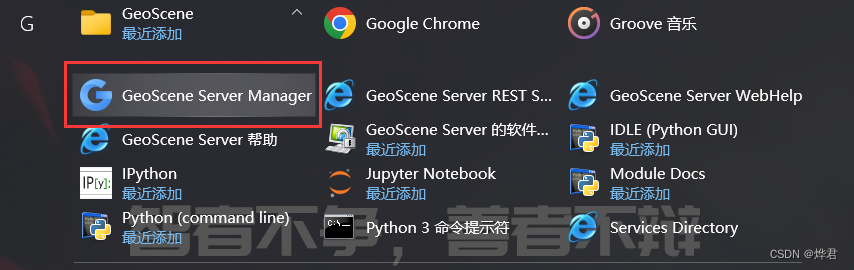
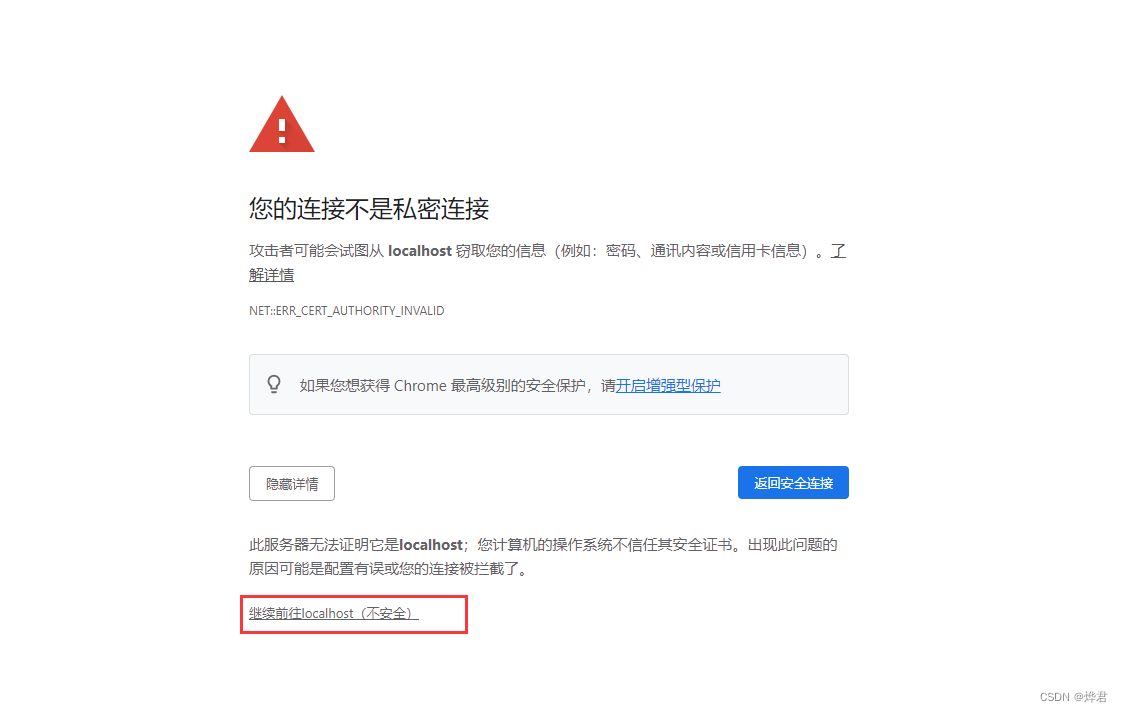
1. After the installation is complete, it will automatically jump to the Server Manager management interface. If there is no automatic jump, select "GeoScene Server Manager" in the menu bar, and click to continue browsing this website in the pop-up browser (for Chrome browser: click "Advanced , and then click Continue).
2. Click to create a new site
3 . Set the server main site administrator account, click Next

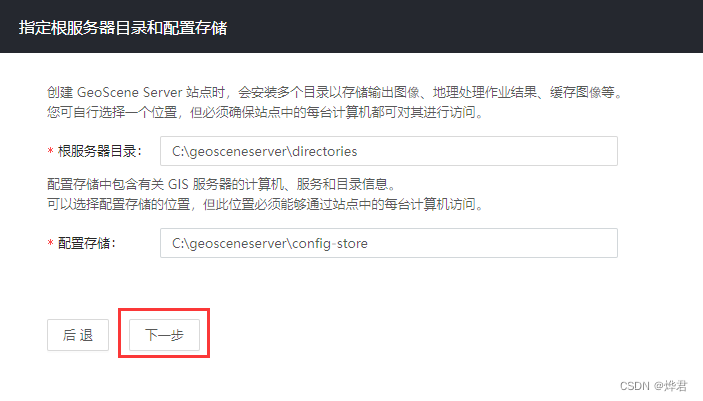
4. Specify the root service directory and configuration storage, and click Next (Note: It is recommended not to change the default directory. If the C disk space is really small, you can change it to a disk with a large space, such as E:\geosceneserver\directories.) 5
. A configuration summary pops up, click Finish, and wait for the site to be created

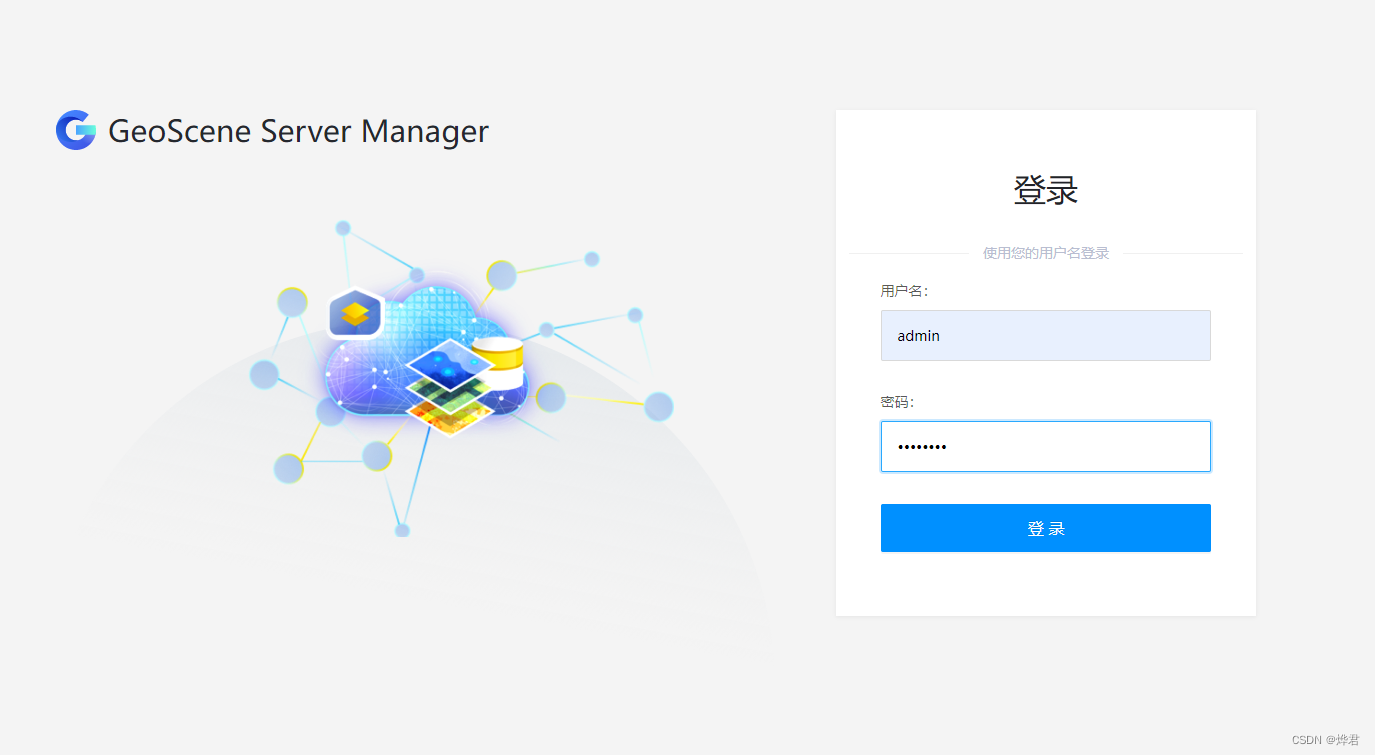
. After the creation of the site is complete, the login page will pop up, and enter the server main site administrator account and password you just set to log in. You can keep this page for now. After configuring the datastore later, you need to verify whether the datastore is configured successfully from the server log.

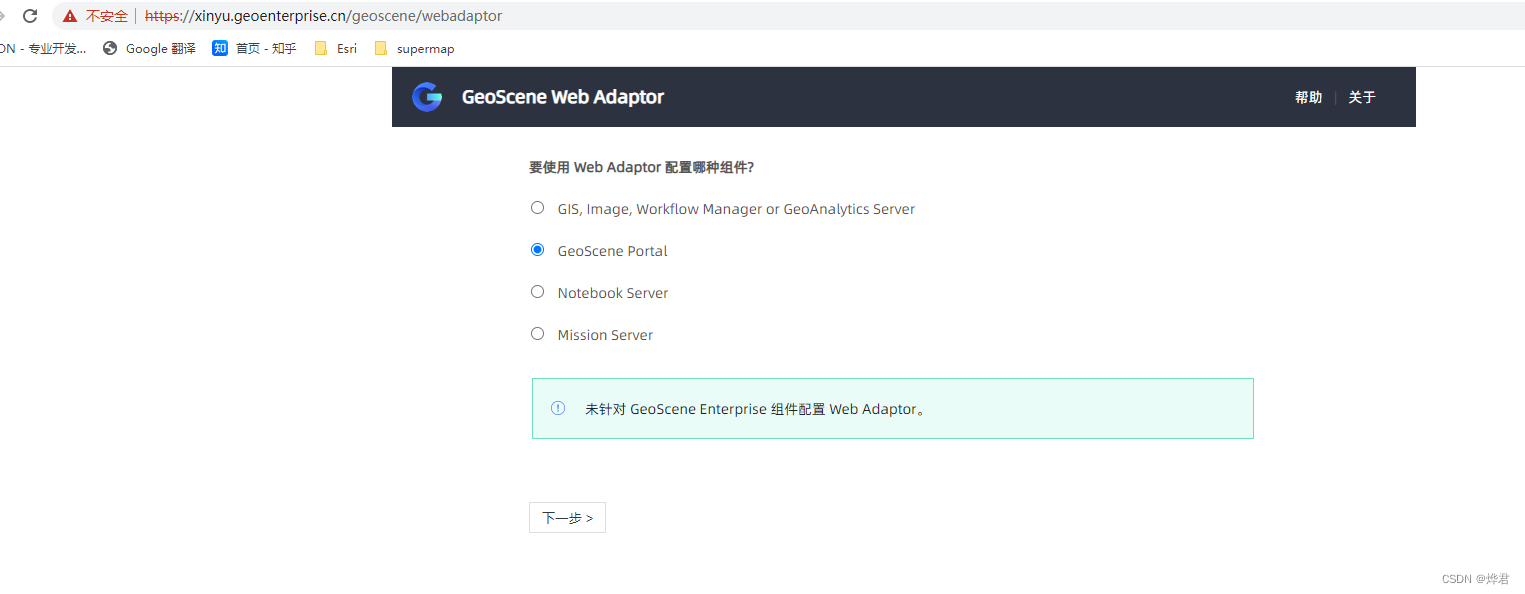
4 WebAdaptor installation and configuration GeoScene Server
To configure, you need to install WebAdaptor first, please continue to read the documentation. In addition, both GeoScene Server and Portal must be configured independently using Web Adapter, but they are named differently, so they can be regarded as two independent Web Adaptors.
4.1 Install Web Adapter
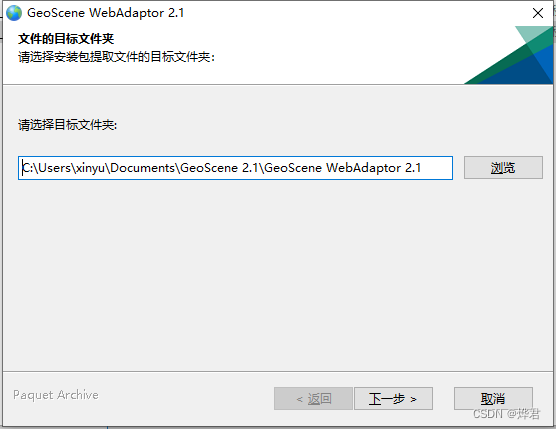
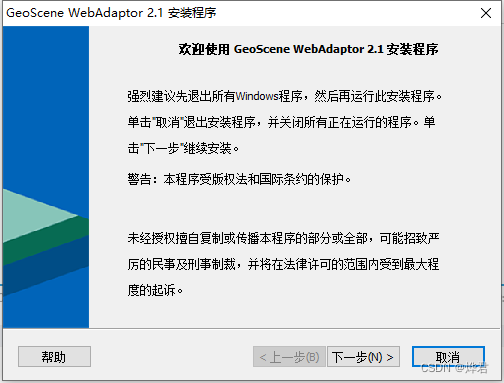
1. Open the WebAdaptor installer

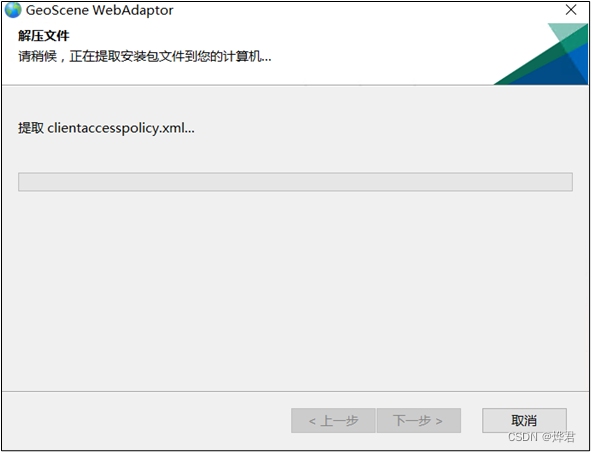
2.Select the target folder to extract the installation package (you can keep the default here)

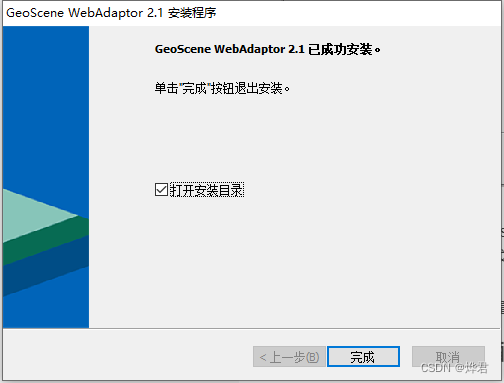
3. Install WebAdaptor 2.1

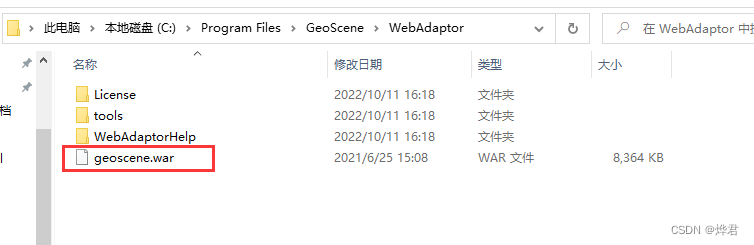
4. Go to the installation directory, make a copy of geoscene.war, and rename it to server.war (the name of the server can be customized, and the name used for portal configuration must be geoscene). Copy the copied file to the webapps folder of the Tomcat installation directory.
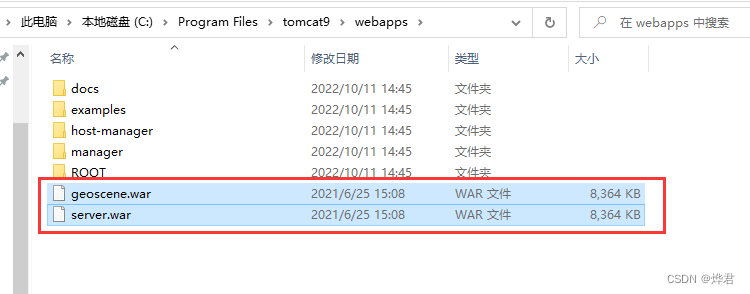
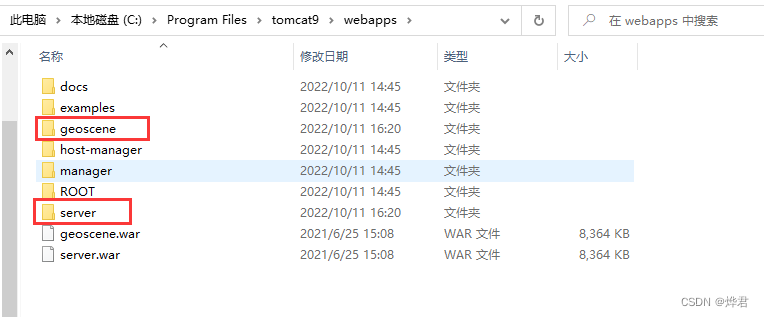
5. Start the tomcat service, and the war package will be automatically decompressed in this directory.
4.2 Configure GeoScene Server using WebAdaptor
1. Open the Web Adapter configuration page in a web browser. (Try to use a newer version of Google Chrome) The URL format is:
https://webadaptorhost.domain.com/webadaptorname/webadaptor (for example: https://xinyu.geoenterprise.cn/server/webadaptor, where xinyu.geoenterprise.cn is the full name of the computer set at the beginning, and server is the name of the webadaptor that was customized and renamed in the previous step).
Choose the first option
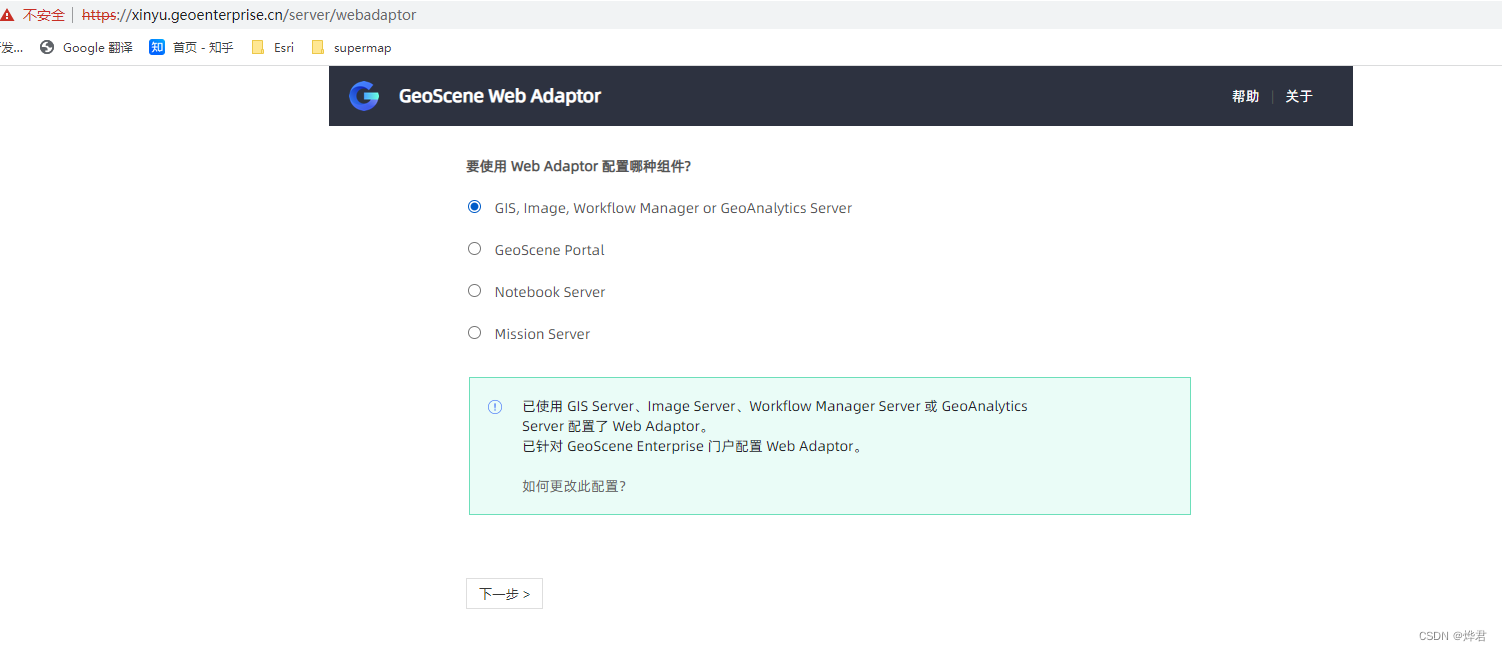
2. Fill in the information according to the format prompted by the example in the figure. The administrator user name and password are the server main site administrator account information set in Part 2.
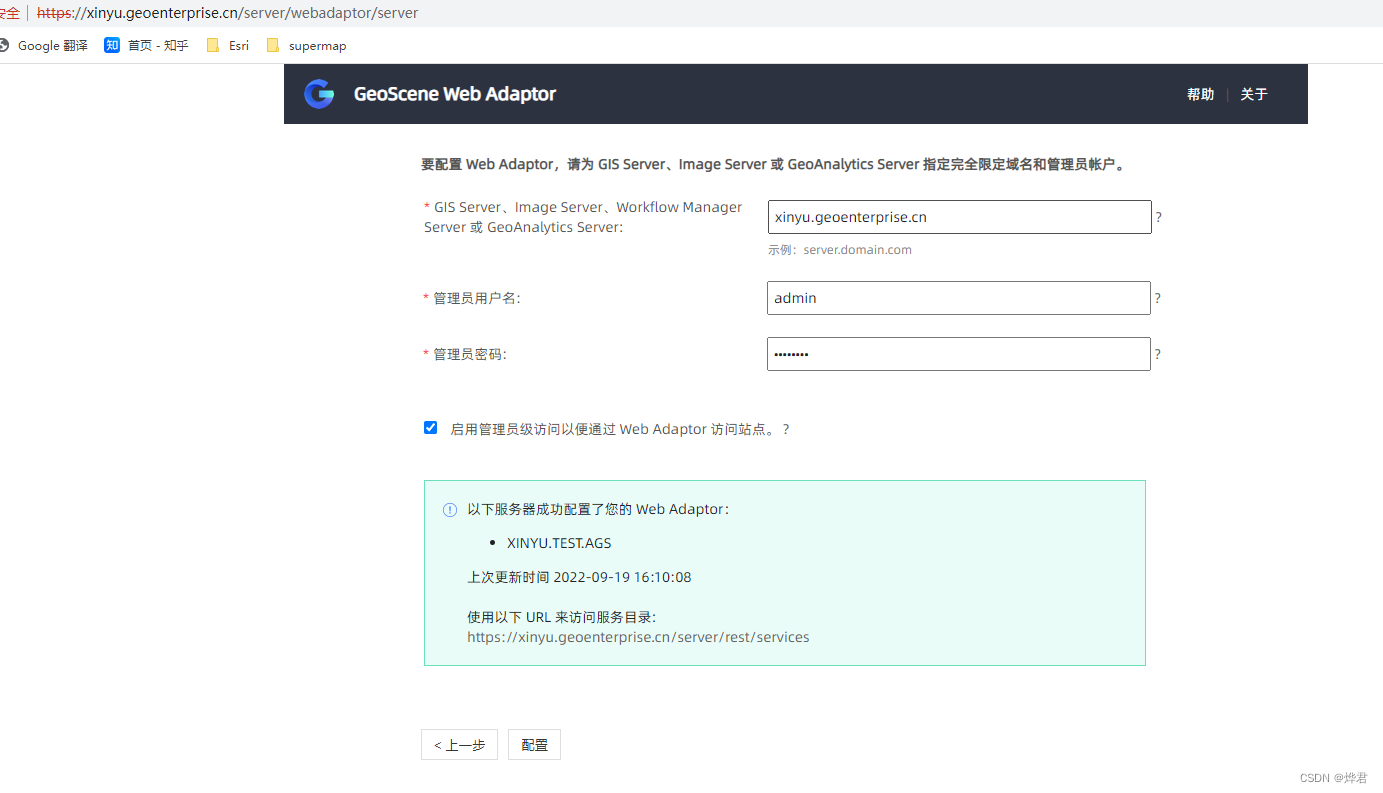
3. Click Configure, the following interface appears to indicate that the configuration is successful
5 GeoScene DataStore installation
5.1 Install GeoScene DataStore
1. Unzip the GeoScene DataStore installation file
2. Click Next

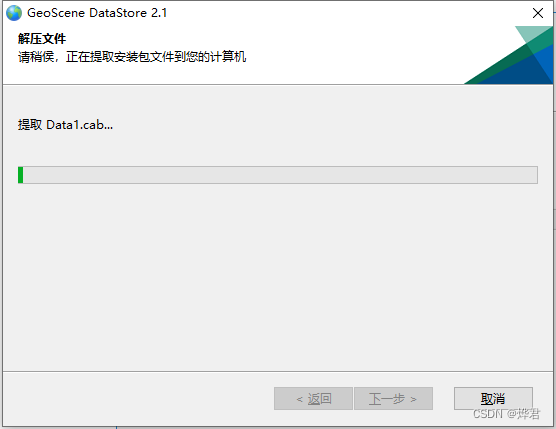
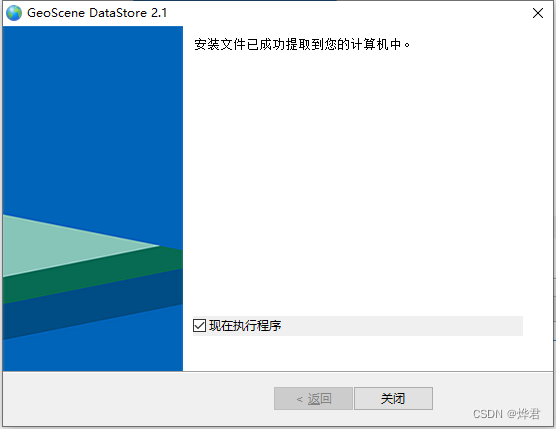
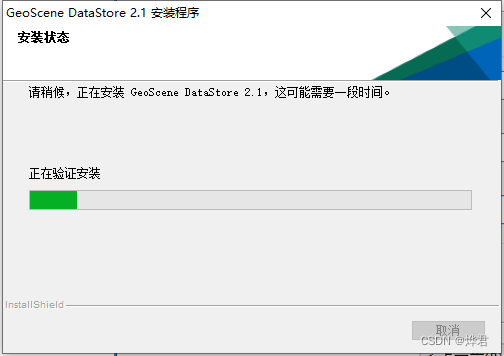
3. After the decompression is complete, click Close to execute the installation program automatically.
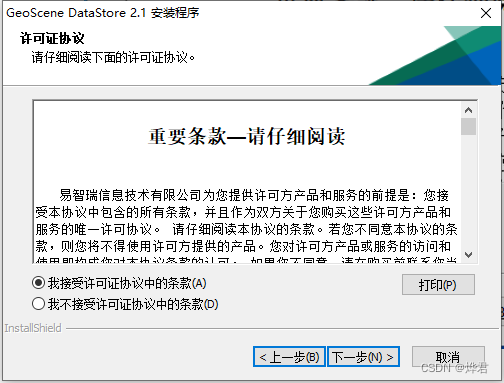
4. Click to accept the license agreement, click Next
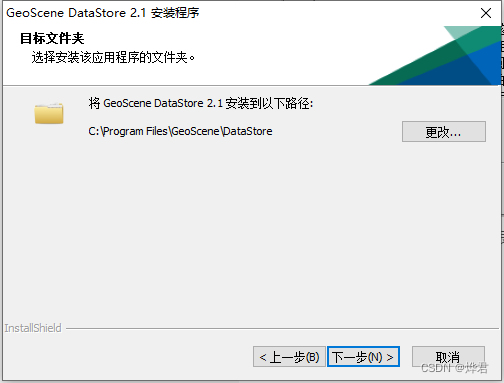
5. Select the installation folder (just keep the default)
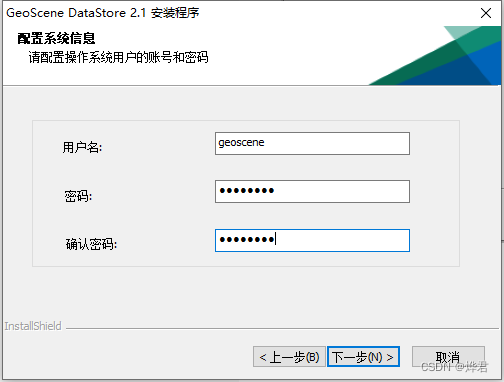
6. Set account password
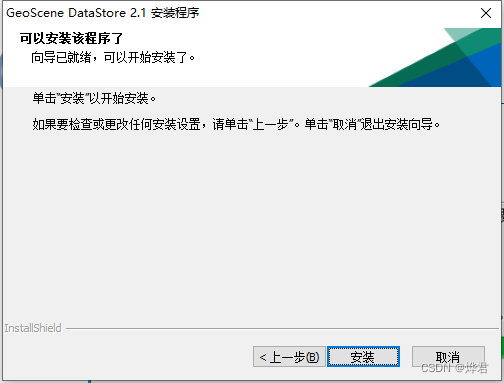
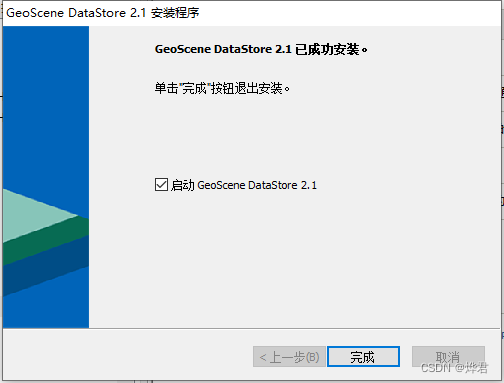
Click Finish to pop up the configuration interface.
5.2 Configuring a GeoScene Server site for GeoScene Data Store
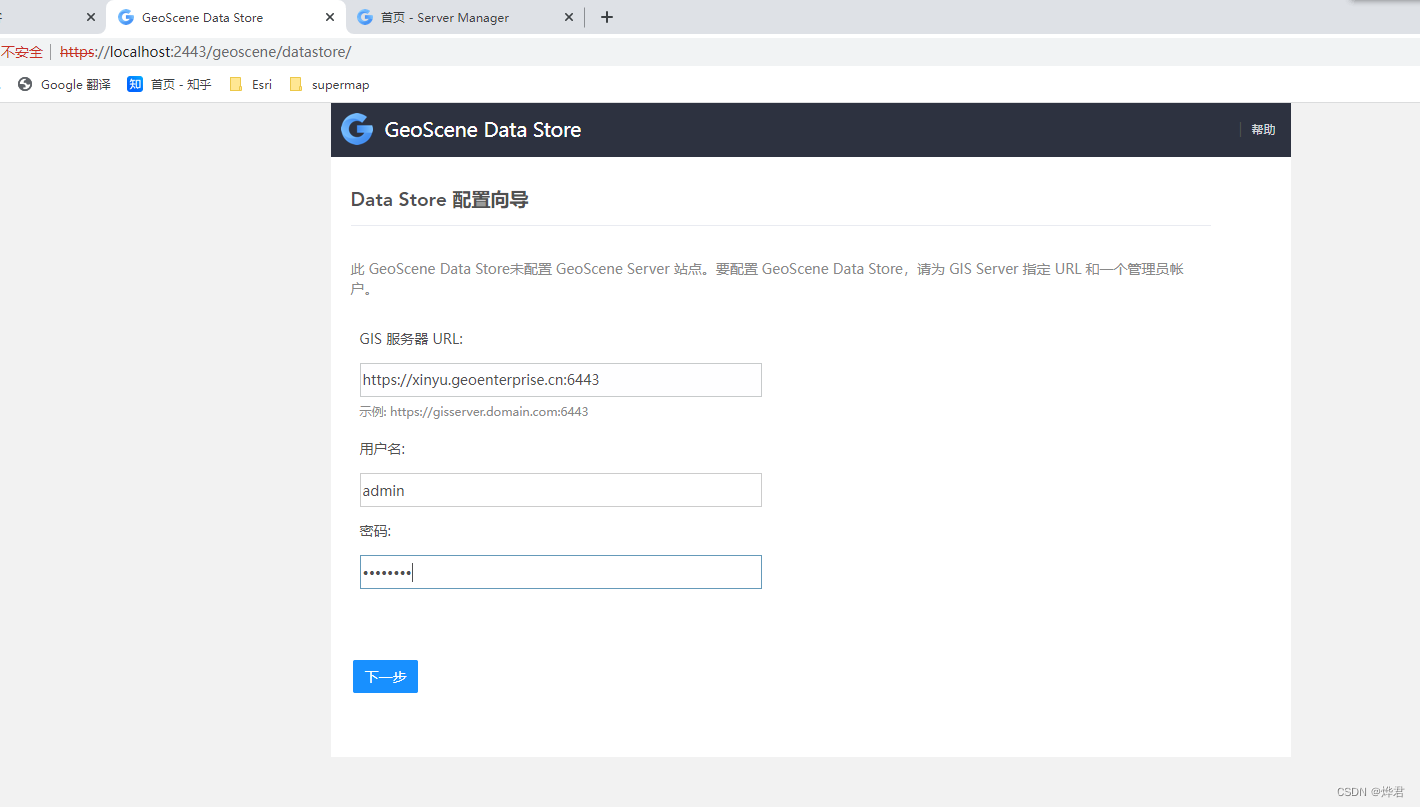
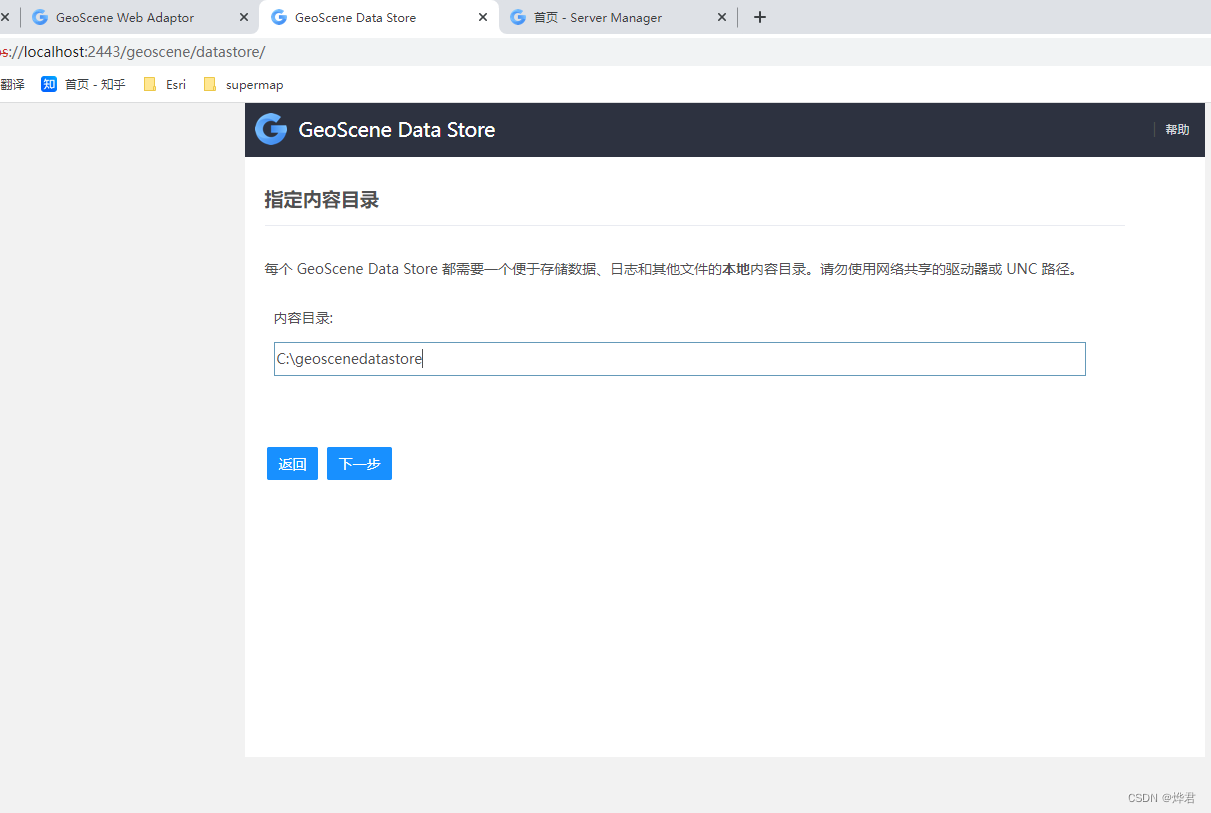
1. Enter the configuration interface (https://localhost:2443/geoscene/datastore/)
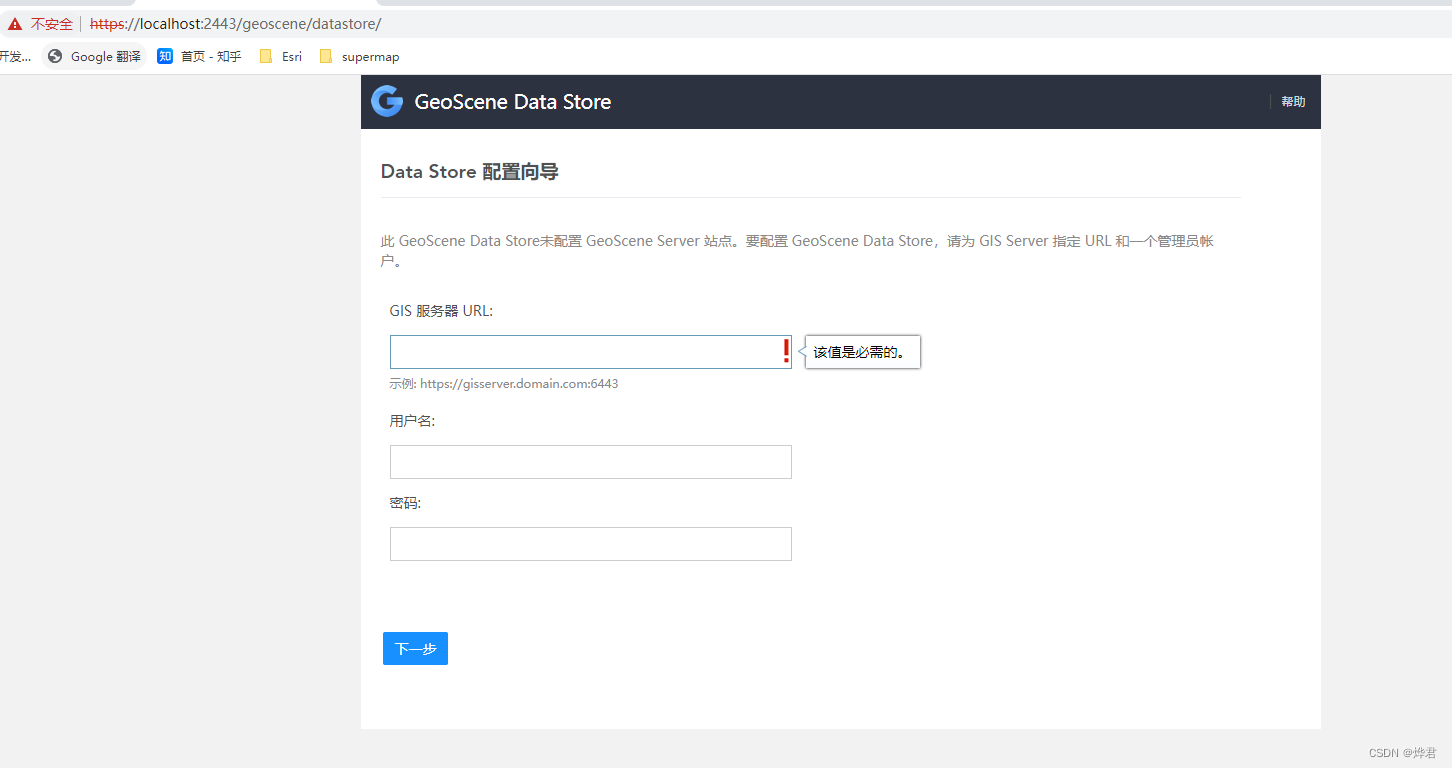
2. Fill in the information according to the format in the figure. The user name and password are the account information of the server main site administrator set in Part 2. Click Next.
3. Set the content storage path. If there is insufficient space (hosted service data will be stored here, especially 3D data, so it will require a lot of space for later use), you can also specify a local content directory with a relatively large disk space, such as E:\geoscenedatastore (please Do not use network shared drives or UNC paths). Click Next
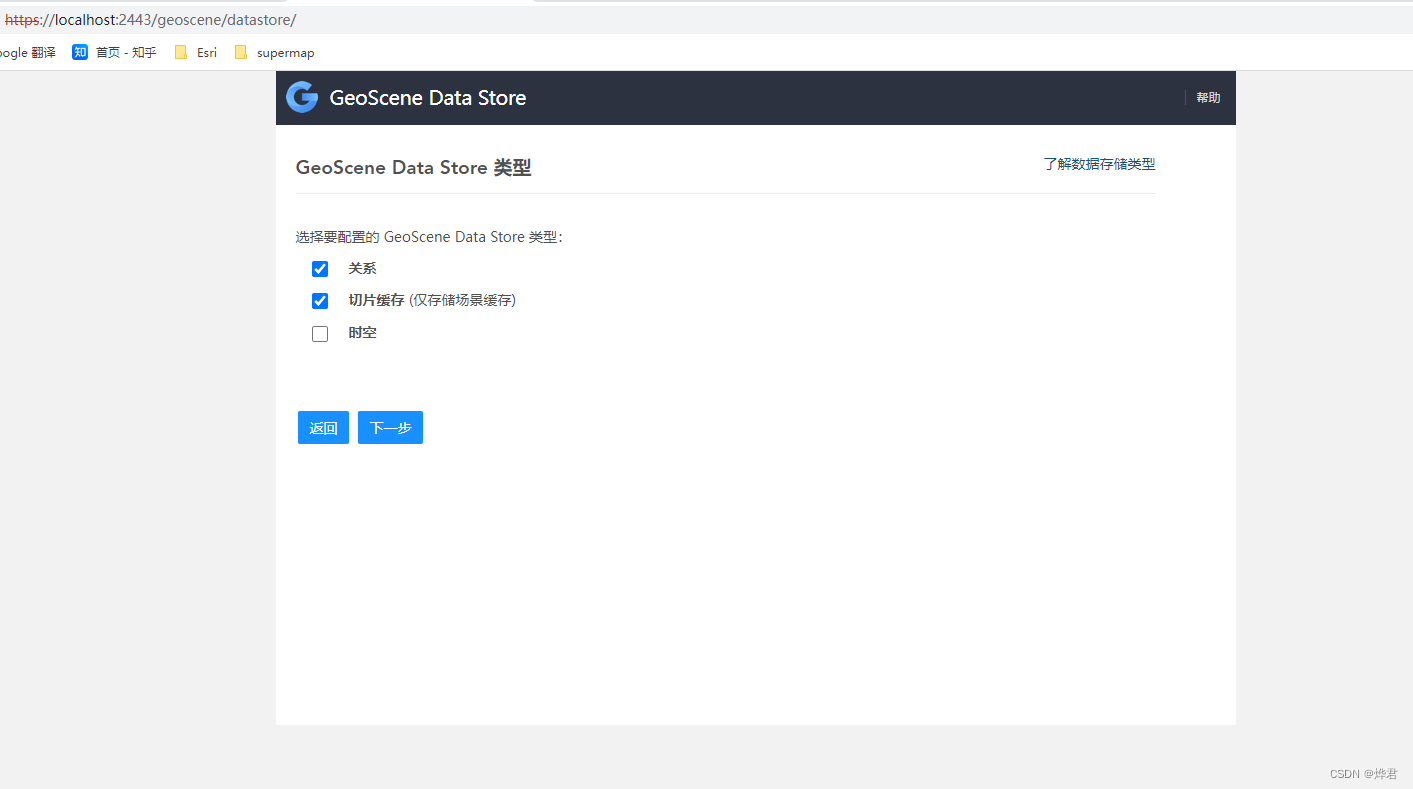
4.Select Relational and Tile Cache. (The 'relationship' type is used to store managed 2D data, and the 'slice cache' type is used to store managed 3D data [for example, when slpk releases Scene Layer, related data will be stored in this type of database]), the last one is 'space-time' Types (for real-time data functions and big data analysis functions) can be configured later (this configuration page can be accessed at any time for database configuration). Then click Next.
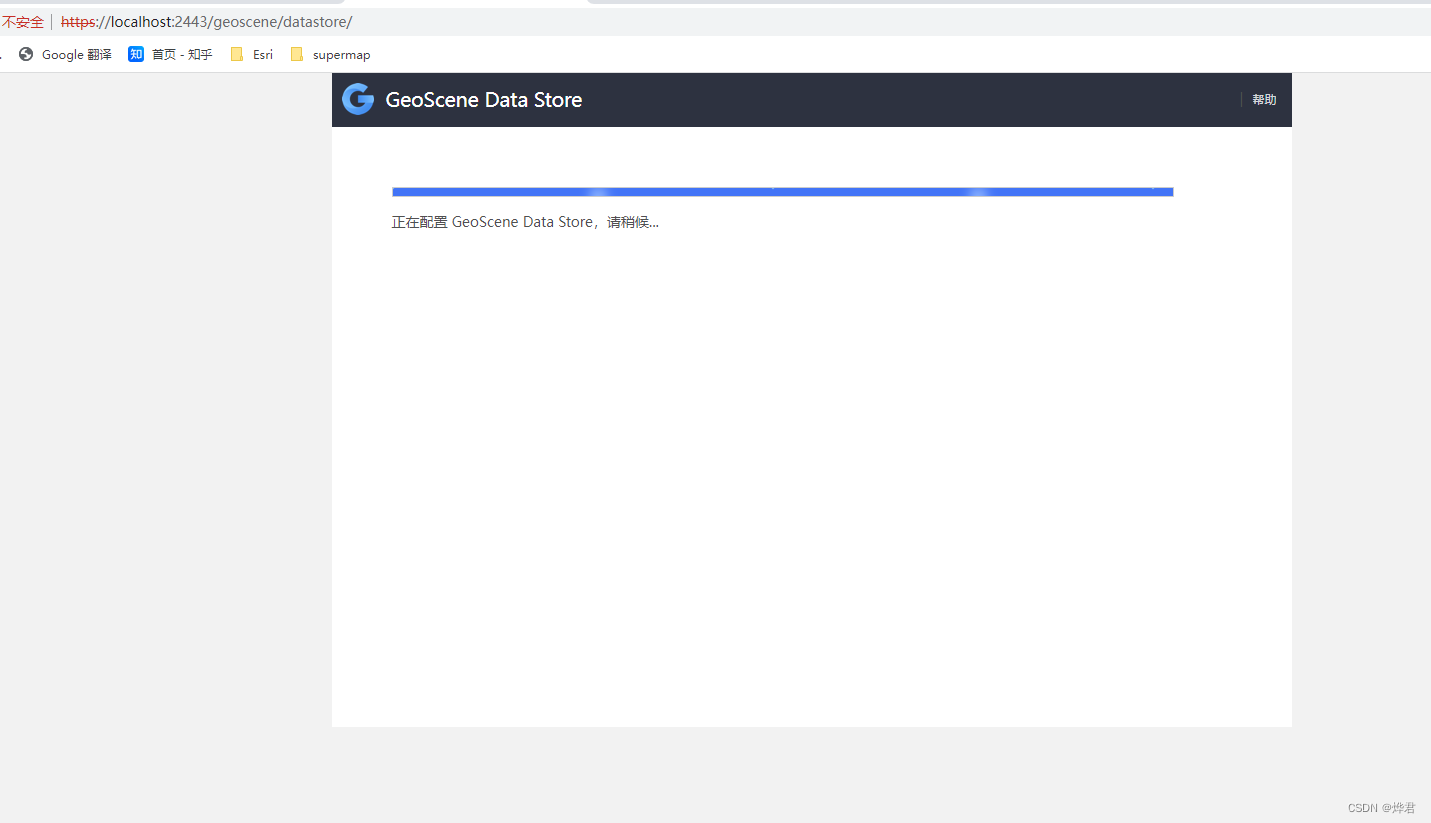
5. Click Finish and wait for configuration.

The following interface appears, indicating that the configuration is successful.
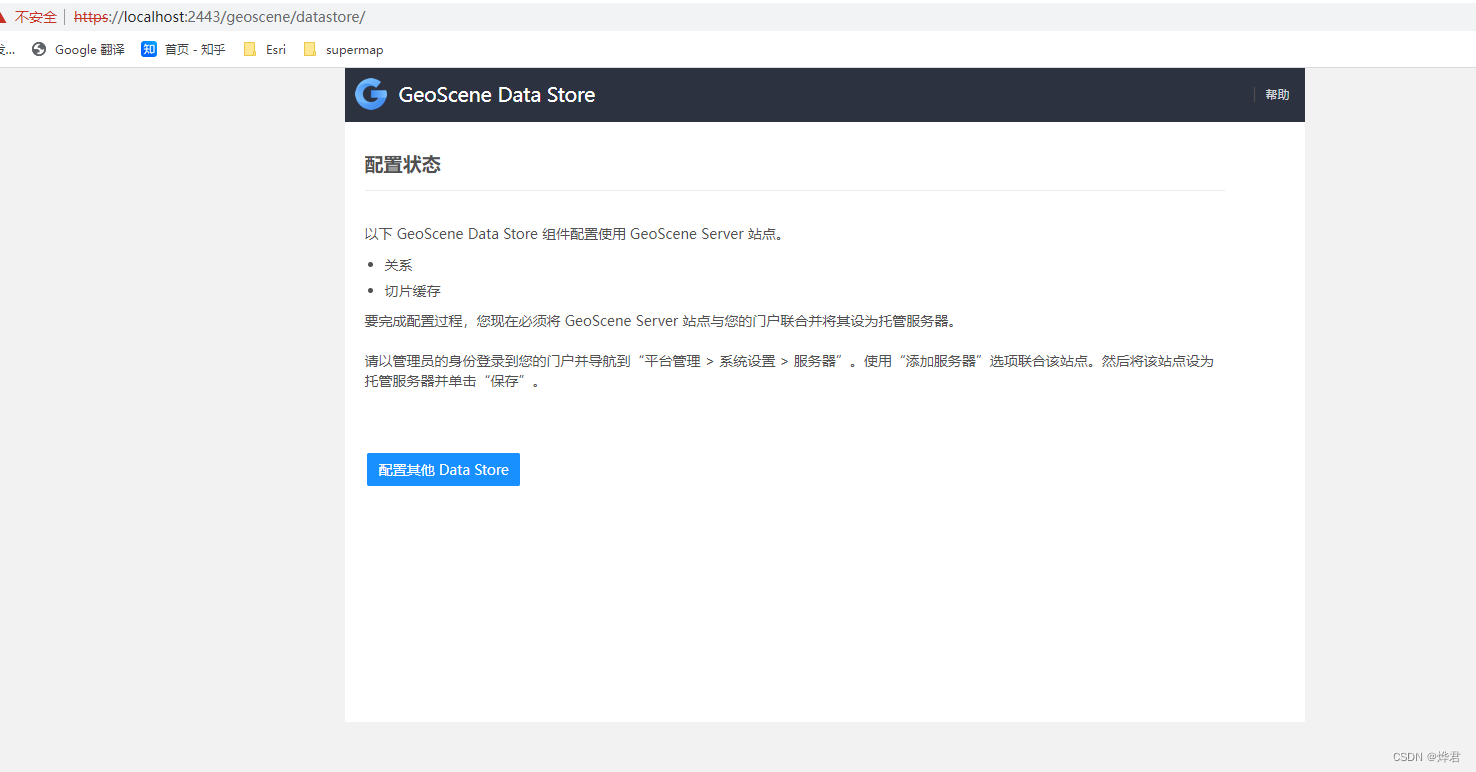
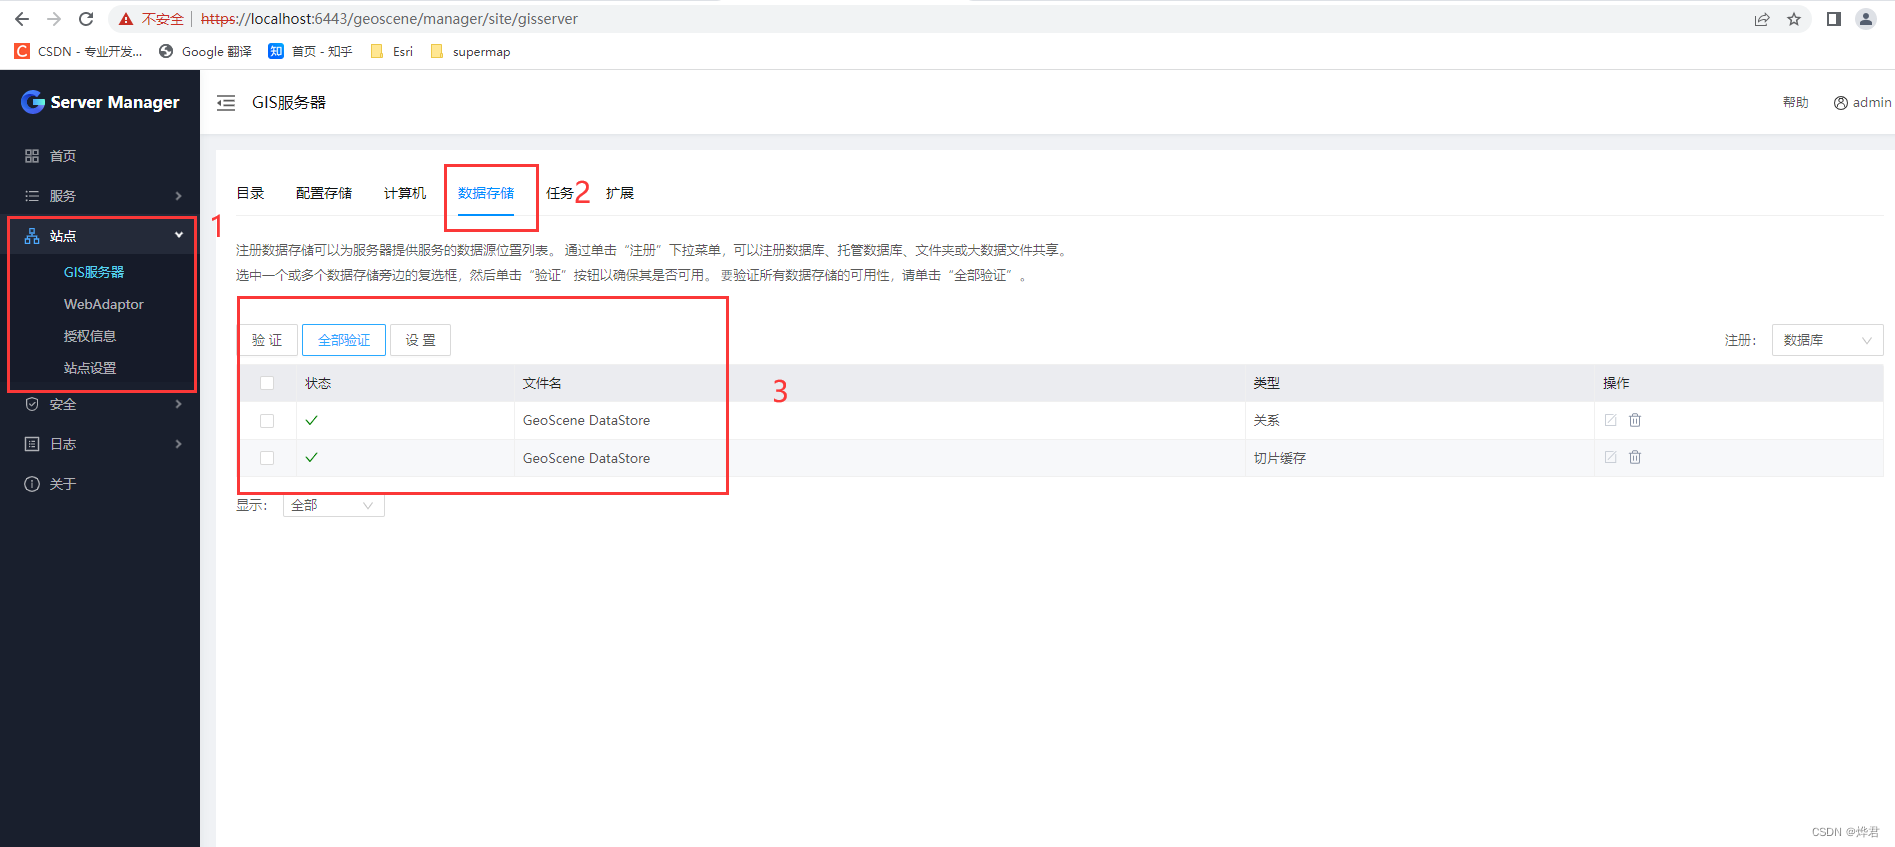
6. You can also verify the Datastore site storage on the Server Manager page: click the site on the left - GIS server, and then select data storage in the options on the right, you can see the configured relational and slice cache data storage listed below path. If you do not see a green tick in the status bar, you can click the Verify All button to verify whether the configuration is correct.
6 GeoScene Portal installation and configuration Web Adapter
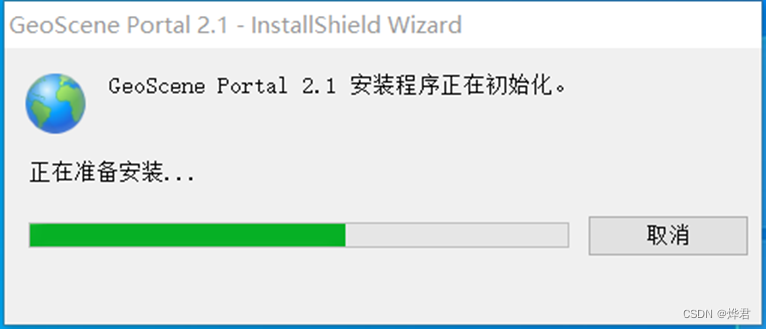
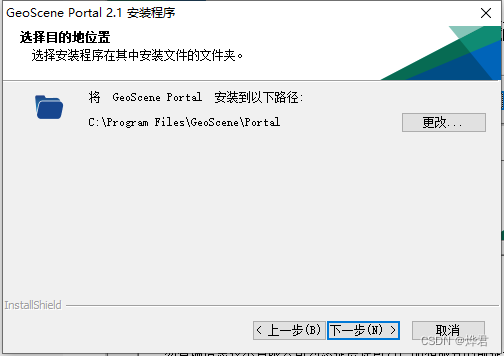
6.1 Install GeoScene Portal
1. Unzip the installation file

2. Select the installation package extraction path (just keep the default)


3. When finished, click Close to automatically execute the installer.
4. Click Next
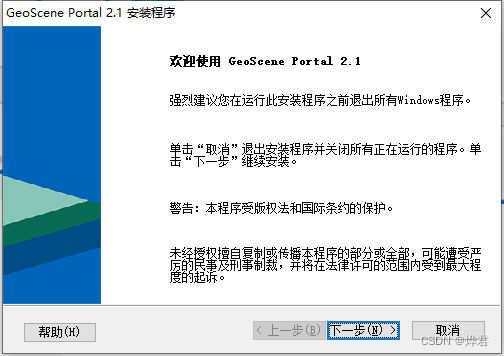
5. Accept the license agreement and click Next.

6. Select the installation path
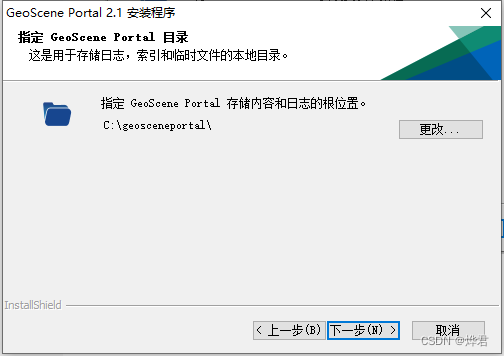
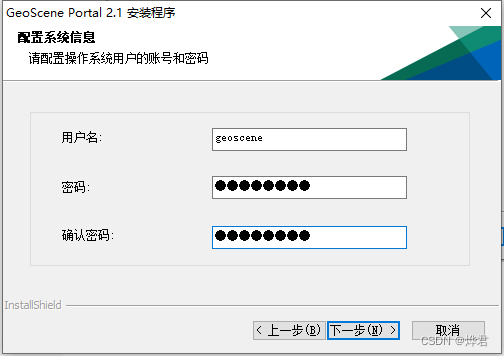
7. Set account password
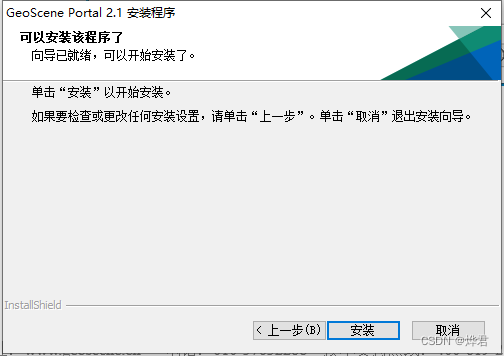
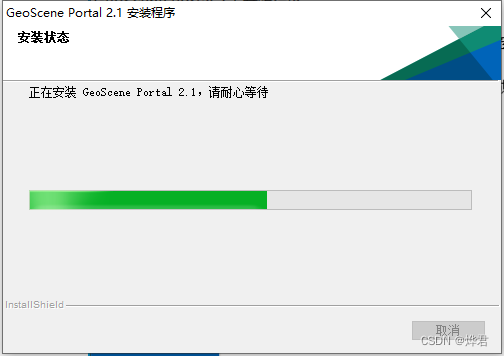
8. Click Install and wait for the installation to complete (it can take a long time).
6.2 Create a portal
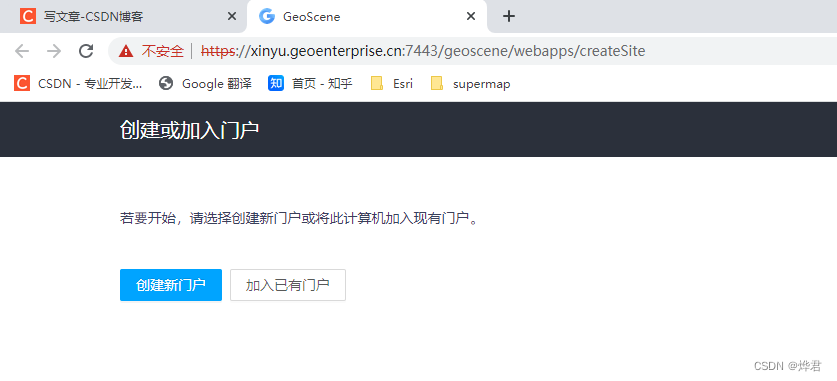
1. After the installation is complete, click Finish to automatically jump to the portal creation page. Click Create New Portal.
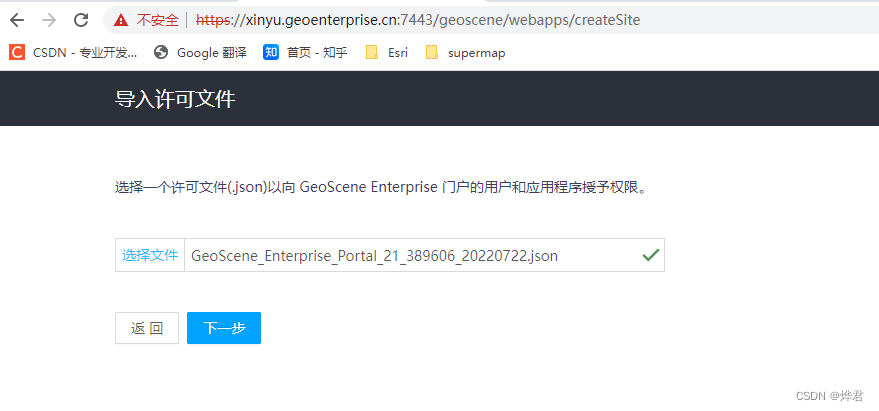
2. After importing the license file, click Next.
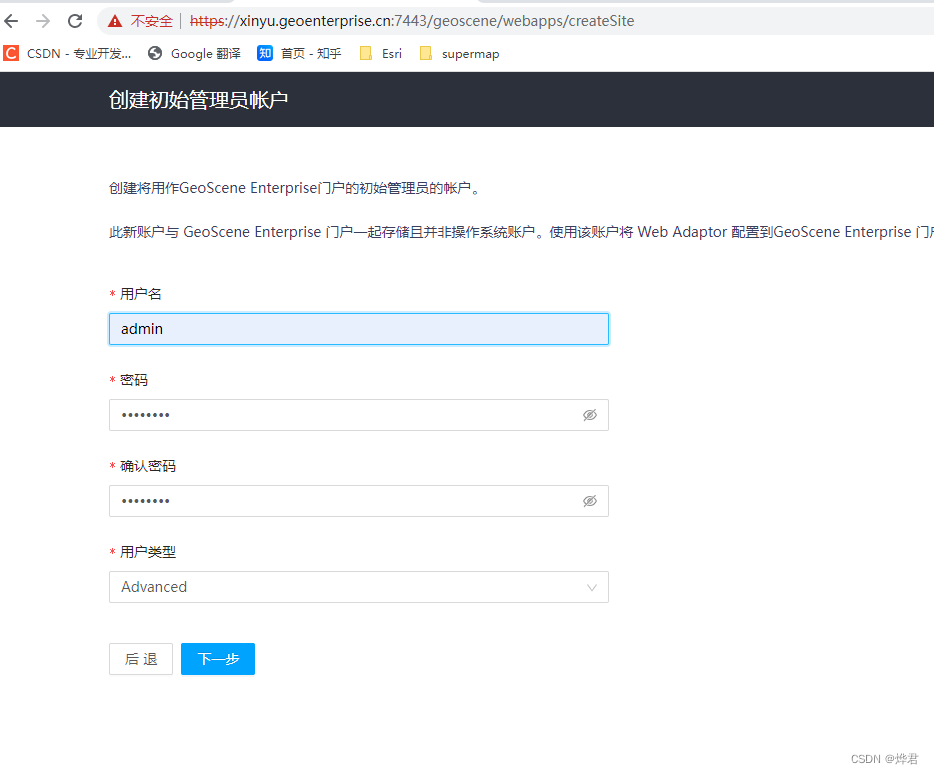
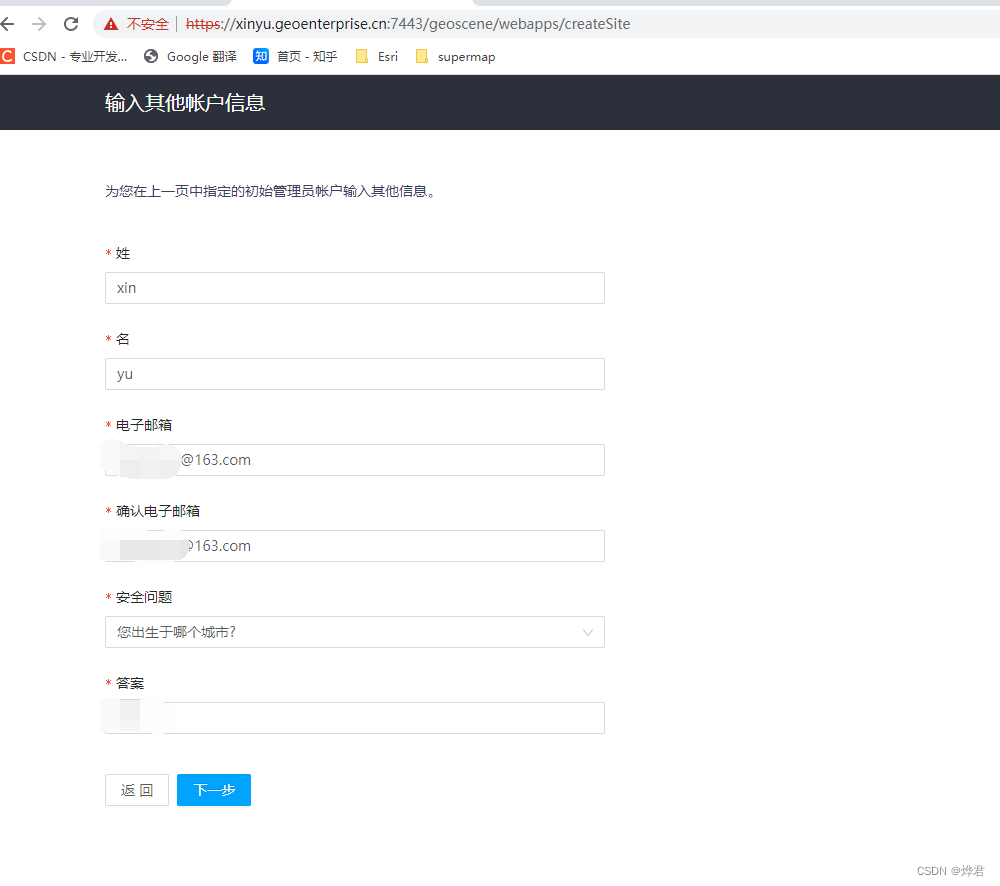
3. Create an initial administrator account.
The initial administrator account is very important. Please remember the password. If you forget the password, you can only reset it through the security question at present, so please also carefully set the security question in the next step.
4. Enter the corresponding information according to the prompt, and click Next after the input is complete.
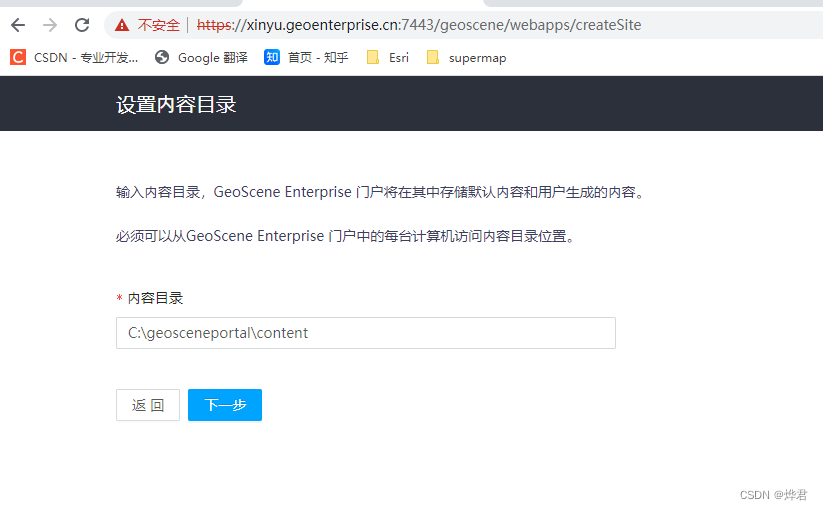
5. Set the content directory (you can keep the default). Click Next when finished.
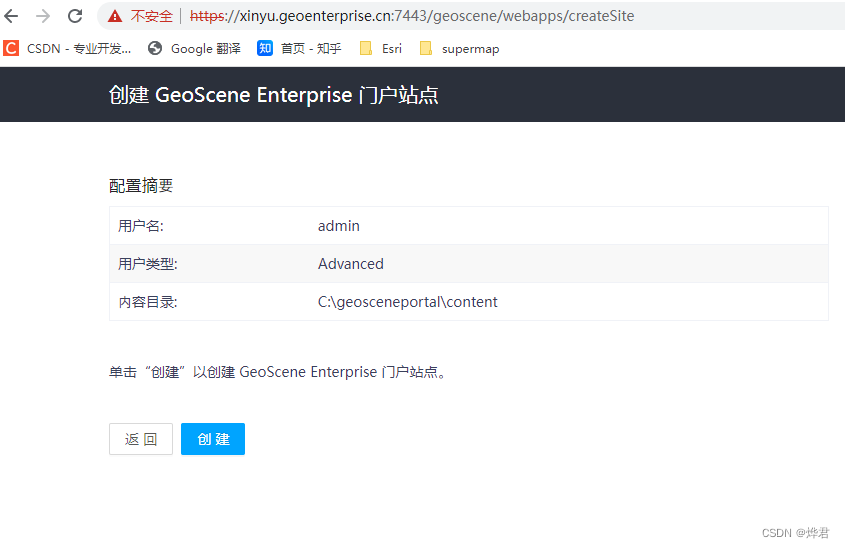
6. Click Create (the creation process will take a few minutes, do not close the window)
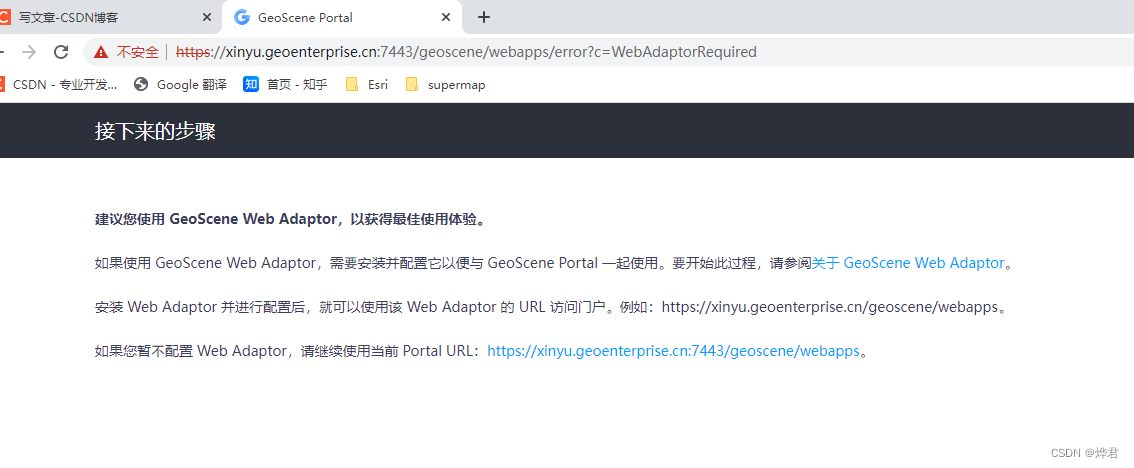
7. Click OK and wait for the configuration to complete (this process also takes a few minutes).

After the completion, you will be prompted to configure WebAdaptor
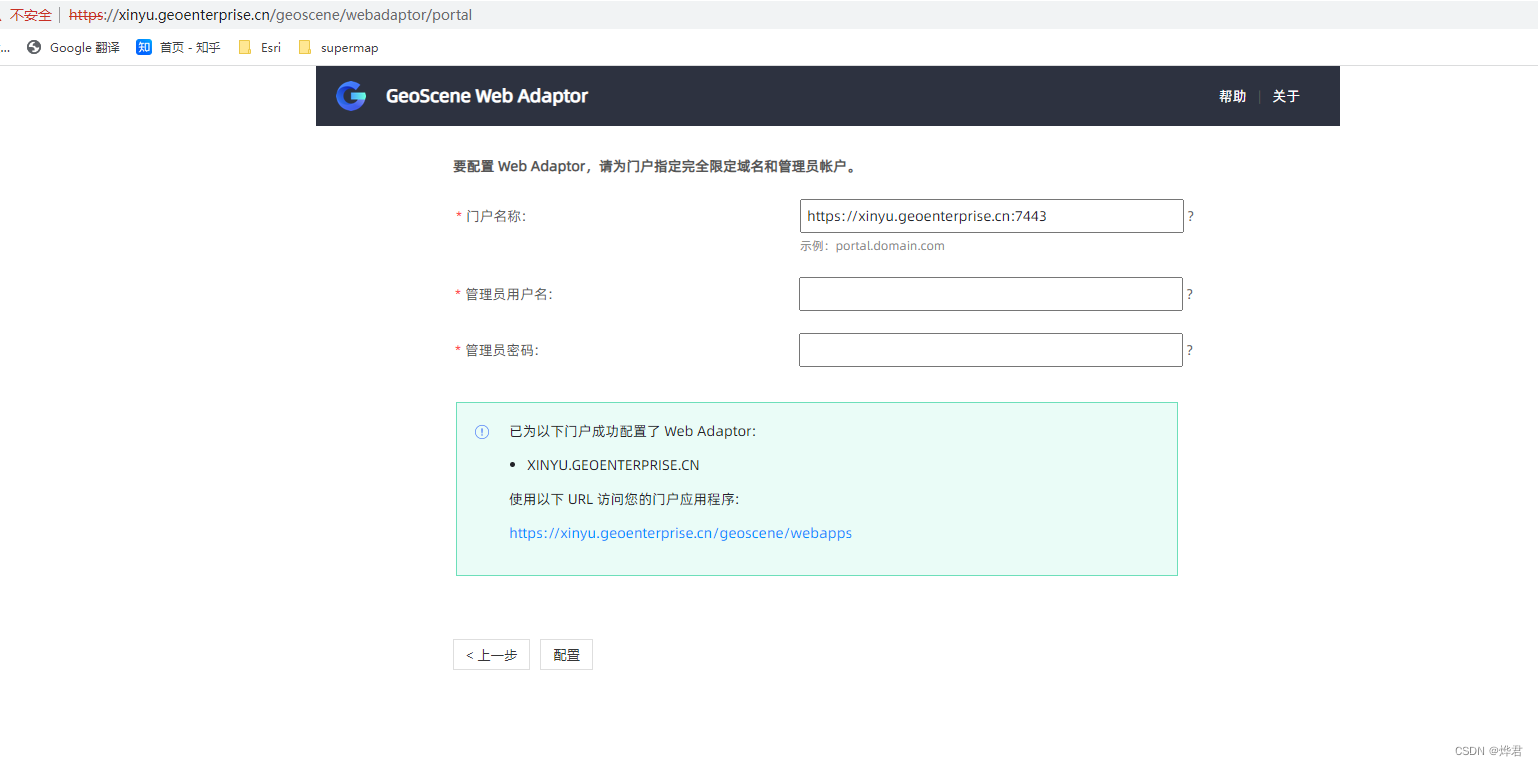
6.3 Use Web Adapter to configure GeoScene Portal
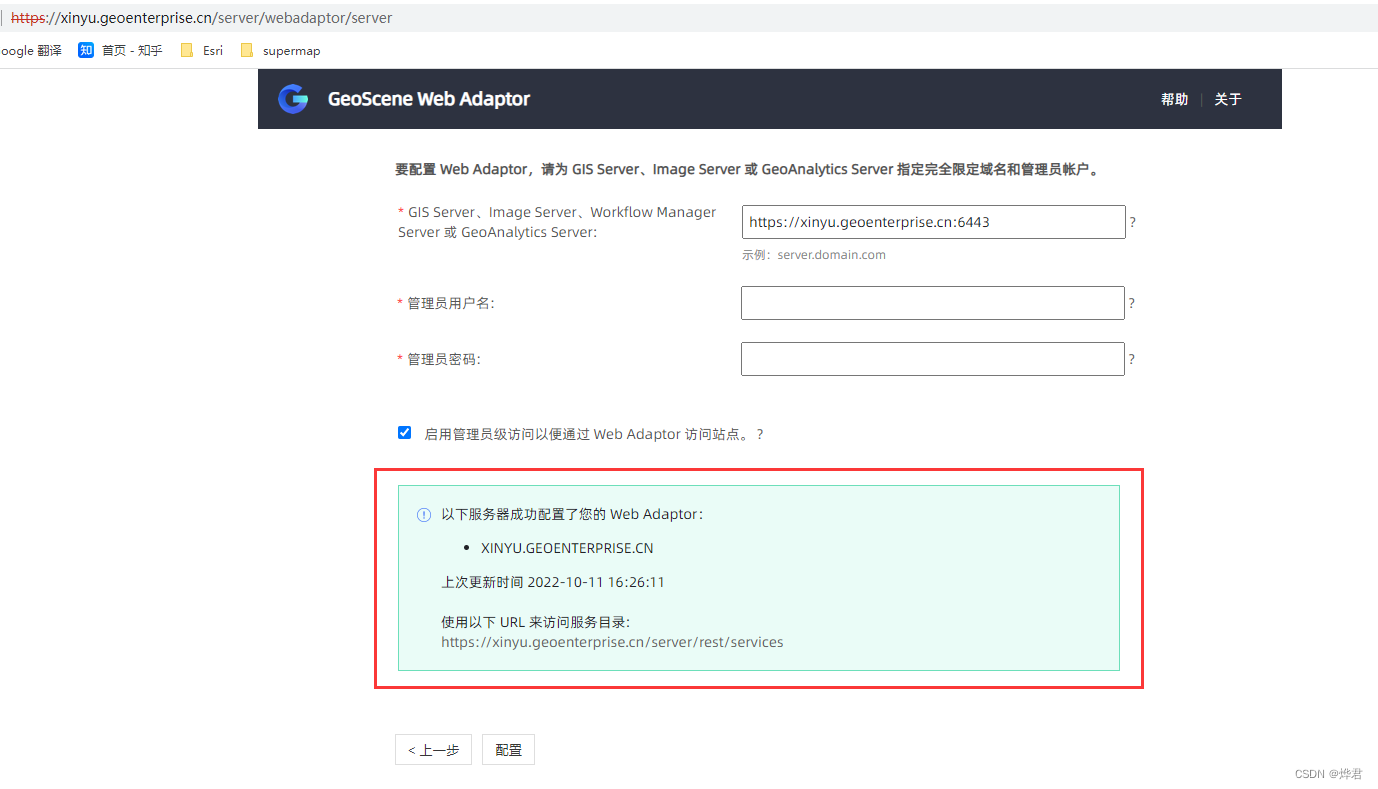
1. Enter the configuration page (https://computer name/custom webadaptor name/webadaptor).
2. Enter the information according to the format in the figure. The administrator username and password here are the initial administrator username and password set in the previous step. In this example our portal address is product.geosceneonline.cn. Click Configure.
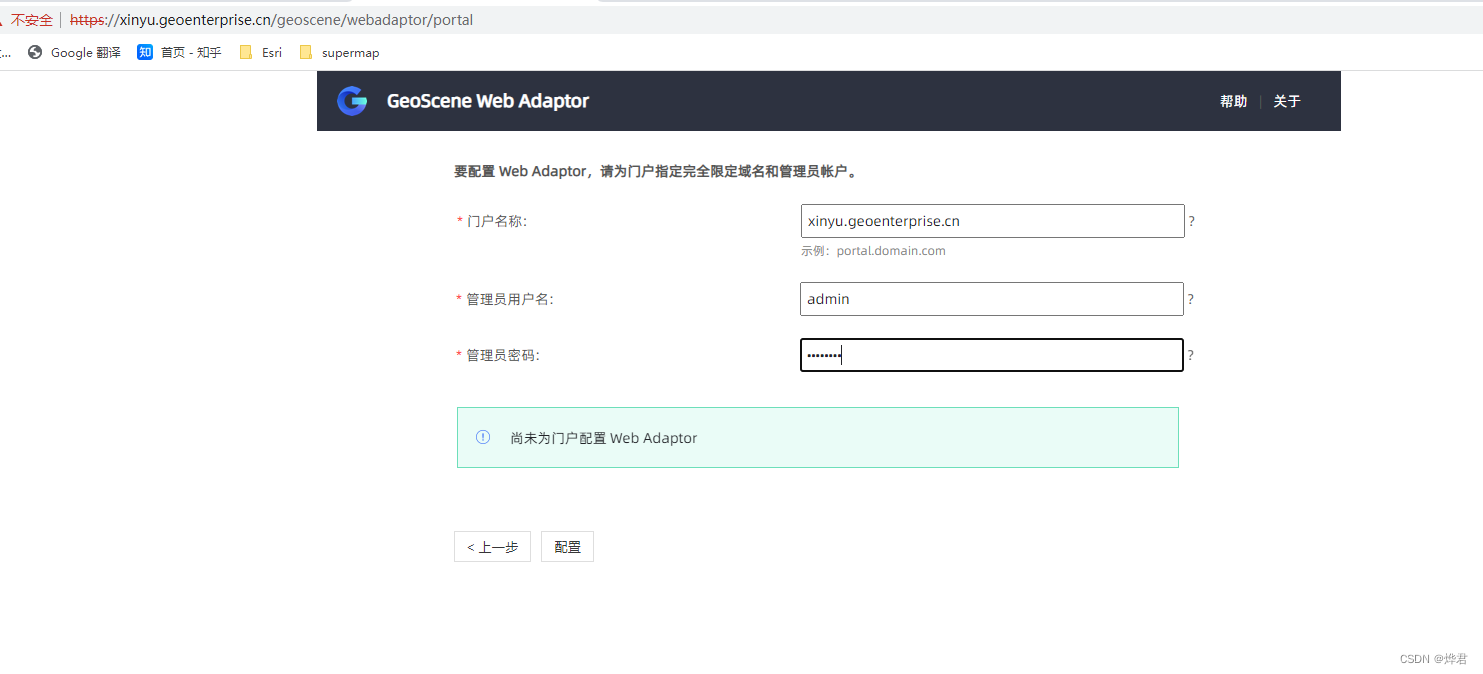
If the following information appears, the configuration is successful.
7 Server and Portal Joint Hosting
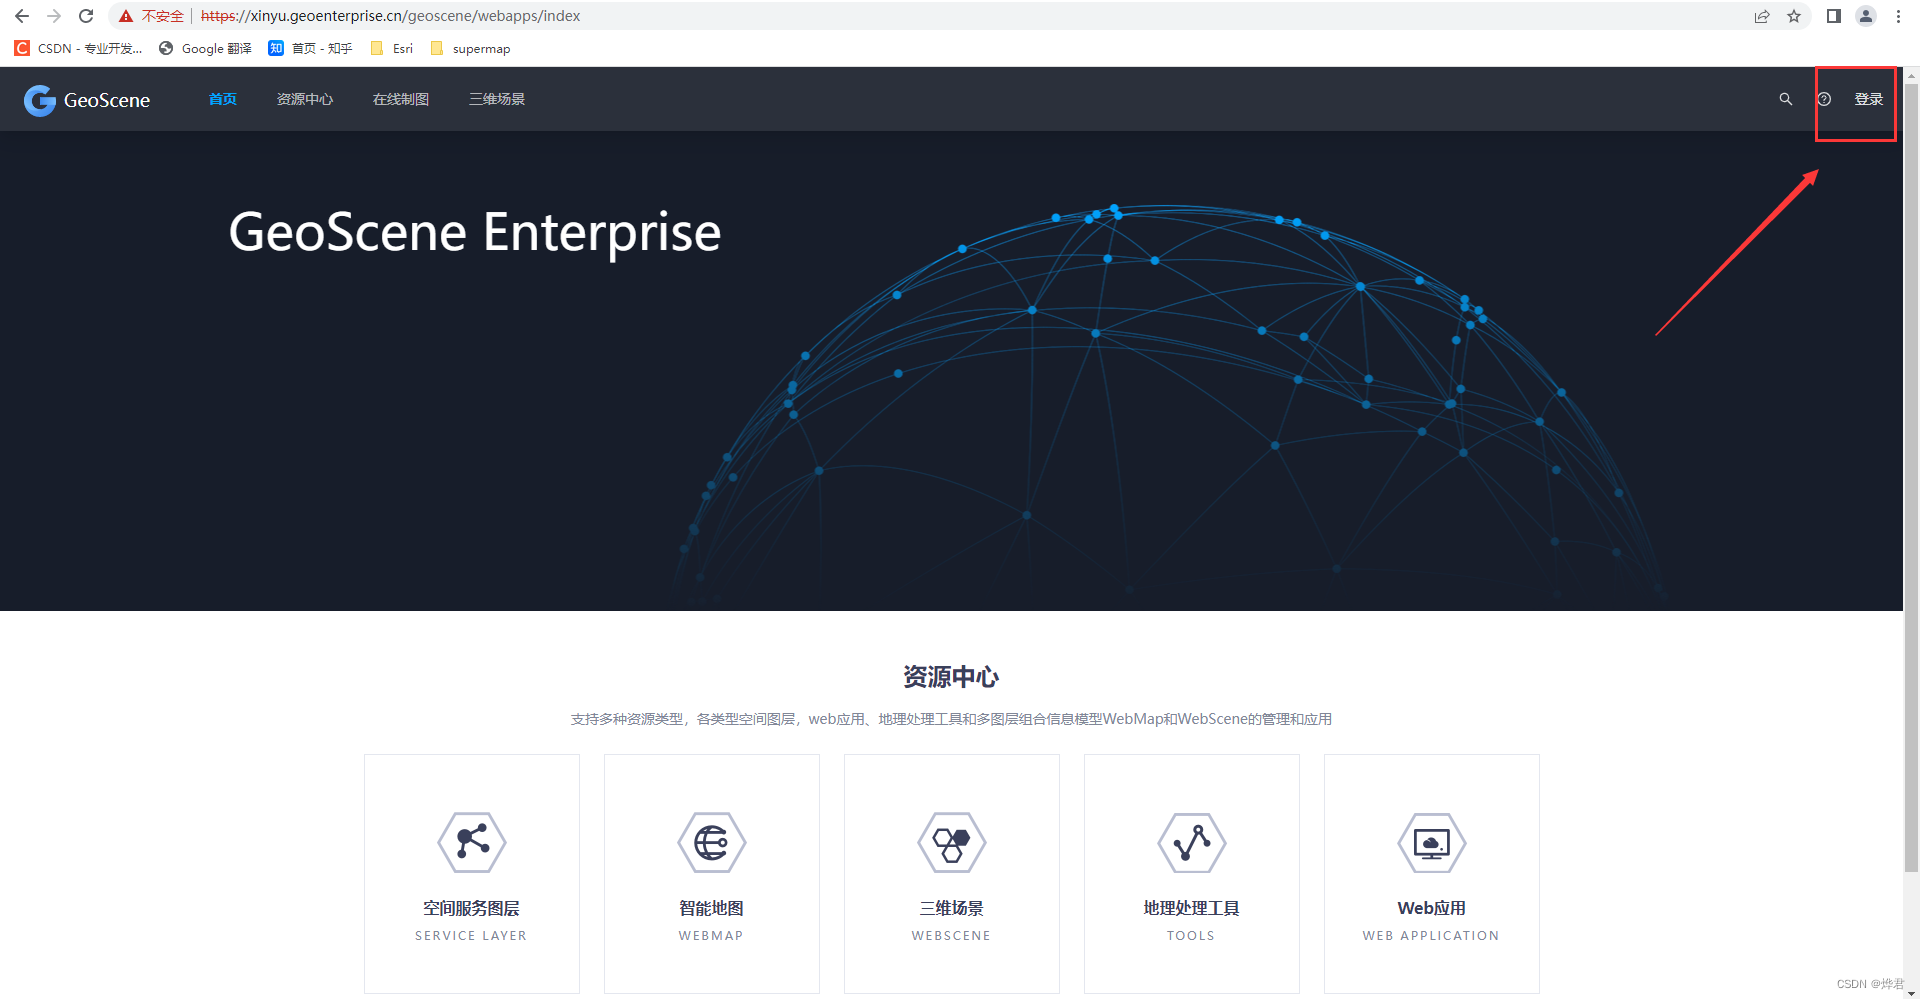
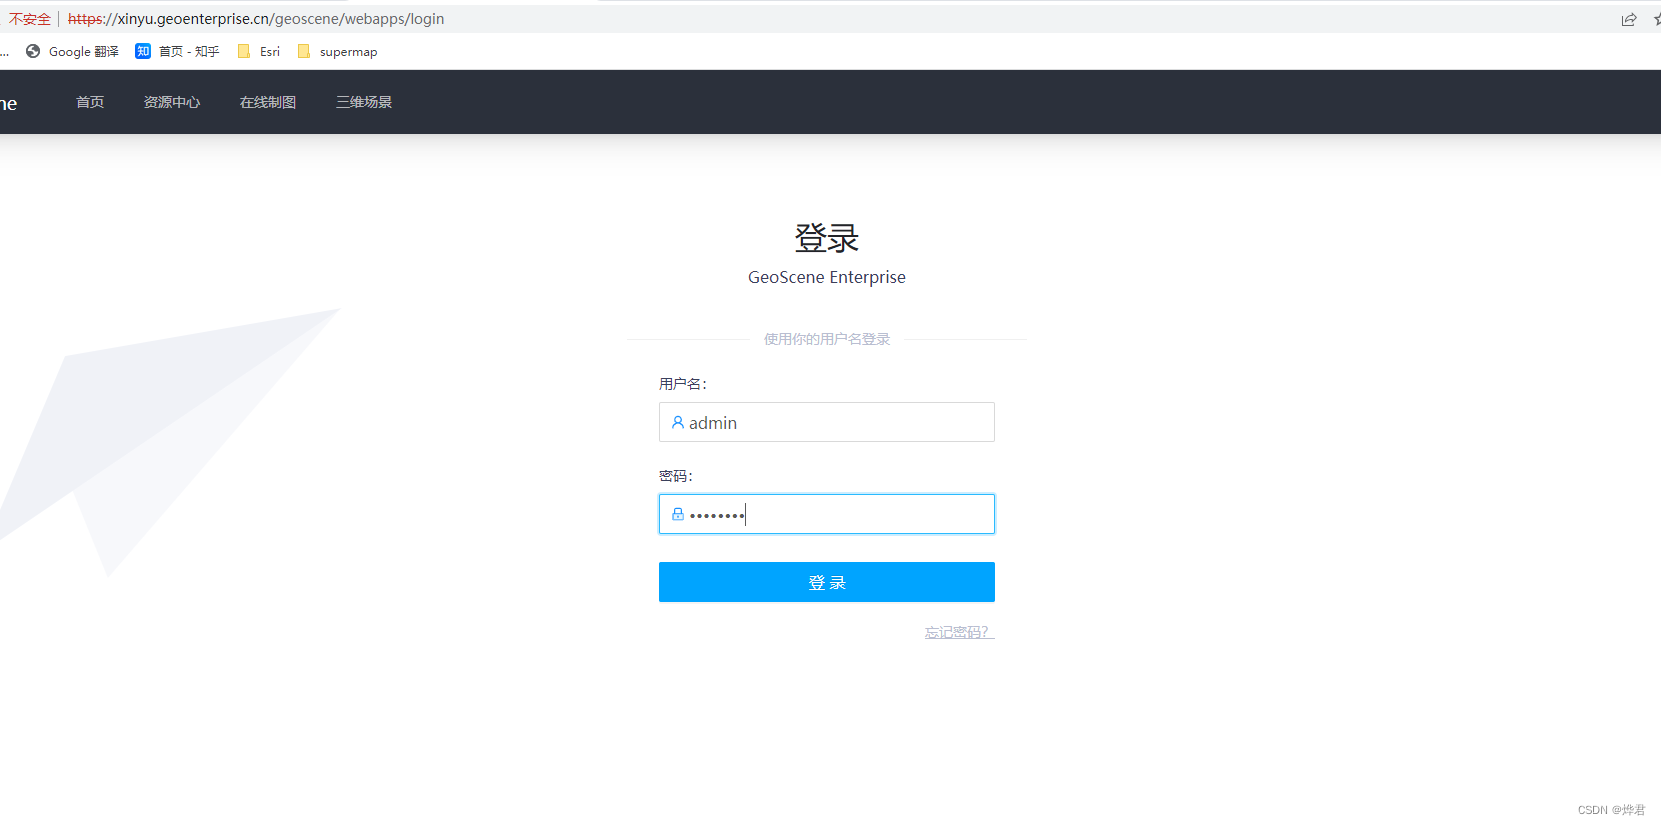
1. Log in to Portal with the initial administrator account in the browser. In this example: https://xinyu.geoenterprise.cn/geoscene/webapps/index.
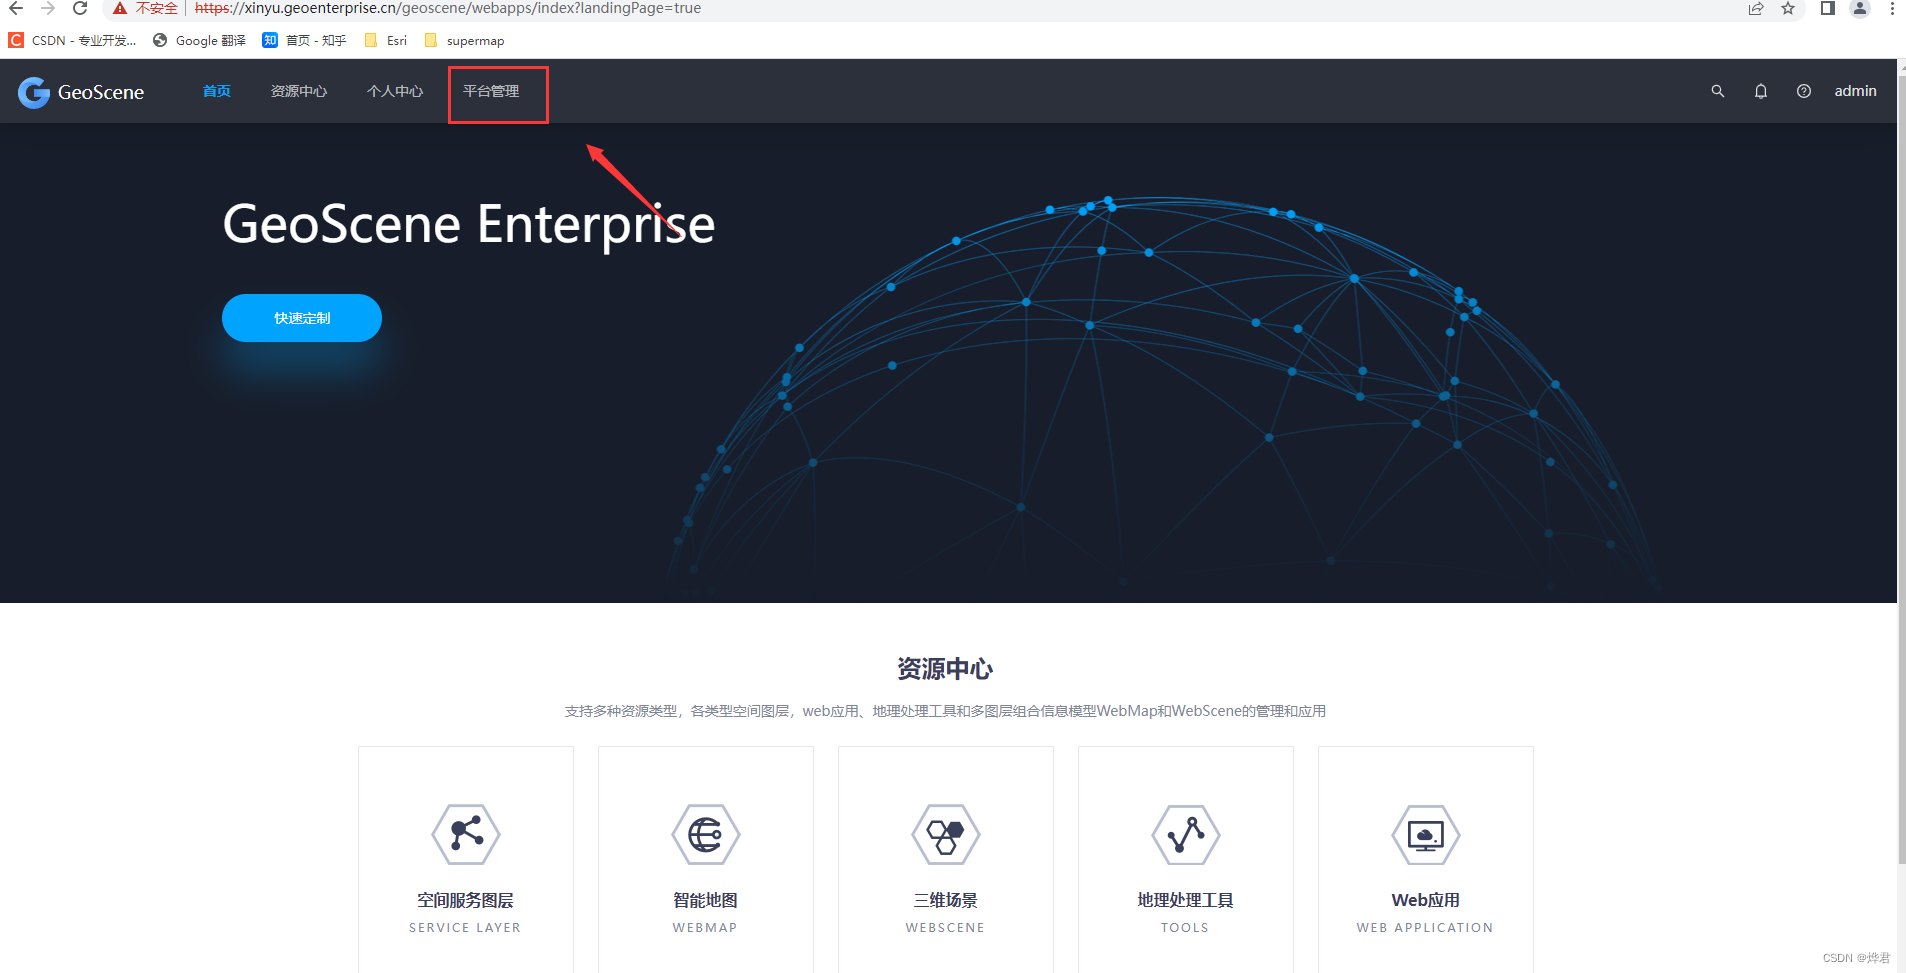
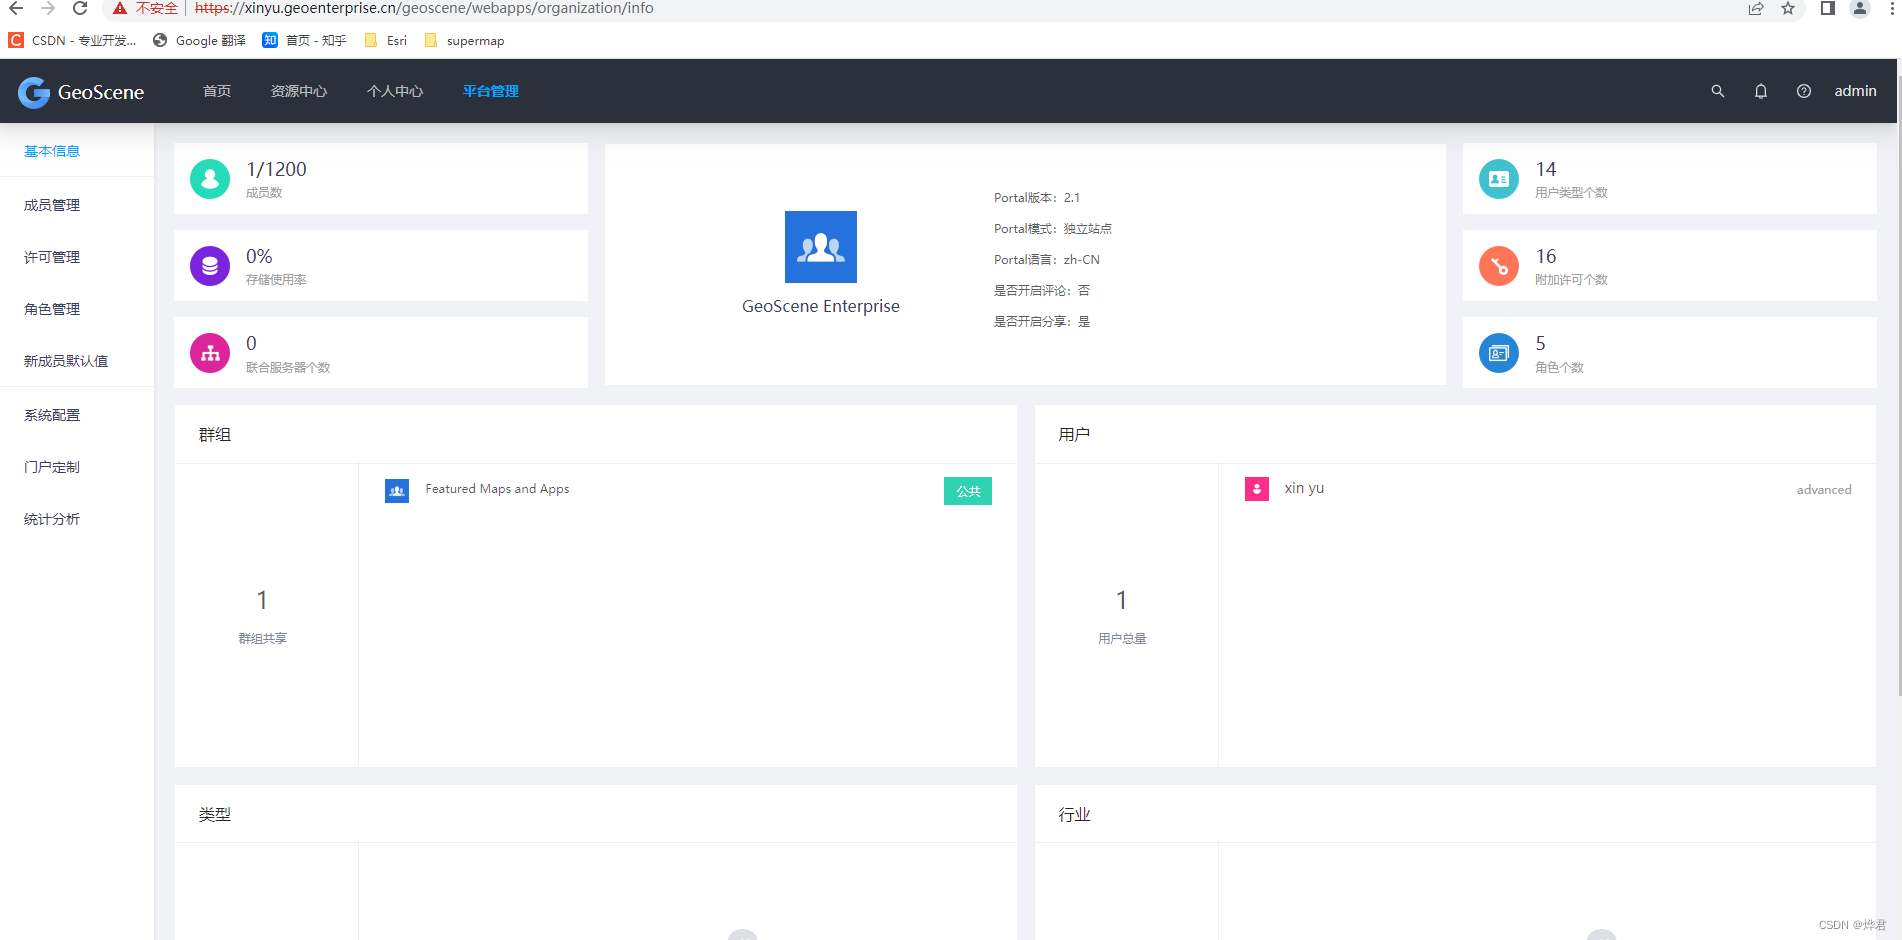
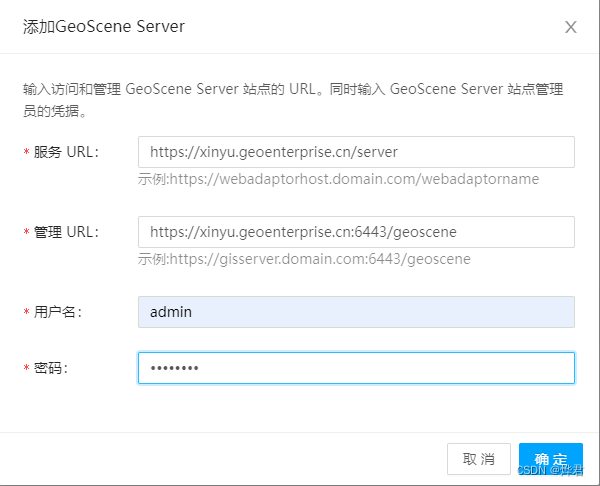
2. Click System Configuration on the left, and select Server on the right. Then in the federated server configuration item, select Add Server.
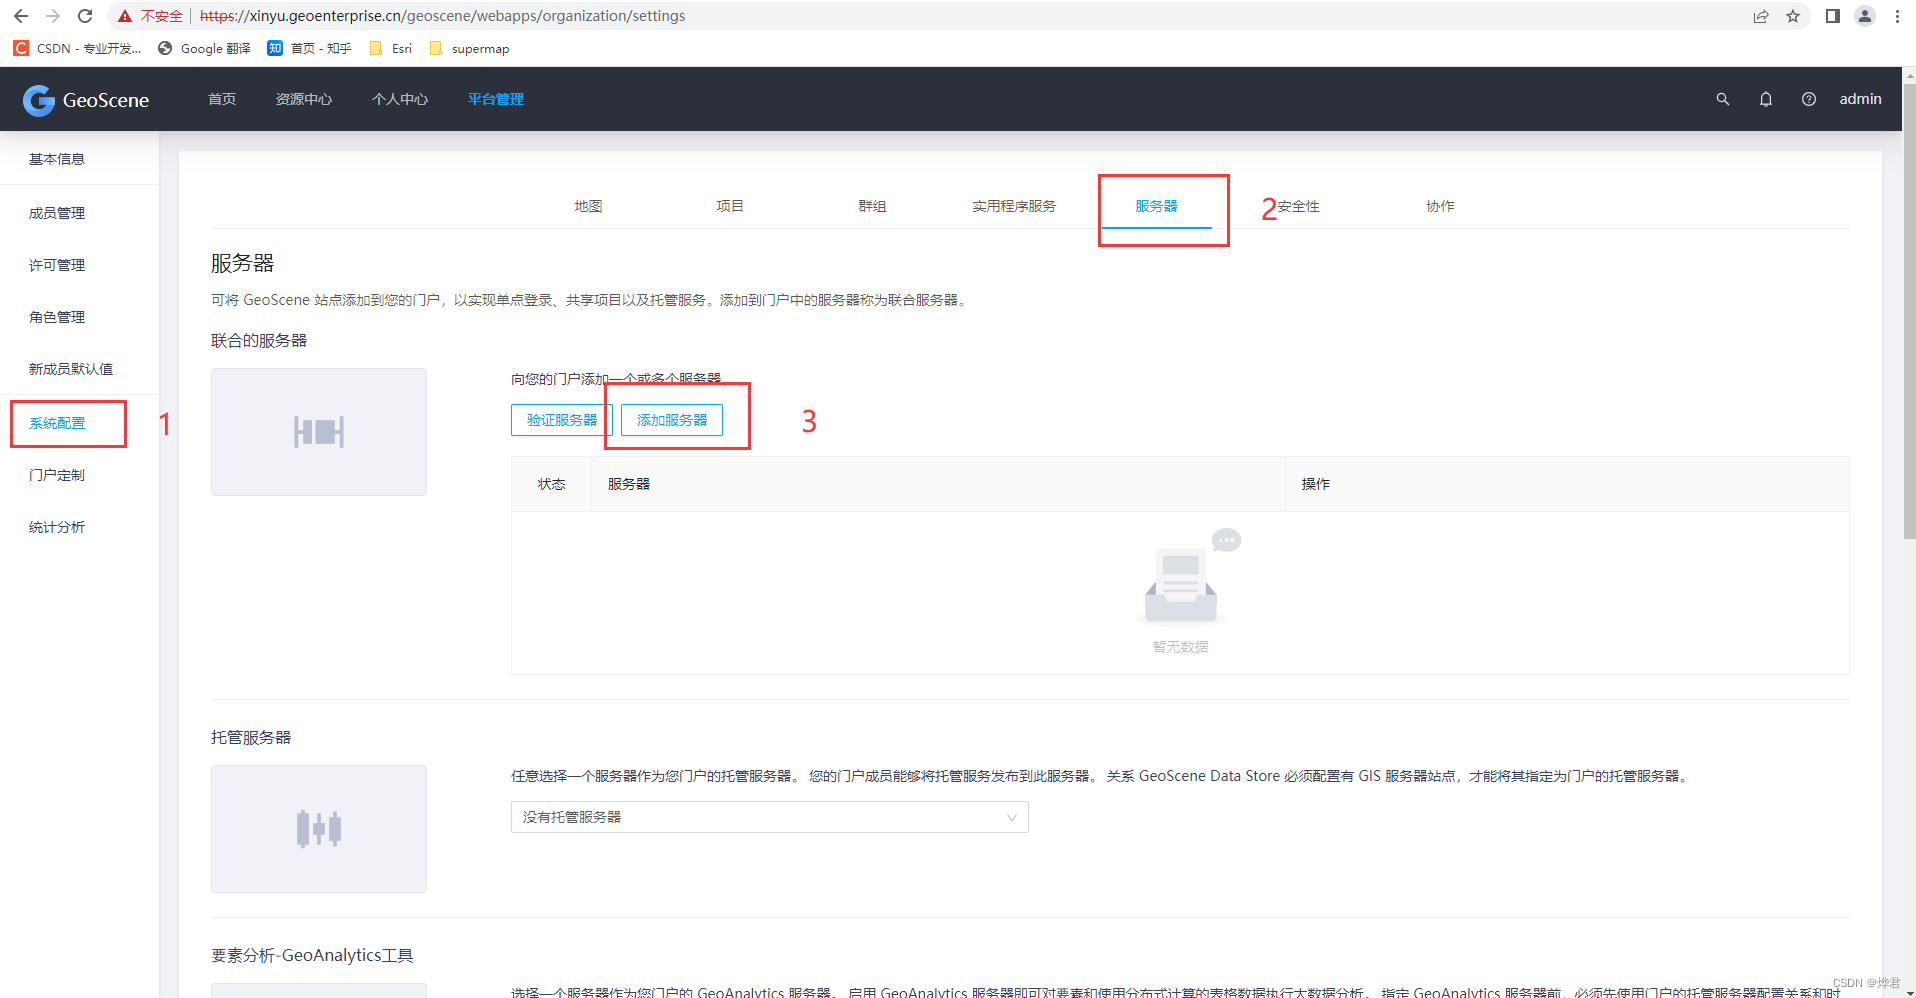
3. Fill in the information according to the format ( note: geoscene must be filled in at the end of the management URL ). The username and password are the server's main site administrator account.
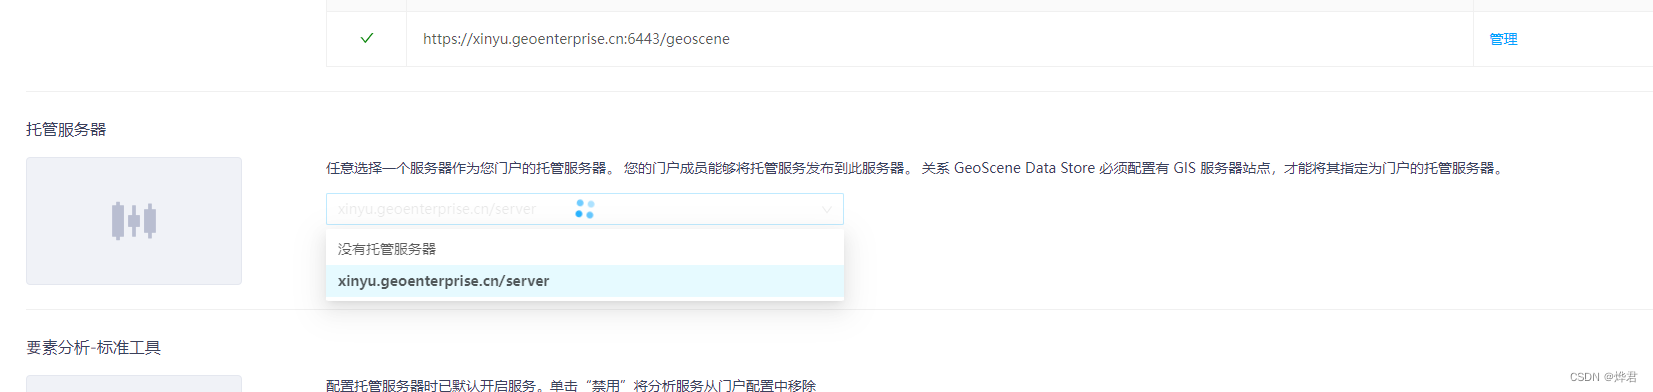
4. After adding, as shown in the figure below, you need to click the verification server to complete the verification (a green tick appears).
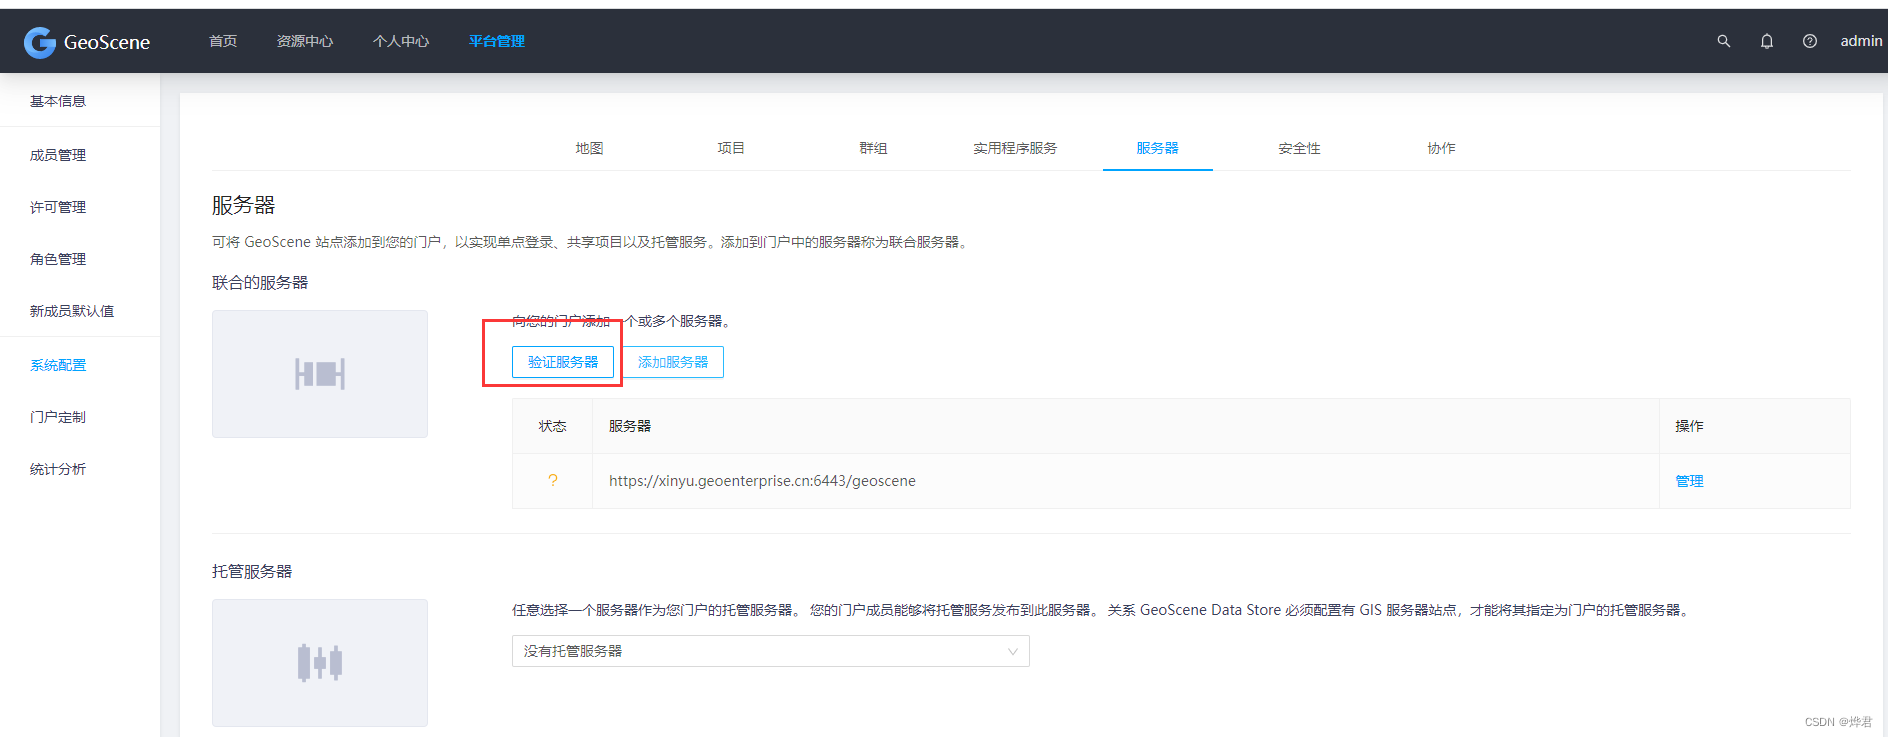

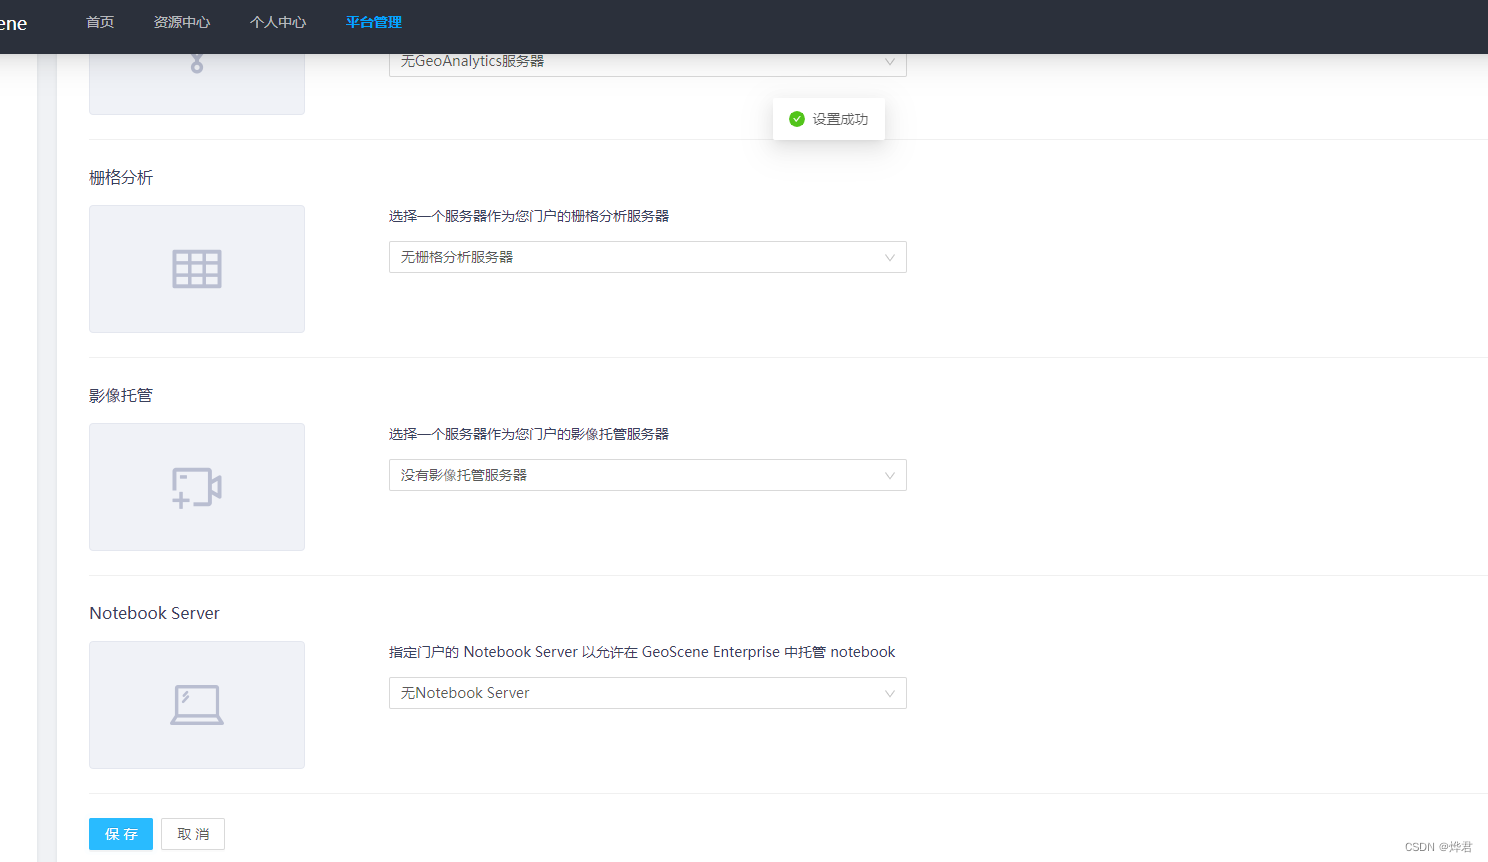
5. Next, you need to configure the hosting server on the same page. Mark the position in the figure, click the drop-down menu, and select the hosting server below.


6. Swipe to the bottom of the page, click the save button at the position shown in the figure below, and a prompt will appear after clicking.
8 Test 2D and 3D service publishing
8.1 Two-dimensional service
1. Publish the service. Click Personal Center-My Content-Add-Local Resources
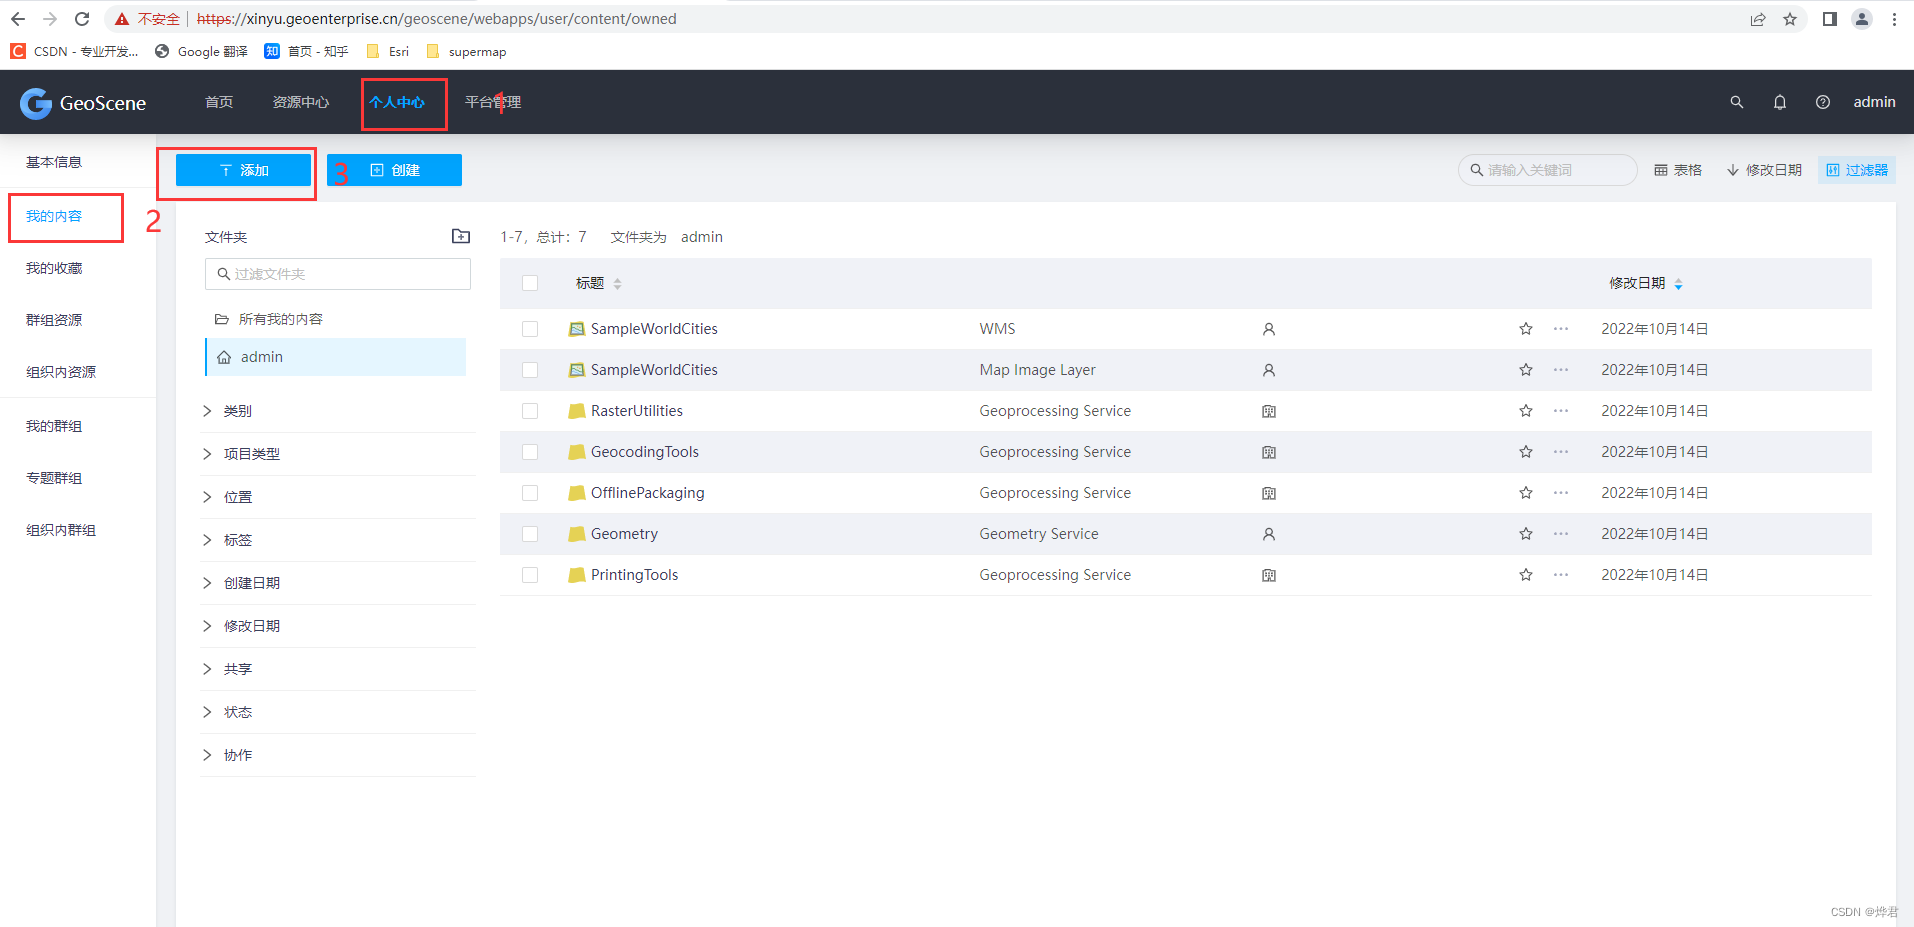

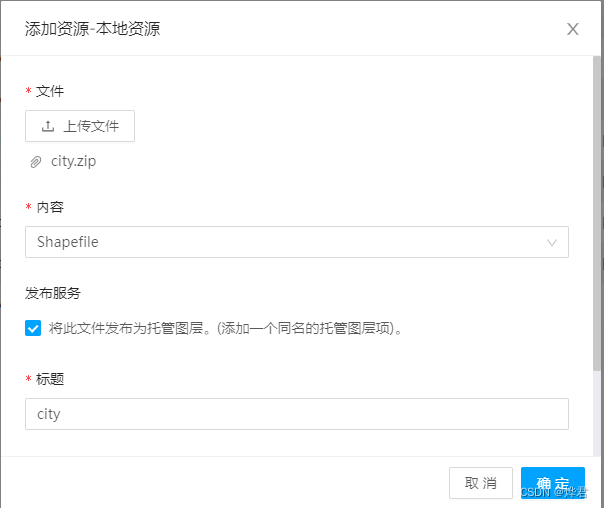
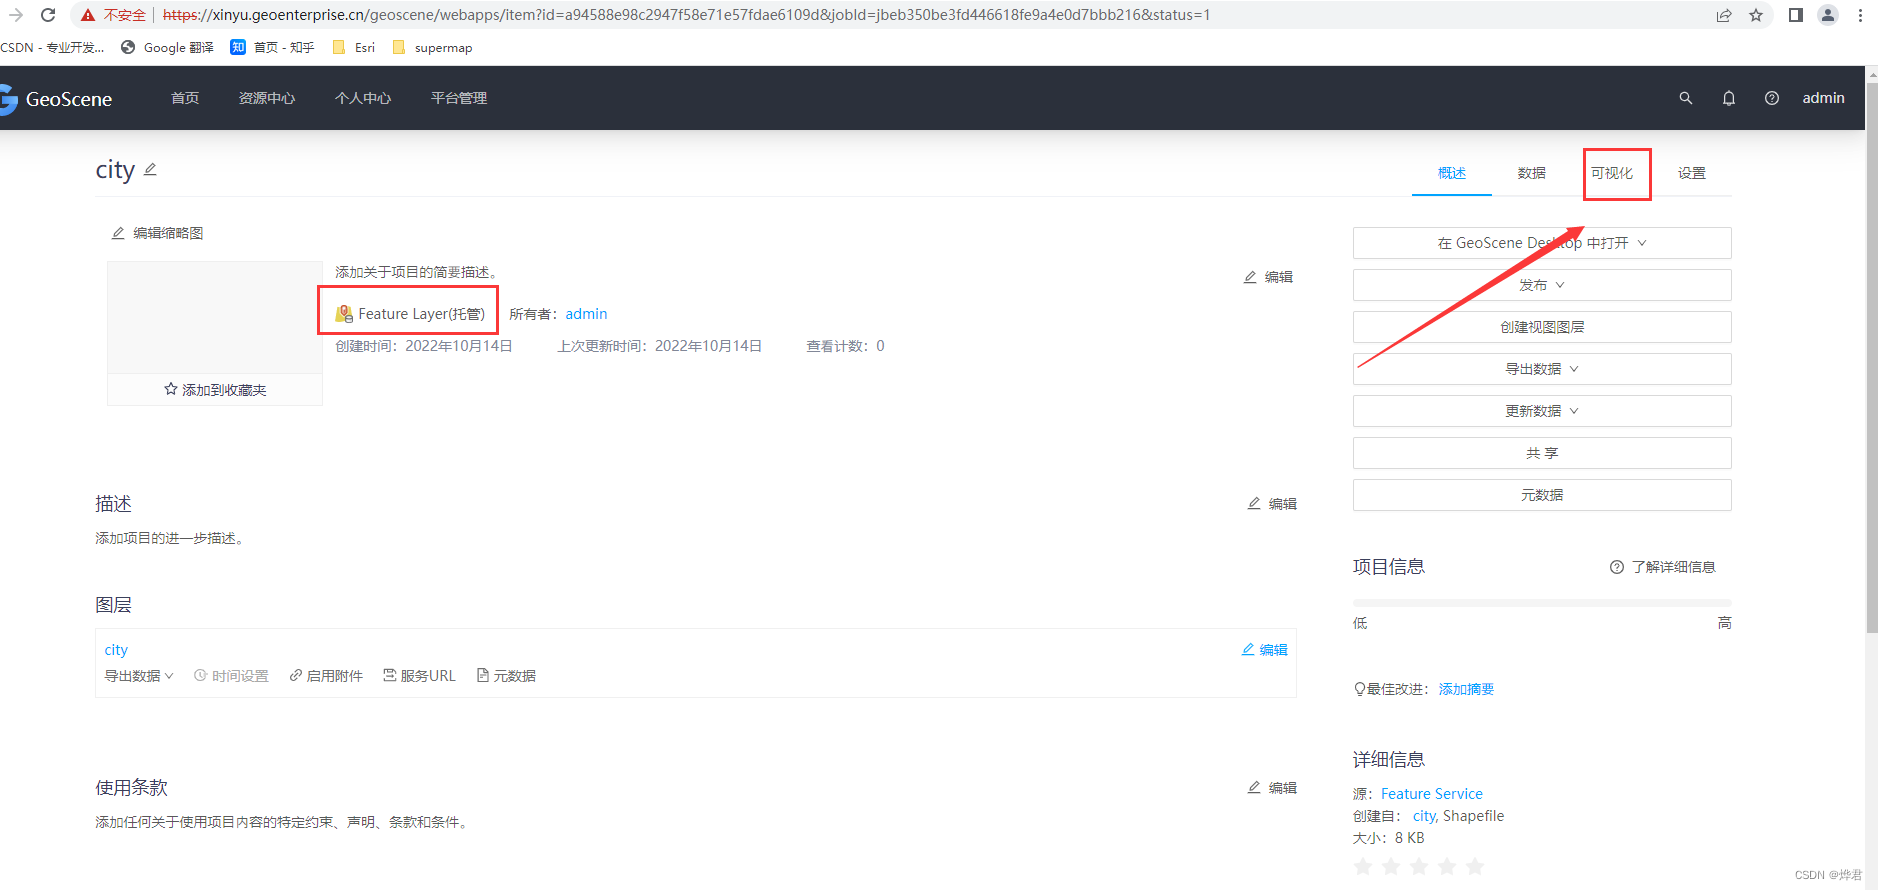
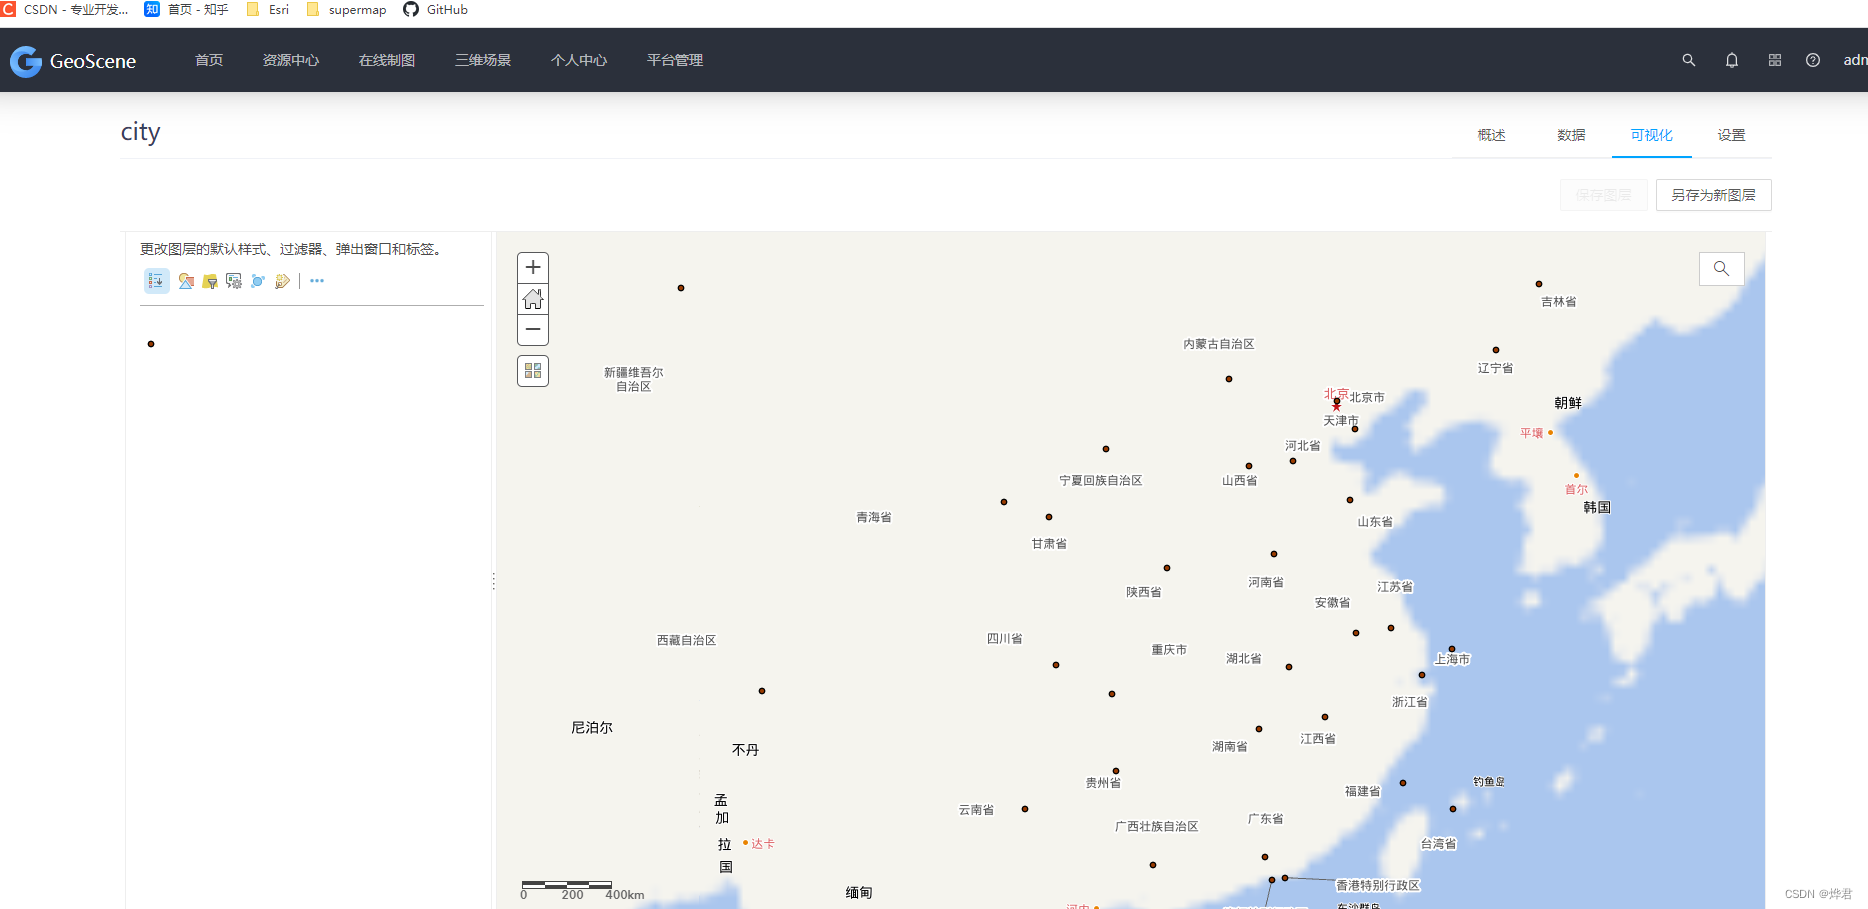
3. Created Chinacity hosting layer, click Visualization to view the layer.
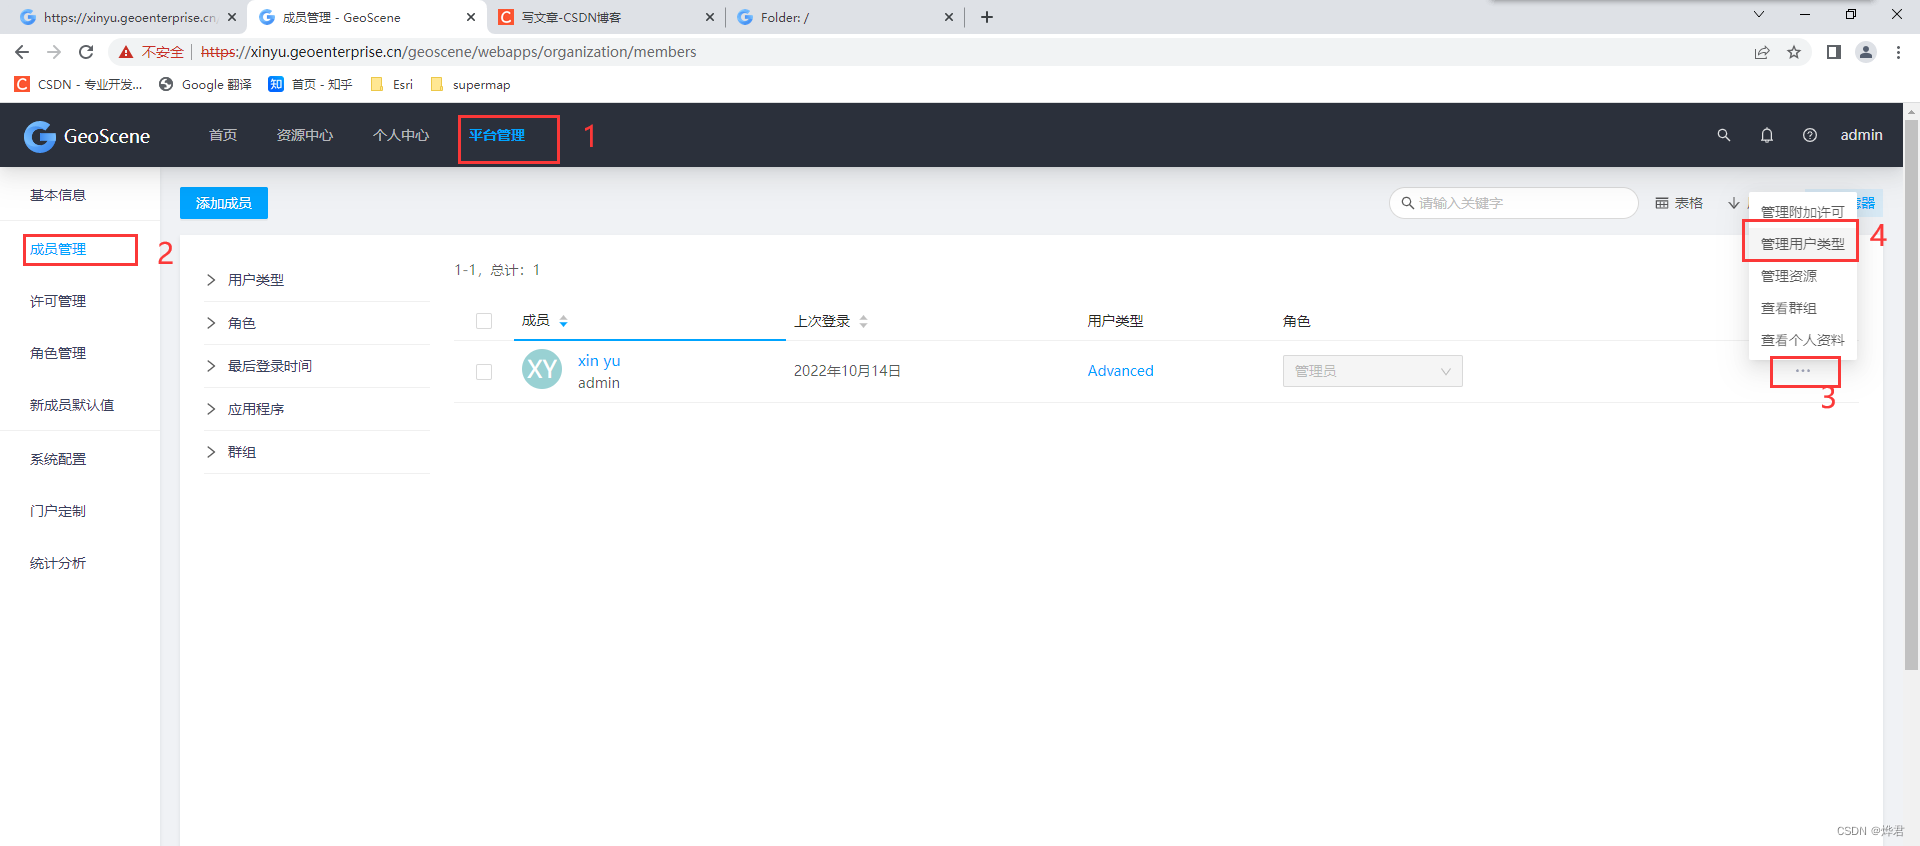
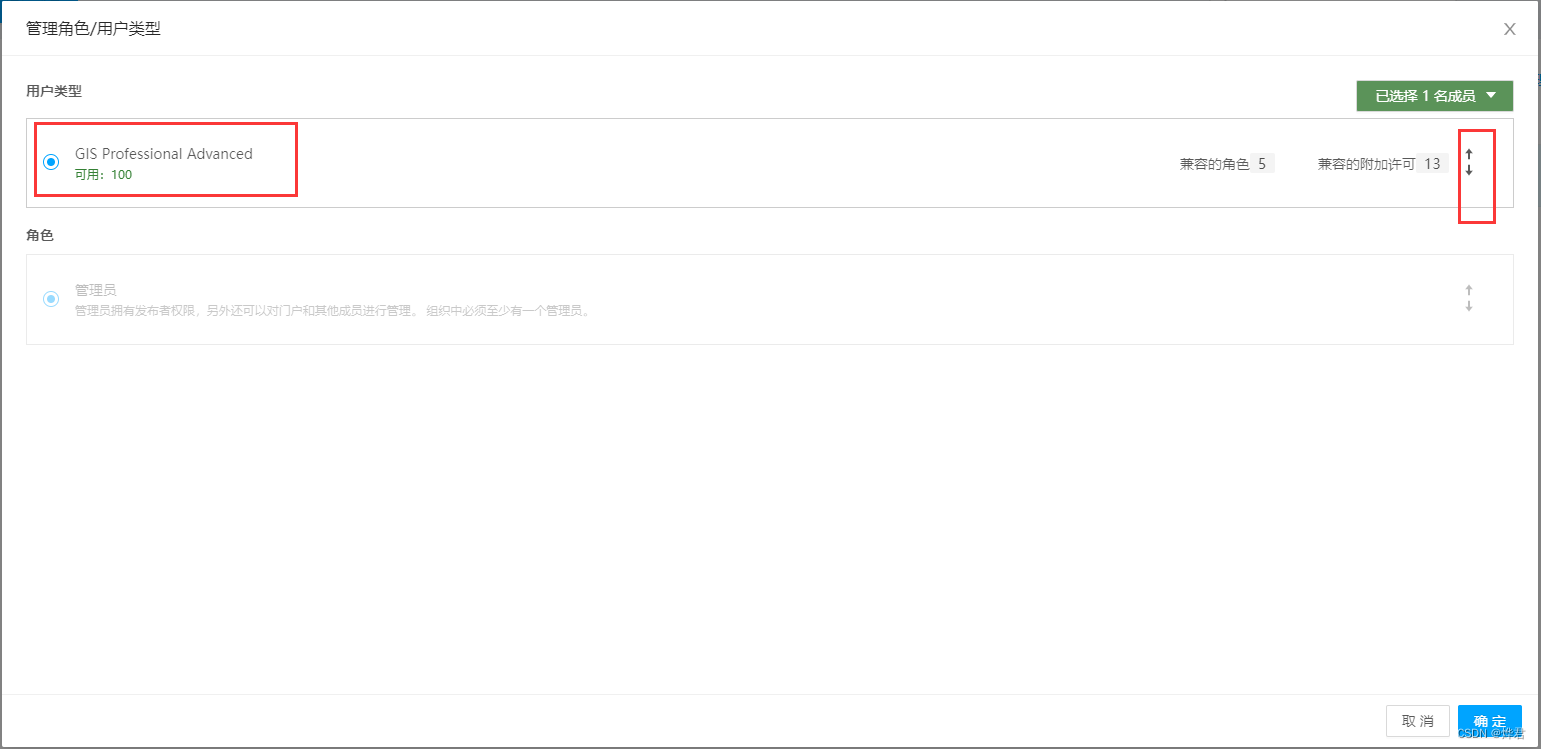
Note: If you cannot find the map viewer after sending the service, you need to change the user type to "GIS Professional Advanced". Platform management - member management - find the user that needs to be changed - click the three dots on the right - manage user types.
Go back to the feature page you just published. The "Open in Map Viewer" button appears, which can be clicked to view the feature layer in a map viewer. 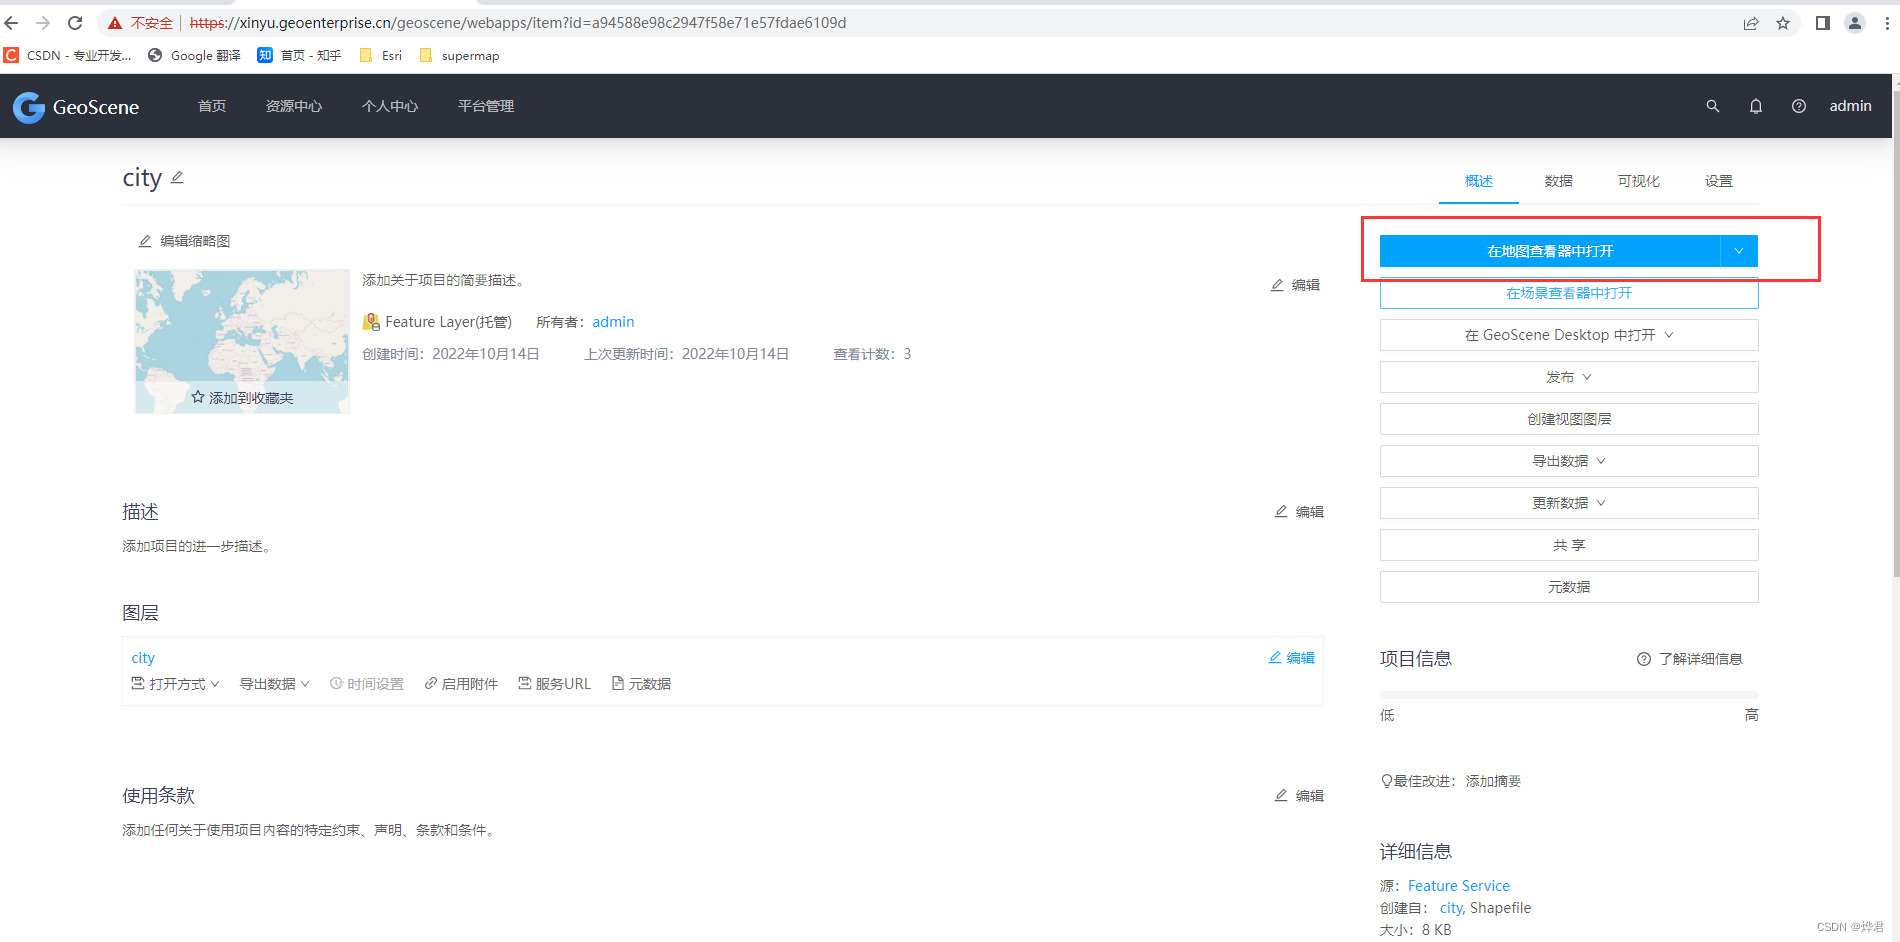
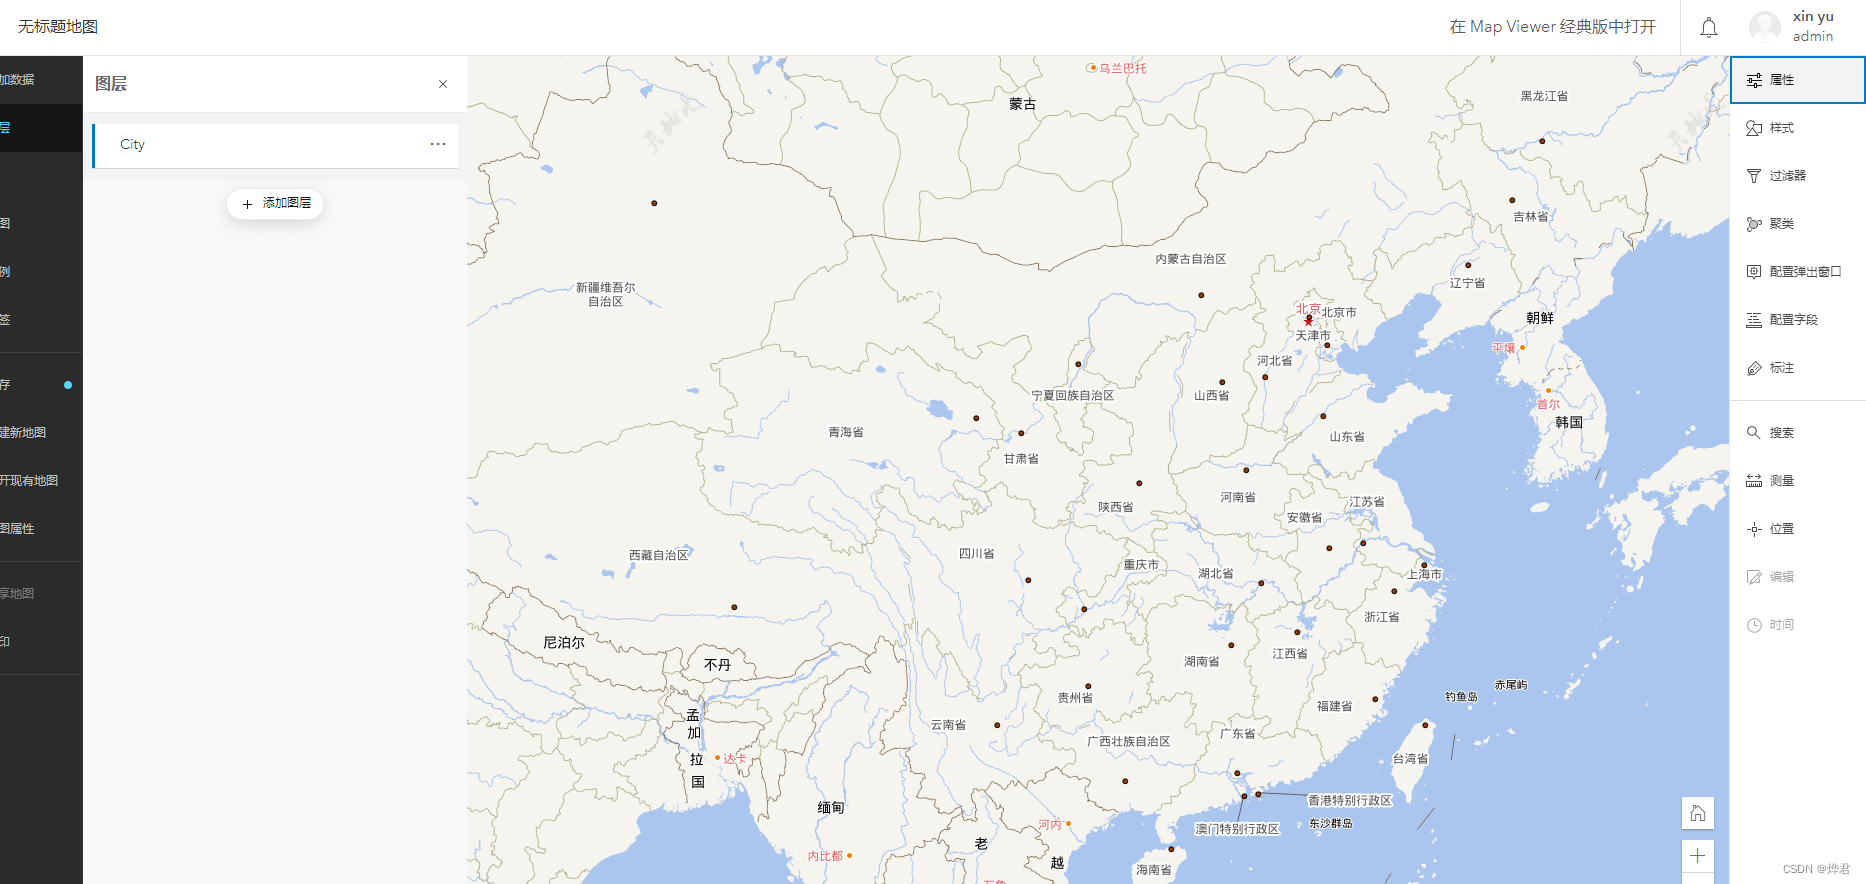
2D data released successfully
8.2 3D Services
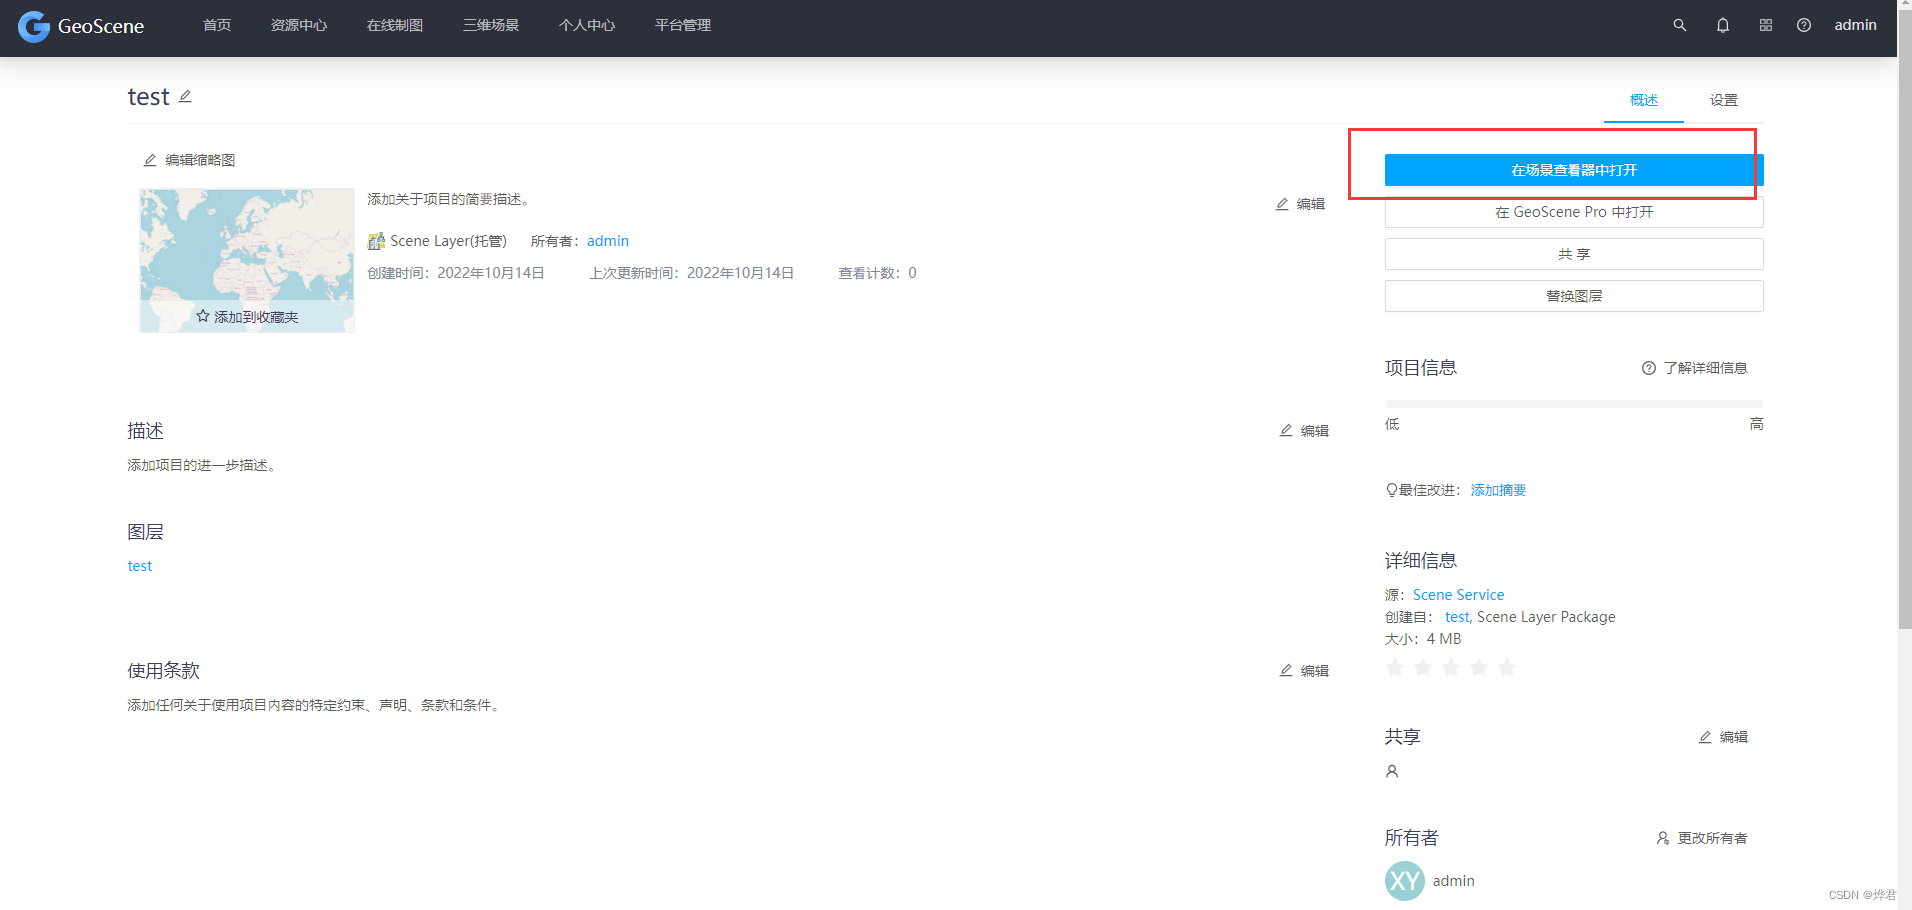
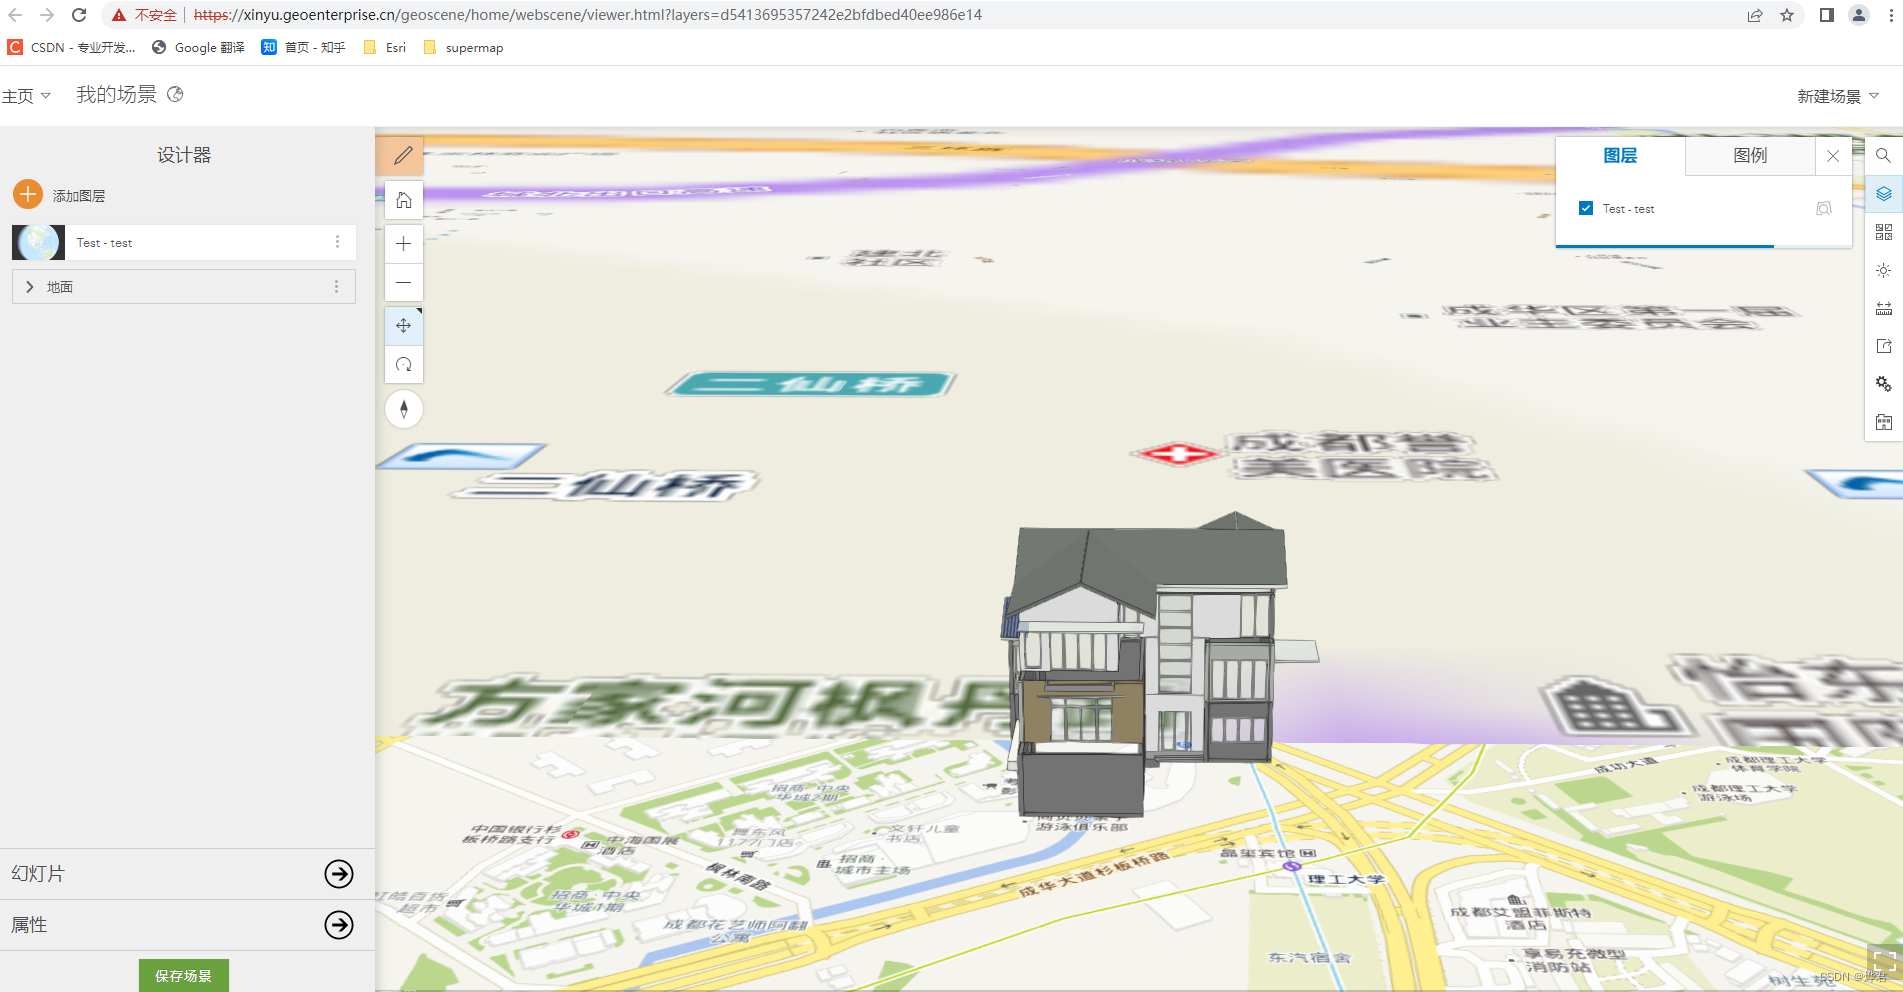
2. Publishing a service
is the same as publishing a 2D service. The browsing effect is as follows:
Summarize
At this point, the entire set of GeoScene Enterprise products is installed! (Scattering flowers!!!!!!)
Welcome to pay attention to the GISer who is too lazy to name