1. Use of PostMan tool
1. Introduction to PostMan
After the code is written, if we want to test, we only need to open the browser and directly enter the address to send the request. GETYou can use the browser directly to send a request, but POSTwhat if you want to send a request?
If the request is to send a post request, we have to prepare the page and prepare the form form on the page, which is more troublesome to test. So we need to use some third-party tools, such as PostMan.
- PostMan is a powerful Chrome plugin for debugging web pages and sending HTTP requests for web pages.

-
Function: often used for interface testing
-
feature
- Simple
- practical
- beautiful
- Generous
2. PostMan installation
PostMan's official download website: PostMan

can be installed automatically by double-clicking Postman-win64-8.3.1-Setup.exe. After the installation is complete, if you need to register, you can follow the prompts to register. If there is a link to skip the test at the bottom, you can also click to skip the registration
If you see the following interface, it means the installation has been successful.
3. PostMan use
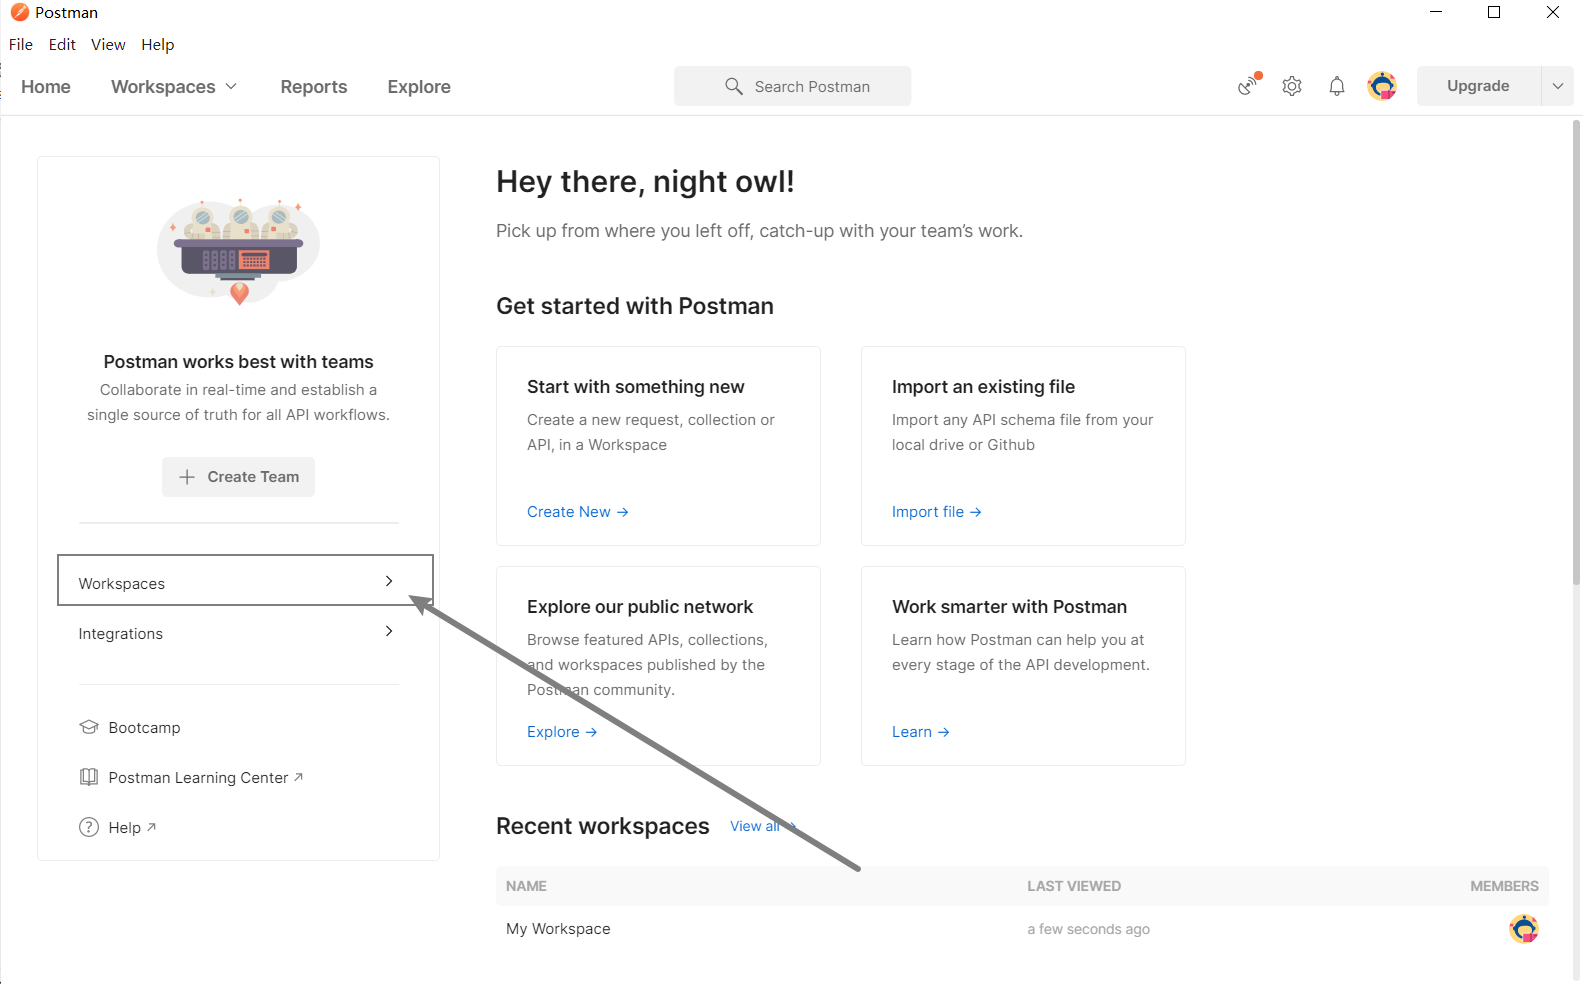
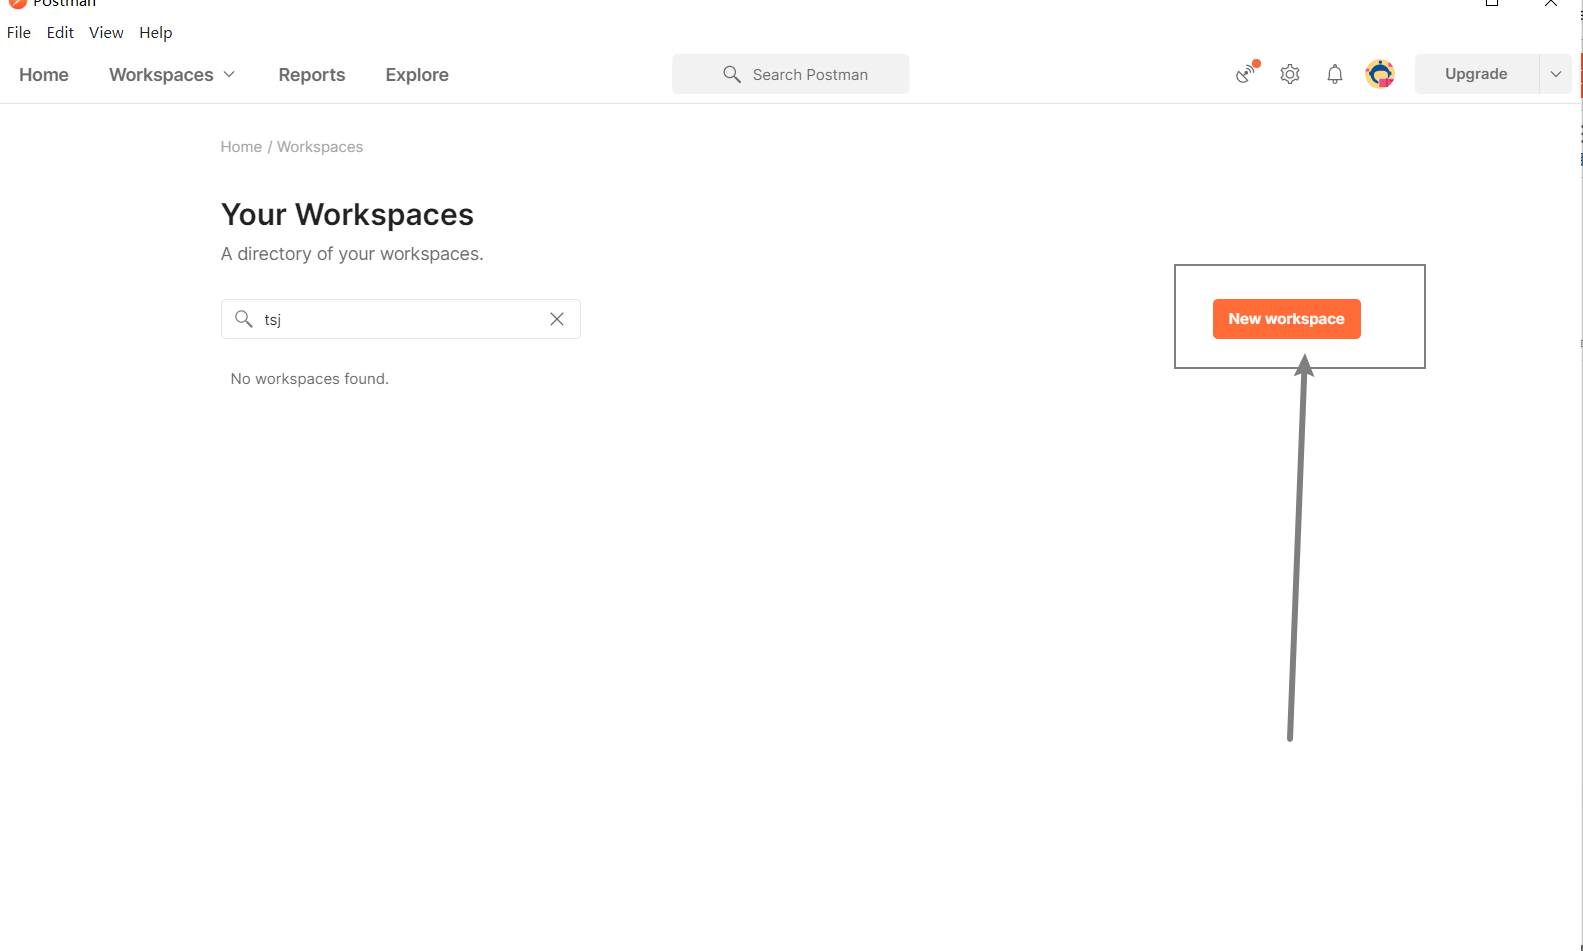
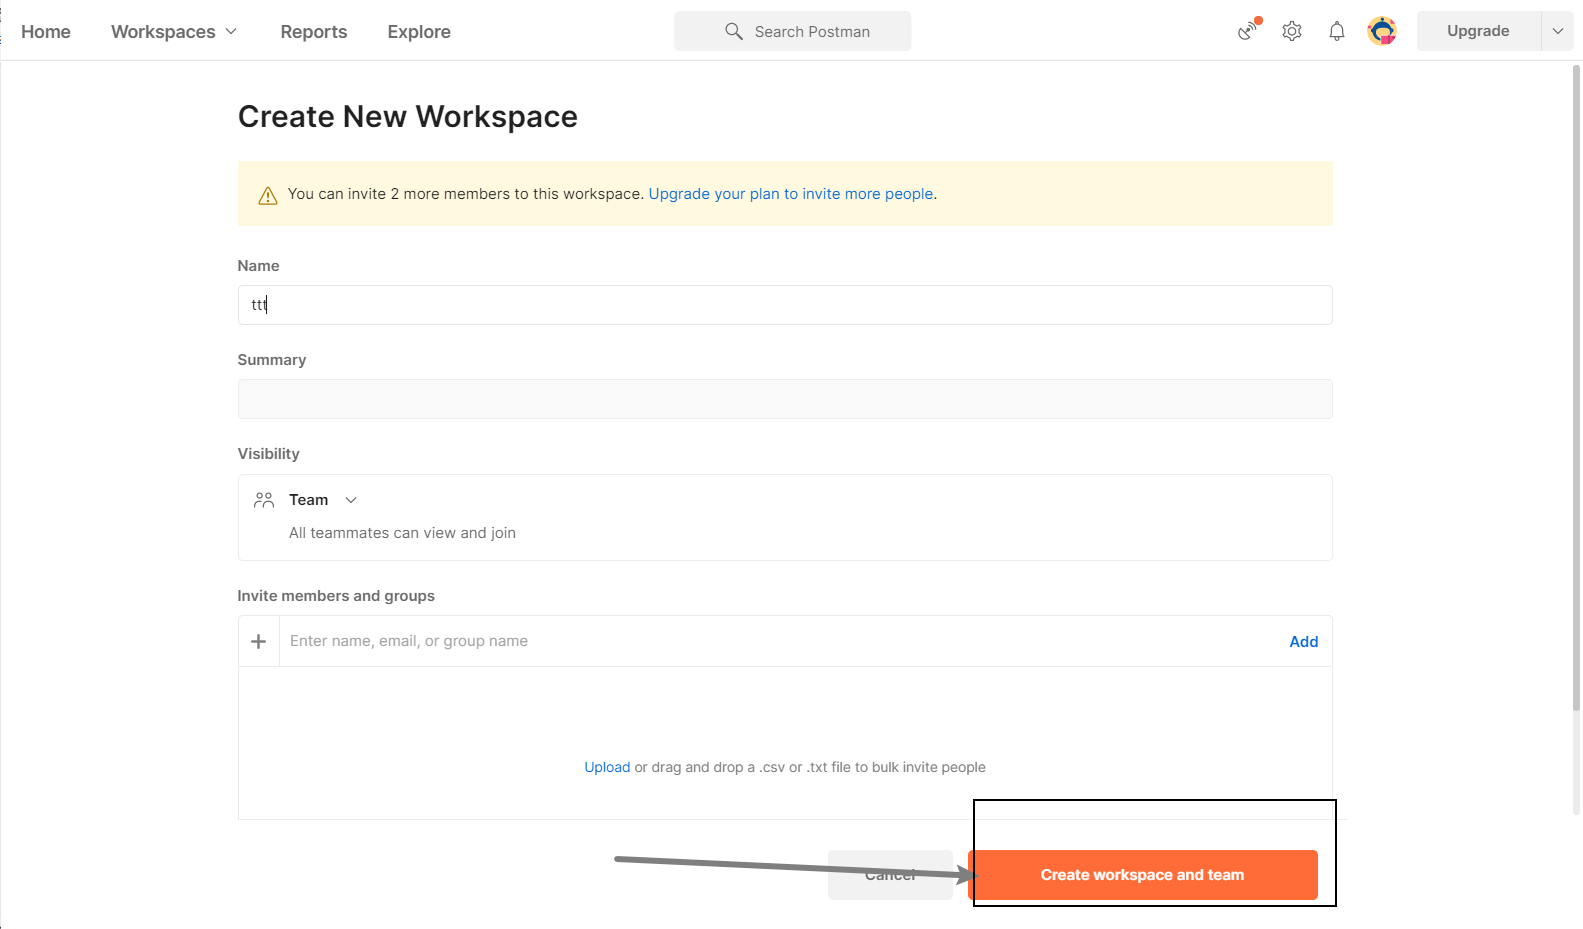
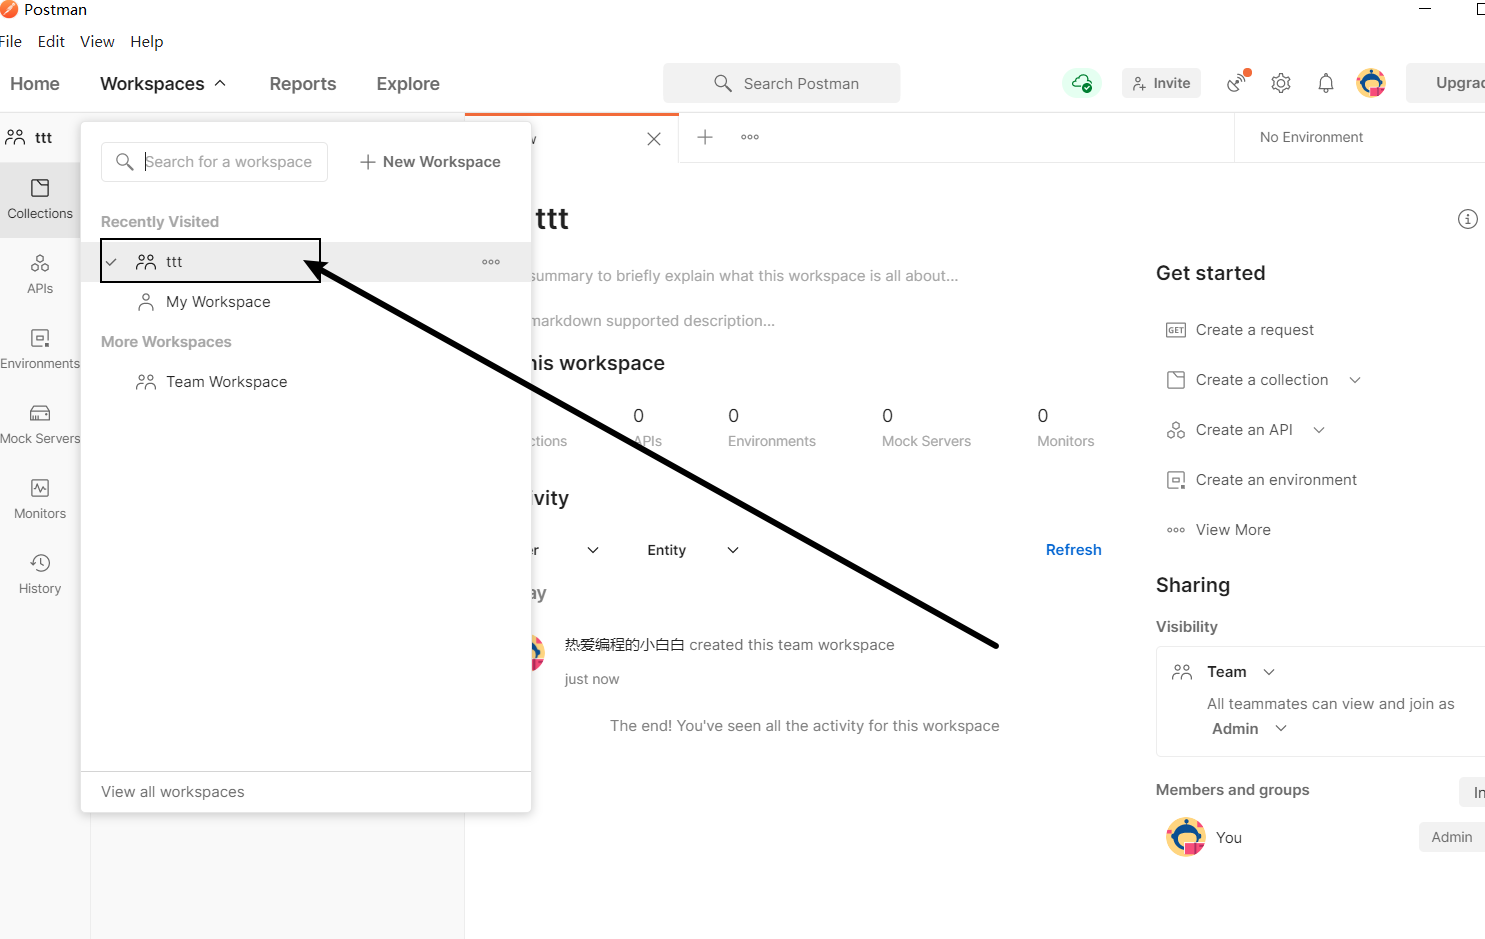
1. Create a WorkSpace workspace
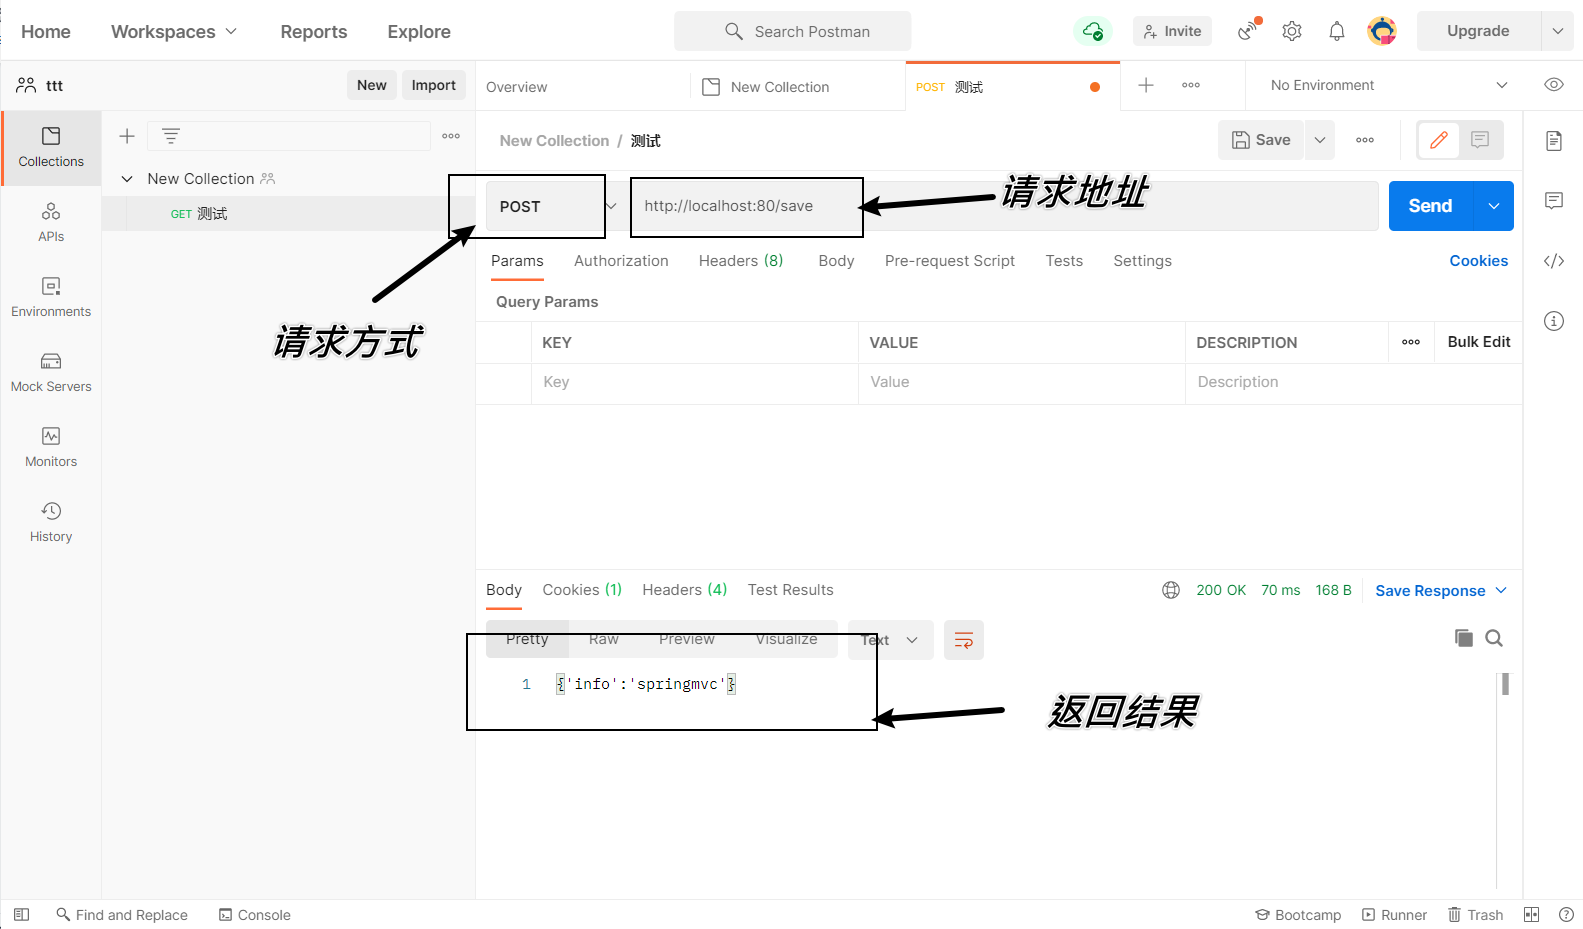
2. Send request
![[External link picture transfer failed, the source site may have an anti-leeching mechanism, it is recommended to save the picture and upload it directly (img-X3sq1fXc-1682171003098)(assets/1630464489898.png)]](https://img-blog.csdnimg.cn/7fbb927dbff54949b150e31688b0dc05.png)
3. Save the current request
![[External link picture transfer failed, the source site may have an anti-leeching mechanism, it is recommended to save the picture and upload it directly (img-TTg9Rmas-1682171003099)(assets/1630464783034.png)]](https://img-blog.csdnimg.cn/42369d1185eb47d8ab43491264023539.png)
Note: A new directory needs to be created for the first request, and there is no need to create a new directory later, just save it directly to the already created directory.
2. Request and response
We have completed the knowledge learning related to the introductory case before, and then we need to systematically study the knowledge points related to SpringMVC. As we mentioned before, SpringMVC is the framework of the web layer. The main function is to receive requests, receive Data, response results, so this chapter is for learning SpringMVCfocusContent, we will mainly explain four parts:
- request mapping path
- request parameters
- Date type parameter passing
- response json data
1. Set the request mapping path
1. Environment preparation
-
Create a Web Maven project
-
pom.xml adds Spring dependency
<?xml version="1.0" encoding="UTF-8"?> <project xmlns="http://maven.apache.org/POM/4.0.0" xmlns:xsi="http://www.w3.org/2001/XMLSchema-instance" xsi:schemaLocation="http://maven.apache.org/POM/4.0.0 http://maven.apache.org/xsd/maven-4.0.0.xsd"> <modelVersion>4.0.0</modelVersion> <groupId>com.itheima</groupId> <artifactId>springmvc_03_request_mapping</artifactId> <version>1.0-SNAPSHOT</version> <packaging>war</packaging> <dependencies> <dependency> <groupId>javax.servlet</groupId> <artifactId>javax.servlet-api</artifactId> <version>3.1.0</version> <scope>provided</scope> </dependency> <dependency> <groupId>org.springframework</groupId> <artifactId>spring-webmvc</artifactId> <version>5.2.10.RELEASE</version> </dependency> </dependencies> <build> <plugins> <plugin> <groupId>org.apache.tomcat.maven</groupId> <artifactId>tomcat7-maven-plugin</artifactId> <version>2.1</version> <configuration> <port>80</port> <path>/</path> </configuration> </plugin> </plugins> </build> </project> -
Create the corresponding configuration class
public class ServletContainersInitConfig extends AbstractAnnotationConfigDispatcherServletInitializer { protected Class<?>[] getServletConfigClasses() { return new Class[]{ SpringMvcConfig.class}; } protected String[] getServletMappings() { return new String[]{ "/"}; } protected Class<?>[] getRootConfigClasses() { return new Class[0]; } } @Configuration @ComponentScan("com.itheima.controller") public class SpringMvcConfig { } -
Write BookController and UserController
@Controller
public class UserController {


    @RequestMapping("/save")
    @ResponseBody
    public String save(){


        System.out.println("user save ...");
        return "{'module':'user save'}";
    }

    @RequestMapping("/delete")
    @ResponseBody
    public String save(){


        System.out.println("user delete ...");
        return "{'module':'user delete'}";
    }
}

@Controller
public class BookController {


    @RequestMapping("/save")
    @ResponseBody
    public String save(){


        System.out.println("book save ...");
        return "{'module':'book save'}";
    }
}
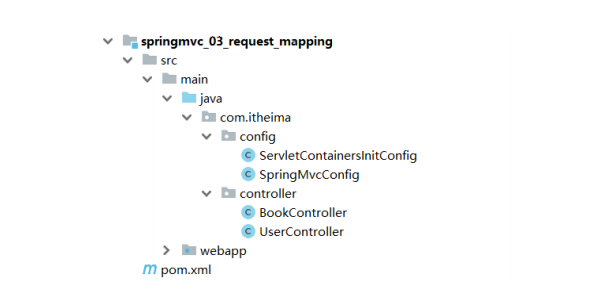
The final created project structure is as follows:
After preparing the environment, start the Tomcat server, and an error will be reported in the background:
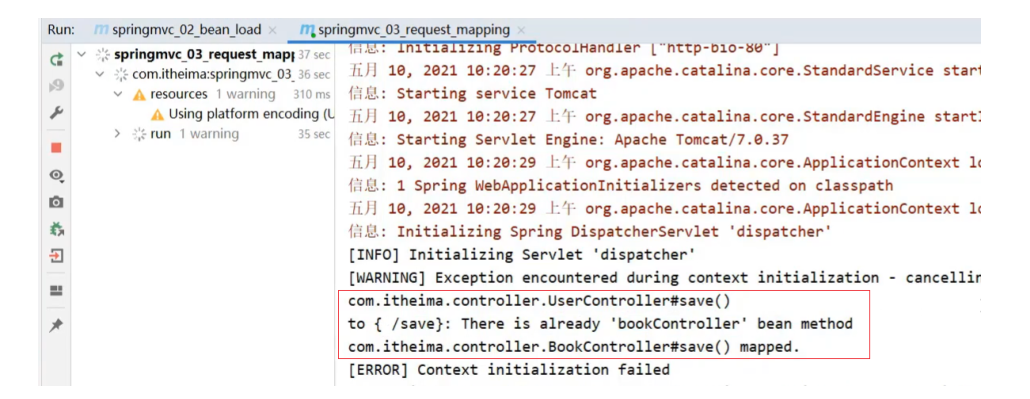
It can be seen from the error message:
- UserController has a save method, the access path is
http://localhost/save - BookController also has a save method, the access path is
http://localhost/save - When accessing
http://localhost/saved, is it accessing UserController or BookController?
2. Problem analysis
The team is developed by multiple people, and each person sets a different request path. How to solve the conflict problem?
Solution: Set the module name as the request path prefix for different modules
For the save of the Book module, set its access path tohttp://localhost/book/save
For the save of the User module, set its access path tohttp://localhost/user/save
In this way, there are fewer cases of naming conflicts in the same module.
3. Set the mapping path
Step 1: Modify the Controller
@Controller
public class UserController {


    @RequestMapping("/user/save")
    @ResponseBody
    public String save(){


        System.out.println("user save ...");
        return "{'module':'user save'}";
    }

    @RequestMapping("/user/delete")
    @ResponseBody
    public String save(){


        System.out.println("user delete ...");
        return "{'module':'user delete'}";
    }
}

@Controller
public class BookController {


    @RequestMapping("/book/save")
    @ResponseBody
    public String save(){


        System.out.println("book save ...");
        return "{'module':'book save'}";
    }
}
The problem is solved, but each method needs to be modified in front of it, which is cumbersome to write and there are many repeated codes. If /user changes later, all methods need to be modified, and the coupling degree is too high.
Step 2: Optimize path configuration
Optimization:
@Controller
@RequestMapping("/user")
public class UserController {


    @RequestMapping("/save")
    @ResponseBody
    public String save(){


        System.out.println("user save ...");
        return "{'module':'user save'}";
    }

    @RequestMapping("/delete")
    @ResponseBody
    public String save(){


        System.out.println("user delete ...");
        return "{'module':'user delete'}";
    }
}

@Controller
@RequestMapping("/book")
public class BookController {


    @RequestMapping("/save")
    @ResponseBody
    public String save(){


        System.out.println("book save ...");
        return "{'module':'book save'}";
    }
}
Notice:
- When annotations are added to the class and method
@RequestMapping, when the front end sends a request, it must be added and matched with the value of the two annotations to access it. /@RequestMapping annotation value attribute can be added or not
Extended little knowledge:
As for how PostMan thinks that small characters are not good-looking, you can use ctrl+=the adjustment method to increase or ctrl+-decrease the size.
2. Request parameters
After the request path is set, as long as the page sending request address is consistent with the path configured in the background Controller class, the front-end request can be received. After receiving the request, how to receive the parameters passed by the page?
The transmission and reception of request parameters is related to the request method. Currently, the two common request methods are:
- GET
- POST
How does the front end send different requests, and how does the back end receive them?
1. Environment preparation
-
Create a Web Maven project
-
pom.xml adds Spring dependency
<?xml version="1.0" encoding="UTF-8"?> <project xmlns="http://maven.apache.org/POM/4.0.0" xmlns:xsi="http://www.w3.org/2001/XMLSchema-instance" xsi:schemaLocation="http://maven.apache.org/POM/4.0.0 http://maven.apache.org/xsd/maven-4.0.0.xsd"> <modelVersion>4.0.0</modelVersion> <groupId>com.itheima</groupId> <artifactId>springmvc_03_request_mapping</artifactId> <version>1.0-SNAPSHOT</version> <packaging>war</packaging> <dependencies> <dependency> <groupId>javax.servlet</groupId> <artifactId>javax.servlet-api</artifactId> <version>3.1.0</version> <scope>provided</scope> </dependency> <dependency> <groupId>org.springframework</groupId> <artifactId>spring-webmvc</artifactId> <version>5.2.10.RELEASE</version> </dependency> </dependencies> <build> <plugins> <plugin> <groupId>org.apache.tomcat.maven</groupId> <artifactId>tomcat7-maven-plugin</artifactId> <version>2.1</version> <configuration> <port>80</port> <path>/</path> </configuration> </plugin> </plugins> </build> </project> -
Create the corresponding configuration class
public class ServletContainersInitConfig extends AbstractAnnotationConfigDispatcherServletInitializer { protected Class<?>[] getServletConfigClasses() { return new Class[]{ SpringMvcConfig.class}; } protected String[] getServletMappings() { return new String[]{ "/"}; } protected Class<?>[] getRootConfigClasses() { return new Class[0]; } } @Configuration @ComponentScan("com.itheima.controller") public class SpringMvcConfig { } -
Write UserController
@Controller
public class UserController {


    @RequestMapping("/commonParam")
    @ResponseBody
    public String commonParam(){


        return "{'module':'commonParam'}";
    }
}
-
Write model classes, User and Address
public class Address {


    private String province;
    private String city;
    //setter...getter...略
}
public class User {


    private String name;
    private int age;
    //setter...getter...略
}
The final created project structure is as follows:
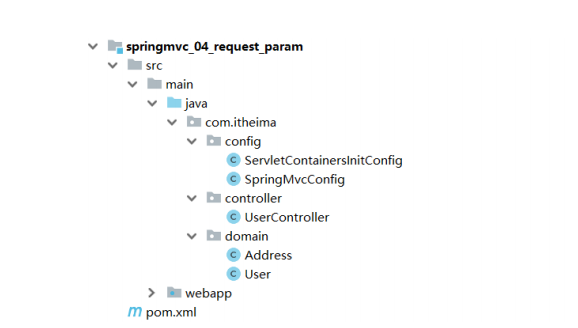
2. Parameter passing
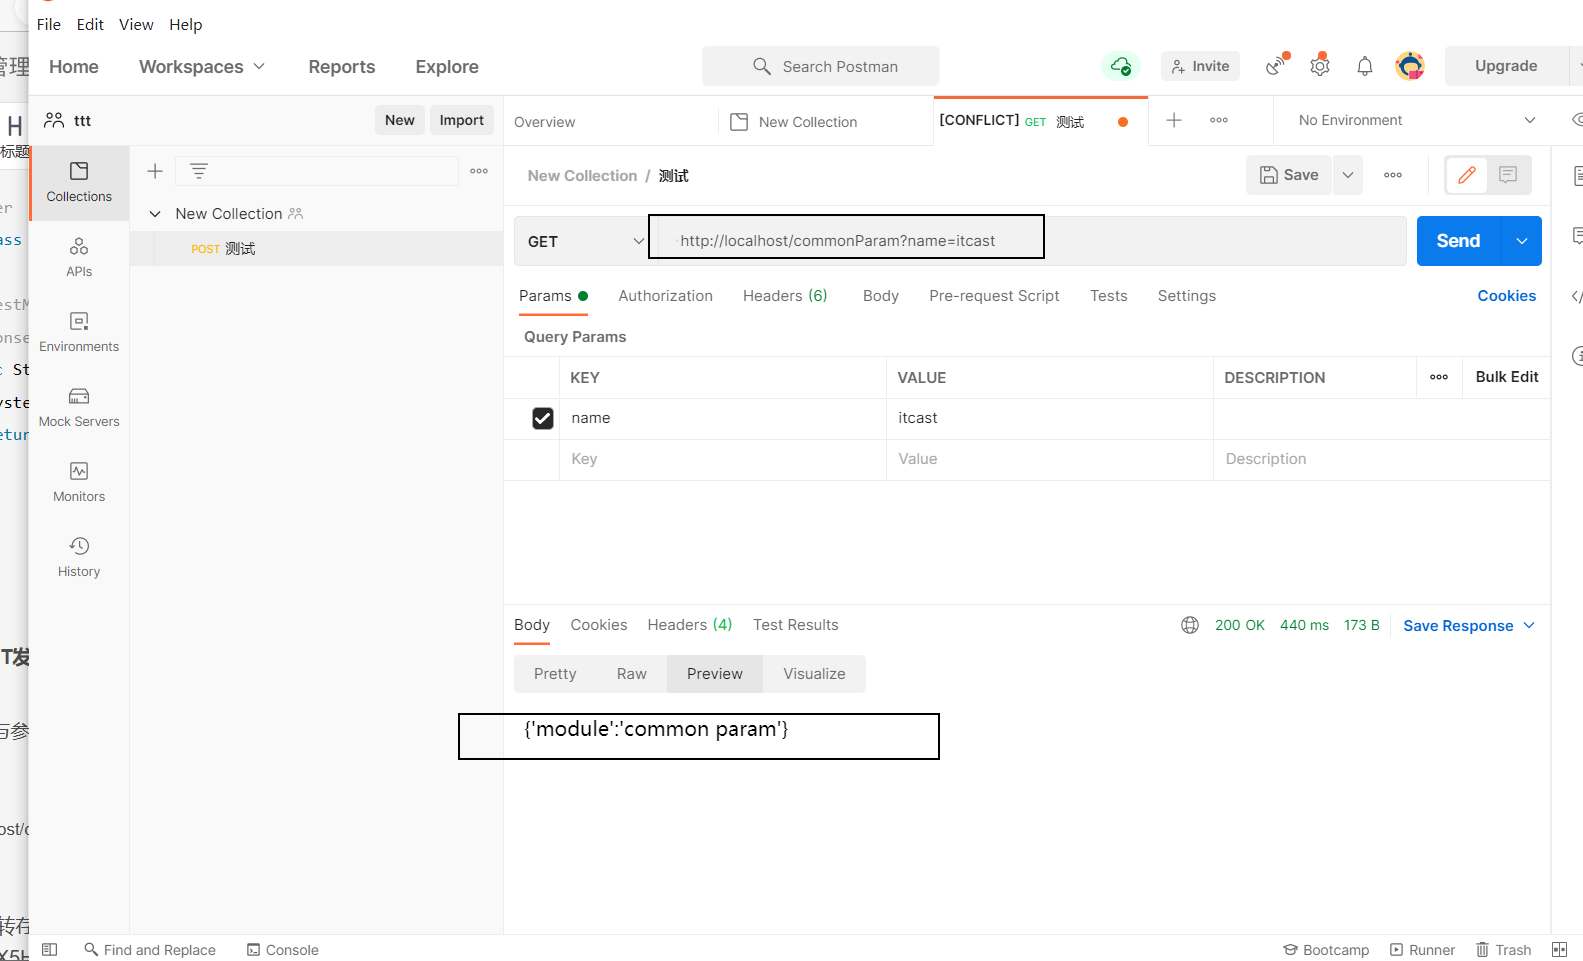
GET sends a single parameter
Send request and parameters:
http://localhost/commonParam?name=itcast
Receive parameters:
@Controller
public class UserController {
@RequestMapping("/commonParam")
@ResponseBody
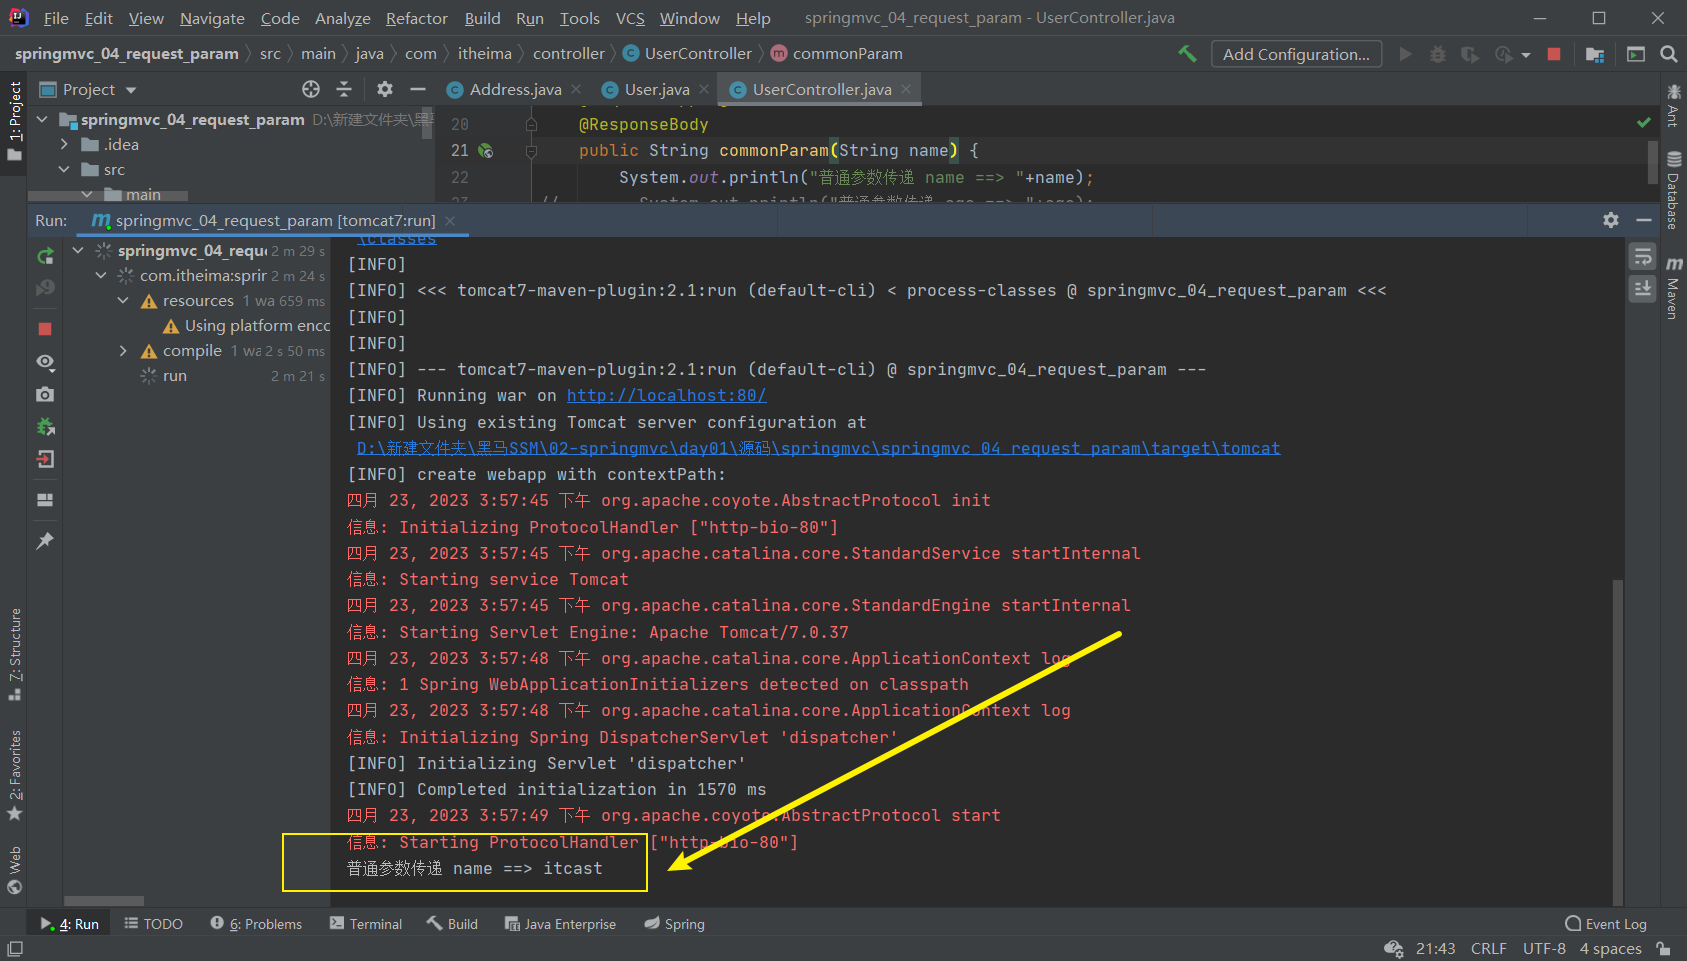
public String commonParam(String name){
System.out.println("普通参数传递 name ==> "+name);
return "{'module':'commonParam'}";
}
}
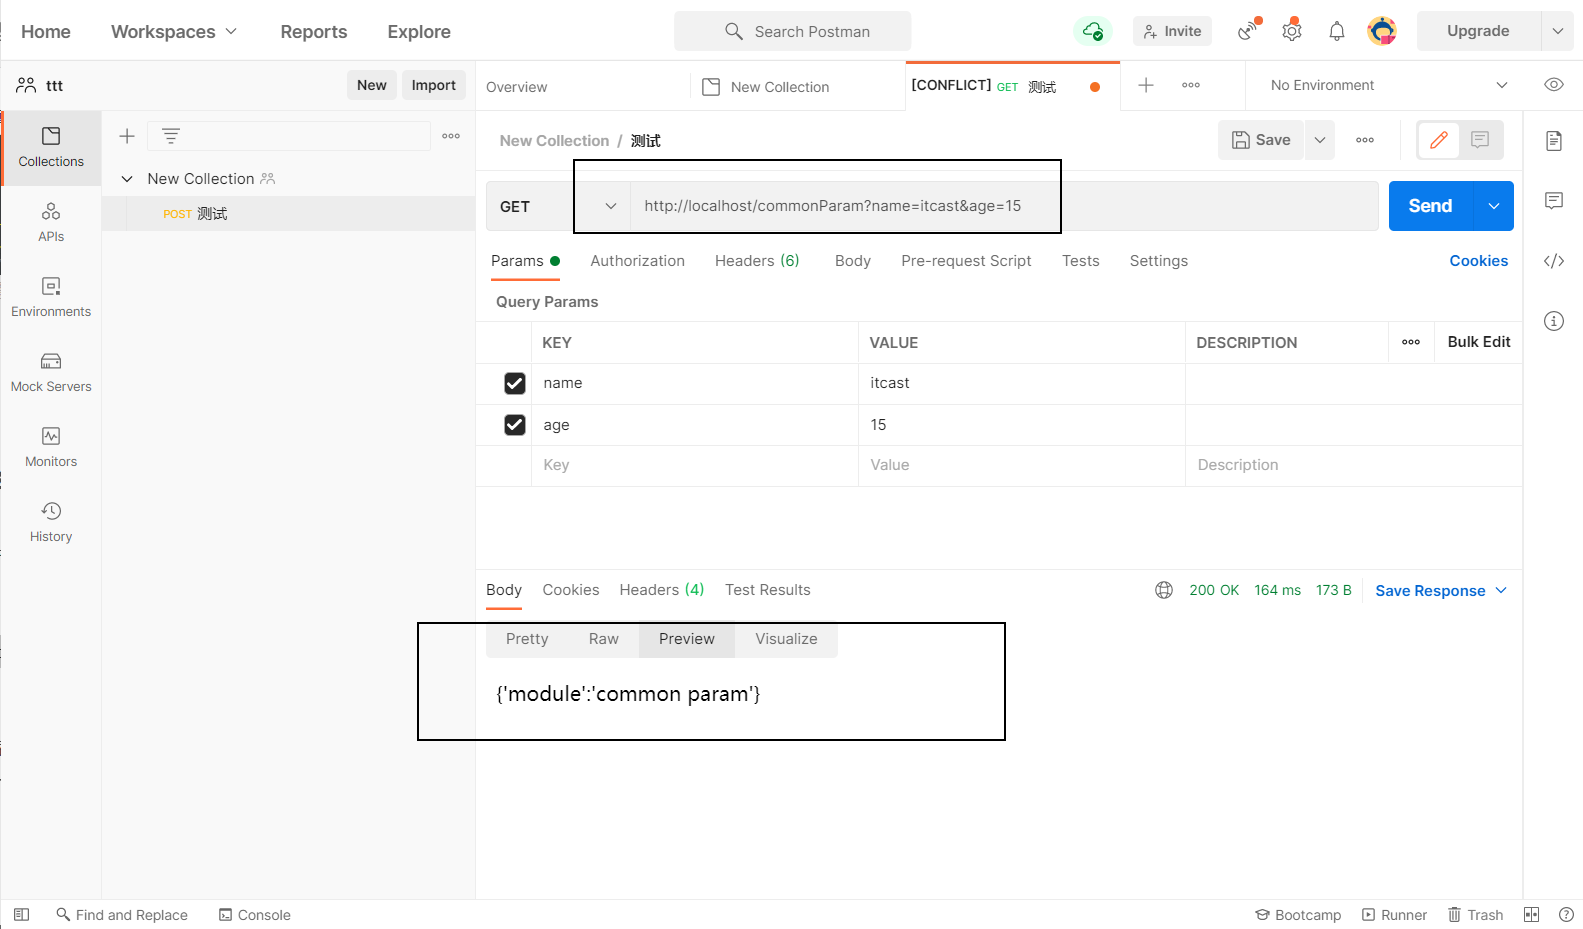
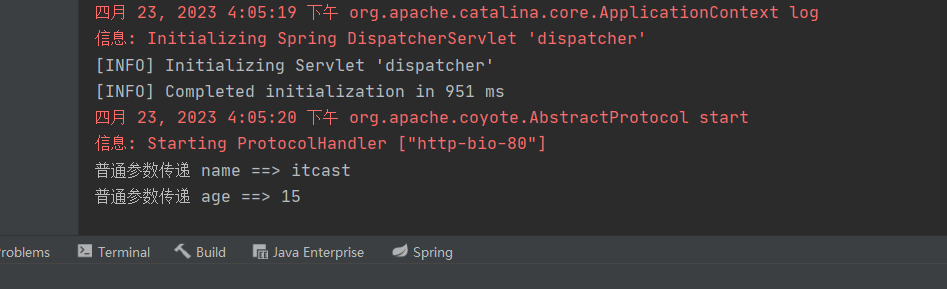
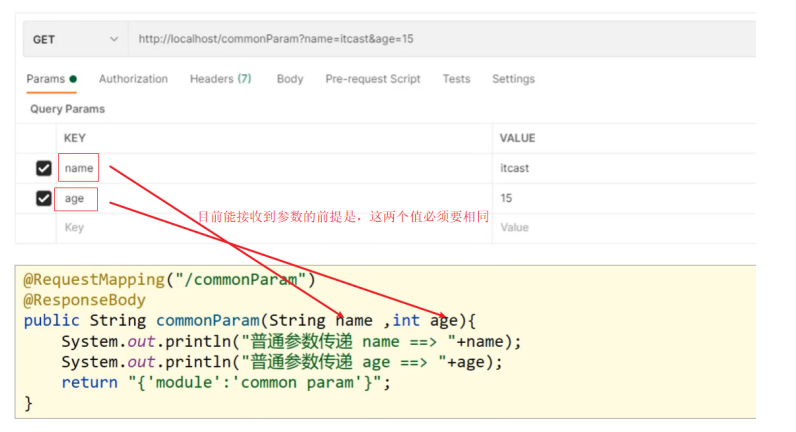
GET sends multiple parameters
Send request and parameters:
http://localhost/commonParam?name=itcast&age=15
Receive parameters:
@Controller
public class UserController {


    @RequestMapping("/commonParam")
    @ResponseBody
    public String commonParam(String name,int age){


        System.out.println("普通参数传递 name ==> "+name);
        System.out.println("普通参数传递 age ==> "+age);
        return "{'module':'commonParam'}";
    }
}
GET request Chinese garbled characters
If there is Chinese in the parameters we pass, you will find that the received parameters will have Chinese garbled characters.
send request:http://localhost/commonParam?name=张三&age=18
Console:
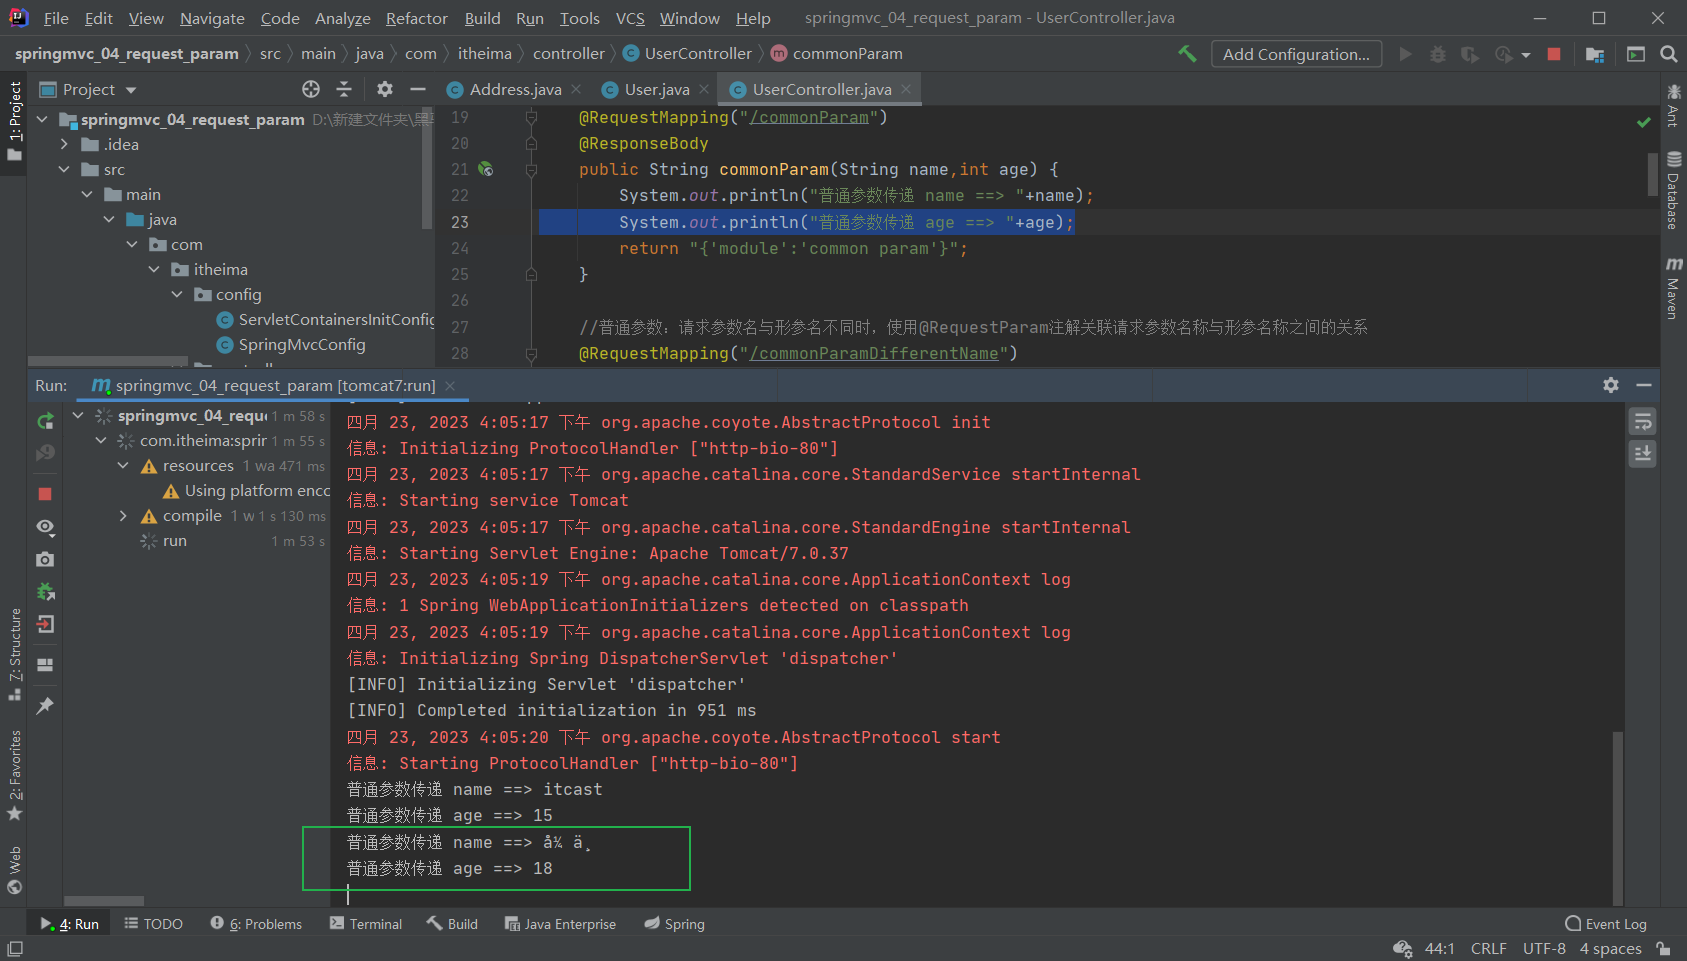
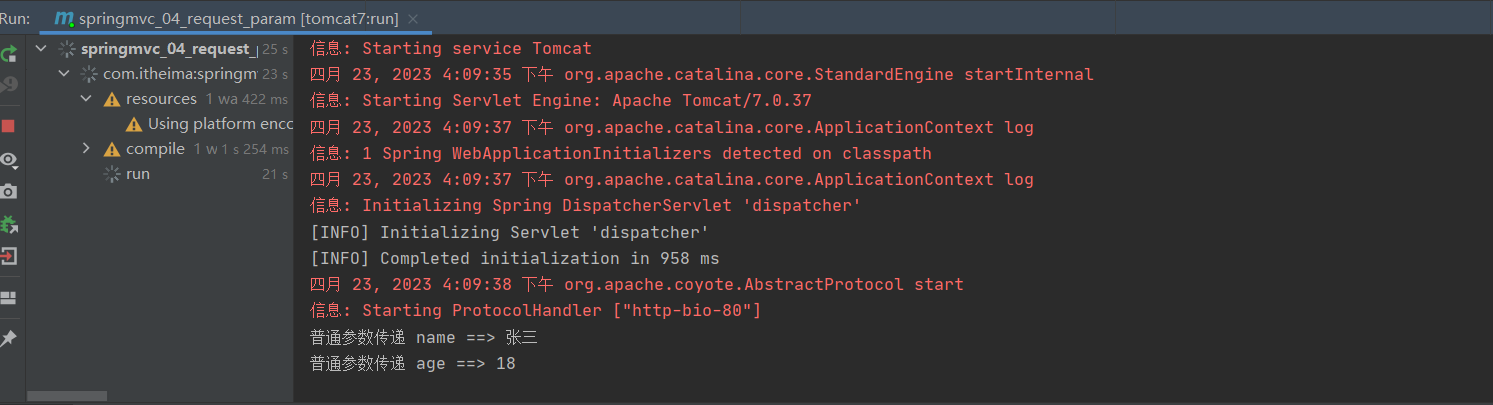
The reason for the garbled characters is believed to be clear to everyone. Tomcat 8.5 and later versions have already dealt with the problem of Chinese garbled characters, but the Tomcat plug-in in IDEA is currently only up to Tomcat7, so pom.xml needs to be modified to solve the problem of GET request Chinese garbled characters
<build>
    <plugins>
      <plugin>
        <groupId>org.apache.tomcat.maven</groupId>
        <artifactId>tomcat7-maven-plugin</artifactId>
        <version>2.1</version>
        <configuration>
          <port>80</port><!--tomcat端口号-->
          <path>/</path> <!--虚拟目录-->
          <uriEncoding>UTF-8</uriEncoding><!--访问路径编解码字符集-->
        </configuration>
      </plugin>
    </plugins>
  </build>
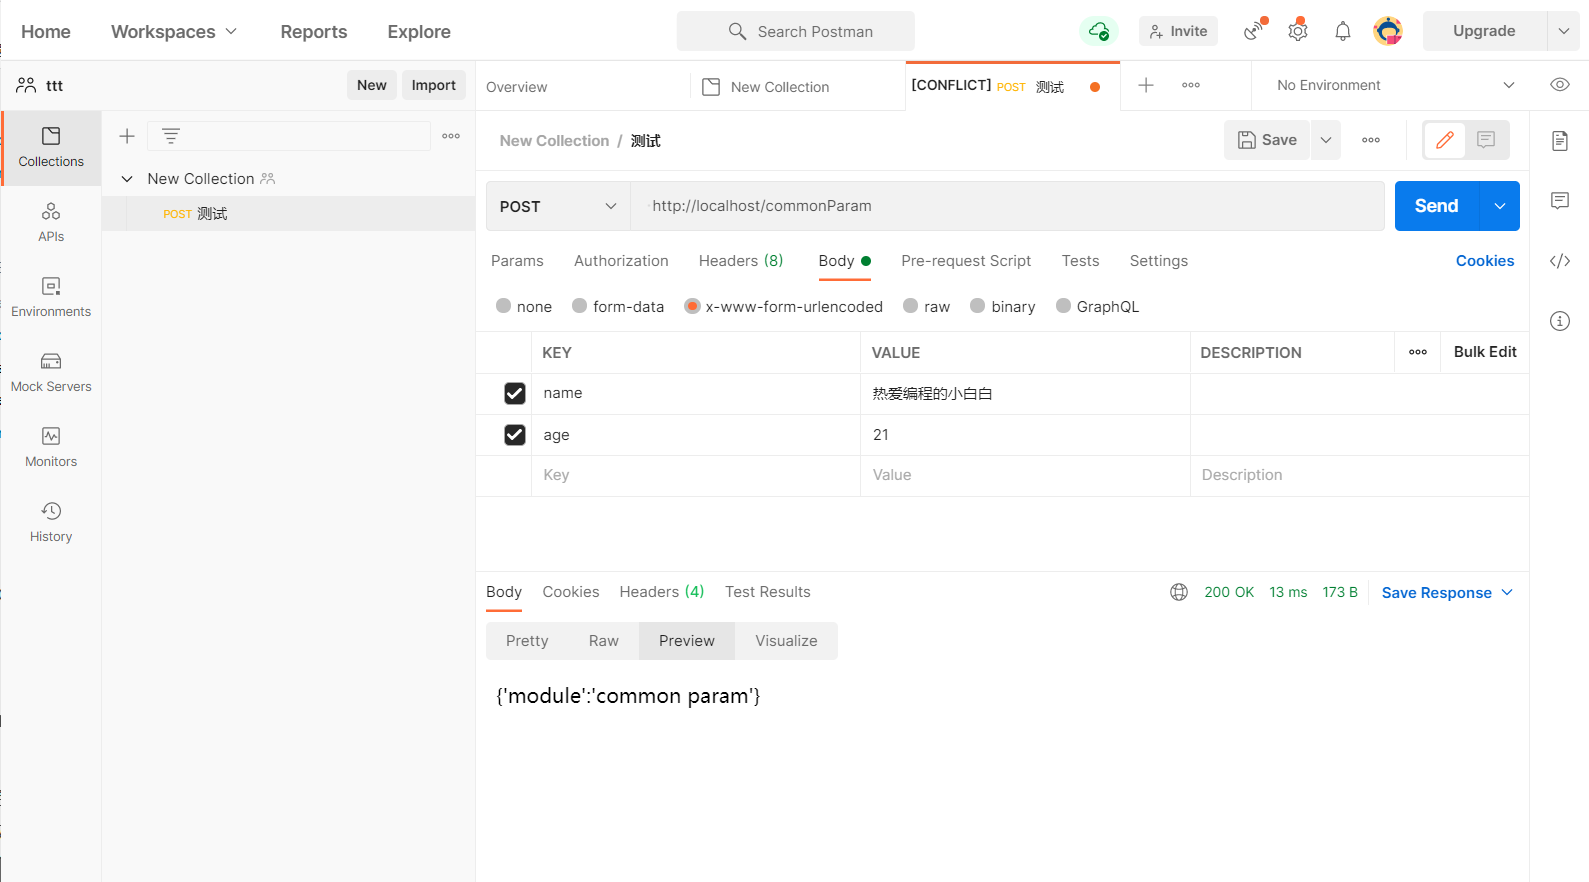
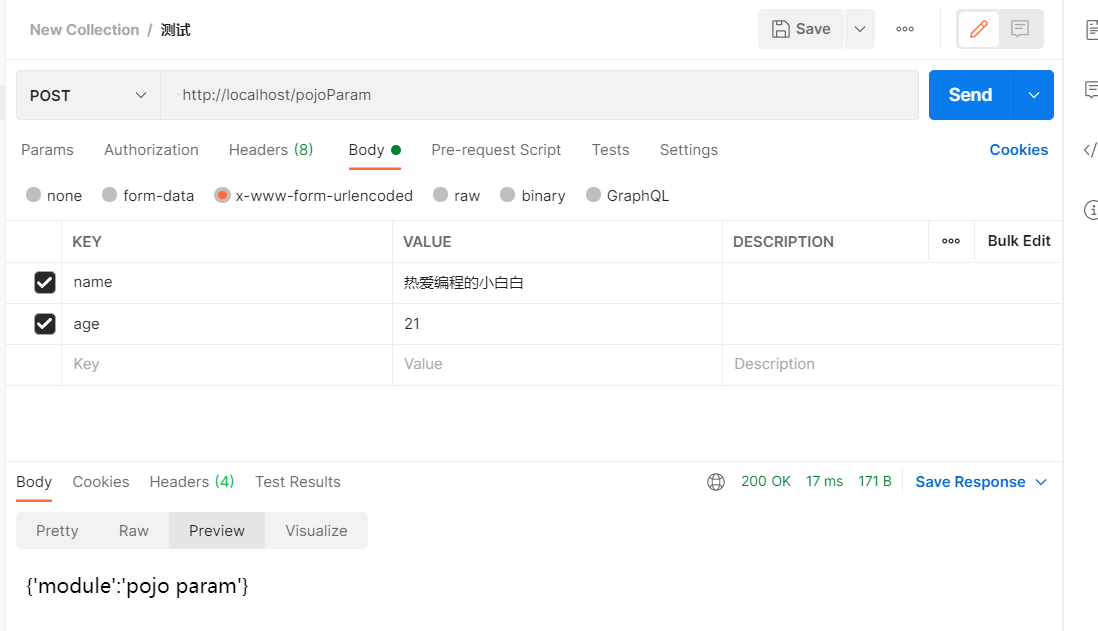
POST send parameters
Send request and parameters:

Consistent with GET, without any modification
@Controller
public class UserController {


    @RequestMapping("/commonParam")
    @ResponseBody
    public String commonParam(String name,int age){


        System.out.println("普通参数传递 name ==> "+name);
        System.out.println("普通参数传递 age ==> "+age);
        return "{'module':'commonParam'}";
    }
}
POST request Chinese garbled characters
Solution: configure filter
public class ServletContainersInitConfig extends AbstractAnnotationConfigDispatcherServletInitializer {


    protected Class<?>[] getRootConfigClasses() {


        return new Class[0];
    }

    protected Class<?>[] getServletConfigClasses() {


        return new Class[]{

    SpringMvcConfig.class};
    }

    protected String[] getServletMappings() {


        return new String[]{

    "/"};
    }

    //乱码处理
    @Override
    protected Filter[] getServletFilters() {


        CharacterEncodingFilter filter = new CharacterEncodingFilter();
        filter.setEncoding("UTF-8");
        return new Filter[]{

    filter};
    }
}
CharacterEncodingFilter is in the spring-web package, so you need to import the corresponding jar package before using it.
3. Five types of parameter passing
Previously, we have been able to use GET or POST to send requests and data, and the data carried are relatively simple data. Next, on this basis, we will study some more complex parameter transfers. The common types of parameters are:
- common parameters
- POJO type parameters
- Nested POJO type parameters
- Array type parameter
- collection type parameters
How to send these parameters and how to receive them in the background? Let’s learn one by one.
1. Common parameters
- Ordinary parameters: url address parameter passing, the address parameter name is the same as the formal parameter variable name, and the formal parameter can be defined to receive the parameter.
How to solve the problem if the address parameter names of the formal participants are inconsistent?
Send request and parameters:
http://localhost/commonParamDifferentName?name=张三&age=18
Background receiving parameters:
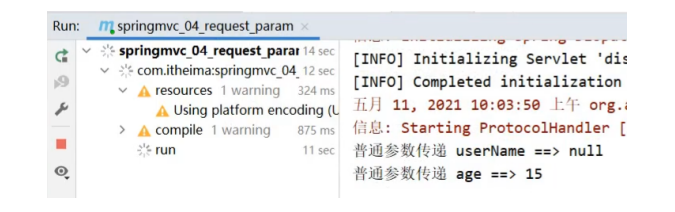
@RequestMapping("/commonParamDifferentName")
@ResponseBody
public String commonParamDifferentName(String userName , int age){


    System.out.println("普通参数传递 userName ==> "+userName);
    System.out.println("普通参数传递 age ==> "+age);
    return "{'module':'common param different name'}";
}
Because the front-end is given name, the background is used to receive userName, the two names do not match, resulting in failure to receive data:
Solution: use @RequestParam annotation
@RequestMapping("/commonParamDifferentName")
    @ResponseBody
    public String commonParamDifferentName(@RequestPaam("name") String userName , int age){


        System.out.println("普通参数传递 userName ==> "+userName);
        System.out.println("普通参数传递 age ==> "+age);
        return "{'module':'common param different name'}";
    }
Note: If you write the @RequestParam annotation framework, you don’t need to parse the injection yourself, which can improve the framework’s processing performance
2. POJO data type
Simple data types generally handle requests with relatively few parameters. If there are many parameters, it will be more complicated when receiving parameters in the background. At this time, we can consider using POJO data types.
- POJO parameter: The name of the request parameter is the same as the property name of the parameter object, and the parameter can be received by defining the POJO type parameter
At this time, you need to use the POJO class prepared earlier. Let’s look at User first.
public class User {


    private String name;
    private int age;
    //setter...getter...略
}
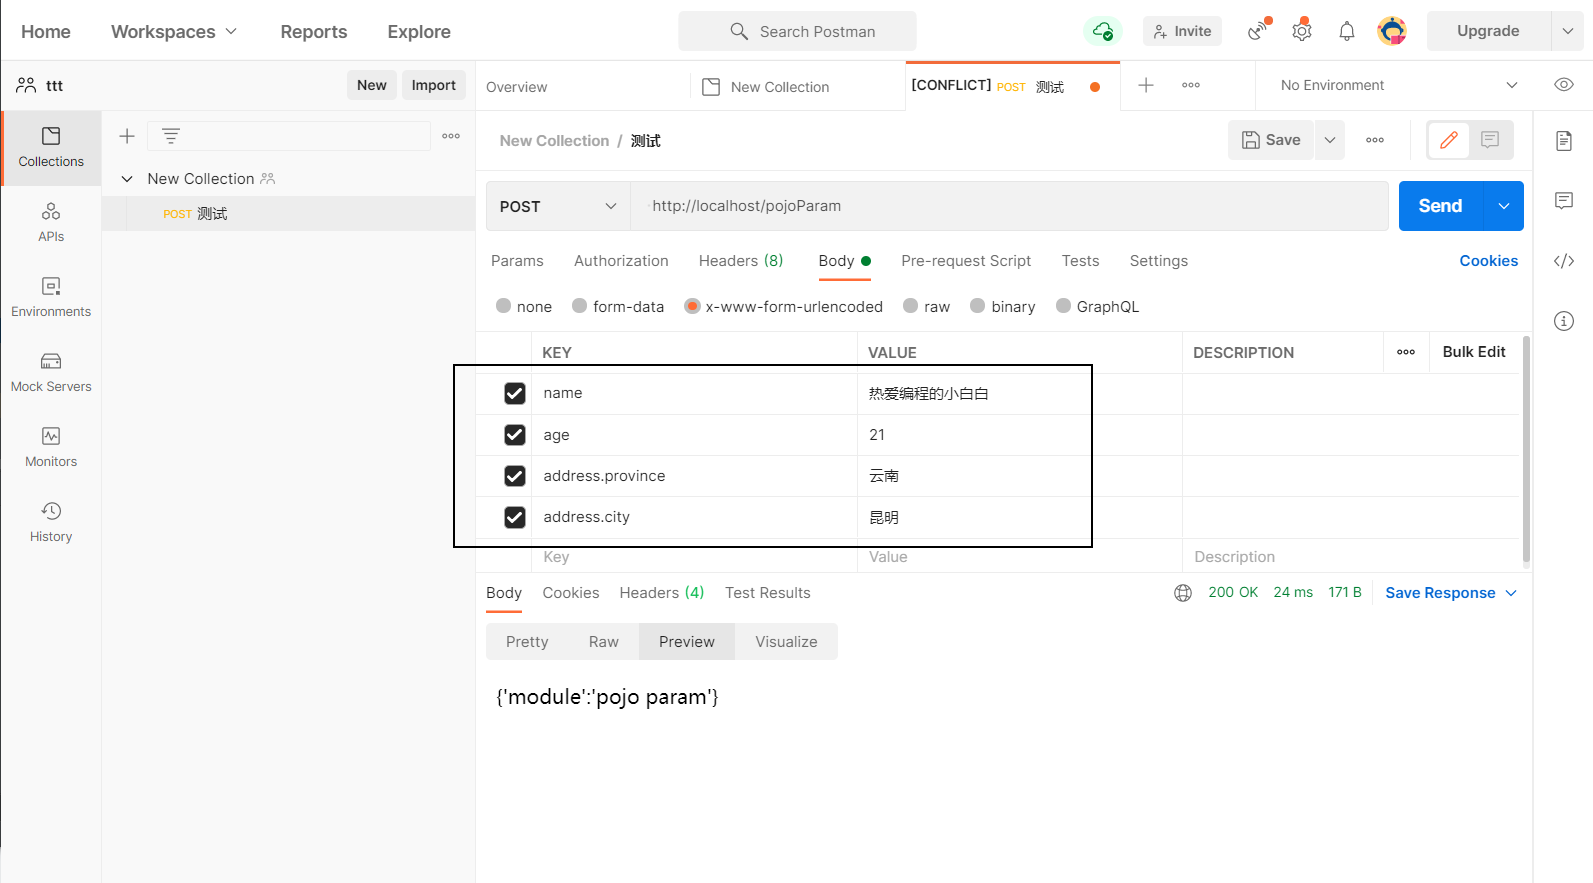
Send request and parameters:
Background receiving parameters:
//POJO参数:请求参数与形参对象中的属性对应即可完成参数传递
@RequestMapping("/pojoParam")
@ResponseBody
public String pojoParam(User user){


    System.out.println("pojo参数传递 user ==> "+user);
    return "{'module':'pojo param'}";
}
Notice:
- The method of receiving POJO parameters and sending request data by front-end GET and POST remains unchanged.
- The name of the request parameter key must be consistent with the name of the attribute in the POJO, otherwise it cannot be encapsulated.
3. Nested POJO type parameters
If other POJO classes are nested in the POJO object, such as
public class Address {


    private String province;
    private String city;
    //setter...getter...略
}
public class User {


    private String name;
    private int age;
    private Address address;
    //setter...getter...略
}
- Nested POJO parameters: The request parameter name is the same as the formal parameter object attribute name, and nested POJO attribute parameters can be received according to the object hierarchy relationship
Send request and parameters:
Background receiving parameters:
//POJO参数:请求参数与形参对象中的属性对应即可完成参数传递
@RequestMapping("/pojoParam")
@ResponseBody
public String pojoParam(User user){


    System.out.println("pojo参数传递 user ==> "+user);
    return "{'module':'pojo param'}";
}

Notice:
The name of the request parameter key must be consistent with the name of the attribute in the POJO, otherwise it cannot be encapsulated
4. Array type parameter
To give a simple example, if the front end needs to obtain the user's hobbies, in most cases there are multiple hobbies, how to send request data and receive data?
- Array parameter: The request parameter name is the same as the formal parameter object attribute name and there are multiple request parameters. Define the array type to receive parameters
Send request and parameters:
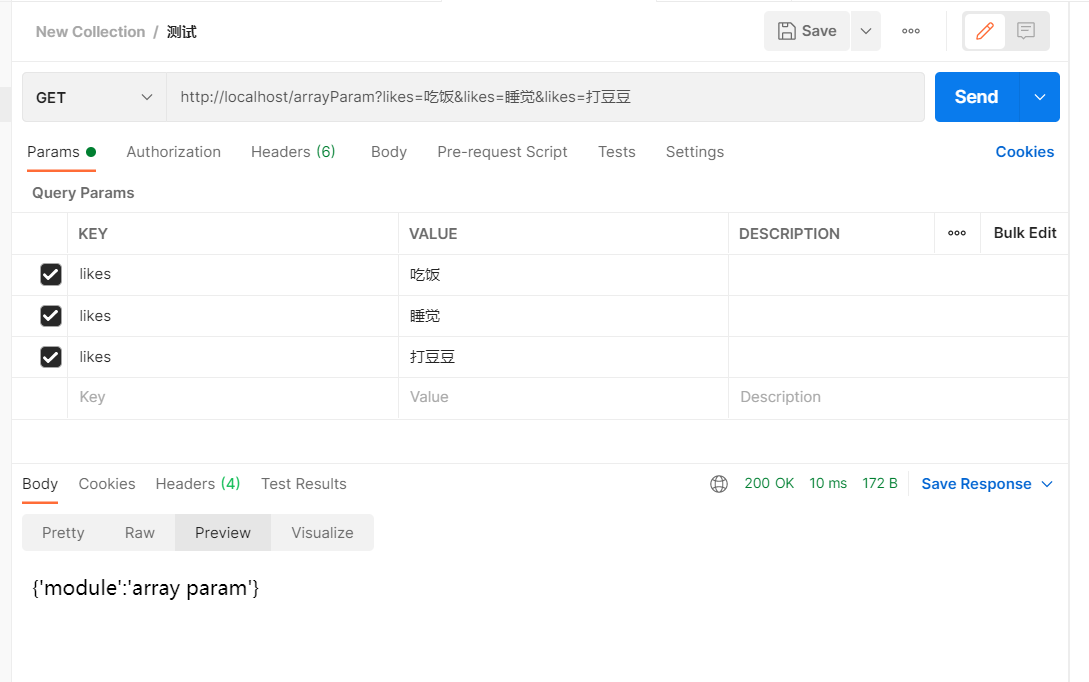
Background receiving parameters:
  //数组参数:同名请求参数可以直接映射到对应名称的形参数组对象中
    @RequestMapping("/arrayParam")
    @ResponseBody
    public String arrayParam(String[] likes){


        System.out.println("数组参数传递 likes ==> "+ Arrays.toString(likes));
        return "{'module':'array param'}";
    }
5. Collection type parameters
Arrays can receive multiple values, so can collections also achieve this function?
Send request and parameters:
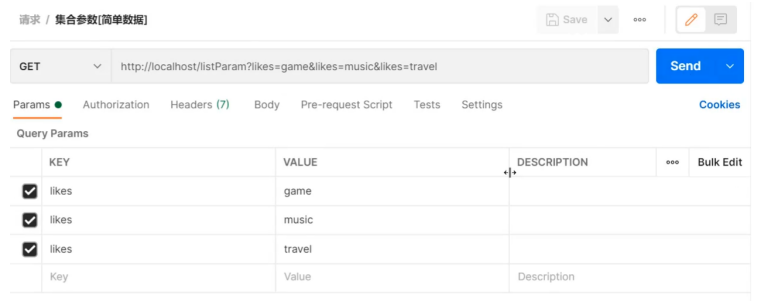
Background receiving parameters:
//集合参数:同名请求参数可以使用@RequestParam注解映射到对应名称的集合对象中作为数据
@RequestMapping("/listParam")
@ResponseBody
public String listParam(List<String> likes){


    System.out.println("集合参数传递 likes ==> "+ likes);
    return "{'module':'list param'}";
}
Running will report an error,
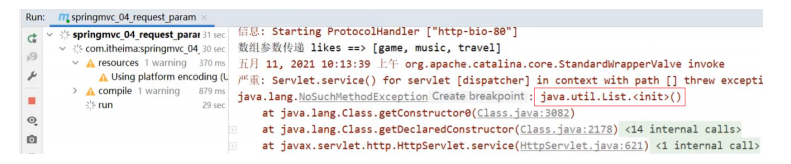
The reason for the error is: SpringMVC treats List as a POJO object, creates an object and prepares to encapsulate the front-end data into the object, but List is an interface that cannot create objects, so an error is reported.
The solution is: use @RequestParamannotations
//集合参数:同名请求参数可以使用@RequestParam注解映射到对应名称的集合对象中作为数据
@RequestMapping("/listParam")
@ResponseBody
public String listParam(@RequestParam List<String> likes){


    System.out.println("集合参数传递 likes ==> "+ likes);
    return "{'module':'list param'}";
}
- The collection saves ordinary parameters: the request parameter name is the same as the formal parameter collection object name and there are multiple request parameters, @RequestParam binds the parameter relationship
- It is easier to use arrays than collections for simple data types.
Knowledge point 1: @RequestParam
| name | @RequestParam |
|---|---|
| type | Formal parameter annotation |
| Location | SpringMVC controller method parameter definition front |
| effect | Relationship Between Binding Request Parameters and Processor Method Parameters |
| Related parameters | required: whether it is a required parameter defaultValue: the default value of the parameter |
4. JSON data transmission parameters
As we said earlier, the more popular development method is asynchronous calls. The front and back are exchanged asynchronously, and the transmitted data usesJSON, so if the front end sends JSON data, how should the back end receive it?
For the JSON data type, there are three common ones:
- json plain array (["value1", "value2", "value3", ...])
- json object ({key1:value1,key2:value2,…})
- array of json objects ([{key1:value1,…},{key2:value2,…}])
For the above data, how does the front end send and how does the back end receive it?
JSON plain array
Step 1: Add dependencies to pom.xml
SpringMVC uses jackson by default to handle json conversion, so you need to add jackson dependency in pom.xml
<dependency>
    <groupId>com.fasterxml.jackson.core</groupId>
    <artifactId>jackson-databind</artifactId>
    <version>2.9.0</version>
</dependency>
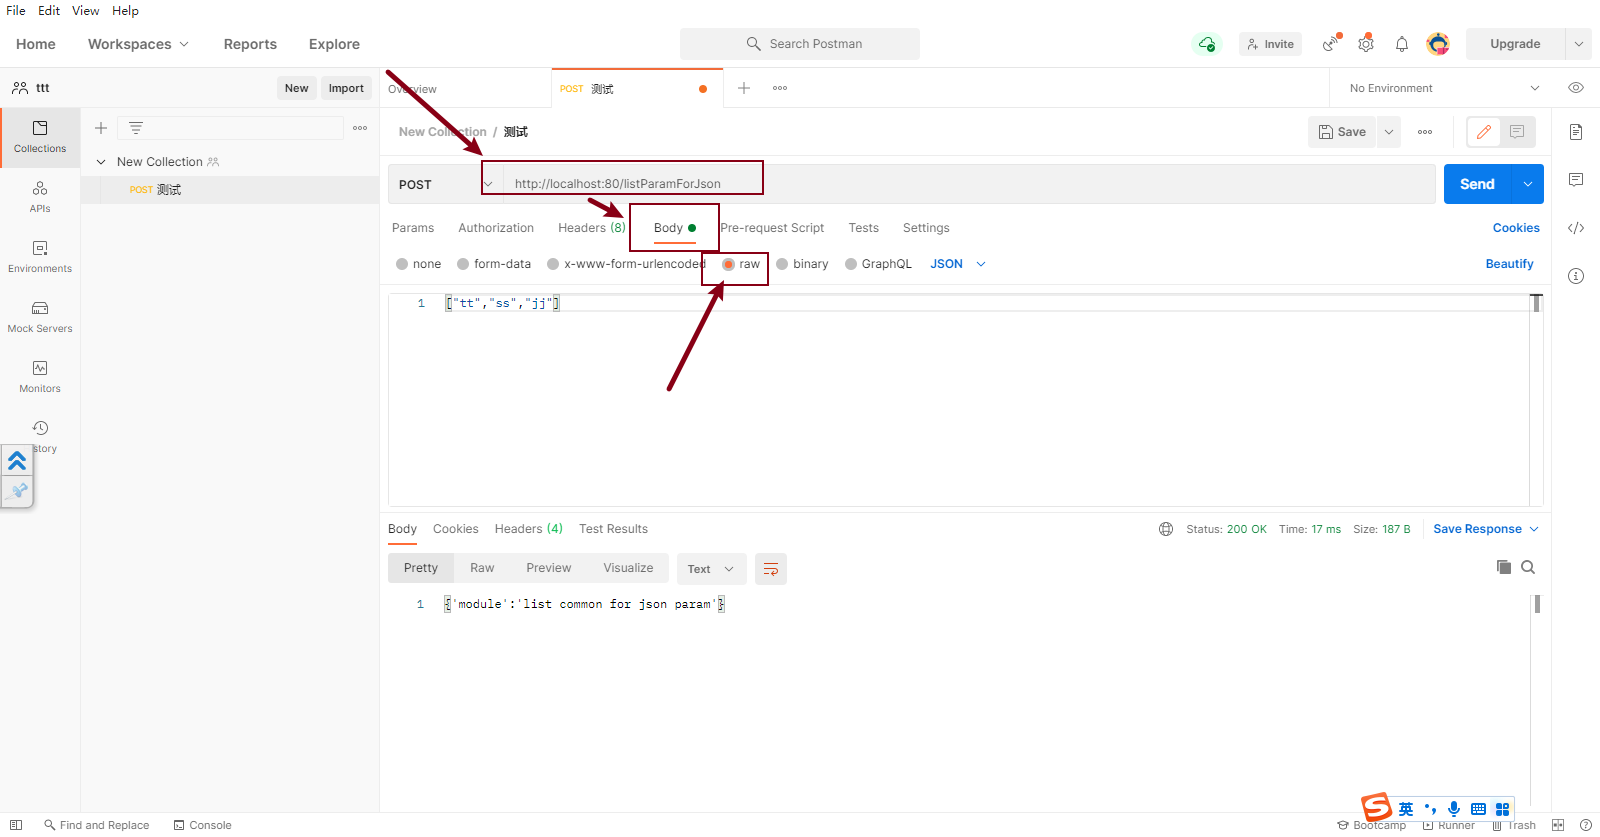
Step 2: PostMan sends JSON data
Step 3: Enable SpringMVC annotation support
Enable the annotation support of SpringMVC in the configuration class of SpringMVC, which includes the function of converting JSON into objects.
@Configuration
@ComponentScan("com.itheima.controller")
//开启json数据类型自动转换
@EnableWebMvc
public class SpringMvcConfig {


}
Step 4: Add @RequestBody before the parameter
//使用@RequestBody注解将外部传递的json数组数据映射到形参的集合对象中作为数据
@RequestMapping("/listParamForJson")
@ResponseBody
public String listParamForJson(@RequestBody List<String> likes){


    System.out.println("list common(json)参数传递 list ==> "+likes);
    return "{'module':'list common for json param'}";
}
Step 5: Start and run the program

The data of JSON ordinary array has been transferred, how to transfer the data of JSON object data and JSON object array?
JSON object data
We will find that we only need to pay attention to how the request and data are sent? How is the back-end data received?
Sending of requests and data:
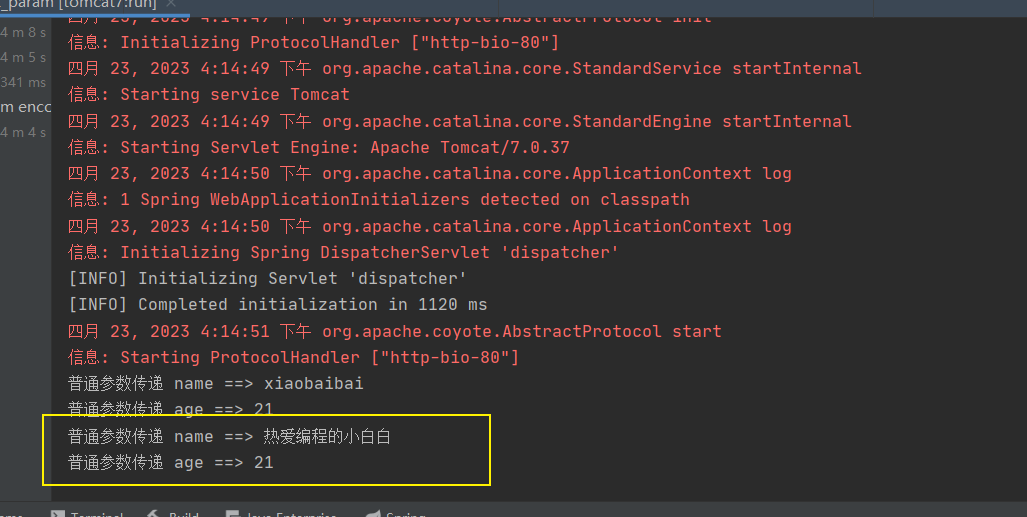
{


"name":"热爱编程的小白白",
"age":21
}
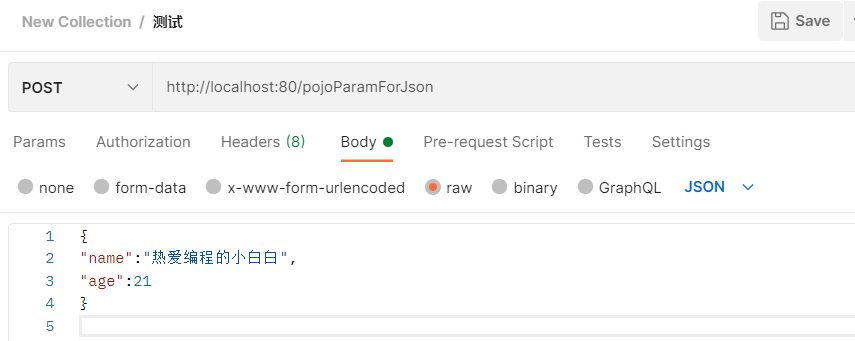
The backend receives data:
@RequestMapping("/pojoParamForJson")
@ResponseBody
public String pojoParamForJson(@RequestBody User user){


    System.out.println("pojo(json)参数传递 user ==> "+user);
    return "{'module':'pojo for json param'}";
}
Start program access test
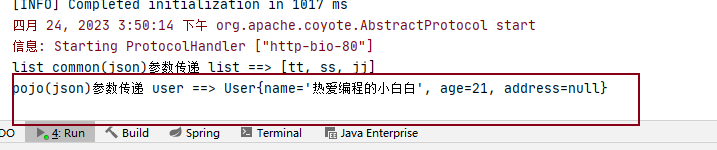
illustrate:
The reason why address is null is that the front end does not pass data to the back end.
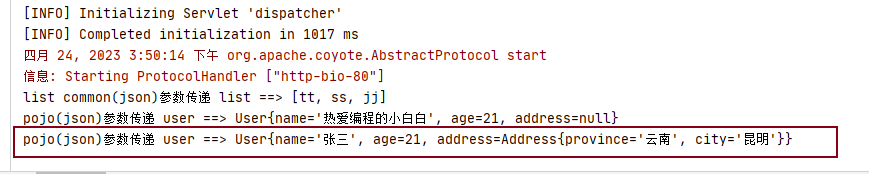
If we want address to also have data, we need to modify the data content passed by the front end:
{


	"name":"张三",
	"age":21,
    "address":{


        "province":"云南",
        "city":"昆明"
    }
}
Send the request again, and you can see the data in address
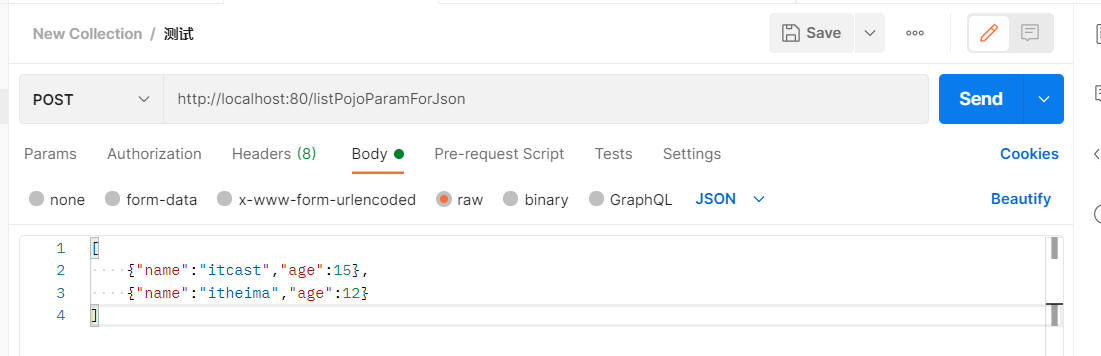
array of JSON objects
How to save multiple POJOs in a collection?
Sending of requests and data:
[
    {

    "name":"itcast","age":15},
    {

    "name":"itheima","age":12}
]
The backend receives data:
@RequestMapping("/listPojoParamForJson")
@ResponseBody
public String listPojoParamForJson(@RequestBody List<User> list){


    System.out.println("list pojo(json)参数传递 list ==> "+list);
    return "{'module':'list pojo for json param'}";
}
Start program access test

summary
The implementation steps of SpringMVC receiving JSON data are:
(1) Import jackson package
(2) Use PostMan to send JSON data
(3) Turn on the SpringMVC annotation driver and add the @EnableWebMvc annotation to the configuration class
(4) Add the @RequestBody annotation before the parameters of the Controller method
Knowledge point 1: @EnableWebMvc
| name | @EnableWebMvc |
|---|---|
| type | Configuration class annotation |
| Location | Above the SpringMVC configuration class definition |
| effect | Enable multiple auxiliary functions of SpringMVC |
Knowledge point 2: @RequestBody
| name | @RequestBody |
|---|---|
| type | Formal parameter annotation |
| Location | SpringMVC controller method parameter definition front |
| effect | Pass the data contained in the request body to the request parameters. This annotation can only be used once for a handler method |
The difference between @RequestBody and @RequestParam
-
the difference
- @RequestParam is used to receive url address pass parameters, form pass parameters [application/x-www-form-urlencoded]
- @RequestBody is used to receive json data [application/json]
-
application
- In the later stage of development, the data in json format is mainly sent, and @RequestBody is widely used
- If you send data in non-json format, use @RequestParam to receive request parameters
5. Date type parameter passing
We have dealt with simple data types, POJO data types, array and collection data types, and JSON data types before. Next, we have to deal with a more common data type in development.日期类型
The date type is special, because there are more than N input methods for the date format, such as:
- 2088-08-18
- 2088/08/18
- 08/18/2088
- …
For so many date formats, how should SpringMVC receive them, and can it handle date type data well?
Step 1: Write a method to receive date data
Add a method in the UserController class and set the parameter to a date type
@RequestMapping("/dataParam")
@ResponseBody
public String dataParam(Date date)
    System.out.println("参数传递 date ==> "+date);
    return "{'module':'data param'}";
}
Step 2: Start the Tomcat server
Check the console to see if there is an error. If there is an error, solve the error first.
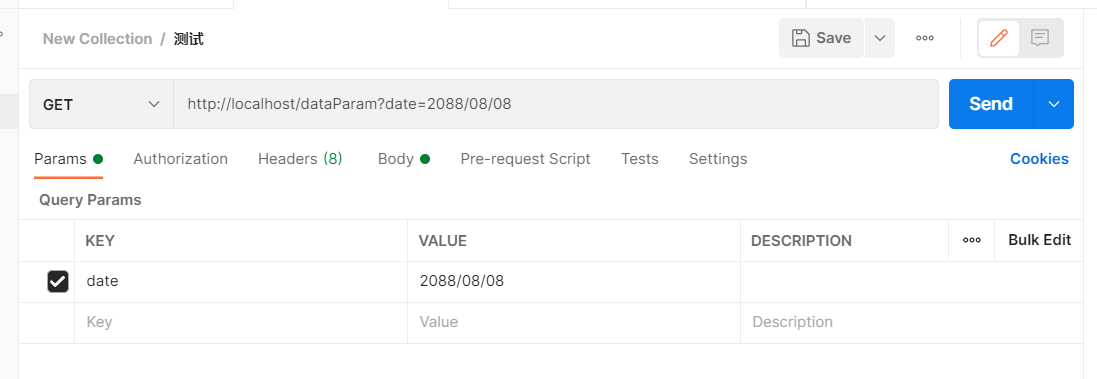
Step 3: Send the request using PostMan
Use PostMan to send a GET request and set the date parameter
http://localhost/dataParam?date=2088/08/08
Step 4: View the console

By printing, we found that SpringMVC can receive the date data type and print it on the console.
At this time, we wondered if the format of the date parameter was changed to something else, would SpringMVC still be able to handle it?
Step 5: Change the date format
In order to better see the results of the program running, we add an additional date parameter to the method
@RequestMapping("/dataParam")
@ResponseBody
public String dataParam(Date date,Date date1)
    System.out.println("参数传递 date ==> "+date);
    return "{'module':'data param'}";
}
Use PostMan to send the request, carrying two different date formats,
http://localhost/dataParam?date=2088/08/08&date1=2088-08-08

After sending the request and data, the page will report 400, and the console will report an error
Resolved [org.springframework.web.method.annotation.MethodArgumentTypeMismatchException: Failed to convert value of type ‘java.lang.String’ to required type ‘java.util.Date’; nested exception is org.springframework.core.convert.ConversionFailedException: Failed to convert from type [java.lang.String] to type [java.util.Date] for value ‘2088-08-08’; nested exception is java.lang.IllegalArgumentException]
As can be seen from the error message, the reason for the error is that it 2088-08-08failed when converting to a date type. The reason is that the format of string to date supported by SpringMVC by default is yyyy/MM/dd, and what we are passing now does not conform to its default format, so SpringMVC cannot Format conversion is performed, so an error is reported.
The solution is also relatively simple, requiring the use of@DateTimeFormat
@RequestMapping("/dataParam")
@ResponseBody
public String dataParam(Date date,
                        @DateTimeFormat(pattern="yyyy-MM-dd") Date date1)
    System.out.println("参数传递 date ==> "+date);
	System.out.println("参数传递 date1(yyyy-MM-dd) ==> "+date1);
    return "{'module':'data param'}";
}
Restart the server, resend the request test, and SpringMVC can correctly convert the date
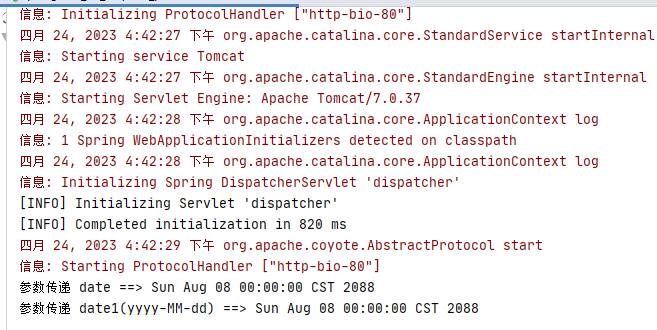
Step 6: Date Carrying Time
Next, let's send a date with time to see how SpringMVC handles it?
First modify the UserController class and add a third parameter
@RequestMapping("/dataParam")
@ResponseBody
public String dataParam(Date date,
                        @DateTimeFormat(pattern="yyyy-MM-dd") Date date1,
                        @DateTimeFormat(pattern="yyyy/MM/dd HH:mm:ss") Date date2)
    System.out.println("参数传递 date ==> "+date);
	System.out.println("参数传递 date1(yyyy-MM-dd) ==> "+date1);
	System.out.println("参数传递 date2(yyyy/MM/dd HH:mm:ss) ==> "+date2);
    return "{'module':'data param'}";
}
Use PostMan to send the request, carrying two different date formats,
http://localhost/dataParam?date=2088/08/08&date1=2088-08-08&date2=2088/08/08 8:08:08
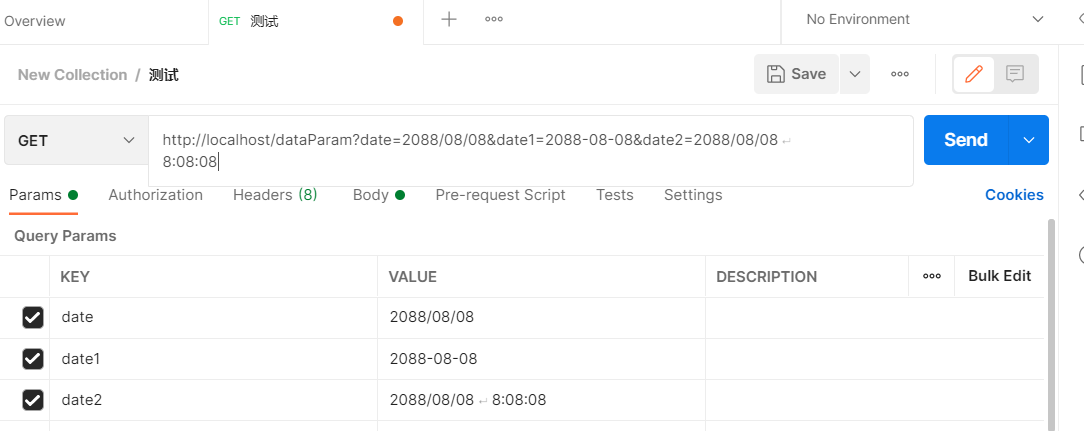
Restart the server, resend the request test, and SpringMVC can convert the date and time data

Knowledge point 1: @DateTimeFormat
| name | @DateTimeFormat |
|---|---|
| type | Formal parameter annotation |
| Location | Before the SpringMVC controller method formal parameters |
| effect | Set date and time data format |
| related attributes | pattern: Specifies the date and time format string |
Internal realization principle
Before explaining the internal principles, we need to think about a question:
- The front end passes the string, and the back end uses the date to receive it
- The front end passes JSON data, and the back end uses objects to receive
- The front end passes strings, and the back end uses Integer to receive
- There are many data types needed in the background
- There are many types of conversions in the data transfer process
Q: Who will do this type conversion?
Answer: Spring MVC
Q: How does SpringMVC implement type conversion?
Answer: SpringMVC provides many type conversion interfaces and implementation classes
In the framework, there are some type conversion interfaces, among them:
- (1) Converter interface
/**
*	S: the source type
*	T: the target type
*/
public interface Converter<S, T> {


    @Nullable
    //该方法就是将从页面上接收的数据(S)转换成我们想要的数据类型(T)返回
    T convert(S source);
}
Note: The package to which Converter belongs isorg.springframework.core.convert.converter
Implementation class of Converter interface
![[External link picture transfer failed, the source site may have an anti-leeching mechanism, it is recommended to save the picture and upload it directly (img-J6FMrBvz-1682171003114)(assets/1630496385398.png)]](https://img-blog.csdnimg.cn/02dec344e7e4400f9299a2203ac5afc8.png)
The framework provides many implementation classes corresponding to the Converter interface, which are used to realize the conversion between different data types, such as:
Request parameter age data (String→Integer)
Date format conversion (String → Date)
- (2) HttpMessageConverter interface
This interface is to implement the conversion work between objects and JSON
Note: The configuration class of SpringMVC uses @EnableWebMvc as a standard configuration, do not omit it
6. Response
After SpringMVC receives the request and data, it performs some processing. Of course, this processing can be forwarded to the Service, and the Service layer calls the Dao layer to complete. In any case, after the processing, the result needs to be notified to the user.
For example: query user information according to user ID, query user list, add new users, etc.
For the response, it mainly includes two parts:
- response page
- response data
- text data
- json data
Because asynchronous calls are the mainstream method commonly used at present, we need to pay more attention to how to return JSON data, and we only need to know about others.
1. Environment preparation
-
Create a Web Maven project
-
pom.xml adds Spring dependency
<?xml version="1.0" encoding="UTF-8"?> <project xmlns="http://maven.apache.org/POM/4.0.0" xmlns:xsi="http://www.w3.org/2001/XMLSchema-instance" xsi:schemaLocation="http://maven.apache.org/POM/4.0.0 http://maven.apache.org/xsd/maven-4.0.0.xsd"> <modelVersion>4.0.0</modelVersion> <groupId>com.itheima</groupId> <artifactId>springmvc_05_response</artifactId> <version>1.0-SNAPSHOT</version> <packaging>war</packaging> <dependencies> <dependency> <groupId>javax.servlet</groupId> <artifactId>javax.servlet-api</artifactId> <version>3.1.0</version> <scope>provided</scope> </dependency> <dependency> <groupId>org.springframework</groupId> <artifactId>spring-webmvc</artifactId> <version>5.2.10.RELEASE</version> </dependency> <dependency> <groupId>com.fasterxml.jackson.core</groupId> <artifactId>jackson-databind</artifactId> <version>2.9.0</version> </dependency> </dependencies> <build> <plugins> <plugin> <groupId>org.apache.tomcat.maven</groupId> <artifactId>tomcat7-maven-plugin</artifactId> <version>2.1</version> <configuration> <port>80</port> <path>/</path> </configuration> </plugin> </plugins> </build> </project> -
Create the corresponding configuration class
public class ServletContainersInitConfig extends AbstractAnnotationConfigDispatcherServletInitializer { protected Class<?>[] getRootConfigClasses() { return new Class[0]; } protected Class<?>[] getServletConfigClasses() { return new Class[]{ SpringMvcConfig.class}; } protected String[] getServletMappings() { return new String[]{ "/"}; } //乱码处理 @Override protected Filter[] getServletFilters() { CharacterEncodingFilter filter = new CharacterEncodingFilter(); filter.setEncoding("UTF-8"); return new Filter[]{ filter}; } } @Configuration @ComponentScan("com.itheima.controller") //开启json数据类型自动转换 @EnableWebMvc public class SpringMvcConfig { } -
Write the model class User
public class User { private String name; private int age; //getter...setter...toString省略 } -
Create page.jsp under webapp
<html> <body> <h2>Hello Spring MVC!</h2> </body> </html> -
Write UserController
@Controller
public class UserController {


}
The final created project structure is as follows:
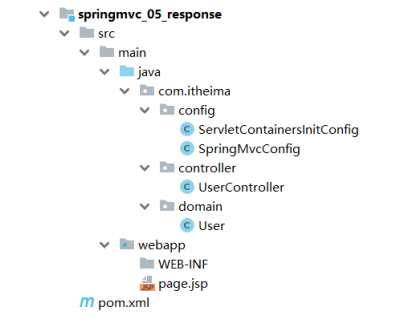
2. Response page [understand]
Step 1: Set up the back page
@Controller
public class UserController {


    @RequestMapping("/toJumpPage")
    //注意
    //1.此处不能添加@ResponseBody,如果加了该注入,会直接将page.jsp当字符串返回前端
    //2.方法需要返回String
    public String toJumpPage(){


        System.out.println("跳转页面");
        return "page.jsp";
    }

}
Step 2: Start the program test
This involves page jumps, so it is not suitable to use PostMan for testing. Open the browser directly and enter
http://localhost/toJumpPage
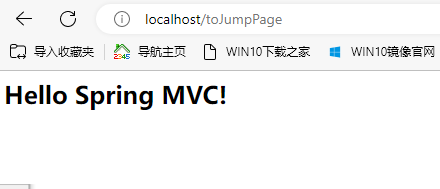
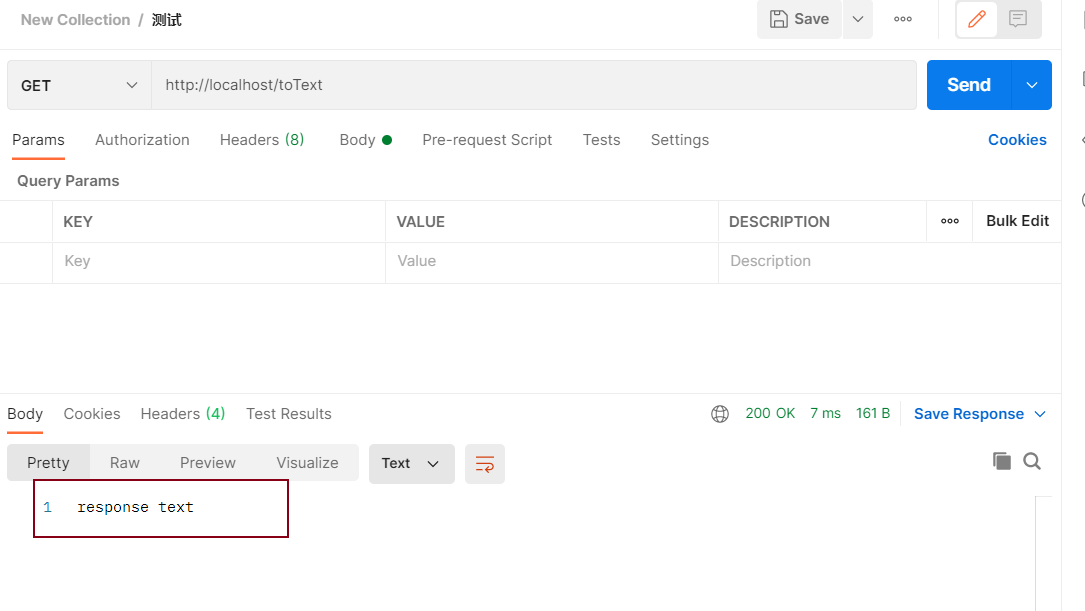
3. Return text data [understand]
Step 1: Set the return text content
@Controller
public class UserController {


   	@RequestMapping("/toText")
	//注意此处该注解就不能省略,如果省略了,会把response text当前页面名称去查找,如果没有回报404错误
    @ResponseBody
    public String toText(){


        System.out.println("返回纯文本数据");
        return "response text";
    }

}
Step 2: Start the program test
There is no page jump involved here, because what we are sending now is a GET request, you can use a browser or PostMan to test, enter the address to http://localhost/toTextaccess
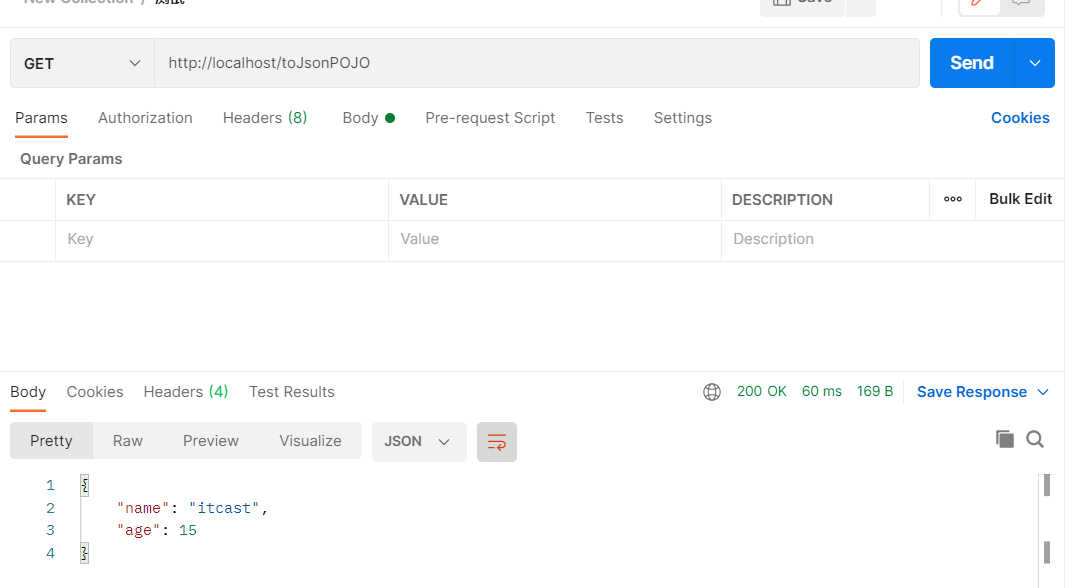
4. Response JSON data
Response POJO object
@Controller
public class UserController {


    @RequestMapping("/toJsonPOJO")
    @ResponseBody
    public User toJsonPOJO(){


        System.out.println("返回json对象数据");
        User user = new User();
        user.setName("itcast");
        user.setAge(15);
        return user;
    }

}
The return value is an entity class object. Set the return value to the entity class type to return the json data of the corresponding object. You need to rely on ==@ResponseBodyNotes and@EnableWebMvc==Annotation
Restart the server, accesshttp://localhost/toJsonPOJO
Response POJO collection object
@Controller
public class UserController {
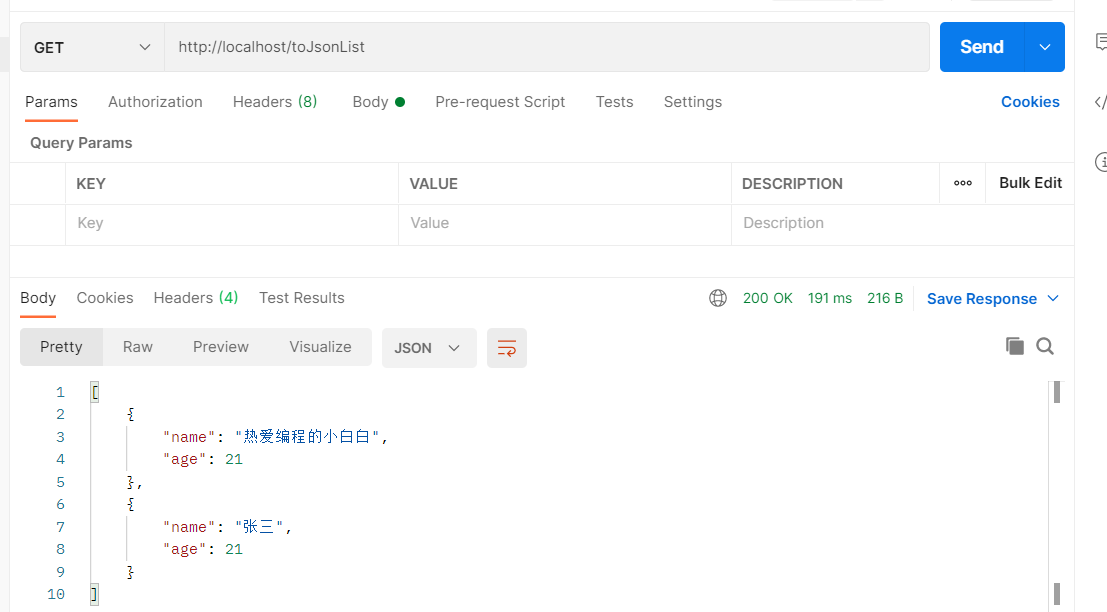
@RequestMapping("/toJsonList")
@ResponseBody
public List<User> toJsonList(){
System.out.println("返回json集合数据");
User user1 = new User();
user1.setName("热爱编程的小白白");
user1.setAge(21);
User user2 = new User();
user2.setName("张三");
user2.setAge(21);
List<User> userList = new ArrayList<User>();
userList.add(user1);
userList.add(user2);
return userList;
}
}
Restart the server, accesshttp://localhost/toJsonList
Knowledge point 1: @ResponseBody
| name | @ResponseBody |
|---|---|
| type | Method\Class Annotation |
| Location | Above the SpringMVC controller method definition and on the control class |
| effect | Set the return value of the current controller as the response body and write it on the class. All methods of this class have this annotation function |
| related attributes | pattern: Specifies the date and time format string |
illustrate:
- This annotation can be written on the class or on the method
- Written on the class means that all methods under the class have the @ReponseBody function
- When the method is annotated with @ReponseBody
- The return value of the method is a string, which will be directly responded to the front end as text content
- The return value of the method is an object, which will convert the object into a JSON response to the front end
Type conversion is used here again, and it is completed internally through the implementation class of the Converter interface, so in addition to the functions mentioned above, Converter can also implement:
- Object to Json data (POJO -> json)
- Collection to Json data (Collection -> json)
Notes from: Dark Horse Programmer SSM Framework Tutorial