Pre-preparation for a clustered environment
introduce
It is necessary to complete the pre-preparation for the cluster environment, including creating multiple virtual machines, configuring host name mapping, SSH password-free login, and so on.
deploy
Configure multiple Linux virtual machines
To install clustering software, the first condition is to have multiple Linux servers available.
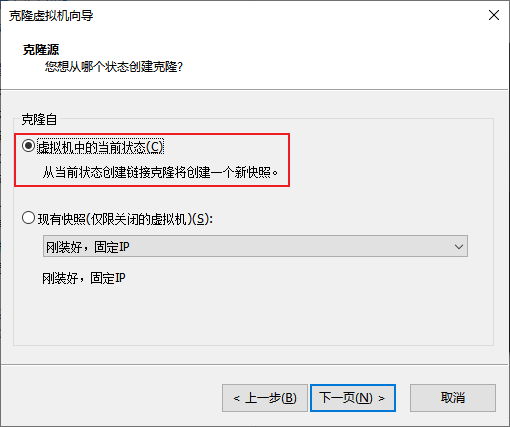
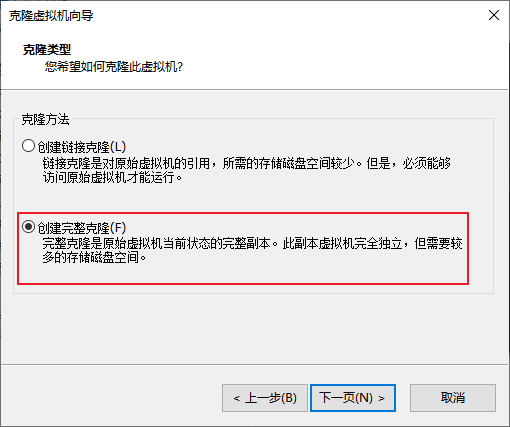
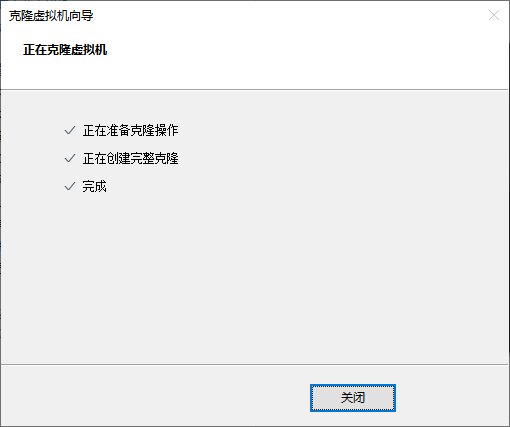
We can use the cloning function provided by VMware to clone 3 additional virtual machines for use.
-
First, shut down the current CentOS system virtual machine (you can use the root user to execute it
init 0to quickly shut down) -
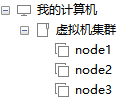
new folder
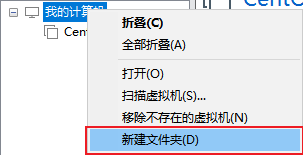
The folder is named:
虚拟机集群 -
clone


-
The same operation is cloned: node2 and node3
-
Open node1, modify the host name to node1, and modify the fixed ip to: 192.168.88.131
# 修改主机名 hostnamectl set-hostname node1 # 修改IP地址 vim /etc/sysconfig/network-scripts/ifcfg-ens33 IPADDR="192.168.88.131" # 重启网卡 systemctl stop network systemctl start network # 或者直接 systemctl restart network -
The same operation starts node2 and node3,
Modify the node2 host name to node2, set the ip to 192.168.88.132
Modify the host name of node2 to node3, and set the ip to 192.168.88.133
-
Configure FinalShell, configure connections to node1, node2, node3
For simplicity, it is recommended to configure root user login
Prepare hostname mapping
-
Modify the hosts file in the Windows system and fill in the following content:
If students use MacOS system, please:
- sudo su -, switch to root
- Modify the /etc/hosts file
192.168.88.131 node1 192.168.88.132 node2 192.168.88.133 node3 -
In the /etc/hosts file of the 3 Linux, fill in the following content (3 must be added)
192.168.88.131 node1
192.168.88.132 node2
192.168.88.133 node3
Configuring SSH password-free login
Introduction
The SSH service is a security authentication protocol for remote login.
We connect to Linux remotely through FinalShell, which is the SSH service used.
SSH service support:
- User authentication through account + password authentication
- User authentication through account + key file
SSH allows us to remotely log in to other hosts through SSH commands, such as:
Execute on node1: ssh root@node2, you will log in to the node2 server as the root user, enter the password to log in successfully
Or ssh node2, will directly log in to the node2 server as the current user.
SSH password-free configuration
Most of the cluster software installed later requires remote login and remote command execution. For simplicity, we can configure password-free SSH login between the three Linux servers
-
Execute on each machine:
ssh-keygen -t rsa -b 4096, press Enter all the way to the end -
Execute on each machine:
ssh-copy-id node1 ssh-copy-id node2 ssh-copy-id node3 -
After the execution is completed, the secret-free intercommunication between node1, node2, and node3 will be completed between root users
Configure the JDK environment
Most of the follow-up big data cluster software requires the Java runtime environment, so we provideeachMachines are configured with JDK environment.
For JDK configuration, refer to: TomcatInstallation and deployment link.
Turn off firewall and SELinux
Cluster software needs to communicate with each other through ports. In order to avoid the problem of network failure, we can simply turn off the firewall inside the cluster.
Execute on every machine
systemctl stop firewalld
systemctl disable firewalld
Linux has a security module: SELinux, which is used to limit the relevant permissions of users and programs to ensure the security and stability of the system.
The configuration of SELinux is the same as that of the firewall. It is very complicated and is not covered in the course. A chapter on SELinux configuration can be published later depending on the situation.
At present, we only need to turn off the SELinux function to avoid problems in the operation of subsequent software.
Execute on every machine
vim /etc/sysconfig/selinux

# 将第七行,SELINUX=enforcing 改为
SELINUX=disabled
# 保存退出后,重启虚拟机即可,千万要注意disabled单词不要写错,不然无法启动系统
add snapshot
In order to avoid subsequent problems, after completing the above settings, forper virtual machineSnapshots are made for later use.
Supplementary command - scp
In the subsequent installation and deployment operations, we will frequently transfer data between multiple servers.
In order to transfer each other in more aspects, we add a command: scp
The scp command is an upgraded version of the cp command, namely: ssh cp, which completes file copying through the SSH protocol.
Its main function is: between different Linux servers, SSHtransfer files to each other through the protocol.
As long as you know the account and password (or key) of the server, you can transfer files to each other through SCP.
grammar:
scp [-r] 参数1 参数2
- -r选项用于复制文件夹使用,如果复制文件夹,必须使用-r
- 参数1:本机路径 或 远程目标路径
- 参数2:远程目标路径 或 本机路径

如:
scp -r /export/server/jdk root@node2:/export/server/
将本机上的jdk文件夹, 以root的身份复制到node2的/export/server/内
同SSH登陆一样,账户名可以省略(使用本机当前的同名账户登陆)

如:
scp -r node2:/export/server/jdk /export/server/
将远程node2的jdk文件夹,复制到本机的/export/server/内


# scp命令的高级用法
cd /export/server
scp -r jdk node2:`pwd`/    # 将本机当前路径的jdk文件夹,复制到node2服务器的同名路径下
scp -r jdk node2:$PWD      # 将本机当前路径的jdk文件夹,复制到node2服务器的同名路径下