Article directory
foreword
I already have U-net, why do I need linkNet?
For unet, see this article [Semantic Segmentation] unet structure and code implementation: https://blog.csdn.net/weixin_40293999/article/details/129648032
It introduces resNet, which focuses on a RealTime, real-time system for automatic driving, etc. The field of the returned result. unet is suitable for less real-time places such as medical diagnosis. It also borrows the structure of autoencoders.
Paper: https://arxiv.org/pdf/1707.03718.pdf is an article in 2017, only 5 pages, worth reading. A new deep neural network architecture is introduced for efficient pixel-level semantic segmentation for visual scene understanding. Using only 11.5 million parameters and 21.2 GFLOPs, the network is both accurate and fast.
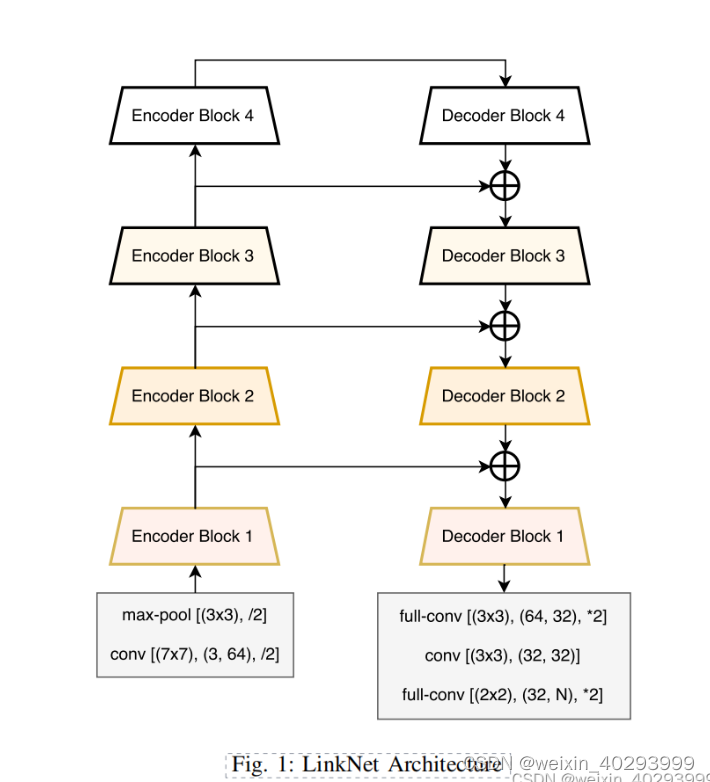
1. Network structure
1.1 Schematic diagram of network structure
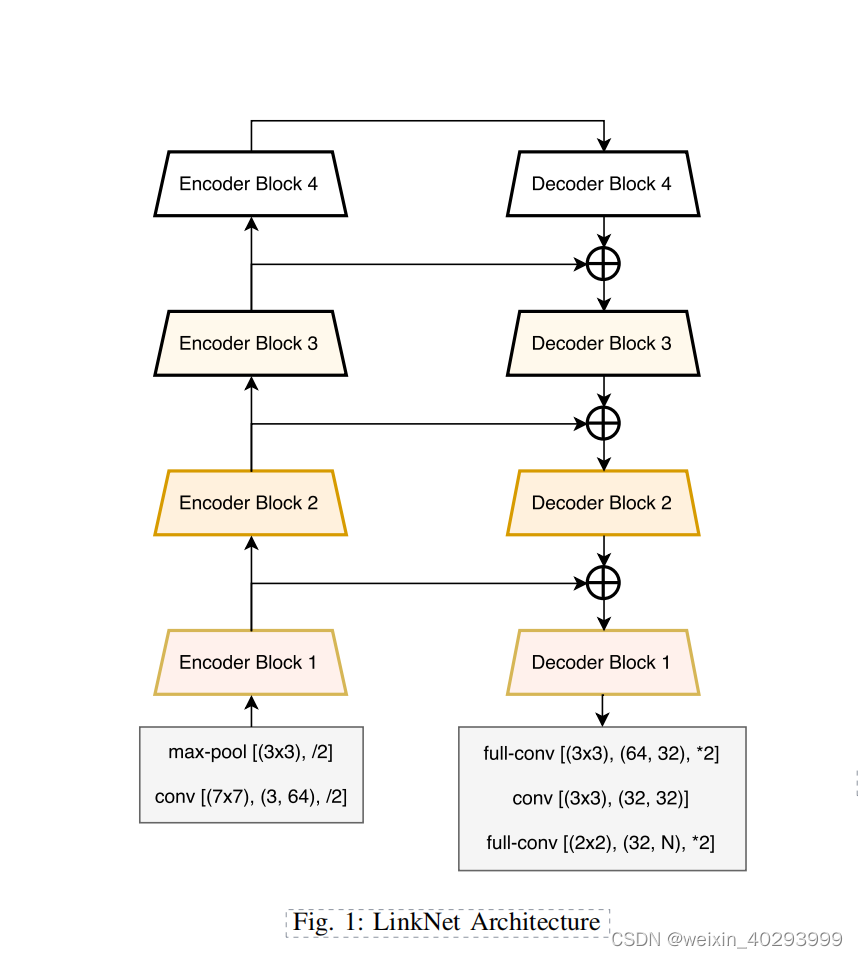
It is copied on the paper, it is recommended to read the paper directly.
1.2 Create LinkNet model
LinkNet can build the entire model from 4 basic modules
1. Convolution module (convolution+BN+Activate)
2. Deconvolution (deconvolution+BN+Activate)
3. Encoder (4 convolution modules)
4. Decoder (convolution module + deconvolution module + convolution module)
5. Realize the overall network structure (1, 2, 3, 4 can be built with building blocks): convolution module + deconvolution module + encoder + decoder
2. Code
2.1 Construction of each module
2.1.1 Convolution Module
Convolution module, initialize the default kernel_size=3, stride = 1, padding =1, that is, the size of the feature map is output as it is.
Then use sequential to process them into a pipeline
# 卷积模块
class ConvBlock(nn.Module):
    def __init__(self, in_channels, out_channels,k_size=3,stride=1,pad=1) -> None:
        super().__init__()
        self.conv_bn_relu = nn.Sequential(
            nn.Conv2d(in_channels, out_channels,kernel_size=k_size,stride,padding=pad),
            nn.BatchNorm2d(out_channels),
            nn.ReLU(inplace=True)
            )

    def farward(self,x):
        x = self.conv_bn_relu(x)
        return x
2.1.2 Deconvolution module
Deconvolution requires two paddings, padding is the position where deconvolution starts, and output_padding fills the edge of the image after deconvolution
class DeconvBlock(nn.Module):
    def __init__(self, in_channels, out_channels,k_size=3,stride=2,padding=1,output_padding = 1) -> None:
        """
        反卷积需要有两个padding
        """
        super().__init__()
        #padding 是反卷积开始的位置, output_padding 将反卷积之后的图像的边缘部分进行填充
        self.deconv = nn.ConvTranspose2d(in_channels,out_channels,kernel_size=k_size,stride=stride,padding=padding,output_padding=output_padding)
        self.bn = nn.BatchNorm2d(out_channels)

    def farward(self,x, is_act=True):
        x = self.deconv(x)
        if is_act:
            x = torch.relu(self.bn(x))
        return x
2.1.3 Encoder module
The multiplexed convolution module consists of
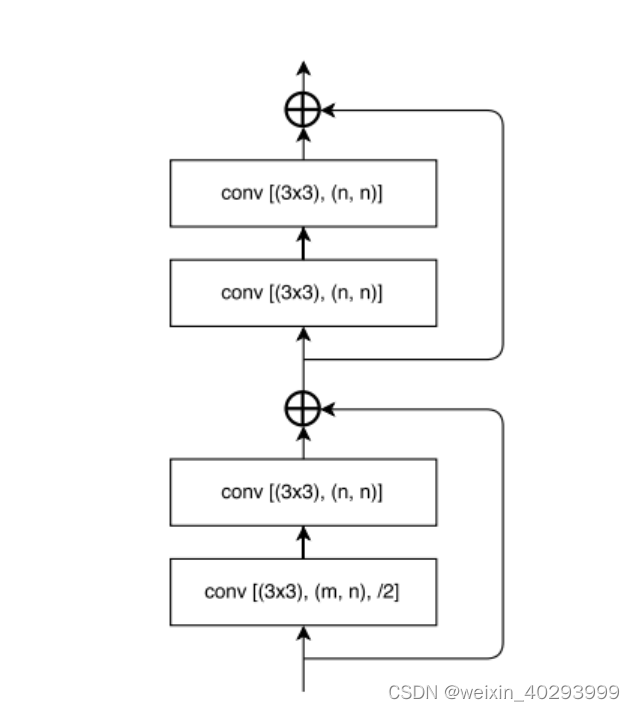
4 basic convolution blocks + a shortcut block. It needs to be explained here, because the entire 4 convolutions are scaled by 1, so the shortcut also needs to be processed accordingly, otherwise it will not add up.
class EncodeBlock(nn.Module):
   def __init__(self, in_channels, out_channels) -> None:
       super().__init__()
       # 第一层需要对图像进行缩放
       self.conv1 = ConvBlock(in_channels,out_channels,stride=2)
       # 第2层不需要对图像进行缩放
       self.conv2 = ConvBlock(out_channels,out_channels)
       # 第三层,第四层原样输出
       self.conv3 = ConvBlock(out_channels,out_channels)
       self.conv4 = ConvBlock(out_channels,out_channels)

       self.short_cut =  ConvBlock(in_channels,out_channels,stride=2)
   def farward(self,x):
       out1 = self.conv1(x)
       out1 = self.conv2(out1)
       short_cut = self.short_cut(x)
       # 第一部分的输出和shortcut相加
       out2 = self.conv3(out1+short_cut)
       out2 = self.conv4(out2)
       return out2 + out1
2.2 Coding Network Structure
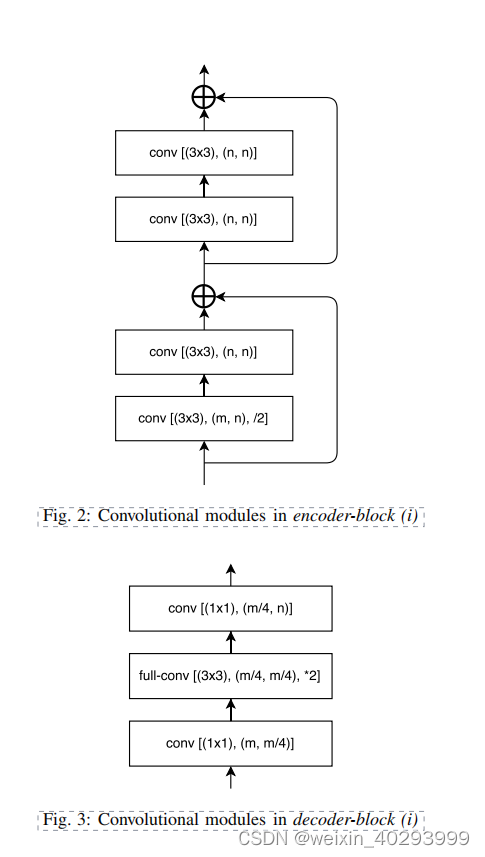
Still need to look at this network structure diagram
to start building blocks
class Net(nn.Module):
    def __init__(self) -> None:
        super().__init__()
        # 第一层
        self.input_conv = ConvBlock(3,64,stride=2,k_size=7,pad=3)
        # maxpool 原来的图像缩放2倍
        self.input_maxpool = nn.MaxPool2d(kernel_size=2)
        # 四个编码器模块,通道扩大一倍,size减小一倍
        self.encode1 = EncodeBlock(64,64)
        self.encode2 = EncodeBlock(64,128)
        self.encode3 = EncodeBlock(128,256)
        self.encode4 = EncodeBlock(256,512)
        # 四个解码模块,和encode是对应的,通道数减小,size扩大为原来的一倍
        self.decode4 = DeconvBlock(512,256)
        self.decode3 = DeconvBlock(256,128)
        self.decode2 = DeconvBlock(128,64)
        self.decode1 = DeconvBlock(64,64)
        # 输出部分,第一层走默认即可
        self.deconv_out1 = DeconvBlock(64,32)
        self.conv_out = ConvBlock(32,32)
        # stride 为2 可以不写, 一共就是2分类。kesize=2,因为论文给的是2x2的,2x2的适合 padding是不需要变化的,都是0 保证正好变为原来的2倍,因为stride正好是2
        self.deconv_out2 = DeconvBlock(32,2,k_size=2,padding=0,output_padding=0)

    def farward(self,x):
        # input 的两层
        x = self.input_conv(x)
        x = self.input_maxpool(x)
        # 后面的中间值要保留
        e1 = self.encode1(x)
        e2 = self.encode2(e1)
        e3 = self.encode3(e2)
        e4 = self.encode3(e3)
        # 到此为止,左边半拉,完成

        d4 = self.decode4(e4)
        d3 = self.decode3(d4+e3)
        d2 = self.decode2(d3+e2)
        d1 = self.decode2(d2+e1)
        f1 = self.deconv_out1(d1)
        f2 = self.conv_out(f1)
        f3 = self.deconv_out2(f2)
        return f3
Initialize and look at the structure
 Output exceeds the size limit. Open the full output data in a text editor
Net(
(input_conv): ConvBlock(
  (conv_bn_relu): Sequential(
    (0): Conv2d(3, 64, kernel_size=(7, 7), stride=(1, 1), padding=(3, 3))
    (1): BatchNorm2d(64, eps=1e-05, momentum=0.1, affine=True, track_running_stats=True)
    (2): ReLU(inplace=True)
  )
)
(input_maxpool): MaxPool2d(kernel_size=2, stride=2, padding=0, dilation=1, ceil_mode=False)
(encode1): EncodeBlock(
  (conv1): ConvBlock(
    (conv_bn_relu): Sequential(
      (0): Conv2d(64, 64, kernel_size=(3, 3), stride=(1, 1), padding=(1, 1))
      (1): BatchNorm2d(64, eps=1e-05, momentum=0.1, affine=True, track_running_stats=True)
      (2): ReLU(inplace=True)
    )
  )
  (conv2): ConvBlock(
    (conv_bn_relu): Sequential(
      (0): Conv2d(64, 64, kernel_size=(3, 3), stride=(1, 1), padding=(1, 1))
      (1): BatchNorm2d(64, eps=1e-05, momentum=0.1, affine=True, track_running_stats=True)
      (2): ReLU(inplace=True)
    )
  )
  (conv3): ConvBlock(
...
(deconv_out2): DeconvBlock(
  (deconv): ConvTranspose2d(32, 2, kernel_size=(2, 2), stride=(2, 2))
  (bn): BatchNorm2d(2, eps=1e-05, momentum=0.1, affine=True, track_running_stats=True)
)
)
2.3 Loss function & training
model = Net()
loss_fn = nn.CrossEntropyLoss()
Its training is almost exactly the same as unet training, with the IOU indicator added.
The division of the IOU index
tensor and tensor uses torch.true_divide(tensor1,tesor2)
2.4 Training
training up
Output exceeds the size limit. Open the full output data in a text editor
epoch:  0 loss:  0.072 accuracy: 0.806 IOU: 0

      test_loss:  0.071 test_accuracy: 0.81 test_iou: 0
epoch:  1 loss:  0.072 accuracy: 0.806 IOU: 0

      test_loss:  0.07 test_accuracy: 0.81 test_iou: 0
epoch:  2 loss:  0.071 accuracy: 0.807 IOU: 0

      test_loss:  0.07 test_accuracy: 0.809 test_iou: 0
epoch:  3 loss:  0.071 accuracy: 0.807 IOU: 0

      test_loss:  0.07 test_accuracy: 0.811 test_iou: 0
epoch:  4 loss:  0.071 accuracy: 0.807 IOU: 0

      test_loss:  0.071 test_accuracy: 0.81 test_iou: 0
epoch:  5 loss:  0.071 accuracy: 0.807 IOU: 0

      test_loss:  0.07 test_accuracy: 0.81 test_iou: 0
epoch:  6 loss:  0.071 accuracy: 0.808 IOU: 0

      test_loss:  0.07 test_accuracy: 0.81 test_iou: 0
epoch:  7 loss:  0.071 accuracy: 0.808 IOU: 0

      test_loss:  0.071 test_accuracy: 0.81 test_iou: 0
epoch:  8 loss:  0.071 accuracy: 0.809 IOU: 0
...
      test_loss:  0.07 test_accuracy: 0.81 test_iou: 0
epoch:  9 loss:  0.071 accuracy: 0.809 IOU: 0

      test_loss:  0.071 test_accuracy: 0.809 test_iou: 0
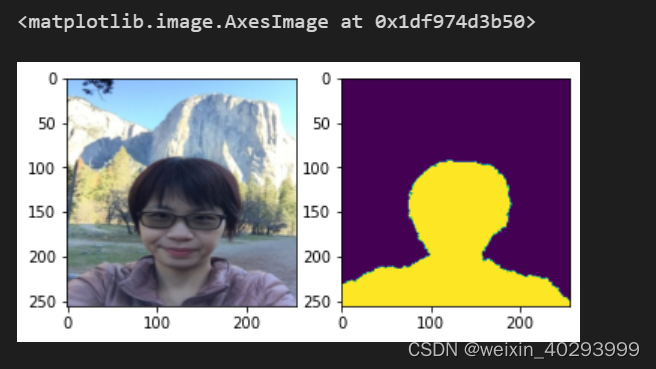
Dataset overview