illustrate
The fisheye lens is a lens with a large field of view, but the obtained picture has a large distortion, so the fisheye lens needs to be calibrated, and the parameters obtained from the calibration can correct the image of the fisheye lens.
The picture below is from the documentation of opencv. Where c is the original image of the fisheye lens, and a and b are the images obtained by different correction methods.
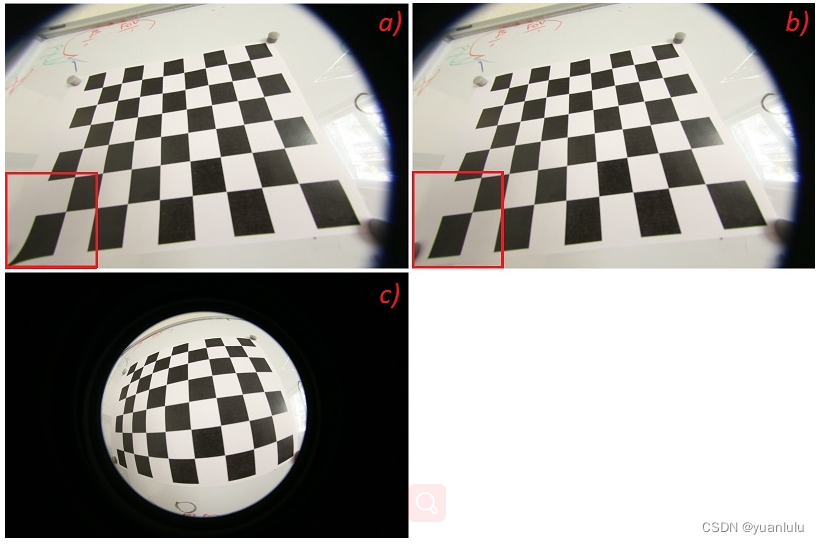
Starting from OpenCV 3.0, OpenCV includes the cv2.fisheye package to handle the correction of fisheye lenses.
According to the article " Fisheye Camera Imaging Model ", opencv is only one of many fisheye lens models implemented, and it is a general approximate model of a fisheye camera proposed by Kannala.
corrective steps
Regarding the steps and codes for correcting fisheye lenses using opencv, there are many on github. Among them, the article "Calibrate fisheye lens using OpenCV—part 1" on the Internet is very good, but it seems that it cannot be opened. I am on the github of a domestic buddy. I saw the pdf version on the project, you need to pick it up yourself: HLearning/fisheye
Correcting the fisheye lens is divided into 2 steps:
- 2 internal references to calibrate the lens. It is called K (internal reference matrix) and D (distortion coefficient) in OpenCV.
- Correct the picture by using K and D
In order to obtain k and d, the "Zhang Zhengyou calibration method" is generally used, that is, the camera is used to take a batch of checkerboard pictures to calculate K/D. I have to buy a lens, print a checkerboard, and take pictures to learn how to correct. Many people probably think about it and want to give up.
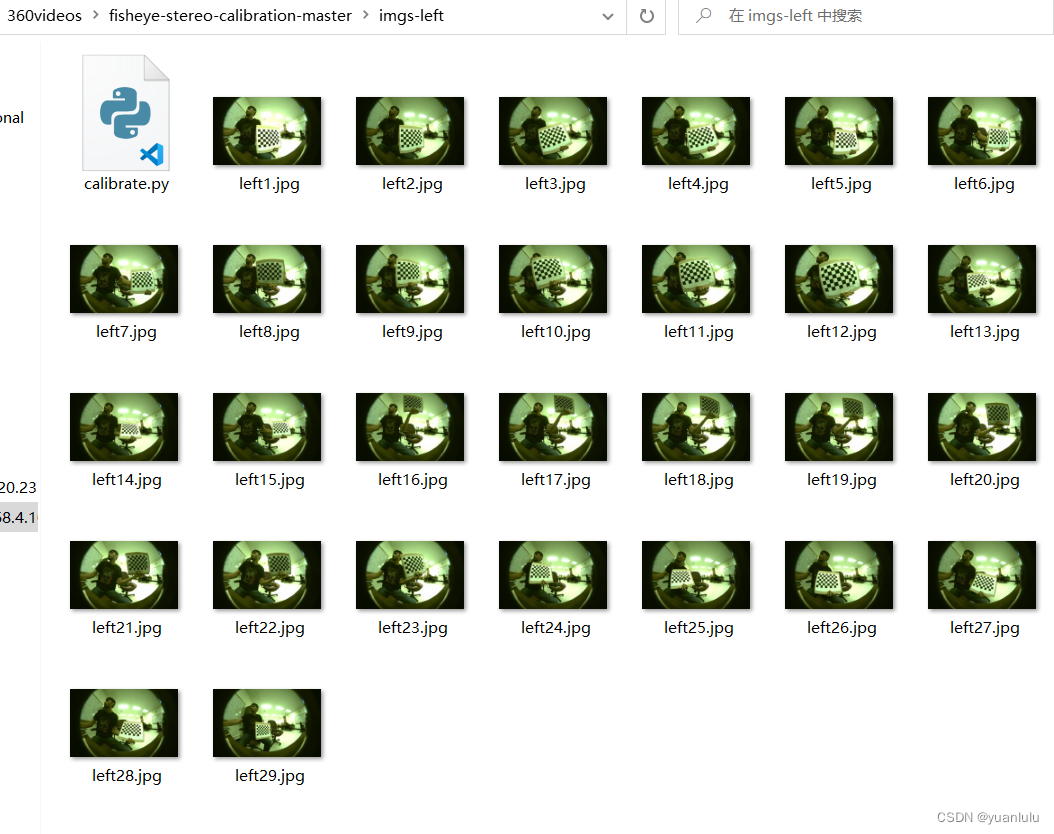
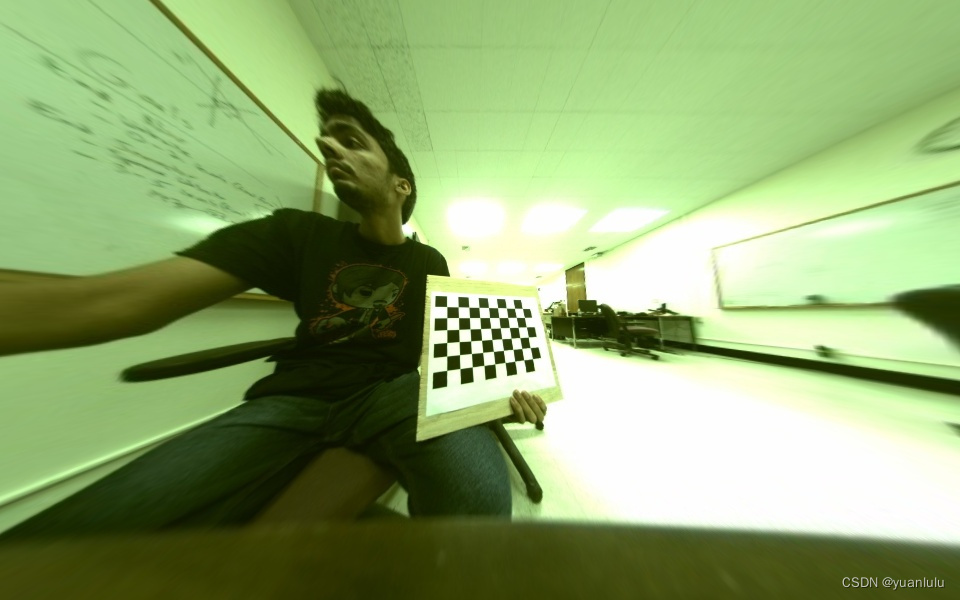
Don't worry, there are pictures taken in the gitgub project " sourishg/fisheye-stereo-calibration ", just take them and use them directly.
There are pictures of left and right lenses in the project. I only need one, and I chose left. Note that this project is in c++, I just use his picture, the code comes from elsewhere.
Lens Calibration
The open source code of this github I used was modified: lengkujiaai/Calibrate-fisheye-lens-using-OpenCV
Save the code as calibrate.py, put it in the same directory as the calibration picture and execute it, and the generated K and D will be printed to the screen.
My code is as follows:
import cv2
assert cv2.__version__[0] >= '3', 'The fisheye module requires opencv version >= 3.0.0'
import numpy as np
import os
import glob
CHECKERBOARD = (6,9)
subpix_criteria = (cv2.TERM_CRITERIA_EPS+cv2.TERM_CRITERIA_MAX_ITER, 30, 0.1)
calibration_flags = cv2.fisheye.CALIB_RECOMPUTE_EXTRINSIC+cv2.fisheye.CALIB_CHECK_COND+cv2.fisheye.CALIB_FIX_SKEW
objp = np.zeros((1, CHECKERBOARD[0]*CHECKERBOARD[1], 3), np.float32)
objp[0,:,:2] = np.mgrid[0:CHECKERBOARD[0], 0:CHECKERBOARD[1]].T.reshape(-1, 2)
_img_shape = None
objpoints = [] # 3d point in real world space
imgpoints = [] # 2d points in image plane.
images = glob.glob('*.jpg')
imgcnt=0
for fname in images:
    img = cv2.imread(fname)
    if _img_shape == None:
        _img_shape = img.shape[:2]
    else:
        assert _img_shape == img.shape[:2], "All images must share the same size."
    gray = cv2.cvtColor(img,cv2.COLOR_BGR2GRAY)
    # Find the chess board corners
    imgcnt+=1
    ret, corners = cv2.findChessboardCorners(gray, CHECKERBOARD, cv2.CALIB_CB_ADAPTIVE_THRESH+cv2.CALIB_CB_FAST_CHECK+cv2.CALIB_CB_NORMALIZE_IMAGE)
    # If found, add object points, image points (after refining them)
    if ret == True:
        objpoints.append(objp)
        cv2.cornerSubPix(gray,corners,(3,3),(-1,-1),subpix_criteria)
        imgpoints.append(corners)
    else:
        print(fname, "findChessboardCorners failed")
N_OK = len(objpoints)
K = np.zeros((3, 3))
D = np.zeros((4, 1))
rvecs = [np.zeros((1, 1, 3), dtype=np.float64) for i in range(N_OK)]
tvecs = [np.zeros((1, 1, 3), dtype=np.float64) for i in range(N_OK)]
rms, _, _, _, _ = \
    cv2.fisheye.calibrate(
        objpoints,
        imgpoints,
        gray.shape[::-1],
        K,
        D,
        rvecs,
        tvecs,
        calibration_flags,
        (cv2.TERM_CRITERIA_EPS+cv2.TERM_CRITERIA_MAX_ITER, 30, 1e-6)
    )
print("imgcnt:", imgcnt)
print("Found " + str(N_OK) + " valid images for calibration")
print("DIM=" + str(_img_shape[::-1]))
print("K=np.array(" + str(K.tolist()) + ")")
print("D=np.array(" + str(D.tolist()) + ")")
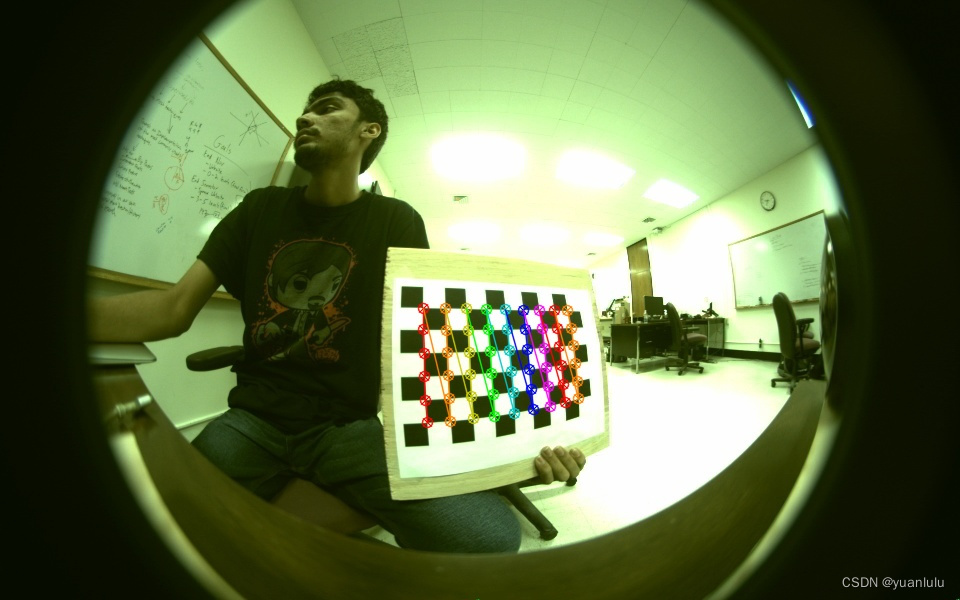
The parameter that needs to be modified in this code is mainly "CHECKERBOARD = (6,9)". Here, it needs to be based on the actual number of corner points of the checkerboard. Where is the corner? The following is the result after visualization, I believe it is not difficult to count.
The above code execution output:
imgcnt: 29
Found 29 valid images for calibration
DIM=(960, 600)
K=np.array([[227.37445013320539, 0.0, 471.44988103922896], [0.0, 226.54869118283946, 305.68361664835436], [0.0, 0.0, 1.0]])
D=np.array([[0.025348291552841663], [-0.025433974064838705], [0.022414488170602896], [-0.00804494586747774]])
Among them, K and D are the parameters we need to correct in the next step.
Correct the picture
K and D are to solve the remap matrix, which are the two variables of map1 and map2 in the following code. They satisfy "map1[i, j]=m and map2[i, j]=n", which means that the pixel value of row i and column j after correction is equal to the pixel value of row n and column m of the original picture , where m, n are allowed to be non-integer.
# You should replace these 3 lines with the output in calibration step
import numpy as np
import cv2
import sys
import os
import glob

# DIM=(1280, 720)
# K=np.array([[-31190.47191209647, -0.0, 667.330647269763], [0.0, -14405.222579044883, 80.68167531658455], [0.0, 0.0, 1.0]])
# D=np.array([[152.50098302679038], [-150.36440309694163], [83.13957034501341], [-39.63732437907149]])

DIM=(960, 600)
K=np.array([[227.37445013320539, 0.0, 471.44988103922896], [0.0, 226.54869118283946, 305.68361664835436], [0.0, 0.0, 1.0]])
D=np.array([[0.025348291552841663], [-0.025433974064838705], [0.022414488170602896], [-0.00804494586747774]])


def undistort(img_path, out_path):
    img = cv2.imread(img_path)
    h,w = img.shape[:2]
    map1, map2 = cv2.fisheye.initUndistortRectifyMap(K, D, np.eye(3), K, DIM, cv2.CV_16SC2)
    undistorted_img = cv2.remap(img, map1, map2, interpolation=cv2.INTER_LINEAR, borderMode=cv2.BORDER_CONSTANT)
    #cv2.imshow("undistorted", undistorted_img)
    cv2.imwrite(out_path,undistorted_img)
    #cv2.waitKey(0)
    #cv2.destroyAllWindows()
if __name__ == '__main__':
    print("sys.argv[0]", sys.argv[0])
    print("sys.argv[1]", sys.argv[1])
    # print("sys.argv[1]", sys.argv[1])
    print("sys.argv[1:]", sys.argv[1:])

    # input_path=os.path(sys.argv[1])
    # out_path=os.path(sys.argv[2])

    glob_str=os.path.join(sys.argv[1], "*.jpg")
    print("glob_str:", glob_str)
    images=glob.glob(glob_str)

    for img in images:
        print("input", img)
        out_img=os.path.join(sys.argv[2], os.path.basename(img))
        print("out_img", out_img)
        undistort(img, out_img)
Comparison before and after correction:
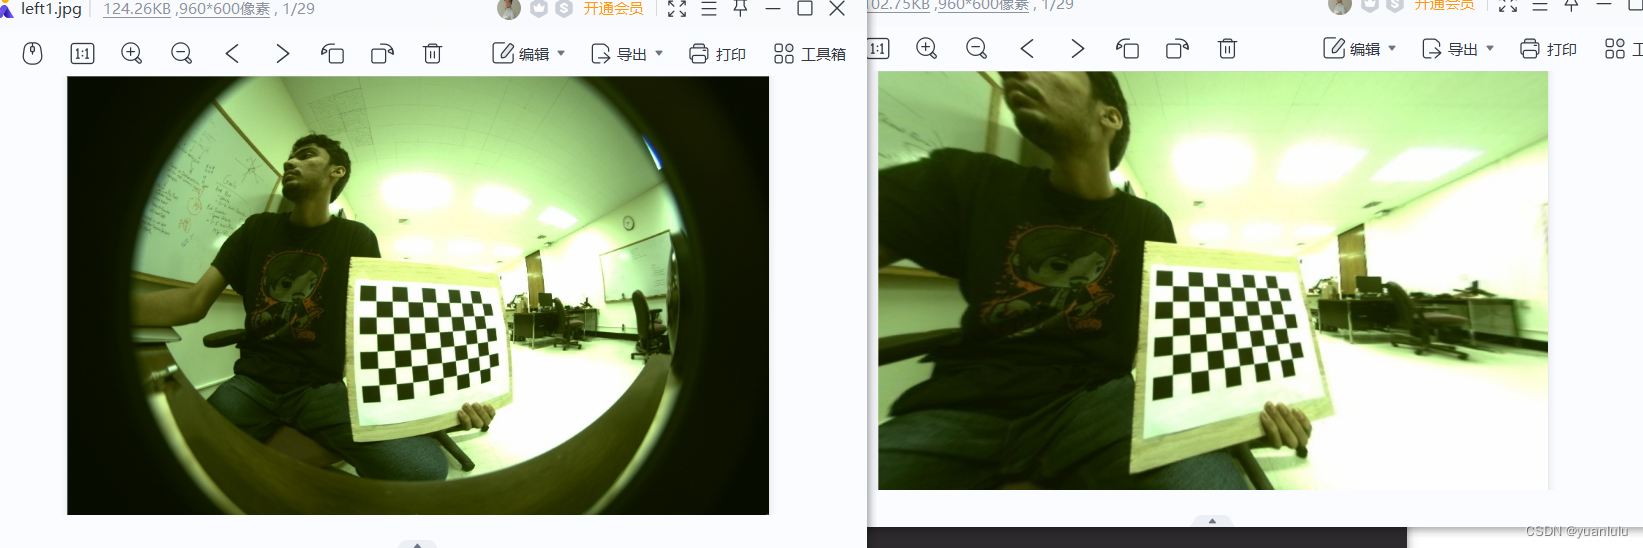
It can be seen that the rectified picture is cropped, and only the middle part is kept. This is because the closer to the edge, the more obvious the stretch after correction. Those who have used the car 360 image should know what it means.
I didn't get through the method of retaining all the pictures in "Calibrate fisheye lens using OpenCV—part 2". I refer to the method in " About C++: OpenCV fisheye calibration will cut too many result images " to get a complete image, but the effect feels weird:
References
lengkujiaai/Calibrate-fisheye-lens-using-OpenCV
sourishg/fisheye-stereo-calibration
OpenCV fisheye calibration clipping too much of the resulting image