Table of contents
Step 1. Create multiple configuration files
Step 2. Specify the configuration in applicaiton.yml
Method 3: Specify the environment configuration in pom.xml
Step 1. Create multiple configuration files
Step 2: Add multi-environment configuration properties in application.yml
Step 3. Specify the configuration used in pom.xml
Pit avoidance: the symbol @ cannot be recognized
Method 1: multiple yml files
Step 1. Create multiple configuration files
application.yml      #主配置文件
application-dev.yml  #开发环境的配置
application-prod.yml #生产环境的配置
application-test.yml #测试环境的配置
Step 2. Specify the configuration in applicaiton.yml
Select the configuration file to be used in application.yml (when the selected file has the same configuration as the application.yml file, the configuration in application.yml will be overwritten)
spring:
 profiles:
   active: dev #需要使用的配置文件的后缀
Method 2: Single yml file
#激活dev环境配置
spring:
  profiles.active: dev


# 开发环境配置
spring:
  profiles: dev
  datasource:
    url: jdbc:mysql://127.0.0.1:3306/dev?useUnicode=true&characterEncoding=utf-8&useSSL=true&serverTimezone=UTC
    username: root
    password: 123456
    driver-class-name: com.mysql.jdbc.Driver
server:
  port: 8080


# 测试环境配置
spring:
  profiles: test
  datasource:
    url: jdbc:mysql://localhost:3306/test?useUnicode=true&characterEncoding=utf-8&useSSL=true&serverTimezone=UTC
    username: root
    password: test
    driver-class-name: com.mysql.jdbc.Driver
server:
  port: 88


# 生产环境配置
spring:
  profiles: prod
  datasource:
    url: jdbc:mysql://localhost:3306/prod?useUnicode=true&characterEncoding=utf-8&useSSL=true&serverTimezone=UTC
    username: root
    password: prod
    driver-class-name: com.mysql.jdbc.Driver
 server:
  port: 99
Configure the default profile as dev, and other environments can use different profiles by specifying startup parameters, such as:
test environment: java -jar project.jar --spring.profiles.active=test
production environment: java -jar project.jar - -spring.profiles.active=prod
Method 3: Specify the environment configuration in pom.xml
Step 1. Create multiple configuration files
application.yml      #主配置文件
application-dev.yml  #开发环境的配置
application-prod.yml #生产环境的配置
application-test.yml #测试环境的配置
Step 2: Add multi-environment configuration properties in application.yml
#多环境配置
  profiles:
    active: @profiles.active@
Step 3. Specify the configuration used in pom.xml
   <profiles>
        <profile>
            <id>dev</id>
            <activation>
                <!--  默认激活-->
                <activeByDefault>true</activeByDefault>
            </activation>
            <properties>
                <profiles.active>dev</profiles.active>
            </properties>
        </profile>

        <profile>
            <id>prod</id>
            <properties>
                <profiles.active>prod</profiles.active>
            </properties>
        </profile>

        <profile>
            <id>test</id>
            <properties>
                <profiles.active>test</profiles.active>
            </properties>
        </profile>
    </profiles>
If true is set to true, the configuration corresponding to the profile is activated.
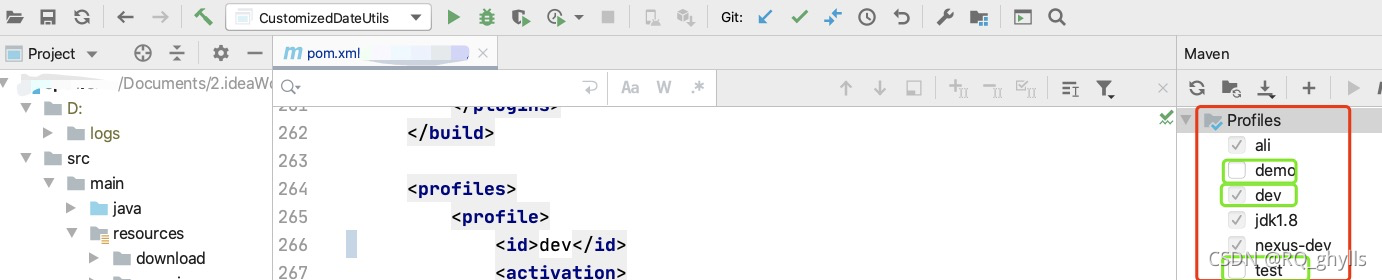
Or as shown in the figure, check the configuration that needs to be used for dynamic activation under maven->profiles
Pit avoidance: the symbol @ cannot be recognized
The @profiles.active@ configured in step 2 will report an exception when starting, and the @ symbol cannot be recognized. Solution:
Set filtering to true in pom.xml
     <build>
         <resources>
            <resource>
                <directory>src/main/resources</directory>
                <filtering>true</filtering>
                <includes>
                    <include>**/*.*</include>
                </includes>
            </resource>
        </resources>
  </build>
Summarize:
All three methods can realize multi-environment configuration. Do the general configuration of the project in the application.yml main configuration file, and do configurations in different environments in other configuration files to avoid repeated configurations.