1. For a single instance environment , the full duration is more than two and a half minutes. Detailed graphic instructions to download here
1. Stop all oracle related processes.
Emctlstop dbconsole
Isqlplusctl stop
Lsnrctl stop
sqlplus /nolog
sql>conn /as sysdba
Connectedtoanidleinstance.
sql>shutdown
Then, cold backup the database cp
2. Metalink search, download and install p6810189_10204_Linux-x86
[oracle@linux~]cdDisk1
[oracle@linuxDisk1~]$./runInstaller–jreLoc/opt/oracle/jdk1.6.0_18/jre/
Note: Because of the environment, I specify to use the latest jdk1.6.0.18 , if your environment is different from mine. Just execute ./runInstaller directly .
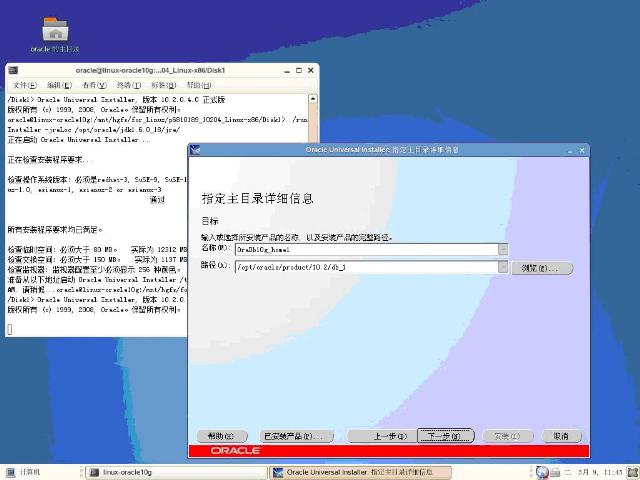
Install according to the graphical interface, specify the previous software installation location


Open a terminal window:
[oracle@linux~]su -
Password:
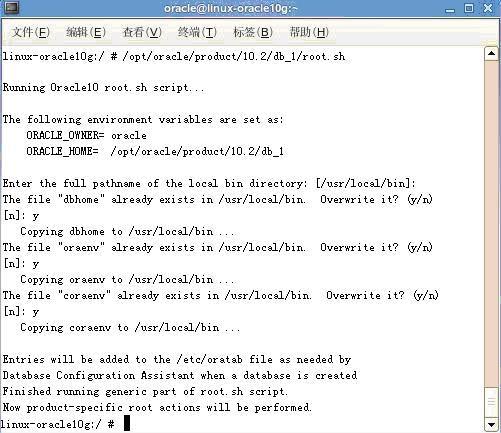
Execute the script prompted, in this example: [root@linux~]#/opt/oracle/product/10.2/db_1/root.sh Close the terminal after completion, return to the installation interface, and confirm. as shown in the picture
Ok, don't start the database yet, the patch software installation is complete, and the database needs to be upgraded.
Important: To upgrade the database, follow the documentation, after the installation is complete , PostinstallationTasks
1 . Use DBUA to upgrade ( graphical interface, easy to operate, and it is said that the probability of error is high )
2 . Manual upgrade ( character interface, the operation is slightly copied, and it is said that the error rate is low )
DBUA mode:
Log in as oracle user
Open the terminal and set the environment variables $ORACLE_HOME , $ORACLE_SID , $PATH
execute dbua
[oracle@linux~]$dbua
See the welcome interface, as shown in the document
Next, select the database according to the prompts ( if the database you want to operate is not in the list, manually modify /etc/oratab to add the SID) , pay attention to the option " Compile invalid objects after the upgrade is complete " , it is recommended to select it, and then go to the next step. If you did not back up your database before the operation, you can choose to back it up here. dbua performs cold backup, and it is necessary to estimate the remaining disk space. Click Next, oracle starts the upgrade operation, as shown in the figure
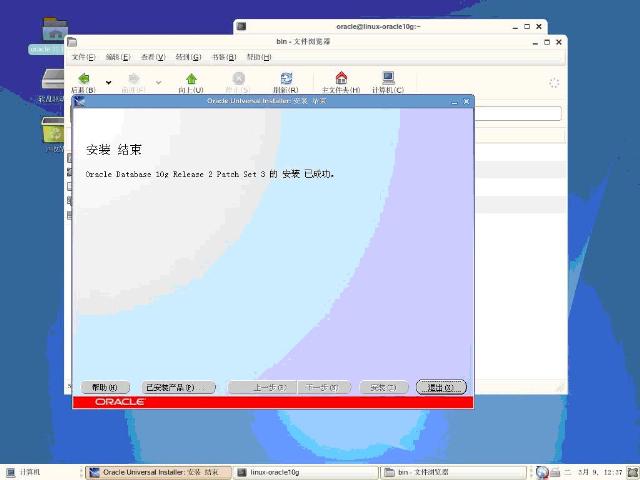
If you are lucky that you do not encounter bugs or errors, you can finish , as shown in the figure
After the upgrade is complete, Oracle will automatically open the database, and quickly connect to see if the data is still there:)
Manual upgrade:
1. Log in as oracle user
Open the terminal and set the environment variables $ORACLE_HOME , $ORACLE_SID , $PATH
[oracle@jsslinuxdbs]$export ORACLE_SID=stu
[oracle@jsslinuxdbs]$oracle@linux-oracle10g:/>sqlplus /no log
SQL*Plus:Release10.2.0.4.0-ProductiononTueMar915:14:182010
Copyright(c)1982,2007,Oracle.AllRightsReserved.
SQL>conn /as sysdba;
Connected.
2. Start the database in upgrade mode
SQL>startup upgrade
The ORACLE routine has been started.
The database is loaded.
The database is already open.
3. Rebuild the data dictionary. In addition: if there is an archive, it is strongly recommended to close the archive first (the upgrade will generate a large number of archive files)
SQL>SPOOL path.log (the default path is /opt/oracle/ under the oracle main directory , this log will be a bit larger than 30 M , you can view it . )
SQL>@$ORACLE_HOME/rdbms/admin/catupgrd.sql
... Installation process diagram omitted (rebuild data dictionary)
SQL>SPOOLOFF
If this step is carried out smoothly, the upgrade has been completed more than half. ( It takes a long time to wait here )
as shown in the picture
(If the above component status is not VALID , please check the path.log log, and re-execute catupgrd.sql when dealing with errors )
grep error path.log
4. After rebuilding the data dictionary, restart the database
SQL>SHUTDOWNIMMEDIATE
SQL>STARTUP
5. Compiling invalid objects
Since some objects may become invalid during catupgrd.sql reconstruction, we need to run utlrp.sql to recompile PL/SQLpackages ( know the function of utlrp.sql , it’s dark, you can execute it if you have nothing to do ) .
@?/rdbms/admin/utlrp.sql
Wait patiently until the end, sql> appears
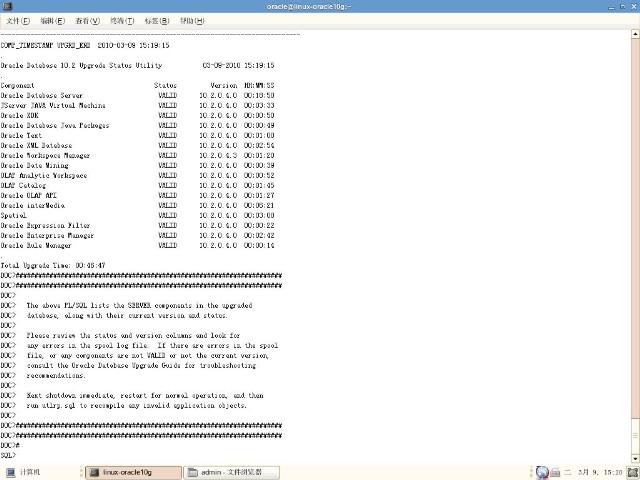
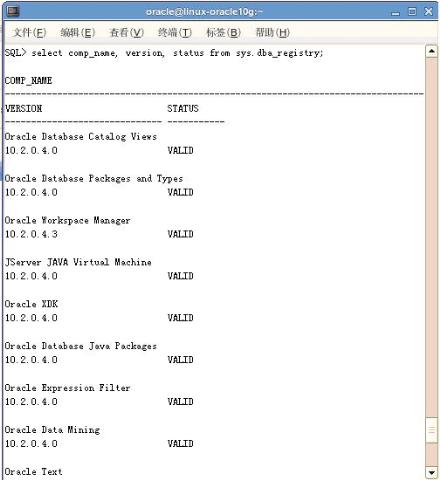
6. Then run the following command to check the status of all components after the upgrade:
SQL>select comp_name,version,status from sys.dba_registry;
If the displayed value is VALID , the upgrade is successfully completed. as shown in the picture
Another: It is best to check it out.
SQL>selecttablespace_name,statusfromdba_tablespaces;
-- tablespaces are in
SQL>selectusernamefromdba_users;
-- users are in
SQL>selectobject_namefromdba_objectswhereowner='SCOTT';
-- user objects are in
Note: In the dba_objects view , there may be some objects similar to BIN$4lzljWIt9gfgMFeM2hVSoA==$0 . This is a new function provided after 10g . After the object is deleted, it is not really deleted, but thrown into the recycle bin. These objects belong to the recycle bin. Object, leave it alone.