
Preparation
First, make sure you have Android Studio installed. If you haven't installed it yet, please visit Android Studio official website to download and install it.
prerequisite
- Install and configure Android Studio
Android Studio Electric Eel | 2022.1.1 Patch 2
Build #AI-221.6008.13.2211.9619390, built on February 17, 2023
Runtime version: 11.0.15+0-b2043.56-9505619 amd64
VM: OpenJDK 64-Bit Server VM by JetBrains s.r.o.
Windows 11 10.0
GC: G1 Young Generation, G1 Old Generation
Memory: 1280M
Cores: 6
Registry:
    external.system.auto.import.disabled=true
    ide.text.editor.with.preview.show.floating.toolbar=false
    ide.balloon.shadow.size=0

Non-Bundled Plugins:
    com.intuit.intellij.makefile (1.0.15)
    com.github.setial (4.0.2)
    com.alayouni.ansiHighlight (1.2.4)
    GsonOrXmlFormat (2.0)
    GLSL (1.19)
    com.mistamek.drawablepreview.drawable-preview (1.1.5)
    com.layernet.plugin.adbwifi (1.0.5)
    com.likfe.ideaplugin.eventbus3 (2020.0.2)
gradle-wrapper.properties
#Tue Apr 25 13:34:44 CST 2023
distributionBase=GRADLE_USER_HOME
distributionUrl=https\://services.gradle.org/distributions/gradle-7.4-bin.zip
distributionPath=wrapper/dists
zipStorePath=wrapper/dists
zipStoreBase=GRADLE_USER_HOME
build.gradle(:Project)
// Top-level build file where you can add configuration options common to all sub-projects/modules.
plugins {
    id 'com.android.application' version '7.3.1' apply false
    id 'com.android.library' version '7.3.1' apply false
    id 'org.jetbrains.kotlin.android' version '1.7.20' apply false
}
setting.gradle
pluginManagement {
    repositories {
        google()
        mavenCentral()
        gradlePluginPortal()
    }
}
dependencyResolutionManagement {
    repositoriesMode.set(RepositoriesMode.FAIL_ON_PROJECT_REPOS)
    repositories {
        google()
        mavenCentral()
    }
}
rootProject.name = "logindemo"
include ':app'
- Basic understanding of the Kotlin language
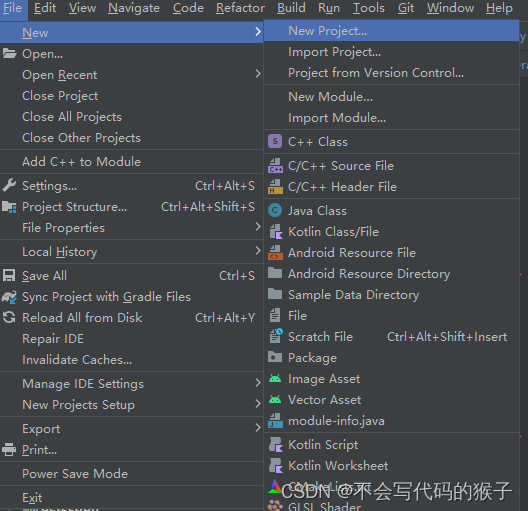
create new project
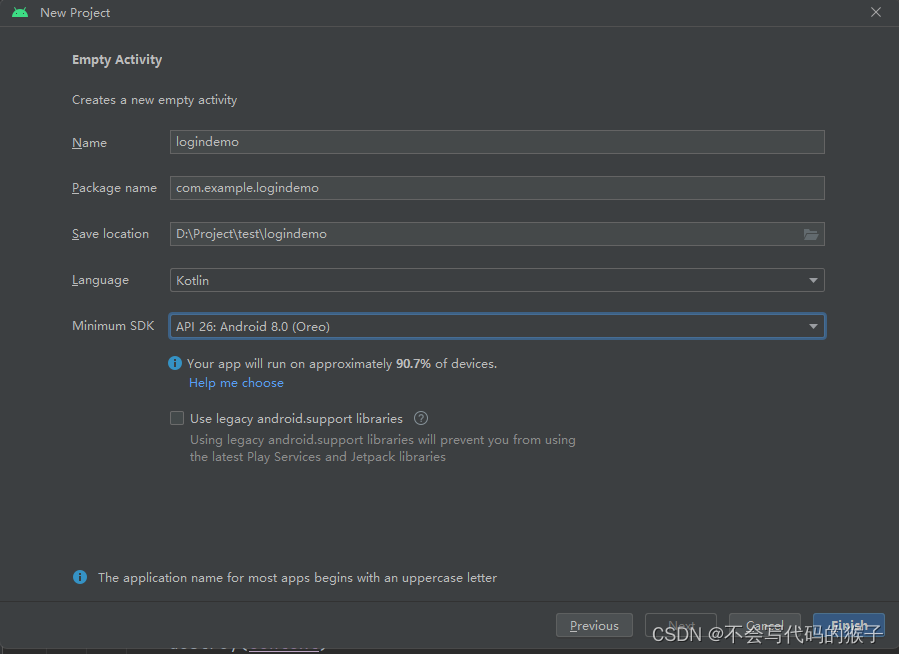
First, open Android Studio and create a new project. Select the "Empty Activity" template and give the project a name such as "LoginDemo". Next, select Kotlin as the development language, and make sure to select the appropriate minimum SDK version.
Designing the login screen In the `activity_main.xml` file, we will create a simple login screen. The interface consists of two input boxes (for username and password) and a login button.
<?xml version="1.0" encoding="utf-8"?>
<androidx.constraintlayout.widget.ConstraintLayout xmlns:android="http://schemas.android.com/apk/res/android"
    xmlns:app="http://schemas.android.com/apk/res-auto"
    xmlns:tools="http://schemas.android.com/tools"
    android:layout_width="match_parent"
    android:layout_height="match_parent"
    tools:context=".MainActivity">

    <EditText
        android:id="@+id/usernameEditText"
        android:layout_width="match_parent"
        android:layout_height="wrap_content"
        android:hint="用户名"
        android:inputType="text"
        app:layout_constraintTop_toTopOf="parent"/>

    <EditText
        android:id="@+id/passwordEditText"
        android:layout_width="match_parent"
        android:layout_height="wrap_content"
        android:hint="密码"
        android:inputType="textPassword"
        app:layout_constraintTop_toBottomOf="@+id/usernameEditText"/>

    <Button
        android:id="@+id/loginButton"
        android:layout_width="match_parent"
        android:layout_height="wrap_content"
        android:text="登录"
        app:layout_constraintTop_toBottomOf="@+id/passwordEditText"/>

</androidx.constraintlayout.widget.ConstraintLayout>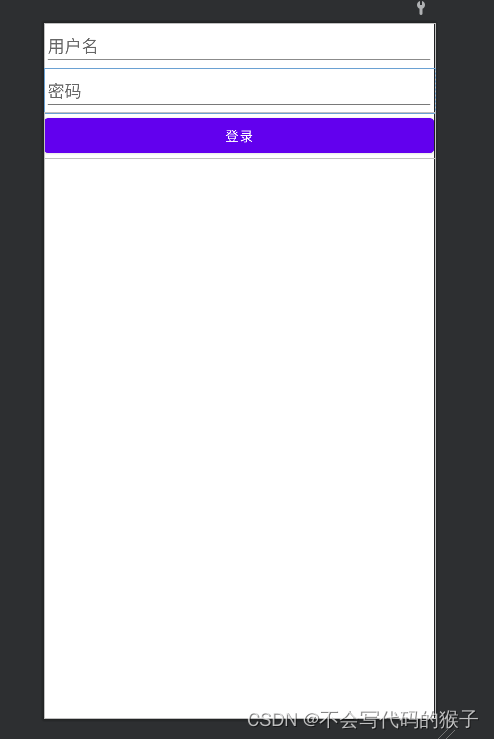
Handling Login Logic In the `MainActivity.kt` file, we will handle the login button click event. First, get a reference to the input box and the button, then set a click listener for the button.
package com.example.logindemo

import android.content.SharedPreferences
import android.os.Bundle
import android.widget.Button
import android.widget.EditText
import android.widget.Toast
import androidx.appcompat.app.AppCompatActivity

class MainActivity : AppCompatActivity() {

    private lateinit var usernameEditText: EditText
    private lateinit var passwordEditText: EditText
    private lateinit var loginButton:Button
    private var sharedPreferences: SharedPreferences ?= null
    override fun onCreate(savedInstanceState: Bundle?) {
        super.onCreate(savedInstanceState)
        setContentView(R.layout.activity_main)

        usernameEditText = findViewById(R.id.usernameEditText)
        passwordEditText = findViewById(R.id.passwordEditText)
        loginButton = findViewById(R.id.loginButton)

        sharedPreferences = getSharedPreferences("LoginDemo", MODE_PRIVATE)

        loginButton.setOnClickListener {
            val username = usernameEditText.text.toString()
            val password = passwordEditText.text.toString()

            if (validateInput(username, password)) {
                saveUserCredentials(username, password)
                Toast.makeText(this, "登录成功!", Toast.LENGTH_SHORT).show()
            } else {
                Toast.makeText(this, "请输入有效的用户名和密码!", Toast.LENGTH_SHORT).show()
            }
        }
    }

    private fun validateInput(username: String, password: String): Boolean {
        return username.isNotEmpty() && password.isNotEmpty()
    }

    private fun saveUserCredentials(username: String, password: String) {
        val editor = sharedPreferences?.edit()
        editor?.putString("username", username)
        editor?.putString("password", password)
        editor?.apply()
    }
}
In the above code, we first get the reference of the input box and the button. Then, we create a SharedPreferences instance to store the user's login information. Next, we set up a click listener for the login button. When the user clicks the login button, we check that the username and password entered are valid. If valid, we save the user's login information into SharedPreferences and display a prompt message. If the input is invalid, we prompt the user to enter a valid username and password.
Learn how to implement login functionality in Android applications. We used Android Studio and Kotlin language for development, and introduced how to use SharedPreferences to store user information. This is just a simple example. In actual applications, user information may need to be sent to the server for verification.
Of course, if you feel that the encapsulation of SharedPreferences is not enough and it is cumbersome to use, you can also use Tencent's open source tool MMKV. The highly encapsulated tool class can more easily complete the functions you need.