Written in front:
I believe that after reading the previous blog, we have successfully built a Linux environment.
If not, you can go and see: Linux environment setup .
Next, I will talk about the common commands of Linux and the understanding of permissions.
This article will introduce some commonly used Linux instructions and intersperse some conceptual understanding of the operating system .
So without further ado, let's start now:
Table of contents
1. What is an operating system?
Example 1: mkdir directory name
Example 2: mkdir -p directory name/directory name/directory name/
Example 4: cd /home/xl/practice/fortest/test2 absolute path
Example 5: cd ../day02/ relative path
Example 2: rm -r delete recursively
1. What is an operating system?
An operating system is a software that manages software and hardware.
Yes, the operating system is actually a large piece of software.
The core job of the operating system is to:
Manage software and hardware resources well,
So as to provide a good (stable, fast, safe) use environment.
2. Linux operating system
The Linux operating system of centos7 we use is pure command line form,
We can compare it with the Windows operating system, which is in the form of a graphical interface.
In fact, Linux also has a graphical interface, but the command line form is closer to the bottom layer of the operating system.
As a beginner to learn Linux, it is recommended to use the pure command line form.
Summary: In fact, the essence of the command line and the graphical interface are the same.
3. Linux basic instructions
We log into Xshell.
The first command I want to introduce is:
1. mkdir
describe:
The mkdir command can be used to create directories.
usage:
mkdir directory name
mkdir -p dirname/dirname/dirname/
Example 1: mkdir directory name
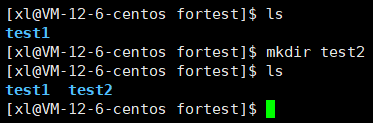
We can ls to view the files in the current directory, and we can see that I created the test2 directory with mkdir.
Note: (we can enter that directory with cd + directory name)
Example 2: mkdir -p directory name/directory name/directory name/

If you want to create a multi-level directory at one time, you can use this method, we can use tree to view the multi-level directory
Note: (tree command download: yum install -y tree) (enter this command)
Note: (friendly reminder: the clear command can clear the screen)
2. touch
describe:
The touch command can be used to create ordinary files.
usage:
touch filename
Example: touch filename
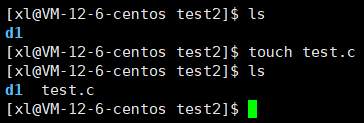
The test.c file was created with the touch command.
3. ls
describe:
The ls command can be used to view files.
usage:
1. ls
2. ls option
ls options:
Directly use ls to view files. It has been demonstrated before, so I won’t demonstrate it here. Here I will talk about the options of ls.
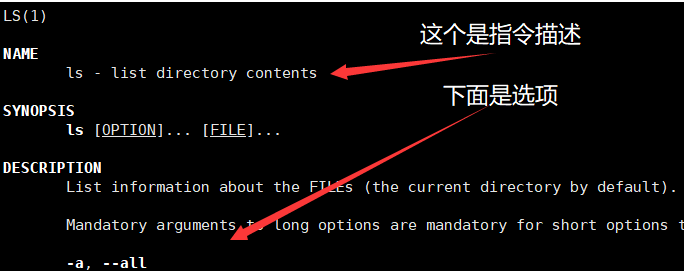
1s actually has a lot of options, and I am used to learning new commands with man pages.
Note: (When you have a command and don’t know its use, or want to know more, you can use man + command name to learn)
![]() + Enter
+ Enter
Note: (click q to exit the man manual) (the specific use of the man manual will be introduced later)
Here we focus on learning two options:
ls -l
ls -a
We can still use: ls -al
Example 1: -l
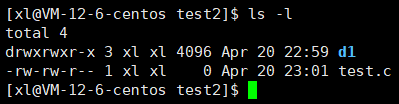
We can use the -l option to view the specific information of the file,
Note: ( ls -l supports abbreviation: ll )

Example 2: -a
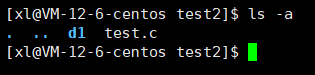
We can find that there are two more directories here, and the -a option allows us to see hidden files.
Note: (not found, the directory is blue) (the prefix of the hidden file is .)
Say I create a hidden file:
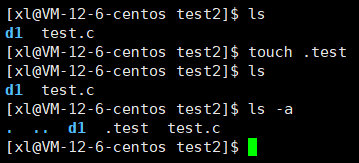
ls can't see it, you need to add the -a option to see it.
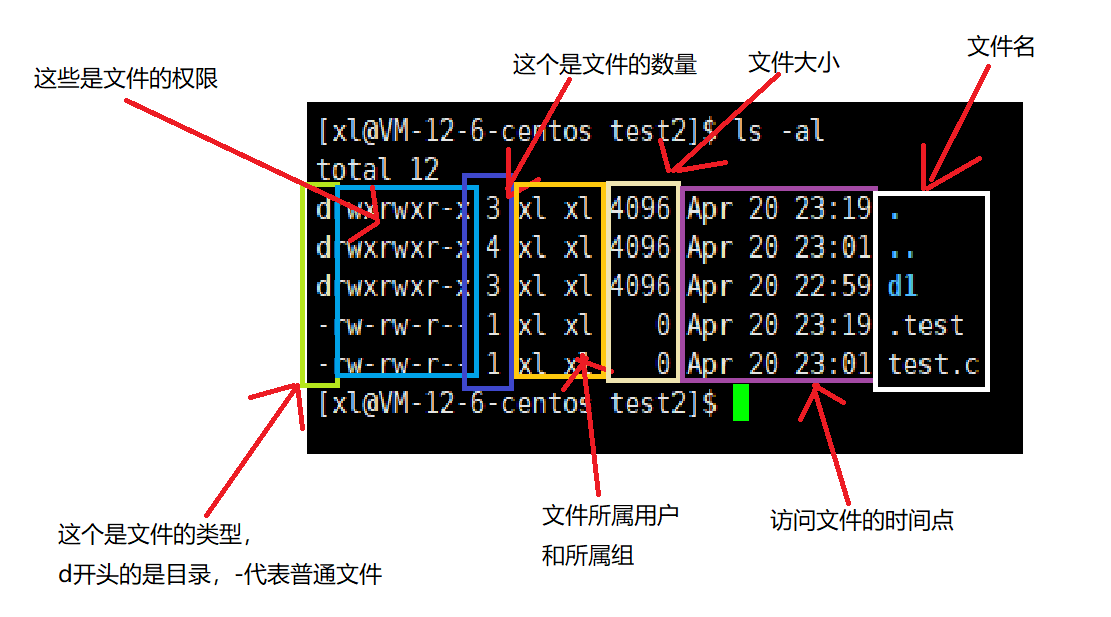
例3:-al
Linux supports combining command options:

Seeing this, you may have doubts, what is the big lump in front of these directories and files,
Here I will give a rough introduction, which will be learned later:
4. cd
describe:
The cd command can change the working directory.
usage:
cd .. return to the parent directory
cd ~ enter the user's home directory
cd - return to the most recently visited directorycd /home/xl/practice/fortest/test2 absolute path
cd ../day02/ relative path
Example 1: cd ..
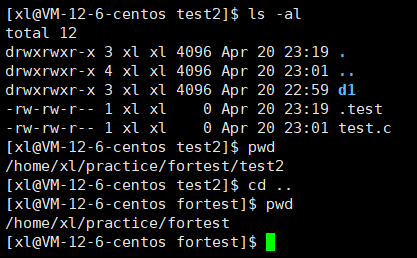
We use cd.. to go back to the parent directory.
Note: (pwd command can view the current directory)
Note: ( .. This directory file is actually the parent directory) ( . This directory file is the current directory)
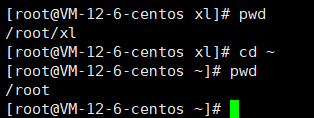
Example 2: cd ~

I used cd ~ to go back to the home directory of my xl user,
If we use the super user will return to root.
Example 3: cd -

As you can see, we just got back to the home directory,
Use cd - to go back to the last visited directory, and you will be back.
Example 4: cd /home/xl/practice/fortest/test2 absolute path
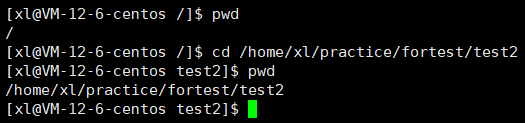
For example, I have been cd .. back to the / directory,
I used the absolute path to access cd /home/xl/practice/fortest/test2 and went directly here.
Supplement: In fact, through the above introduction, it is not difficult for us to find the entire directory structure of Linux:
In fact, it is essentially a multi-fork tree. Our operations on files are essentially adding, deleting, checking and modifying this data structure .
Note: (Only cd from the / directory is an absolute path search)
Example 5: cd ../day02/ relative path
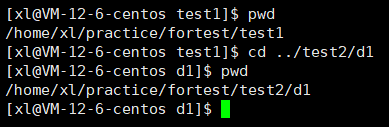
From any other place cd into other directories, it is a relative path search,
Because the relative path is relative to the path you are currently in cd,
When your path changes, relative paths will generally fail (while absolute paths are always valid)
Note: (We usually use relative paths, usually in some fixed scenarios, such as configuration files that need to use absolute paths)
5. is rm
describe:
rmdir can delete files.
usage:
rm
rm -r delete recursively
rm -f force delete
Example 1: rm
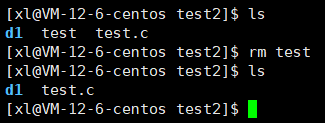
Deleted the test file with rm.
Note: (rmdir can be abbreviated as rm, so we are used to using rm directly)
Example 2: rm -r delete recursively
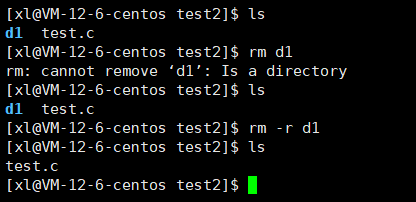
rm cannot directly delete the directory, add the -r option to delete it recursively.
Note: (add -r option to force deletion (you can ignore possible warnings))
Summarize:
We have learned six commonly used and important basic instructions and some small instructions,
Our understanding of the Linux system has improved again.
If you want to continue learning and exploring the mysteries of Linux with me, you can subscribe to this column~ Linux from entry to mastery .
Write at the end:
The above is the content of this article, thank you for reading.
If you feel that you have gained something, you can give the blogger a like .
If there are omissions or errors in the content of the article, please private message the blogger or point it out in the comment area