Many people have just downloaded Kali and found that it is in English, and they don't know how to change the system language. Now I will help you answer it, and hope for more support!
One: Ordinary users obtain root administrator privileges
Because the Kali system uses the common account kali by default, we need to elevate its rights to perform other operations. The following is a detailed introduction for you:
1. Enter the command to temporarily apply for root privileges
1) Open a terminal window and enter sudo su.
2) Enter the password of the common account kali according to the prompt. (usually kali)
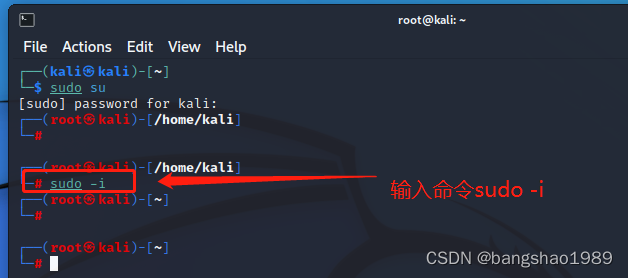
2. Avoid re-entering the password for some operations with root privileges
1) Enter the command sudo -i
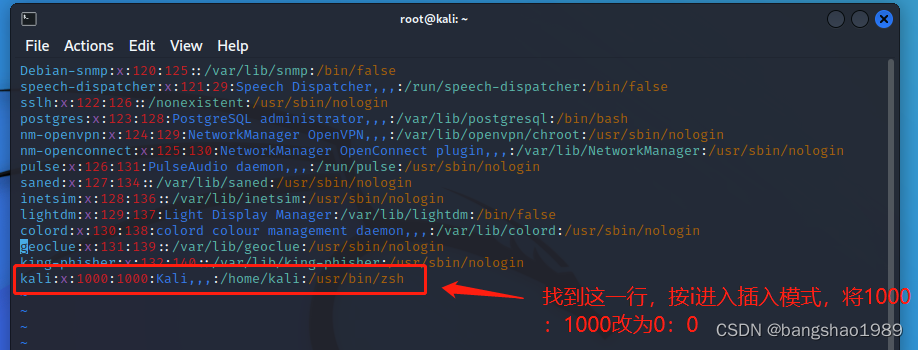
3. Enter the command to enter and modify the configuration file
1) After entering the command vim /etc/passwd, enter the interface in the figure below
2) Find the line that starts with kali in the figure below, press i to enter insert mode, and then change the number 1000:1000 to 0:0
3) Press Esc to exit insert mode
4) Hold down the shift key, then press the z key twice to save the changes
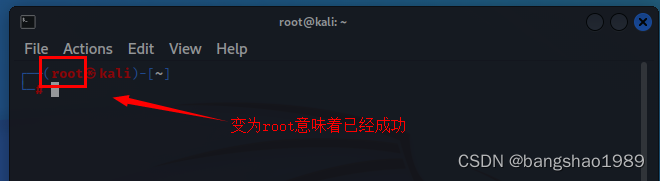
4. After restarting, enter the terminal to verify whether it takes effect
1) Enter reboot in the terminal window to restart the system
2) After restarting, enter the terminal window and check whether there is a root word
2. How to switch the Kali system to Chinese
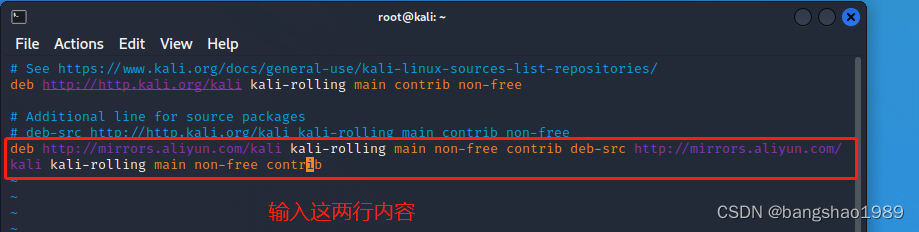
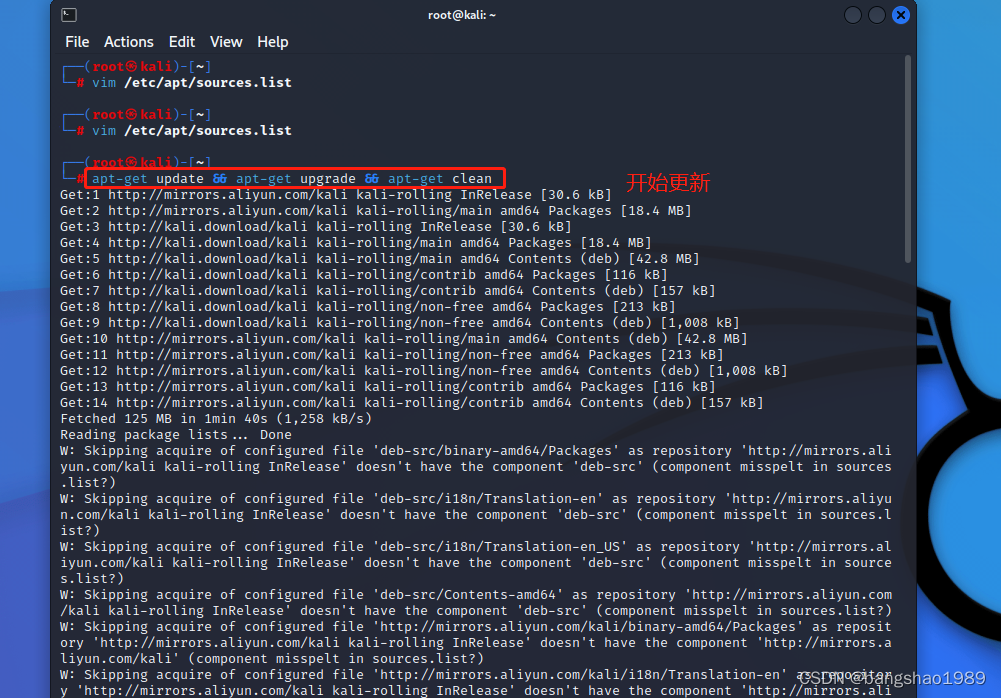
1. Configure the update source and update the software
1) Use the vim editor to open the update source file and enter the command: vim /etc/apt/sources.list
2) Enter the following content in the file: deb http://mirrors.aliyun.com/kali kali-rolling main non-free contrib deb-src http://mirrors.aliyun.com/kali kali-rolling main non- free contrib , save and exit
3) Enter the command: apt-get update && apt-get upgrade && apt-get clean, run the update source and update the software
2. Graphical interface to select language and install fonts
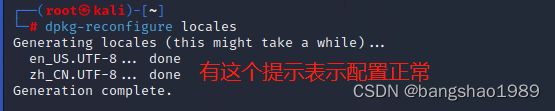
1) Enter the command: dpkg-reconfigure locales to enter the graphical interface for language selection
2) The space bar is for selection, the Tab key is for switching, and the Enter key is for entering the next step. The language with * in the picture is selected, and both pictures 1 and 2 must be consistent with zh_CN.UTF-8
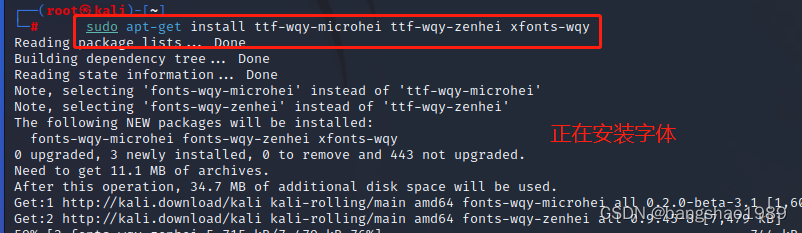
3) Enter the command: sudo apt-get install ttf-wqy-microhei ttf-wqy-zenhei xfonts-wqy, press Enter, install the font
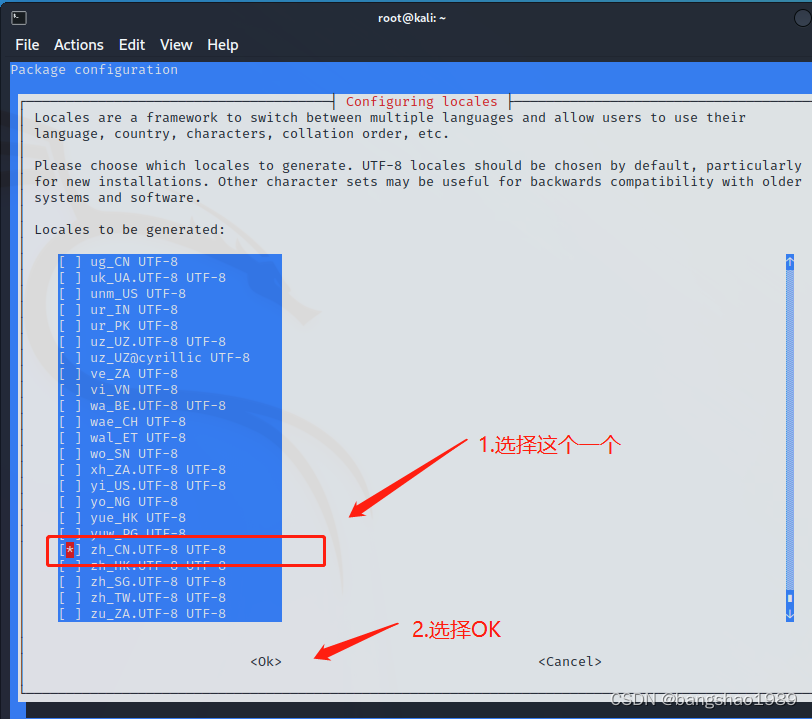 Figure 1
 Figure II
3. Restart the system and verify whether it is successful
1) Enter reboot to restart the system
2) It is recommended that the standard folders all retain the old names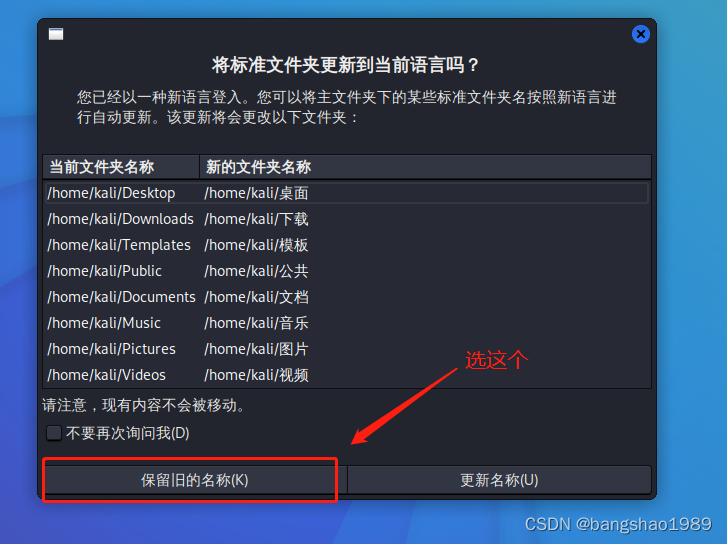
【Notice】:
1) After editing the file, be sure to hold down the shift key and click the z key twice to save the file.
2) If you find that the system has not been switched to Chinese after logging in, restart the entire virtual machine directly.