introduce
Vue CLI is a complete system for rapid development based on Vue.js. After using Vue scaffolding, the page we develop will be a complete system (project)
Environmental preparation
# 1.下载nodejs
	http://nodejs.cn/download/

# 2.配置nodejs环境变量
	1.windows系统:
	 	计算上右键属性---->  高级属性 ---->环境变量 添加如下配置:
		NODE_HOME=  nodejs安装目录
        PATH    = xxxx;%NODE_HOME%
    2.macos 系统
    	推荐使用.pkg安装直接配置node环境

# 3.验证nodejs环境是否成功
	node -v
Install scaffolding
 Vue Cli官方网站
	https://cli.vuejs.org/zh/guide/

 安装vue Cli 脚手架
	npm install -g vue-cli    //安装2.x版本脚手架,默认为2.9.6
    npm install -g @vue/cli  //安装3.x版本脚手架  默认为 @vue/cli 5.0.4

卸载对应版本脚手架
	npm uninstall -g @vue/cli  //卸载3.x版本脚手架
	npm uninstall -g vue-cli  //卸载2.x版本脚手架


查看本地脚手架的版本vue -V
     以 vue-cli  开头的 是2.xxx版本
     以 @vue/cli 开头的 是3.xxx版本
vue scaffolding version 2 project
first step:
First check whether vue-cli is installed in the environment, and enter the command vue -V in the terminal;
Step two:
See if the big version is 2 or 3;
third step:
If it is version 2 (starting with vue-cli), start creating, enter vue init webpack project name in the terminal, and then automatically generate the following files and file names;
	hello     ------------->项目名
    -build  ------------->用来使用webpack打包使用build依赖  构建一些依赖文件
    -config ------------->用来做整个项目配置目录   主要用来对 开发 测试 环境进行配置
    -node_modules  ------>用来管理项目中使用依赖
    -src					 ------>用来书写vue的源代码[重点]
    	+assets      ------>用来存放静态资源 [重点]
      	components   ------>用来书写Vue组件 [重点]
      	router			 ------>用来配置项目中路由[重点]
      	App.vue      ------>项目中根组件[重点]
      	main.js      ------>项目中主入口[重点]
    -static        ------>其它静态
    -.babelrc      ------> 将es6语法转为es5运行
    -.editorconfig ------> 项目编辑配置
    -.gitignore    ------> git版本控制忽略文件
    -.postcssrc.js ------> 源码相关js
    -index.html    ------> 项目主页
    -package.json  ------> 类似与pom.xml 依赖管理  jquery 不建议手动修改
    -package-lock.json ----> 对package.json加锁
    -README.md         ----> 项目说明文件
the fourth step:
Start the project, enter the command npm start / npm run file name in the project terminal
(The file name is the file name found in "scripts" in the package.json file)
the fifth step:
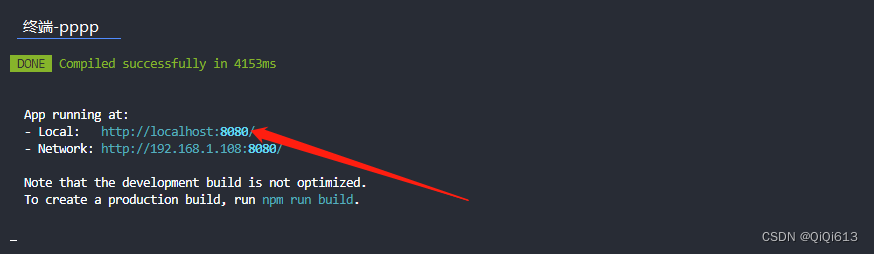
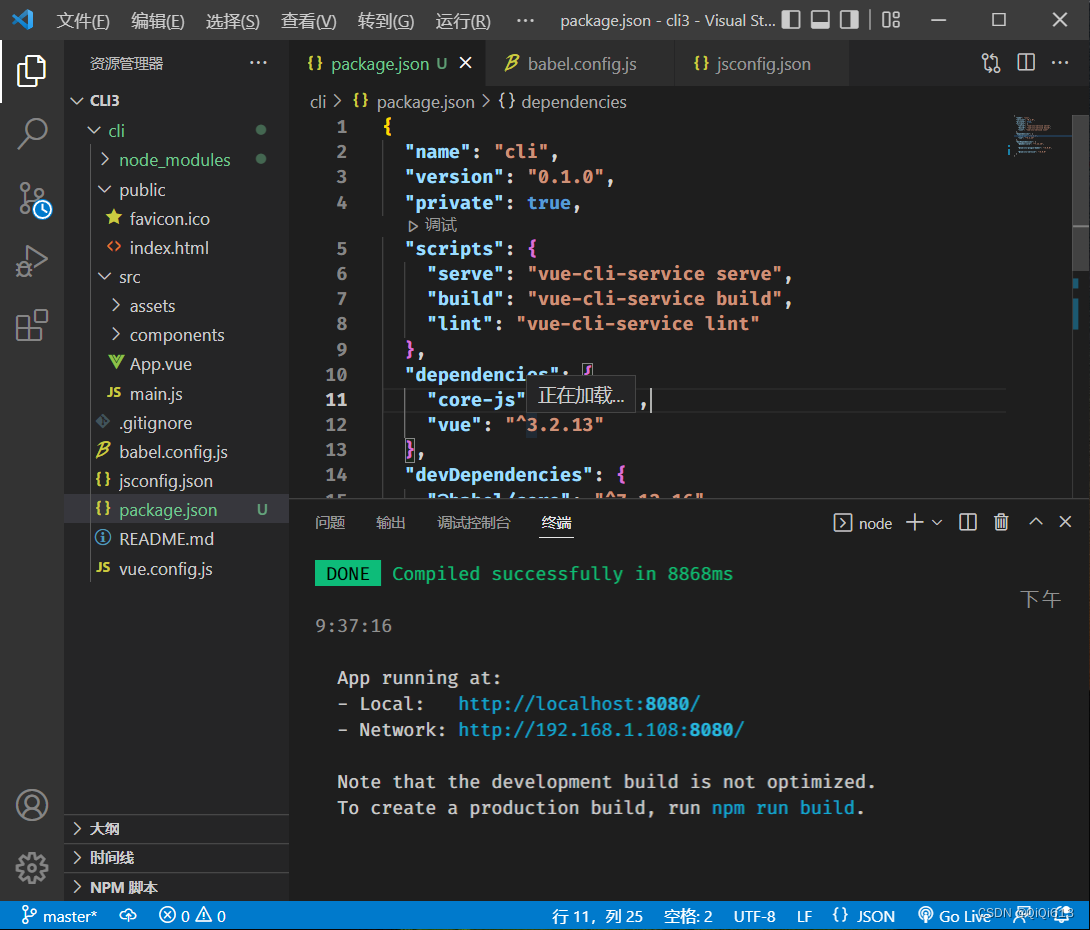
Access the project on the page, when the project is successfully started, the path will be displayed on the terminal, such as http://localhost:8080
Step six:
To end the project, execute ctrl+c in the terminal to exit the project;
Step Seven:
To package the project, enter the command npm run build in the terminal, and a dist file will appear in the project after completion, which is the packaged project;
Step eight:
Copy the dist file to the folder "Package the file and store it here" on the desktop, delete the original dist file, and start the project in the terminal
Step Nine:
Enter the command node .\app.js in the terminal to access the project
vue scaffolding version 3 project
first step:
First check whether vue-cli is installed in the environment, and enter the command vue -V in the terminal;
Step two:
See if the big version is 2 or 3;
third step:
If it is version 3 (starting with @vue/cli), start creating, enter vue create project name in the terminal, and then automatically generate the following files and file names;

the fourth step:
Select the version shown in the figure below in the terminal
Uninstall all plugins and information about eslint in the package.json file (skipable)
the fifth step:
Start the project, enter the command npm run serve in the project terminal
(The file name is the file name found in the "scripts script" in the package.json file)
the fifth step:
Access the project on the page, when the project is successfully started, the path will be displayed on the terminal, such as http://localhost:8080
Step six:
To end the project, execute ctrl+c in the terminal to exit the project;
Step Seven:
To package the project, enter the command npm run build in the terminal, and a dist file will appear in the project after completion, which is the packaged project;
Step eight:
Copy the dist file to the folder "Package the file and store it here" on the desktop, delete the original dist file, and start the project in the terminal
Step Nine:
Enter the command node .\app.js in the terminal to access the project

Vue scaffolding version 3 project is created using HBuilder
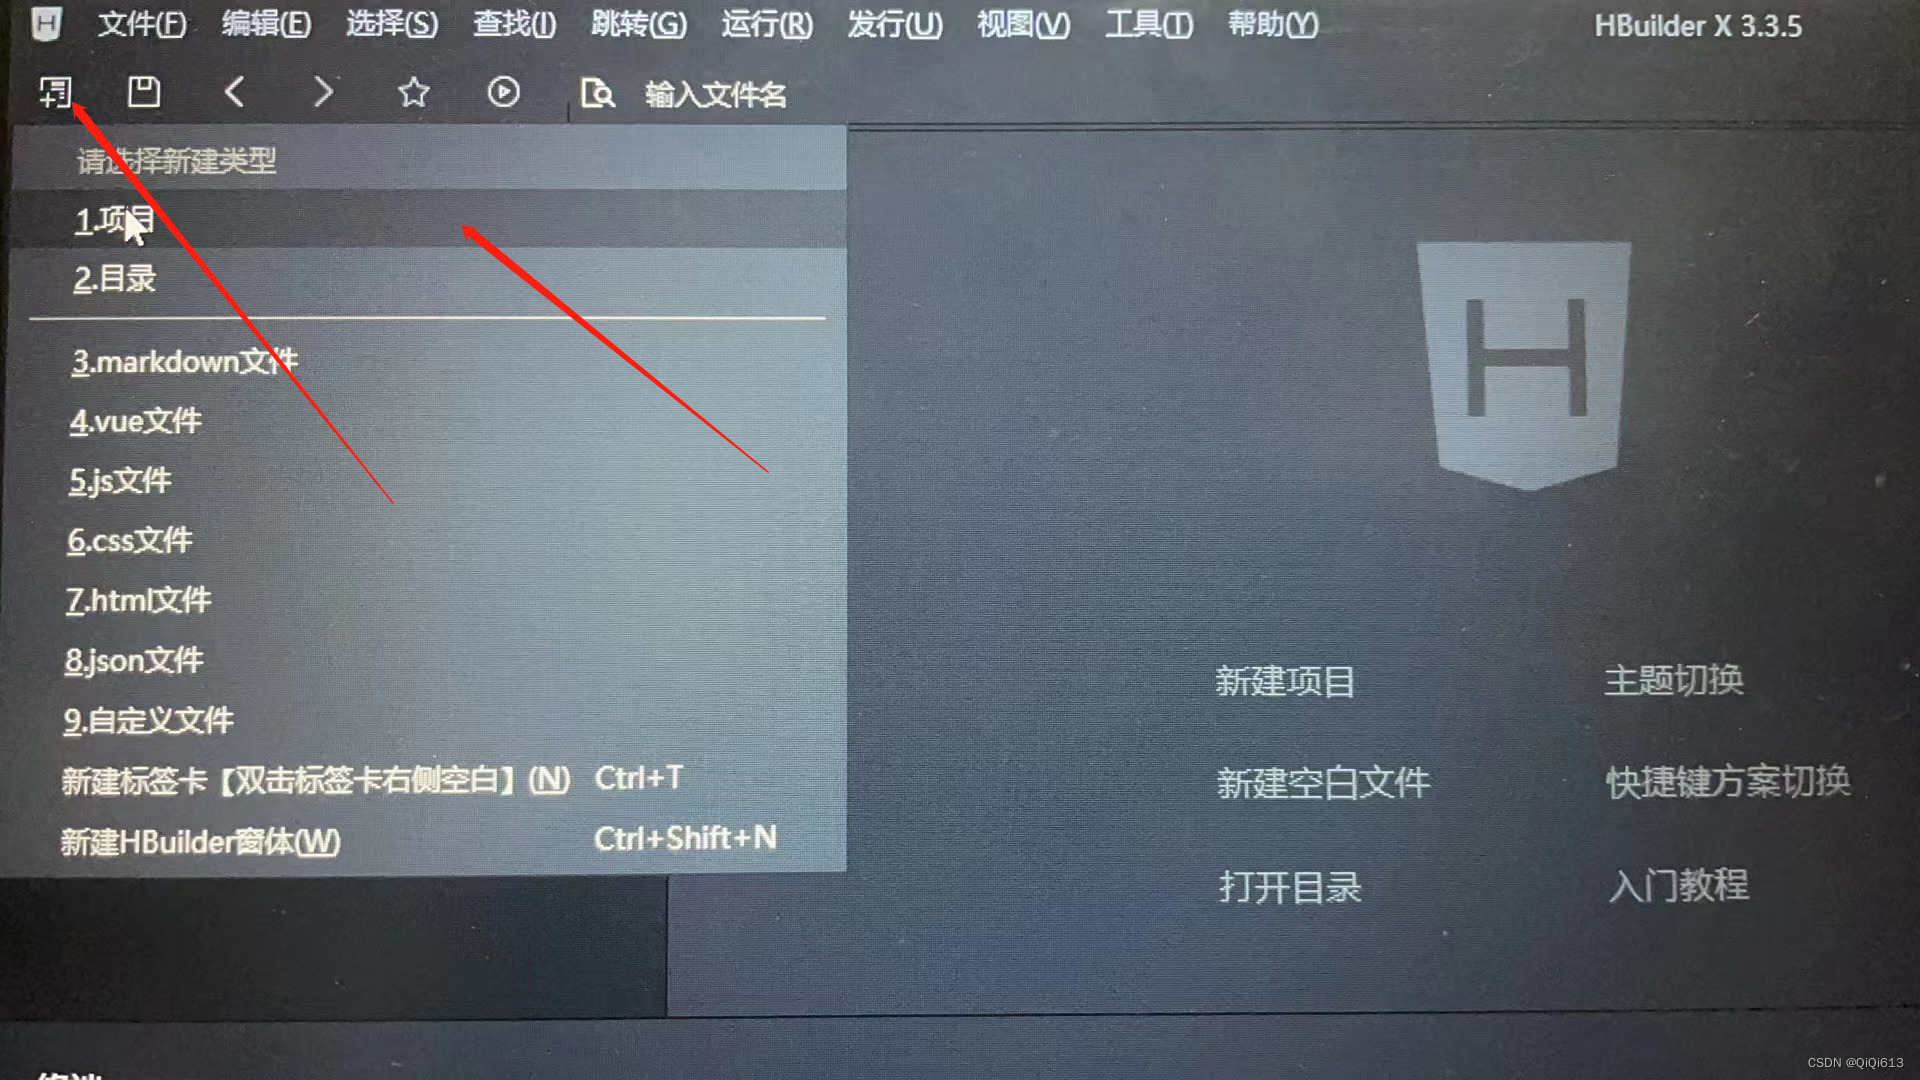
first step:
Open the HBuilder APP ------ click on the upper left corner to create ------ click on the project
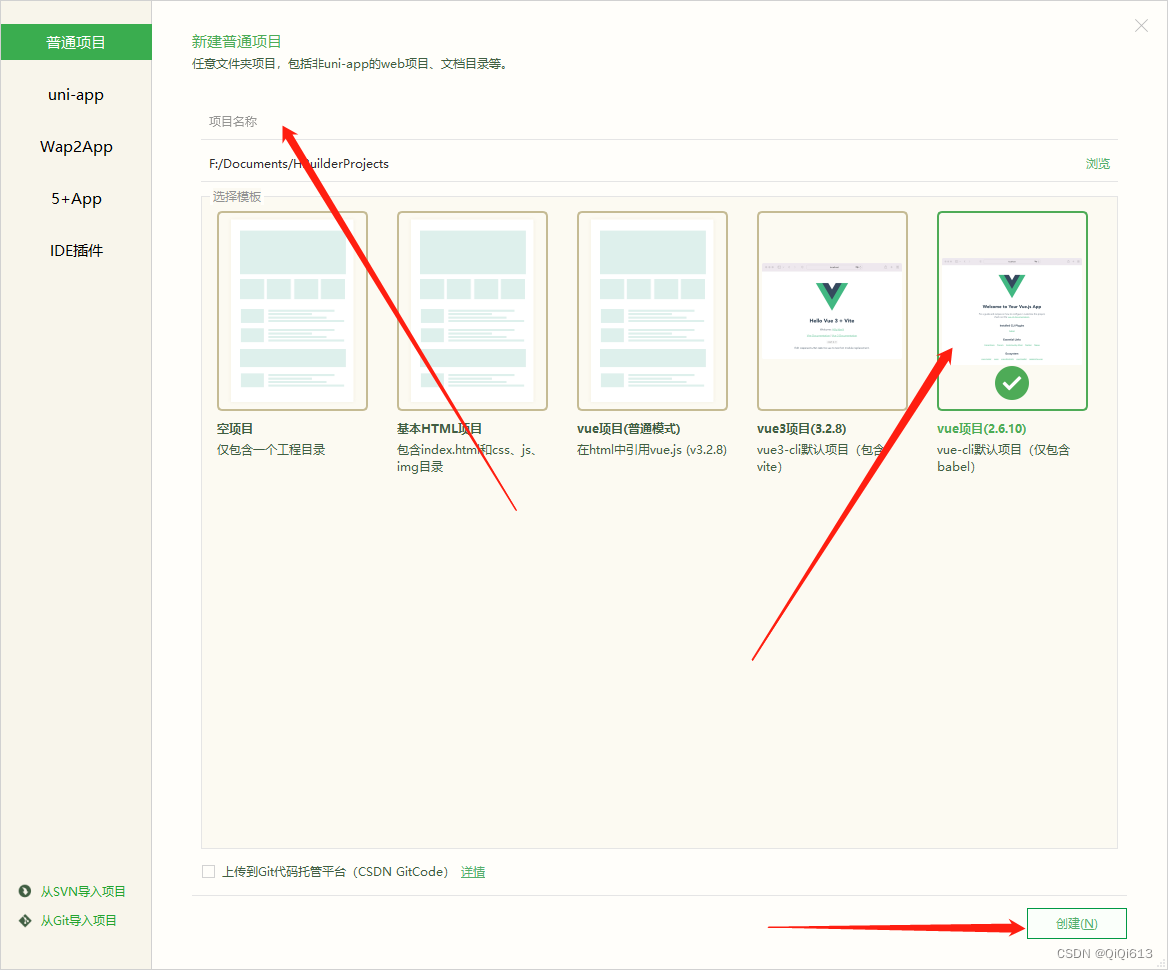
Step two:
Enter the project name in the project name input box ----- click the last project template ----- click Create
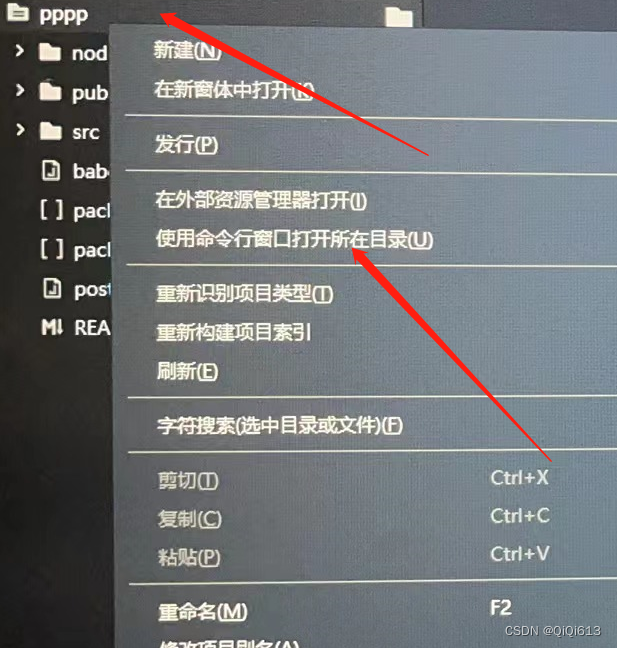
third step:
After the creation is complete, there will be the following files and folders ----- right click on the folder ----- click "Use the command line window to open the directory" to open the terminal
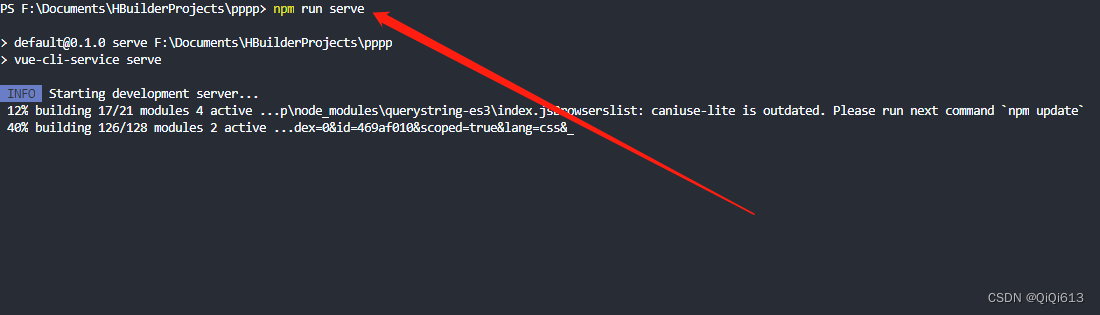
the fourth step:
Start the project, enter npm run serve in the terminal
the fifth step:
Access the project on the page, when the project is successfully started, the path will be displayed on the terminal, such as http://localhost:8080
Step six:
To end the project, execute ctrl+c in the terminal to exit the project;
Step Seven:
To package the project, enter the command npm run build in the terminal, and a dist file will appear in the project after completion, which is the packaged project;
Step eight:
Copy the dist file to the folder "Package the file and store it here" on the desktop, delete the original dist file, and start the project in the terminal
Step Nine:
Enter the command node .\app.js in the terminal to access the project