Article directory
1. Install Visual Studio Code
Visual Studio Code official website link: https://code.visualstudio.com/
Visual Studio Code official website download link: https://code.visualstudio.com/Download
Click the download button, the User Installer version is recommended by default, most people are single-machine single-user, just download the default version here.
- User Installer: Installed in the directory of the current computer account, which means that if you log in to the computer with another account, you will not be able to use Visual Studio Code installed by others.
- System Installer: Installed in a non-user directory, any computer account can use it.


2. Install the necessary plugins


3. Generate an SSH key pair for this machine
Typically, we generate an SSH key pair for one computer, named id_rsa, and submit it to several different websites/servers.
When I configured , I had already generated an SSH key pair, which was stored in C:\Users\账户名\.sshthe directory , as shown in the following figure:

Check it on your computer, if the SSH key pair already exists, you can use it directly, just skip this step; if the SSH key pair does not exist, execute the following command to generate the SSH key pair:
ssh-keygen -t rsa -C "本机标识"
The in the above command -Cjust adds a comment to the generated key pair. It is recommended to fill in the content related to this machine. For specific reasons, refer to this article: https://www.jianshu.com/p/f3020c04d966
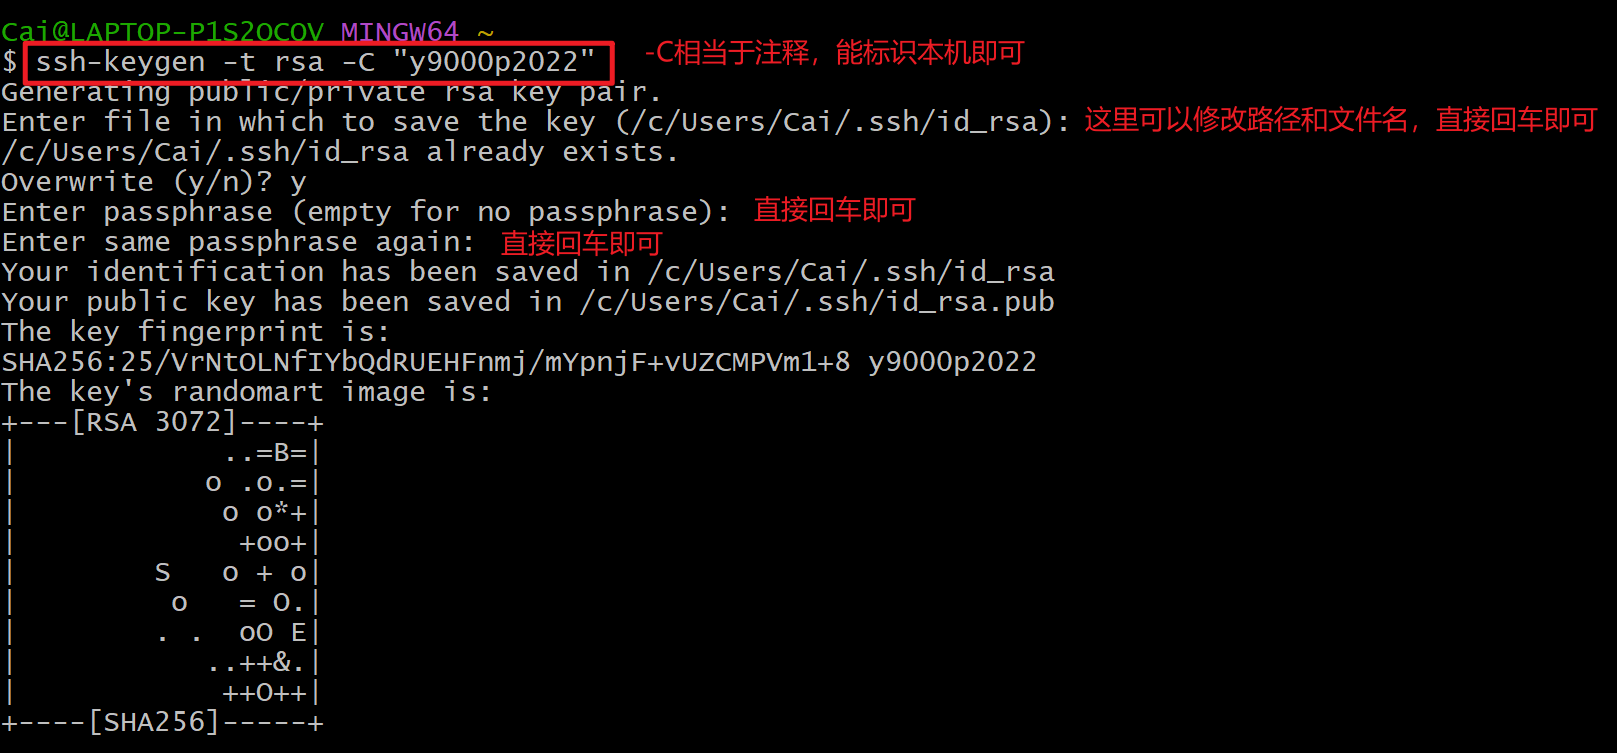
The generated SSH key pair is stored in C:\Users\账户名\.sshthe directory , as shown in the following figure:
4. Copy the public key to Ubuntu
First check whether ~/.ssh/authorized_keysthe file :

If ~/.ssh/authorized_keysit exists , copy the contents of the id_rsa.pub public key to authorized_keys. Open id_rsa.pub with Notepad, copy the contents to the clipboard, and then paste them into authorized_keys through the Xshell terminal.

If ~/.ssh/authorized_keysit does not exist, execute the following command to create it, and then copy the contents of the id_rsa.pub public key to authorized_keys after creation.
cd ~
mkdir .ssh
cd .ssh
touch authorized_keys
To ensure a successful connection, please ensure that the following file permissions are correct:
chmod 700 ~/.ssh
chmod 600 ~/.ssh/authorized_keys
Restart the SSH service:
sudo systemctl restart sshd
5. Configure the Remote plug-in
Open VS Code, then click "Remote Explorer" on the left, and select "Remote":

Then click the small gear (Settings), select the first item in the pop-up window, this C:\Users\账户名\.sshwill automatically create and open configthe file in the directory:


As shown in the figure below, fill in the host information you want to connect to:

Fill in and save, then click "Refresh" or re-enter the "Remote Explorer", you can see the host name just filled in below:

Right-click on the hostname and select "Connect in current window" or "Connect in new window":

Select the operating system type of the remote host in the new pop-up window:


If a failure window pops up, click retry to try again; if the connection is successful, the currently connected host name will be displayed in the lower left corner:

So far, VS Code under Windows is successfully connected to Ubuntu, and password-free login is configured! Subsequent operations such as opening folders, editing codes, and running codes are all performed in the Ubuntu environment.
6. Close the remote connection
Click "File", then click "Close Remote Connection" to exit:

7. Uninstall Visual Studio Code
7.1 Find Visual Studio Code in the control panel and uninstall it

7.2 Delete previously installed plugins
Take my computer as an example, enter C:\Users\Caithe directory , and .vscodedelete the folder.

7.3 Delete user information and cache information
Take my computer as an example, enter C:\Users\Cai\AppData\Roamingthe directory , and Codedelete the folder.
