Tip: After the article is written, the table of contents can be automatically generated. How to generate it can refer to the help document on the right
Article directory
- Nanny level installation tutorial series - Hadoop cluster installation (version 2.9.2)
-
- 1. Install version
- 2. Create 3 virtual machines
- 3. Configure the network
- Fourth, modify the host name
- 5. Mapping
- 6. SSH password-free login
-
- 1. Check if ssh is installed
- 2. Configure ssh configuration file
- 4. Restart the sshd service
- 5. Use the command ssh-keygen to generate the public key and private key (press Enter 3 times in the middle)
- 6. Copy the public key to the key file
- 7. Modify key file permissions
- 8. Shared public key
- 9. After each machine executes the shared public key command for each user, check whether they can log in to each other.
- 7. Install Java
-
- 1. Create two directories to store the software installation compressed package and the decompressed package respectively.
- 2. Install the rz command: yum install lrzsz
- 3. Switch to the directory /opt/module and upload the compressed package in this directory: cd /opt/module
- 4. Enter the command: rz (select the compressed package to upload, click ADD and confirm)
- 5. Unzip the package
- 6. Configuration file: vim /etc/profile
- 7. Restart the configuration file: source /etc/profile
- 8. Verify that java is installed: java -version
- Eight, install hadoop
- 9. Start Hadoop
Nanny level installation tutorial series - Hadoop cluster installation (version 2.9.2)
1. Install version
jdk1.8.0_131、hadoop-2.9.2、CentOS-7-x86_64-DVD-2009.iso
2. Create 3 virtual machines
1 master node: master
2 slave nodes: slave1, slave2
3. Configure the network
1. Configuration file
vim /etc/sysconfig/network-scripts/ifcfg-ens33
** Do not set exactly the same as mine! ! ! **
** Do not set exactly the same as mine! ! ! **
** Do not set exactly the same as mine! ! ! **

Notes:
① IPADDR is the IP address
② GATEWAY is the gateway
2. Configure the VMware Network Adapter VMnet8 network
This step needs to be operated on a Windows system! ! !
Network Configuration Management - VNnet8 - Protocol 4 - Properties
** Do not set exactly the same as mine! ! ! **
** Do not set exactly the same as mine! ! ! **
** Do not set exactly the same as mine! ! ! **
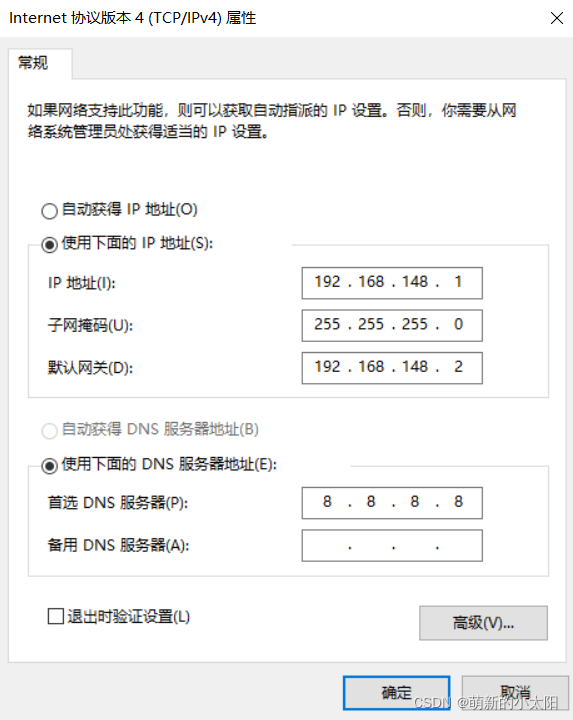
Note: The network segment and gateway in the physical machine must be the same as those in the virtual machine, and the IP addresses (the last three digits) cannot conflict with each other.
3. Reset network
service network restart
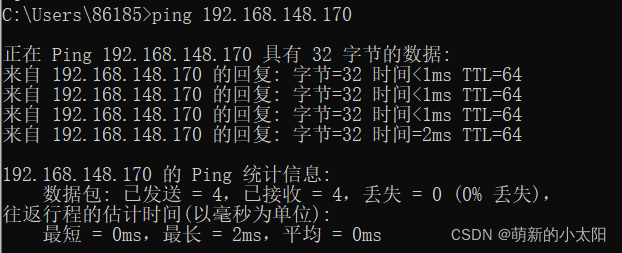
4. Open the windows terminal (Windows+R) to check whether the external network can be pinged
5. Check whether Centos can ping www.baidu.com
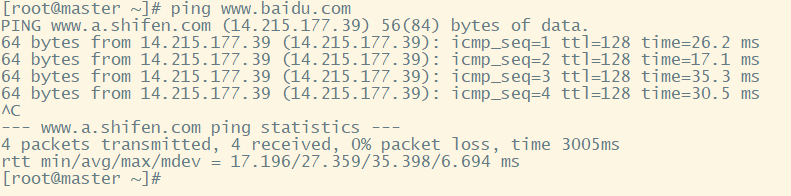
Note:
① If the network still cannot be pinged after completing the above operations, consider checking the virtual machine network compiler to check whether the NAT network segment is the same as the configuration.
② Perform the same operation on the 3 machines, configure the IP addresses of the same network segment (the last 3 digits are different) and the same gateway.
Fourth, modify the host name
1. Modify the hostname
vim /etc/hostname

2. Reboot
reboot
3. Check again if the hostname has changed
hostname

Note: The host names here correspond to 3 different machines: master, slave1, and slave2. The host names of all three machines must be changed! Otherwise, subsequent mapping cannot be completed!
5. Mapping
1. Set up the mapping
vim /etc/hosts
Add IP addresses and hostnames of 3 machines
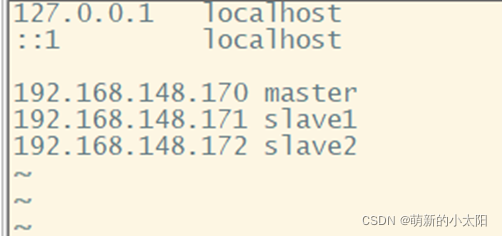
Note: Do the same for 3 machines
2. Check whether the 3 machines can ping each other
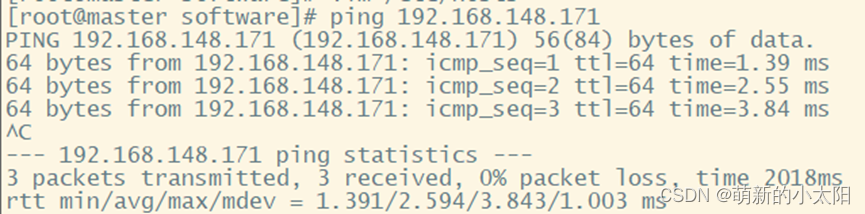
Note: Only a picture of the master pinging slave1 is posted here. Be sure to test that each machine can ping the other two, and ping itself.
6. SSH password-free login
1. Check if ssh is installed
rpm -qa | grep ssh
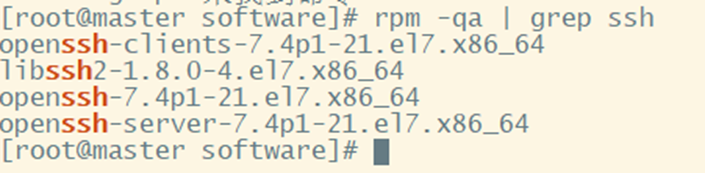
As shown above: If it is installed, it can be used directly; if it is not installed, use the command:
yum -y install openssh
yum -y install openssh-server
yum -y install openssh-clients
2. Configure ssh configuration file
vim /etc/ssh/sshd_config
① Modify the content of line 43: remove the symbol #
② Add above it: RSAAuthentication yes

4. Restart the sshd service
systemctl restart sshd.service
5. Use the command ssh-keygen to generate the public key and private key (press Enter 3 times in the middle)
6. Copy the public key to the key file
cat ~/.ssh/id_rsa.pub >> ~/.ssh/authorized_key
7. Modify key file permissions
chmod 0600 ~/.ssh/authorized_keys
8. Shared public key
ssh-copy-id -i ~/.ssh/id_rsa.pub root@slave1
# 其中需要输入的密码是:root用户密码
9. After each machine executes the shared public key command for each user, check whether they can log in to each other.

Note: Only a picture of the master password-free login to slave1 is posted here. Be sure to test that each machine can log in with the other two without password, and log in with itself without password.
7. Install Java
1. Create two directories to store the software installation compressed package and the decompressed package respectively.
mkdir /opt/module put the compressed package
mkdir /opt/software put the decompressed software package
2. Install the rz command: yum install lrzsz
3. Switch to the directory /opt/module and upload the compressed package in this directory: cd /opt/module
4. Enter the command: rz (select the compressed package to upload, click ADD and confirm)
5. Unzip the package
tar -zxvf jdk-linux-x64.tar.gz -C /opt/software/
tar -zxvf hadoop-2.9.2.tar.gz -C /opt/software/
6. Configuration file: vim /etc/profile
Add in the last line of the file:
export JAVA_HOME=/opt/software/jdk1.8.0_131
export PATH=$JAVA_HOME/bin:$PATH
export CLASSPATH=.:$JAVA_HOME/lib/dt.jar:$JAVA_HOME/lib/tools.jar
7. Restart the configuration file: source /etc/profile
8. Verify that java is installed: java -version

Eight, install hadoop
1. Configuration file:
① add vim /etc/profile
in the last line:
export HADOOP_HOME=/opt/software/hadoop-2.9.2
export PATH=$PATH:$HADOOP_HOME/bin:$HADOOP_HOME/sbin
Then restart the file: source /etc/profile
② vim /etc/profile.d/hadoop.sh
This is a new file, add content:
export HADOOP_HOME=/opt/software/Hadoop-2.9.2
export PATH=$HADOOP_HOME/bin:$HADOOP_HOME/sbin:$PATH
Then restart the file: source /etc/profile.d/hadoop.sh
The remaining configuration files need to switch to this path: cd /opt/software/Hadoop-2.9.2/etc/hadoop <\font>
③ vim hadoop-env.sh
#在第25行修改
export JAVA_HOME=/opt/software/jdk1.8.0_131
#在第26行添加
export HADOOP_SSH_OPTS='-o StrictHostKeyChecking=no'
#在第113行修改
export HADOOP_PID_DIR=${

    HADOOP_PID_DIR}/pids
④ vim mapred-env.sh
# 在第16行修改
export JAVA_HOME=/opt/software/jdk1.8.0_131
# 在第28行修改
export HADOOP_MAPRED_PID_DIR=${

    HADOOP_HOME}/pids
⑤ vim yarn-env.sh
# 在第23行修改
export JAVA_HOME=/opt/software/jdk1.8.0_131
# 在最后一行添加
export YARN_PID_DIR=${

    HADOOP_HOME}/pids
⑥ vim core-site.xml
# 输入:
<configuration>
	<property>
		<name>fs.defaultFS</name>
		<value>hdfs://192.168.148.170:9000</value>
	</property>
	<property>
		<name>hadoop.tmp.dir</name>
		<value>/opt/software/hadoop-2.9.2/hdfsdata</value>
	</property>
	<property>
		<name>io.file.buffer.size</name>
		<value>131072</value>
	</property>
</configuration>
⑦ vim hdfs-site.xml
# 输入 :
<configuration>
	<property>
		<name>dfs.namenode.name.dir</name>
		<value>file:/opt/software/hadoop-2.9.2/hdfsdata/dfs/name</value>
	</property>
	<property>
		<name>dfs.datanode.data.dir</name>
		<value>file:/opt/software/hadoop-2.9.2/hdfsdata/dfs/data</value>
	</property>
	<property>
		<name>dfs.namenode.checkpoint.dir</name>
	   <value>file:/opt/software/hadoop-2.9.2/hdfsdata/dfs/namesecondary</value>
	</property>
	<property>
		<name>dfs.blocksize</name>
		<value>134217728</value>
	</property>
	<property>
        <name>dfs.replication</name>
        <value>3</value>
 </property>
	<property>
		<name>dfs.namenode.http-address</name>
		<value>0.0.0.0:50070</value>
	</property>
</configuration>
⑧ vim mapred-site.xml
Copy the file mapred-site.xml.template and name it mapred-site.xml:
cp mapred-site.xml.template mapred-site.xml
# 输入:
<configuration>
<property>
<name>mapreduce.framework.name</name>
<value>yarn</value>
</property>
<property>
<name>mapreduce.jobhistory.webapp.address</name>
<value>master:19888</value>
</property>
<property>
<name>mapreduce.job.maps</name>
<value>2</value>
</property>
<property>
<name>mapreduce.job.reduces</name>
<value>1</value>
</property>
</configuration>
vim yarn-site.xml
输入:
<configuration>
<!-- Site specific YARN configuration properties -->
<property>
<name>yarn.resourcemanager.hostname</name>
<value>master</value>
</property>
<property>
<name>yarn.nodemanager.aux-services</name>
<value>mapreduce_shuffle</value>
</property>
<property>
<name>yarn.resourcemanager.scheduler.class</name>
<value>org.apache.hadoop.yarn.server.resourcemanager.scheduler.capacity.CapacityScheduler</value>
</property>
<property>
<name>yarn.resourcemanager.webapp.address</name>
<value>${
yarn.resourcemanager.hostname}:8088</value>
</property>
<property>
<name>yarn.nodemanager.local-dirs</name>
<value>${
hadoop.tmp.dir}/nm-local-dir</value>
</property>
</configuration>
⑨ vim slaves
# 删除localhost
# 输入:
slave1
slave2
2. Copy all the files after configuration to the other two machines:
scp /opt/software/hadoop-2.9.2/etc/hadoop/* root@slave1:/opt/software/hadoop-2.9.2/etc/hadoop/
scp /opt/software/hadoop-2.9.2/etc/hadoop/* root@slave2:/opt/software/hadoop-2.9.2/etc/hadoop/
3. Turn off the firewall (permanently off): systemctl disable firewalld.service
4. Reboot: reboot
5. Check whether the firewall is closed: systemctl status firewalld.service

9. Start Hadoop
1. Format the file system: hdfs namenode -format
2. Start Hadoop:
① start-dfs.sh

② start-yarn.sh

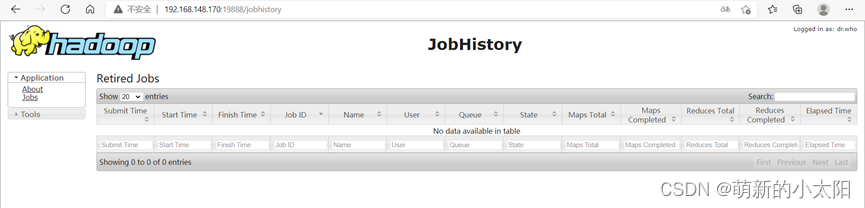
③ mr-jobhistory-daemon.sh start historyserver

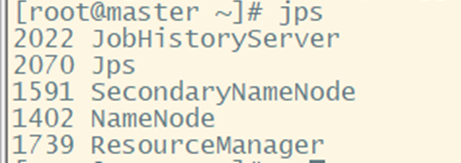
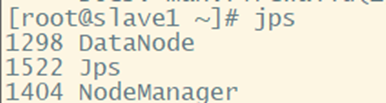
3. Whether the verification is successful: jps
① Master node master:
② Slave nodes slave1, slave2:

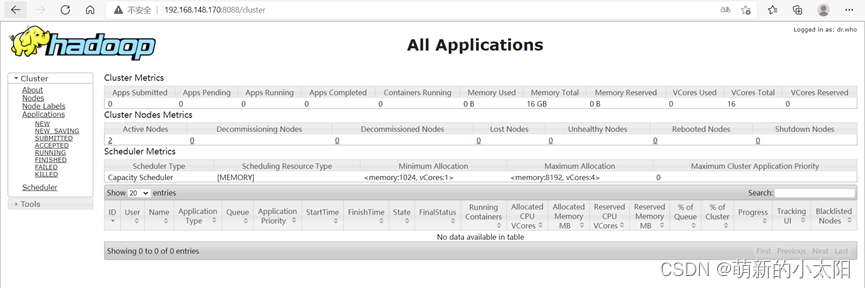
4. Open the browser to see if you can access the webpage
Note: The link IP is the IP set by yourself