This article introduces how to configure a new version of the Python library that can run on the GPU in the Anaconda environment .tensorflow
In the previous article, Anaconda configures the new version of Python tensorflow library (common to CPU and GPU) (https://blog.csdn.net/zhebushibiaoshifu/article/details/129285815), we introduced in detail CPU and GPU common The configuration method of the new version tensorflowof the library; this article is based on this article, and continues to introduce how to further configure the corresponding environment if we want the GPU to participate in the calculation . If you have not configured tensorflowthe library at this time, then first complete the process of the aforementioned article, and then continue with the steps of this article.
It should be noted here that the GPU support for the Windows platform has been canceled in the version of the tensorflowlibrary and above (I tried it, even if WSL is installed); and when writing this article, the version of the library is used , so it is No problem. So if you have installed the library of the version below and below , you can continue to read this article backwards; if you have installed the library of the above version at this time, you can first replace the library with the version of the library through the following code (execute this code , the original and above versions of the library will be automatically deleted), and then continue to read this article.2.112.6.2tensorflow2.10tensorflow2.11tensorflowtensorflow2.102.11tensorflow
pip install --user "tensorflow<2.11"
As we mentioned earlier, although the new version of the library has been configured at that time tensorflow, if you run the code, the prompt message shown in the figure below will still appear, that is, we have not yet configured the GPU running environment.

Among them, if you don’t have a GPU on your computer , or you don’t need to use GPU to calculate, then don’t worry about this problem, just start writing and running machine learning code; but if you have a GPU in your computer and want to let For users who add GPU to computing, further configuration work is required. The specific process is as follows.
1 System version requirements
If you need to use the GPU environment configuration method described in this article , you need to ensure that the version of the Windows19044 operating system is at least above; if this condition is not met, in addition to upgrading the system, you can only use tensorflowthe library of the earlier version to implement GPU computing.
2 GPU settings
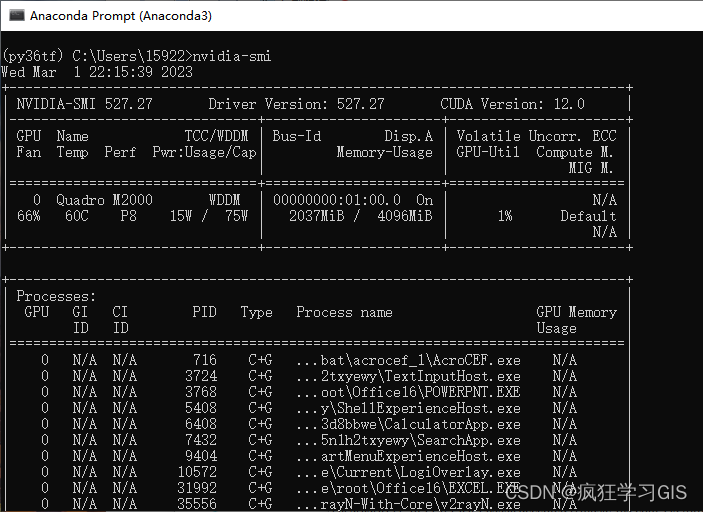
First, we need to open the Anaconda Prompt software; then, we can enter the code shown below to view our GPU status.
nvidia-smi
After running the above code, as shown in the figure below, it is our GPU state. If the information shown in the figure below does not appear, there is a high probability that the driver ( NVIDIA Driver ) is not installed, and you can download it from its official website .
Then, we can configure CUDA and cuDNN ; among them, CUDA is a parallel computing architecture developed by NVIDIA for its GPU , and cuDNN is an acceleration library specially provided by NVIDIA for deep neural network operation. At present, many online tutorials for these two are downloaded and installed manually from the official NVIDIA website, which is relatively troublesome; and since we have used the new version of the tensorflowlibrary here, we can directly implement the download and configuration of the two on the command line .
We enter the code shown below.
conda install -c conda-forge cudatoolkit=11.2 cudnn=8.1.0
Then, run the above code, as shown in the figure below.
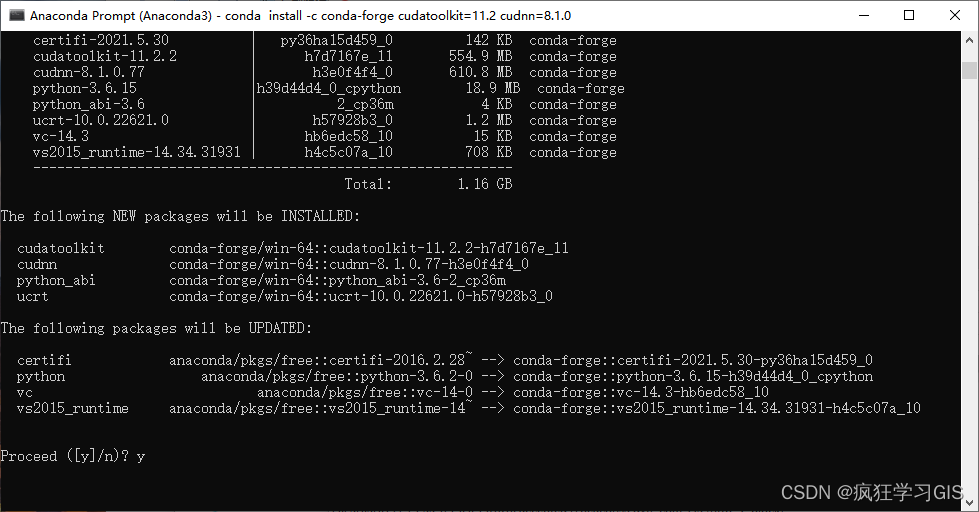
Then, enter yto confirm to start downloading and configuring CUDA and cuDNN . Wait for a while, and the situation shown in the figure below appears, indicating that the configuration of the two has been completed.

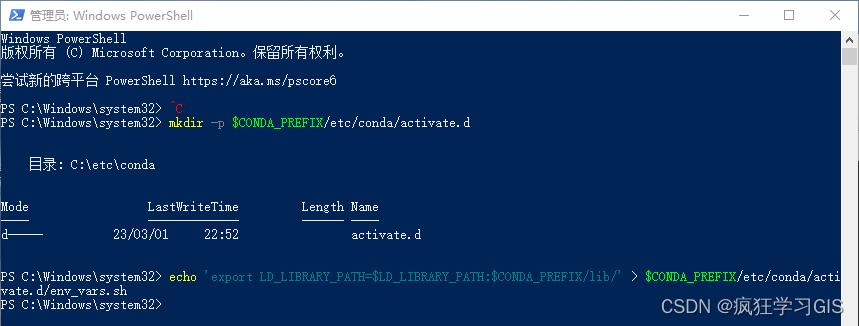
So far, the settings of CUDA and cuDNN have been completed. However, in order for these two to work properly, we also need to configure the system path. Regarding the content of this step, you can directly open the Windows PowerShell software as an administrator to configure it, as shown in the figure below.

Then, enter and run the following two lines of code respectively.
mkdir -p $CONDA_PREFIX/etc/conda/activate.d
echo 'export LD_LIBRARY_PATH=$LD_LIBRARY_PATH:$CONDA_PREFIX/lib/' > $CONDA_PREFIX/etc/conda/activate.d/env_vars.sh
After running, it is shown in the figure below.
At this point, the configuration of the GPU is completely completed .
3 WSL2 configuration
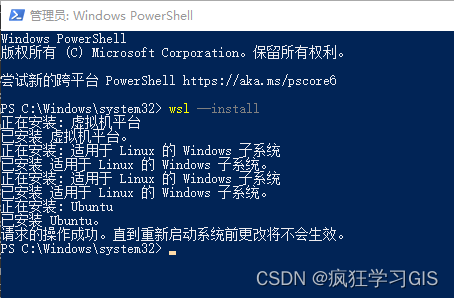
Also, we need to configure WSL2 . WSL is " Windows Subsystem for Linux ", we need to configure this environment to provide conditions for subsequent GPU operations.
For the introduction and manual configuration method of WSL2 , you can directly check its official website ; here we will introduce the simple configuration method through the command line.
First, still in the Windows PowerShell software opened as an administrator , we enter the code shown below.
wsl --install
Then, you can start to install WSL2 ; wait for a while, and the prompt shown in the figure below will appear, indicating that WSL2 has been configured; at this time, you need to restart the computer once.
4 Configuration result verification
So far, all the configuration steps required for GPU computing have been completed . If you configure the above content in a new virtual environment, you can follow the article Anaconda to install third-party libraries and software such as Spyder for the virtual environment (https://blog.csdn.net/zhebushibiaoshifu/article/details/ 128334627), install a Spyder software to facilitate subsequent code writing.
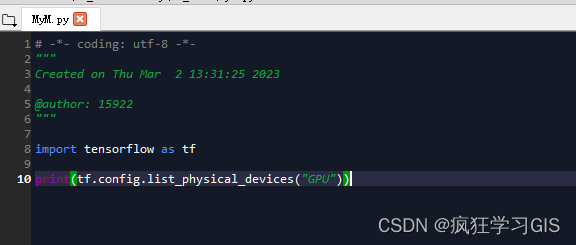
Then, enter the following code in the editor.
import tensorflow as tf
print(tf.config.list_physical_devices("GPU"))
As shown below.
After running the above code, if the output results shown in the figure below appear, it means that the program can find the GPU in the computer , that is, all the aforementioned configurations are no problem; you can start writing various codes for machine learning and use GPU to accelerate It works.

In addition, here is a non-recommended test method. You can also enter the following code.
import tensorflow as tf
tf.test.is_gpu_available()
This is also a method to check whether the GPU is available, but as shown in the figure below, this method will be eliminated soon, so it is recommended to use the method mentioned above to test. If the words shown in the figure below appear True, it means that there is no problem with the configuration.

So far, you're done.
Welcome to pay attention: Crazy learning GIS